Send AWS billing to Google Sheets
AWS is one of the largest cloud service platforms that provides developers with a place to host and manage their software projects and much more. You can receive notifications on Google Sheets when Billing on AWS happens with the help of Vanus Connect. This guide will help you get a record of AWS billings directly on Google Sheets.
Get Started
Step 1: Configure the Source
Log in to Vanus Connect and choose the Send AWS billing to Google Sheets template.
Open AWS Management Console on the browser and log in with your root user id.
Step 2: Configure Sink - Set the AWS account configurations
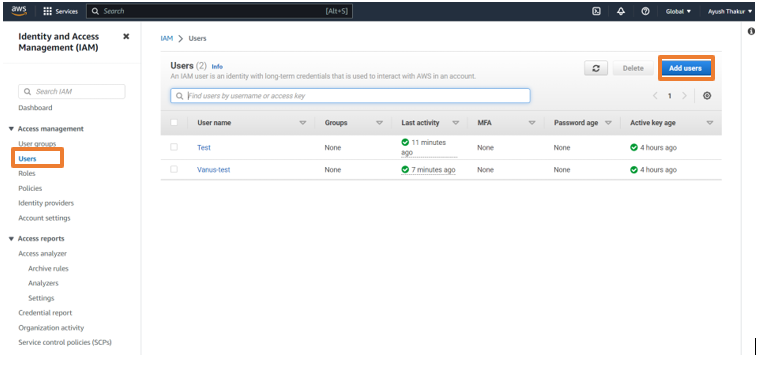
- Search for IAM services and open it.

- Go to Users tab in the left sidebar and click on the Add users button.
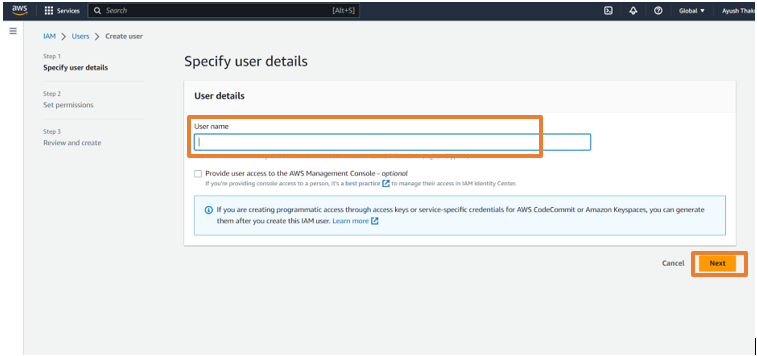
- Add a name for the user and click on Next.
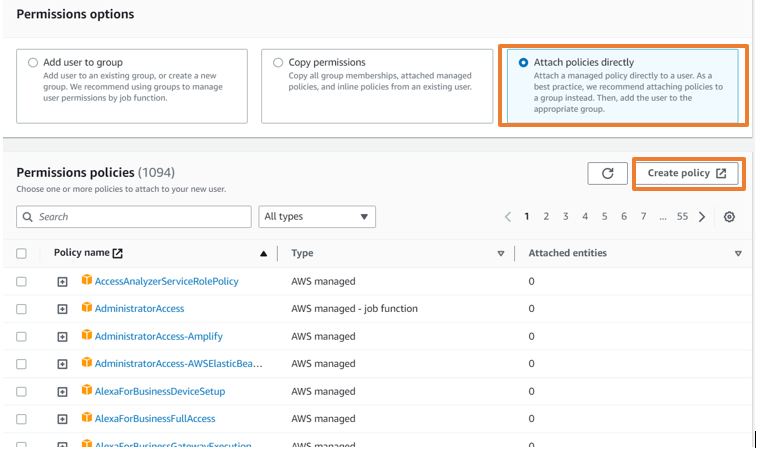
- Select Attach policies directly, and click on Create policy.
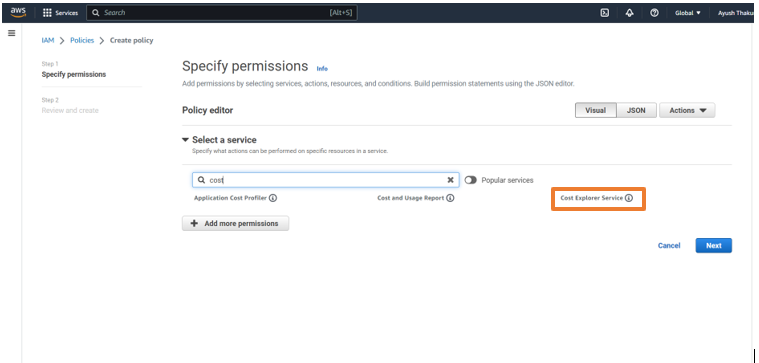
- Search for Cost Explorer Service option and click on it.
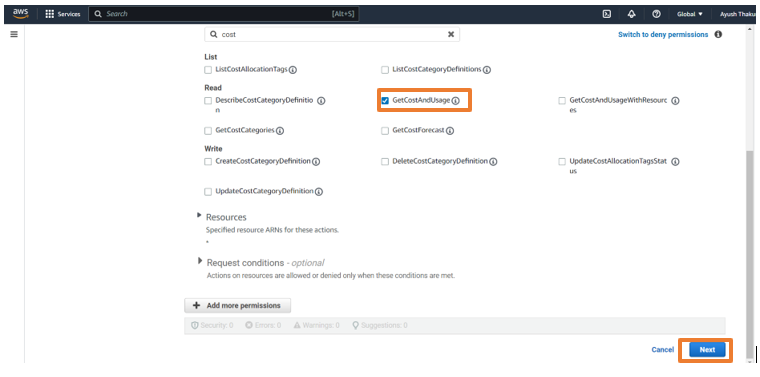
- Now search for GetCostAndUsage option, select it and click on Next.
- Add a name for the policy and click on Create Policy.

- Go back to the previous tab and search for the policy we have just created.
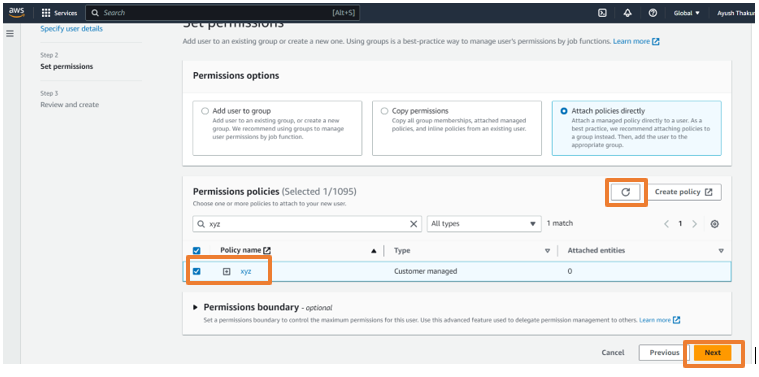
- Add that policy and click on Create User.
Step 3: Create an Access Key and Secret access Key
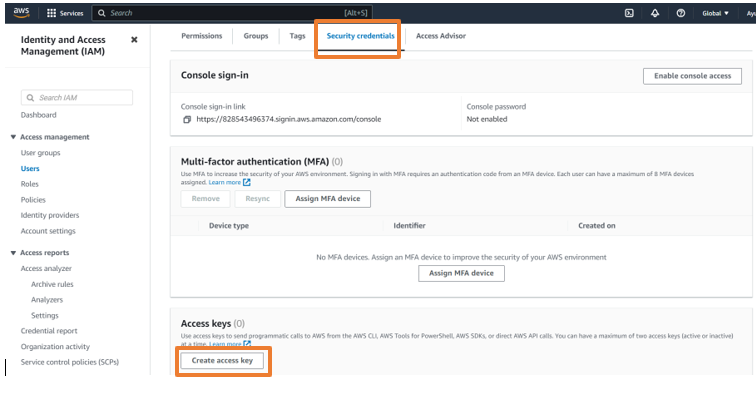
Click on the user we have created and go to the Security credentials tab.
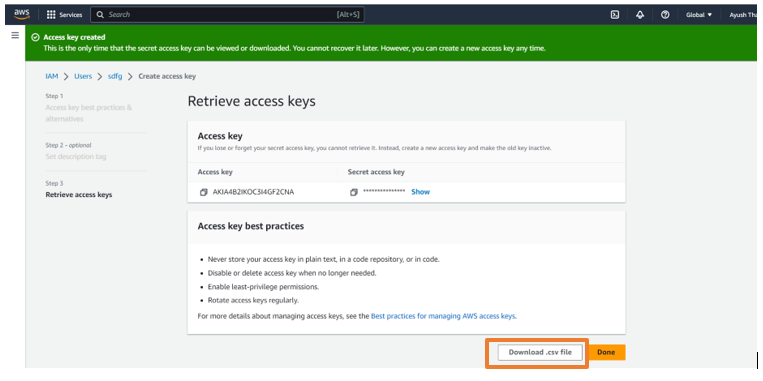
Scroll down the page. In the Access key section, click on Create access key.
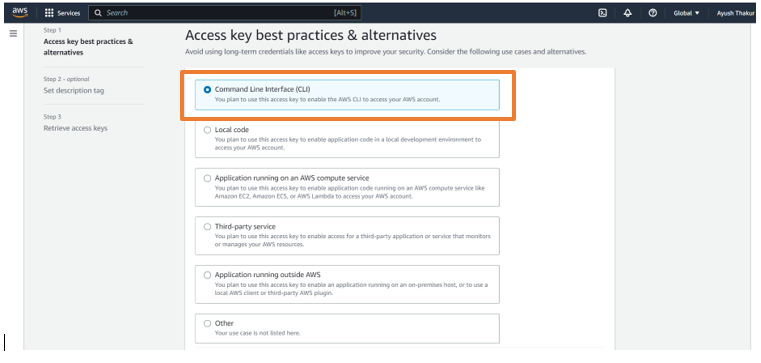
Select Command line interface CLI, and press Next.
Click Create access key and download the .csv file.
Step 3: Connection Configuration
Go back to the Vanus Connect website and add a name for your connection.
Copy and paste the Access key ID and Secret Access key.
Set the desired fetching time in the Source configuration.
Click on Next.
Step 4: Sink Configuration
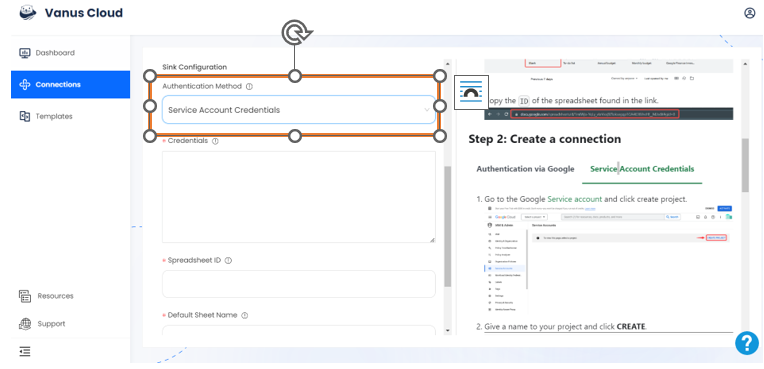
Select the Service Account Credentials in the Authentication Method.
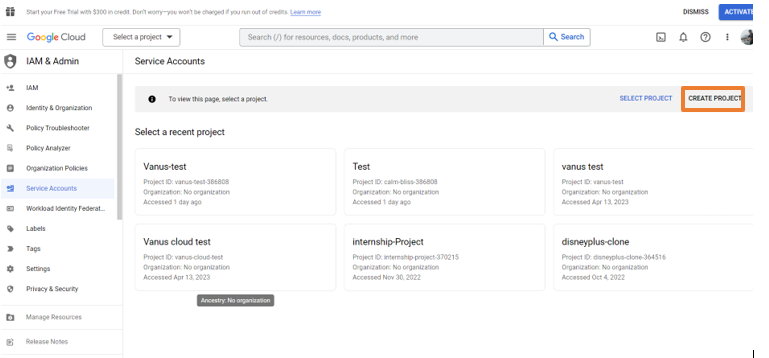
Now go to Google Service Account and add a Project.
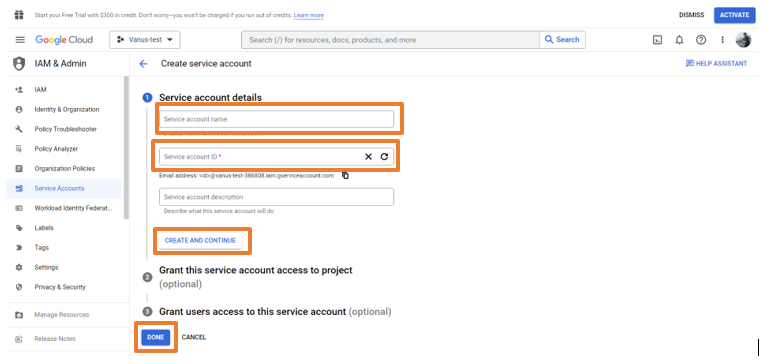
Click on '+ CREATE SERVICE ACCOUNT'.
Add a Service Account Name and Service Account ID and click on Create and Continue and then click on Done.
Now click on the newly created Service Account, and navigate to the Keys tab.
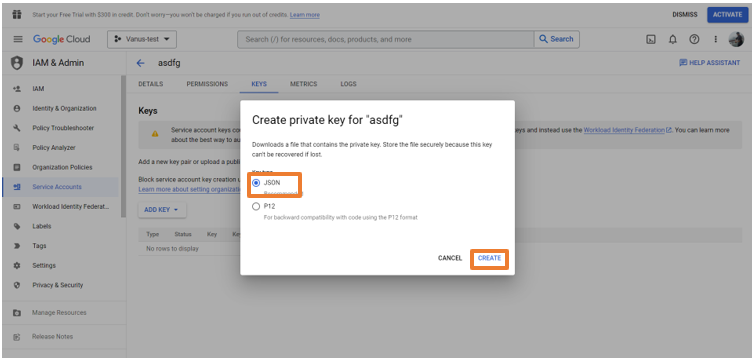
Click on Add Key and select the Create new key option.

Choose JSON format and click on Create. A JSON file will be downloaded to your device.
Open that file and copy the credentials mentioned in it.
Go back to Setup and paste the copied credentials in the Credentials section.
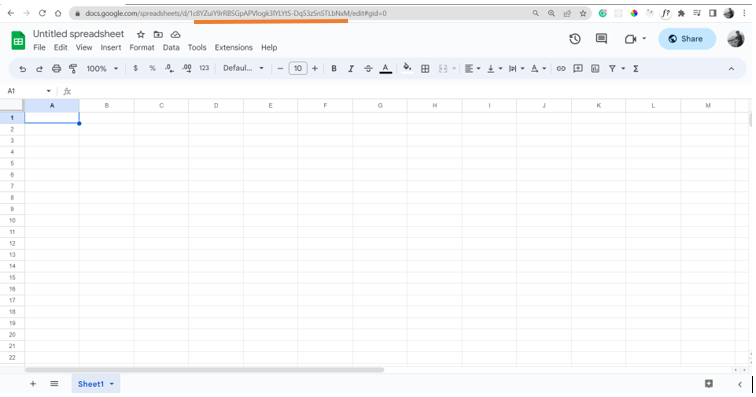
For the spreadsheet Id, we will go to Google Sheets and create a new sheet.
Copy the sheet id from the URL and paste it into the spreadsheet ID section.
Add the sheet name and click on Submit.
Your connection has been successfully set up.
Now all your AWS billings will get recorded in the Google Sheet automatically.