Prerequisites
- A Vanus Cloud account.
- AWS IAM Access Key.
- AWS permissions ce:GetCostAndUsage for the IAM user.
Perform the following steps to configure your Amazon billing Source.
Step 1: Create a new User in AWS
Log in to the AWS Management Console using your root account credentials.
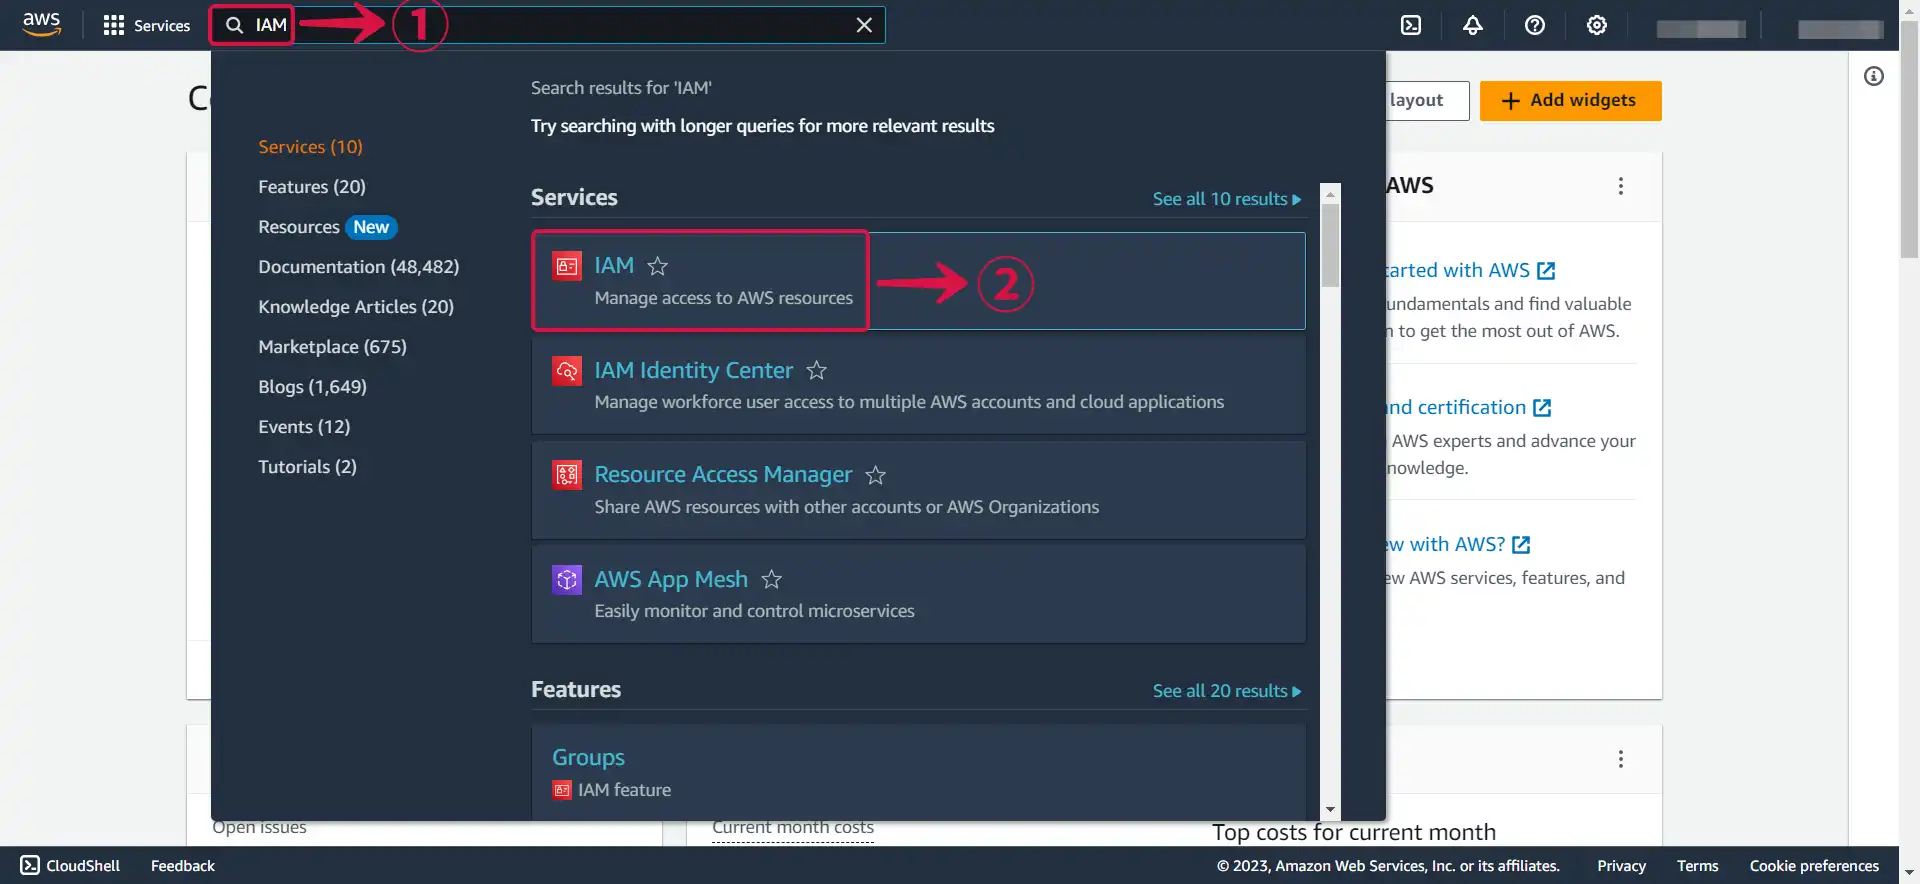
Navigate to the IAM service by searching for IAM① and click the IAM② service.
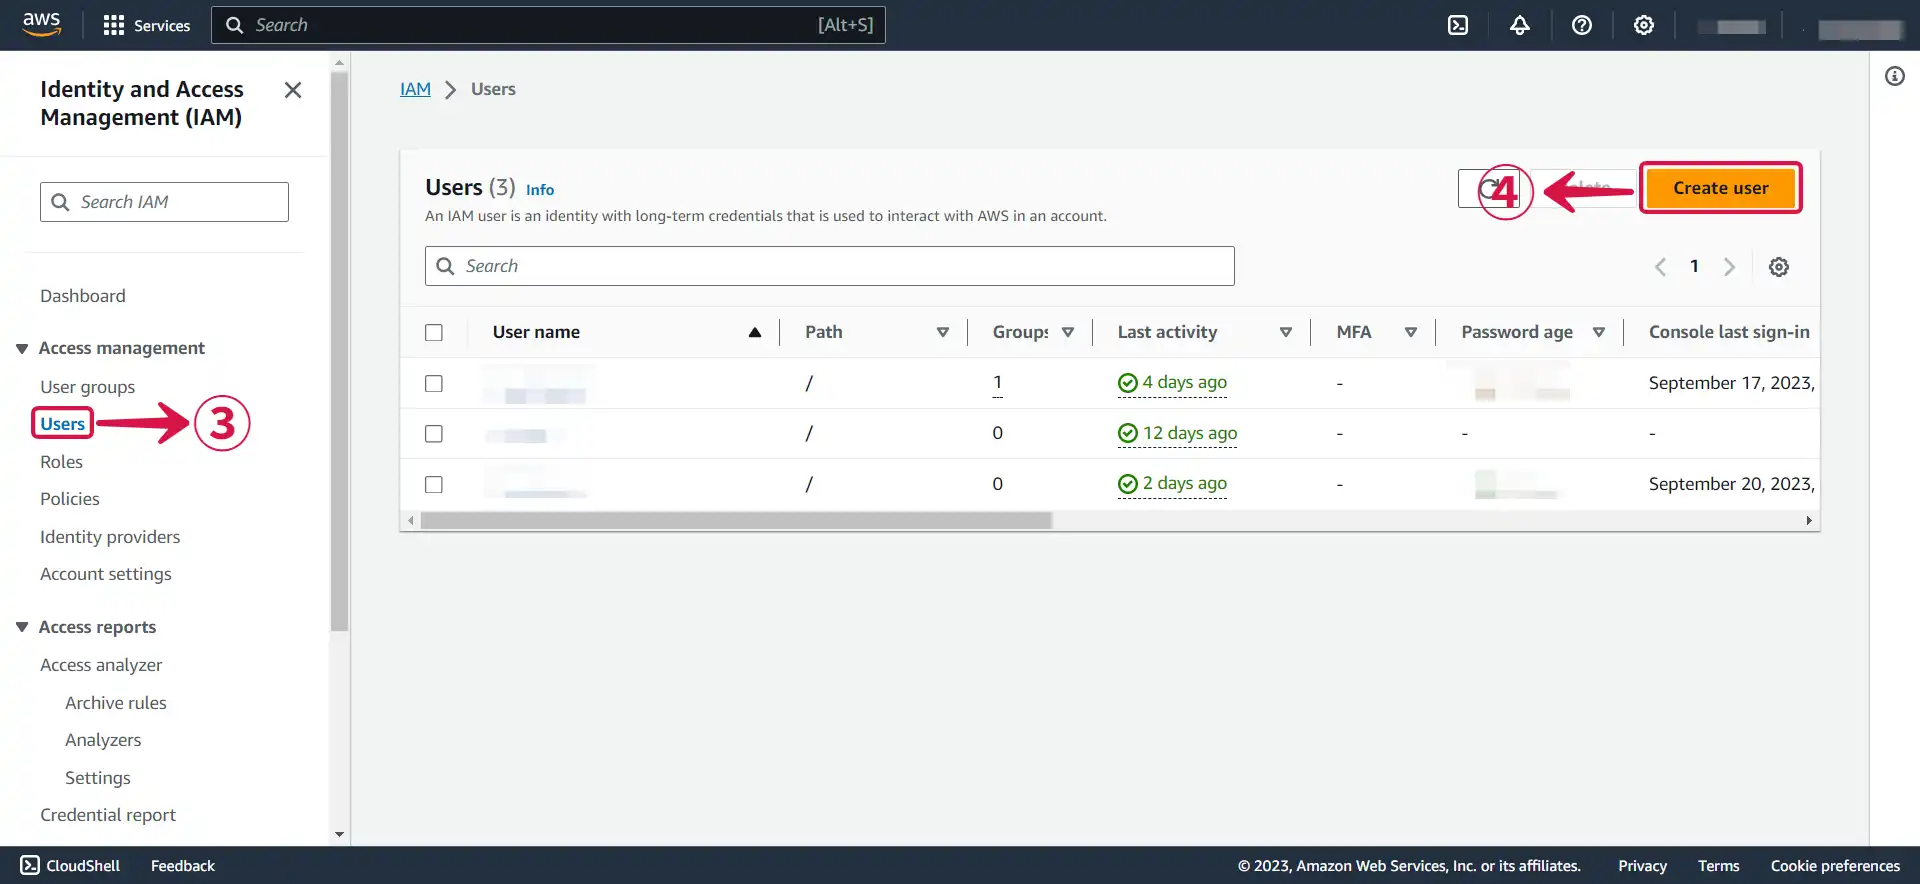
- Click on the Users③ tab in the left navigation menu, and then click the Create user④ button.
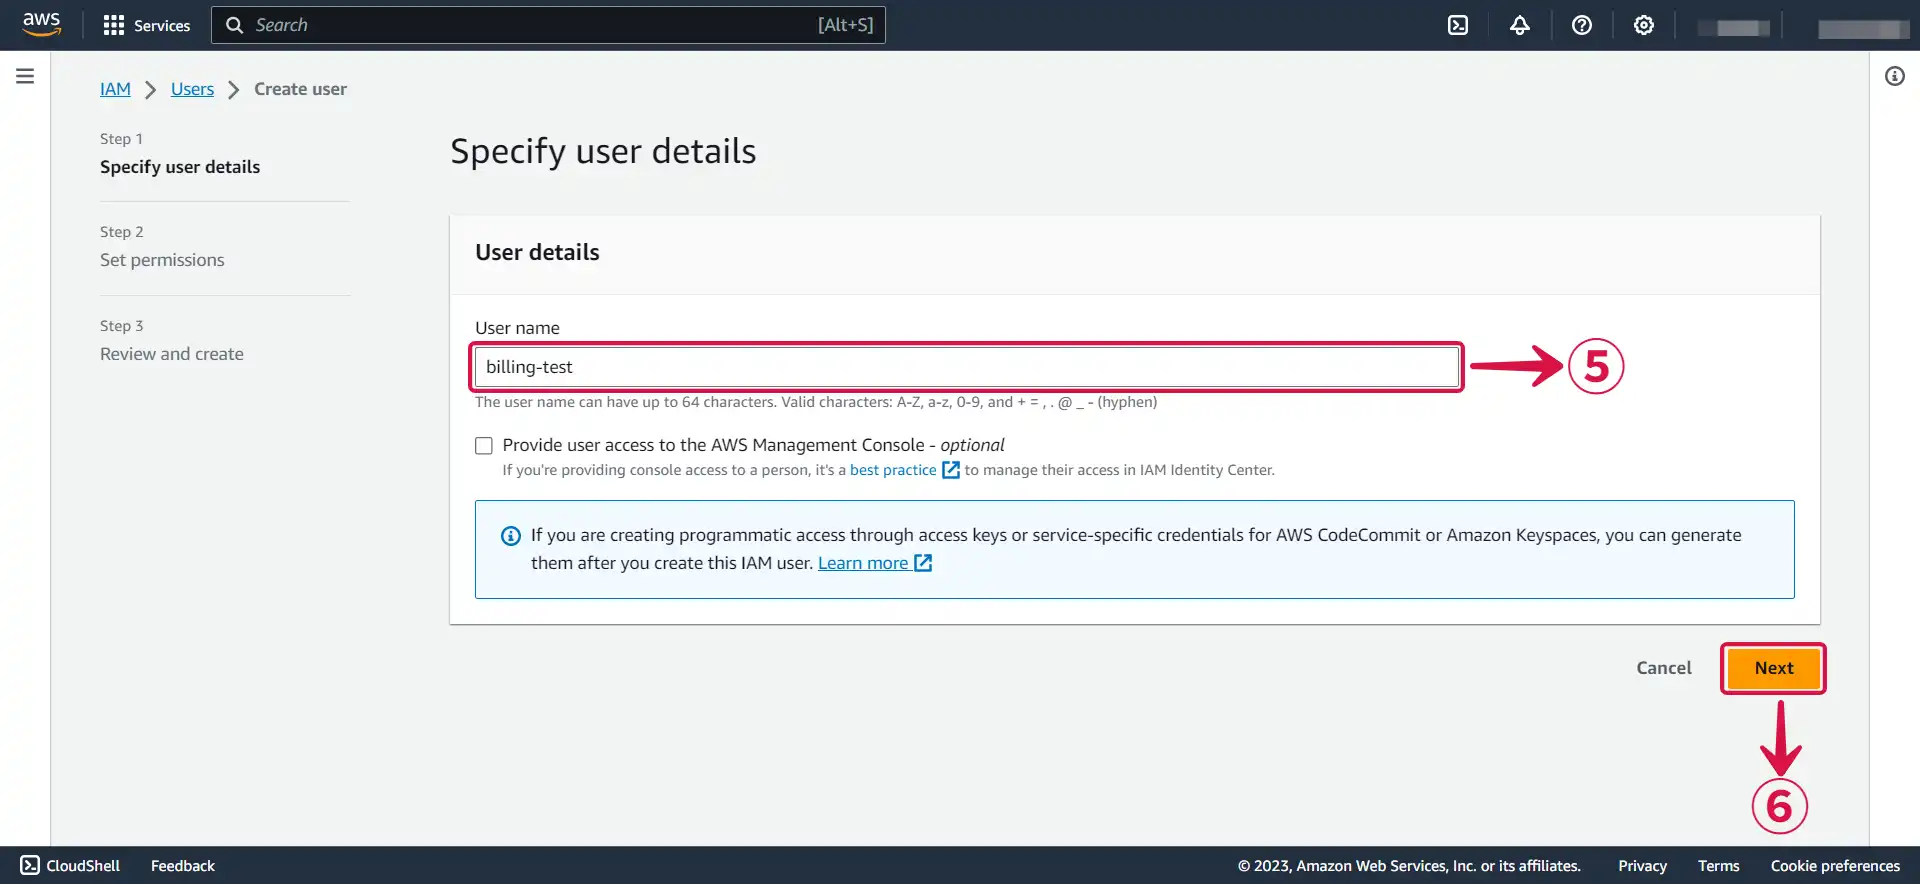
- Write your User name⑤ and click Next⑥.
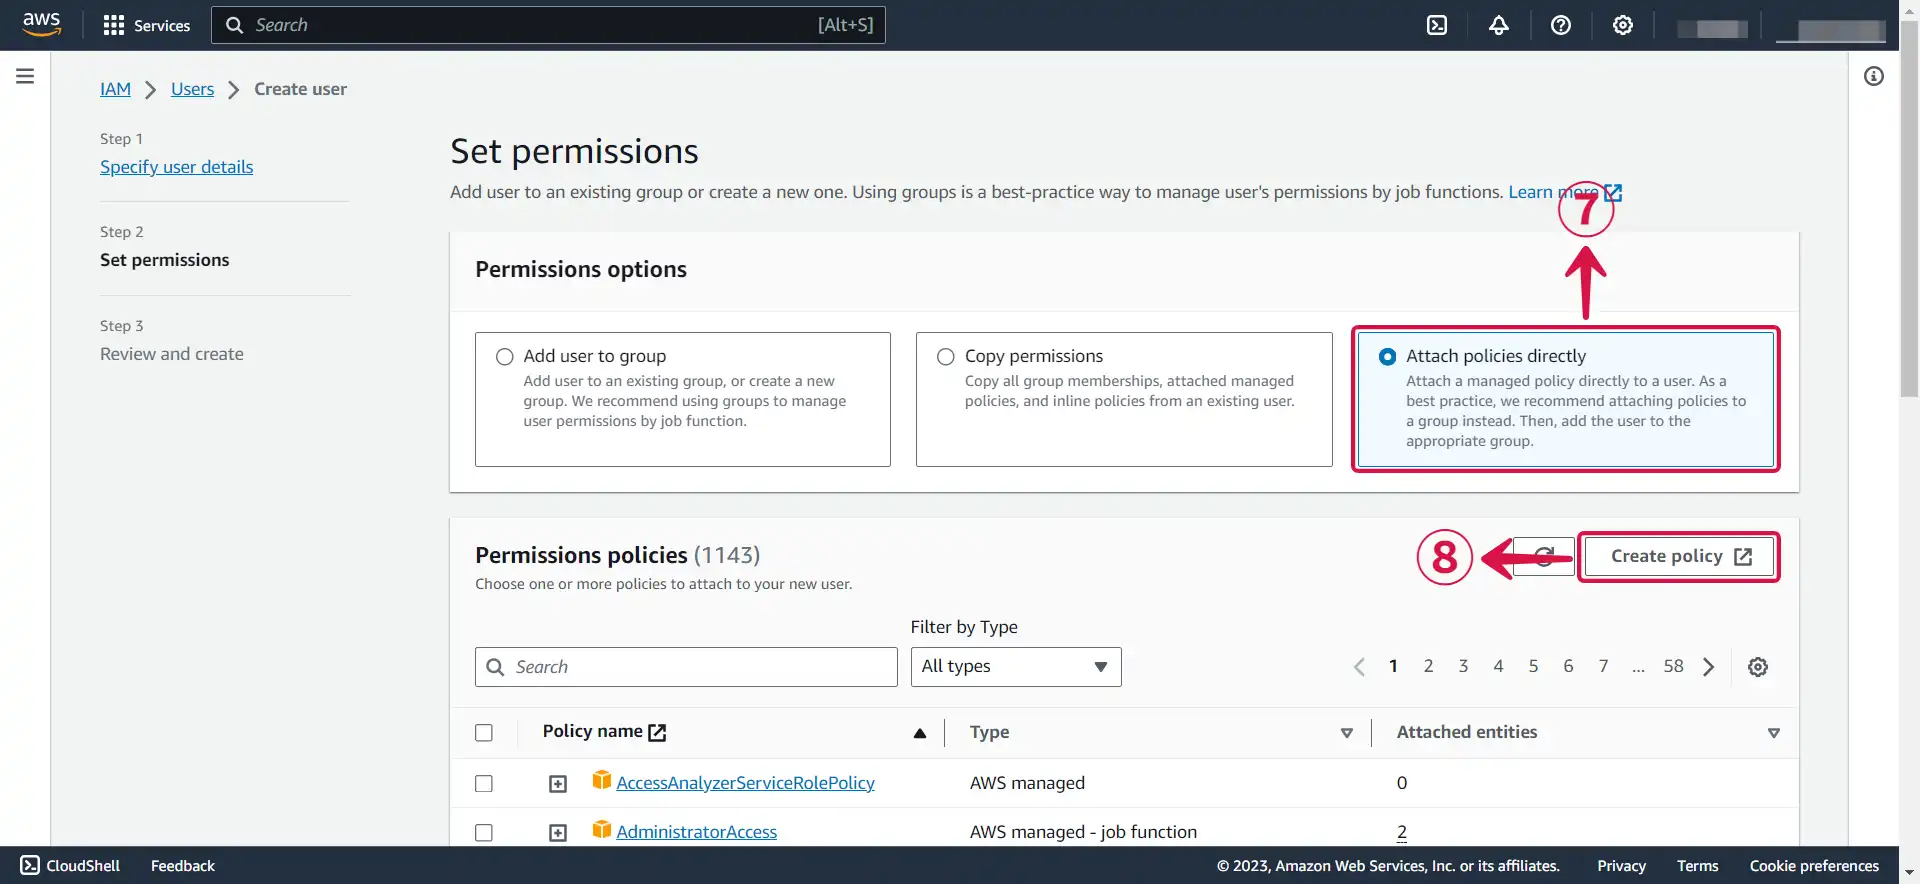
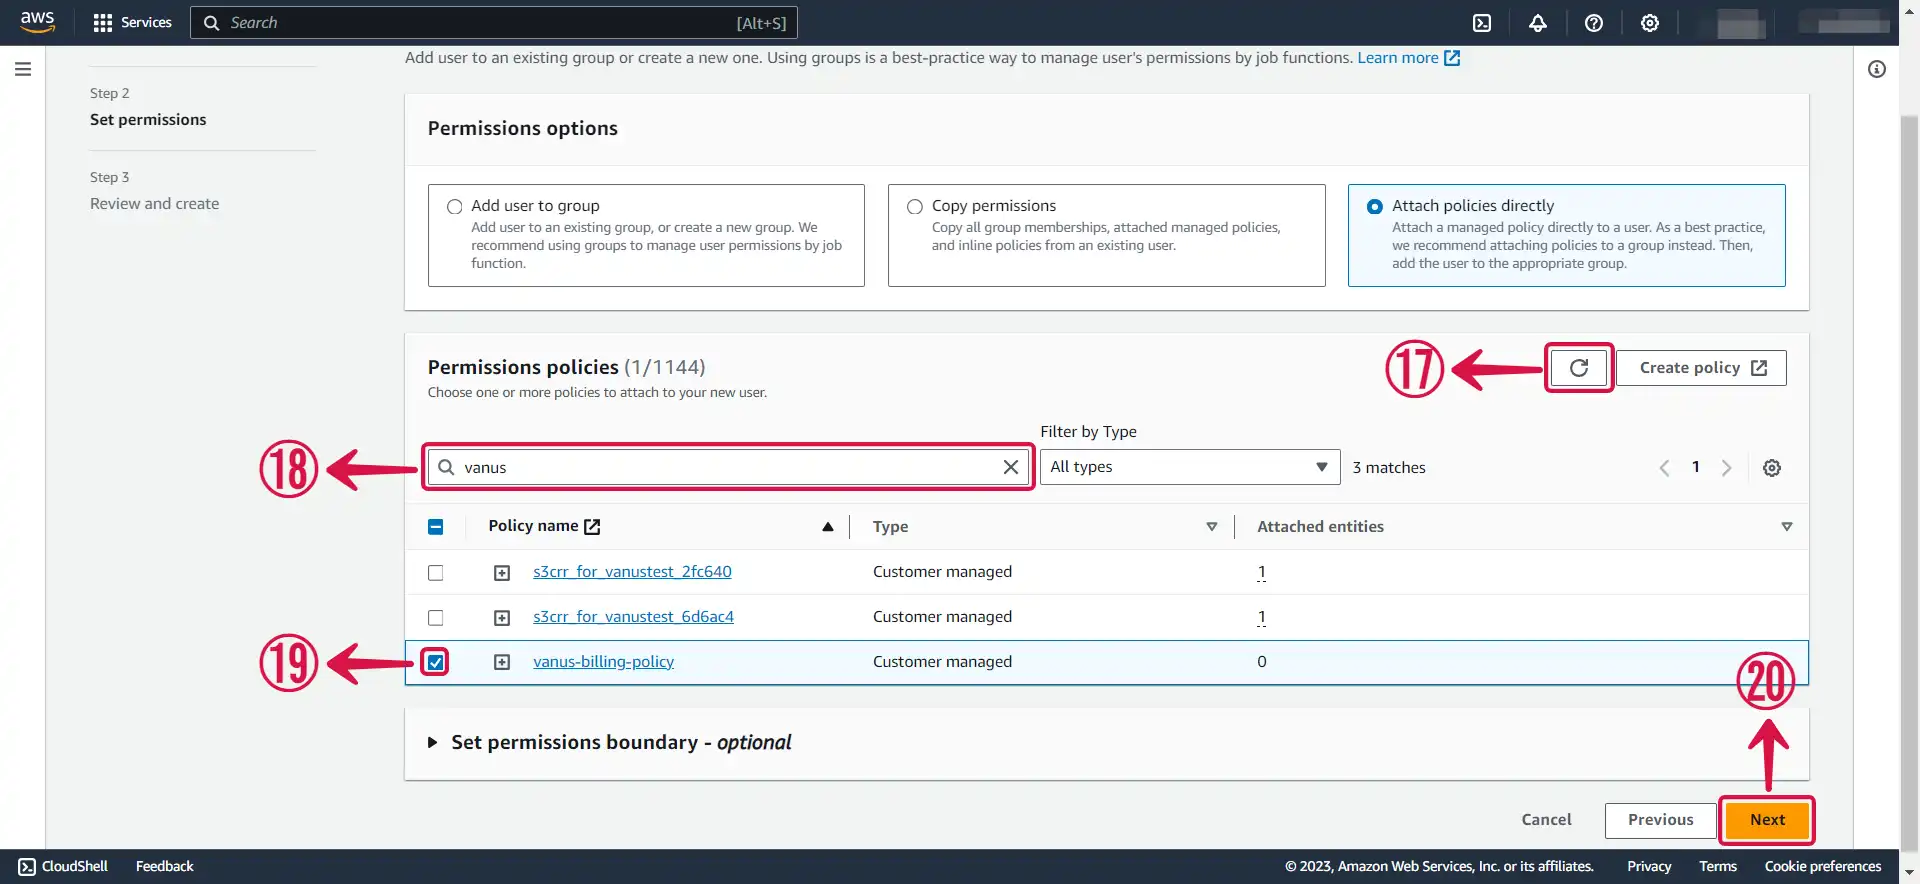
- Select Attach policies directly⑦, and click on Create policy⑧.
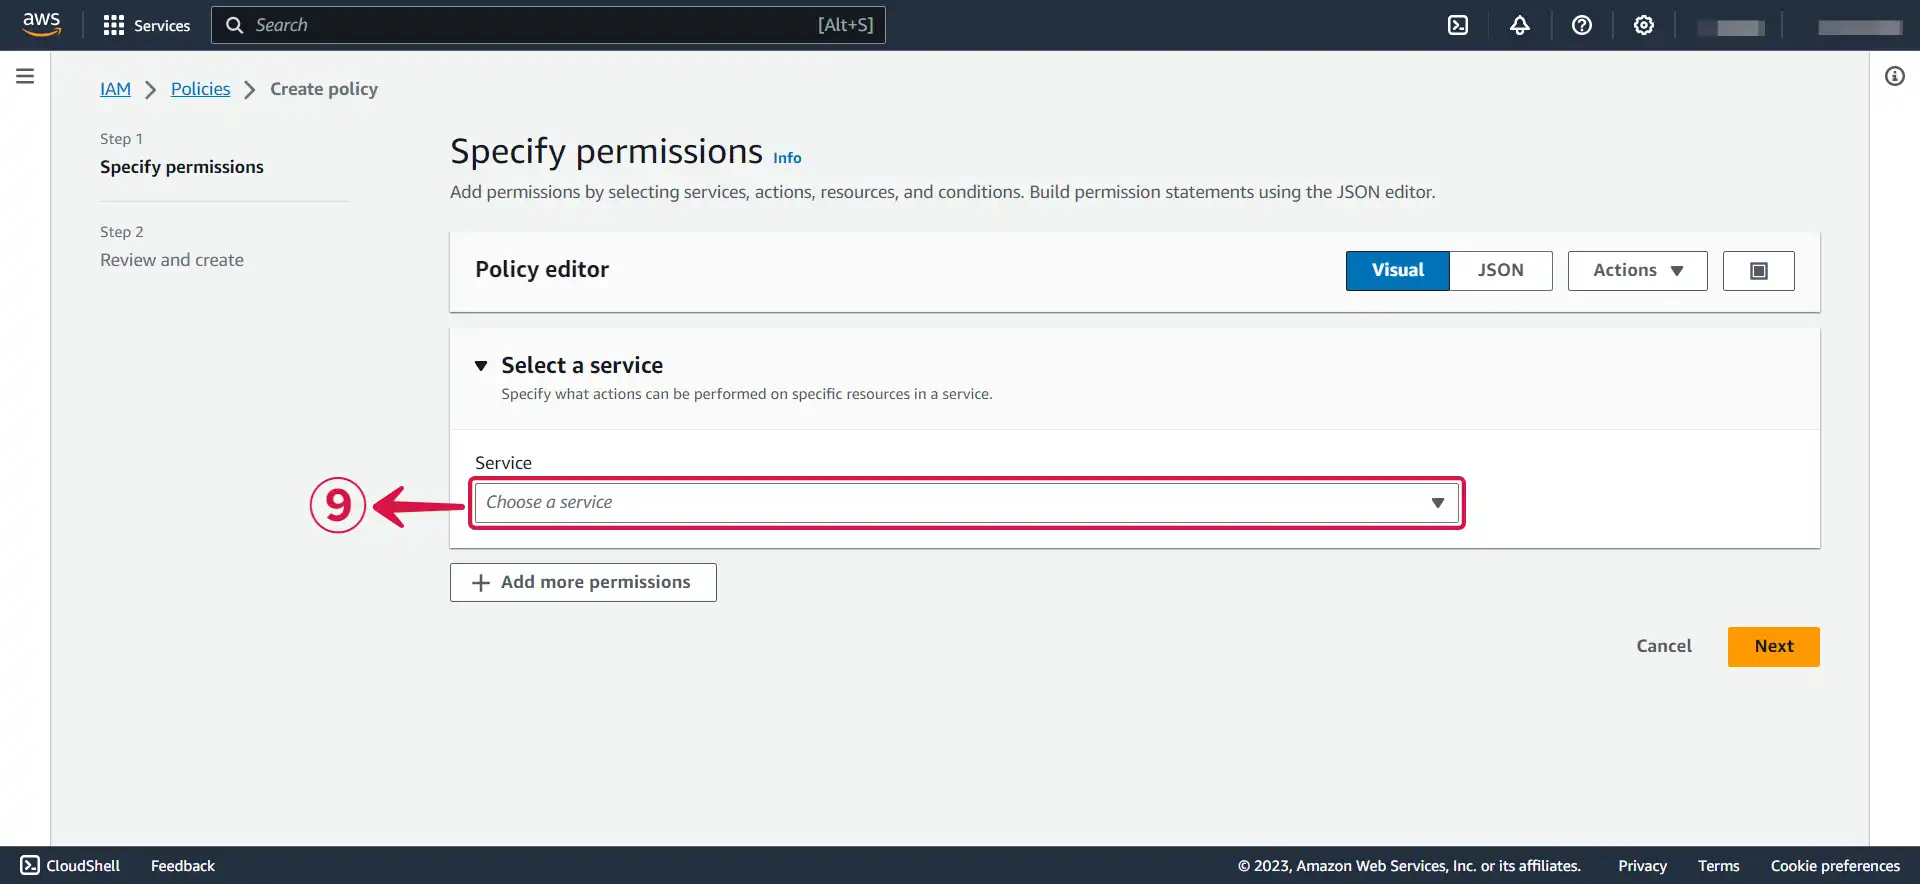
- Click on Choose a service⑨ to open the dropdown menu.
- Select Cost Explorer Service⑩.

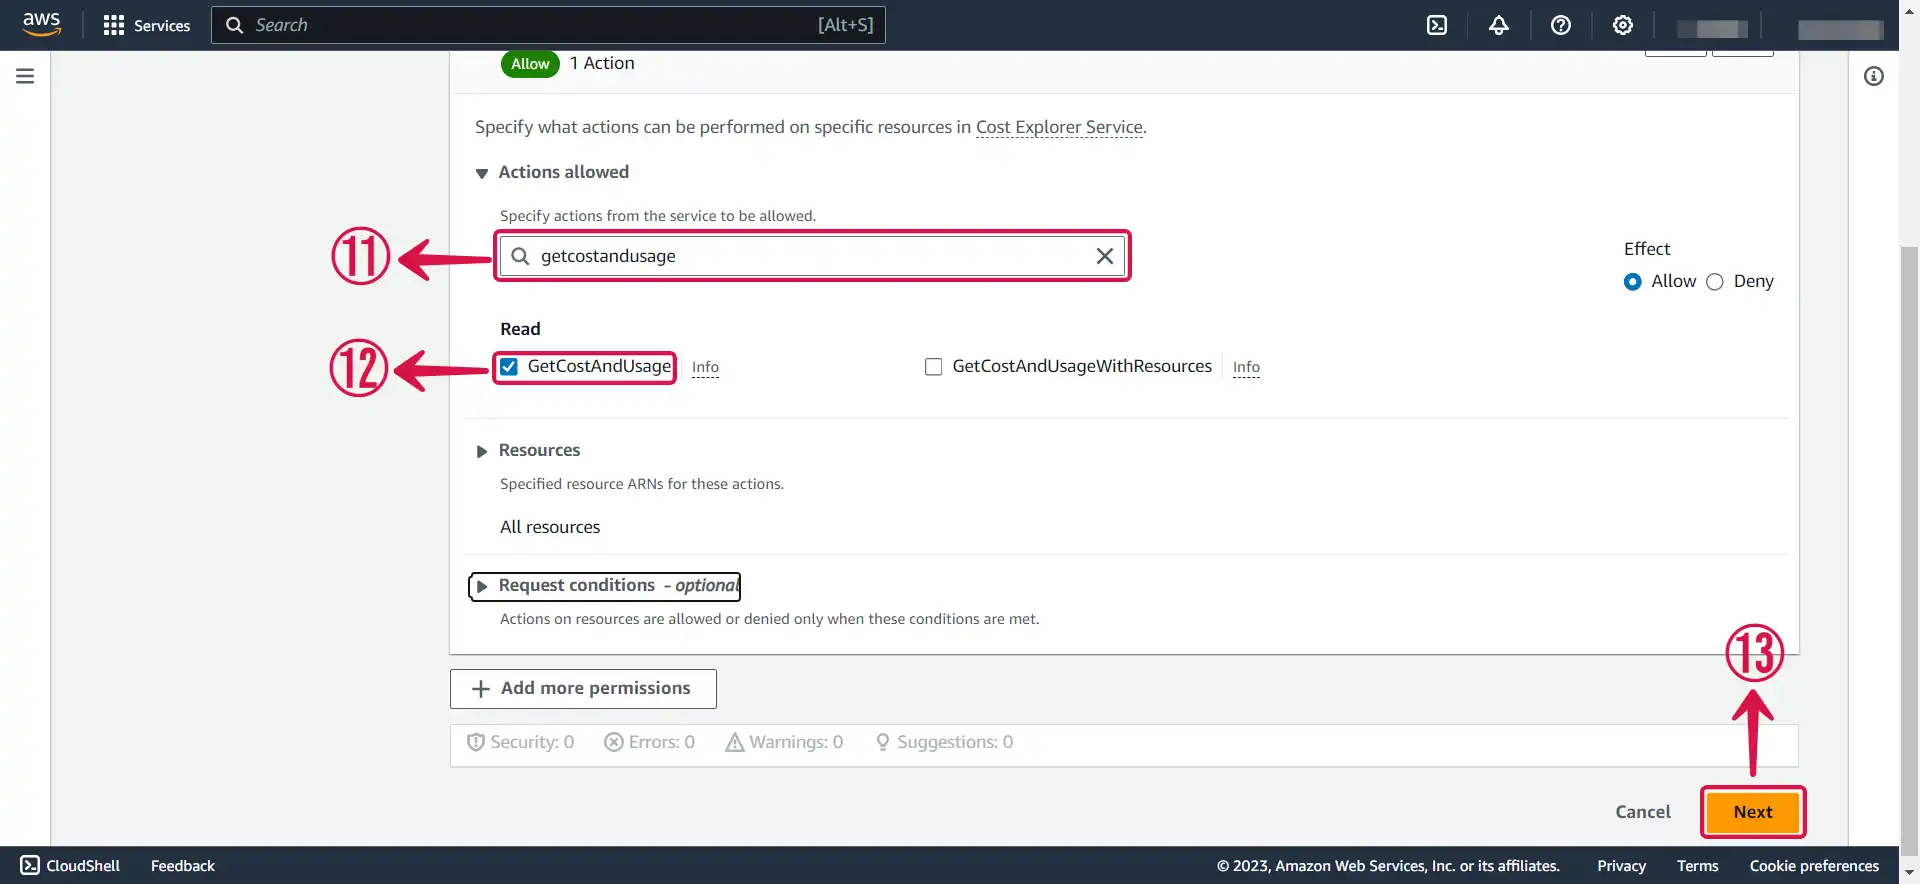
- Search for the following policy: GetCostAndUsage⑪, tick the box⑫ to select it, and then press Next⑬ to proceed to the next page.
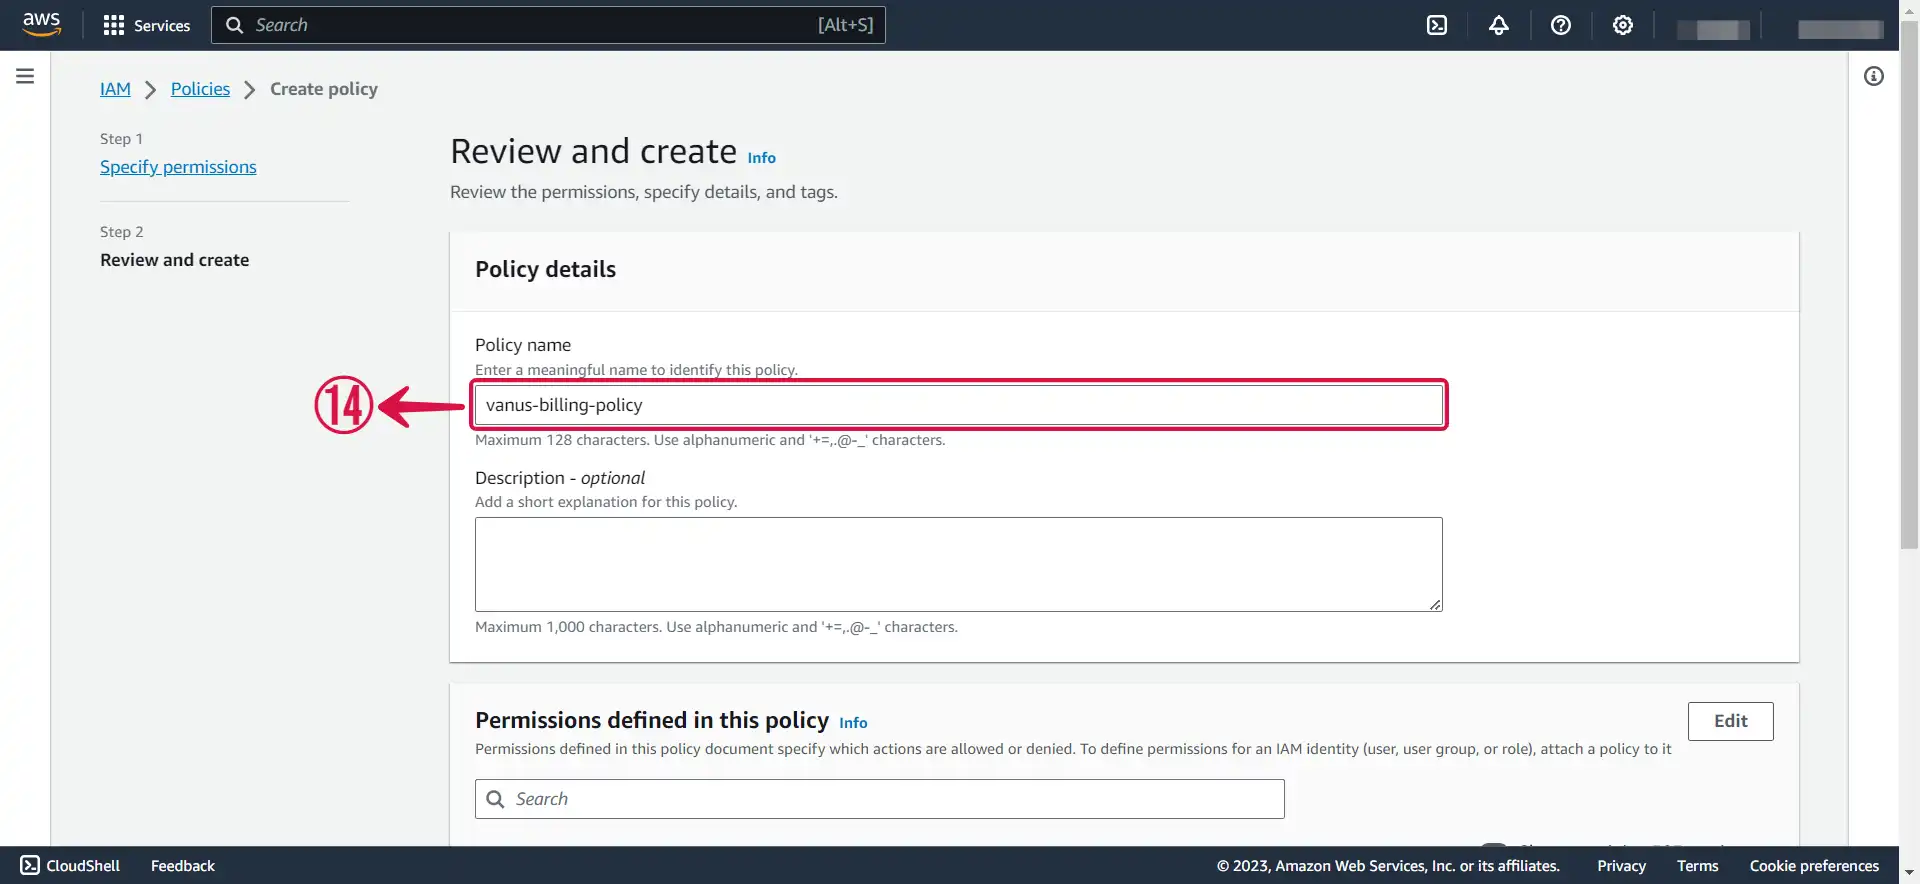
- Name⑭ your policy.
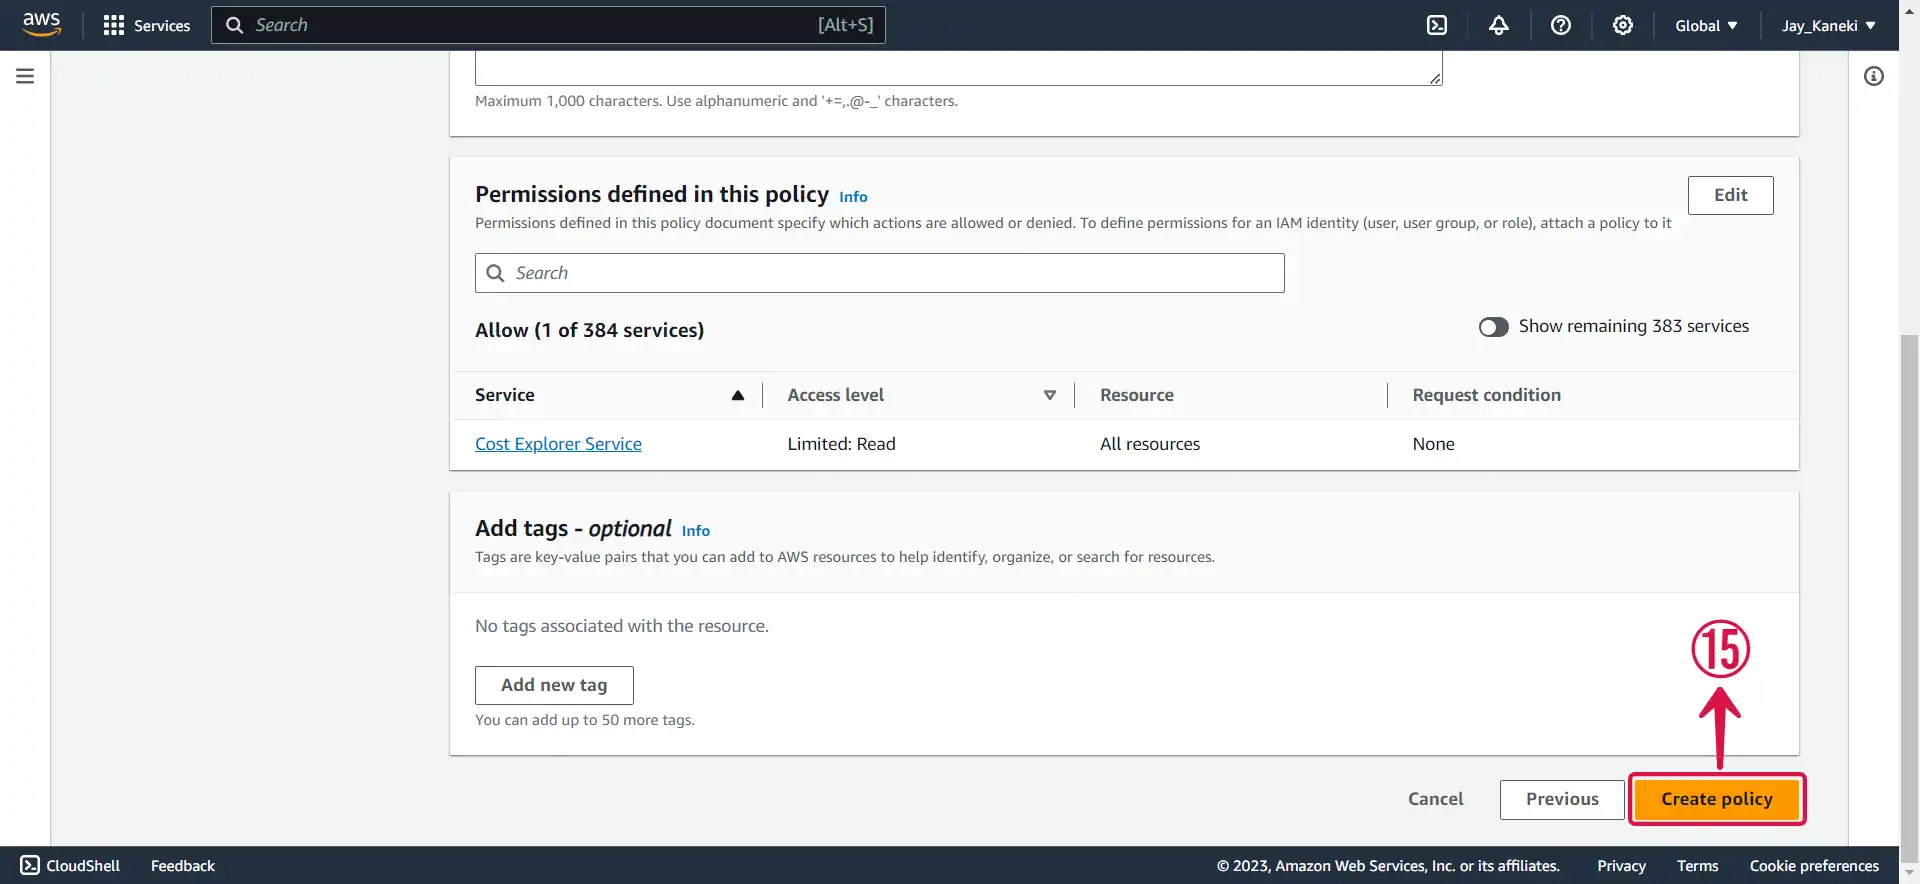
- Click Create policy⑮.
- Return back to your previous
TAB⑯.
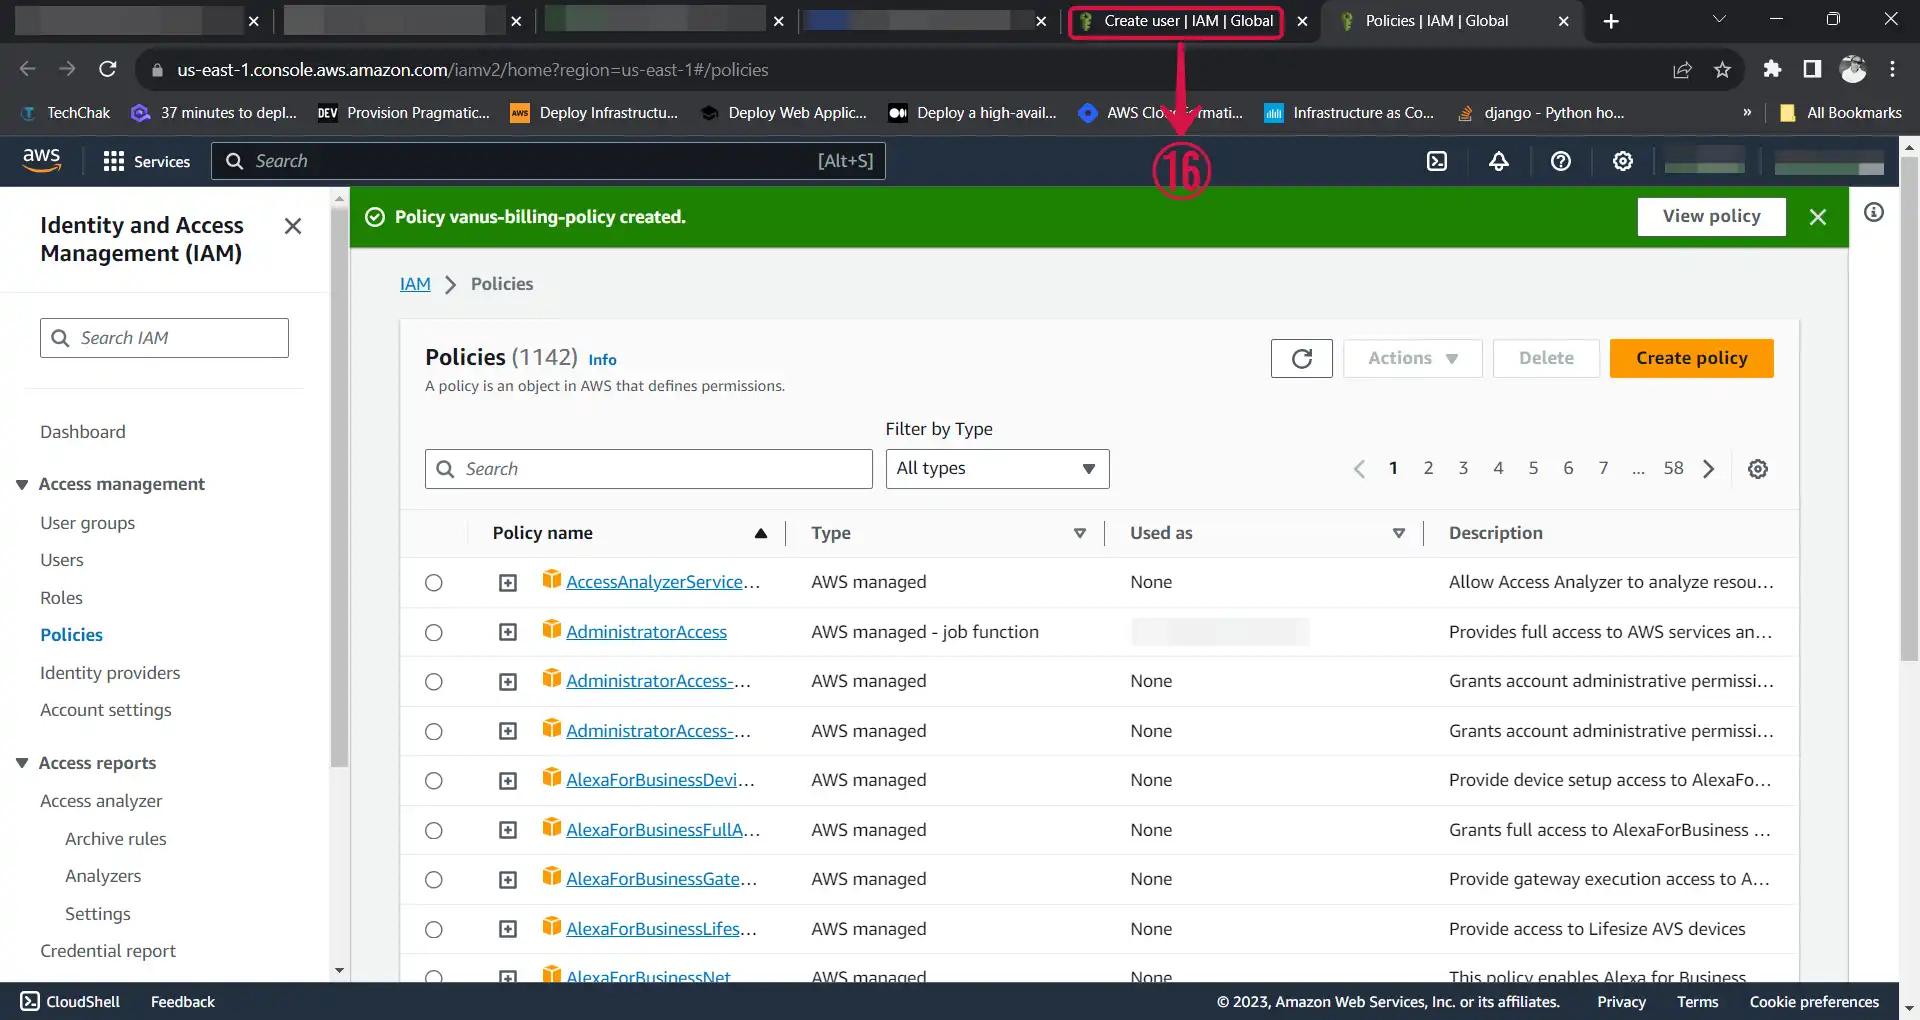
- Refresh⑰ the policy list, search⑱ for your custom policy, check the box⑲ next to it to add it to your account, and then click on Next⑳.
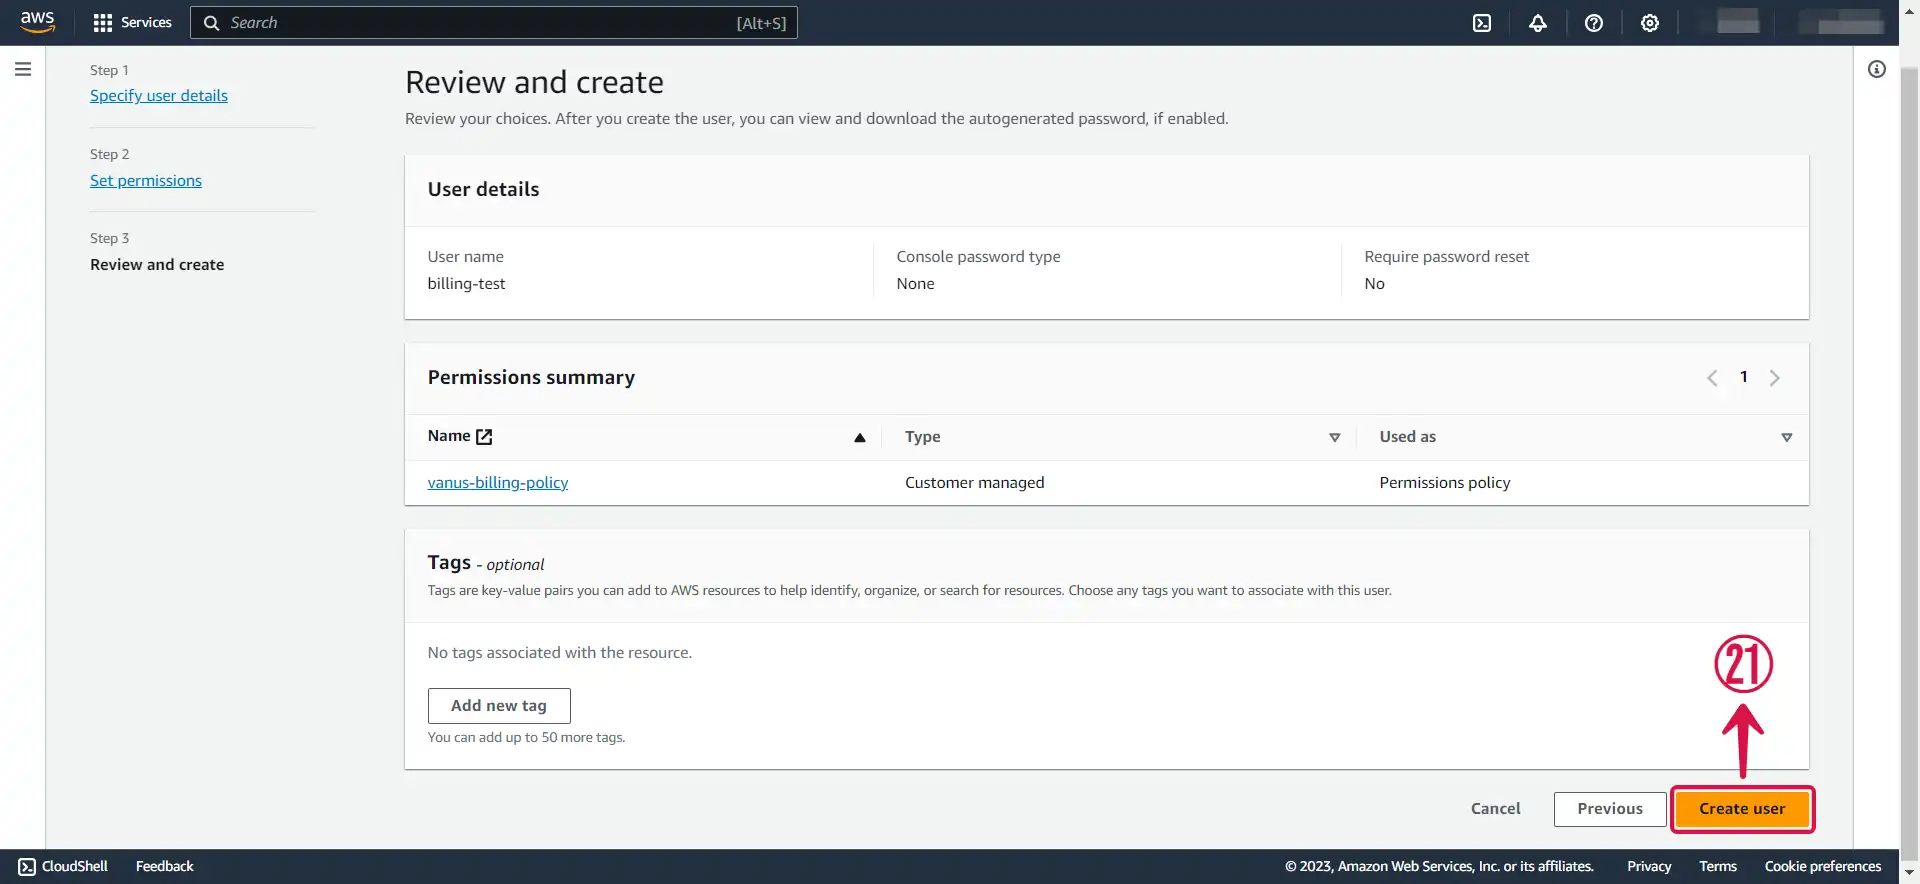
- Review and press Create user㉑.
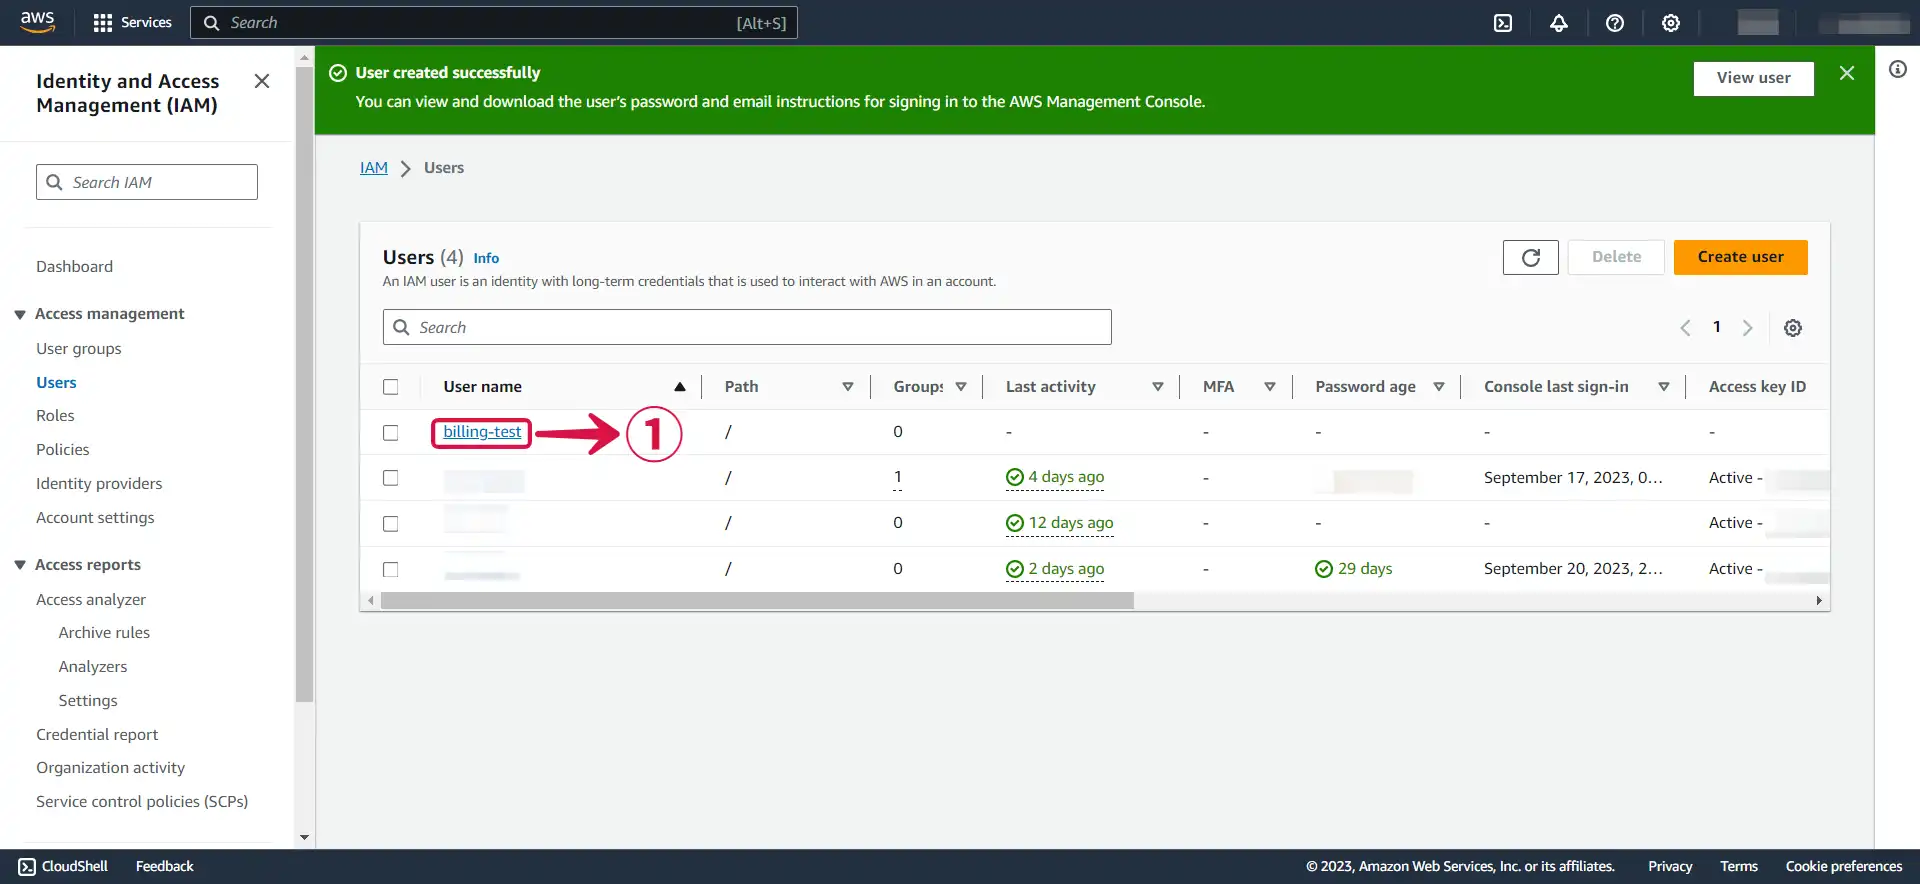
Step 2: Create an Access key and Secret access Key
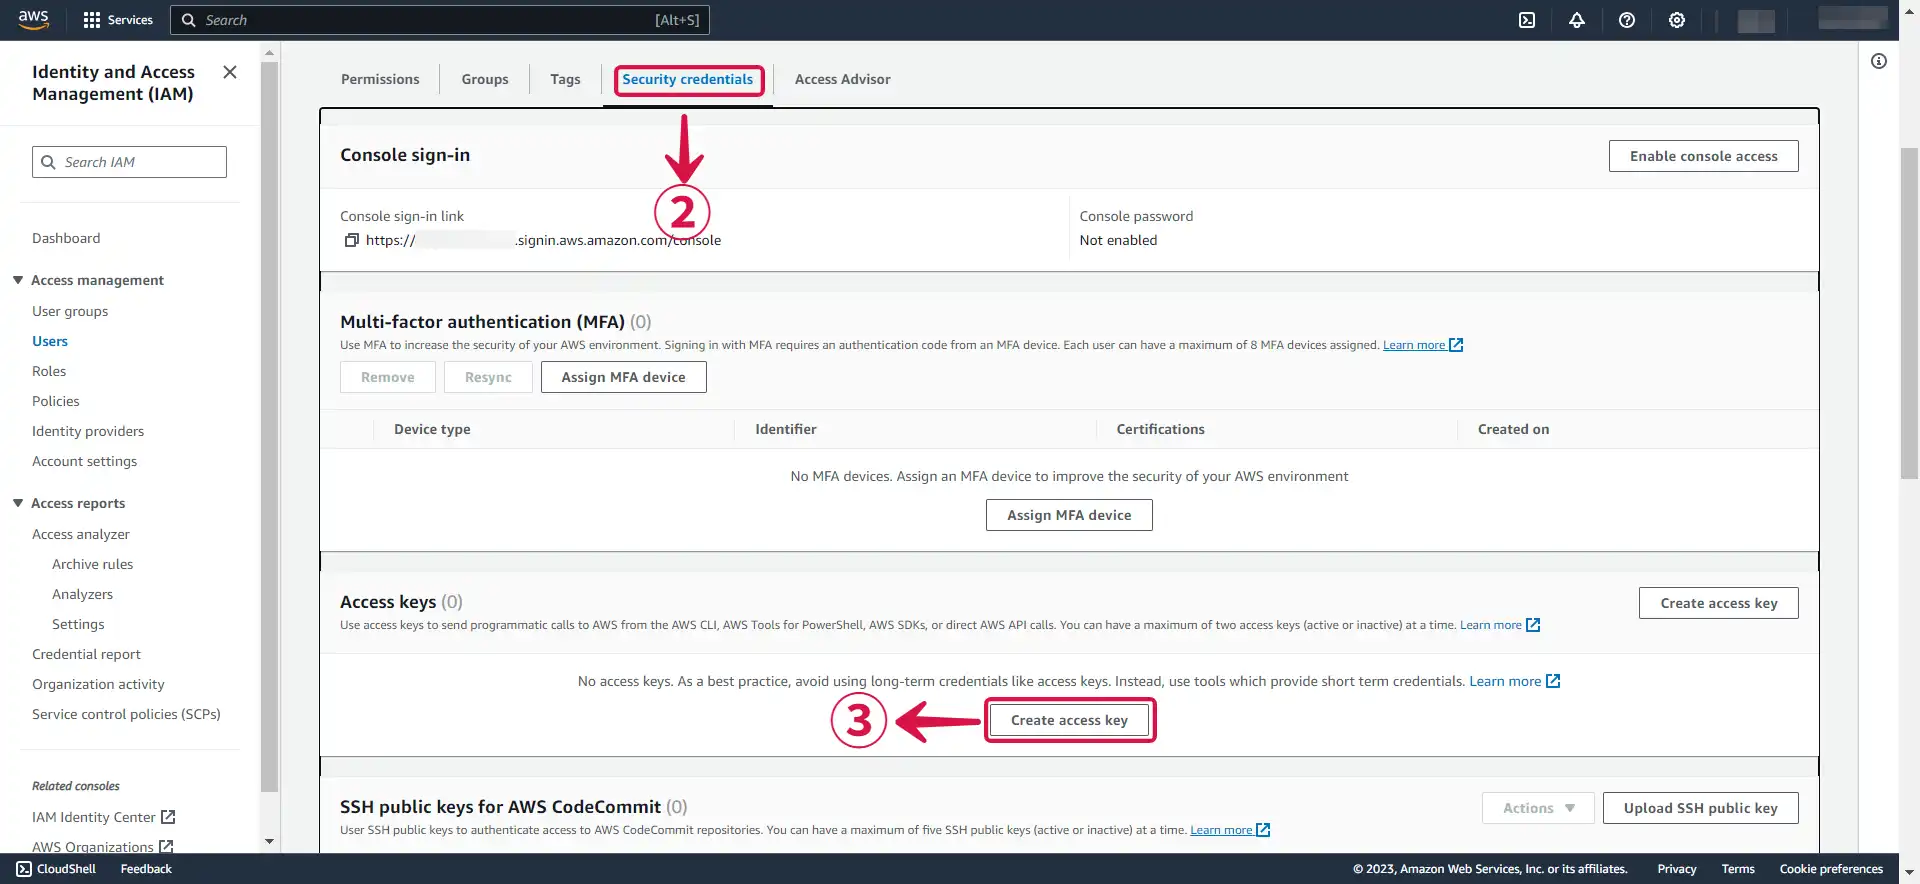
- Now click on the user① you just created.
- Under Security credentials② scroll down the page to
Access Keys, and Click Create access key③.
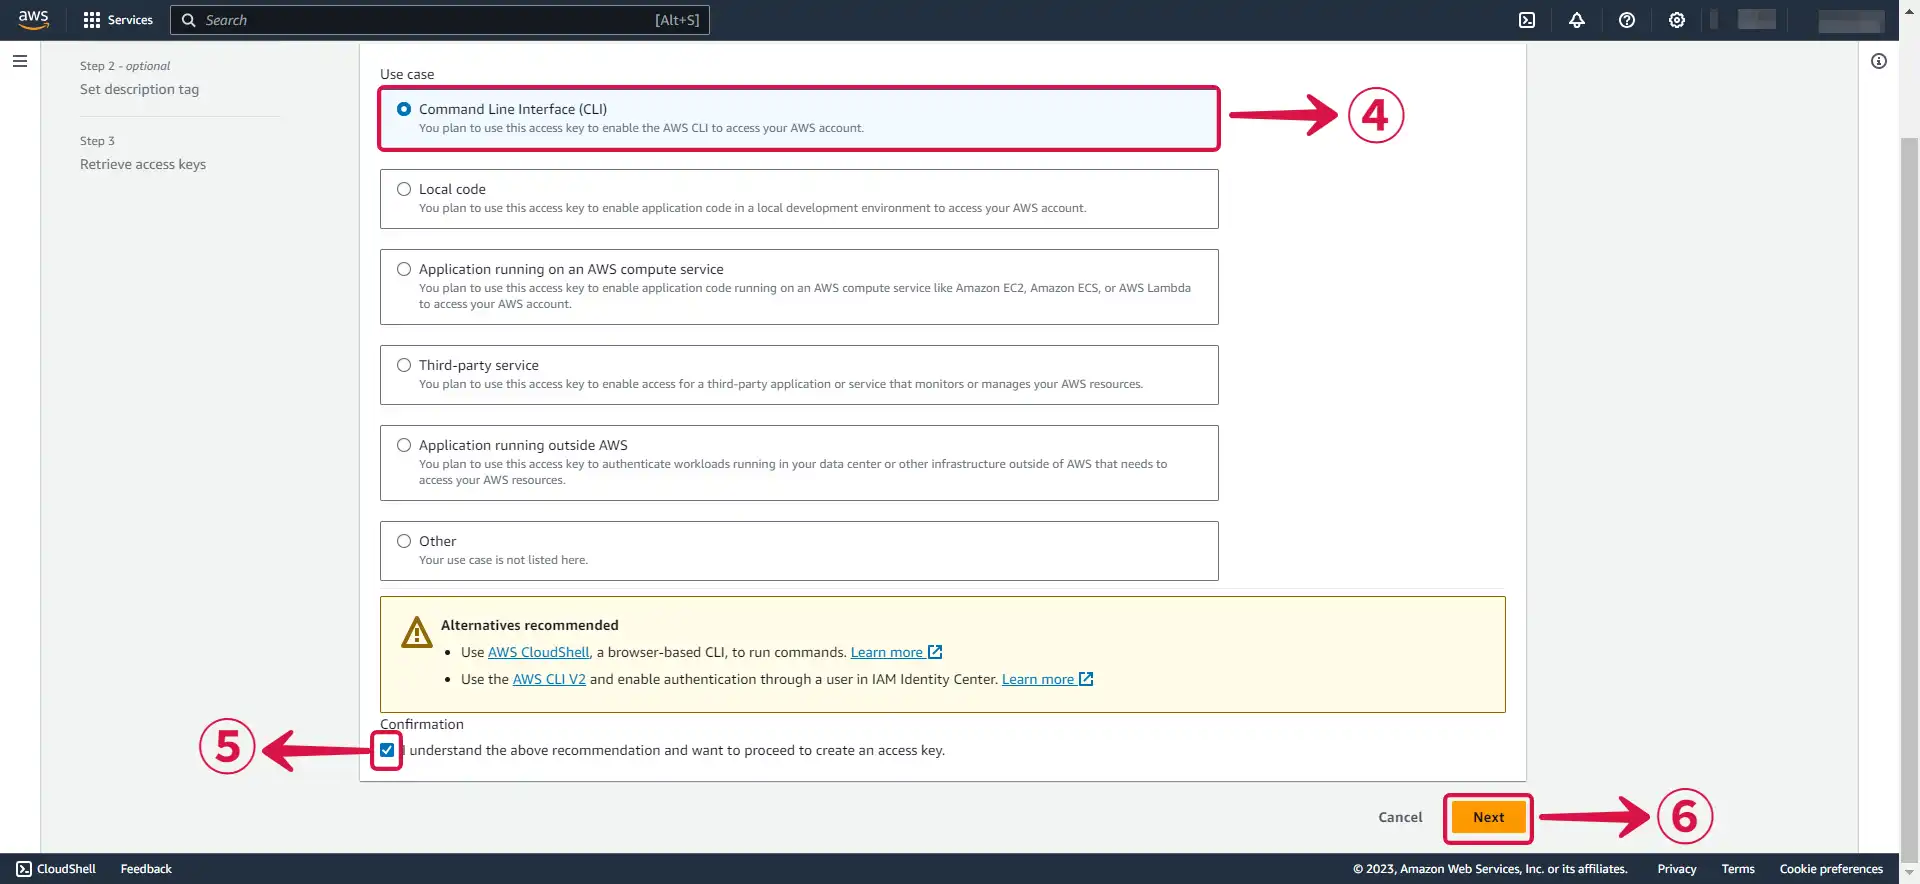
- Select Command Line Interface (CLI)④, tick the Confirmation box⑤ and click Next⑥.
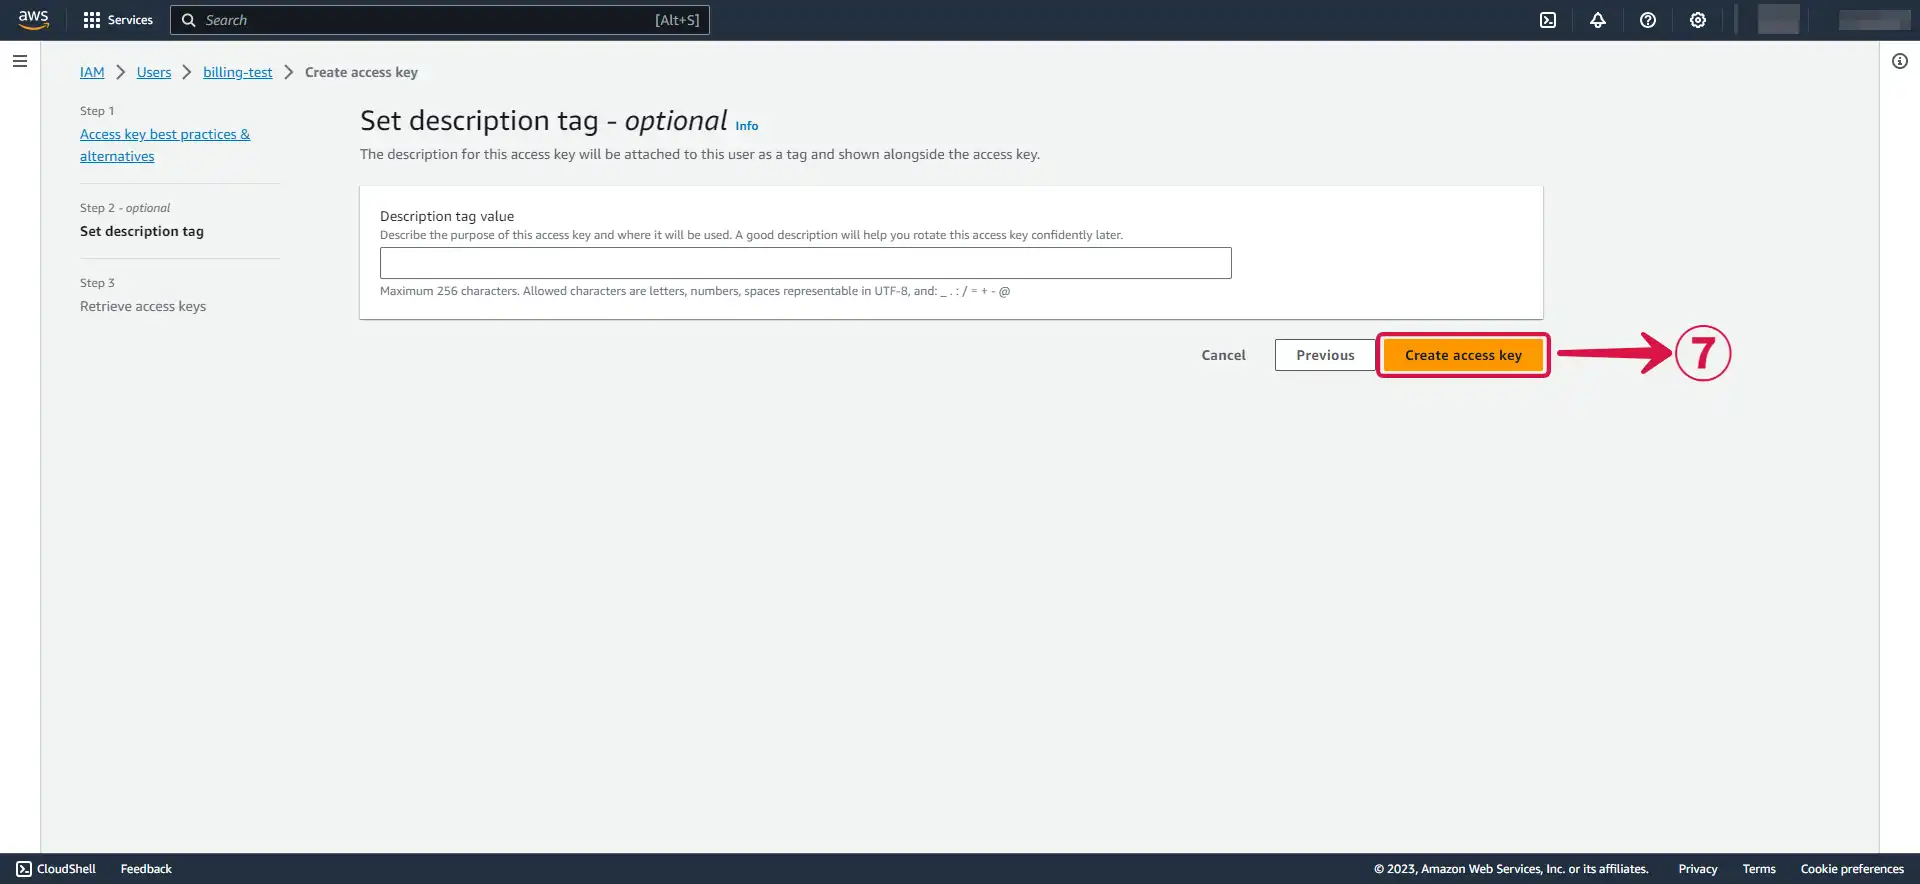
- Click Create access key⑦.
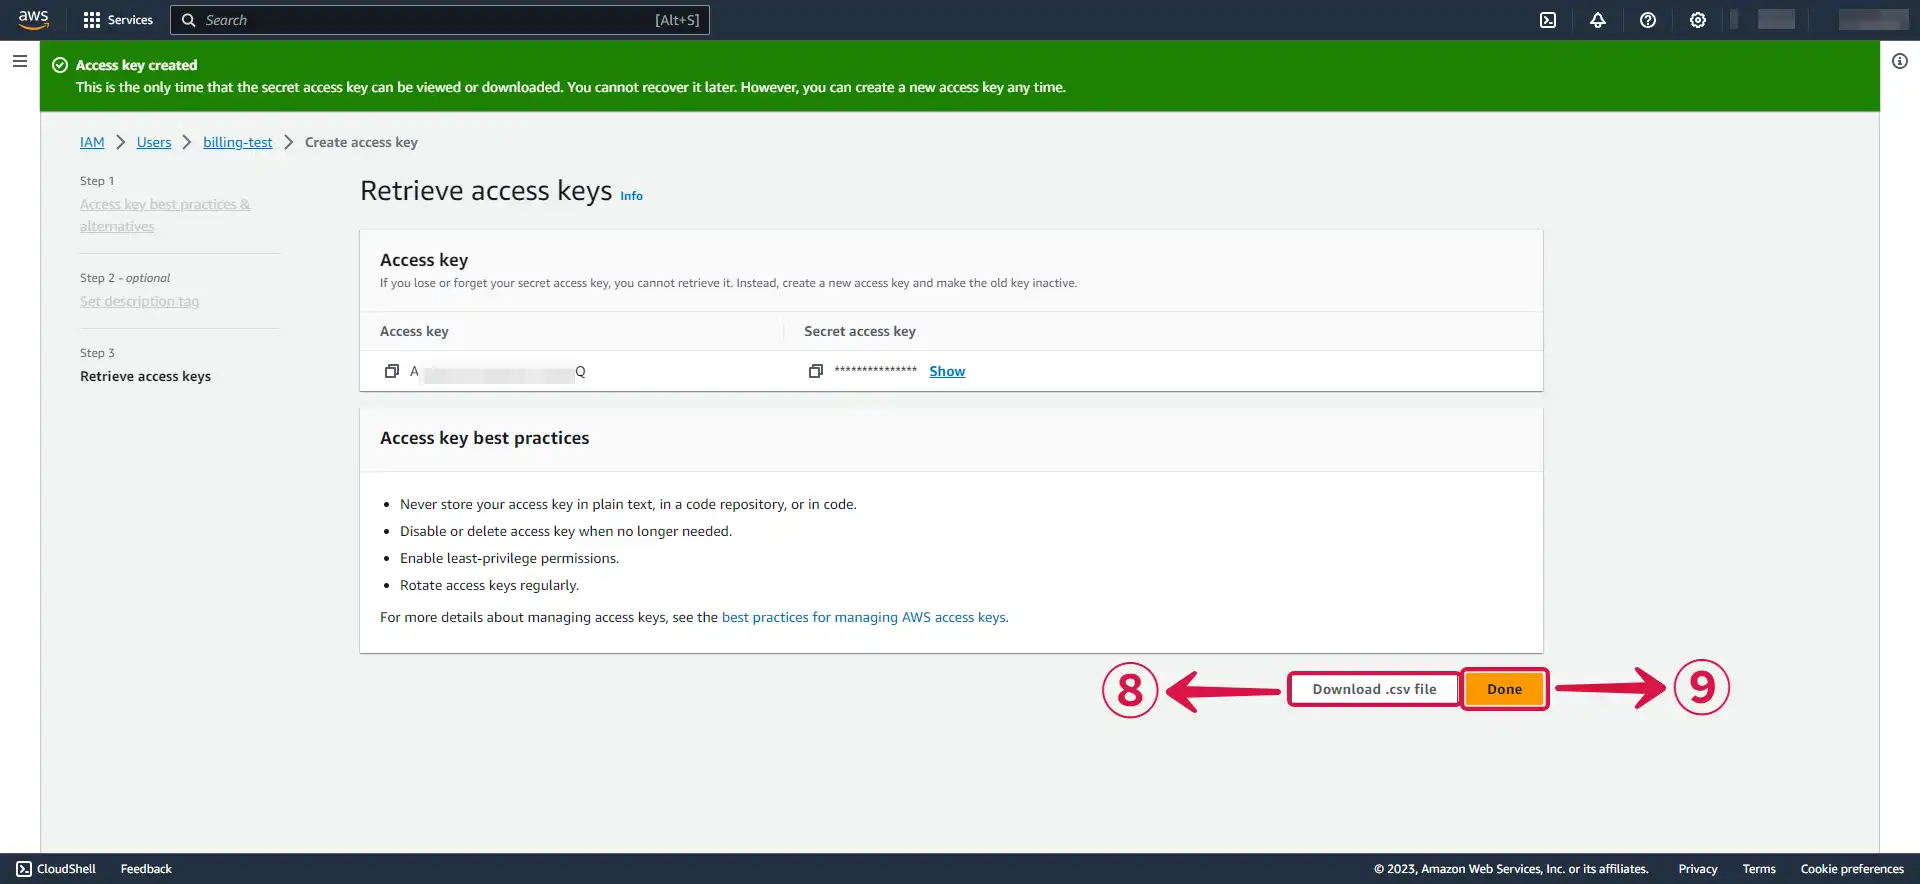
- Download your
Access keyandSecret access keyby clicking the Download .csv file⑧ button, and then click Done⑨.
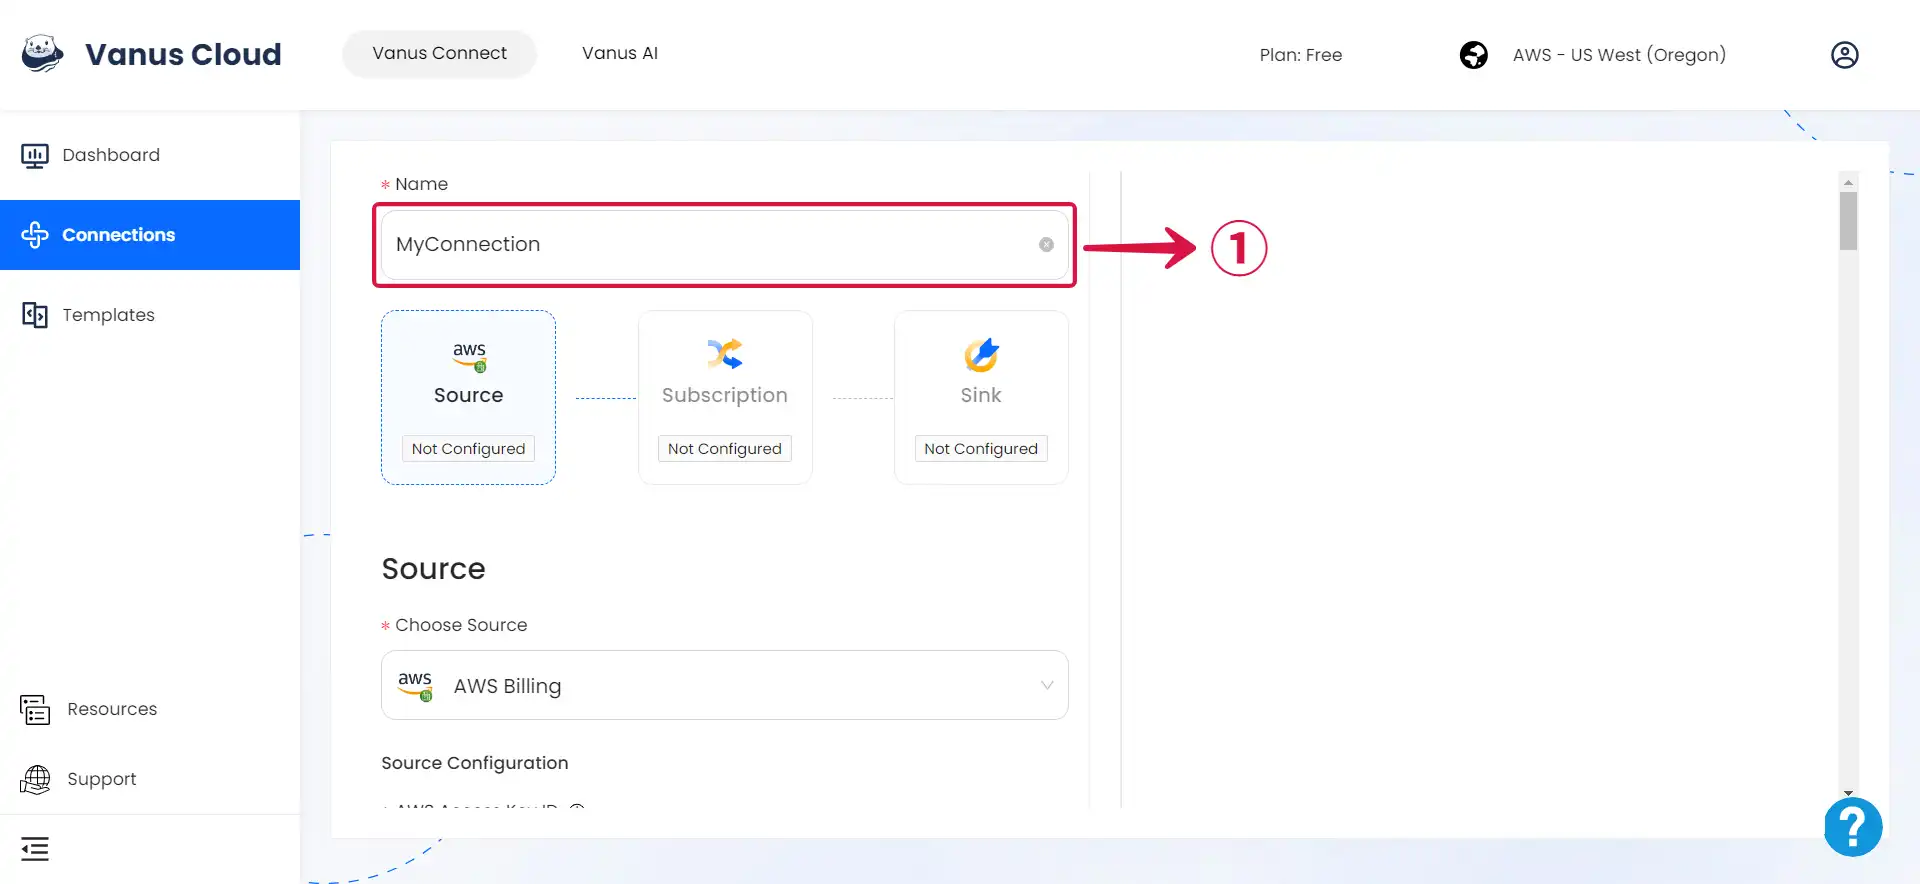
Step 3: Amazon Billing Connection Settings
- Write a Name① for your connection.
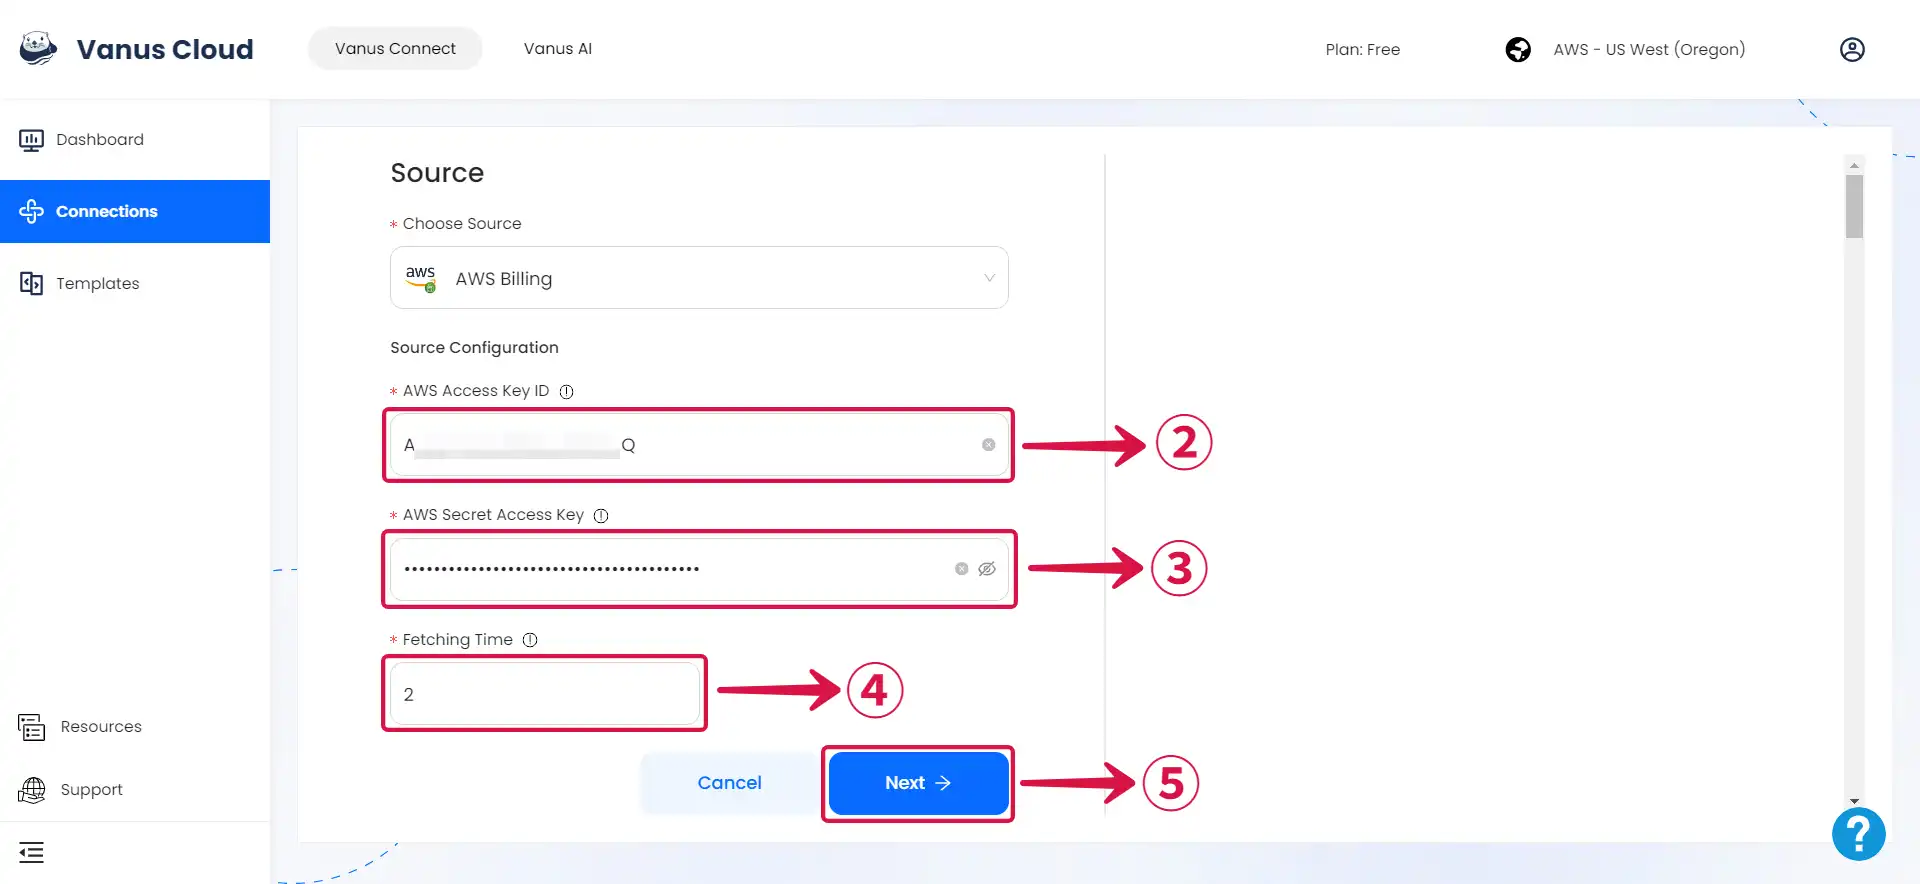
- Enter your Access Key ID② and Secret Access Key③, specify the preferred event Fetching Time④, and then proceed by clicking on Next⑤.
Learn more about Vanus and Vanus Connect in our documentation.