MongoDB
This guide contains information to set up a MongoDB Source in Vanus Connect.
Introduction
MongoDB is a popular open-source document-oriented database that is designed to be scalable and flexible. Unlike traditional relational databases, which store data in tables with predefined schemas, MongoDB stores data in flexible documents that can have varying fields and structures. This makes MongoDB particularly well-suited for use cases where the data being stored is constantly changing or has a complex structure. Additionally, MongoDB is designed to work well with large amounts of data and can easily scale horizontally across multiple servers. One of the key features of MongoDB is its support for dynamic queries and indexing. This allows developers to easily query their data using a variety of different criteria and indexes, which can significantly improve performance. MongoDB is also designed to be easy to use and developer-friendly. It has a powerful query language and a variety of APIs for interacting with the database, and it is often used in conjunction with popular programming languages like JavaScript and Python.
The Vanus MongoDB source connector is a connector provided by Vanus, that extracts data from the users MongoDB database, converts it into CloudEvents, and streams it to their selected system/sink connector. The connector continuously monitors the MongoDB database for changes and captures those changes in real-time. To use the Vanus Connect mongodb source connector, you need to provide a host, username, password, Auth Source, Database, and Collection, which are required to authenticate and authorize access to your MongoDB account.
Prerequisites
- A MongoDB account
- Host
- Username
- Password
- Auth Source
- Databases
- Collections
Getting Started
Step 1: Setup a MongoDB database
Create a MongoDB account(for 1st time users without an account)
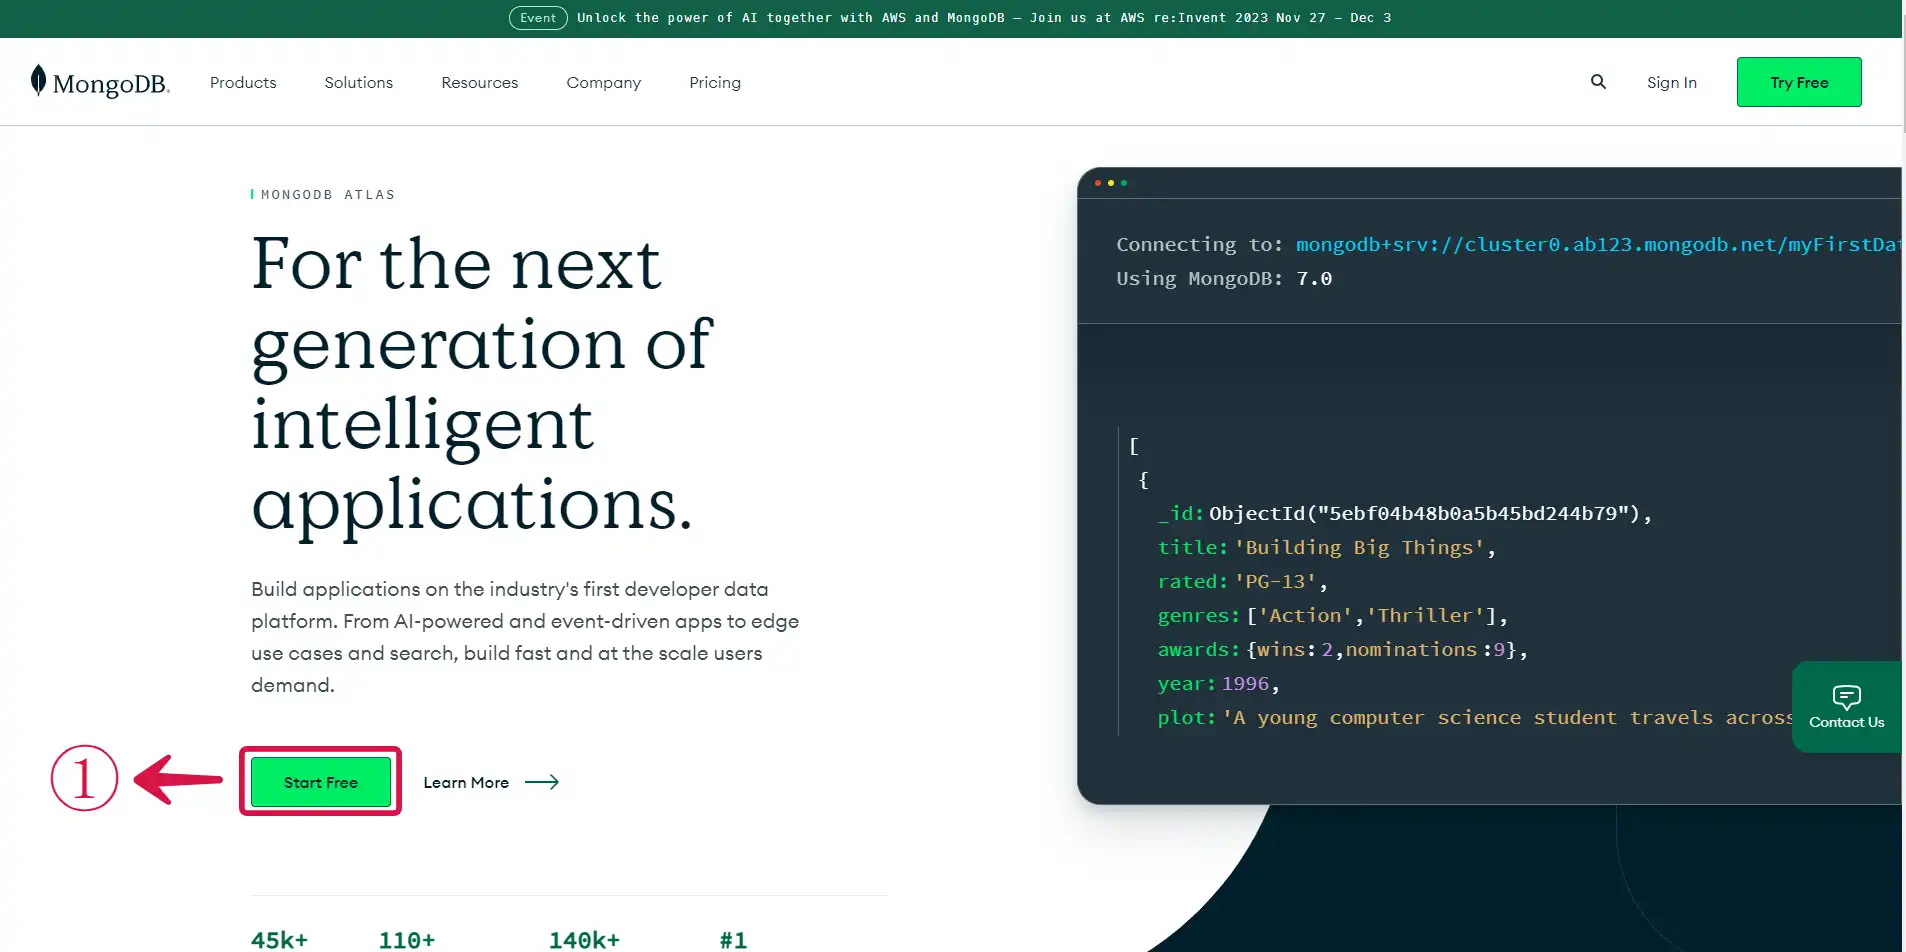
- Go to the official MongoDB website and click on Start free① to create a free account.
- Sign up with your preferred authentication method②.
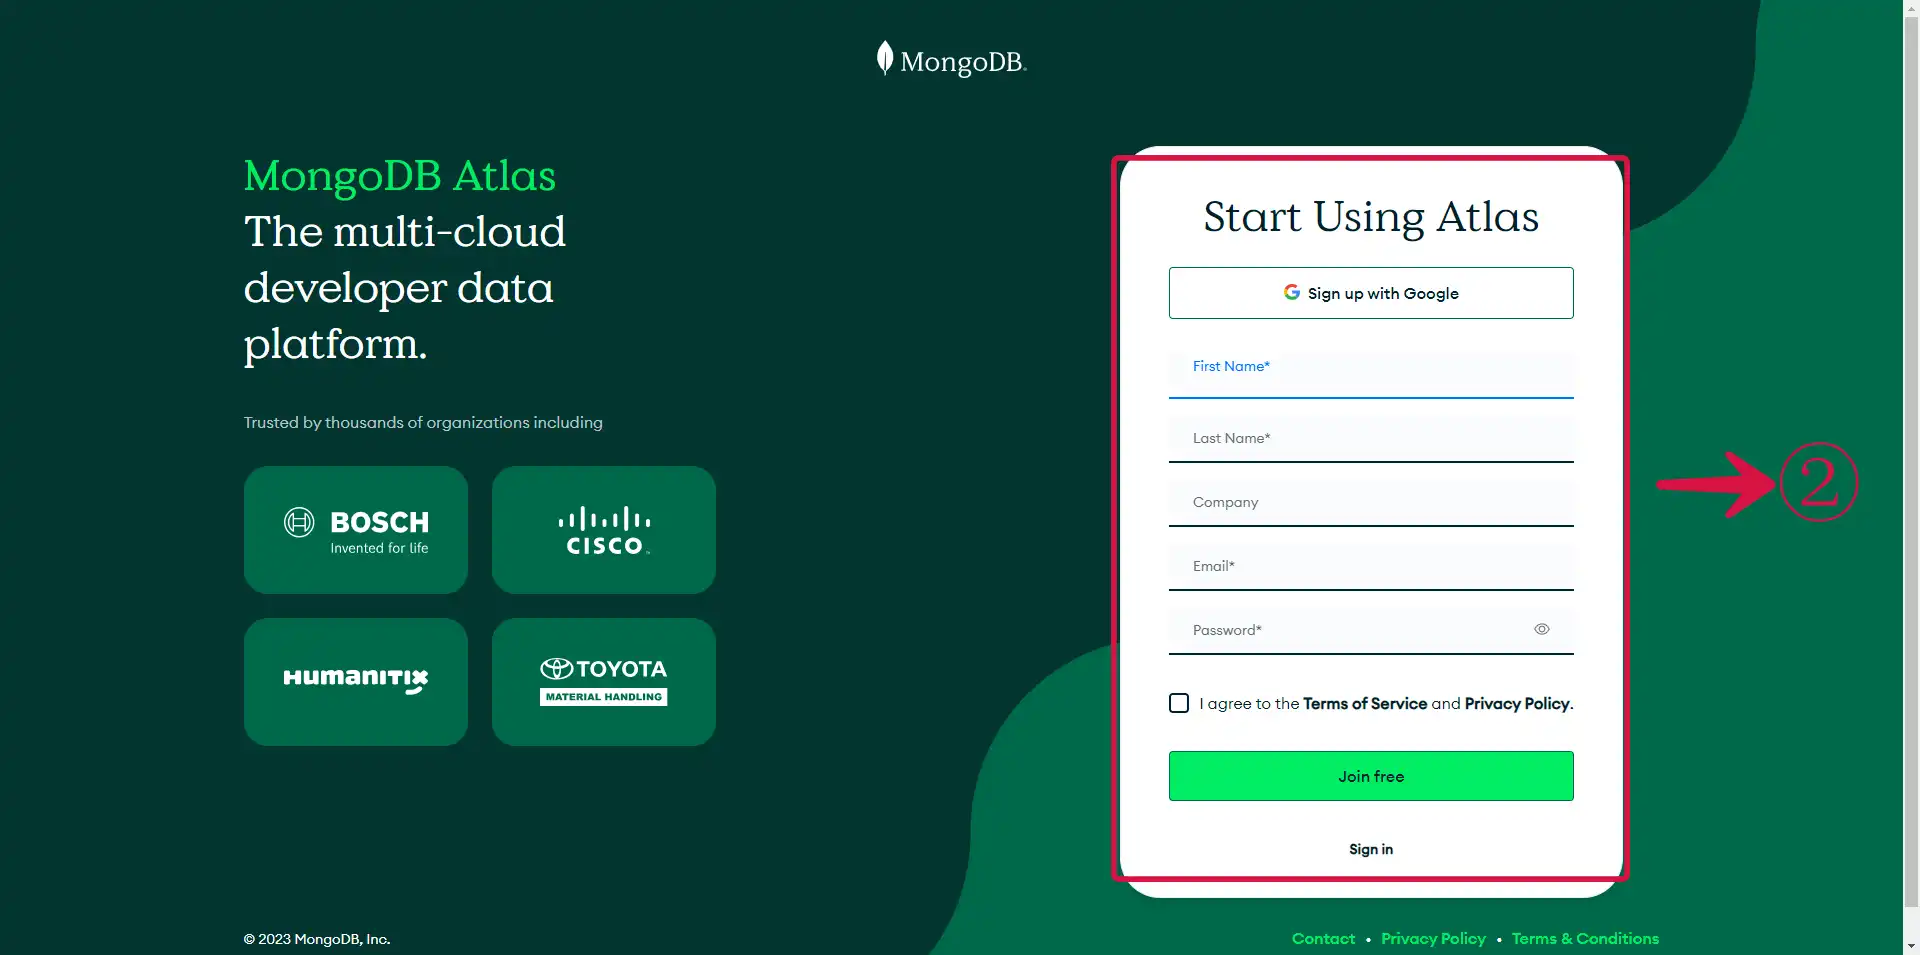
Note MongoDB Atlas is a cloud-based and fully-managed version of the MongoDB database. It is designed to simplify the process of deploying and managing MongoDB in the cloud. It includes features such as automatic scaling, backup and recovery, and performance optimization. The MongoDB website refers to Atlas as it is one of the primary ways to use the MongoDB database in a cloud environment.
Project details information
Answer some few questions like:
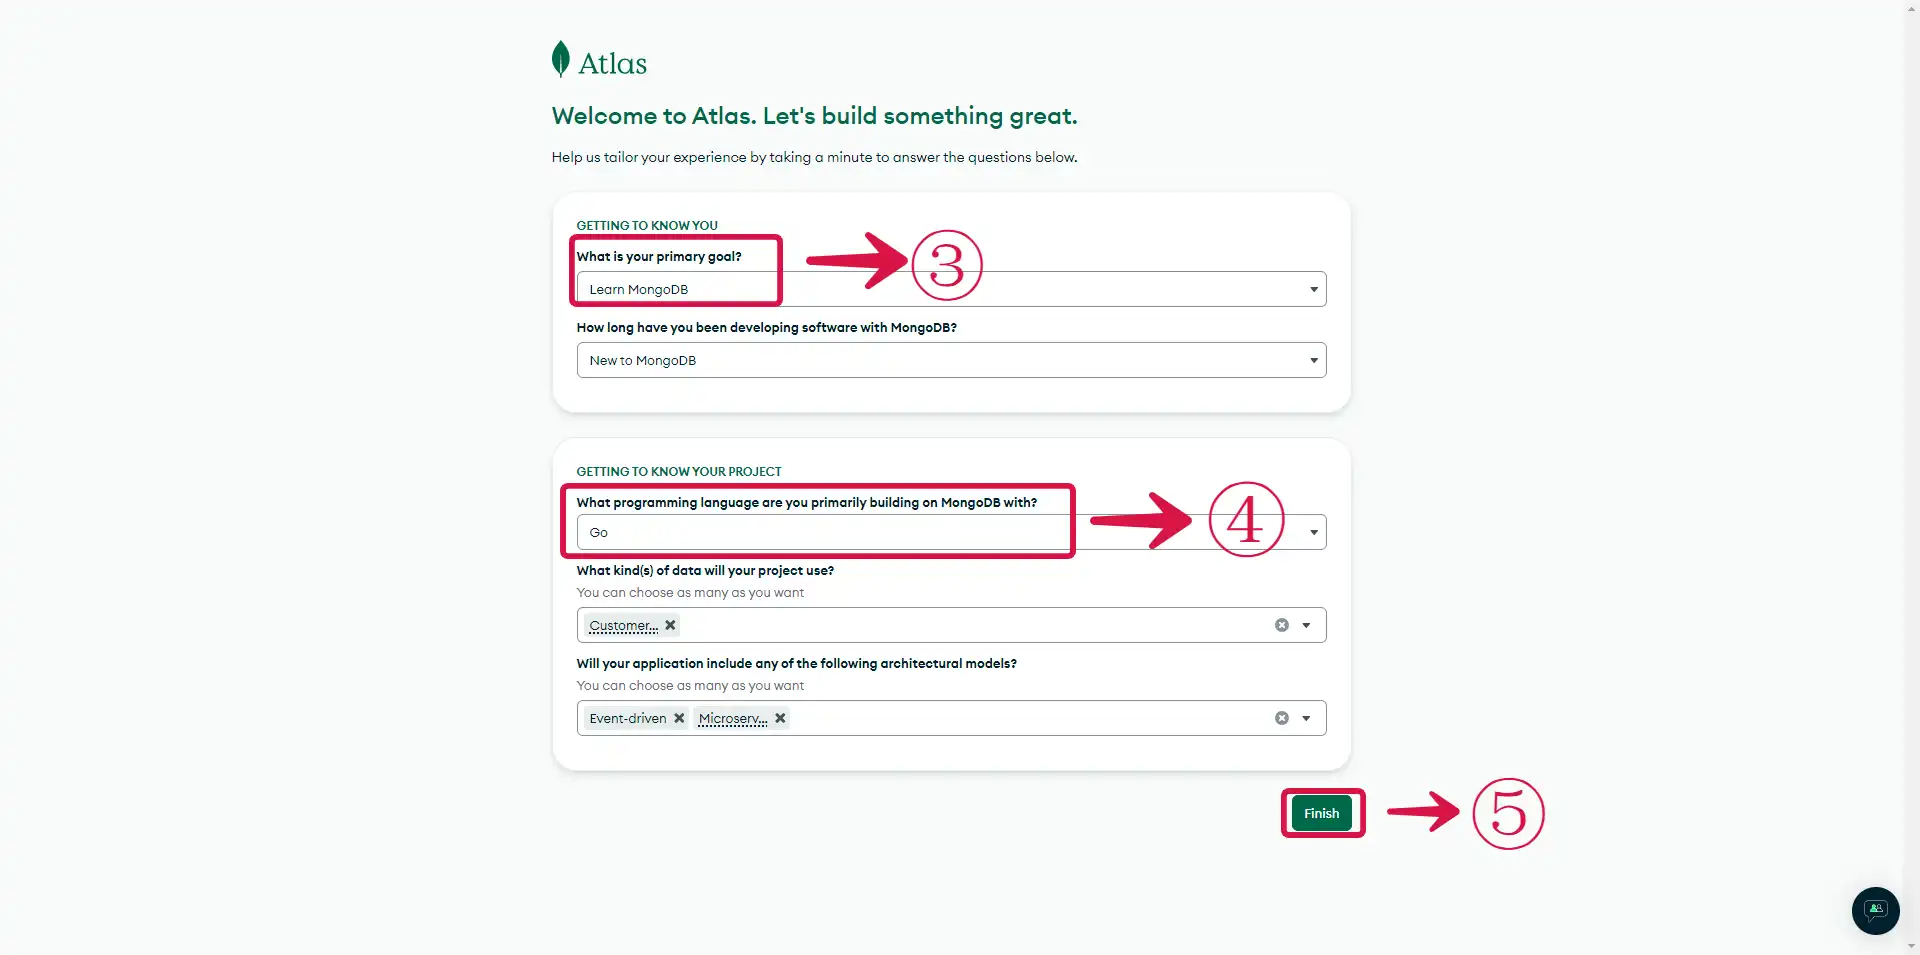
- What is your goal today?:③ These are questions designed to help MongoDB Inc understand the users goals and requirements for using the MongoDB database in the cloud. The questions are designed to understand the user's specific needs and use case. Based on their responses, MongoDB Inc. can provide personalized guidance and resources to maximize the benefits of their MongoDB deployment, ensuring a successful implementation in the cloud.
What is your preferred language?:④ This section is a way for MongoDB Inc. to gather information about the user's technical skills and preferences, and to provide customized support to ensure a successful MongoDB deployment. Select your preferred programming language.
Click the Finish⑤ button.
Setting up your MongoDB database
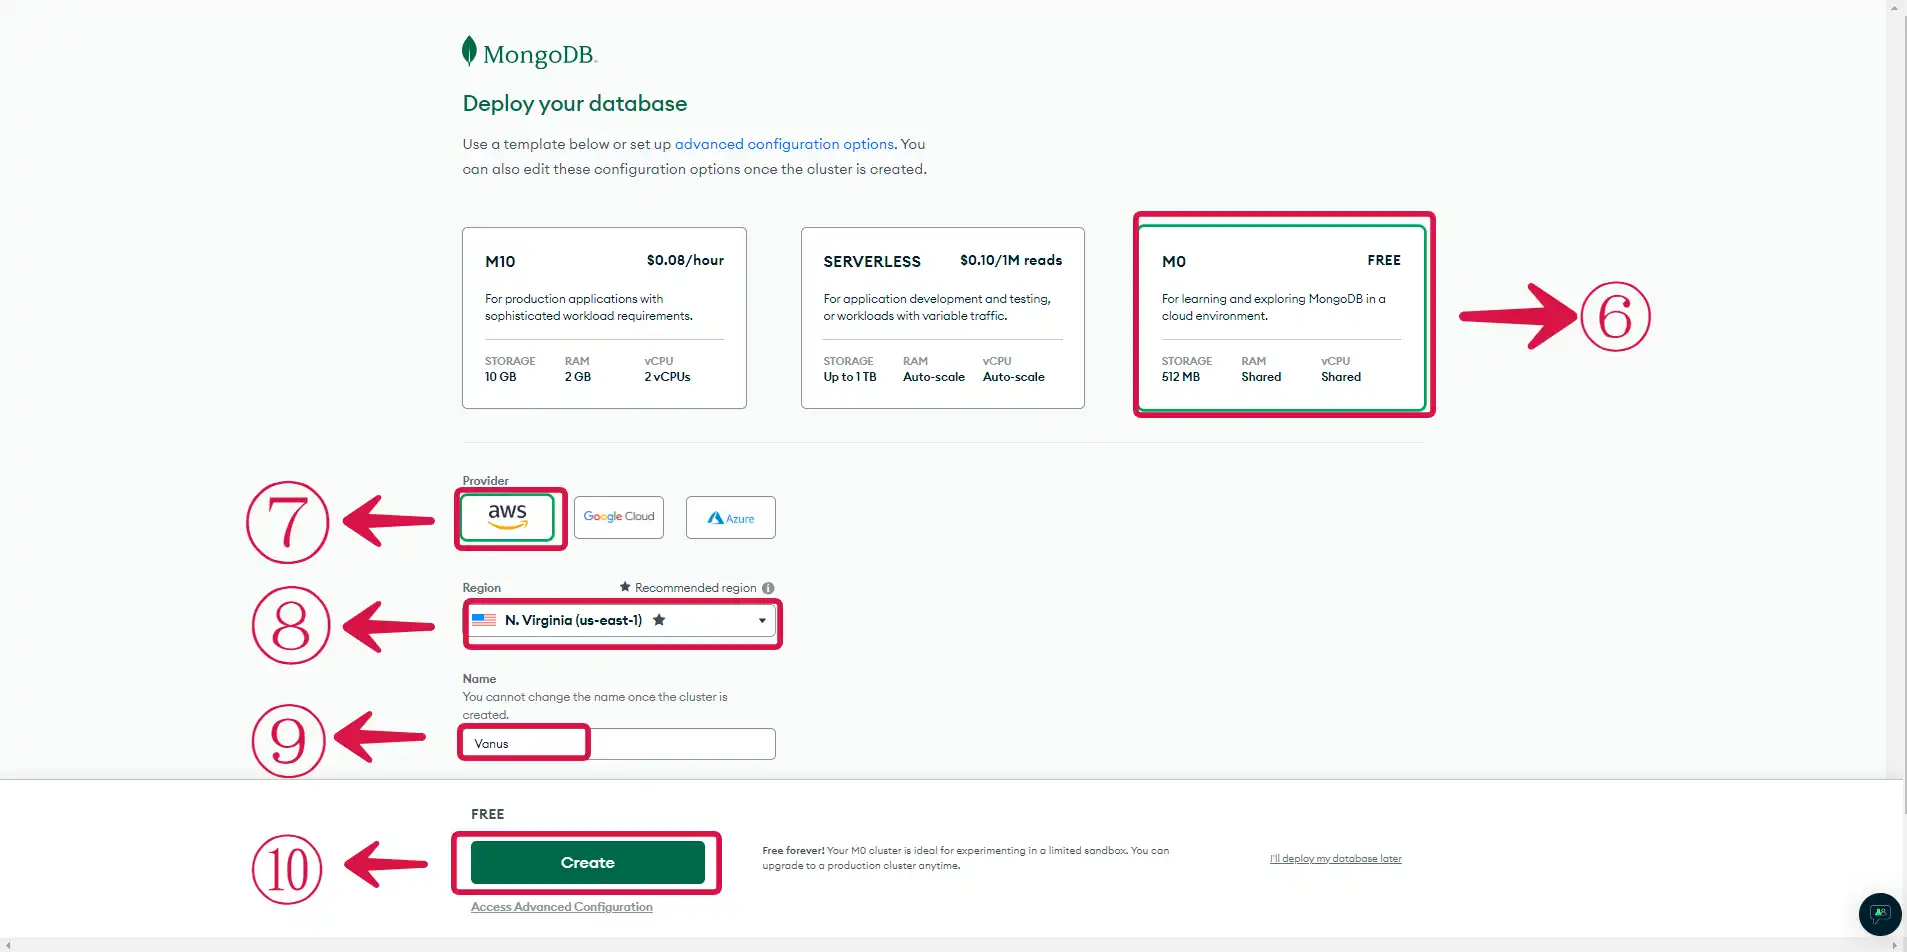
Select the M0⑥ template for a free deployment.
Select⑦ your preferred cloud provider, we selected AWS, but you have the option to go with google cloud or azure.
Note Atlas MongoDB asks users to choose a cloud provider to host their MongoDB deployment. This is because Atlas is a cloud-based database service that needs to know which provider the user wants to use to optimize performance, security, and cost-effectiveness within that provider's environment. Different cloud providers offer different features and capabilities, so Atlas MongoDB can provide customized recommendations and resources based on the user's chosen provider. Choosing a cloud provider is an essential step to set up the MongoDB deployment properly and ensure optimal performance and security.
Select your preferred Region⑧. The region you want your resources to be deployed in.
Choose a Name⑨ for your Cluster.
Note A cluster in MongoDB is a group of servers or nodes that work together to store and manage data. It typically consists of multiple instances of the MongoDB database, which communicate with each other to ensure data consistency and availability. A cluster provides high availability and scalability to a MongoDB deployment, enabling it to handle large amounts of data and traffic. By distributing data across multiple nodes, it ensures that data remains accessible even if some nodes fail
- Click on Create⑩ to create your database.
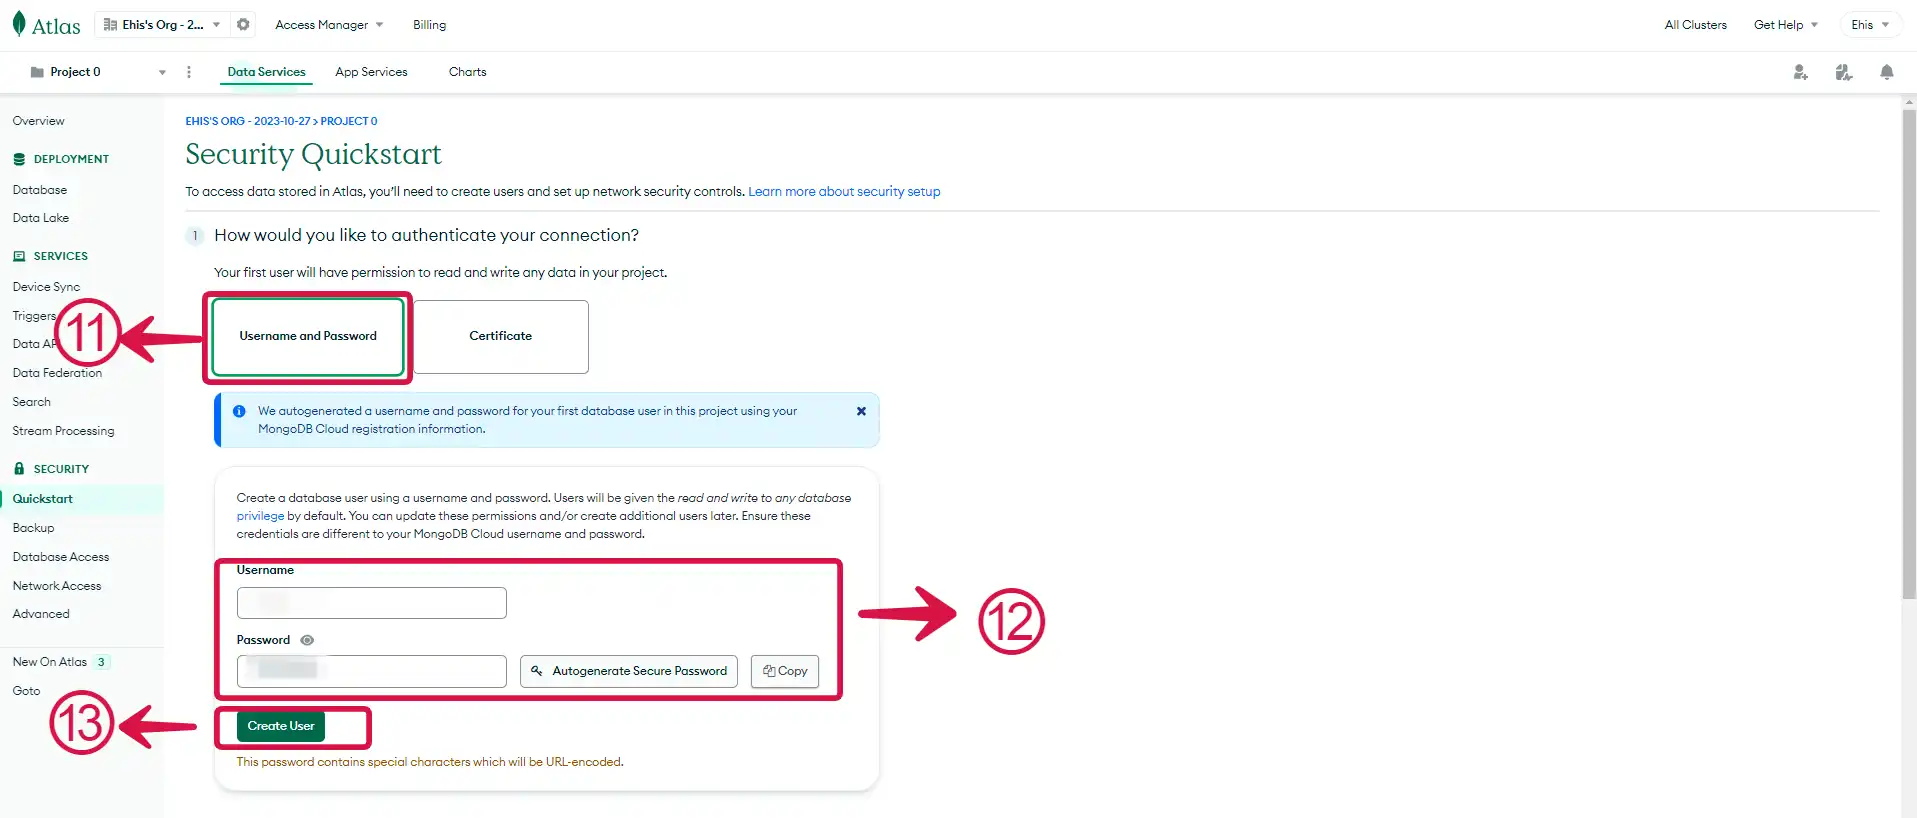
Security Setup
Select⑪ your preferred means of authentication.
For the users who chose Username and Password⑫, type your username in the username field. You can choose to either type your password or have Atlas autogenerate a secure password for you.
Click on Create User⑬ to create the user.
Setting up the host
We are going to be using an EC2 instance running the Ubuntu AMI to connect to our DynamoDB database. We need to set that up before moving to the next step.
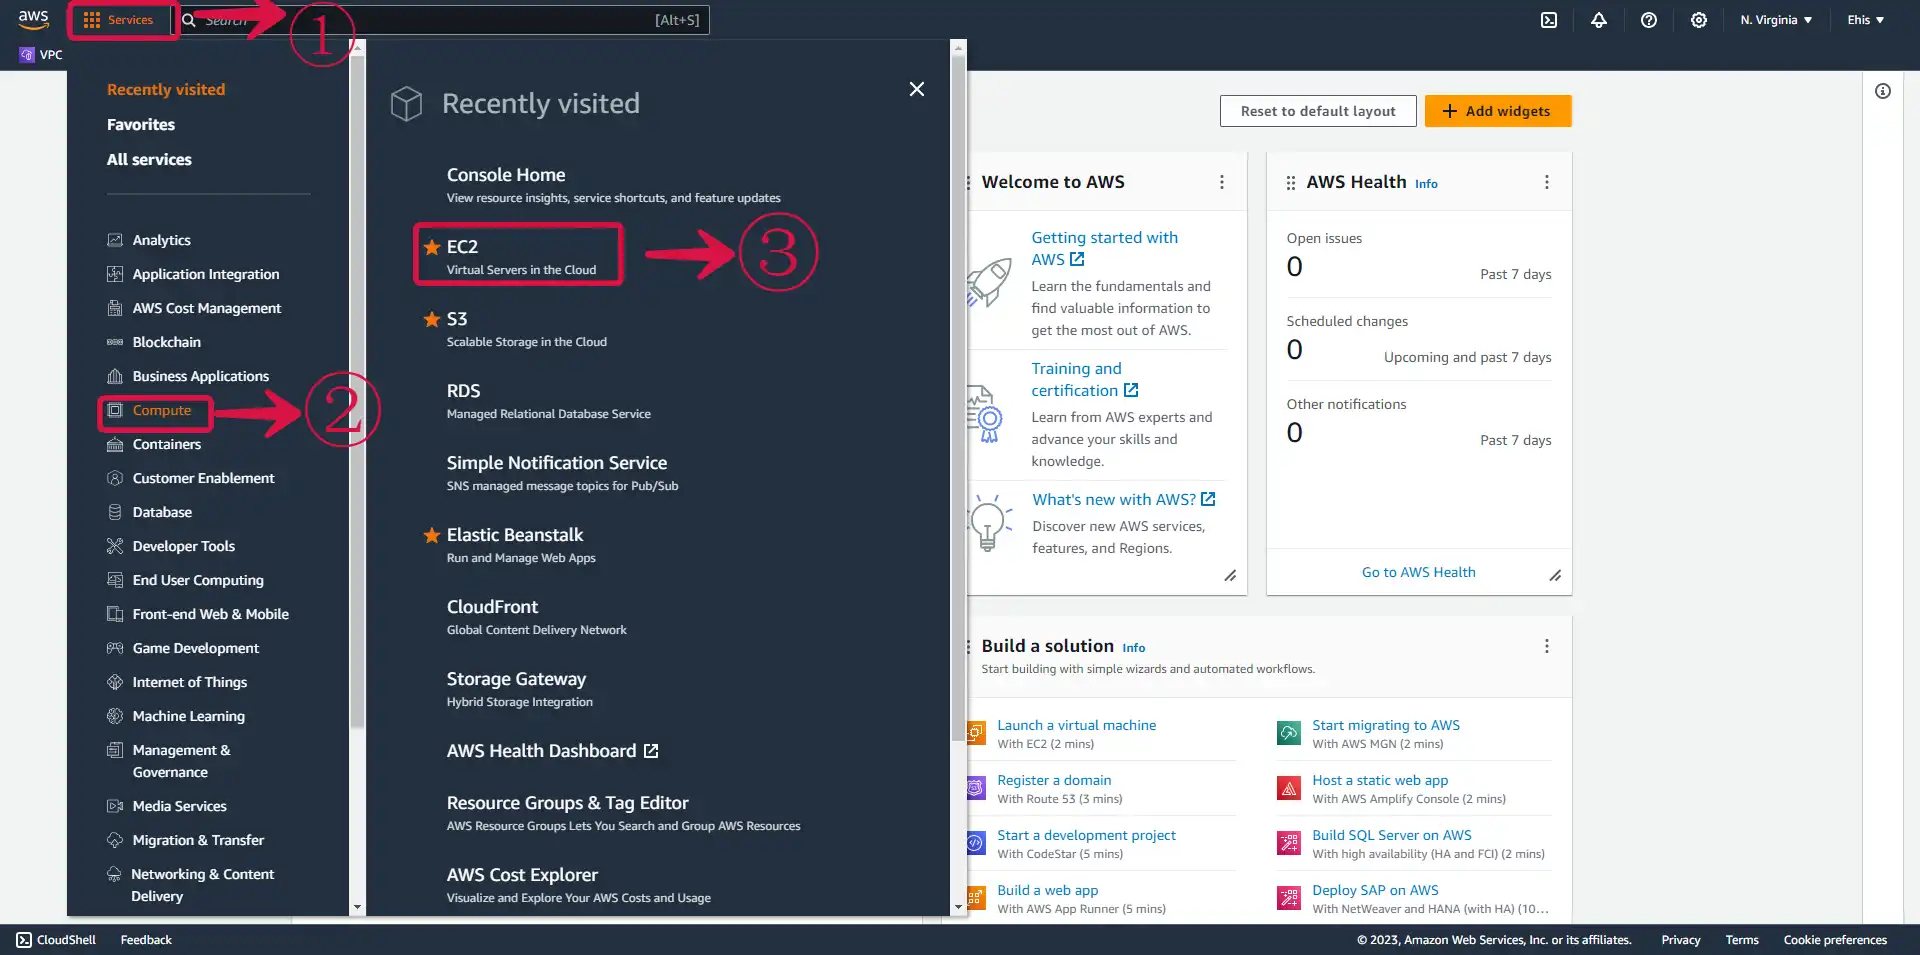
Log in to the AWS Management Console
Click on the left navigation pane called Services① and select Compute②. A list of all compute services would be listed out, select EC2③.
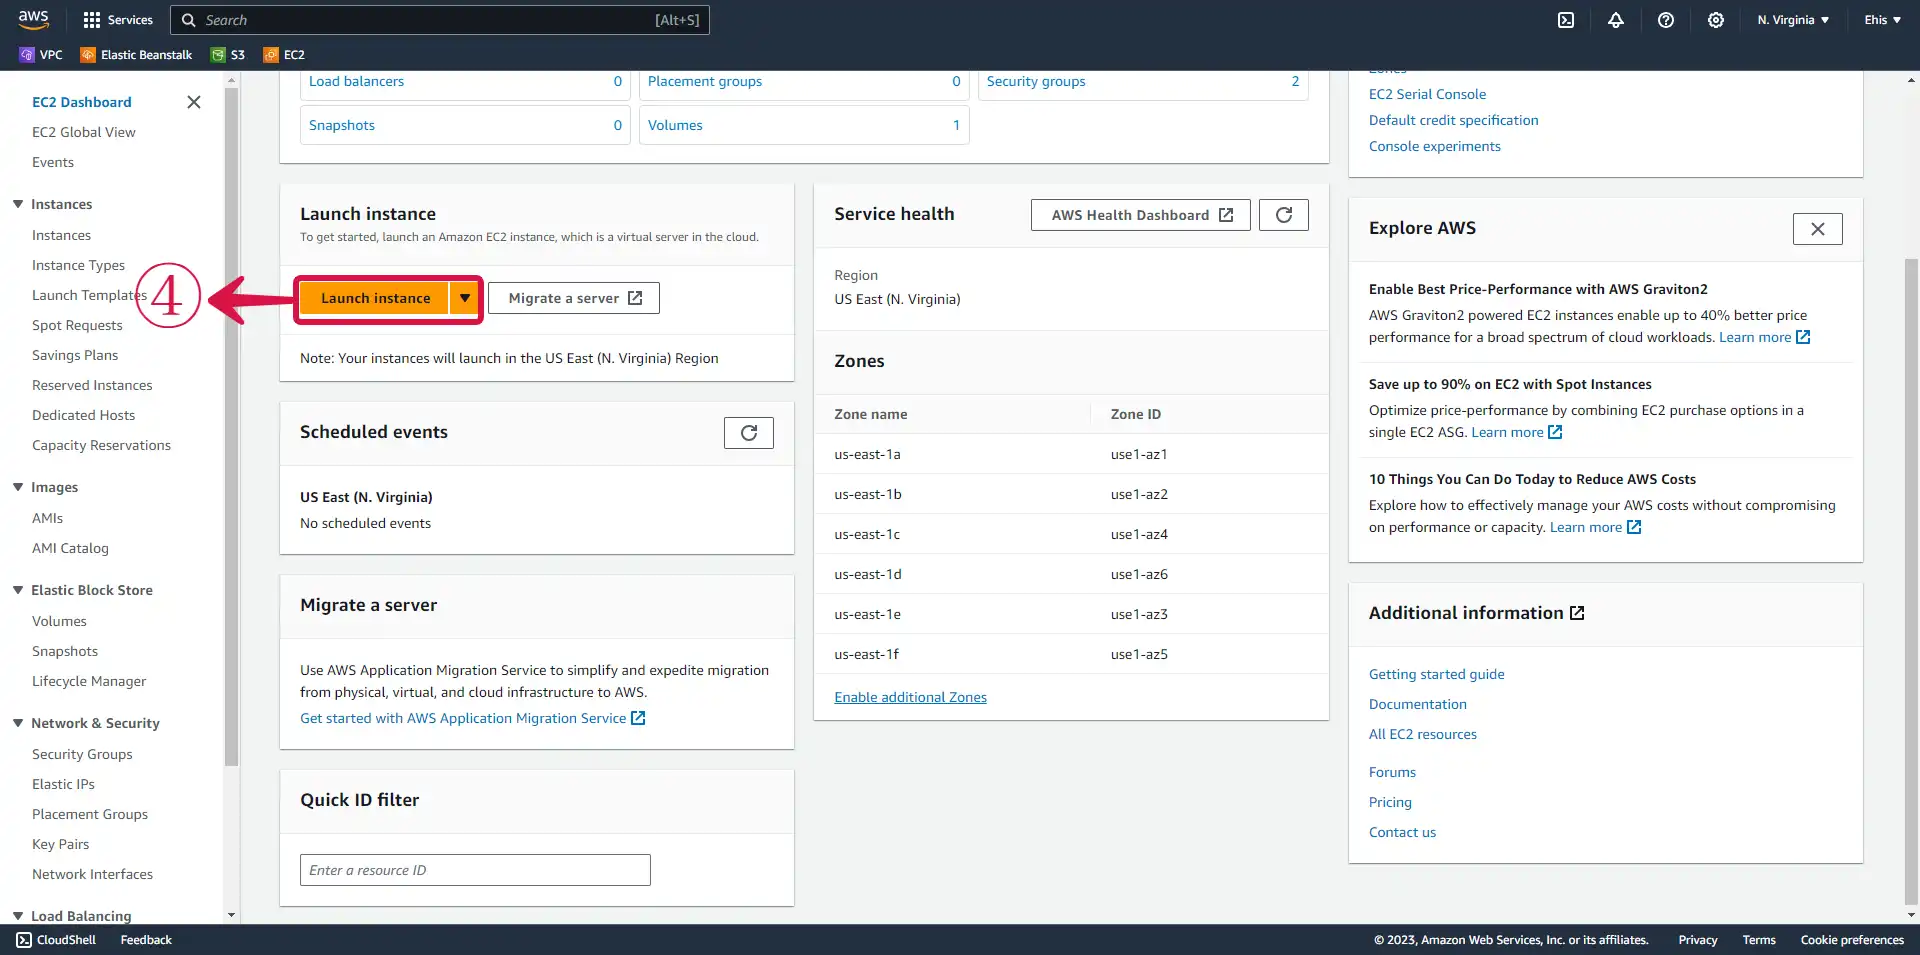
- Click on the Launch Instance④ button.
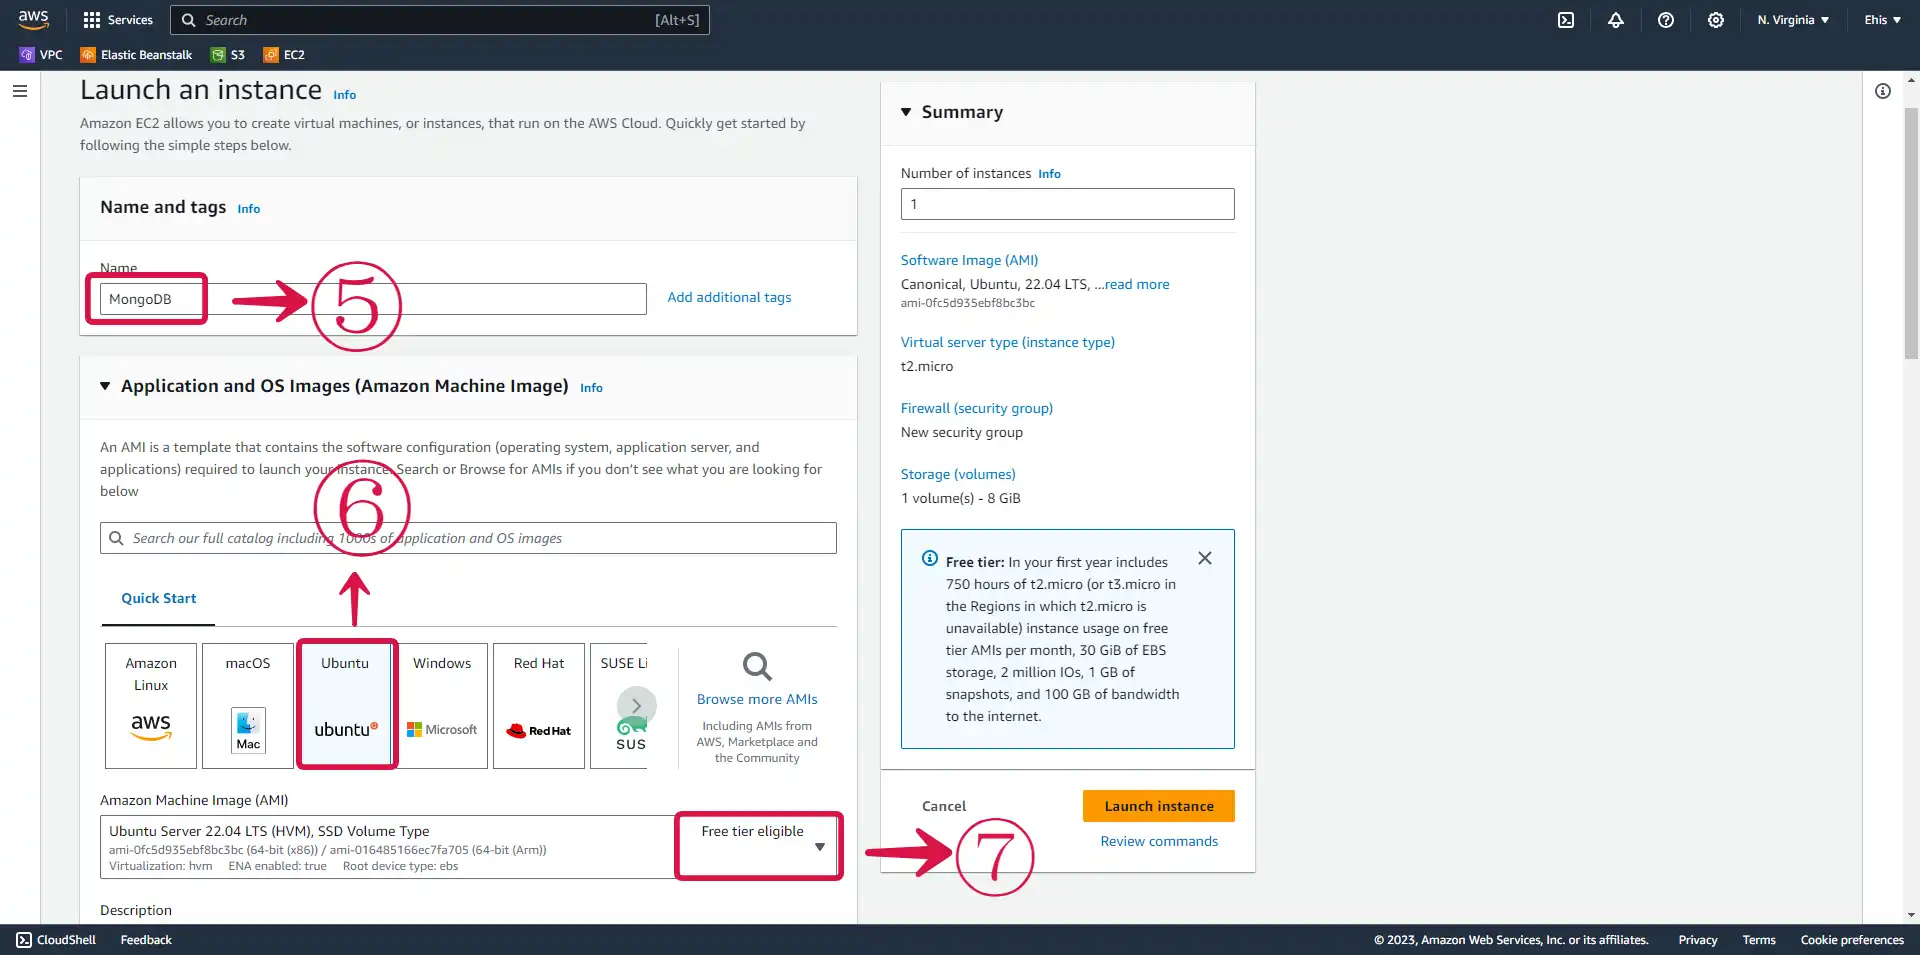
Name and AMI setting
- Give your instance a Name⑤ and Select⑥ an Amazon machine image for the instance. Click on the AMI button to select your preferred server. Select a server that is free tier eligible⑦ to prevent extra cost.
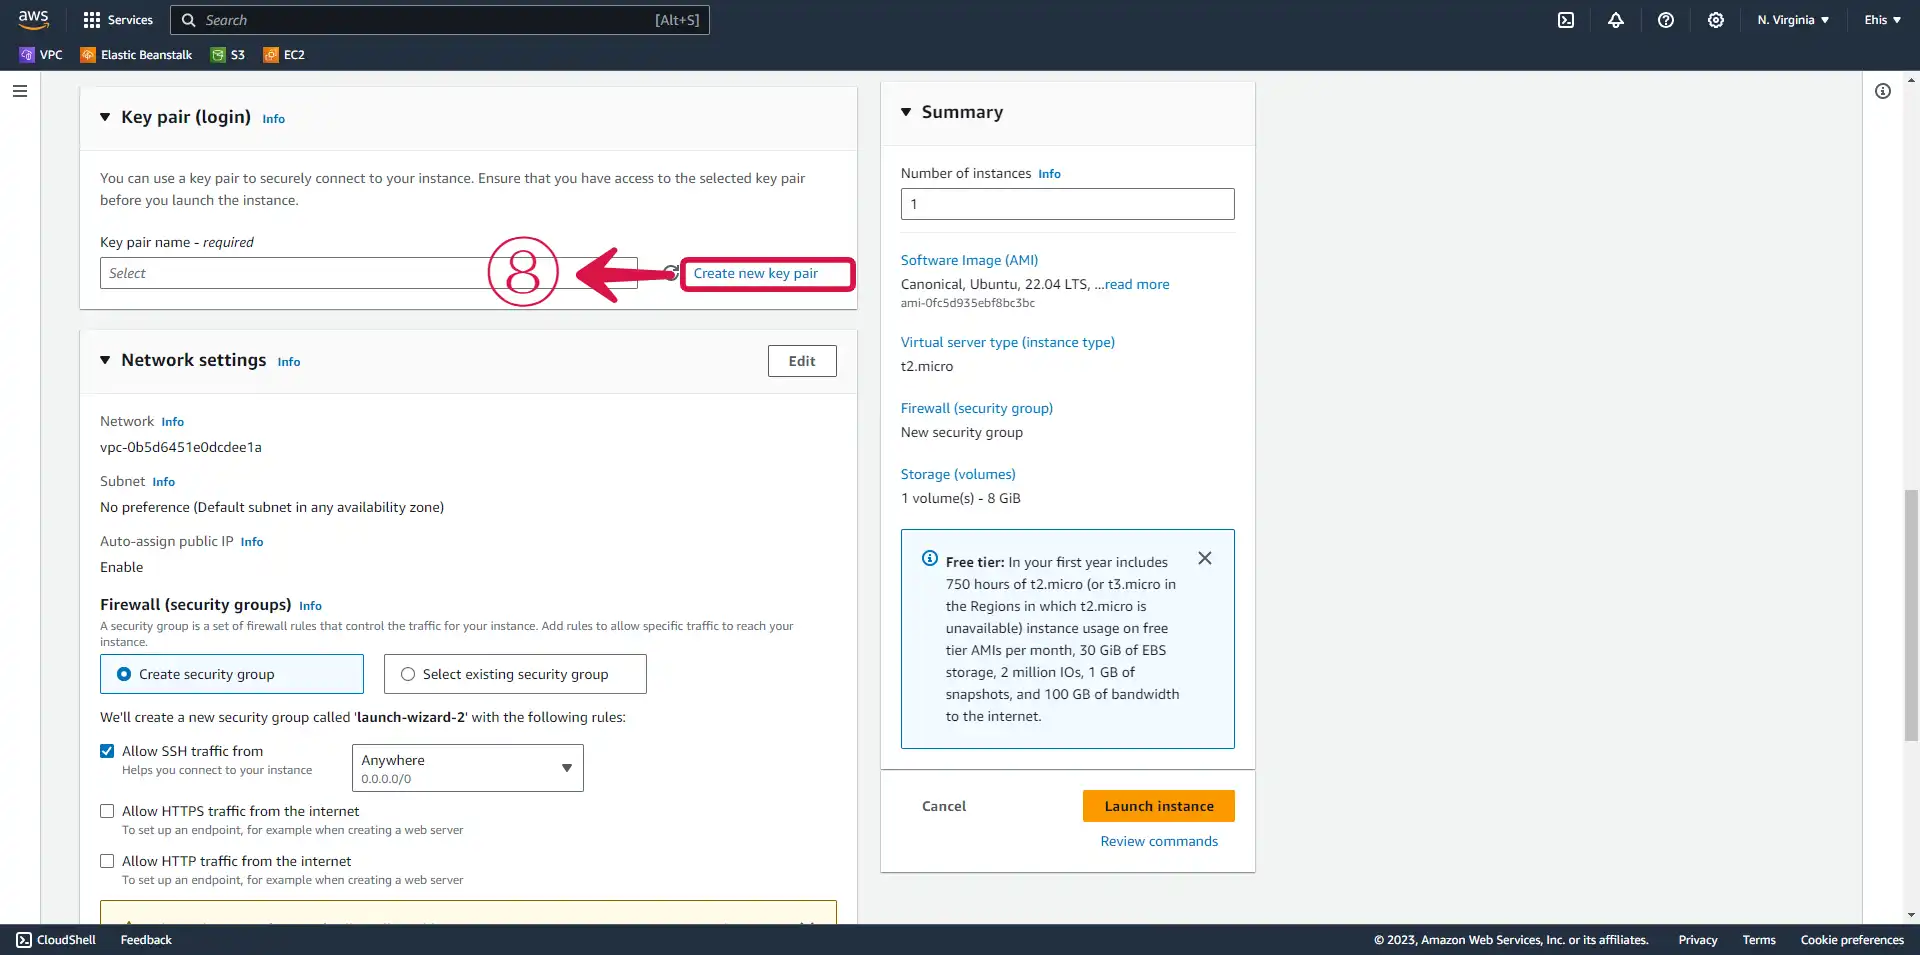
- Create new key pair⑧, to enable you SSH into your server.
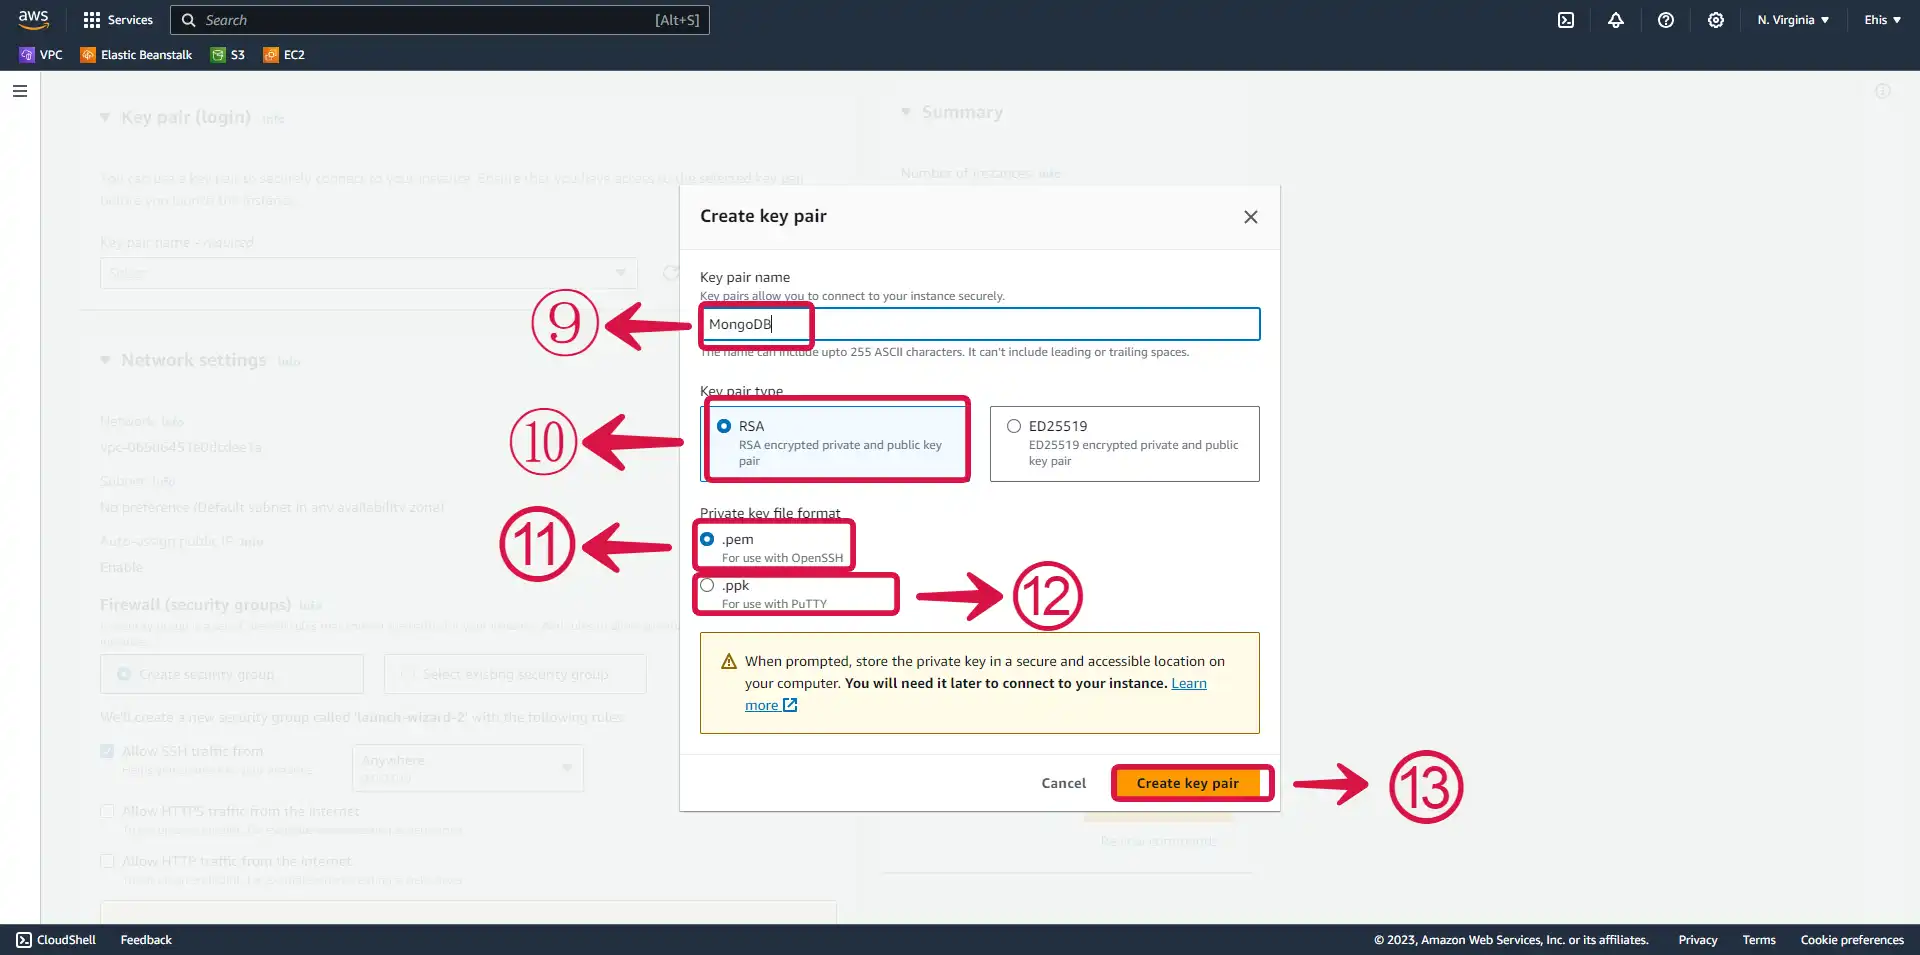
- Provide the Key pair name⑨. Leave the key pair type⑩ on the default selection. For the Private key file format, select the .pem⑪ if you plan on using your terminal to SSH into your instance, or select .ppk⑫ if you want to use putty. Click on Create key pair⑬ to finish the creation of the key pair.
Leave the default VPC and subnet.
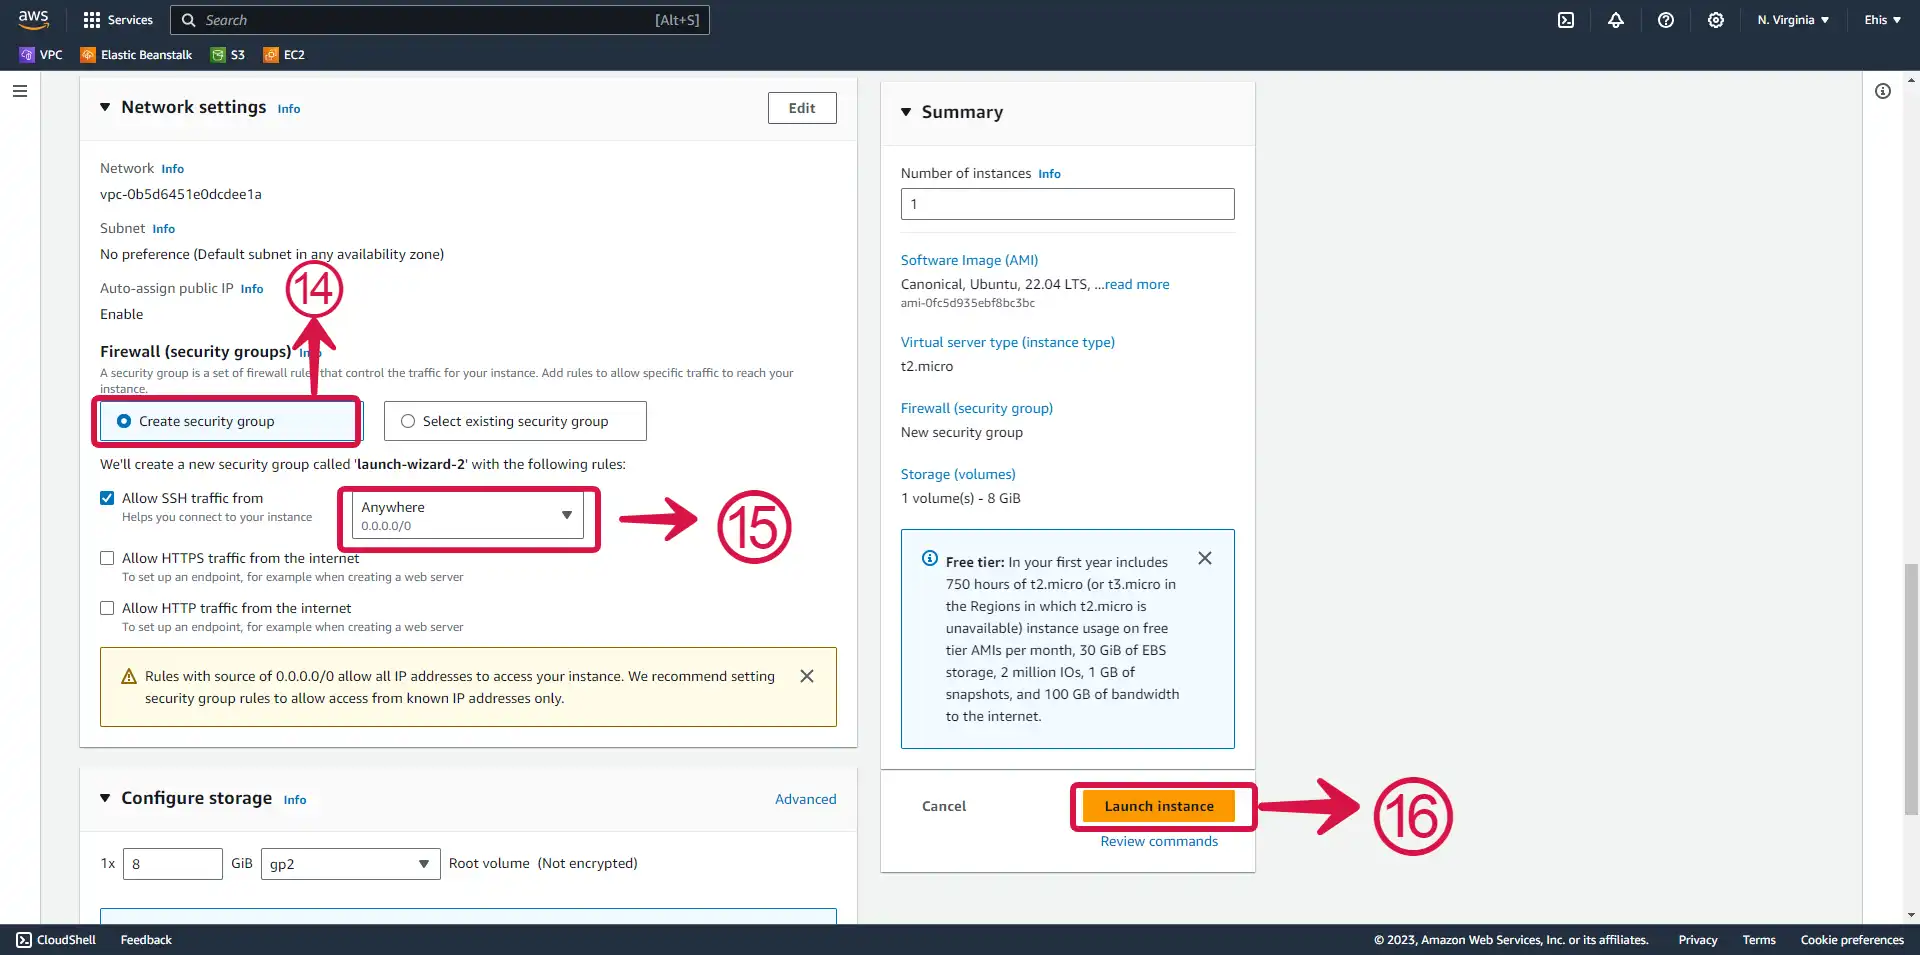
Create Security group⑭. We allowed SSH traffic from Anywhere⑮ because we intend to terminate the instance immediately after the test, it's best practice to set the specific IP you want to have access to your instance. Leave the storage section in its default setting. Click on Launch Instance⑯ when you're done with the required settings.
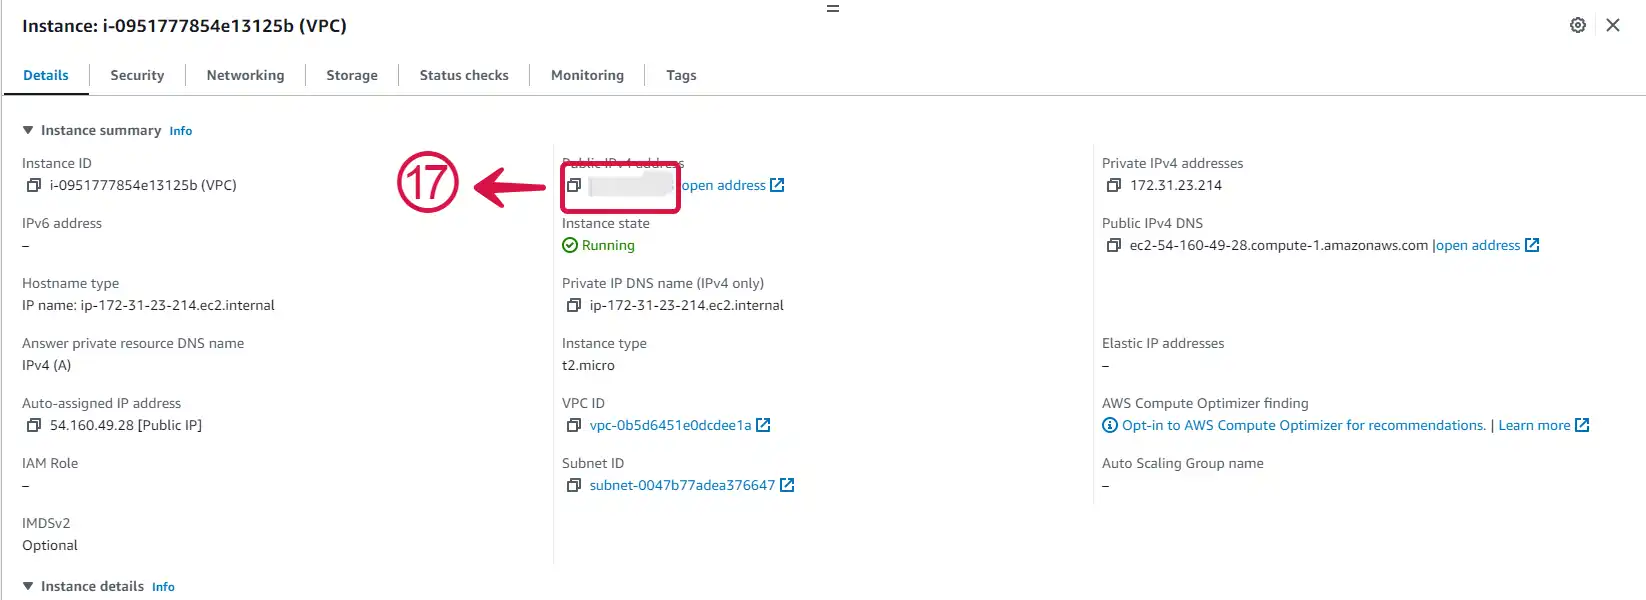
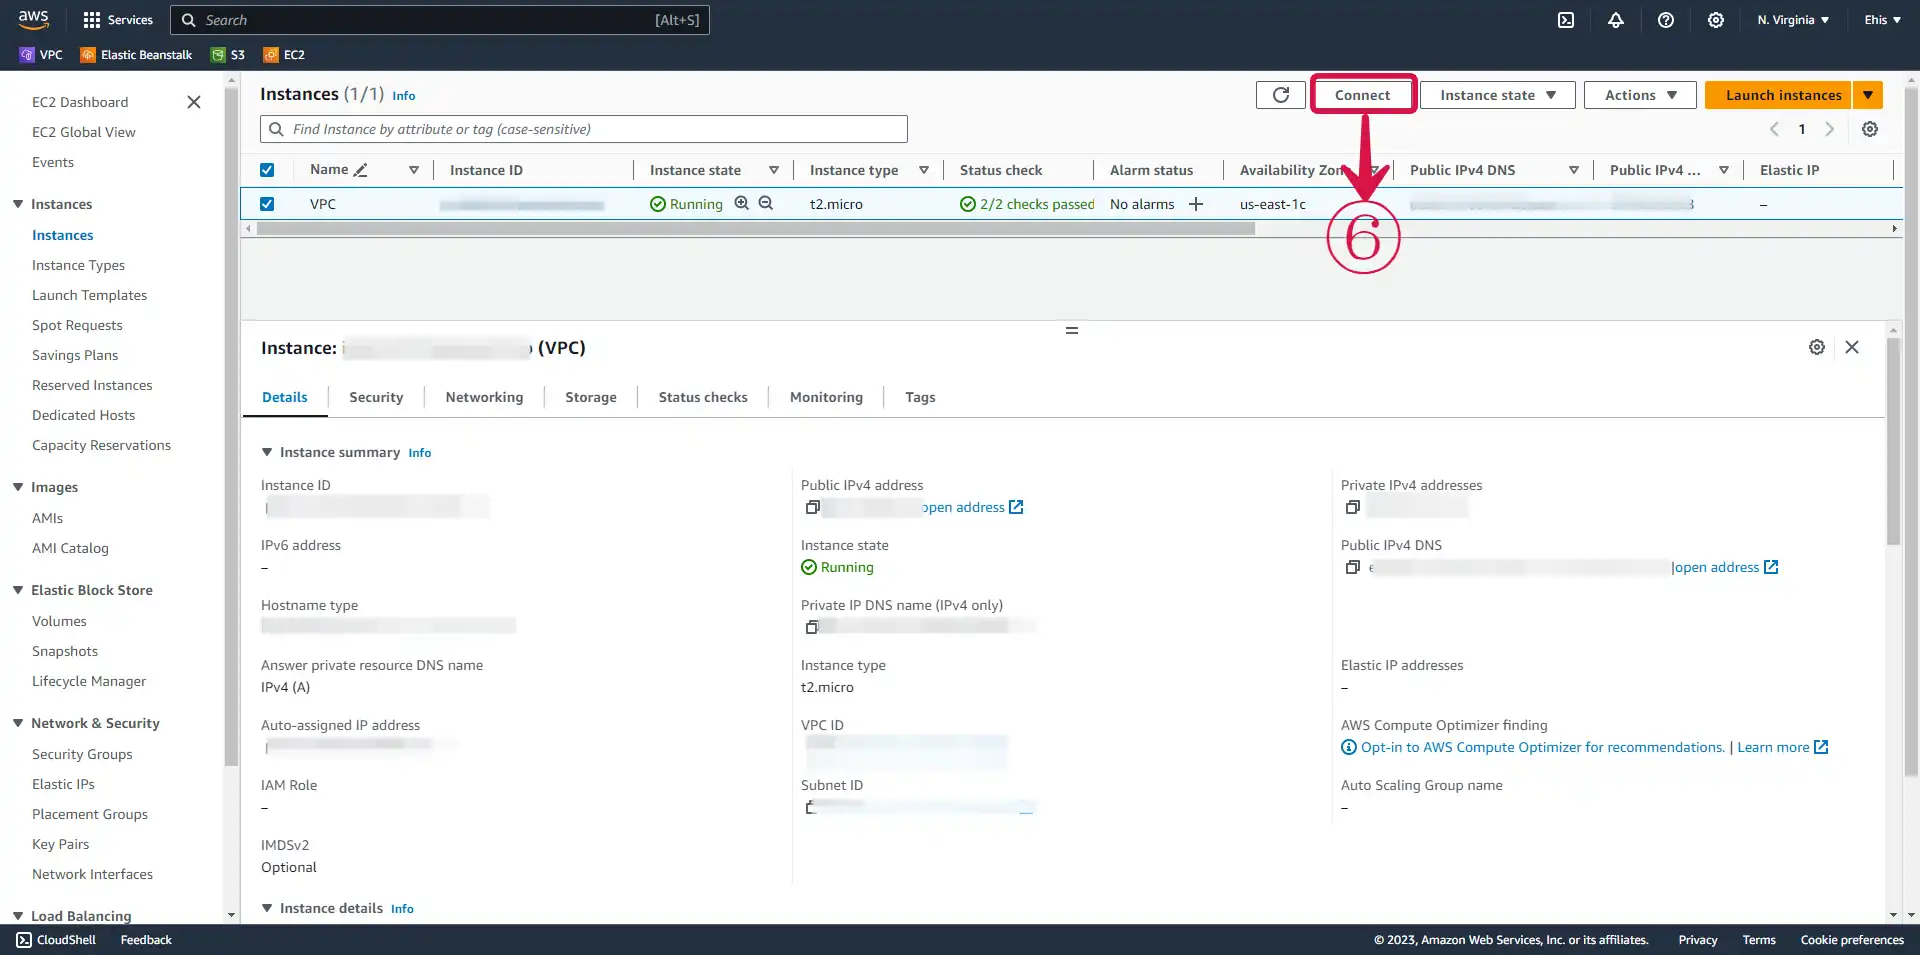
- Check the box before the instance name, to see the drop down menu. Copy⑰ your public IP, it would be needed to set a host for MongoDb.
MongoDB connection setting.
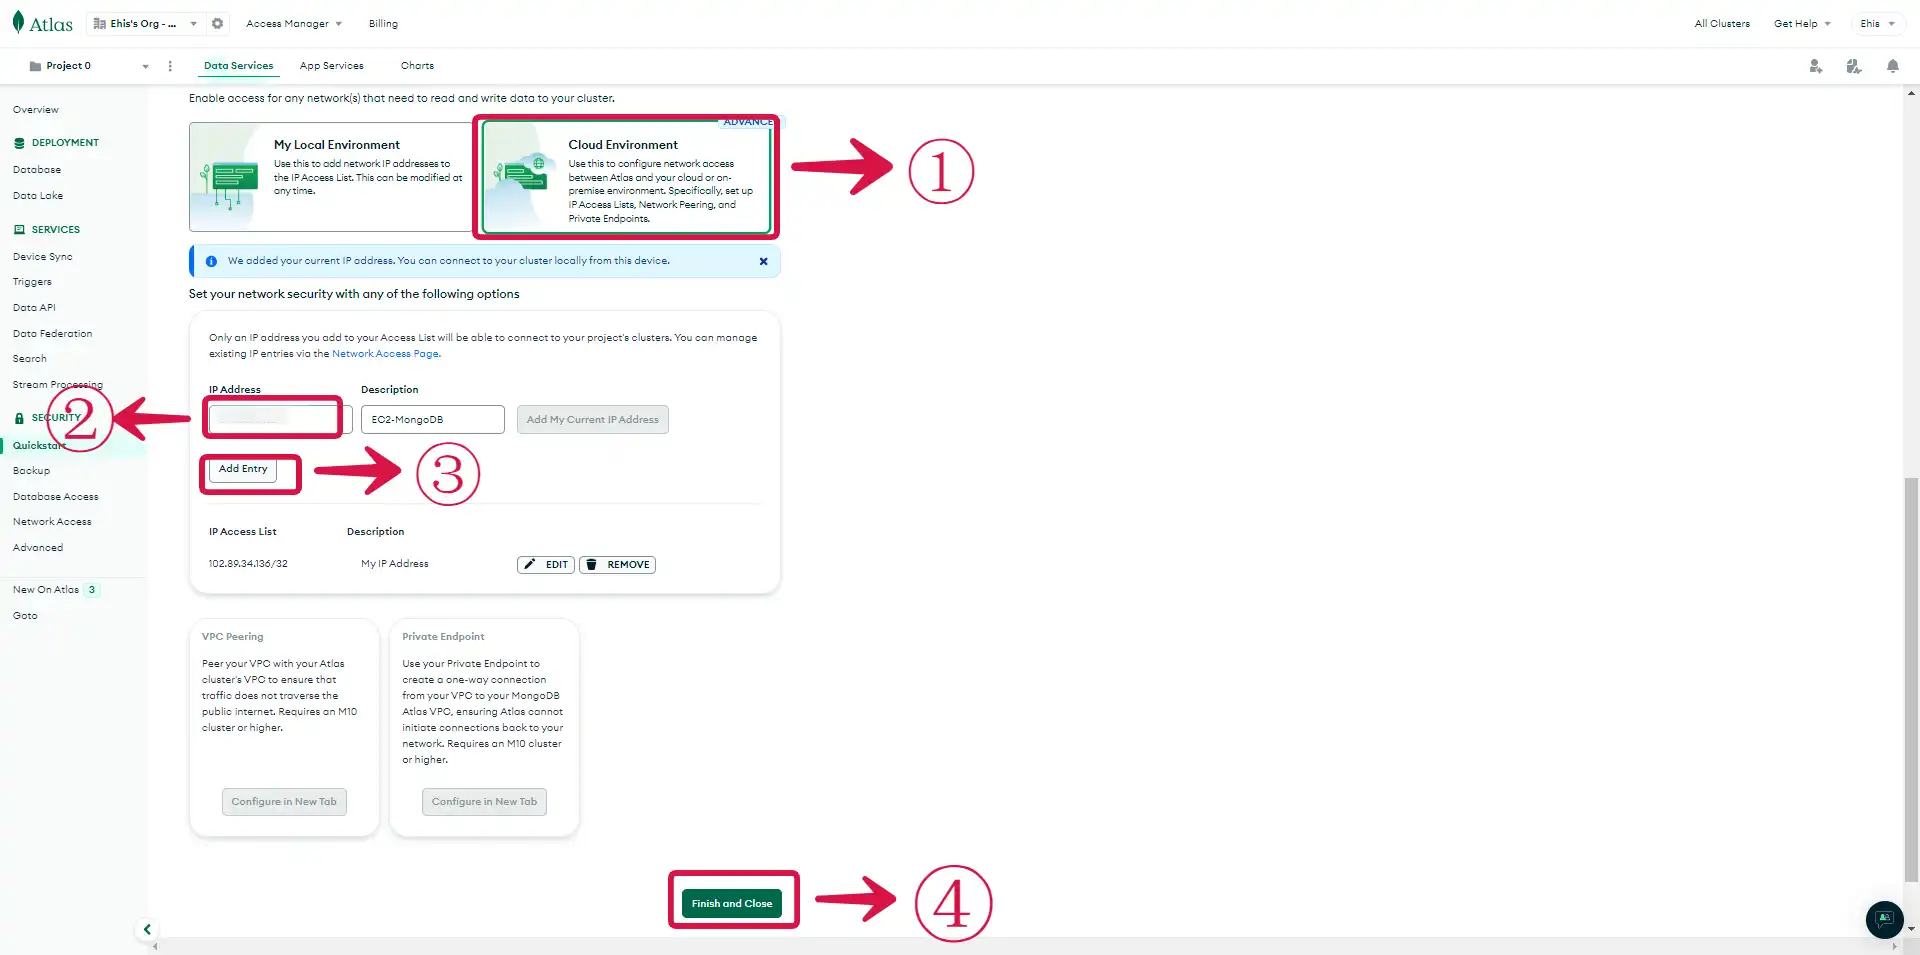
Choose a connection point, select Cloud Environment①.
Set your network security and input the IP Address② of the created EC2 instance.
Click Add Entry③ to save the IP.
Click Finish and Close④ to complete setup.
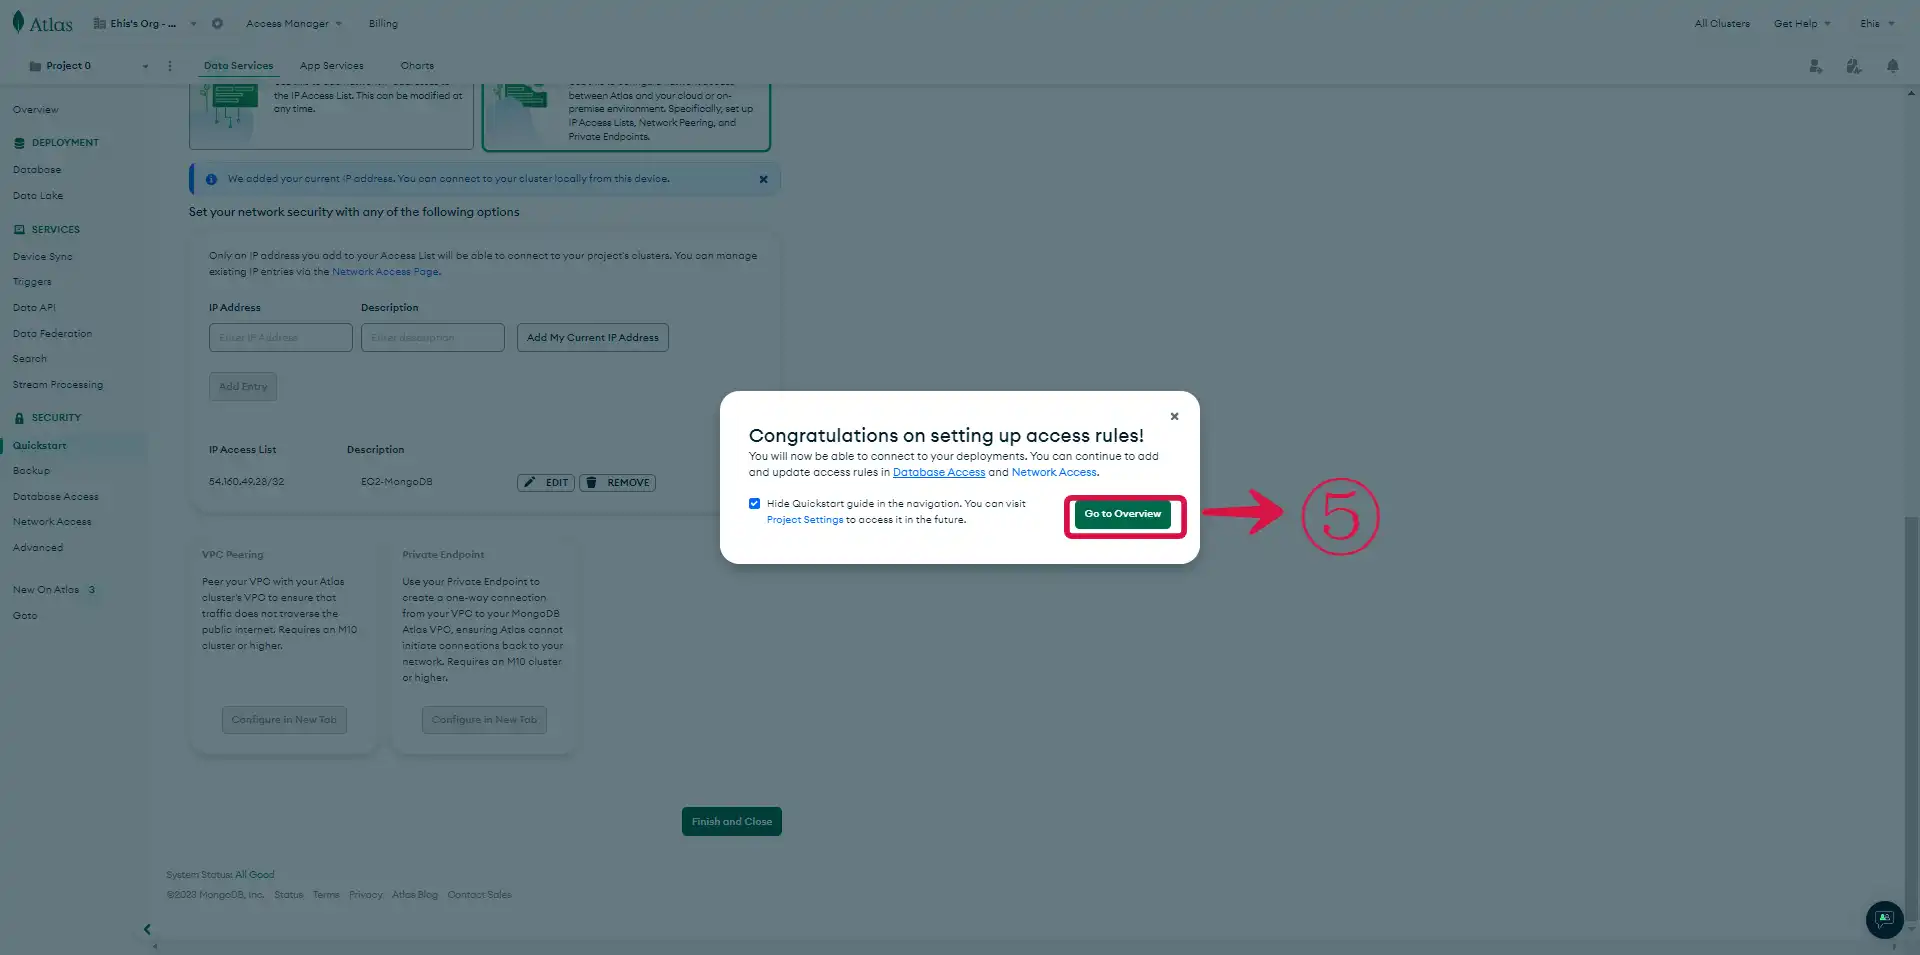
- Your database is ready to be used. Click on Go to Overview⑤ to access to your database page.
SSH Into your EC2 Instance
Now we want to SSH into our EC2 instance to enable us connect to our database host.
- Click the Connect button⑥.
- On the Connect to instance page, select SSH Client⑦ and Copy⑧ the example command given.

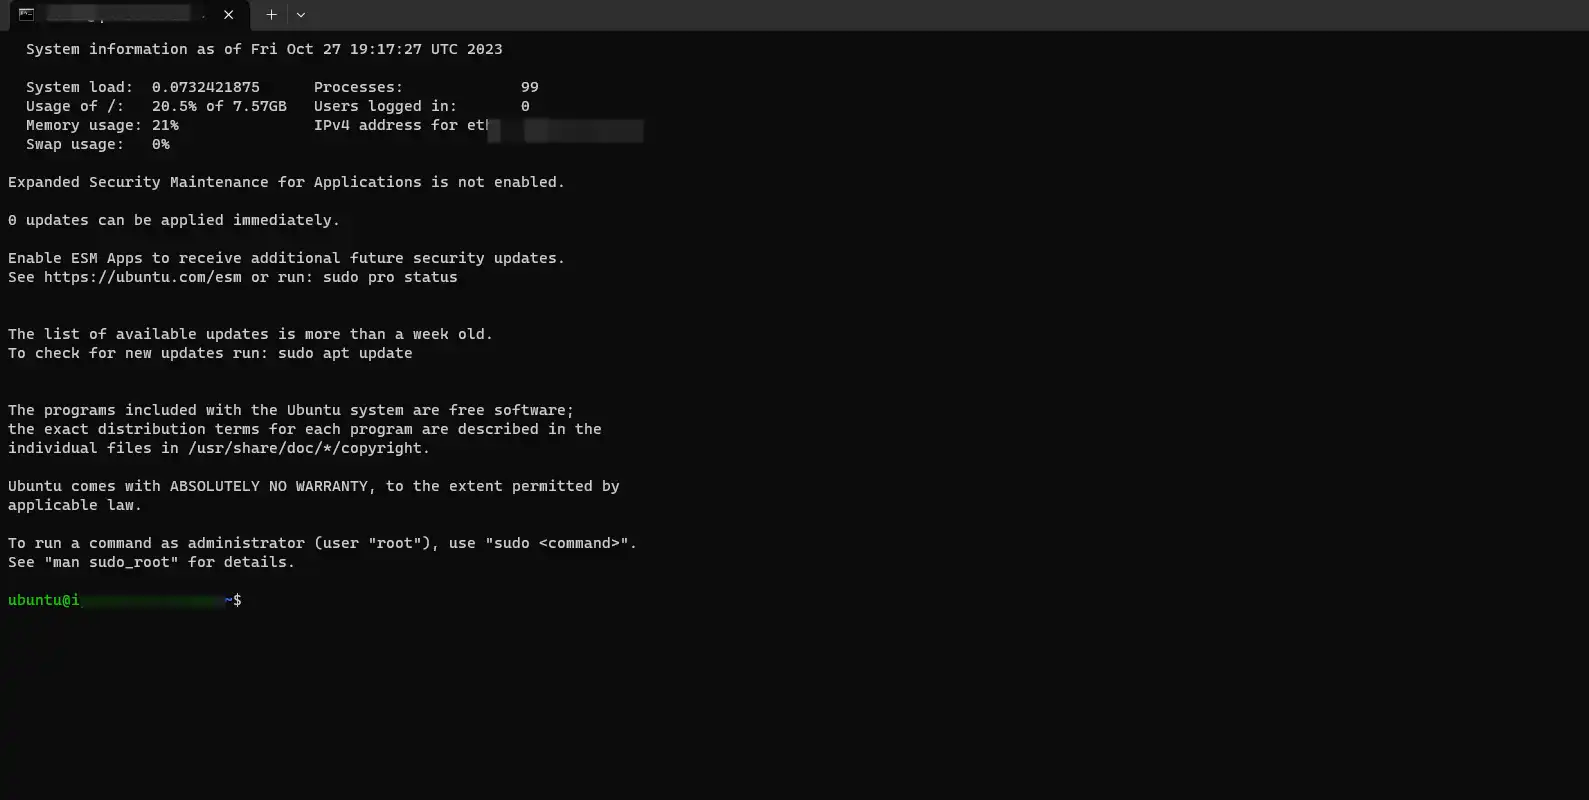
- Open up your terminal and paste the code in the same folder/directory your key pair was downloaded into. You have successfully connected to your instance.
MongoDB cluster Connection
- Go to your MongoDB Database page and click on the Connect⑨ button.
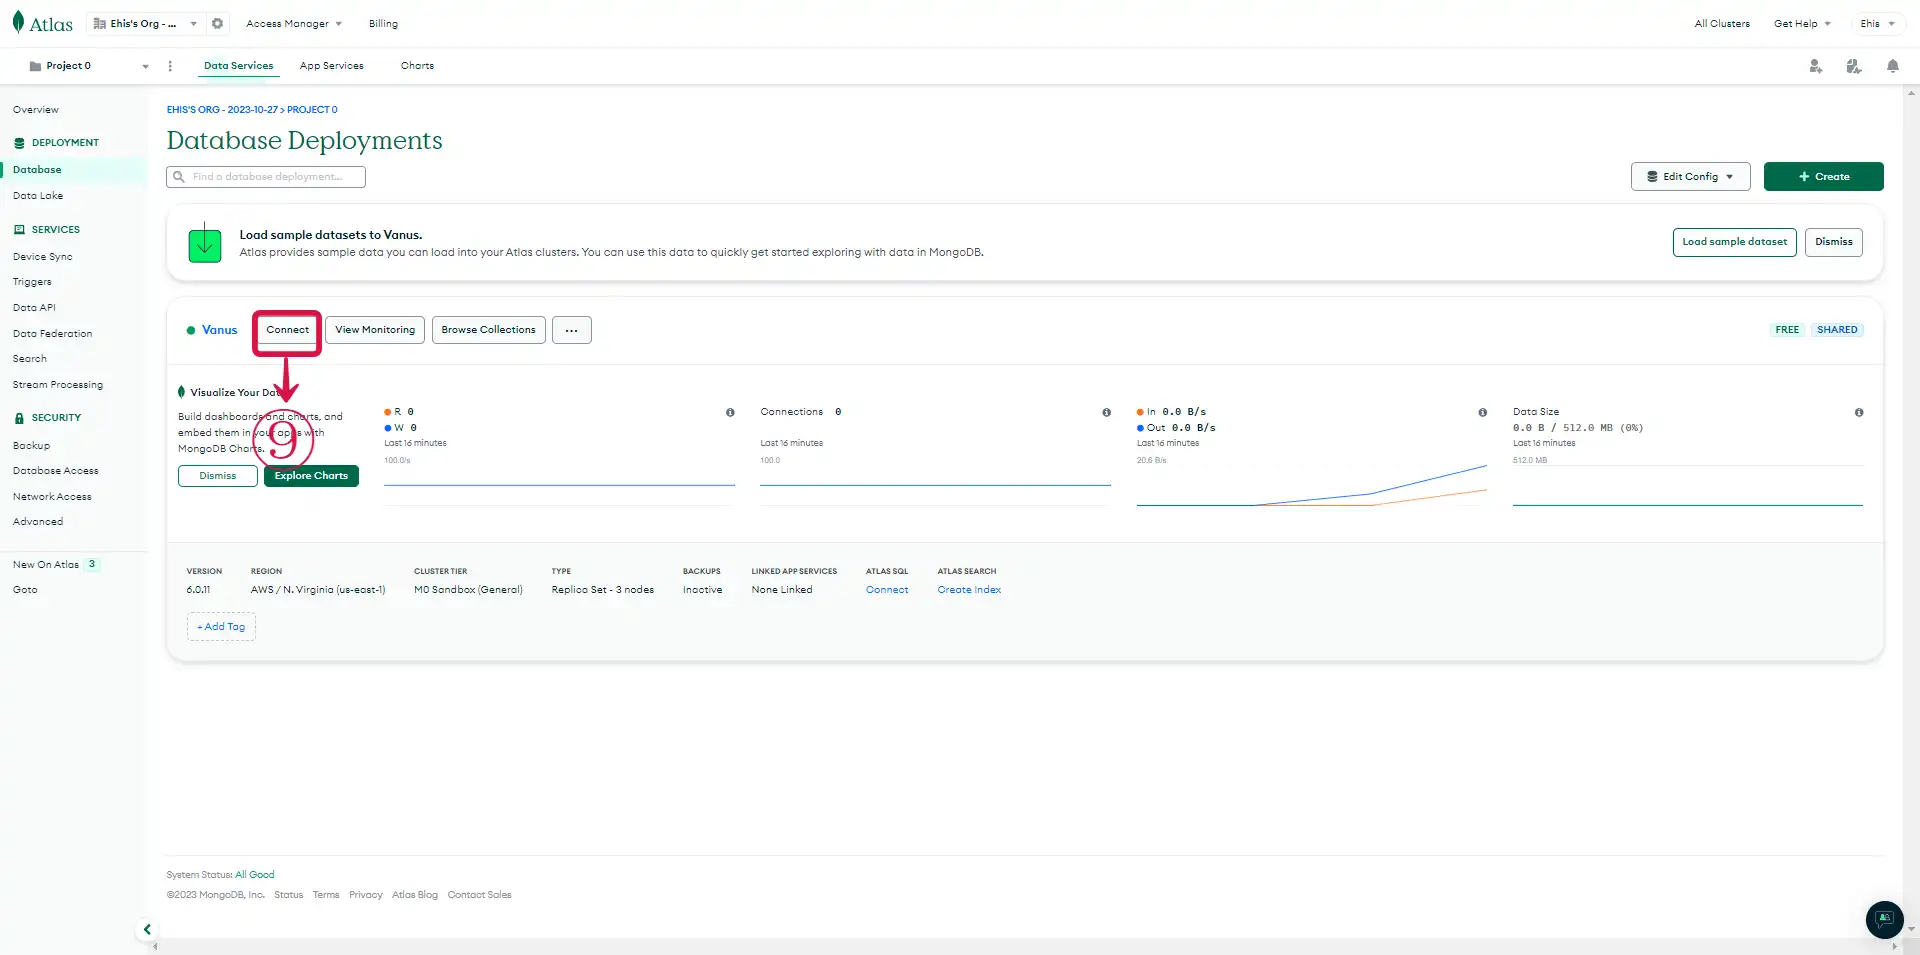
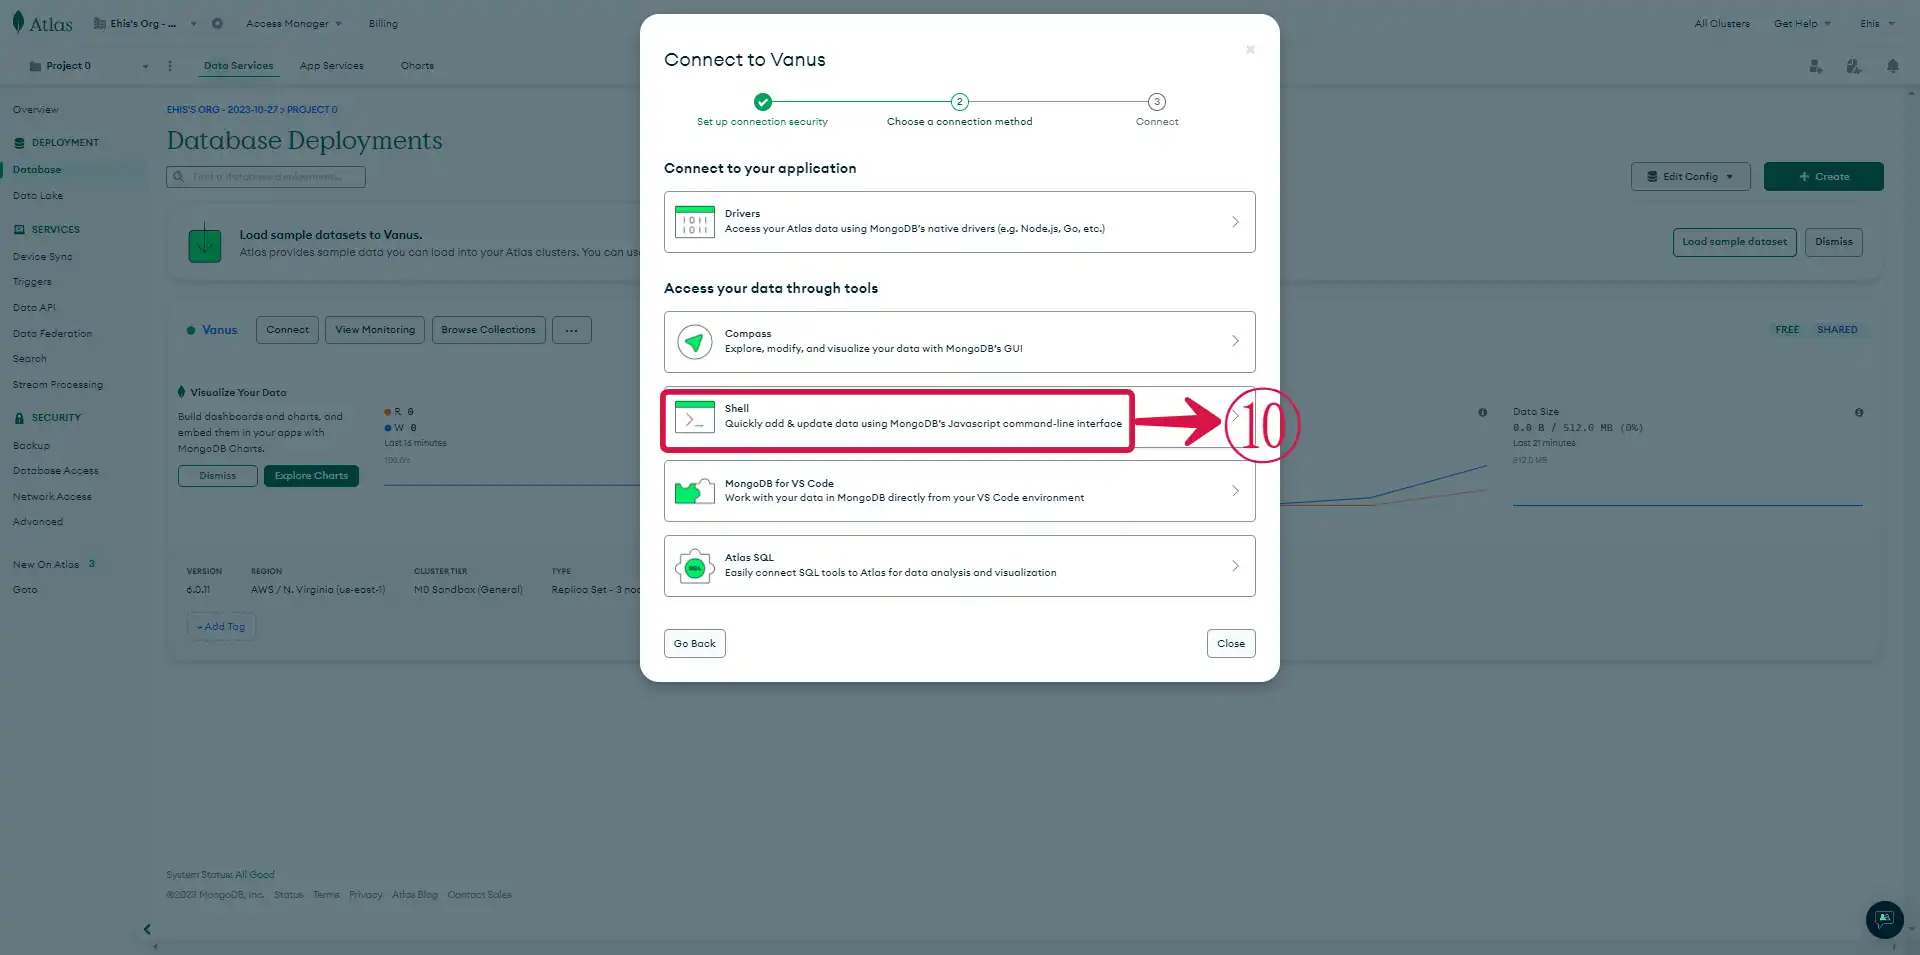
- Select the means through which you would connect to your database. We chose the Shell⑩.
- Select your operating system⑪ and copy download URL⑫.
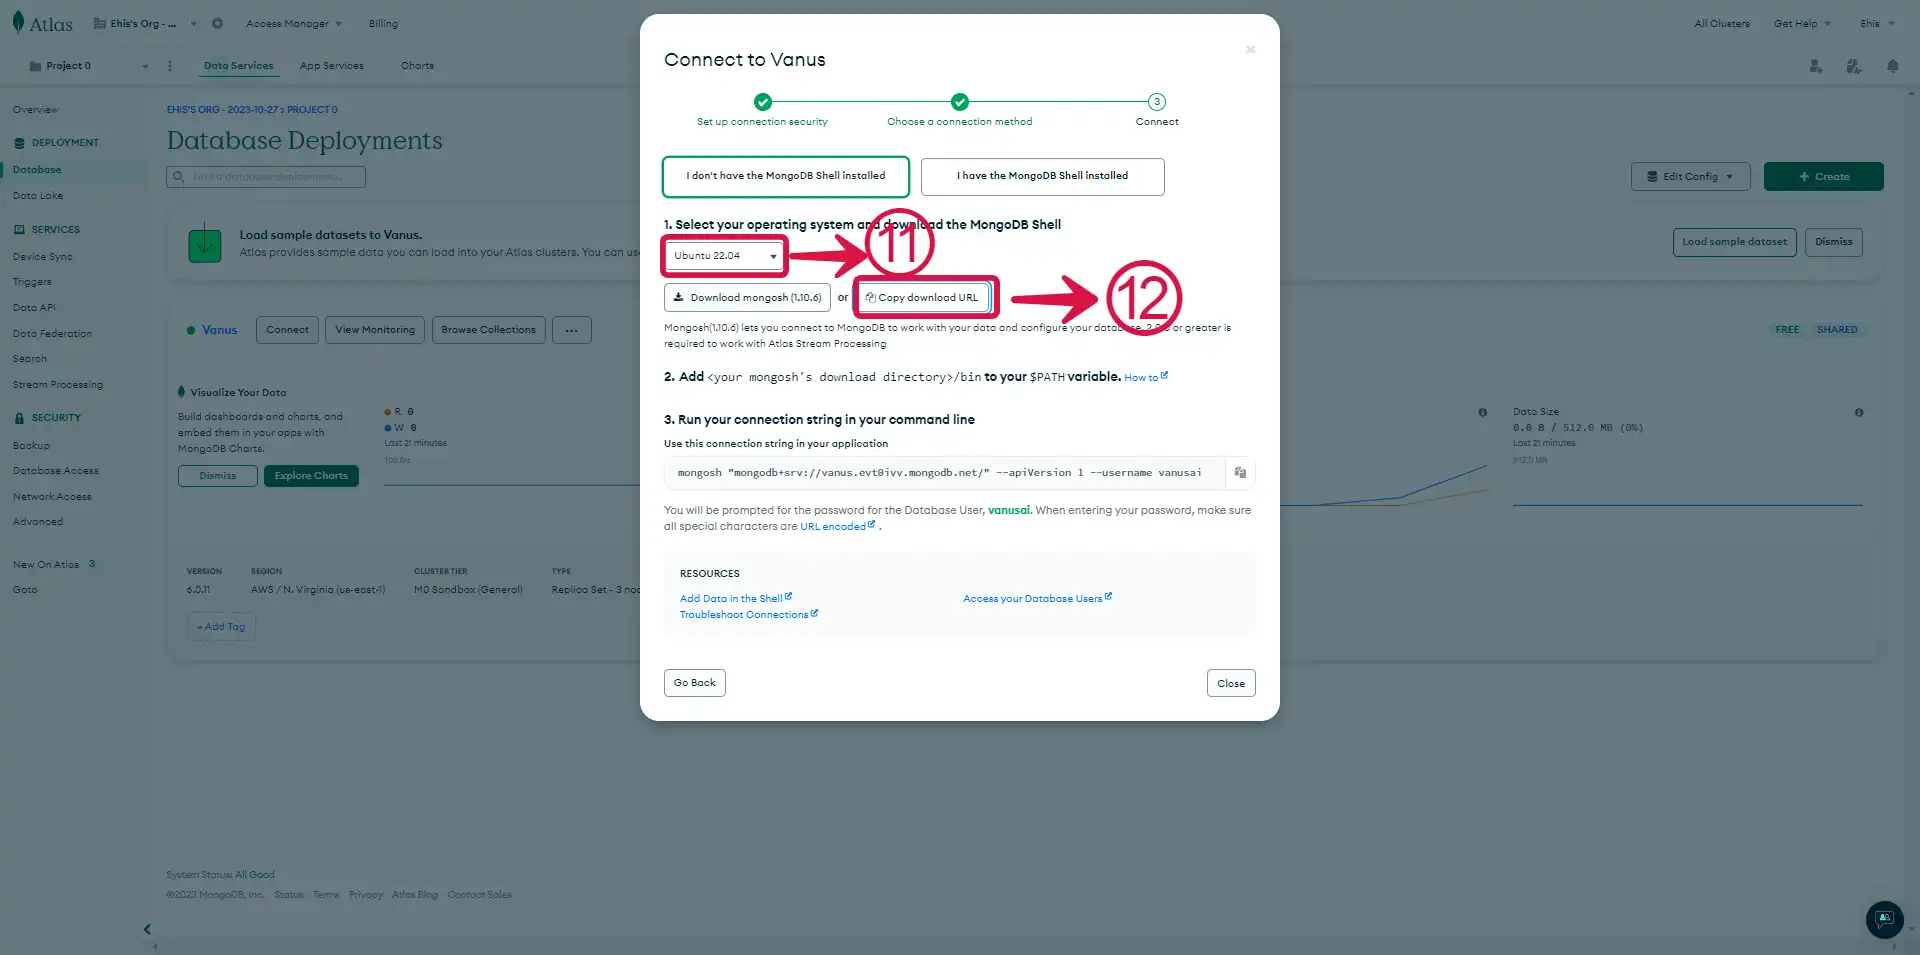
- Paste⑬ it in our terminal with the download command.
wget https://downloads.mongodb.com/compass/mongodb-mongosh_1.10.6_amd64.deb

- Return to the Atlas page, click on the How to⑭ link to get step by step instructions on how to add your mongosh directory to your $PATH variable. Copy⑮ the connection string provided in Step 3 of the Connect to Cluster page.
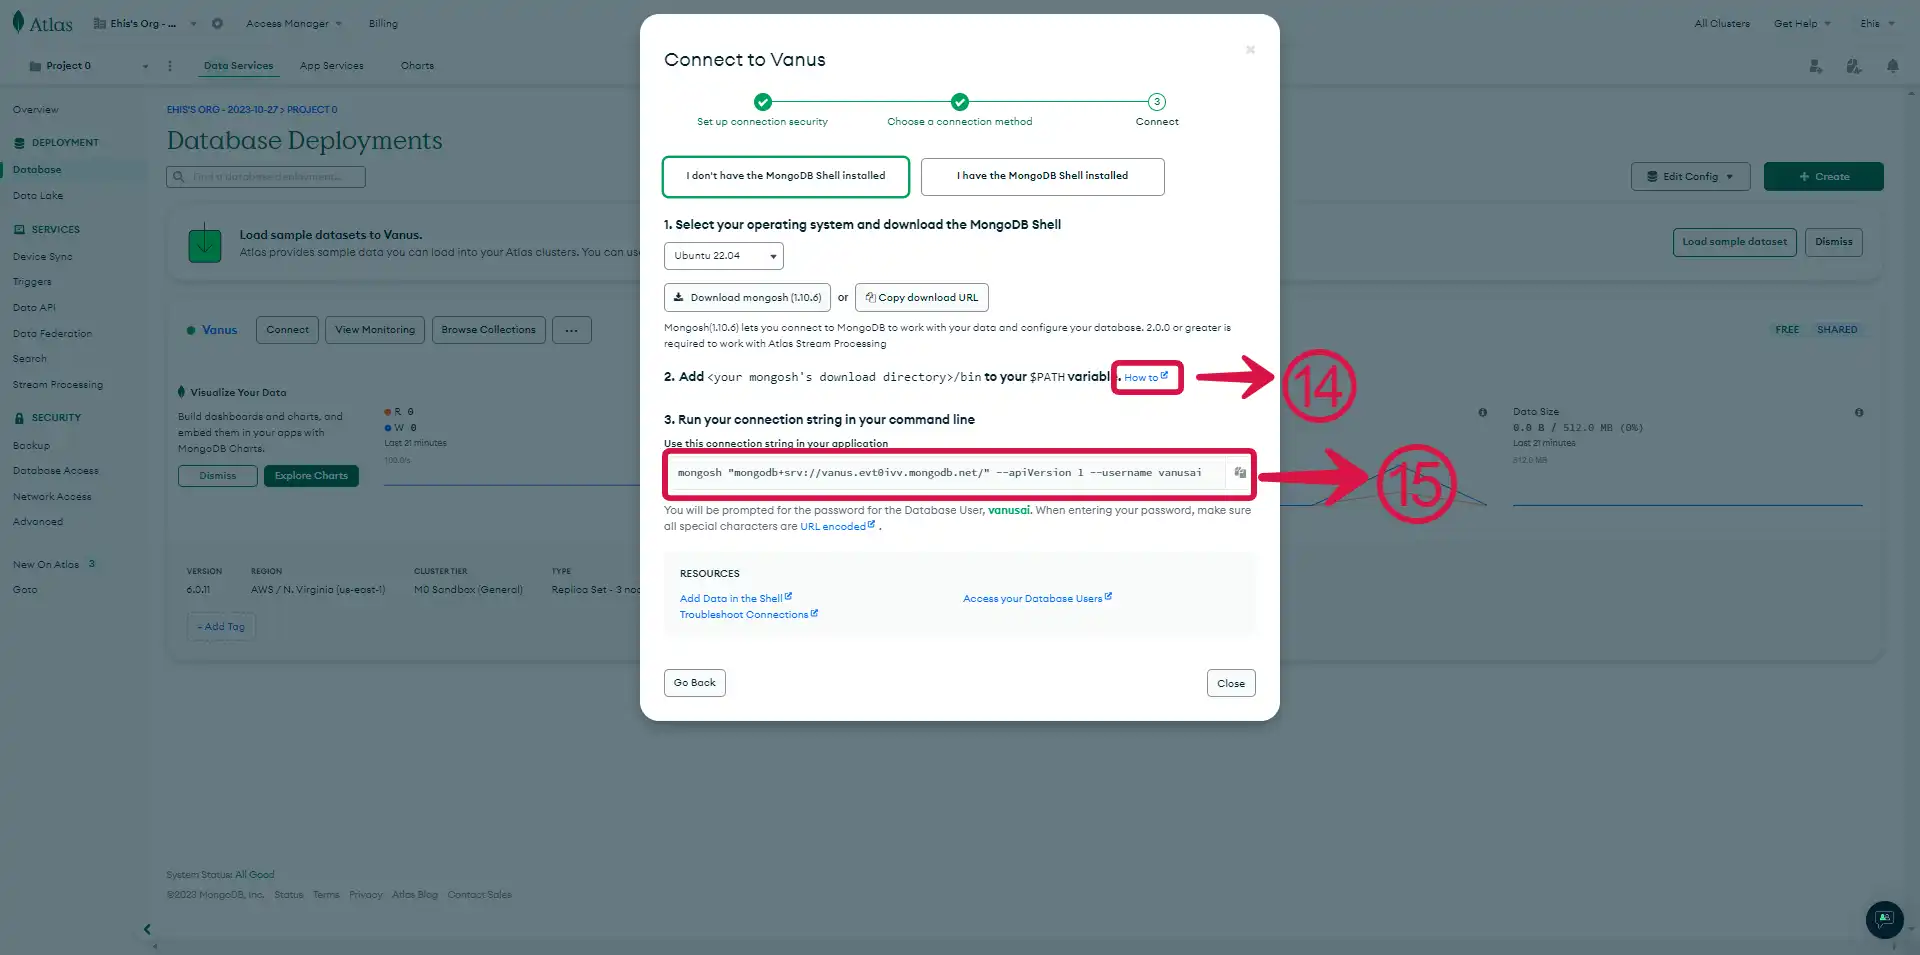
- Paste the command in your terminal, you would be prompted for your password. Type the password you set for database authentication.
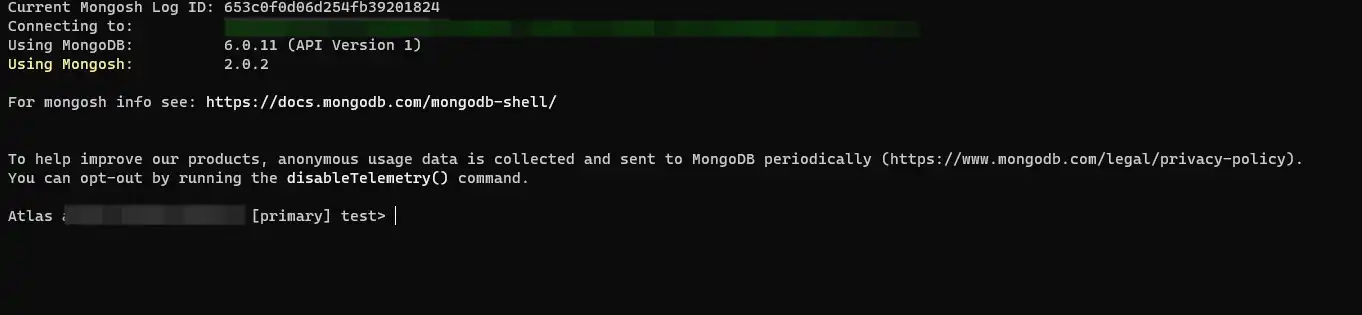
You are now connected to your MongoDB database.
Get the information needed for the Vanus source connection.
- To find your Host, run the command db.runCommand({whatsmyuri:1})① and it'll be outputed to the terminal.

- To find your AuthSource, run db.runCommand({connectionStatus: 1})② on your terminal and it'll output your AuthSource. It's usually admin, but can be changed by users, so it's better to confirm it.

- Go to Atlas Database page and click on Browse collections③ to see your collections.
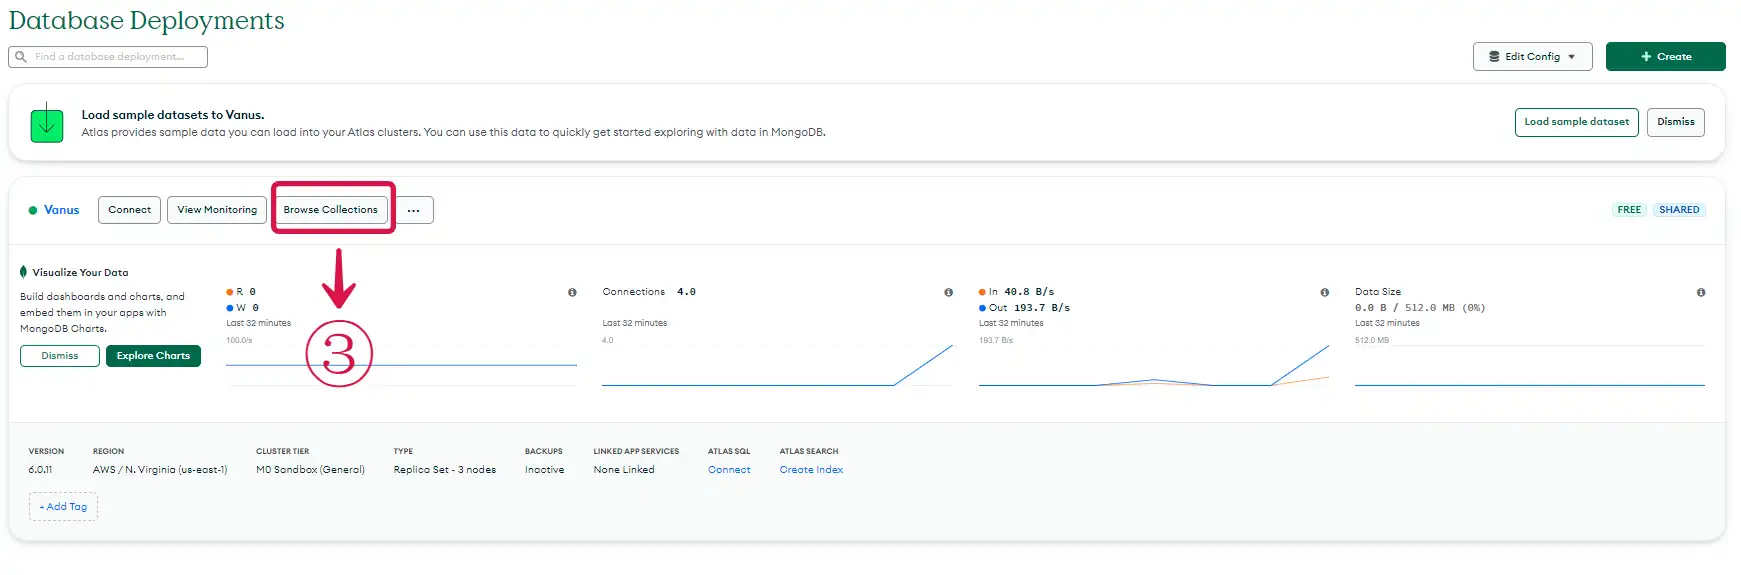
- Copy④ the name of the one you plan on making the Vanus Connect Source connection with.

Step 2: Configure your MongoDB Vanus Connect Source Connection
Return to your Vanus Connection page.
Give the connection a Name①, and input② the required details in the source configuration.
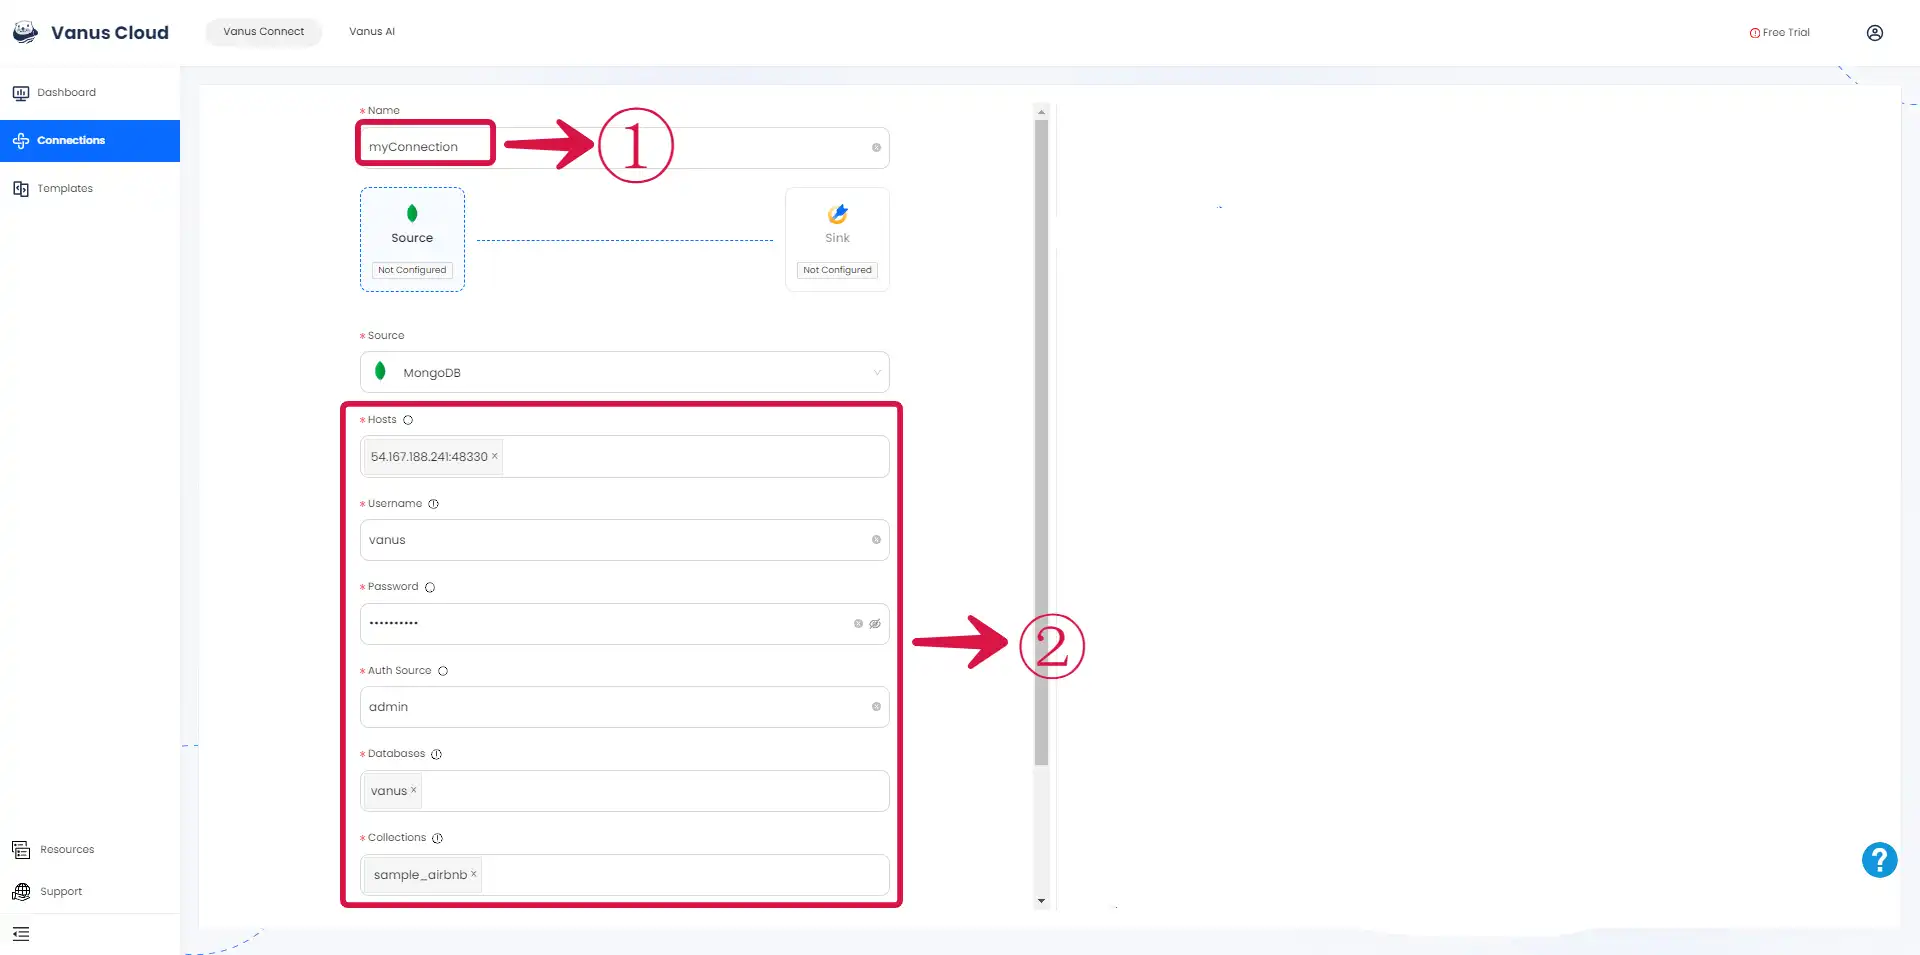
- Click on the Fetch Schema③ button to fetch the schema of your MongoDb and click Next④.

Learn more about Vanus and Vanus Connect in our documentation