
As a developer or company, have you ever felt the need to have just another simpler way of monitoring your AWS Billings aside from Email notifications? Well, in this article, I will show you how it is easy to use Vanus and two connectors (AWS Billing Source & Slack Sink) to receive your AWS Billing reports on a Slack channel. This is made possible using Vanus Connect.
Vanus Connect is a set of producers and consumers to provide interoperability across services, systems, and platforms.
Vanus Connect has two kinds of connectors; Source connector and Sink Connector. The Source Connector obtains data from an underlying data producer (e.g. AWS Billing) and delivers the data to its target after the data has been transformed into CloudEvents. The Sink Connector receives the events with CloudEvent formats, processes the events, and sends them downstream to a consumer(e.g. Slack)
AWS Billing Source
The AWS Billing Source Connector uses AWS Cost Explorer API to pull billing data from the previous day. The AWS Billing source requires a “target URL” to which it will send the CloudEvents. In this demo, we will be using Vanus Gateway to receive these CloudEvents. You will also need programmatic access credentials (access_key_id & secret_access_key) from your AWS account.
Slack Sink
The Slack sink connector handles incoming CloudEvents in a way that extracts the data part of the original event and delivers these extracted data to Slack channels. To set up Slack sink correctly, you need to create a Slack App and the app should have chat:write and chat:write.public permission
Setting Up AWS Billing Source & Slack Sink using Vanus Connect
In this demo, we will be using the Vanus Playground; A cloud Kubernetes environment. We will create the Slack sink connector first to receive incoming CloudEvents before setting up the AWS Billing Source connector.
To begin, we will install Vanus with the command:
kubectl apply -f https://vanus.s3.us-west-2.amazonaws.com/releases/v0.6.0/vanus.yaml
Confirm that you have it installed:
kubectl get po -n vanus
You should see something like this:
vanus-controller-0               1/1     Running   0          96s
vanus-controller-1               1/1     Running   0          72s
vanus-controller-2               1/1     Running   0          69s
vanus-gateway-8677fc868f-rmjt9   1/1     Running   0          97s
vanus-store-0                    1/1     Running   0          96s
vanus-store-1                    1/1     Running   0          68s
vanus-store-2                    1/1     Running   0          68s
vanus-timer-5cd59c5bf-hmprp      1/1     Running   0          97s
vanus-timer-5cd59c5bf-pqkd5      1/1     Running   0          97s
vanus-trigger-7685d6cc69-8jgsl   1/1     Running   0          97s
Next, we will install vsctl, the command line tool for Vanus
curl -O https://dl.vanus.ai/vsctl/latest/linux-amd64/vsctl
chmod ug+x vsctl
mv vsctl /usr/local/bin
Vsctl needs a gateway URL to communicate with Vanus. Get the URL from the service called vanus-gateway. To do this, we have to export the IP address as an Environmental Variable
export VANUS_GATEWAY=192.168.49.2:30001
Setting Up Slack Sink
Now, let’s create a directory for our Slack Sink. To do this, use
mkdir slack
Our directory name is called slack, you can call it what you want. Next, we will move to that directory and create our config.yml file
cd slack

Inside the slack directory, create a file called config.yml
touch config.yml

To set up Slack sink, we will need to set up our Slack App first and obtain the necessary credentials to receive our Billing report. To set up our Slack App, we will follow these steps:
Create a slack channel where you want to receive the billing Create Slack App. The App should have at least chat:write and chat:write.public permission Create an App from scratch Select the App name and Slack Workspace Add permissions; chat:write and chat:write.public Install OAuth tokens to your workspace Copy the token which we will use in our config.yml file
Now, open the file with your text editor, for this, I will be using vim text editor vi config.yml and paste the following code. Ensure you replace the default, app_name, default_channel, and token with yours.
apiVersion: v1
kind: Service
metadata:
  name: sink-slack
  namespace: vanus
spec:
  selector:
    app: sink-slack
  type: ClusterIP
  ports:
    - port: 8080
      name: sink-slack
---
apiVersion: v1
kind: ConfigMap
metadata:
  name: sink-slack
  namespace: vanus
data:
  config.yml: |-
    default: "input_default_name"
    slack:
      - app_name: "input_app_name"
        token: "input_your_token_here"
        default_channel: "#input_default_channel"


---
apiVersion: apps/v1
kind: Deployment
metadata:
  name: sink-slack
  namespace: vanus
  labels:
    app: sink-slack
spec:
  selector:
    matchLabels:
      app: sink-slack
  replicas: 1
  template:
    metadata:
      labels:
        app: sink-slack
    spec:
      containers:
        - name: sink-slack
          image: public.ecr.aws/vanus/connector/sink-slack:latest
          resources:
            requests:
              memory: "128Mi"
              cpu: "100m"
            limits:
              memory: "512Mi"
              cpu: "500m"
          imagePullPolicy: Always
          ports:
            - name: http
              containerPort: 8080
          volumeMounts:
            - name: config
              mountPath: /vance/config
      volumes:
        - name: config
          configMap:
            name: sink-slack
NOTE: The default and app name MUST be the same.
Now, run kubectl apply -f config.yml to set up the Slack Sink

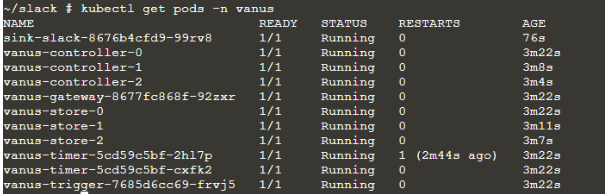
Verify Slack sink is running
kubectl get pods -n vanus
Let us go back with the following command:
cd ..
Before running our Amazon Billing Source, we will need to create an Eventbus. An Eventbus represents a group of pipelines that receive and dispatch events. To create the eventbus, Here, for simplicity, I have named the eventbus billing
vsctl eventbus create --name billing
Setting Up AWS Billing Source
Create a config file for Amazon Billing Source, don't forget the update the access key and secret key obtained from your AWS console (IAM - Programmatic access)
cat << EOF > config.yml
target: http://192.168.49.2:30002/gateway/billing
secret:
  access_key_id: AKIAIOSFODNN7EXAMPLE # <- Your access key
  secret_access_key: wJalrXUtnFEMI/K7MDENG/bPxRfiCYEXAMPLEKEY # <- Your secret key
EOF
Note: The target is the endpoint that will receive our Events in this case Vanus.
Run Amazon billing with the following command:
nohup docker run -it --rm --network=host \
  -v ${PWD}:/vanus-connect/config \
  --name source-aws-billing public.ecr.aws/vanus/connector/source-aws-billing > billing.log &
Just before we can receive the report on our slack channel, we need first to create a subscription which will help us transform the data coming from the AWS Billing report source to data that can be accepted by our Slack sink.
Creating a Subscription
To create a subscription, paste this line of code
vsctl subscription create --name billing \
  --eventbus billing \
  --sink 'http://sink-slack:8080' \
  --transformer '{
      "define": {
        "source" : "$.source",
        "dataDate": "$.data.date",
        "dataService": "$.data.service",
        "dataAmt": "$.data.amount",
        "dataUnit": "$.data.unit"
      },
      "template": "{\"subject\": \"AWS Billing Report\",\"message\":\"Hello, Your AWS Billing Report on ${dataDate} for ${dataService} is ${dataAmt} ${dataUnit}\"}"
    }'
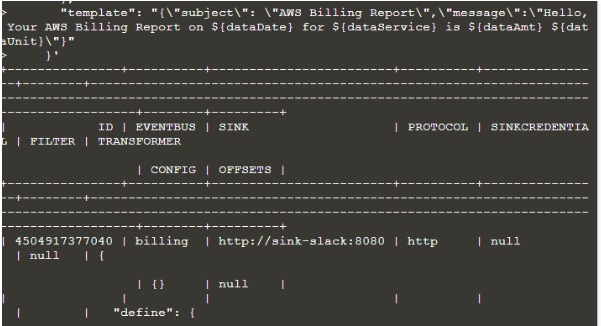
You should see some outputs like the one above. Now we have created a subscription for our Slack sink and also have transformed our data to be compatible with our Slack sink. We can now send CloudEvents from our AWS Billing Source and we will receive the output on our Slack Sink.
To see the output of your billing.log use cat billing.log
Finally, you can check your Slack App to see the Billing report

We successfully receive our AWS Billing reports on our Slack Channel. This will help you as a developer or Company to have just another simpler way of receiving AWS Billing reports.