Jenkins
This guide contains information to set up a Jenkins Source in Vanus Connect.
Introduction
Jenkins is a widely-used automation server that simplifies software development. It enables continuous integration and delivery, streamlining tasks like building, testing, and deploying code. With its extensive plugin ecosystem and active community support, Jenkins is a reliable choice for creating efficient automation solutions.
The Jenkins source connector enables the retrieval of build information through a payload URL. To achieve this, it is necessary to establish a connection within Jenkins.
Prerequisites
- A Jenkins account
- A Vanus Cloud account.
Perform the following steps to configure your Jenkins Source
Jenkins Connection Settings
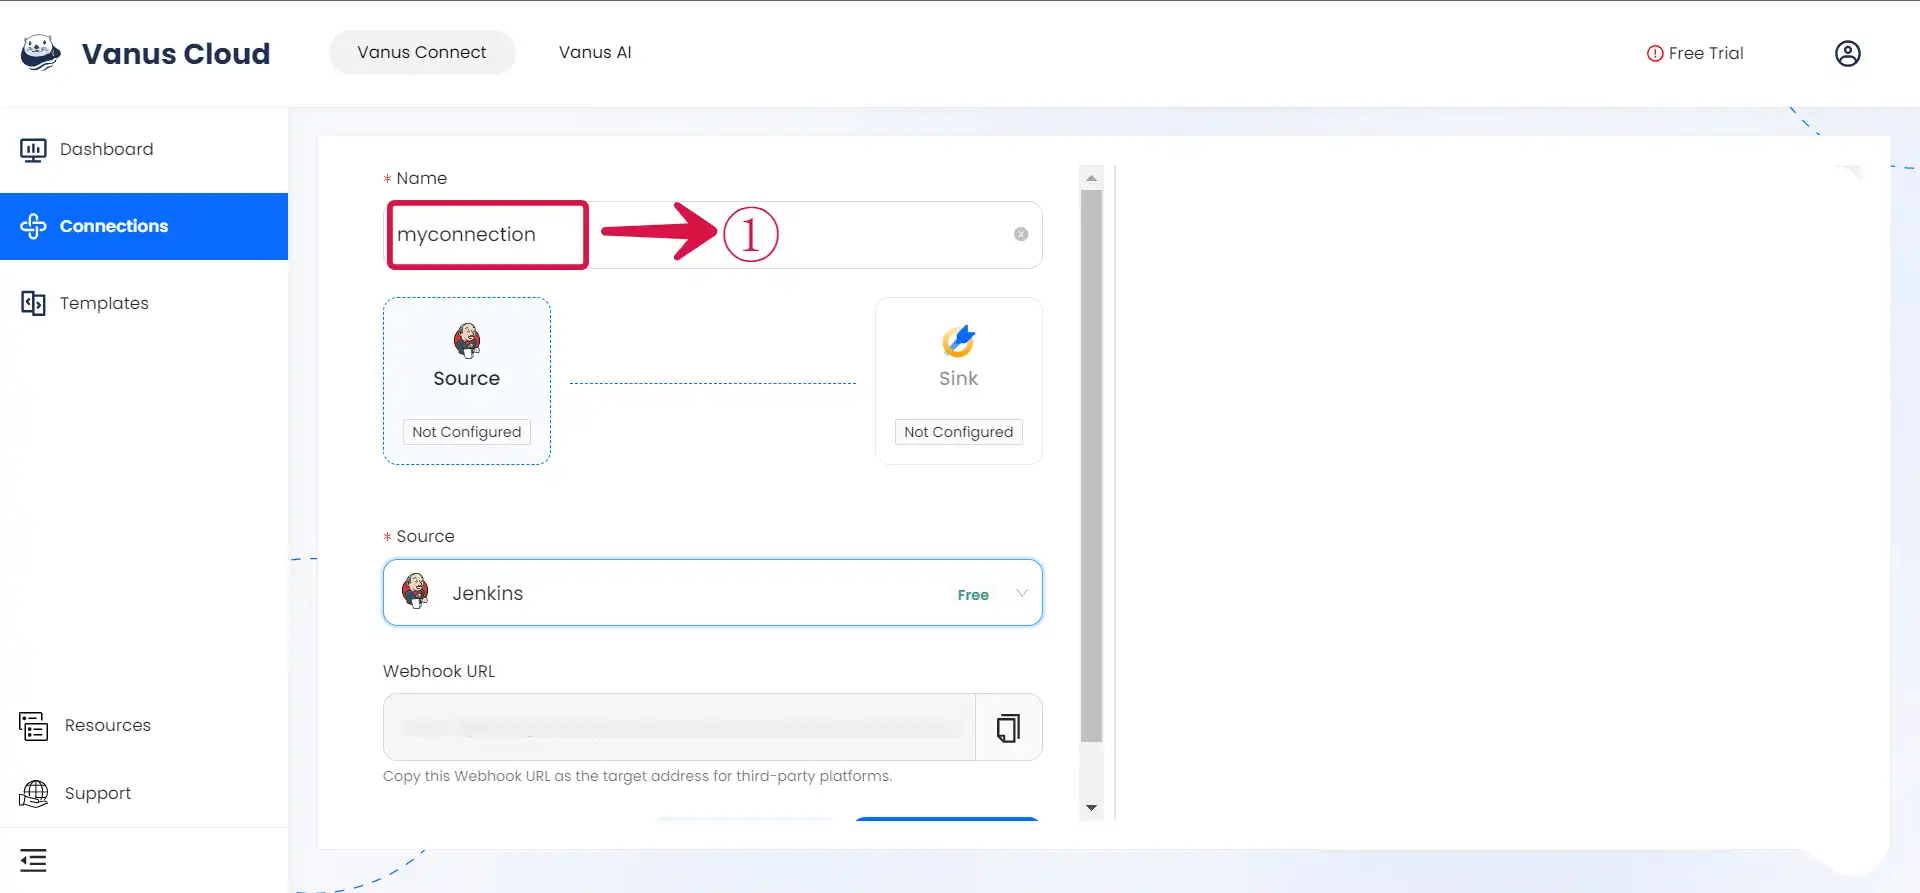
To obtain all Jenkins events in Vanus Connect, follow these steps:
- Write a Name① for your connection in Vanus Connect.
Configuring Jenkins to Send Webhook Events
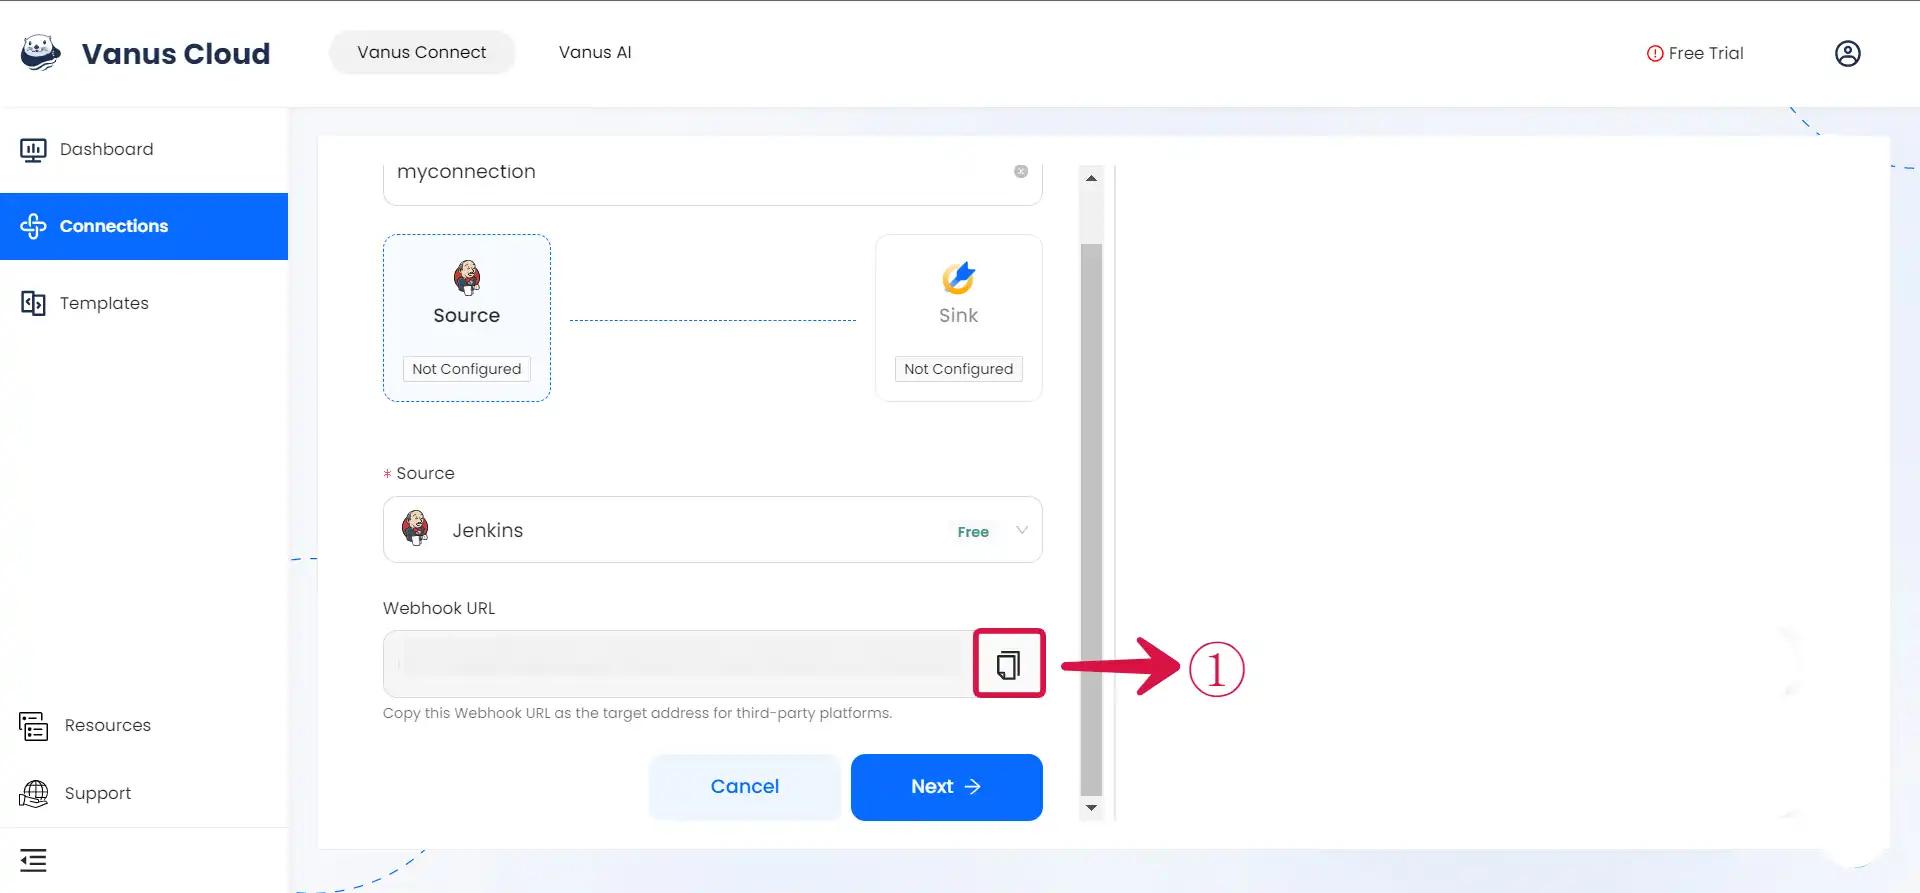
Step 1: Configure webhook
- Click the copy icon① to copy the webhook url.
- Log in to your Jenkins account.
Step 2: Send Jenkins Event
- Plugin
- Script
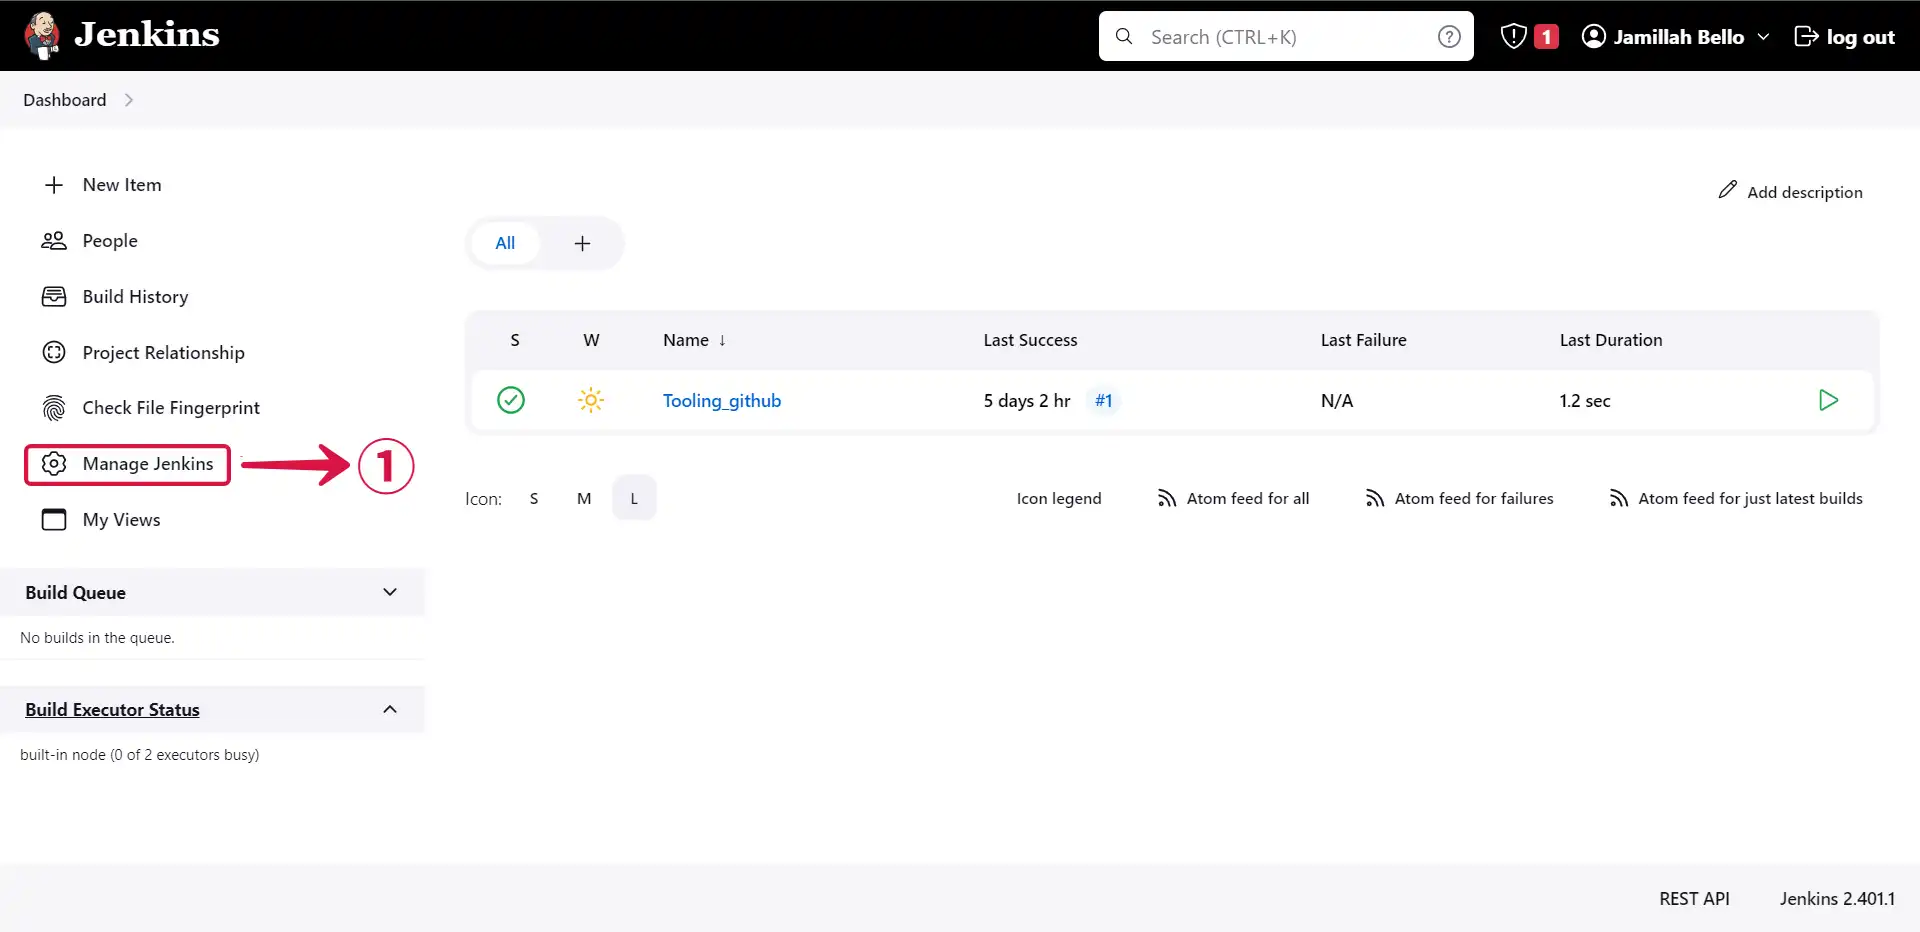
- Click on Manage Jenkins①.
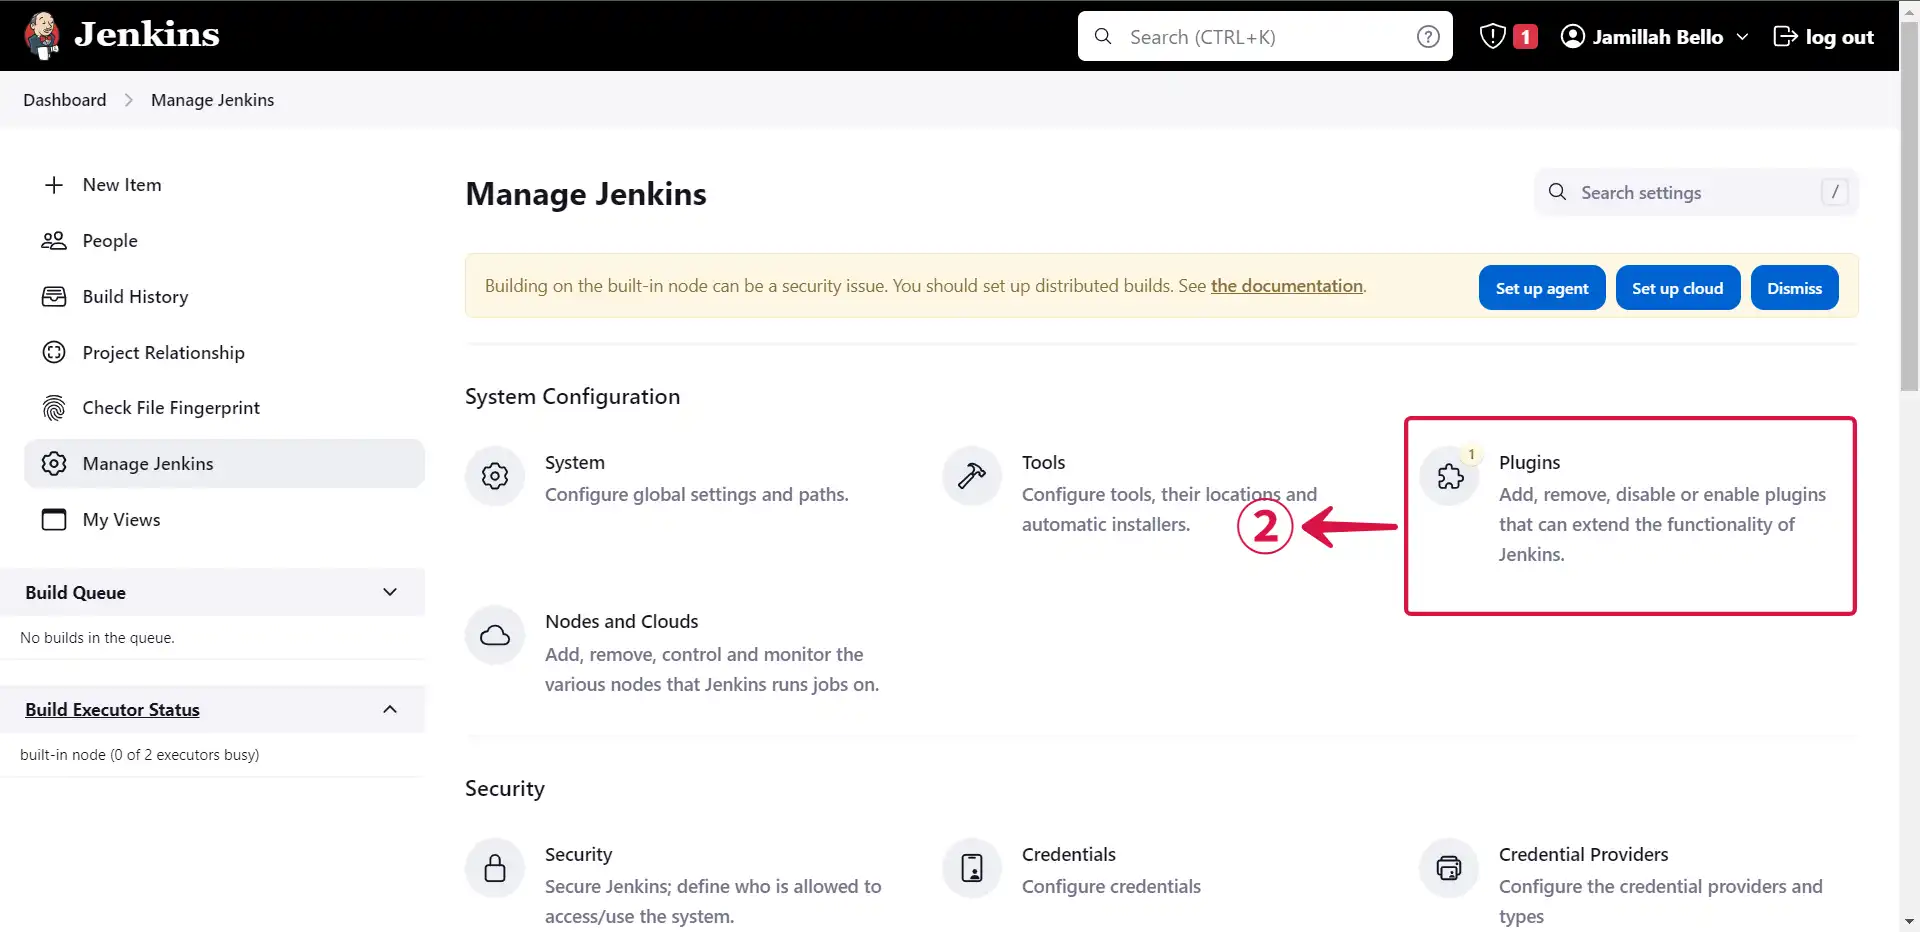
- Navigate to the Plugins② section.
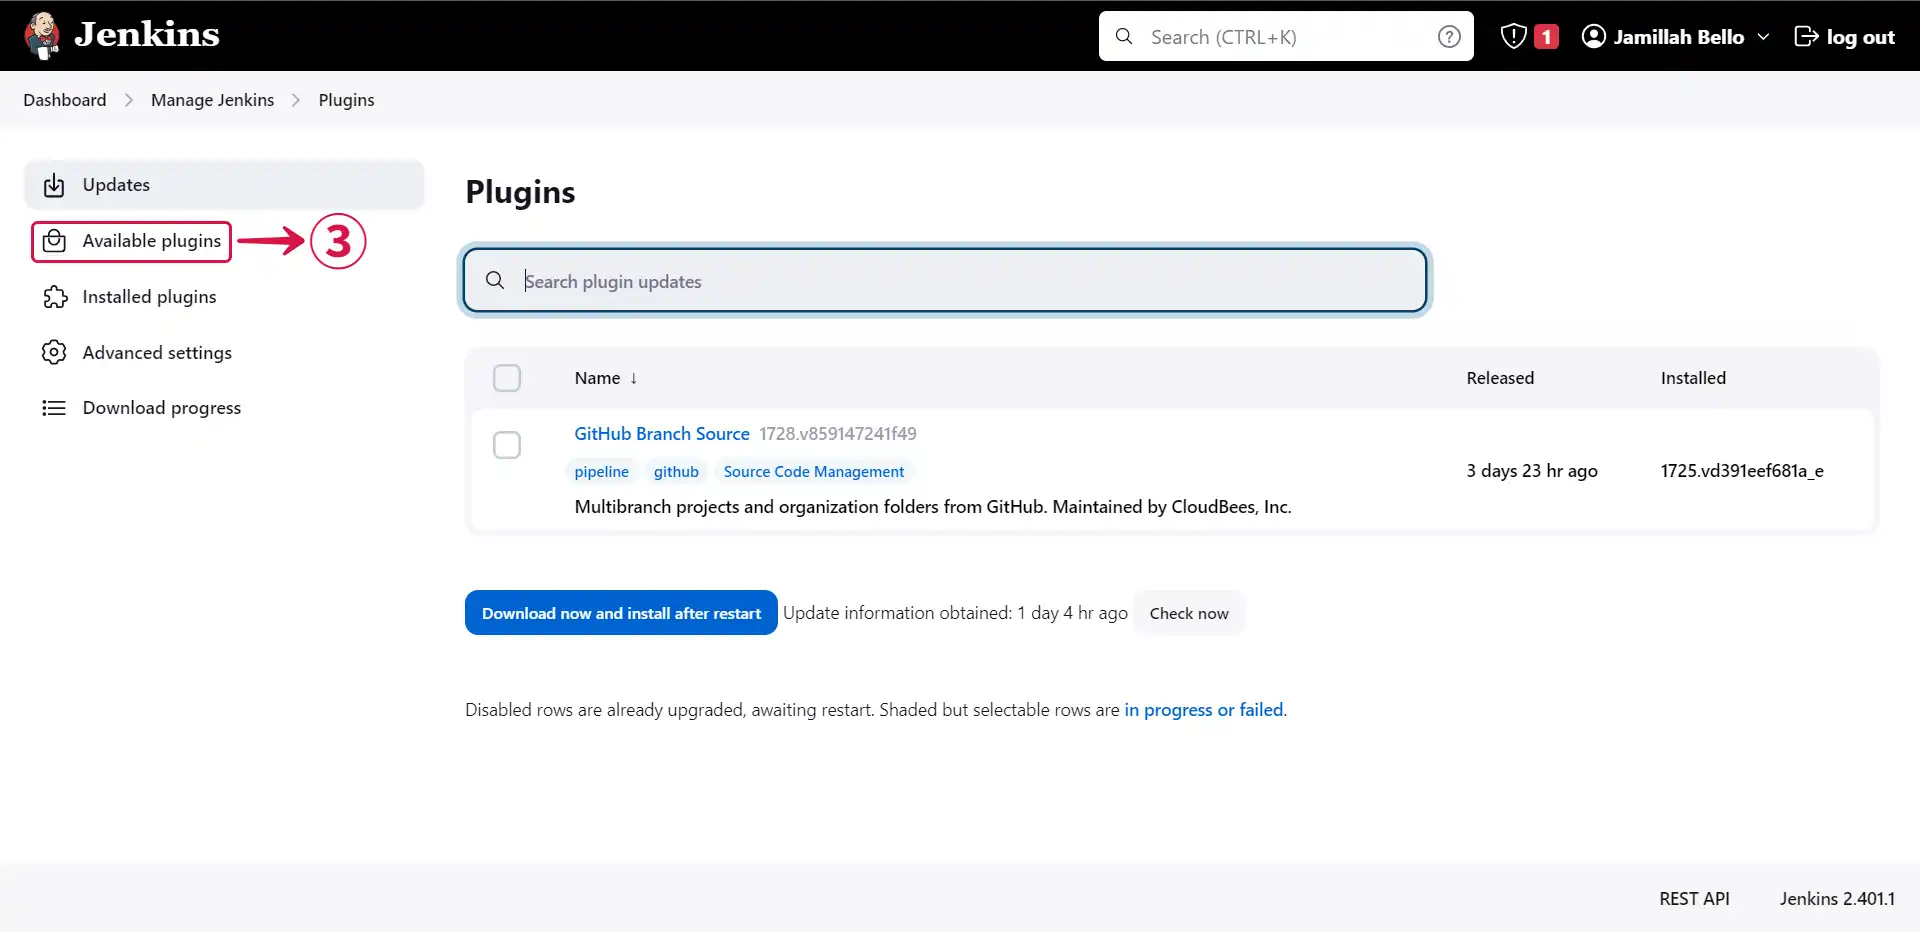
- Click on Available plugins③.
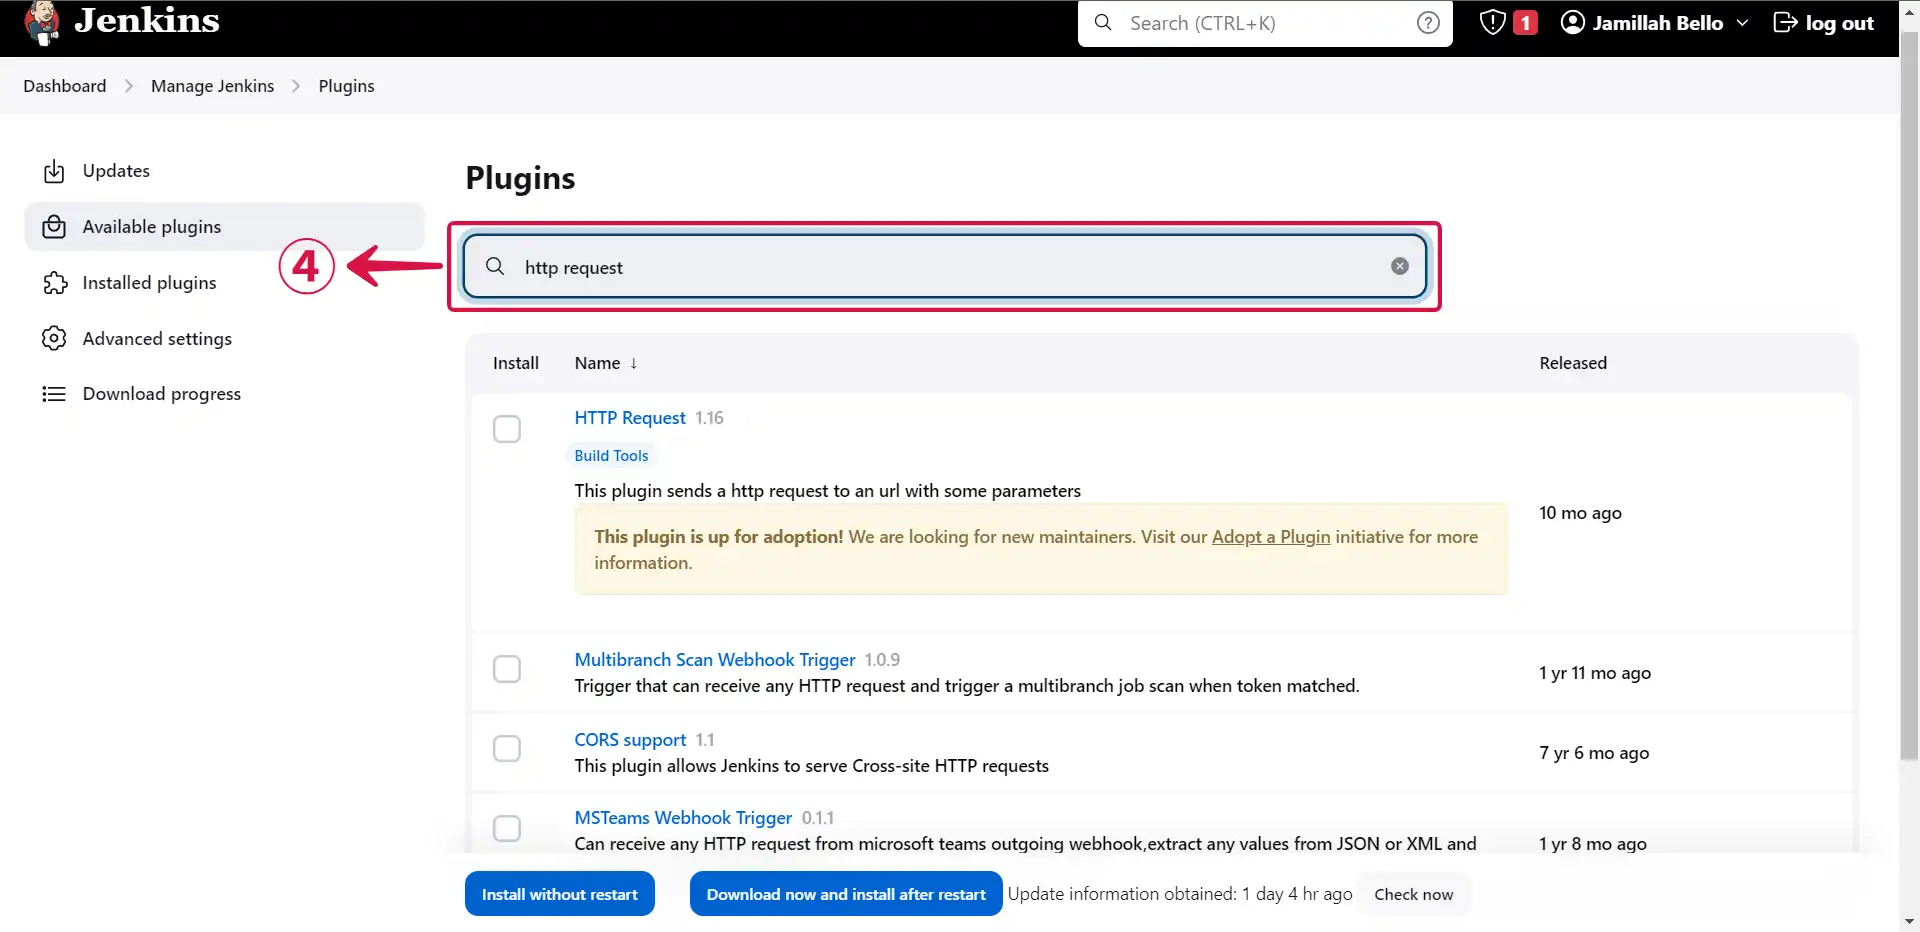
- Search for http request④.
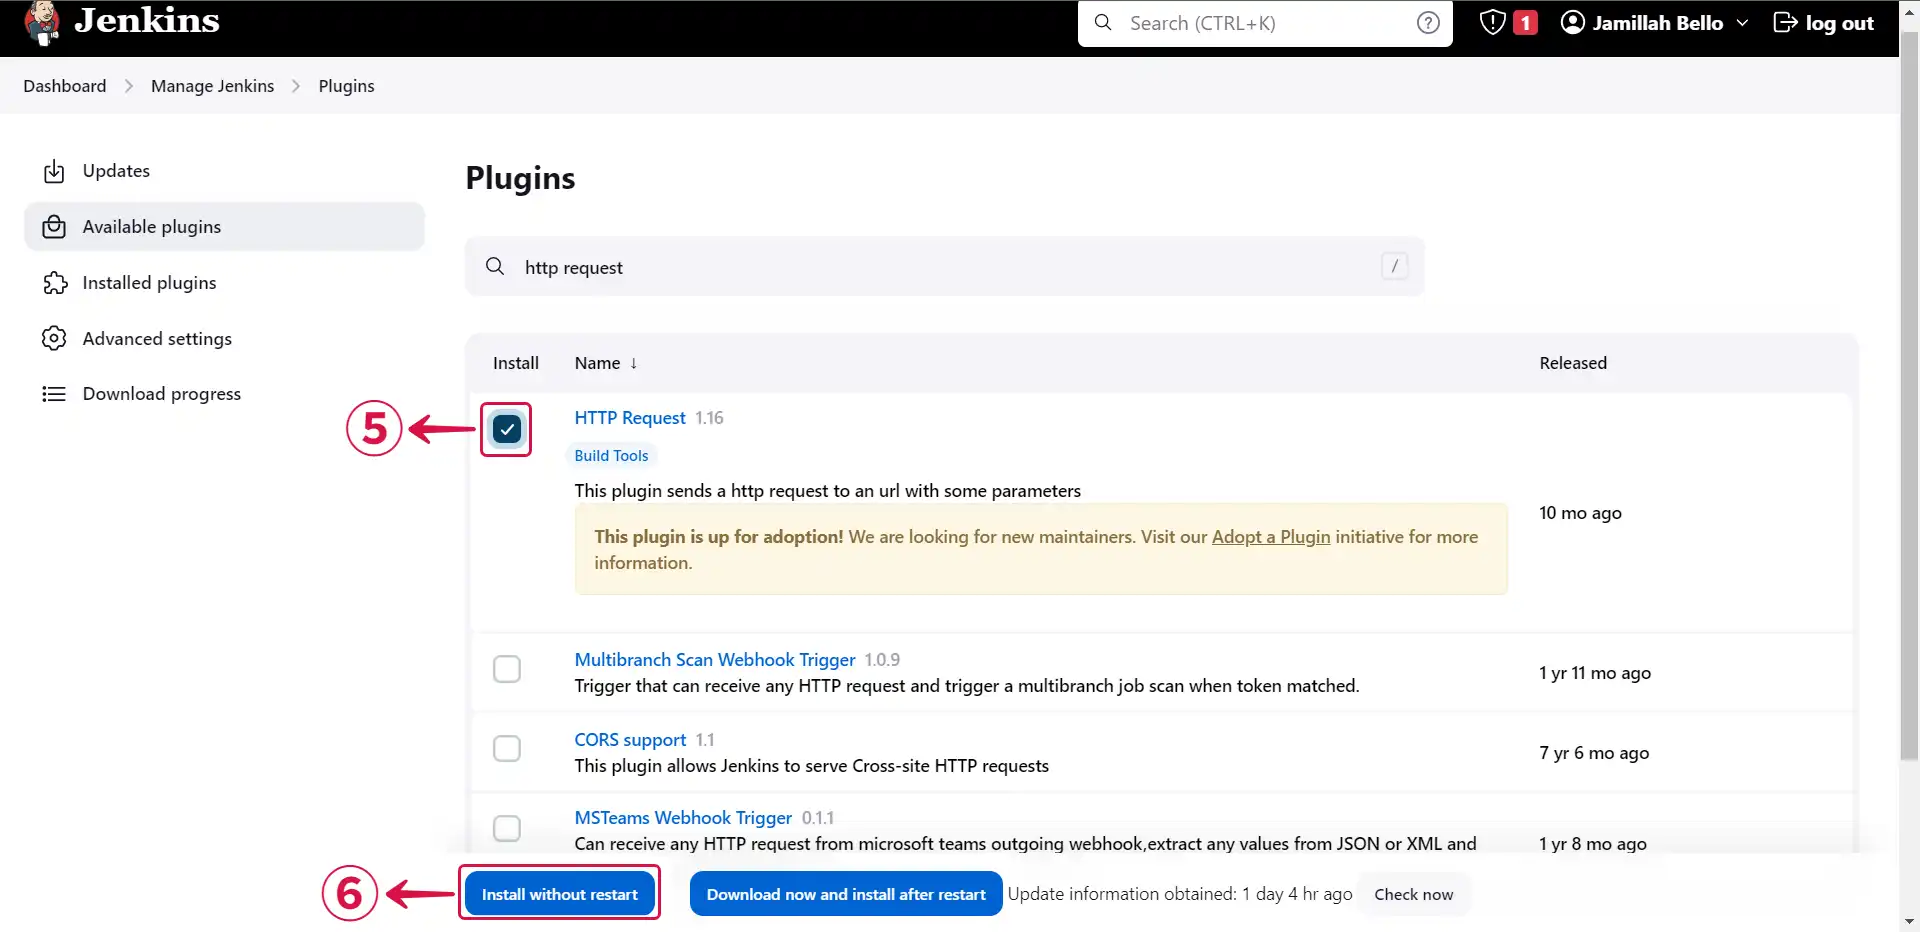
- Select⑤ the plugin and click on Install without restart⑥.
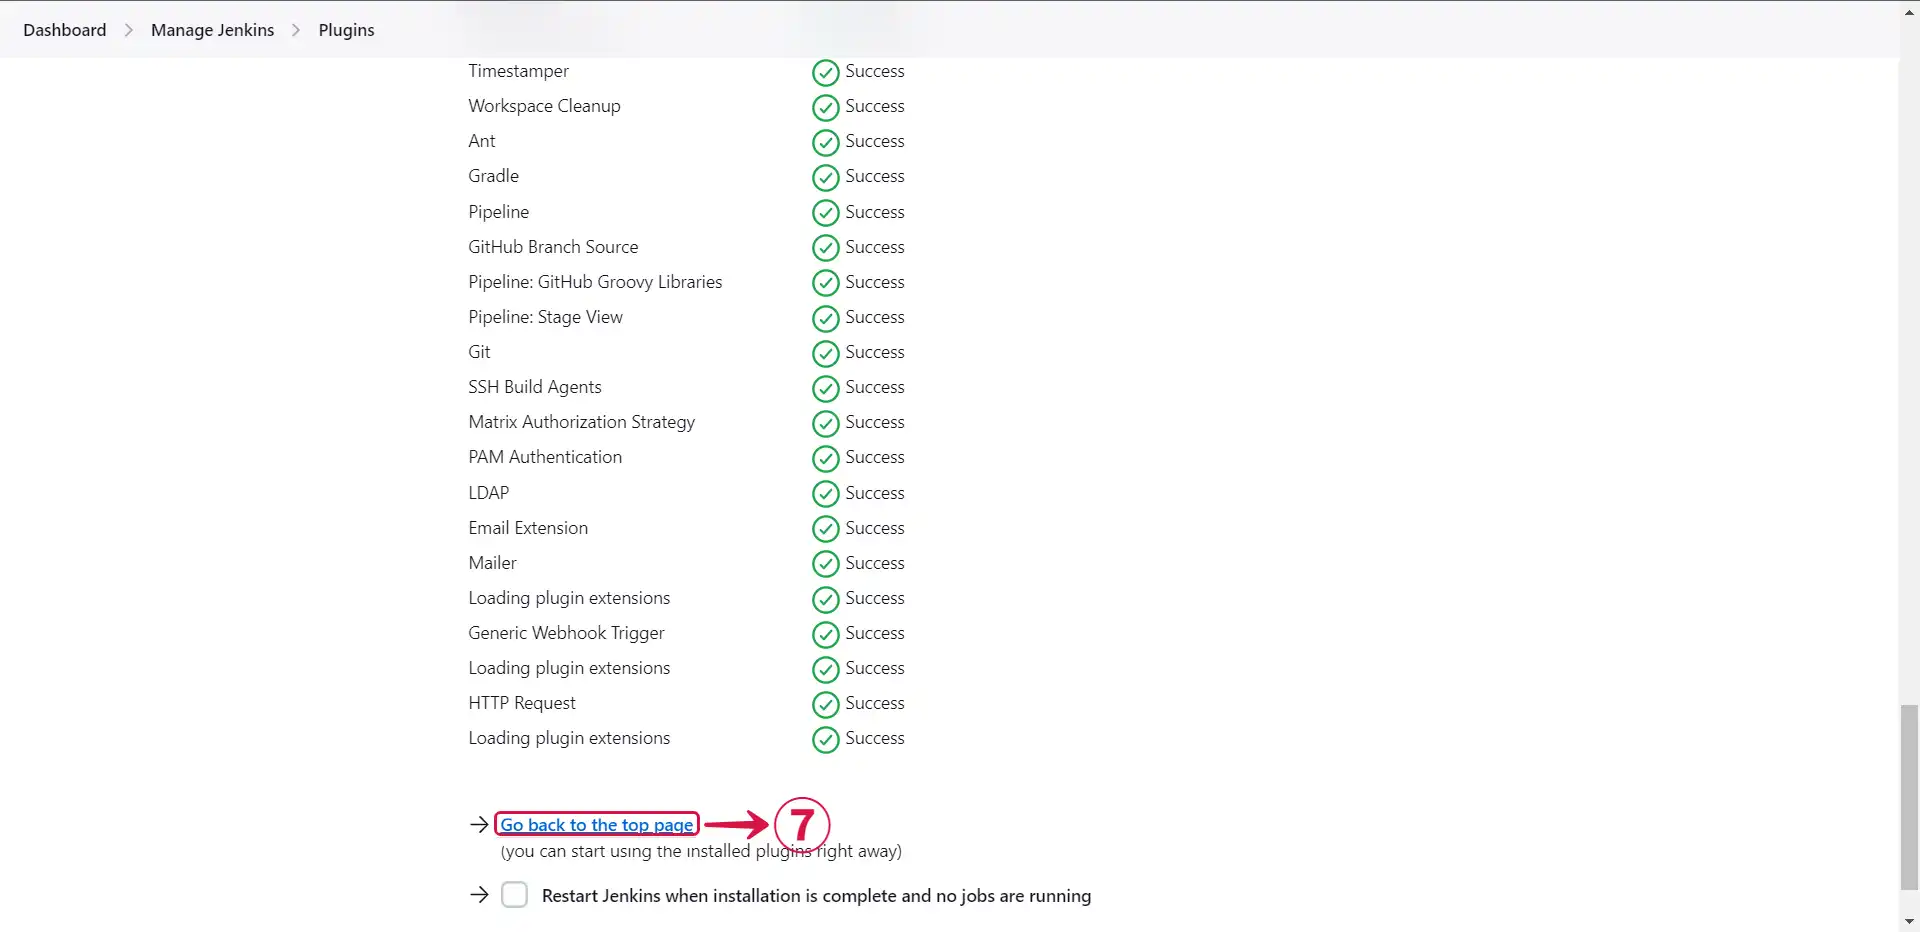
- Click on Go back to the top page⑦.
- Access your project⑧ by clicking on it.
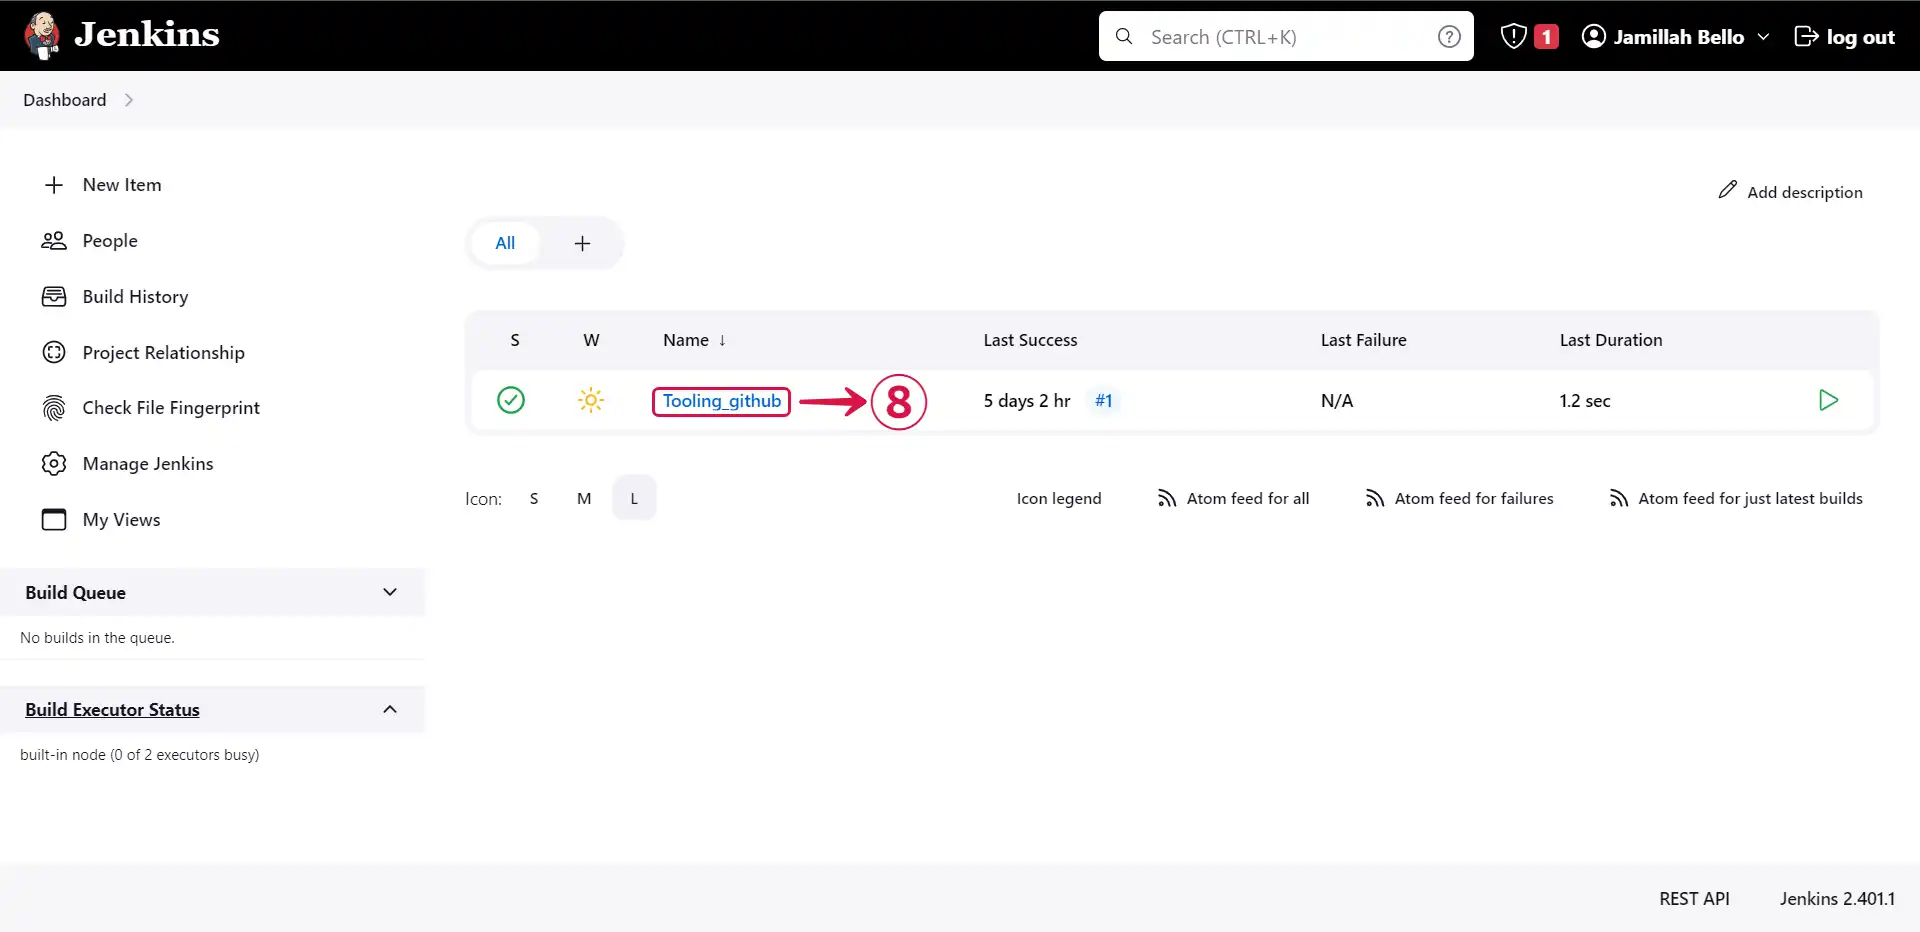
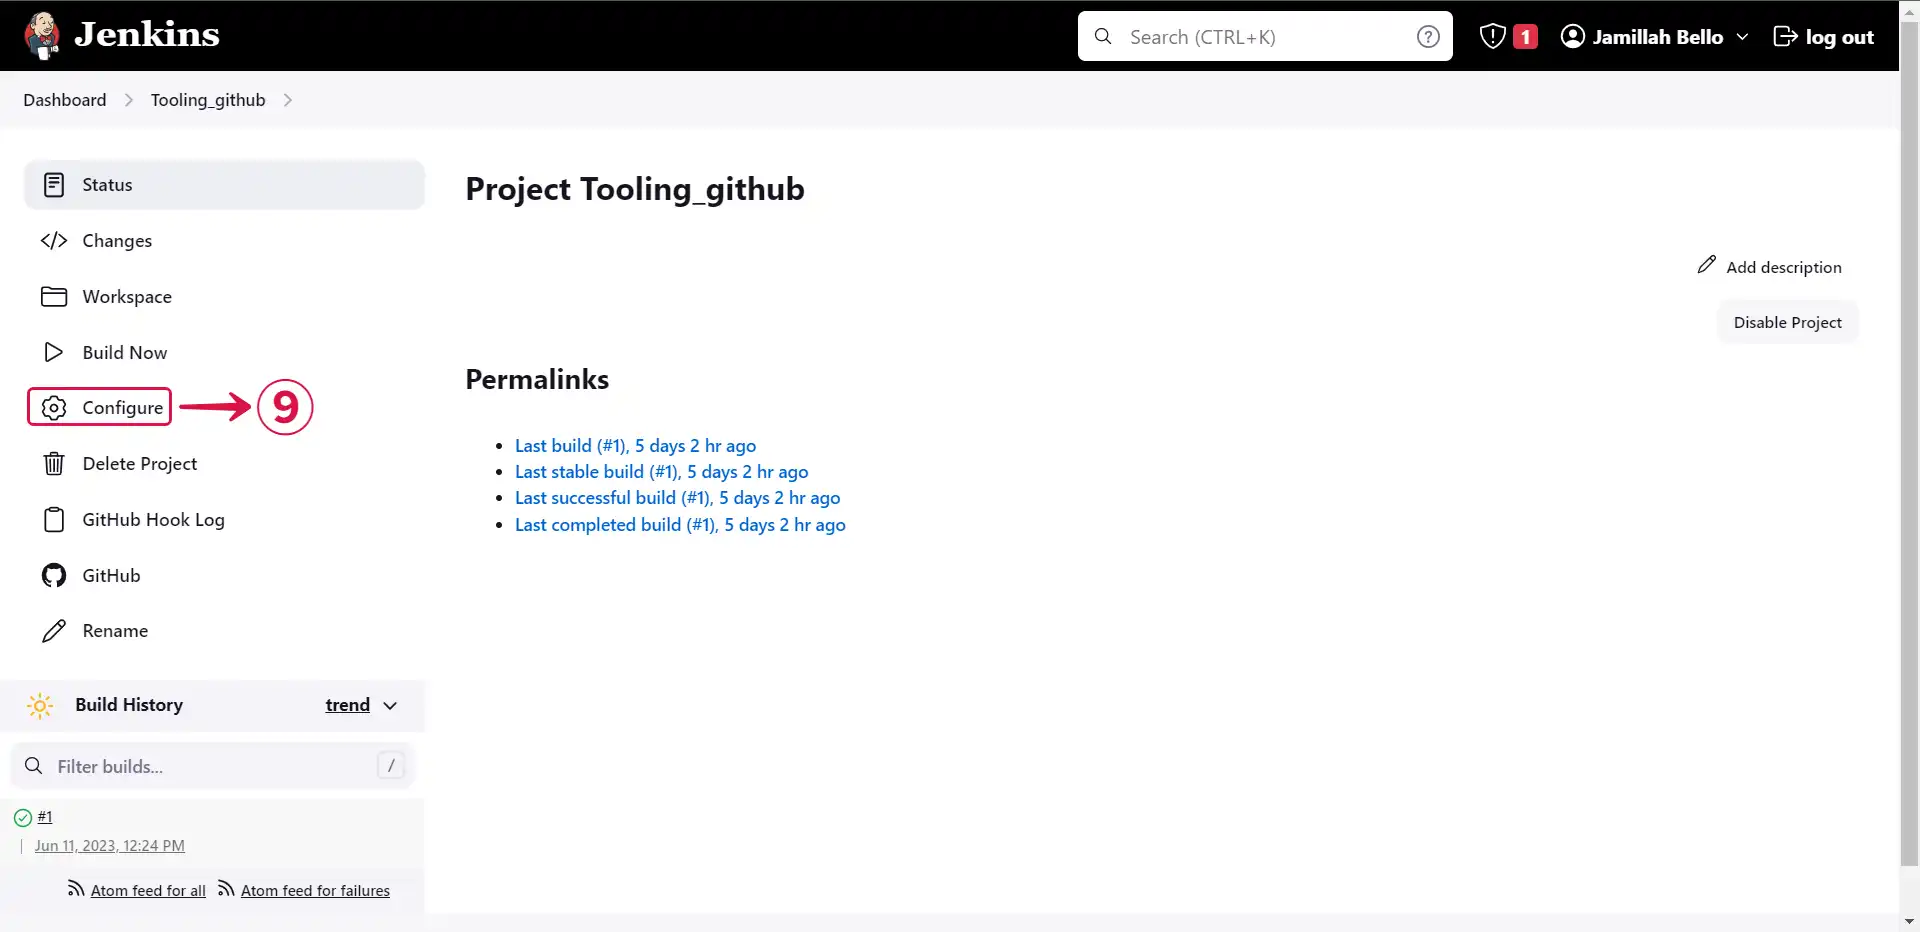
- Click on Configure⑨.
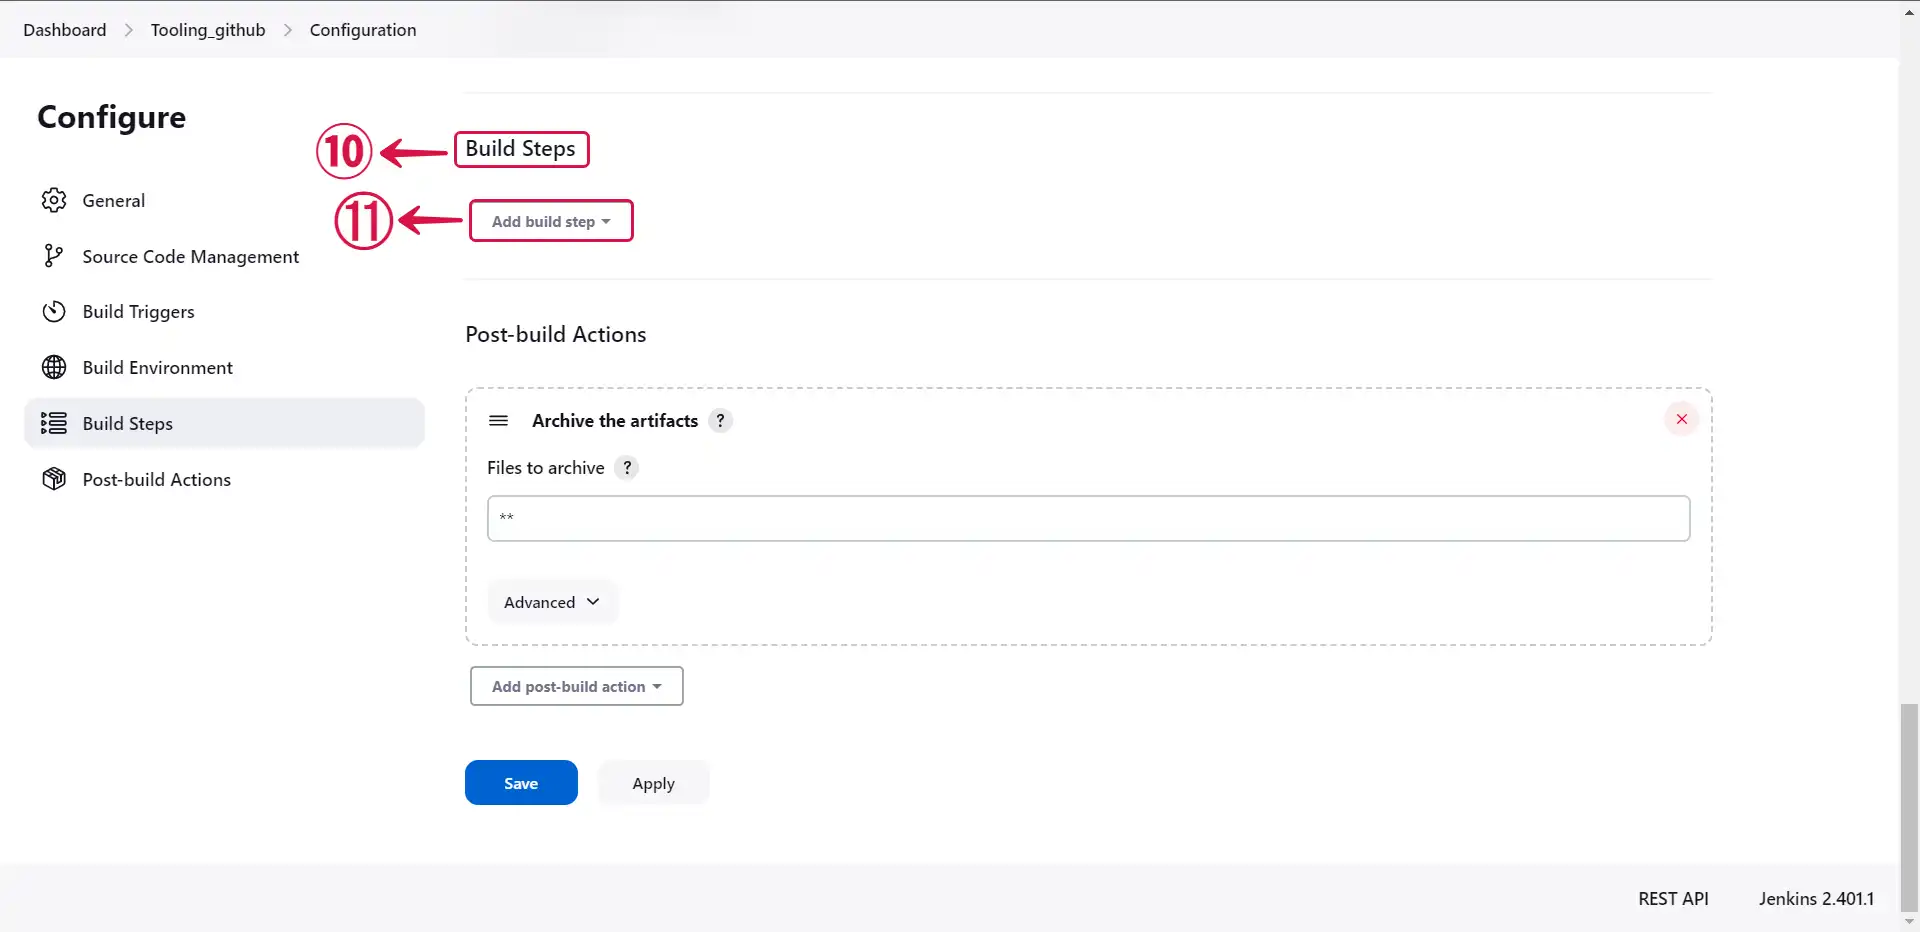
- Scroll down to Build Steps⑩ and click on Add build step⑪.
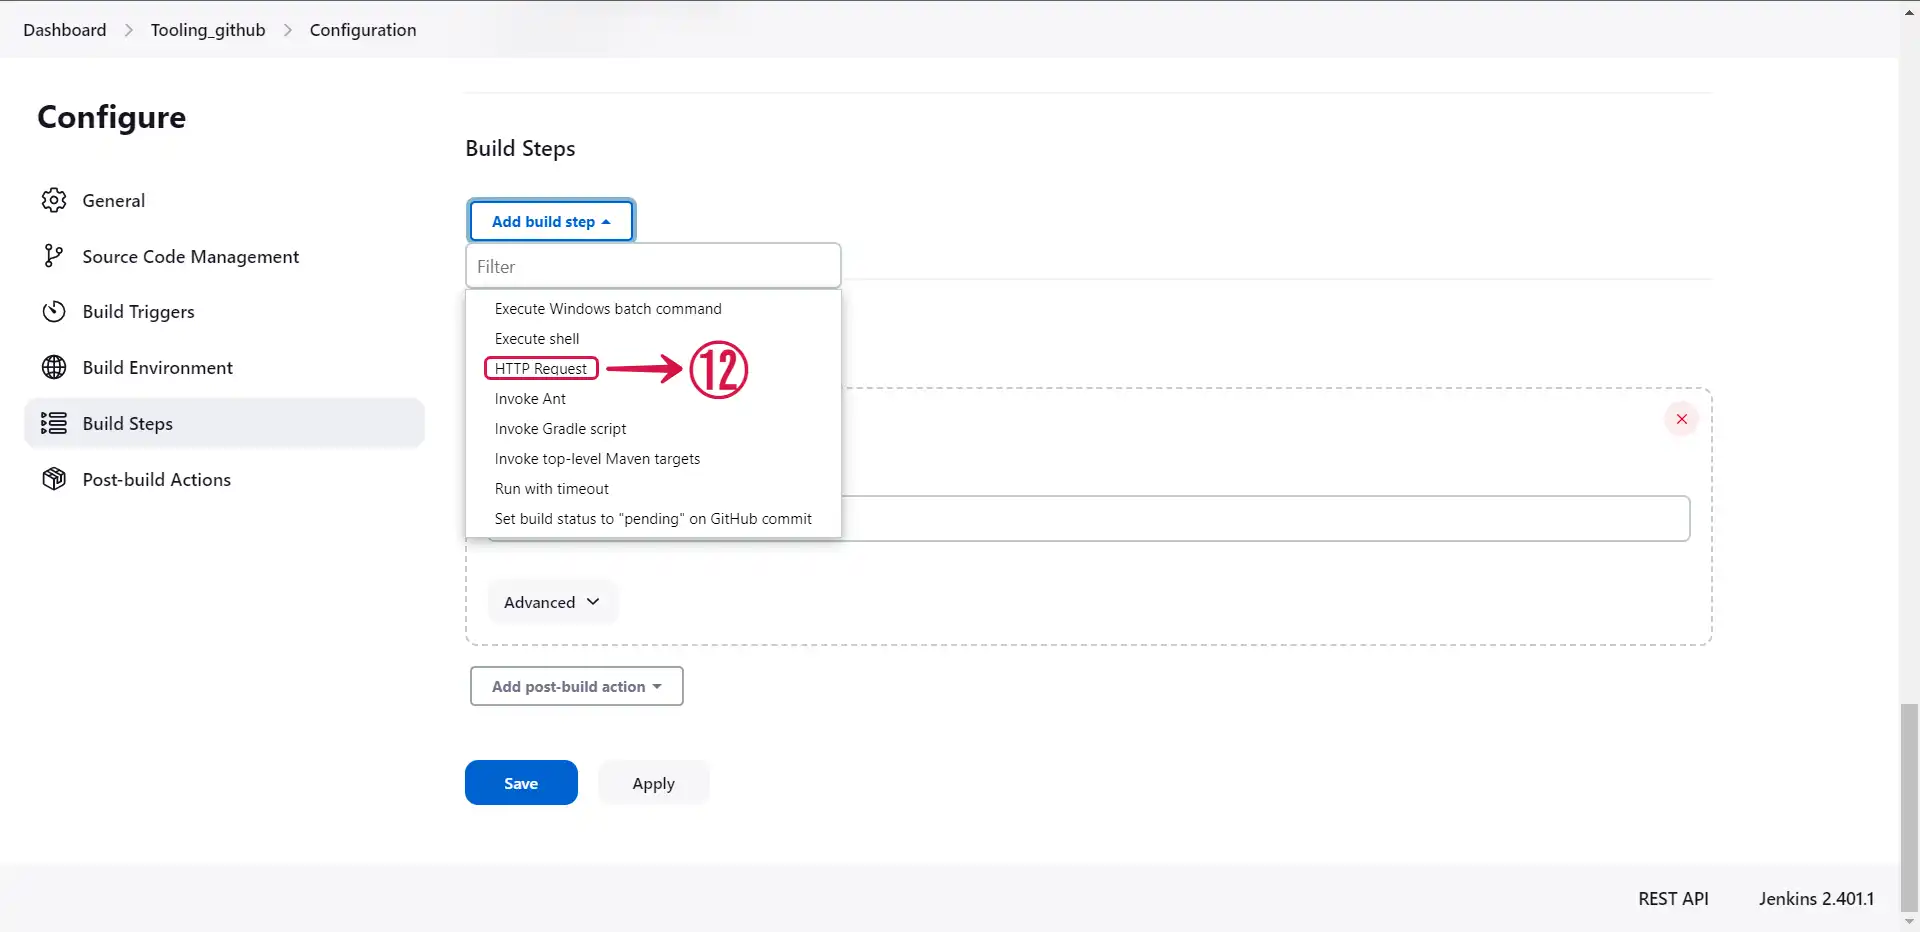
- Select HTTP Request⑫.
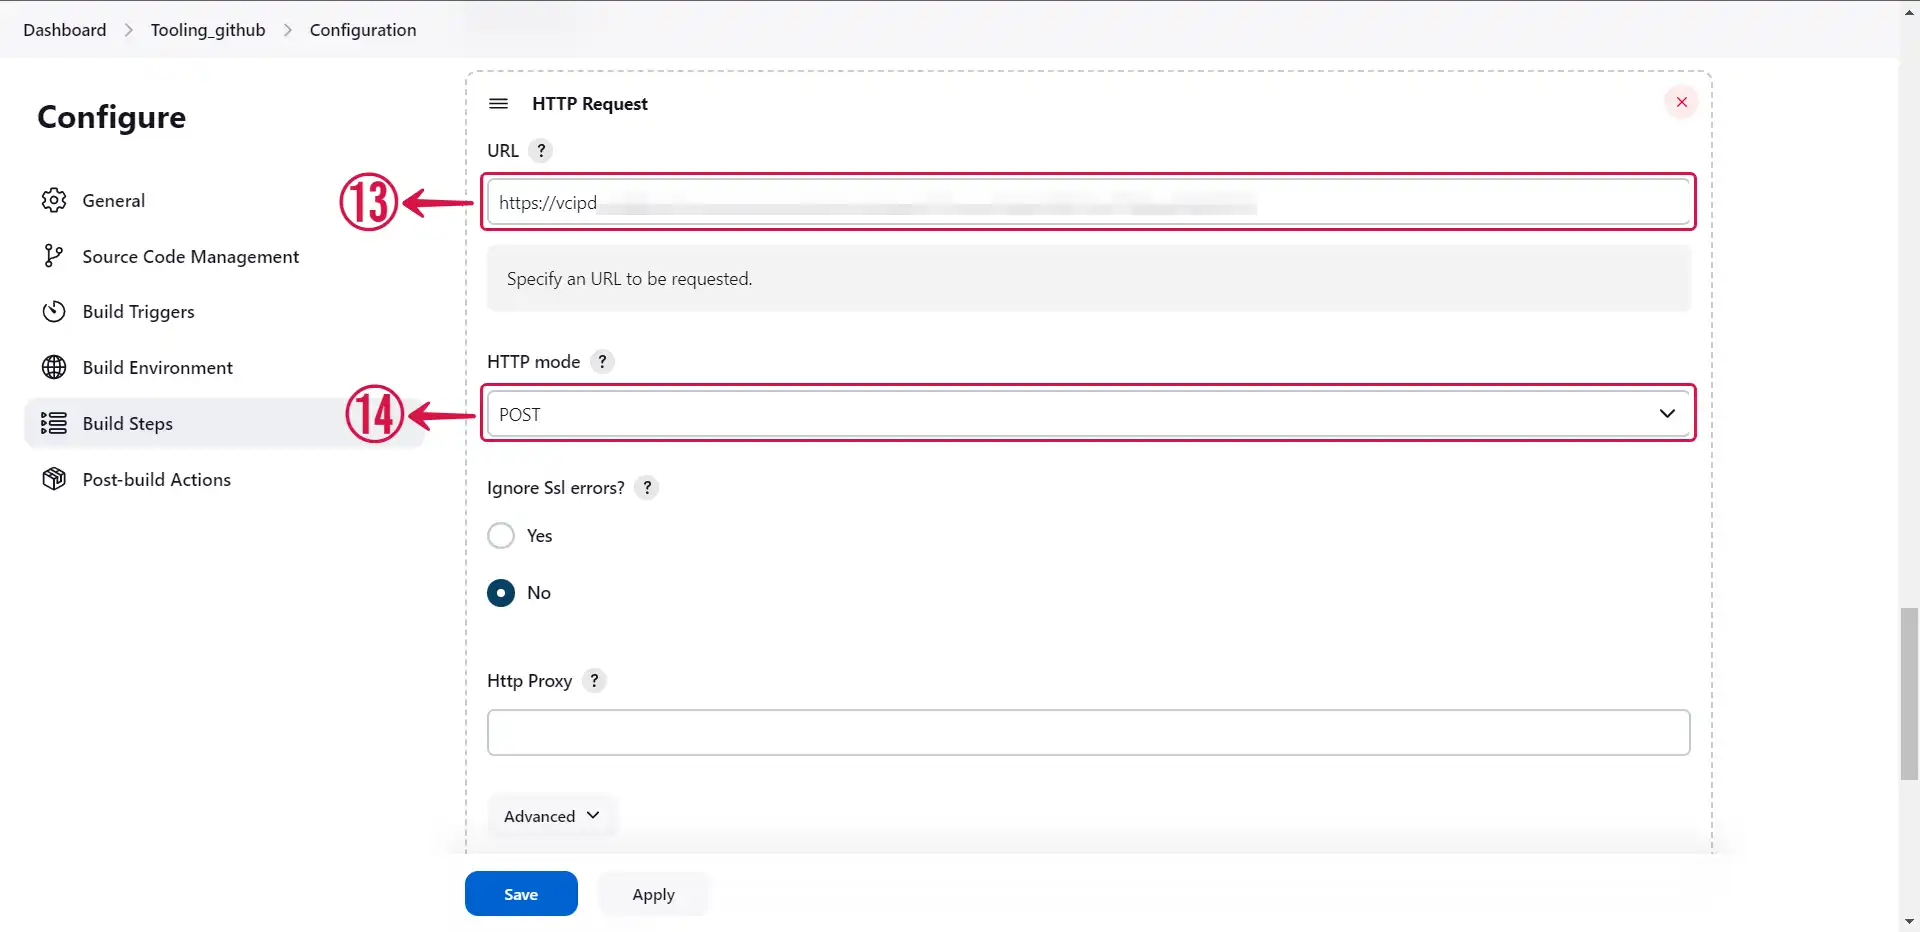
- Provide the payload URL⑬ copied from your Jenkins source connector in Vanus Connect and choose POST⑭ as the HTTP mode.
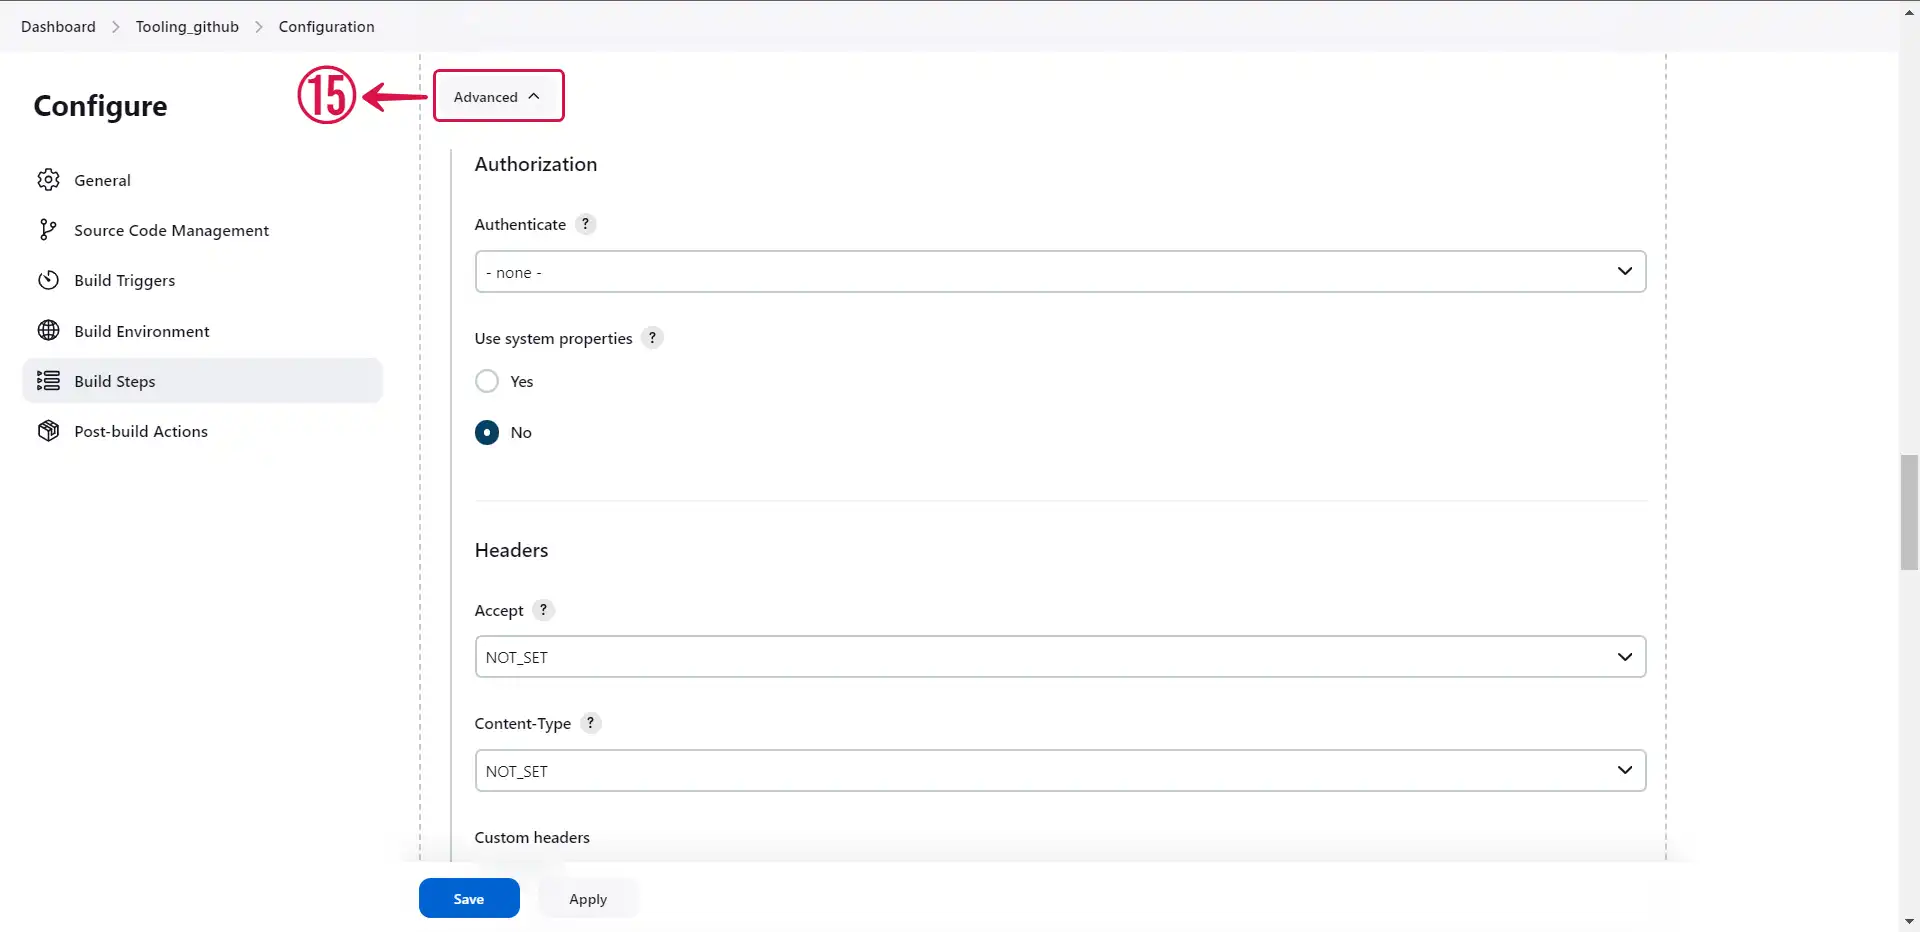
- Click on Advanced⑮ to see more settings.
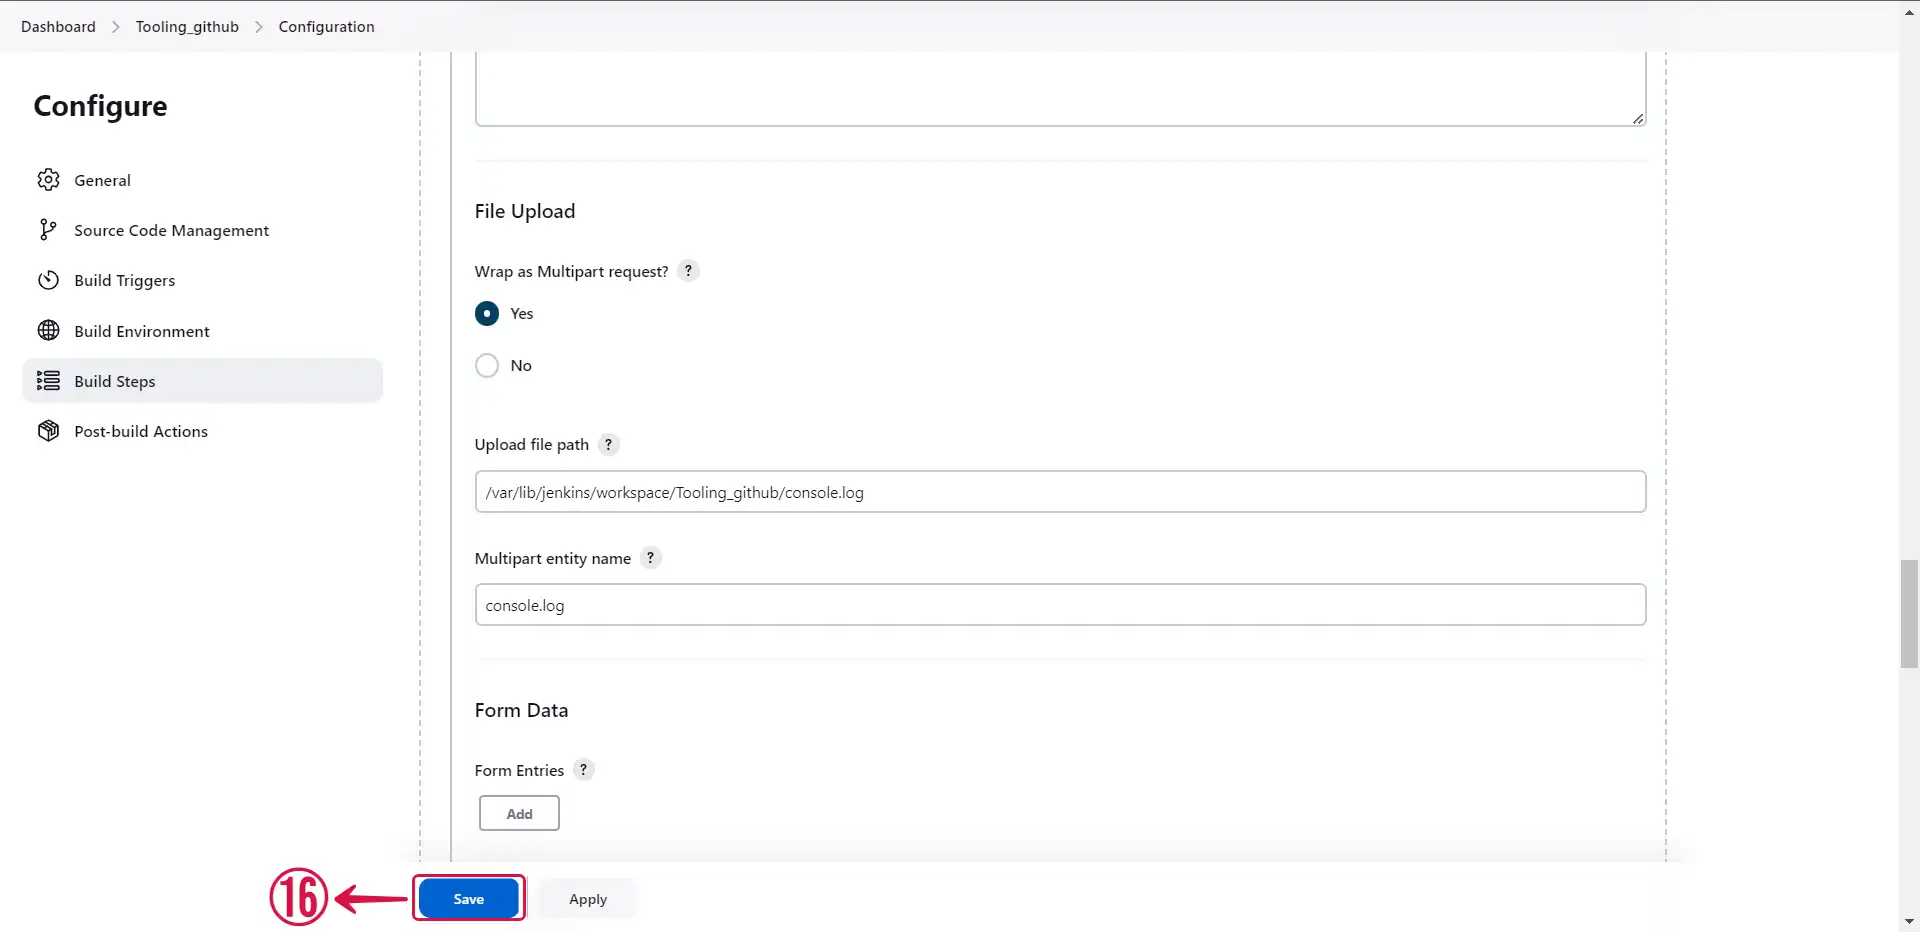
- Set your desired parameters and click on Save⑯.
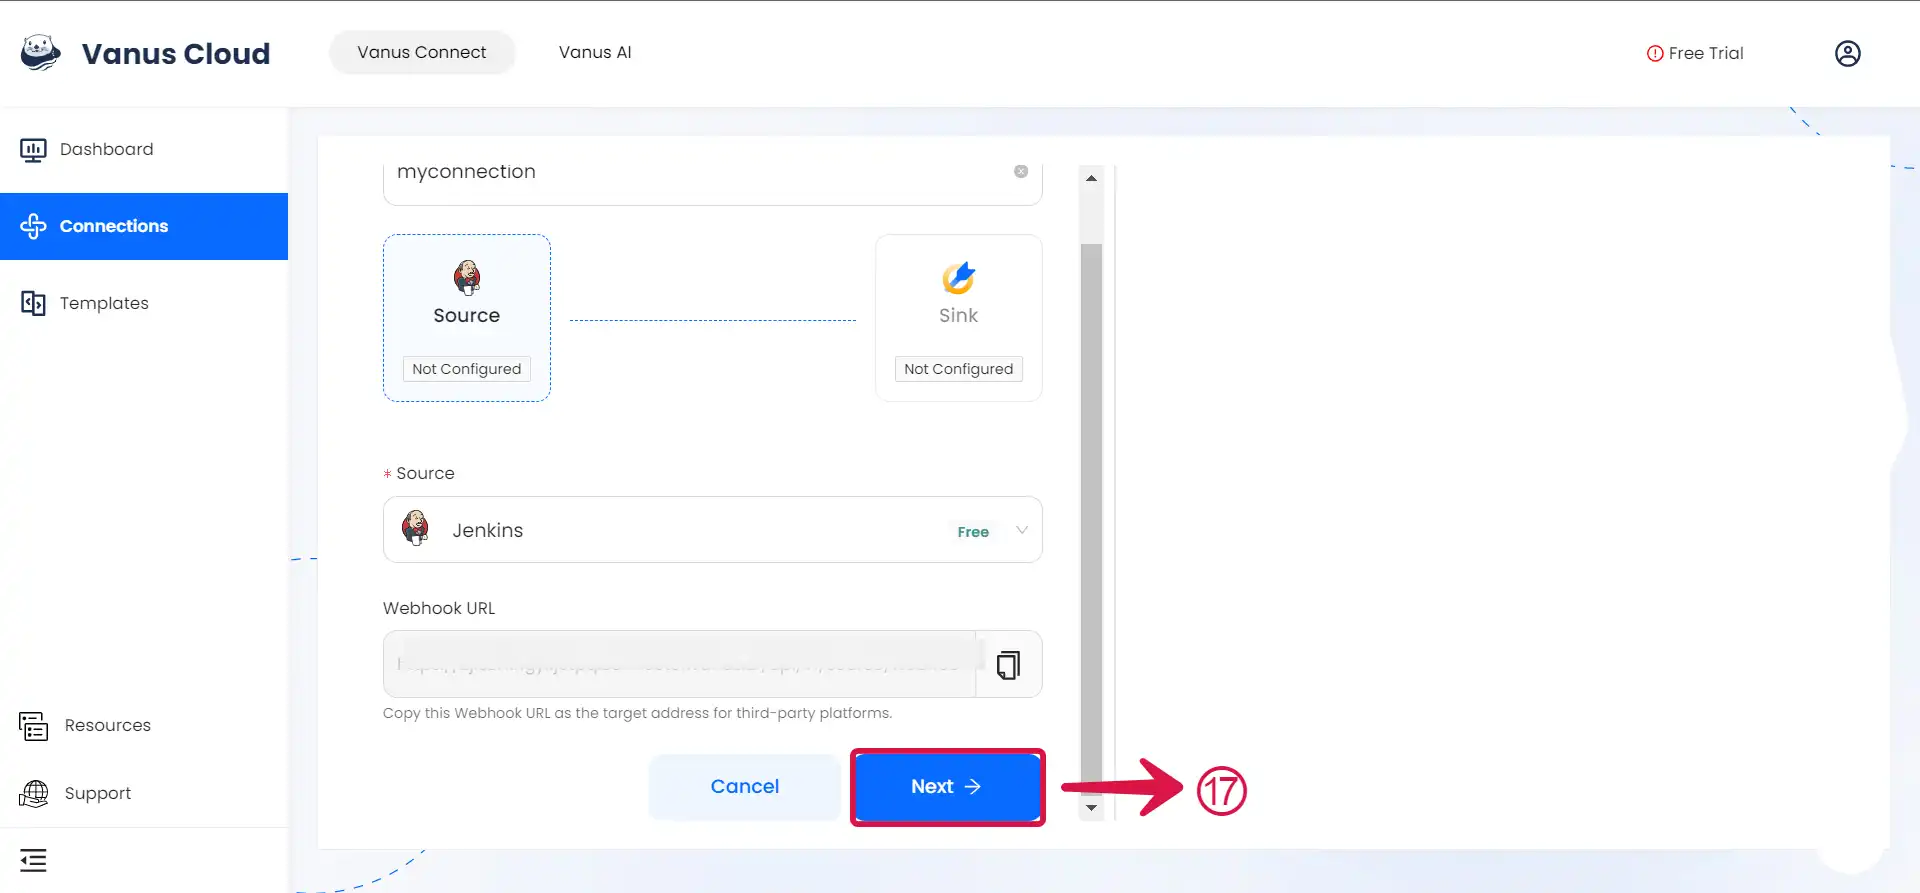
- Go back to Vanus Connect and click Next⑰ to continue the configuration.
If you are employing a custom script to transmit events, there is no requirement to install the HTTP Request plugin.
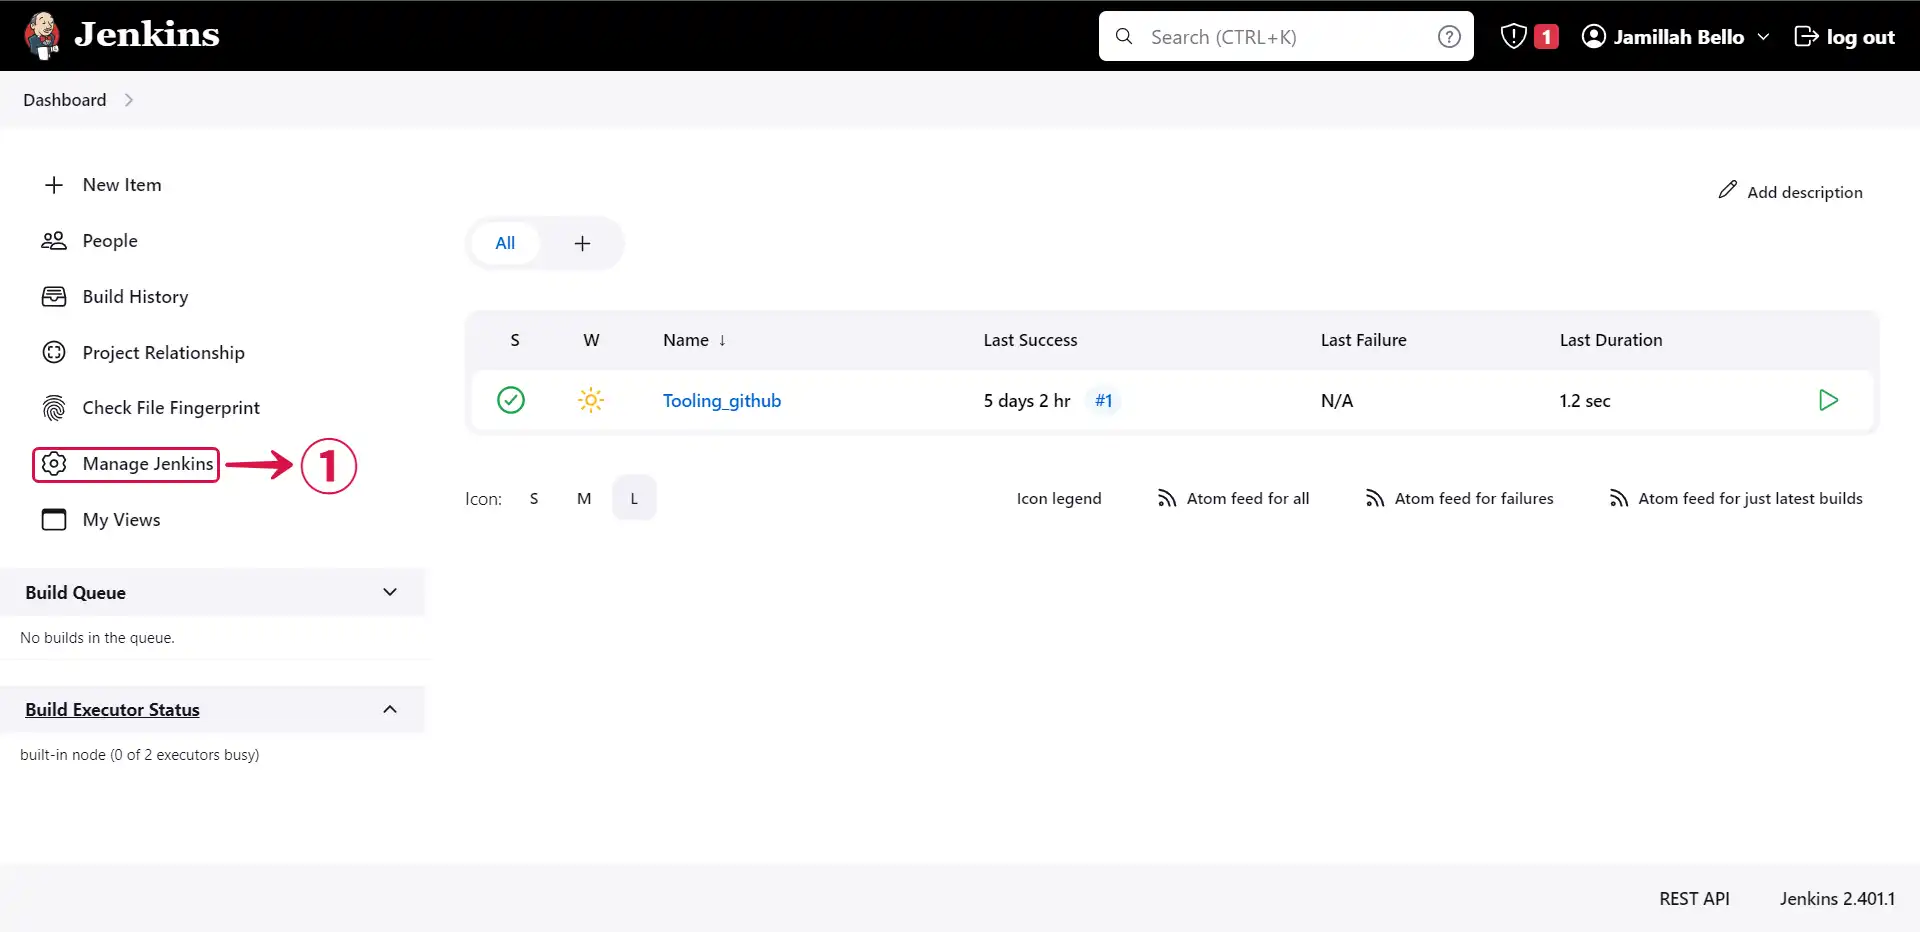
- Click on Manage Jenkins①.
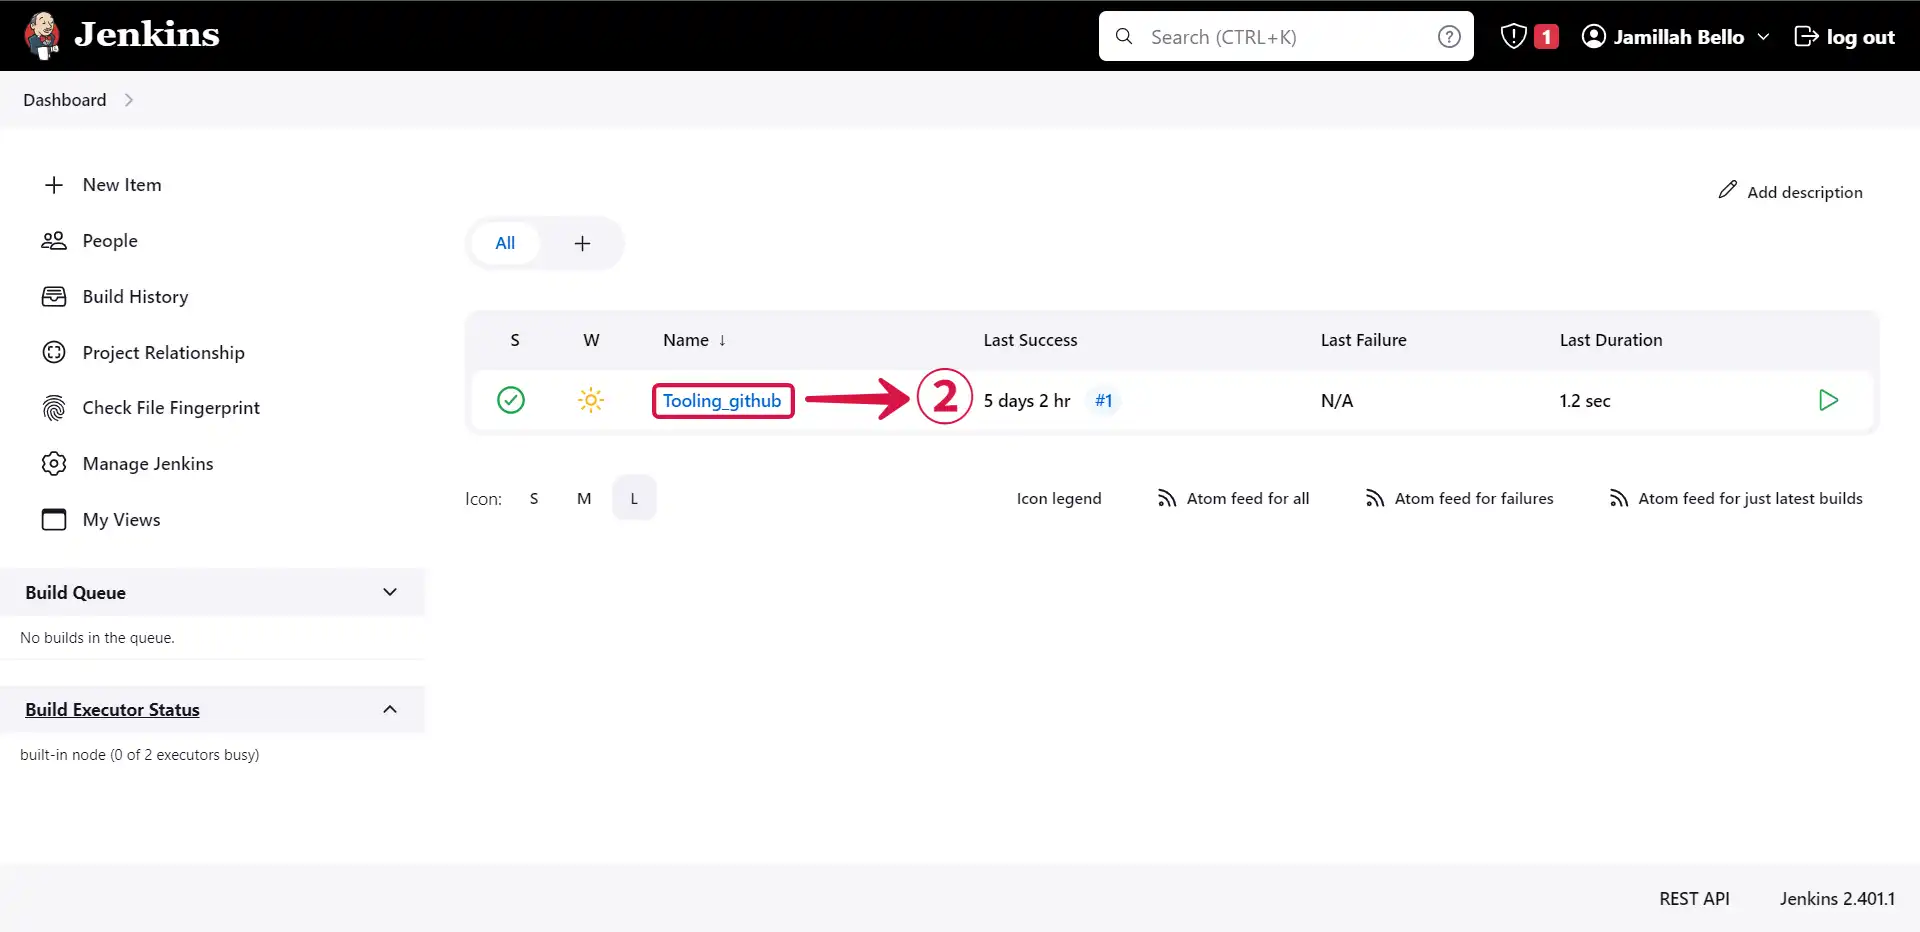
- Click into your project②.
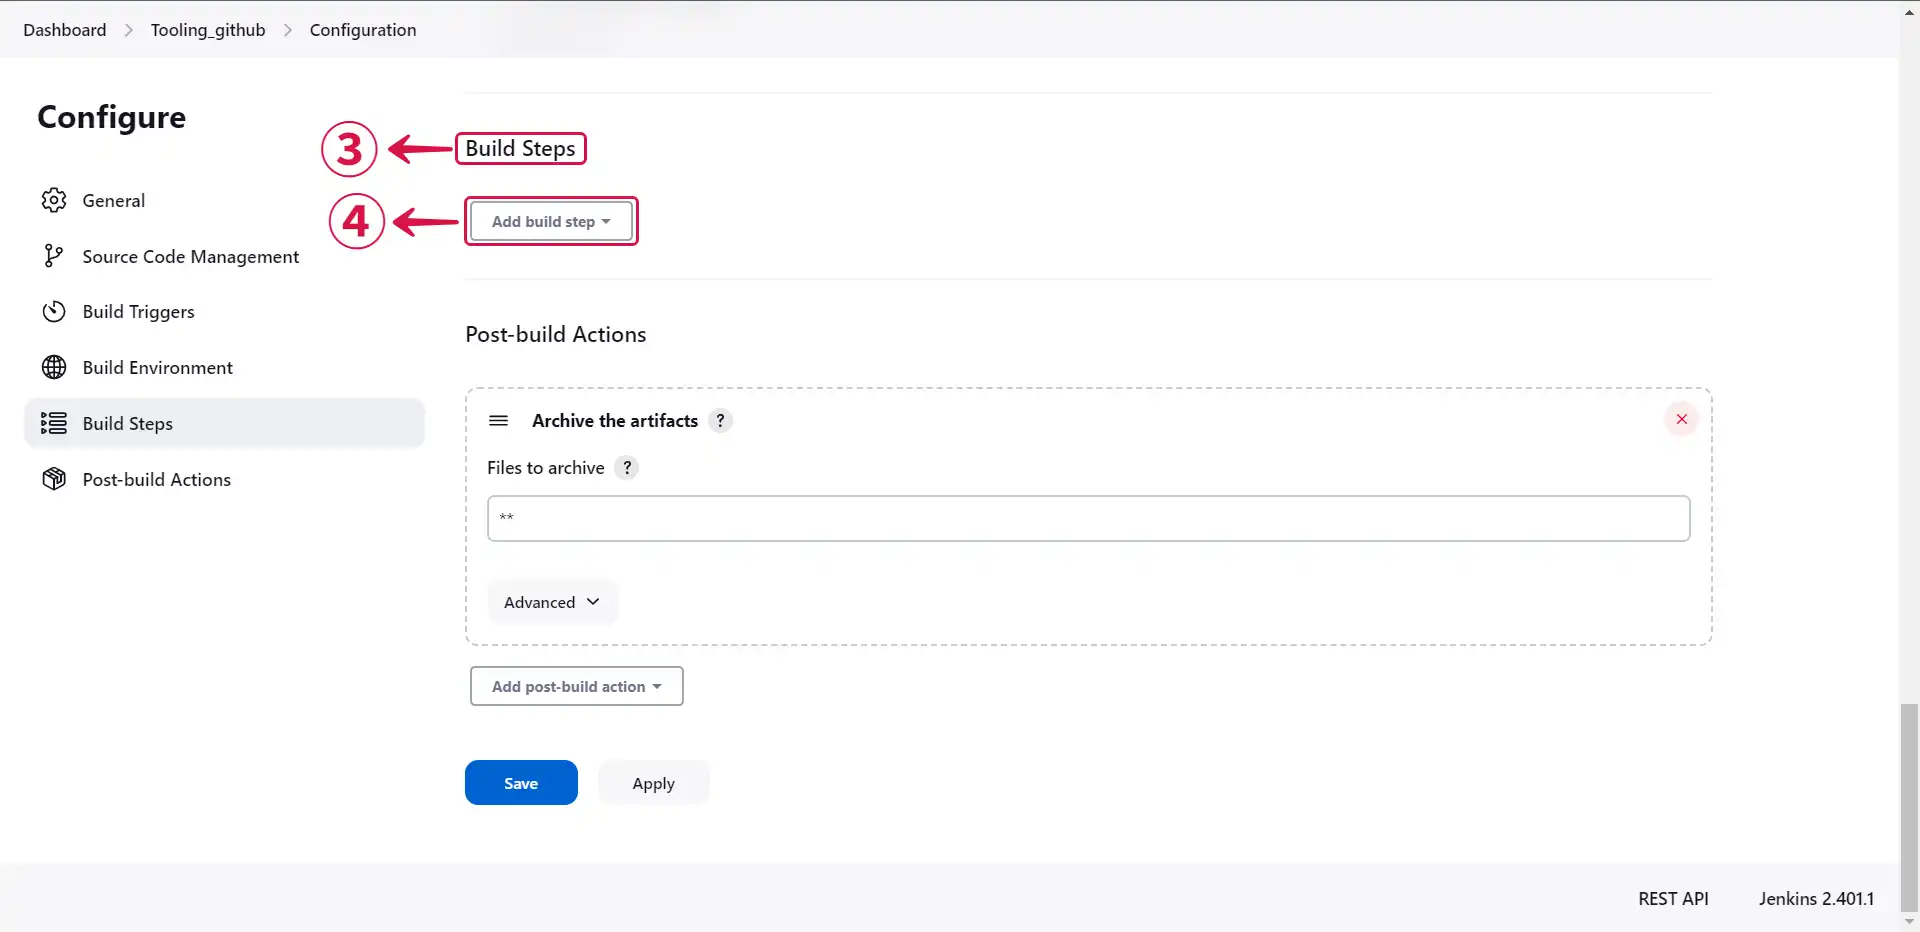
- Scroll down to Build Steps③ and click on Add build step④.
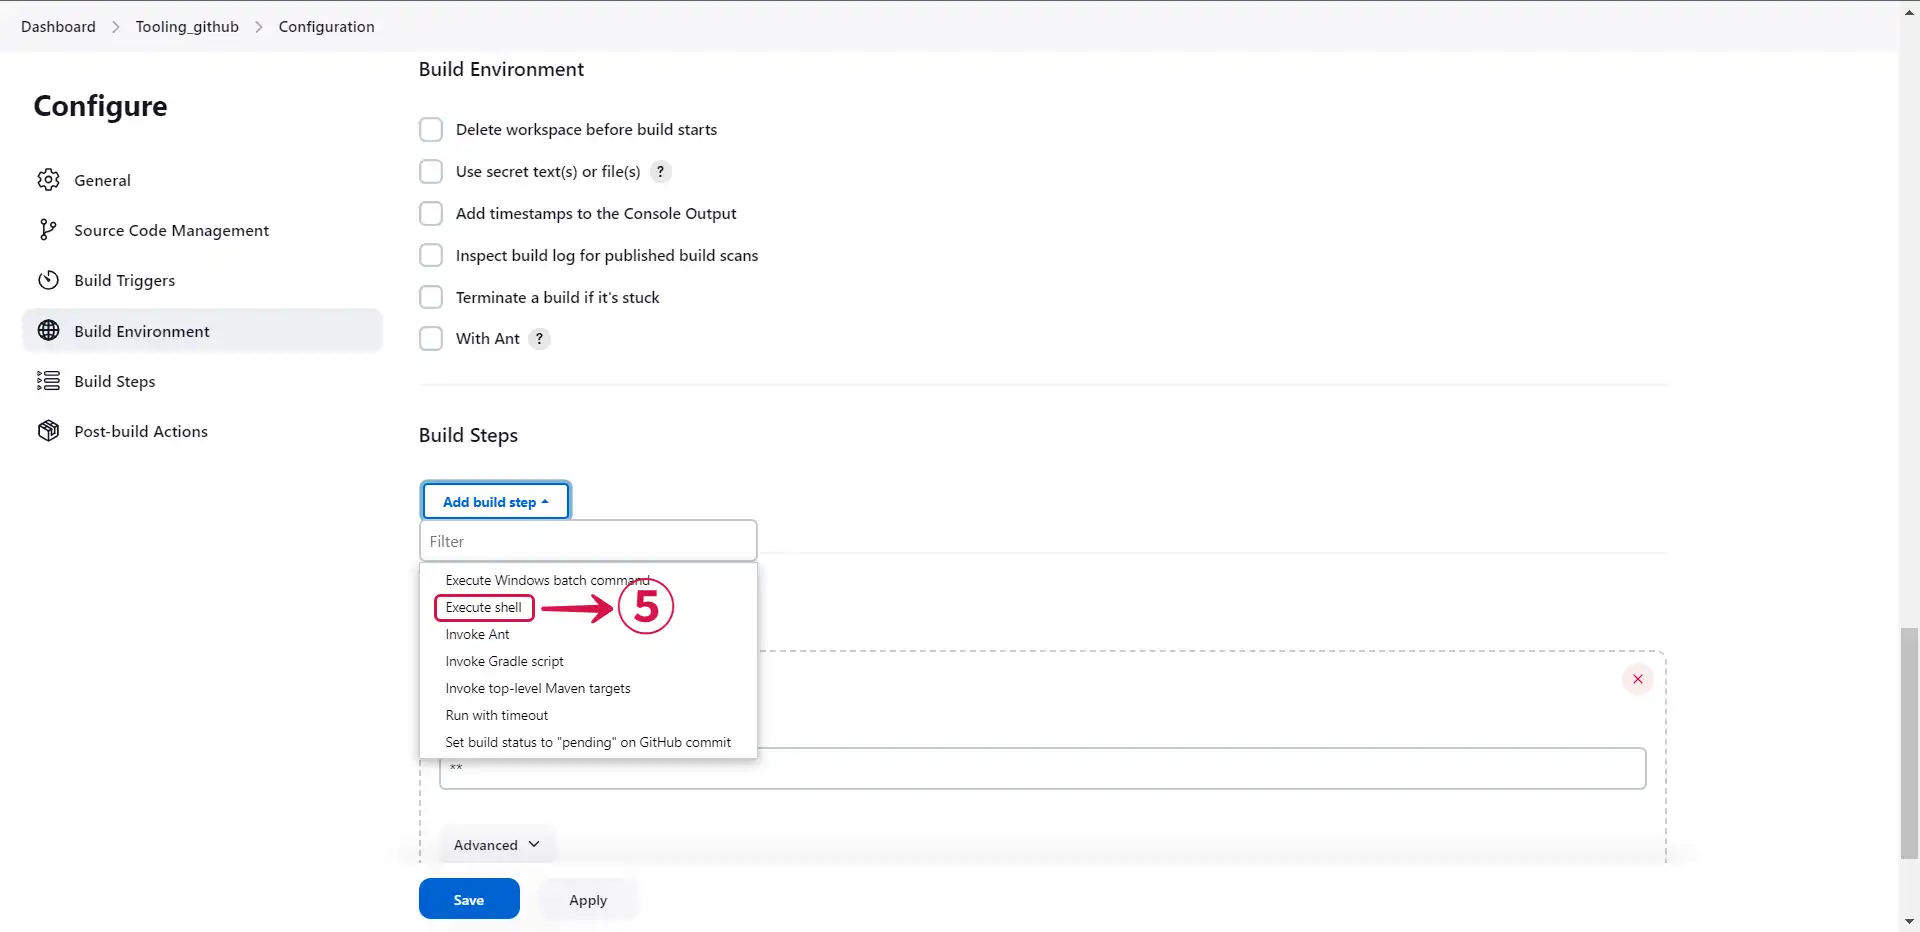
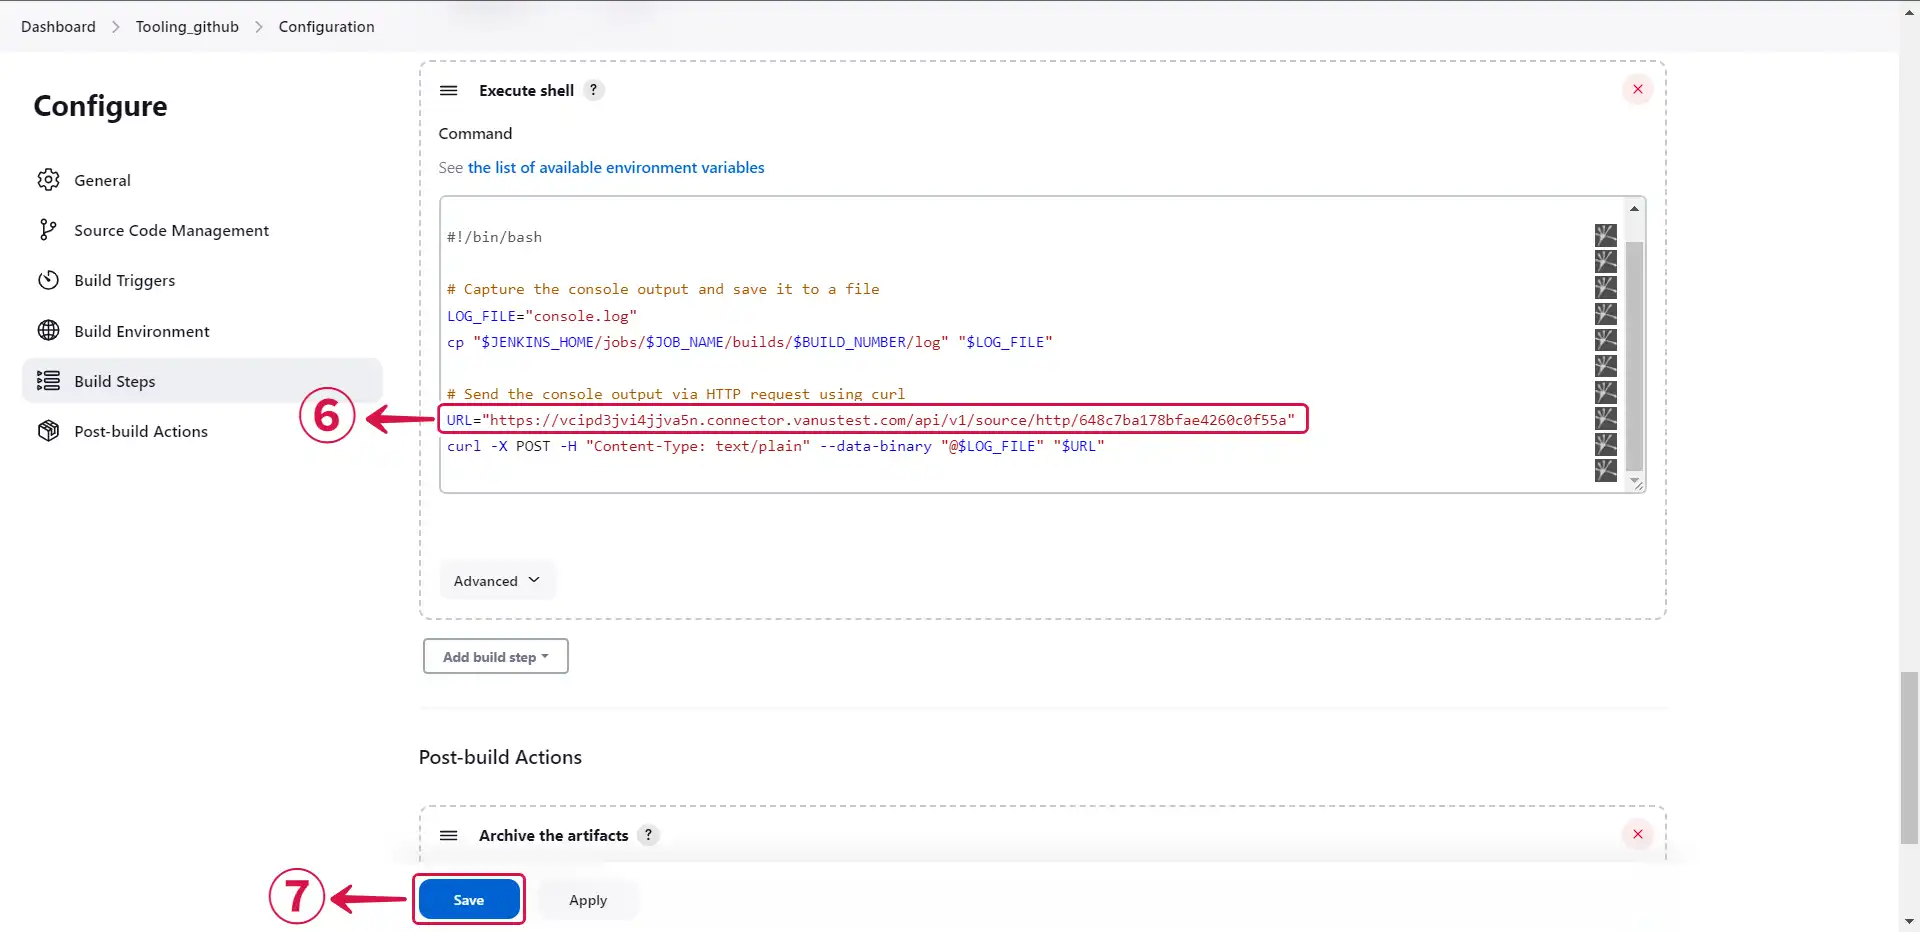
- Click on Execute shell⑤.
- Compose your code in the command field, including the Jenkins source connector's copied payload URL⑥, and click on save⑦.
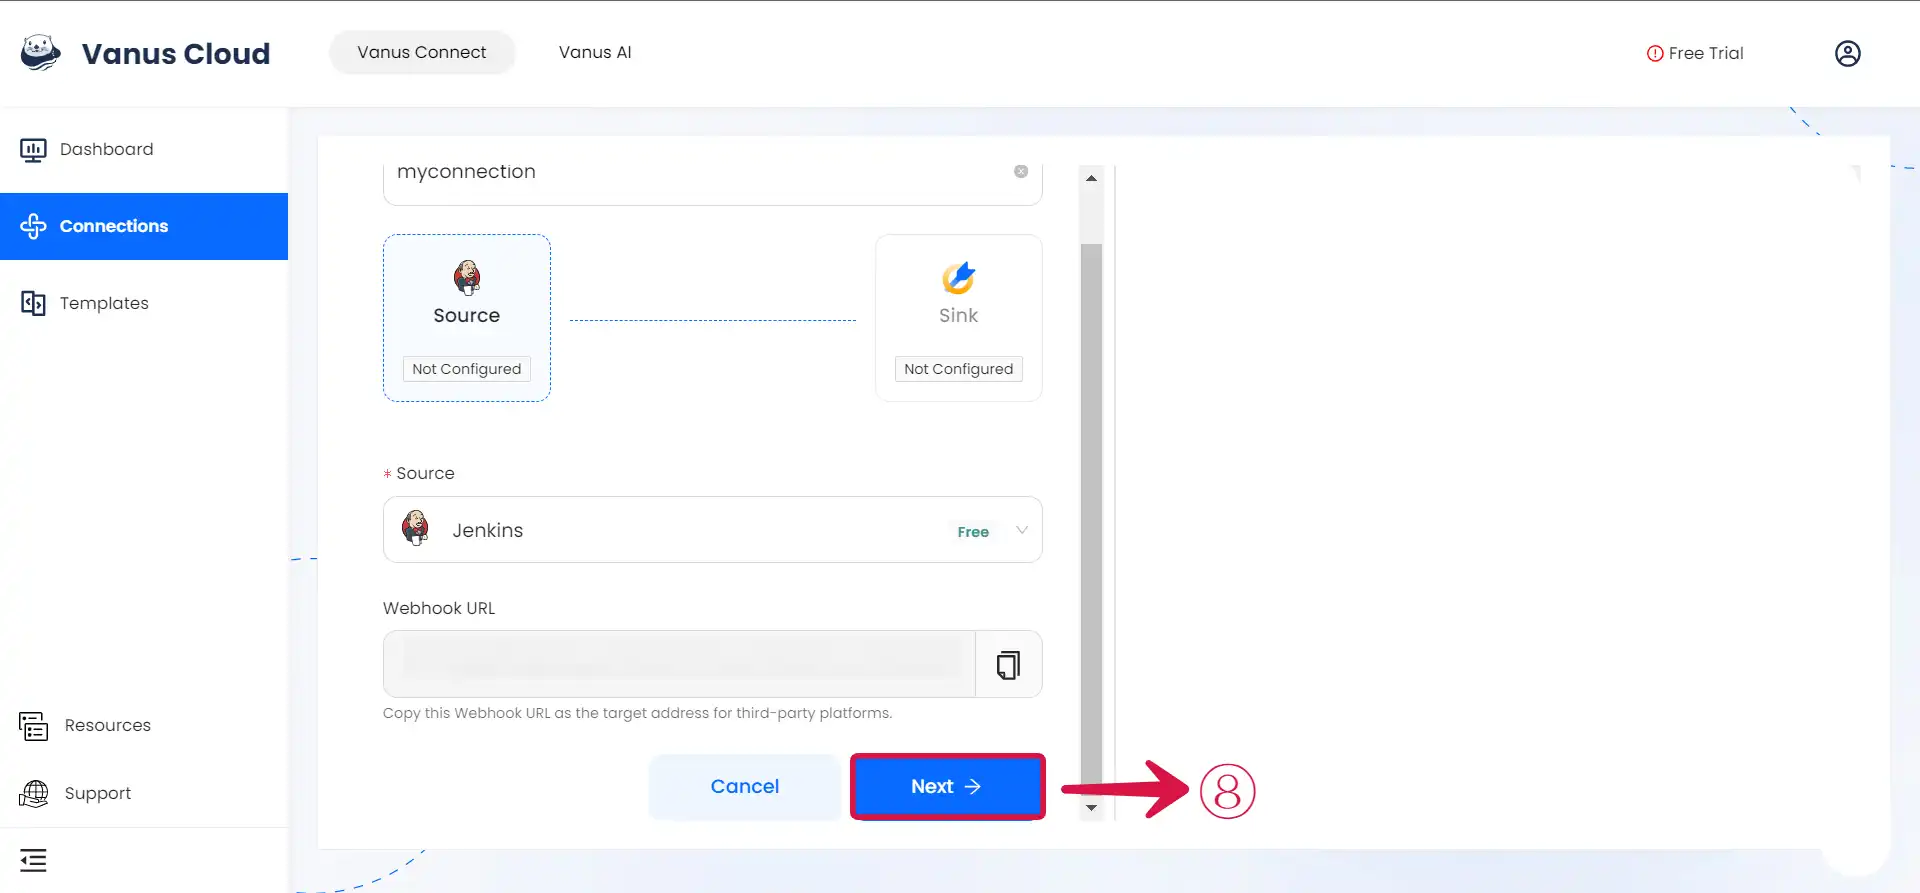
- Click Next⑧ and continue the configuration.
Learn more about Vanus and Vanus Connect in our *documentation.