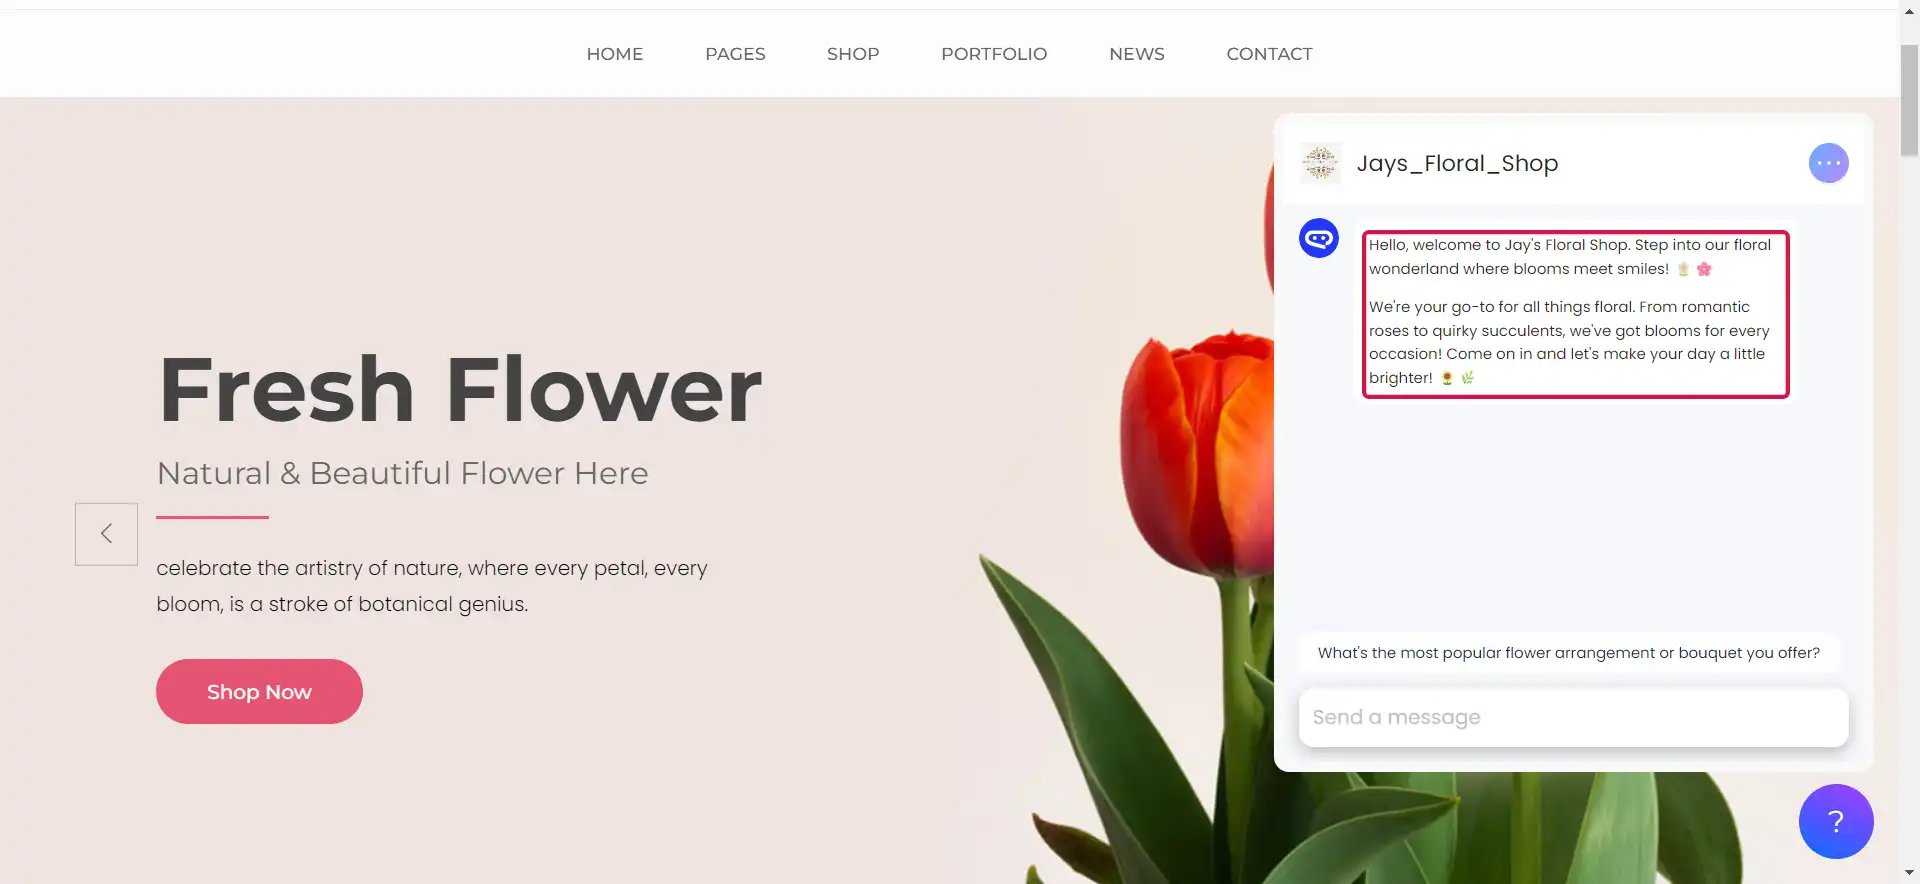
Website Embedding
This documentation will teach you how to integrate Vanus AI into your website.
The website embedding feature is a paid user feature. Therefore, only users with starter subscriptions and above can use this feature.
Step 1: Create an AI application
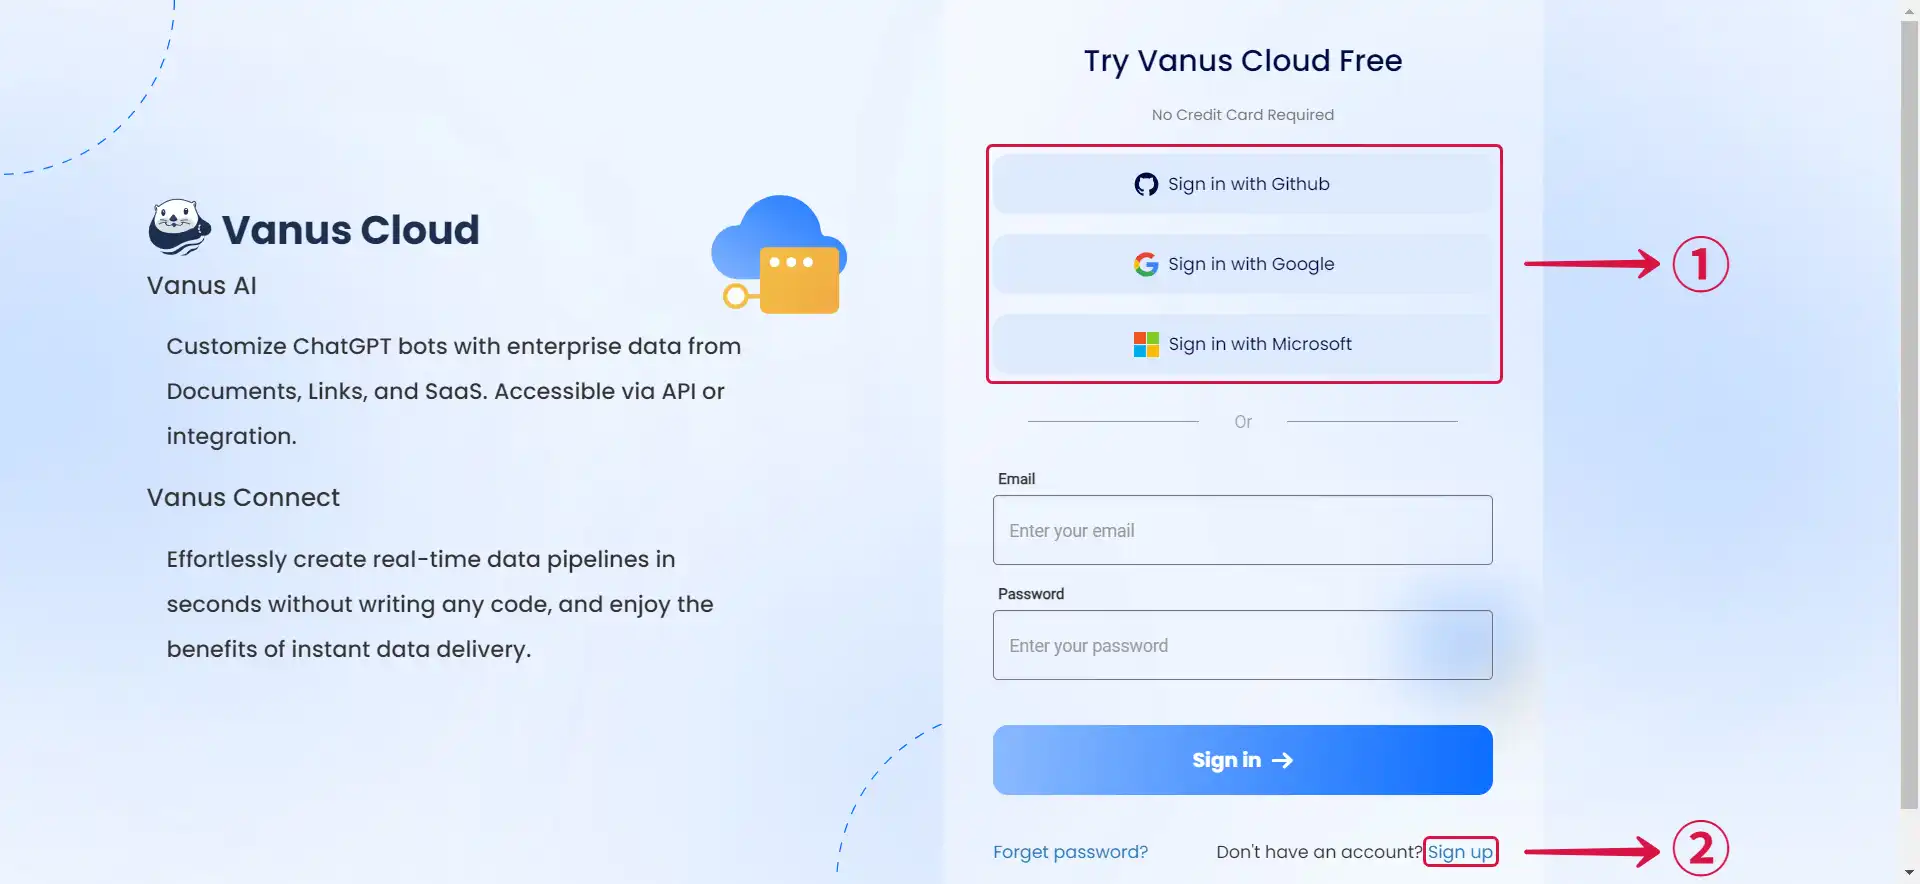
- Navigate to Vanus AI and sign in with Github, Google, Microsoft Account① or click Sign up②.
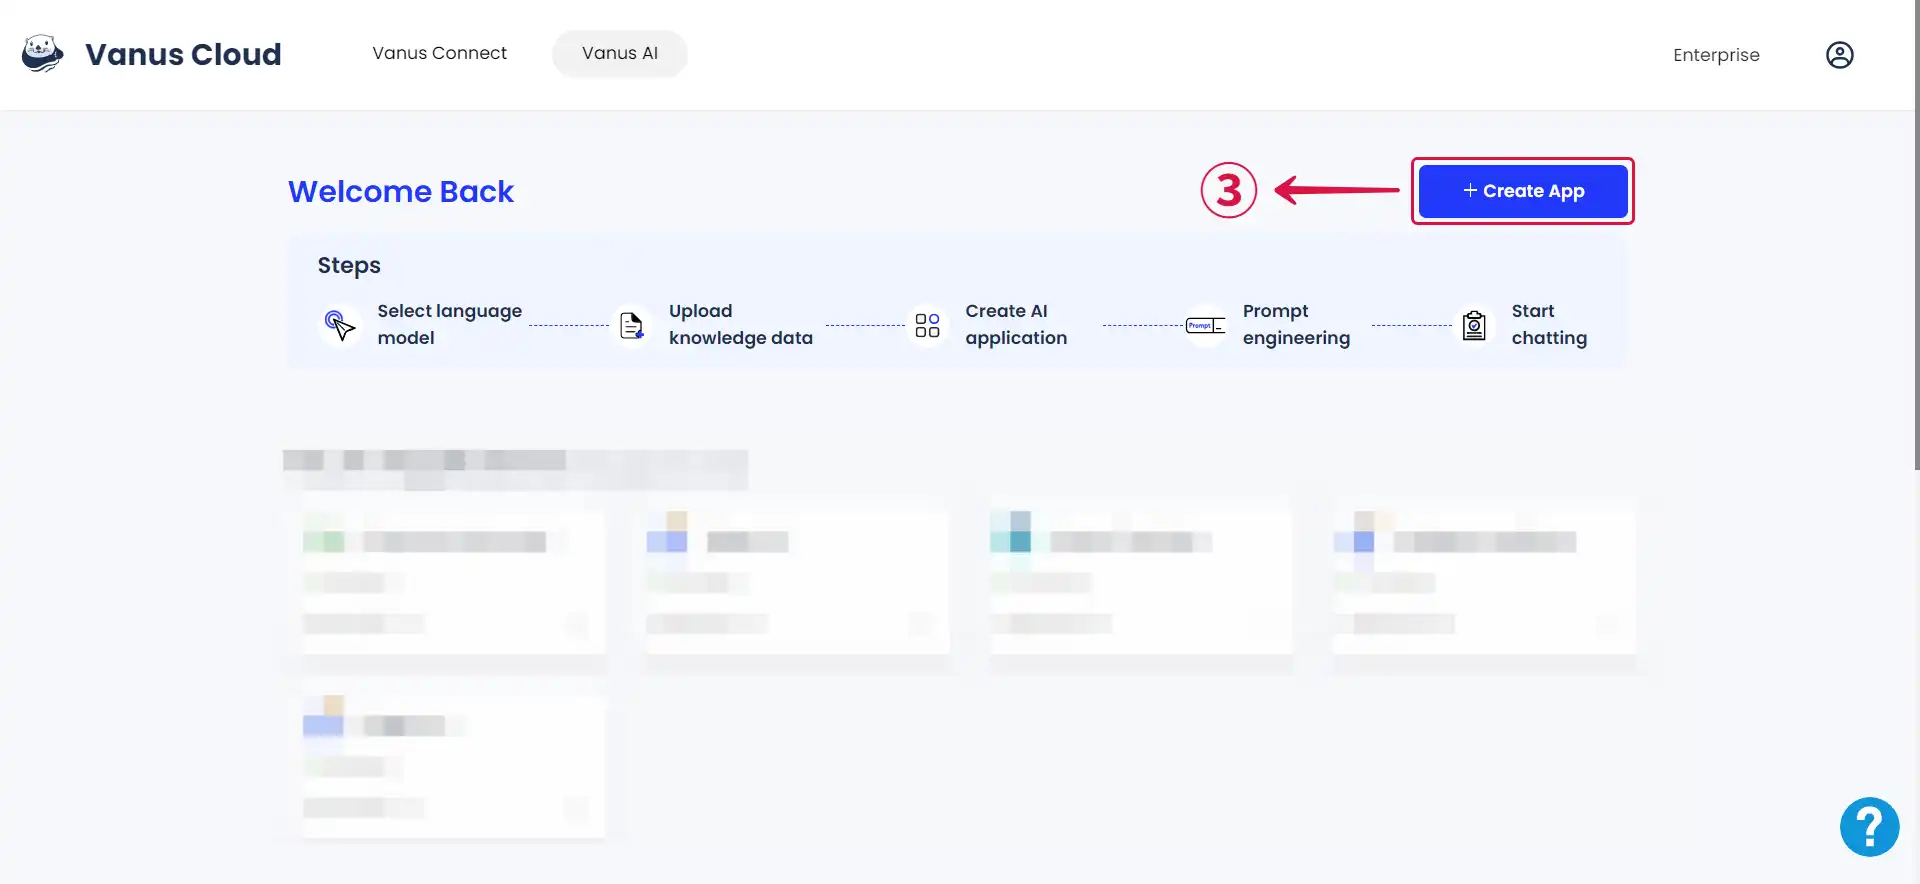
- Initiate a new AI App by hitting the Create App③ button.
- Input an App Name④, select an App Model⑤, upload to the Knowledge Base⑥, then click Create⑦.
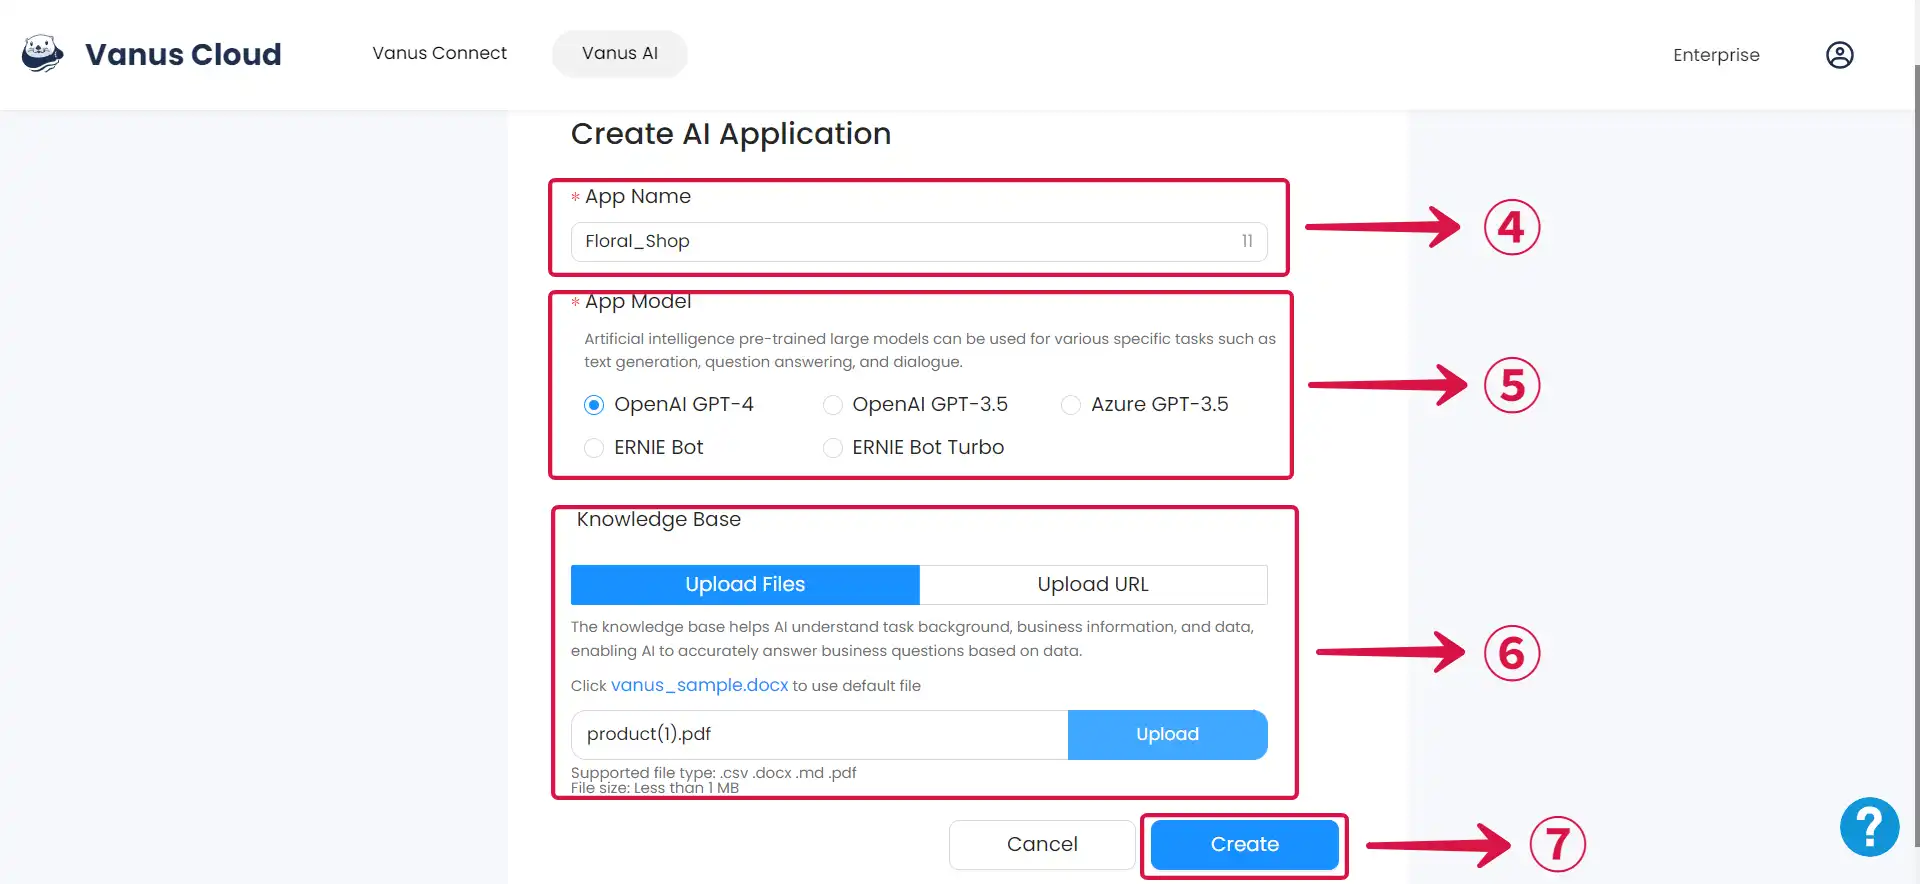
If you find yourself uncertain about which app model to select, please refer to the Large Language Models (LLM) Documentation for clear guidance on choosing the most suitable LLM for your requirements.
Step 2: Website Embedding
- Navigate to the Knowledge Base①.
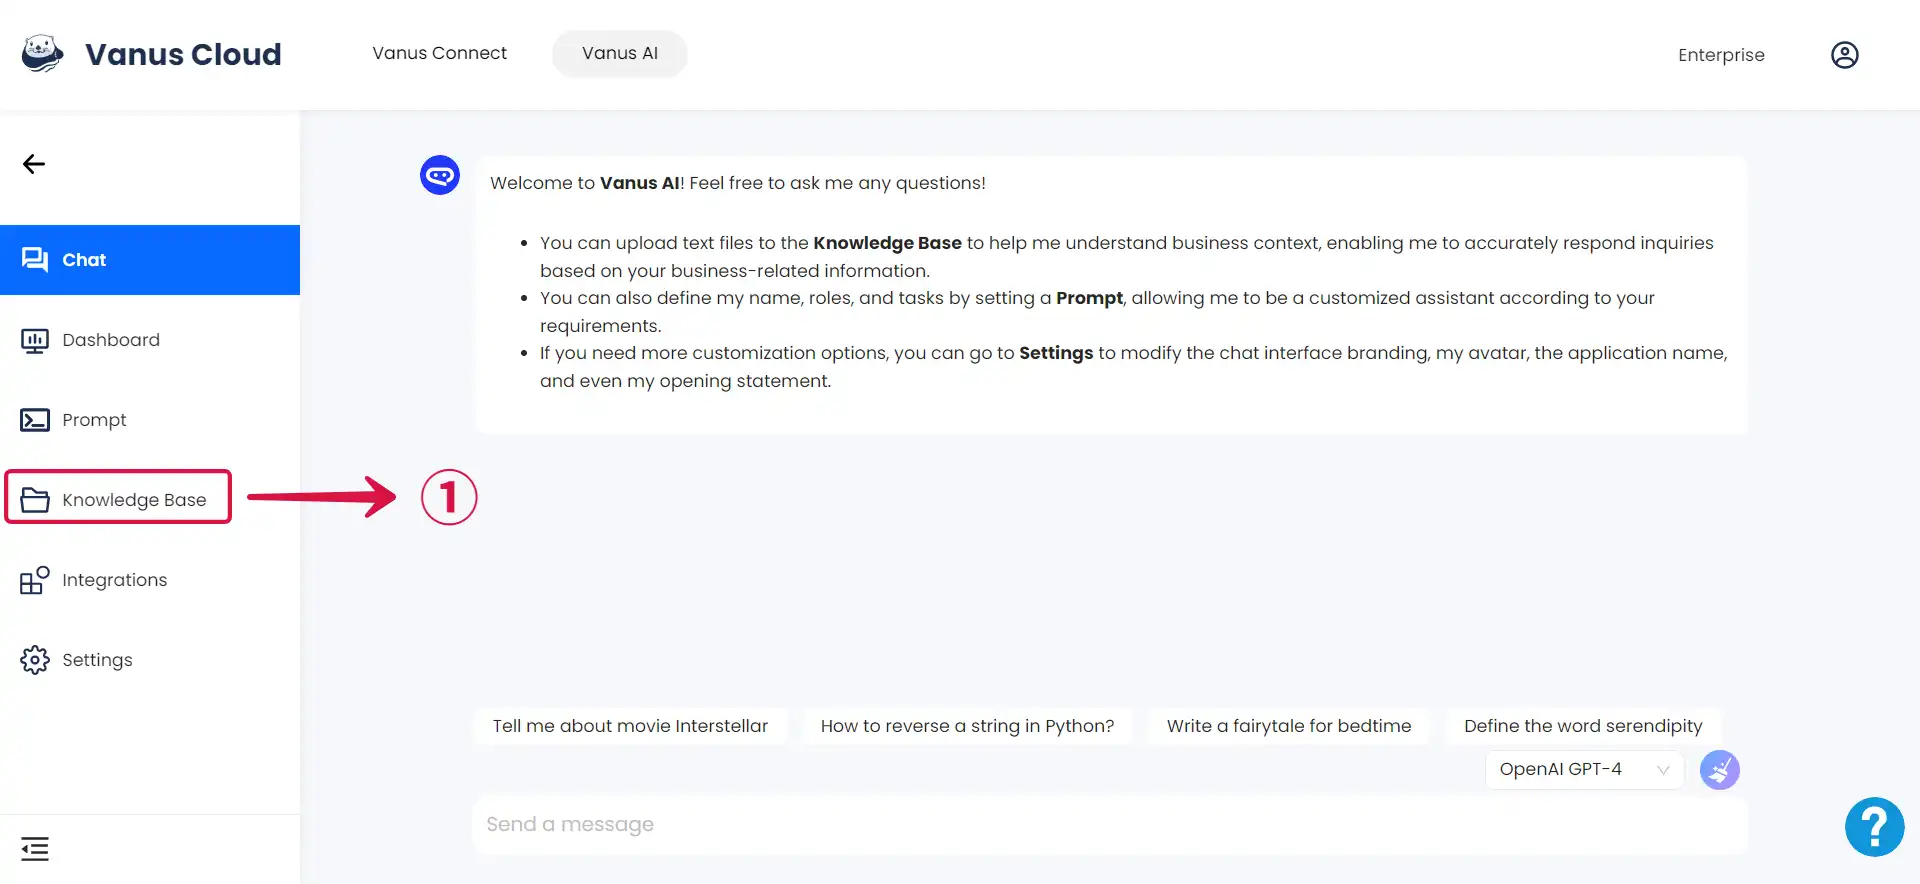
- Click the Add② button if you have additional content to upload.
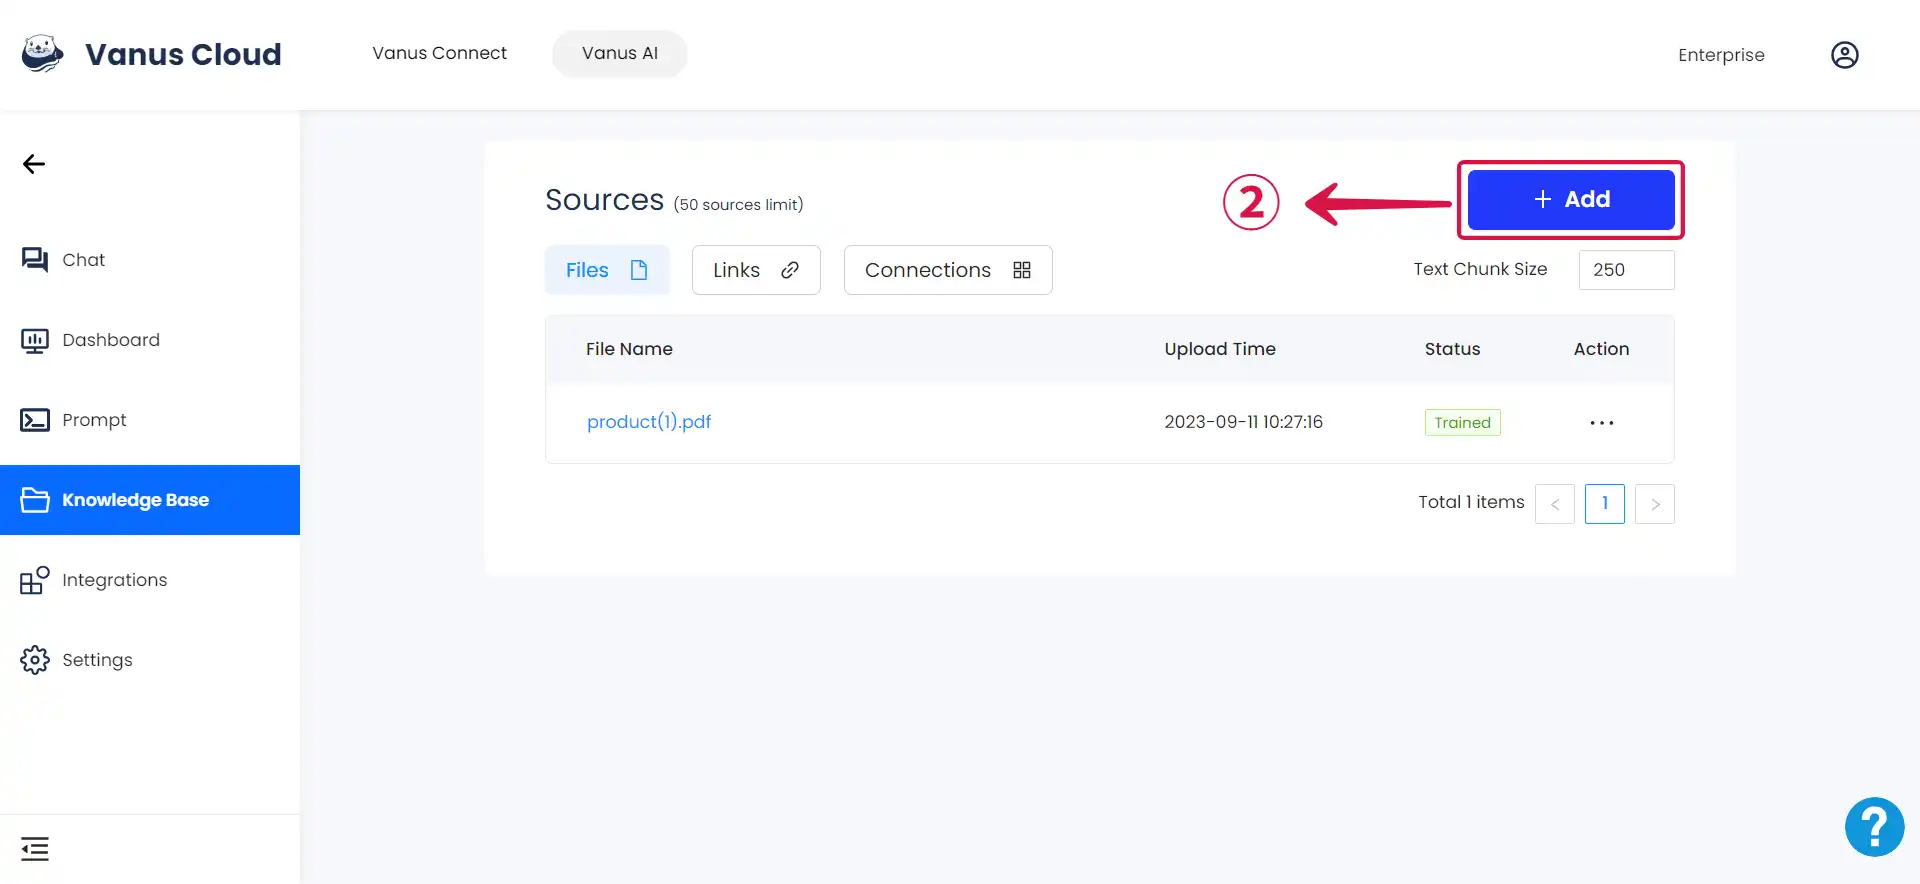
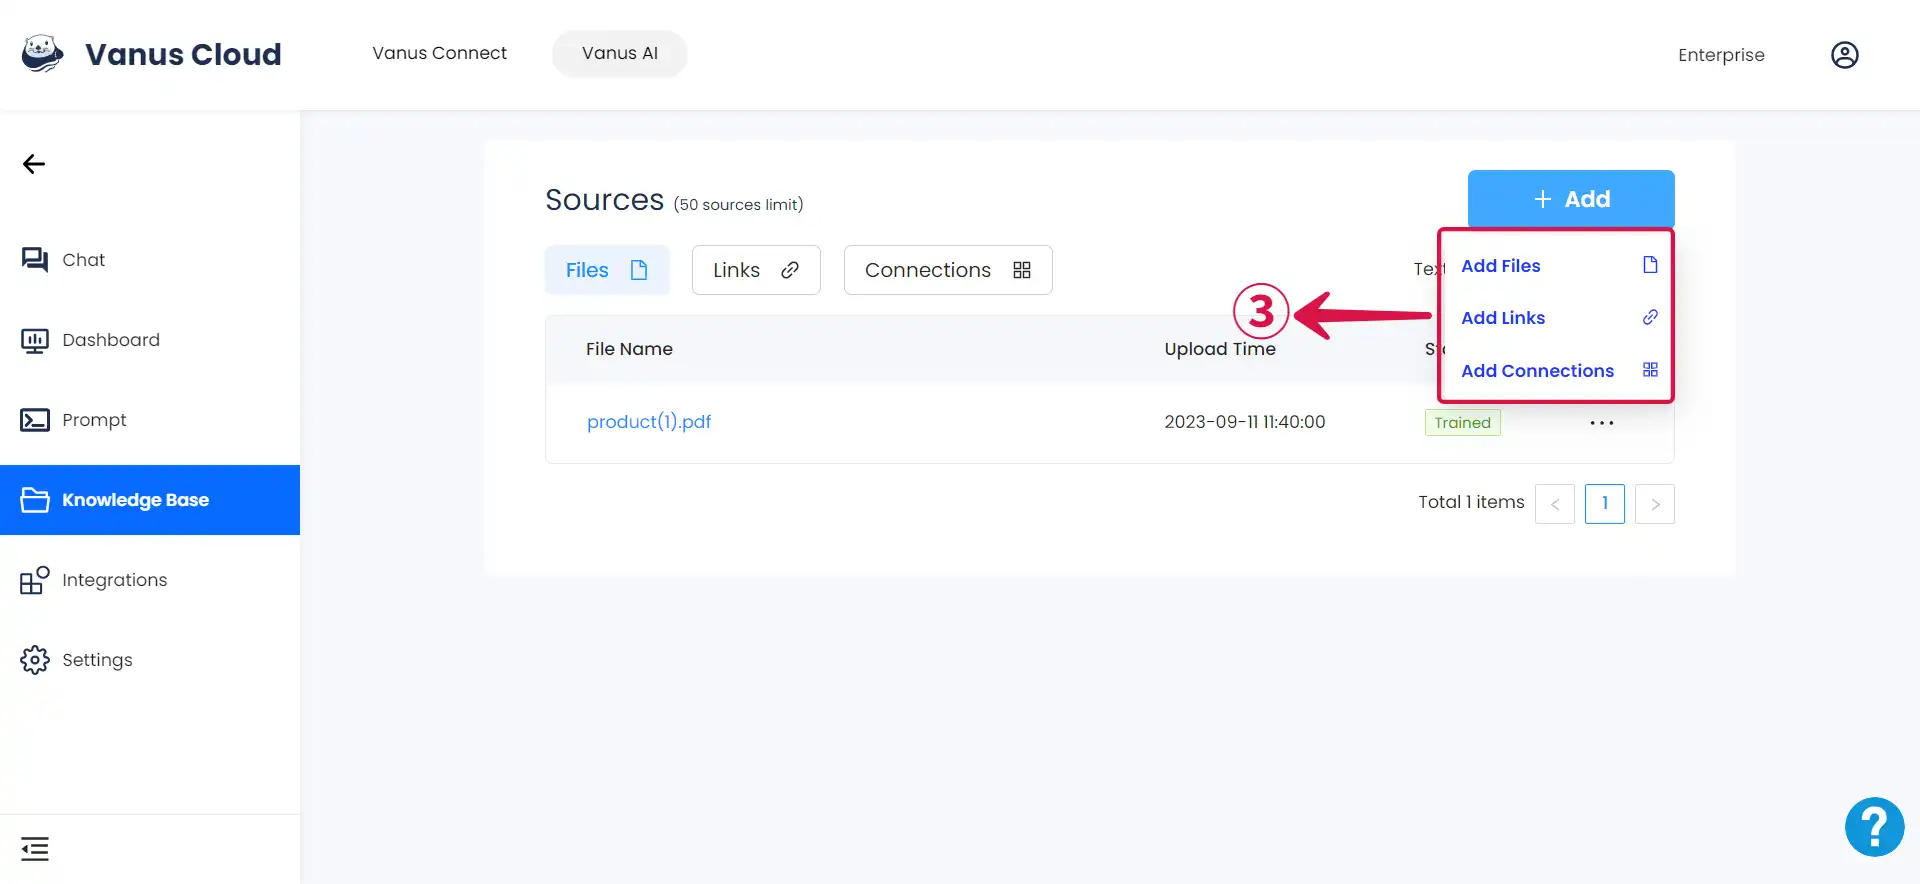
- Select the option that matches the source you want to add, whether it's files, links, or connections③.
For comprehensive guidance on configuring your knowledge base, kindly refer to the Knowledge Base Documentation. Additionally, to enhance the accuracy of your results through data cleaning, explore the Data Cleaning Documentation.
- In the Settings④ tab, You can change your App logo⑤, App Name⑥, and App Greeting⑦.
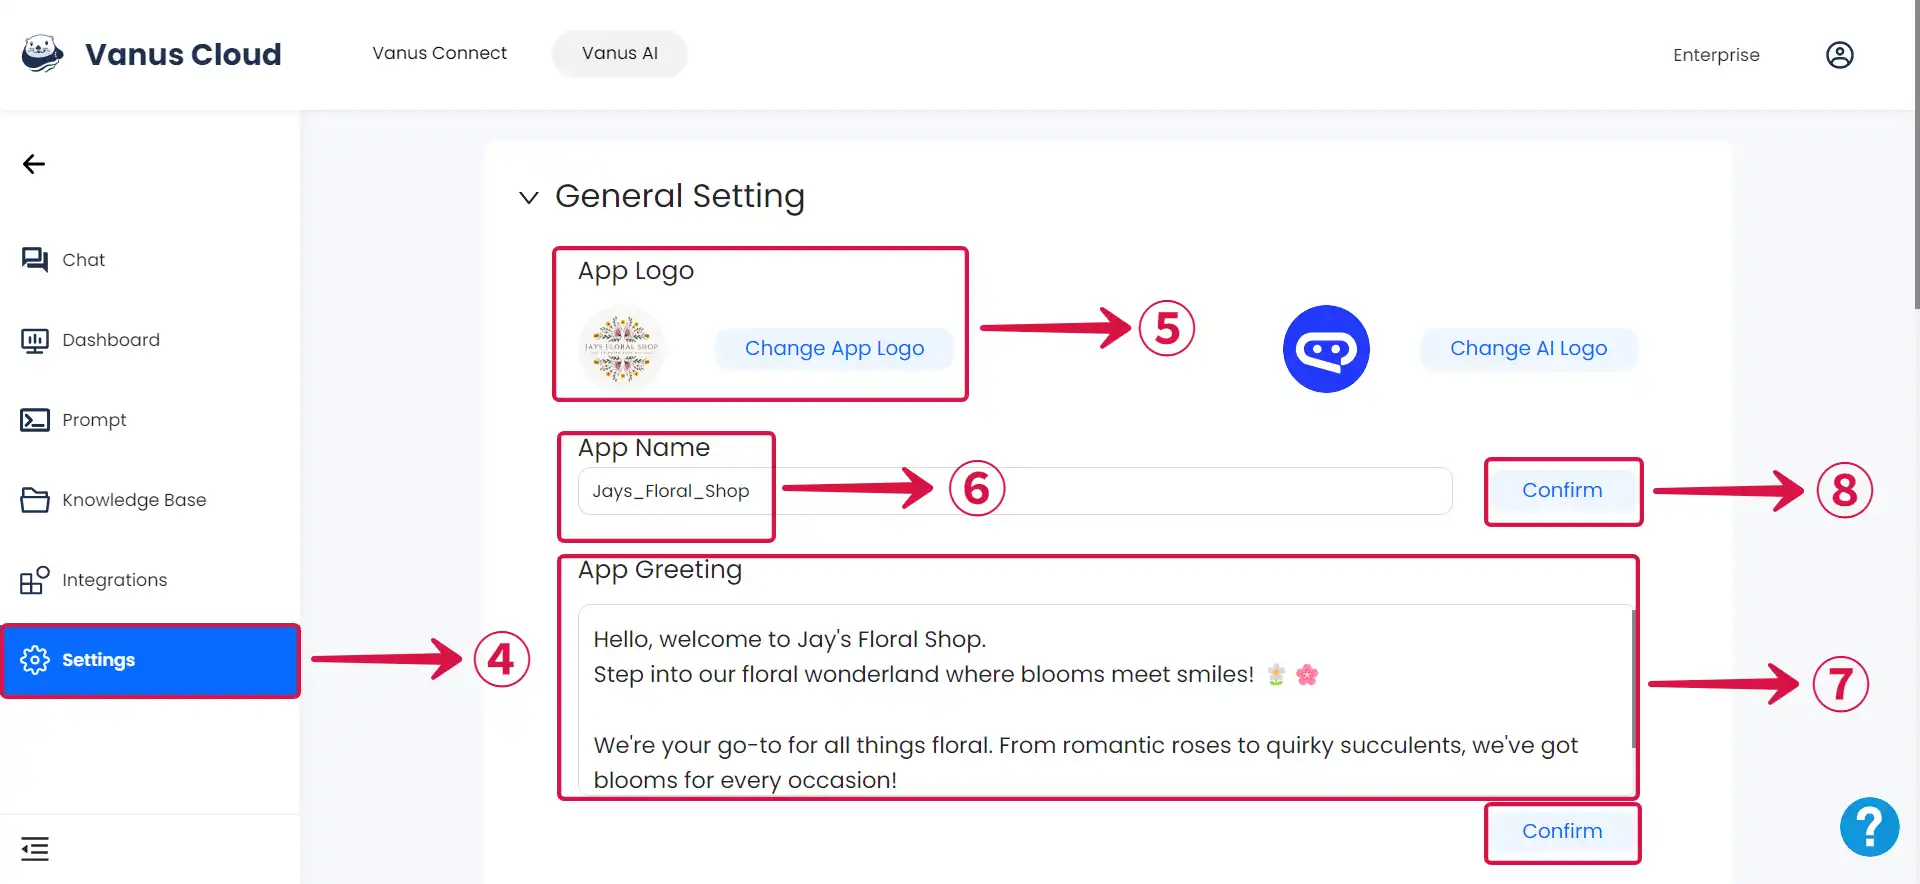
Remember to click Confirm⑧ after making any changes. If you don't, your settings won't be saved.
- Set your preferred Quick Question⑨, and then click confirm⑩.
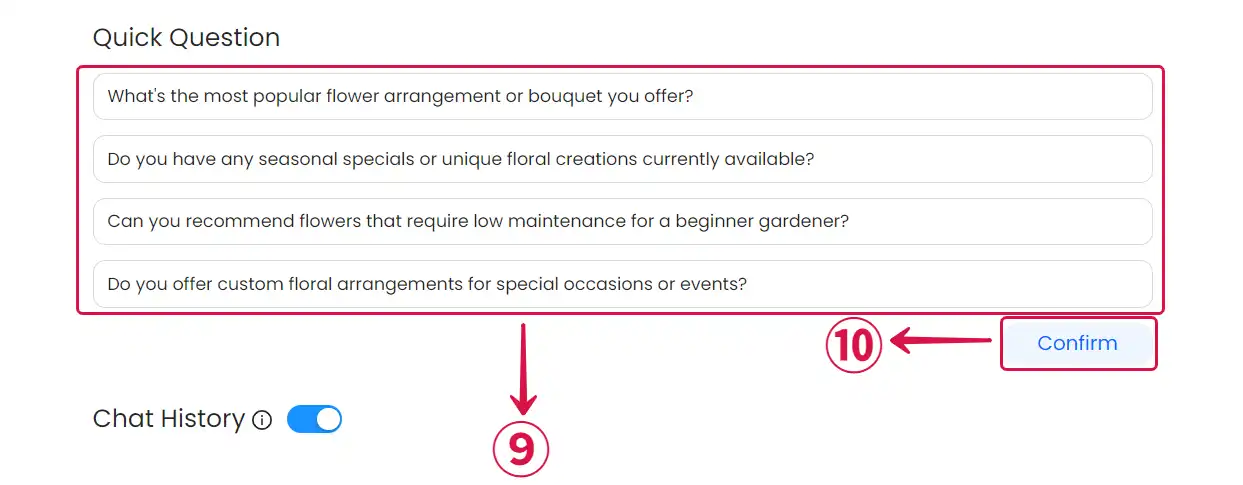
For more detailed instructions on configuring your AI Application correctly, please refer to the App Settings Documentation.
- Go to the Dashboard⑪ page and copy the Code in Method 2⑫.
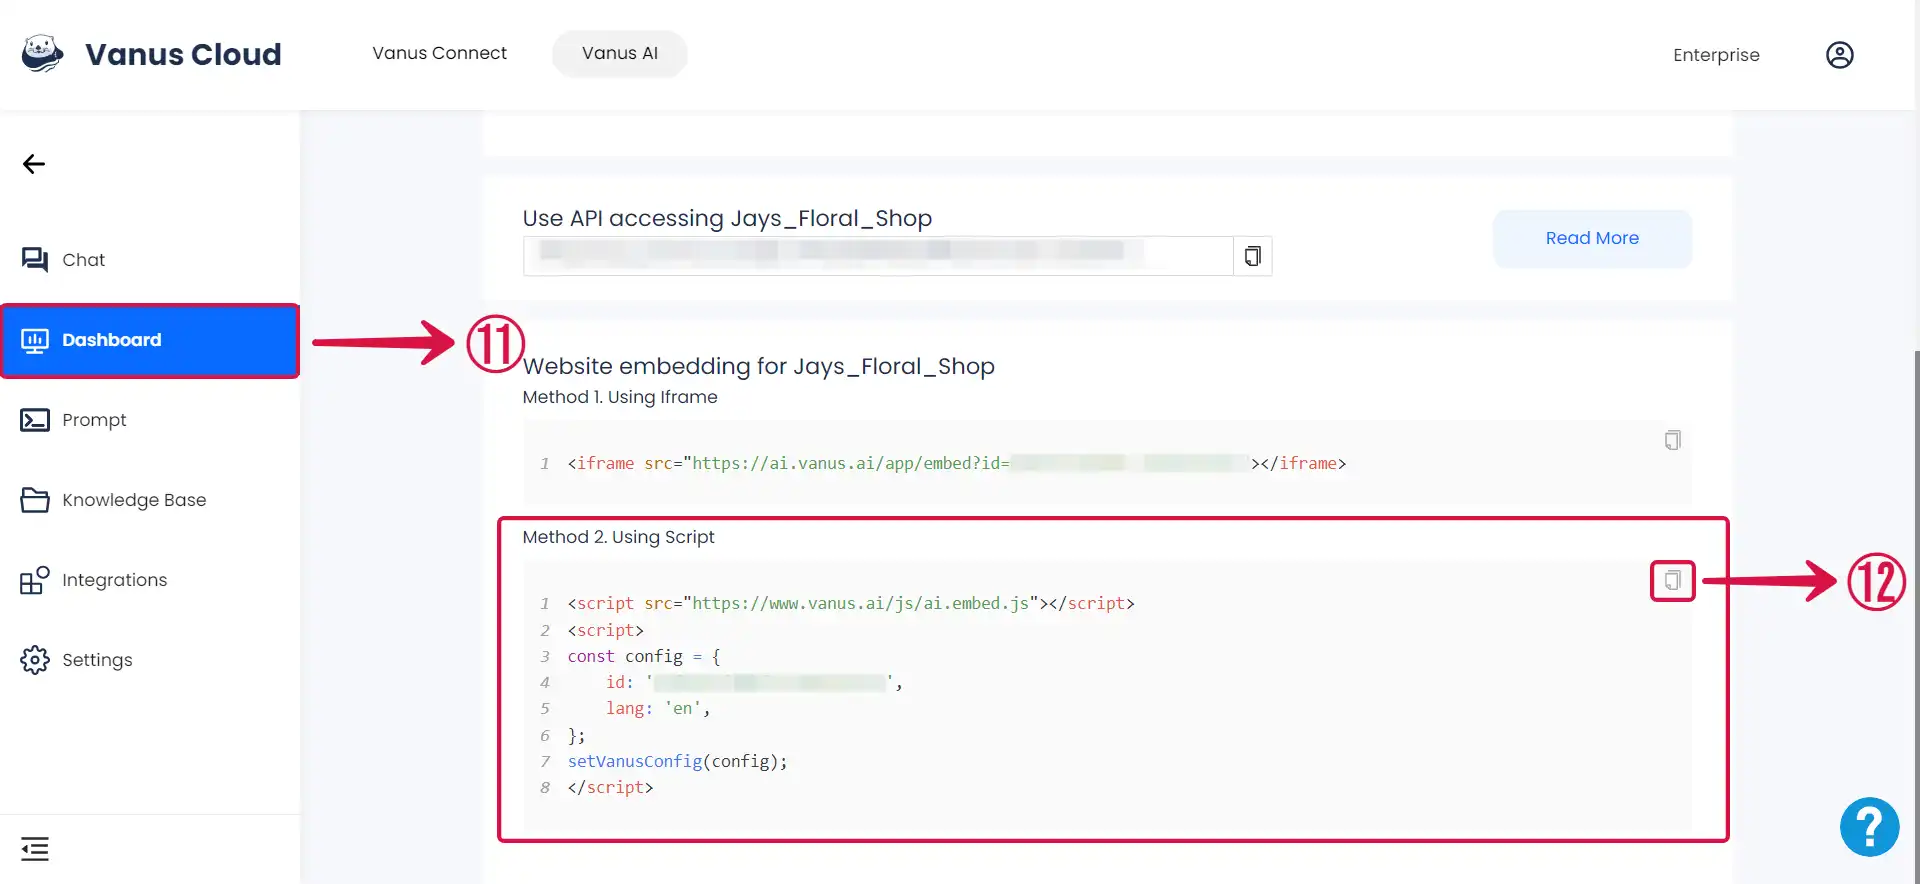
- Insert the code within the <head>⑬ tag of your webpage.

Feel free to place it on multiple pages where you want the AI visible.
Step 3: Using The AI on Your Website
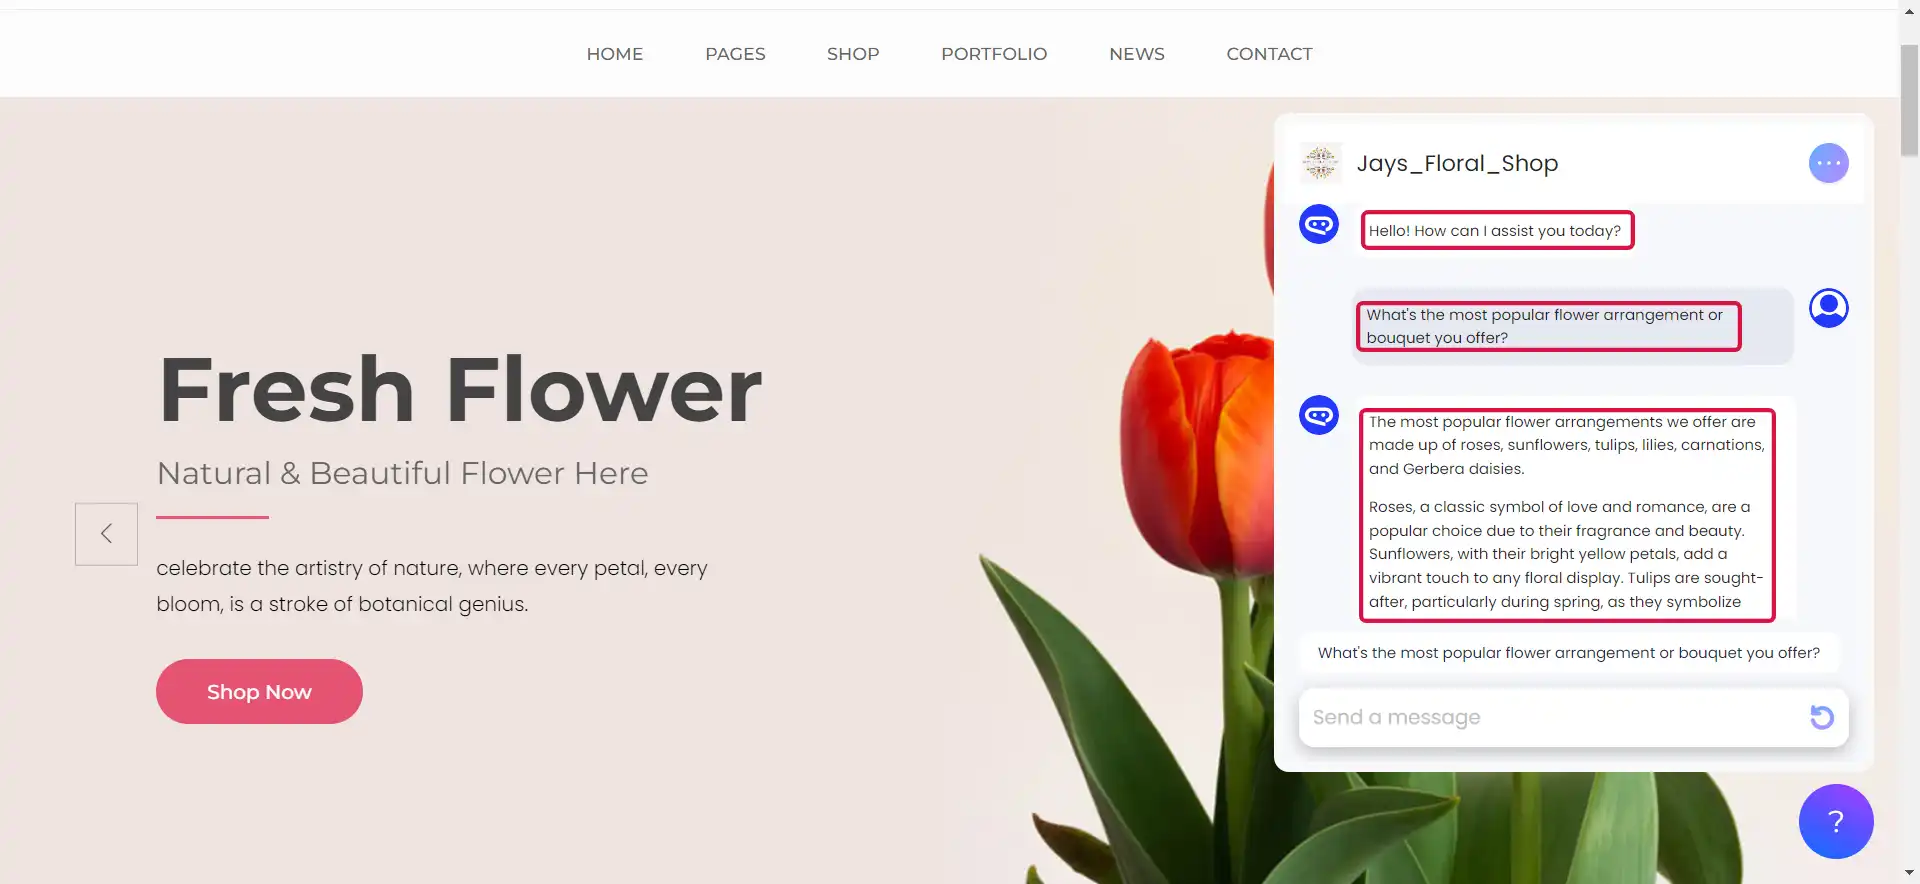
Once you’ve inserted the code into the website’s head tag, you can observe the AI on the integrated page and start interacting with it.
- Click on the help icon①.
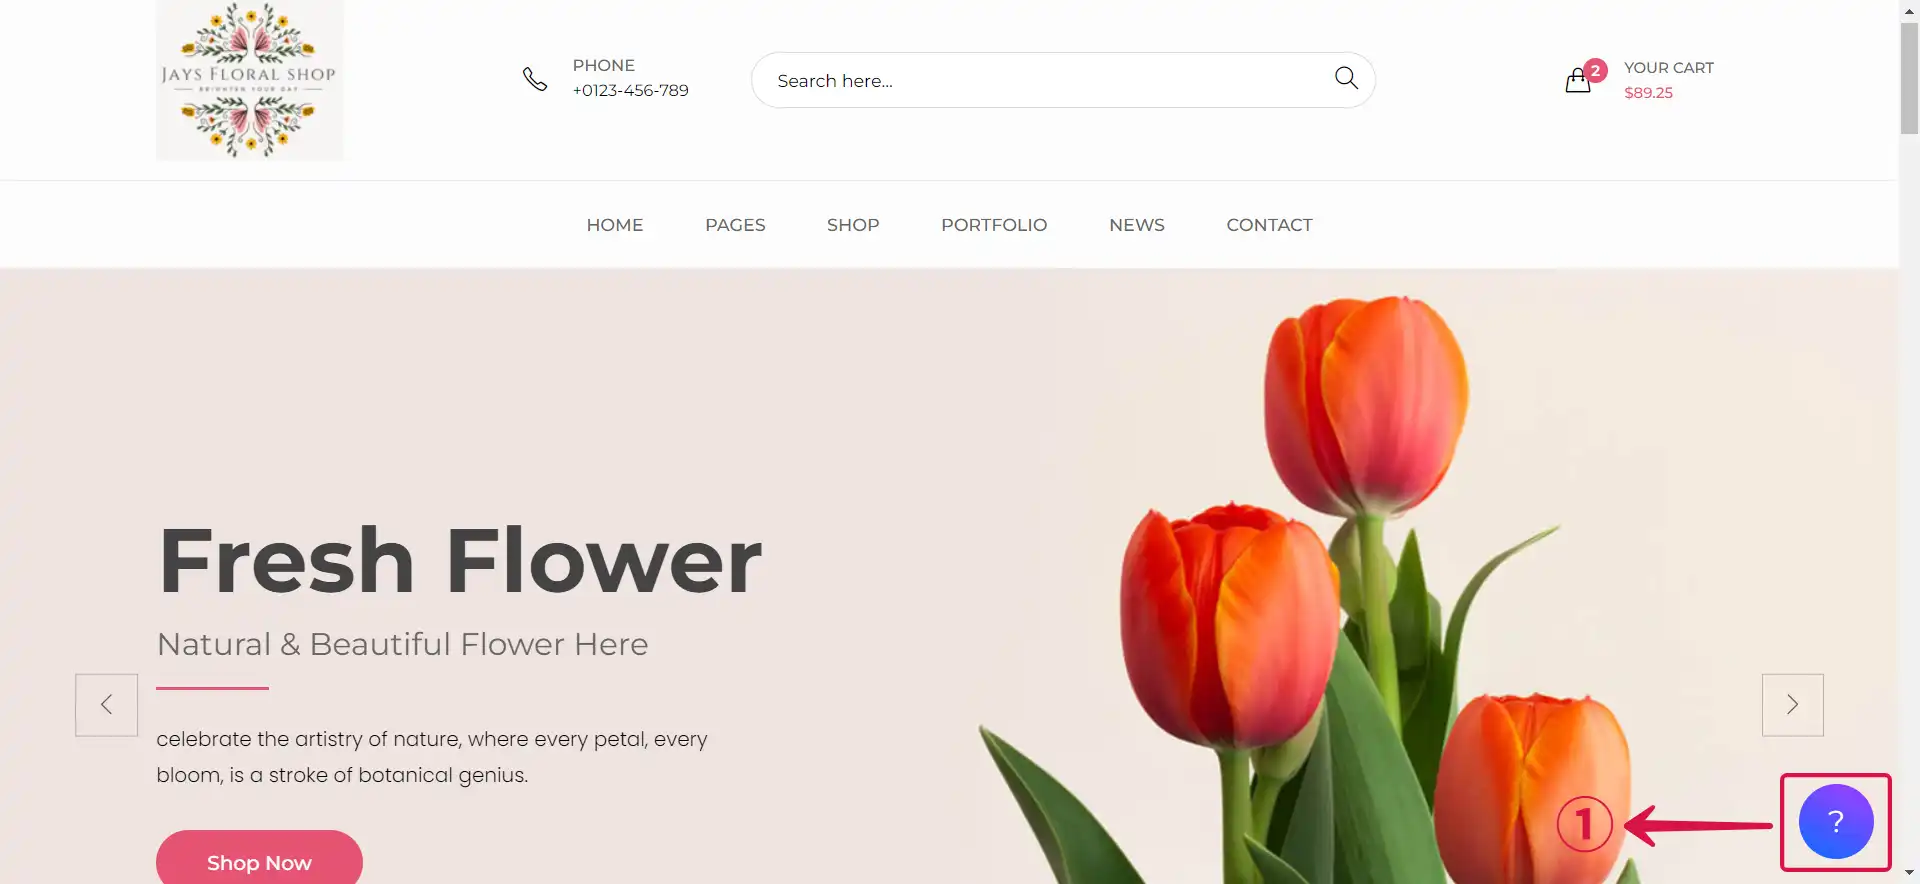
- Interact with the AI.
