Create an AI Application
This documentation will teach you how to create an AI Application on Vanus AI.
Step 1: Creating Your Application
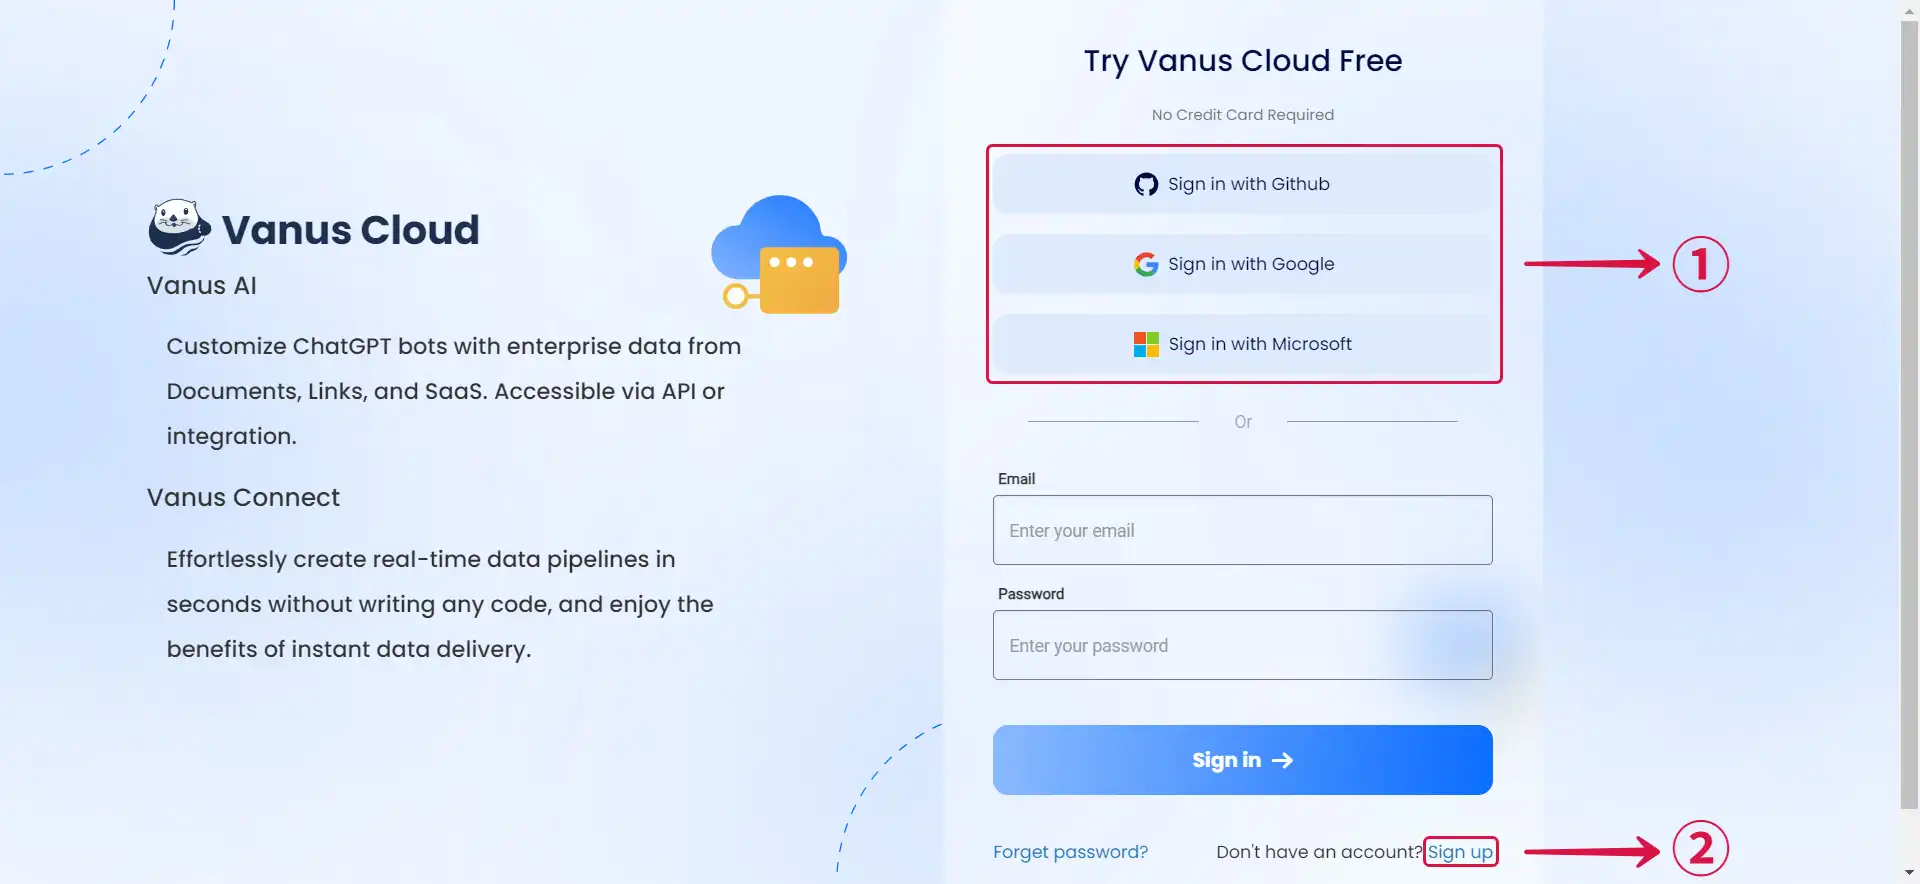
- Navigate to Vanus AI and sign in with Github, Google, Microsoft Account① or click Sign up②.
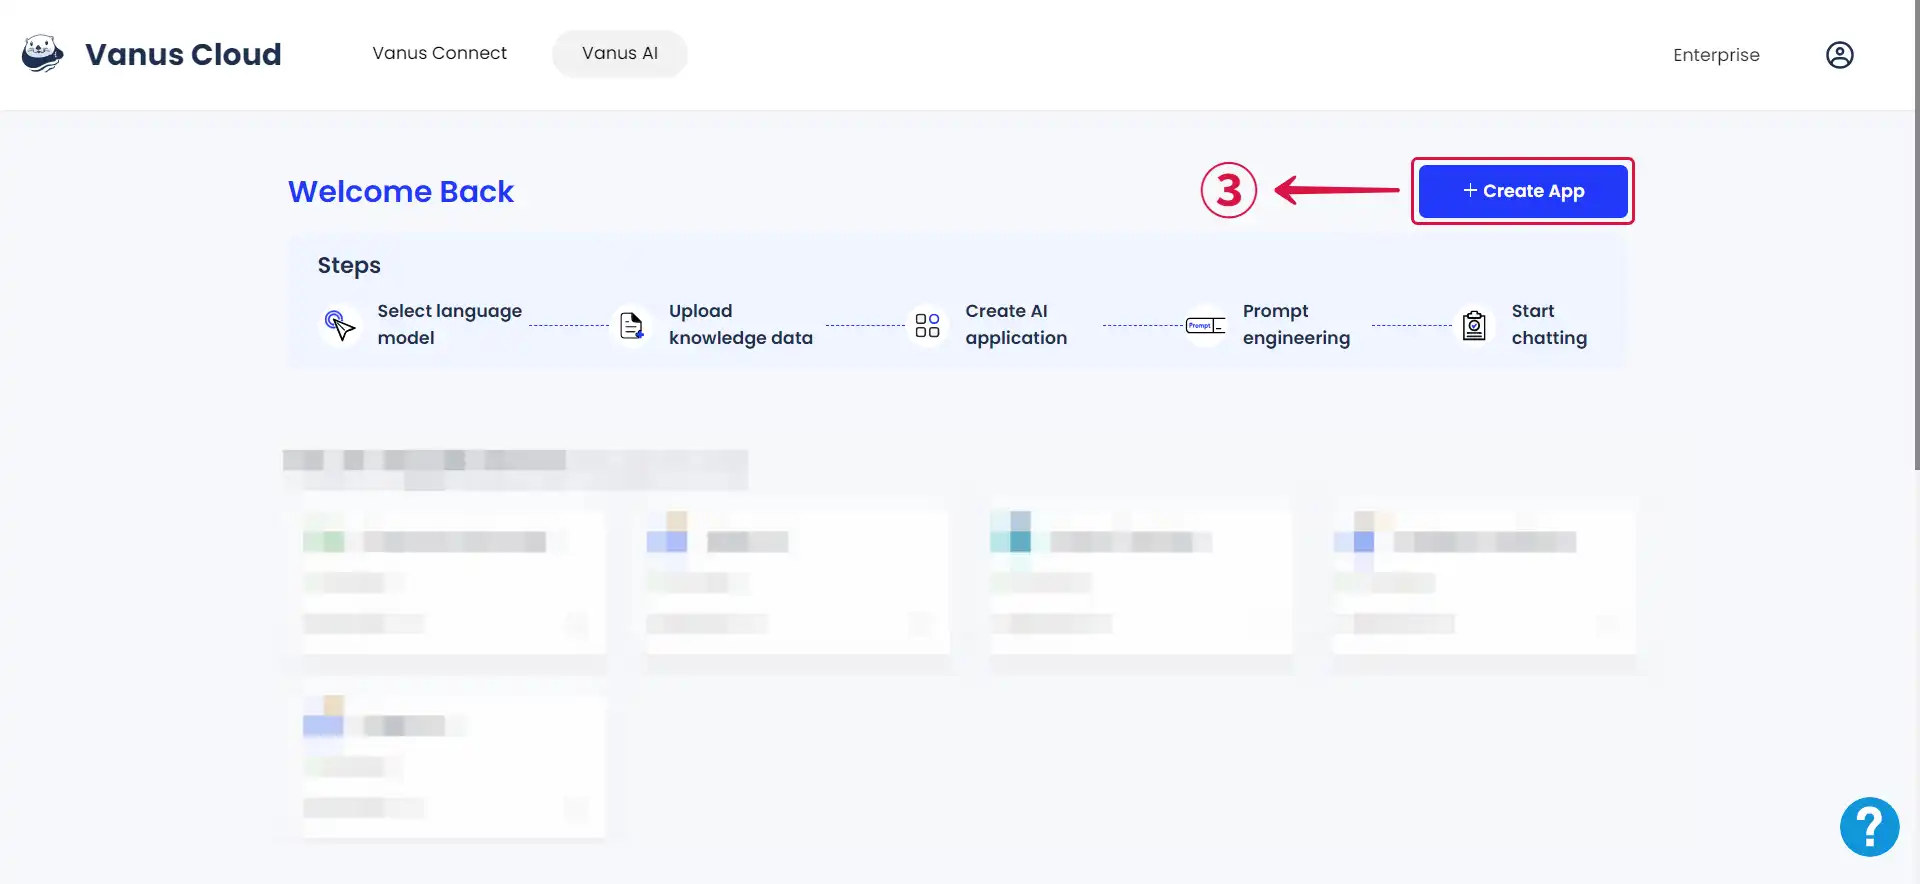
- Initiate a new AI App by hitting the Create App③ button.
- Input an App Name④, select an App Model⑤, upload to the Knowledge Base⑥, then click Create⑦.
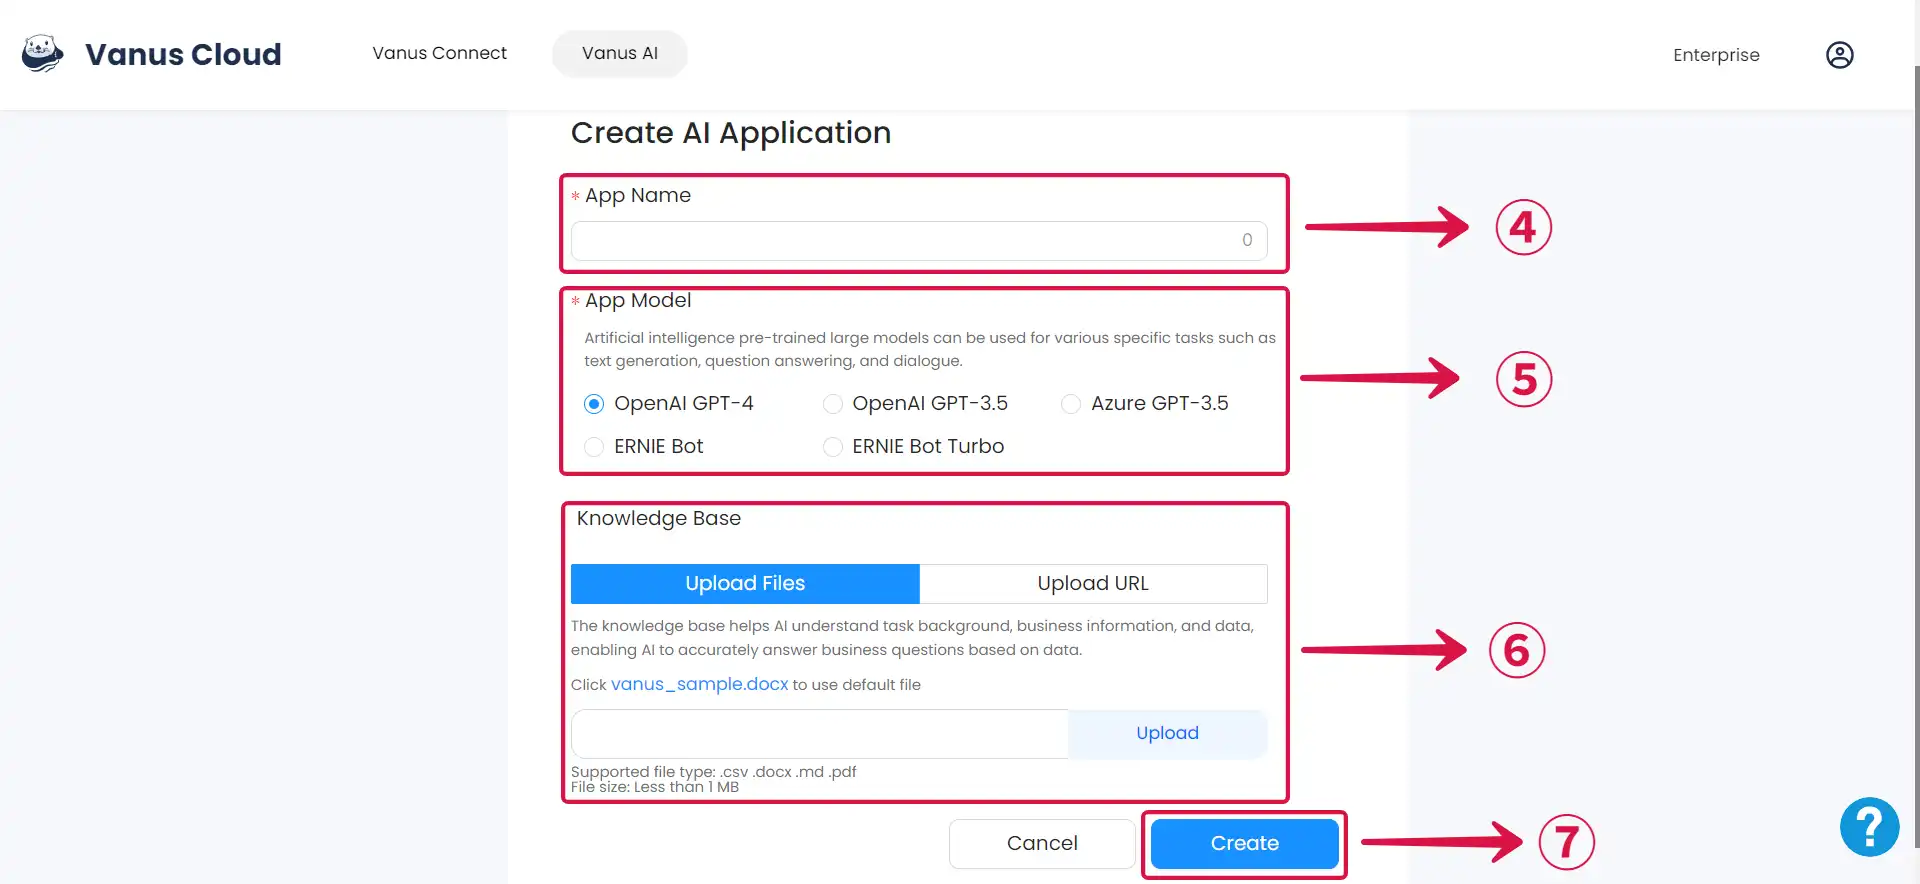
If you find yourself uncertain about which app model to select, please refer to the Large Language Models (LLM) Documentation for clear guidance on choosing the most suitable LLM for your requirements.
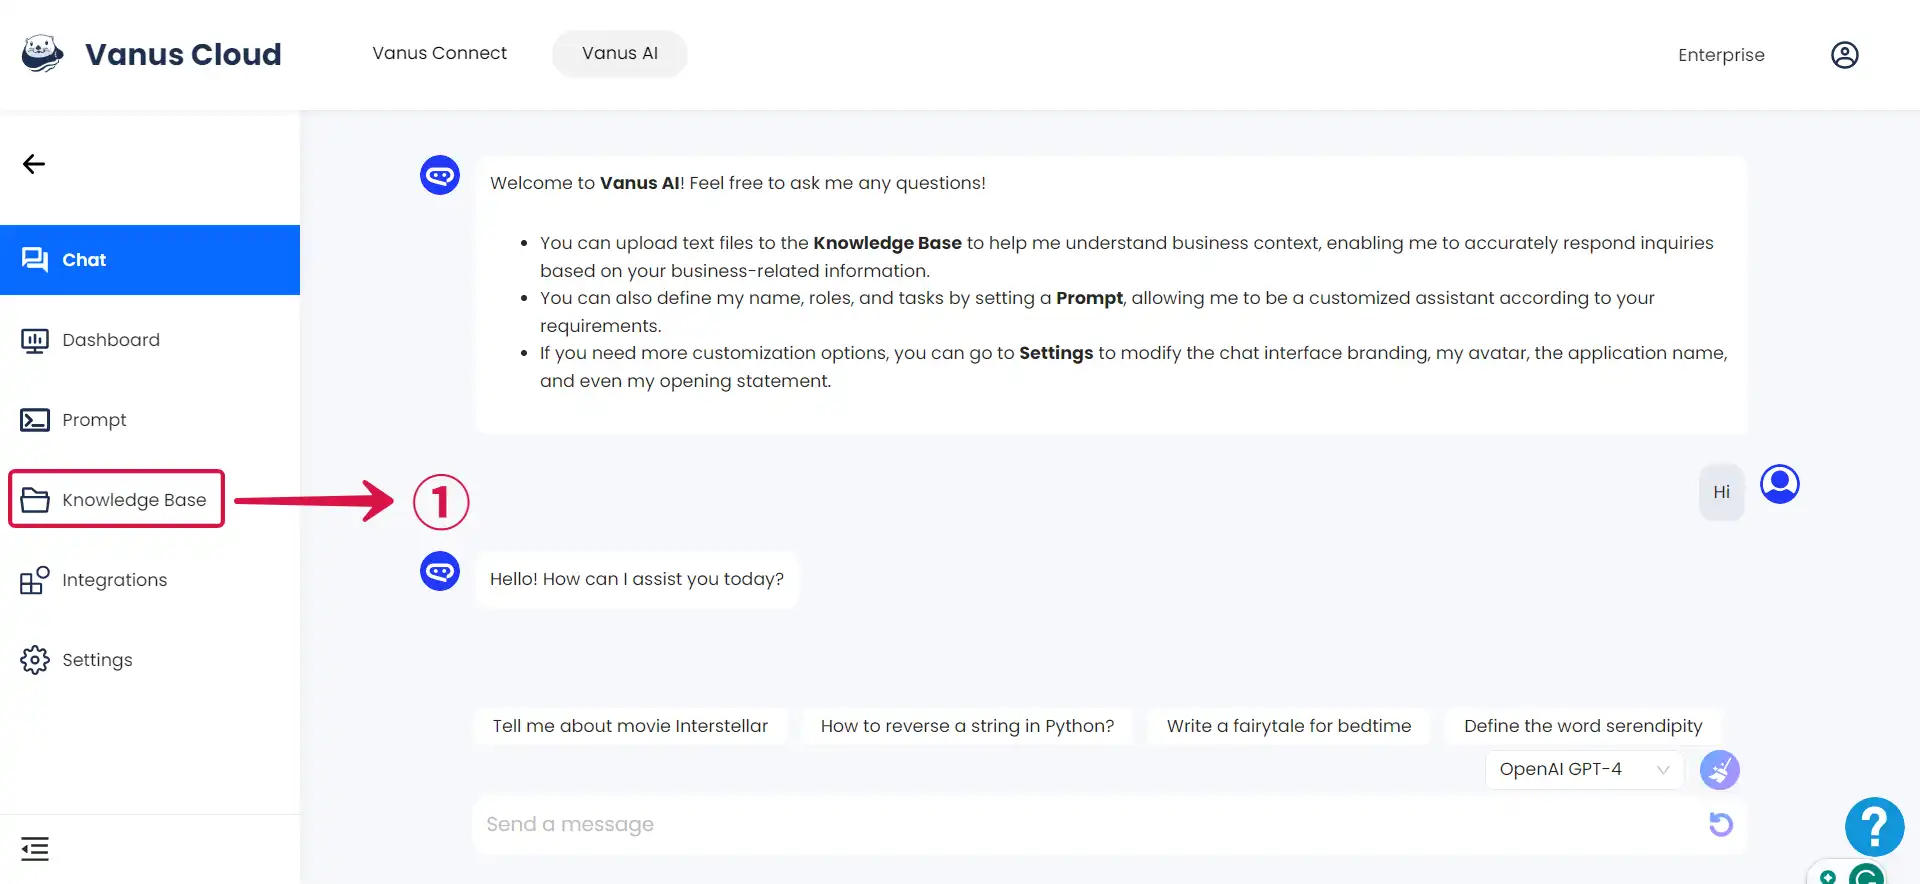
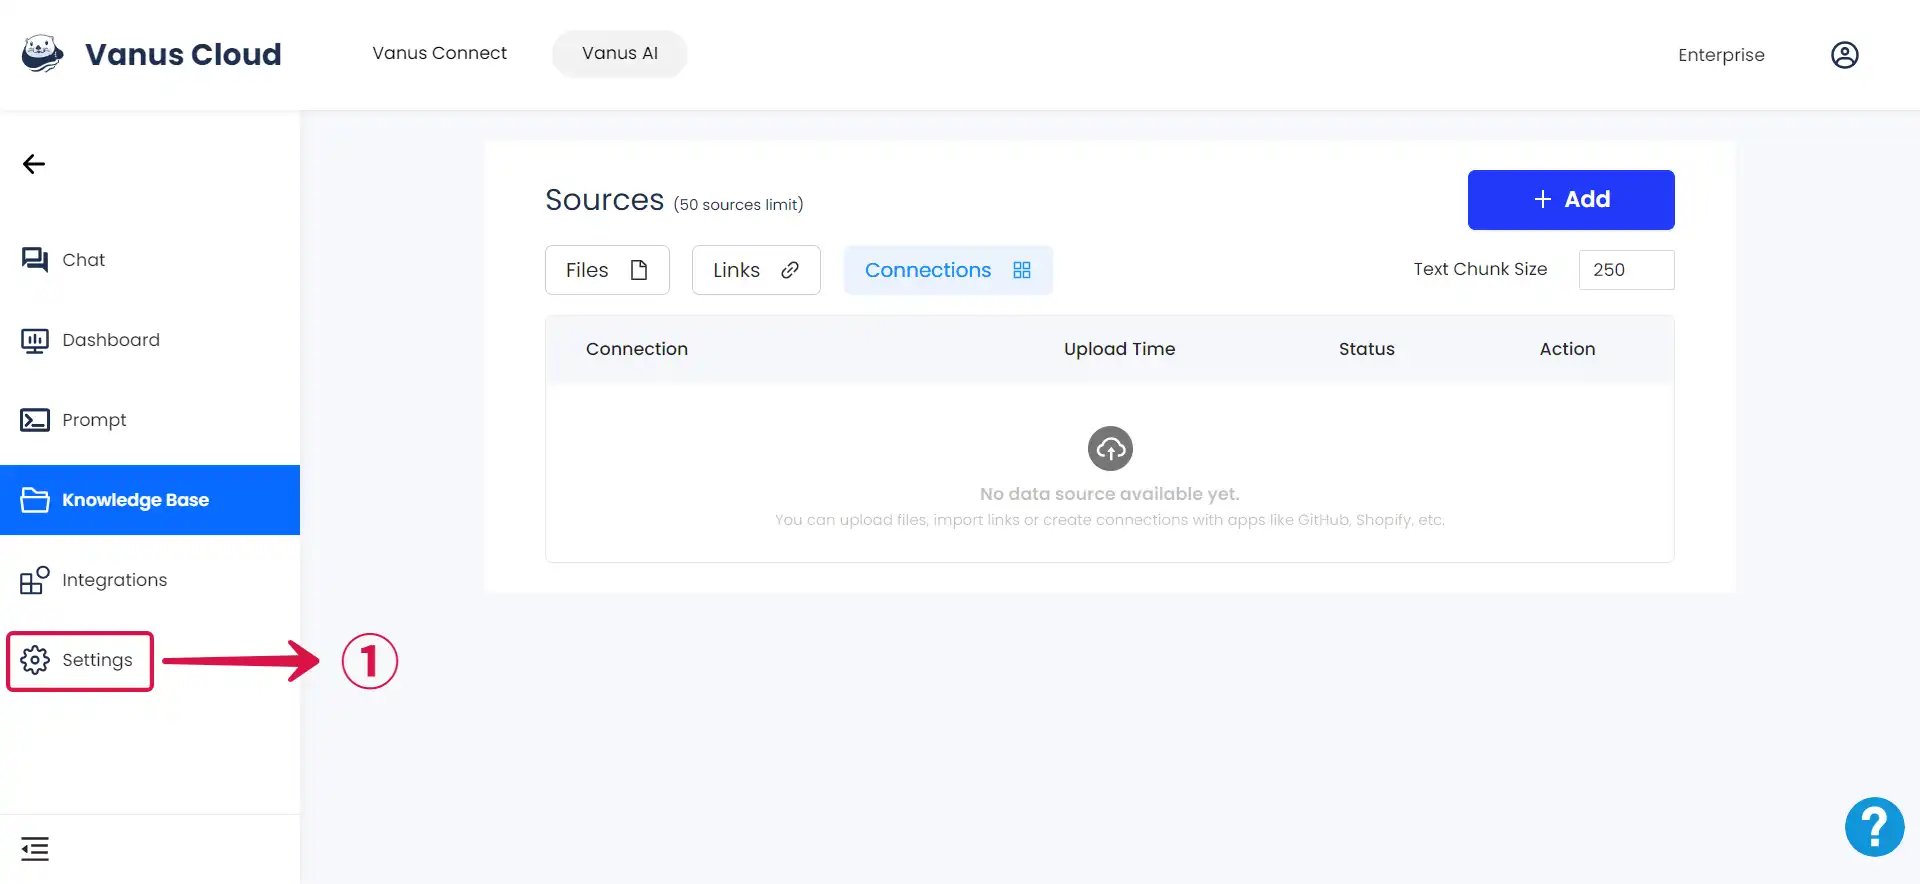
Step 2: Upload Data to the Knowledge Base
The knowledge base is where you input data for your AI Application to learn from. Vanus AI allows users to use their customized data as a reference for the model.
- Click on the Knowledge Base① tab to access the Knowledge Base page.
- Click the Add② button if you have additional content to upload.

For comprehensive guidance on configuring your knowledge base, kindly refer to the Knowledge Base Documentation. Additionally, to enhance the accuracy of your results through data cleaning, explore the Data Cleaning Documentation.
Step 3: Settings
On the settings page, you can tailor your AI application's behavior and appearance to your brand's specifications. This includes customizing your App Logo, AI Logo, App Name, and App Greeting.
Additionally, you can input anticipated user questions in the Quick Question field.
Furthermore, you have the flexibility to adjust your App Model and configure your application's response behavior, while also specifying the relevance and quantity of information retrieved by the AI application.
- To access the settings page, simply click on the Settings① tab.
For more detailed instructions on configuring your AI Application correctly, please refer to the App Settings Documentation.
Step 4: Important Features
- Prompt: The prompt section allows you to instruct your AI Application on its behaviour and interaction style. Depending on your specific use case, you can establish a structured approach for your app's responses, along with other customization options.
Please refer to the Prompt Setting Documentation for a more comprehensive understanding of prompt configuration. Additionally, to optimize your prompts for optimal results, explore the documentation on Optimizing Your Prompt.
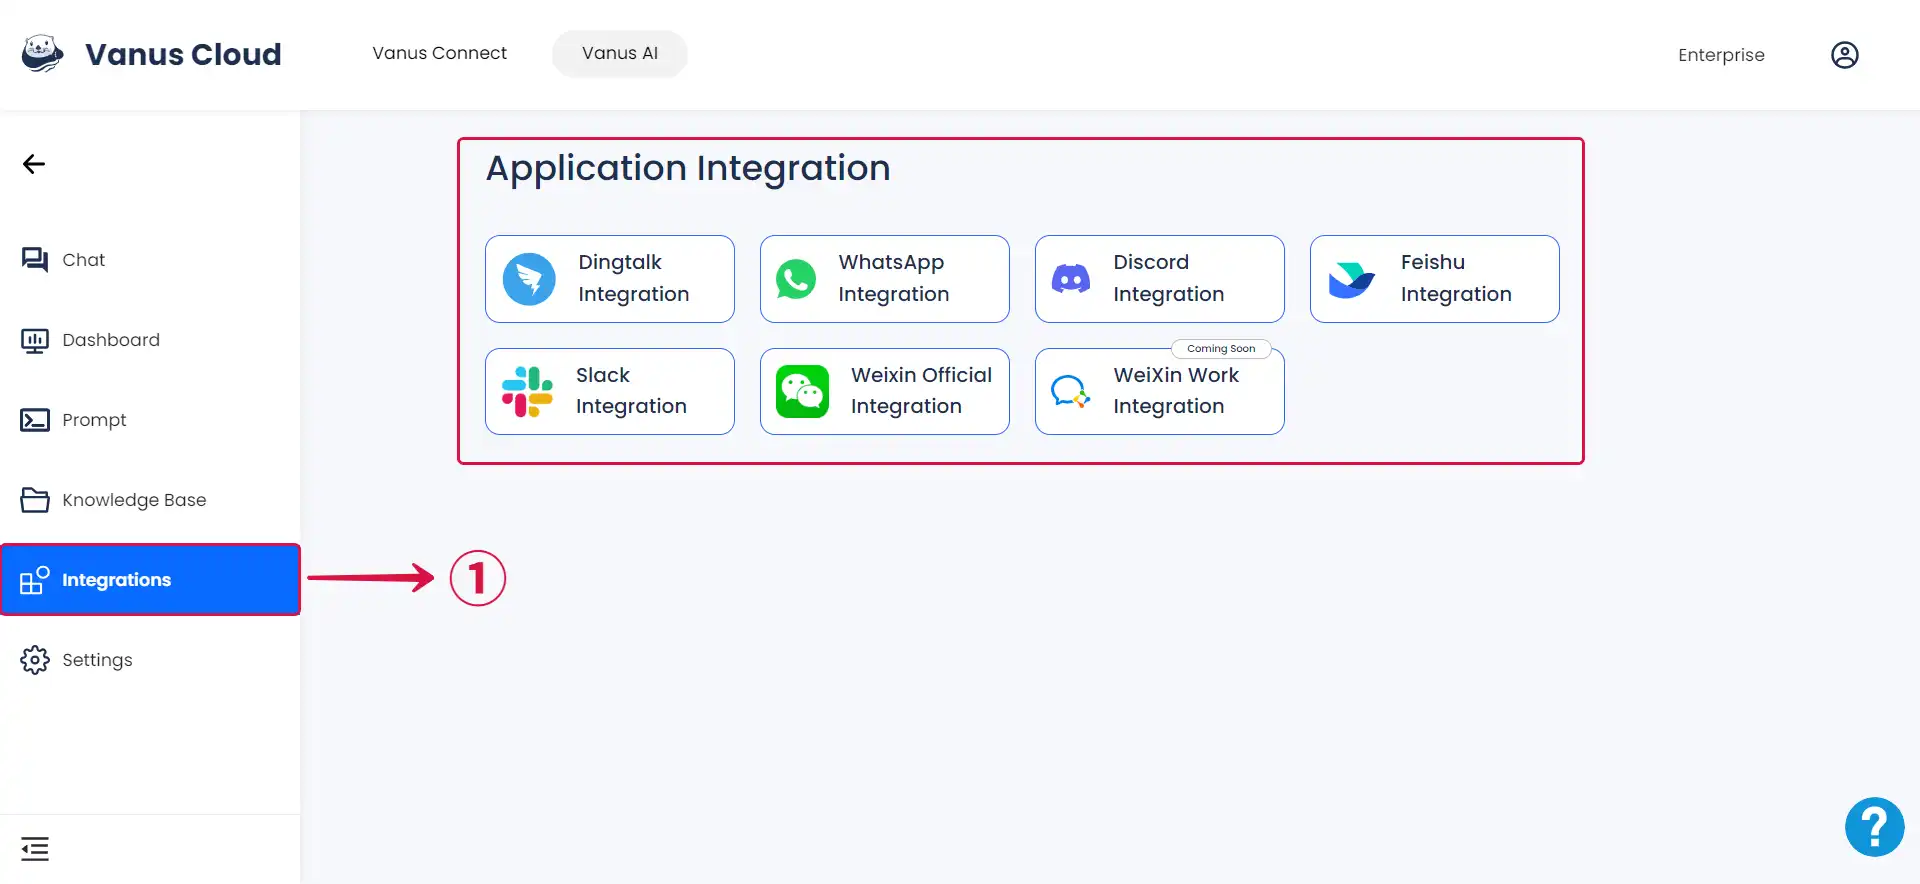
- Integrations: Integrate your AI Application with our presently supported Applications.
- Click on the Integrations① tab, and select the Application you wish to integrate with your AI Application.
For detailed instructions on how to integrate your AI Application with specific apps, please refer to the official Vanus Documentation page and check out the Integrations section of Vanus AI.
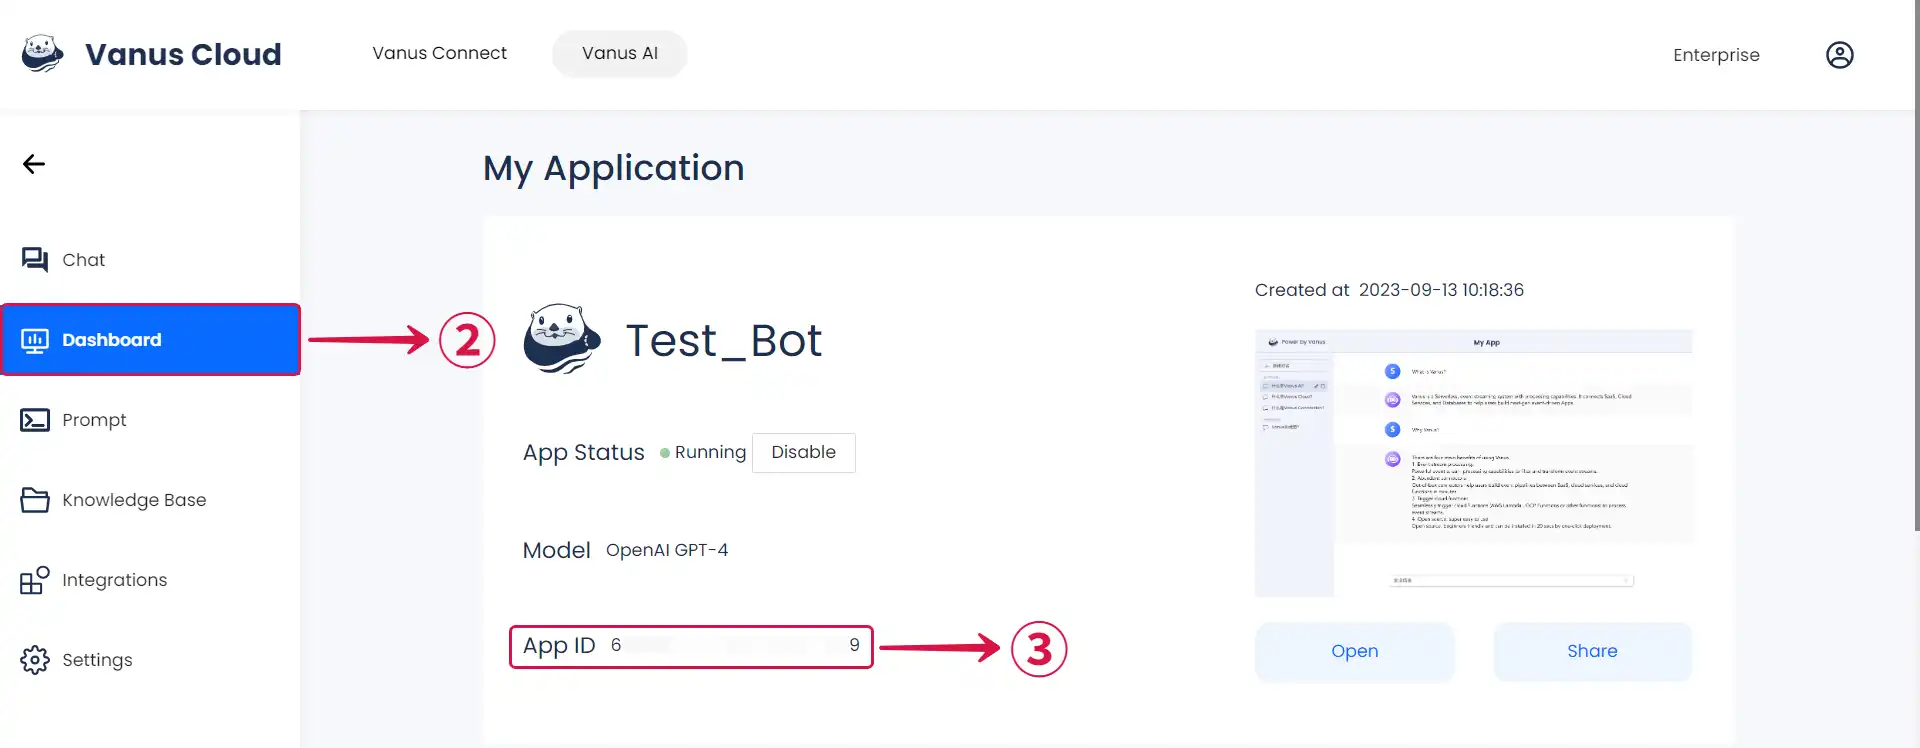
- Dashboard: This is where you obtain the information required to establish a connection between your AI Application and other applications or embed it into your website.
- To access the Dashboard page, simply click on the Dashboard② tab. Here, you'll be able to locate your App ID③ along with other relevant information.
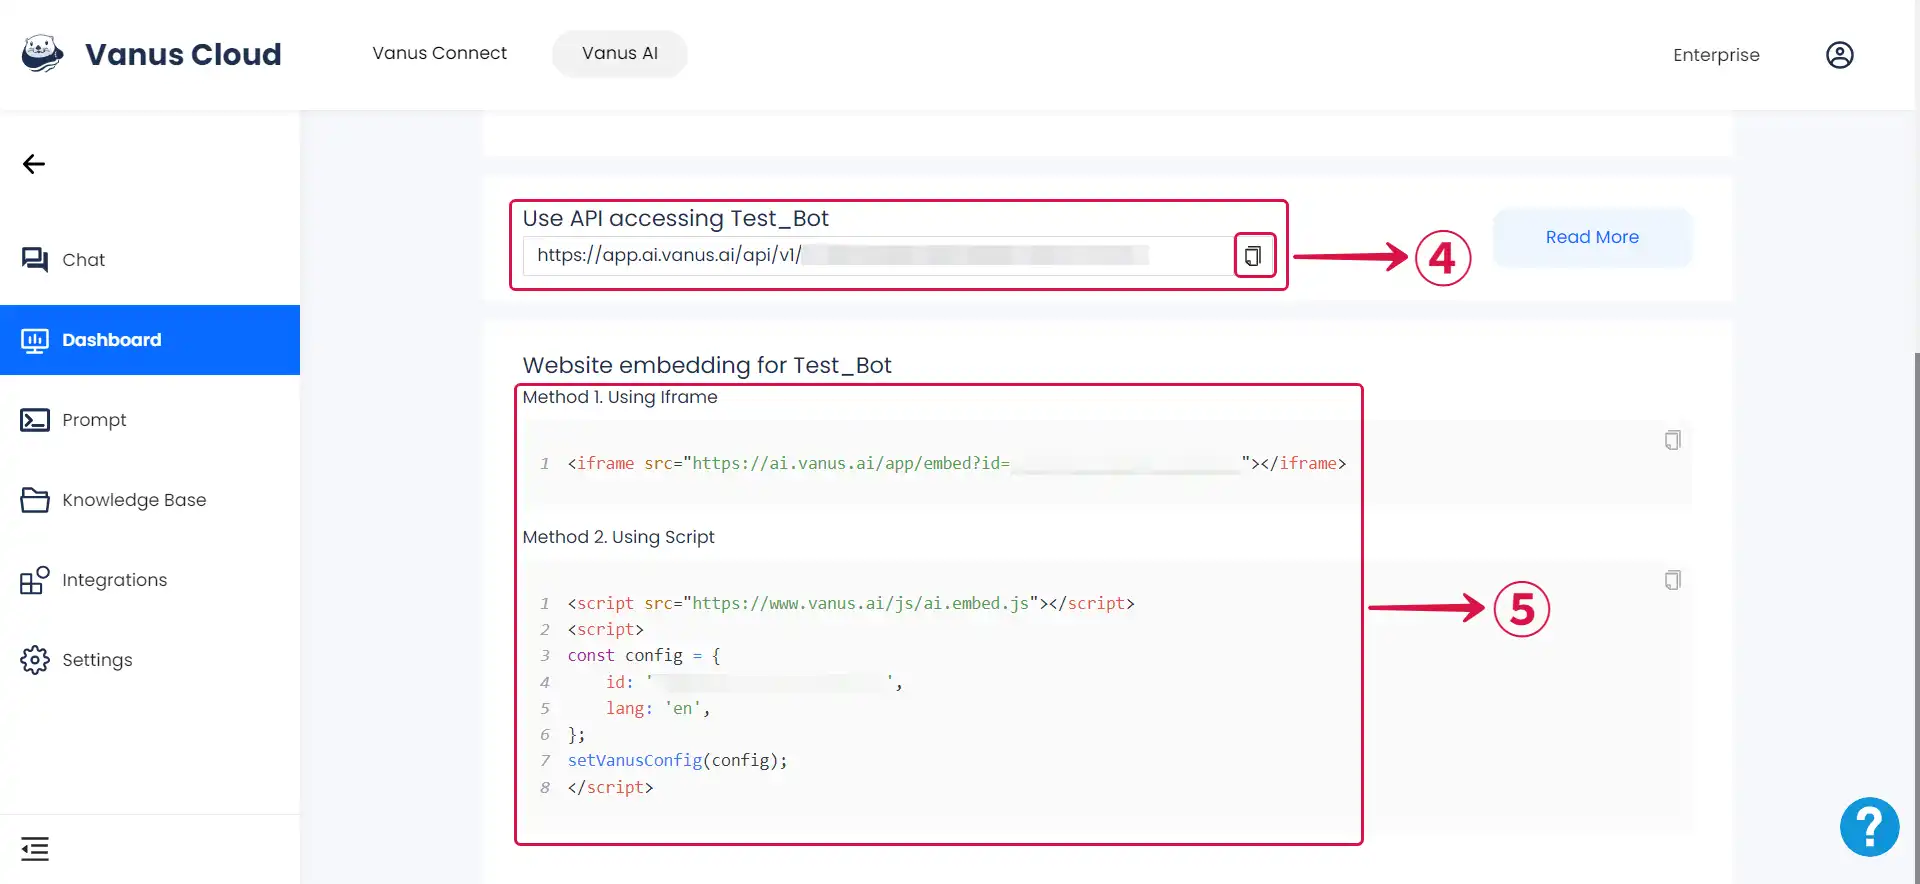
- Obtain API access for your AI Application by copying④ the provided link and using it according to your specific use case.
For guidance on utilizing your API endpoint, please refer to the API Documentation.
- Integrate your AI Application into your website using any of the Methods⑤ available in the dashboard.
For detailed instructions on successfully embedding your AI application in your website, please refer to the Website Embedding Documentation.