Prompt Setting
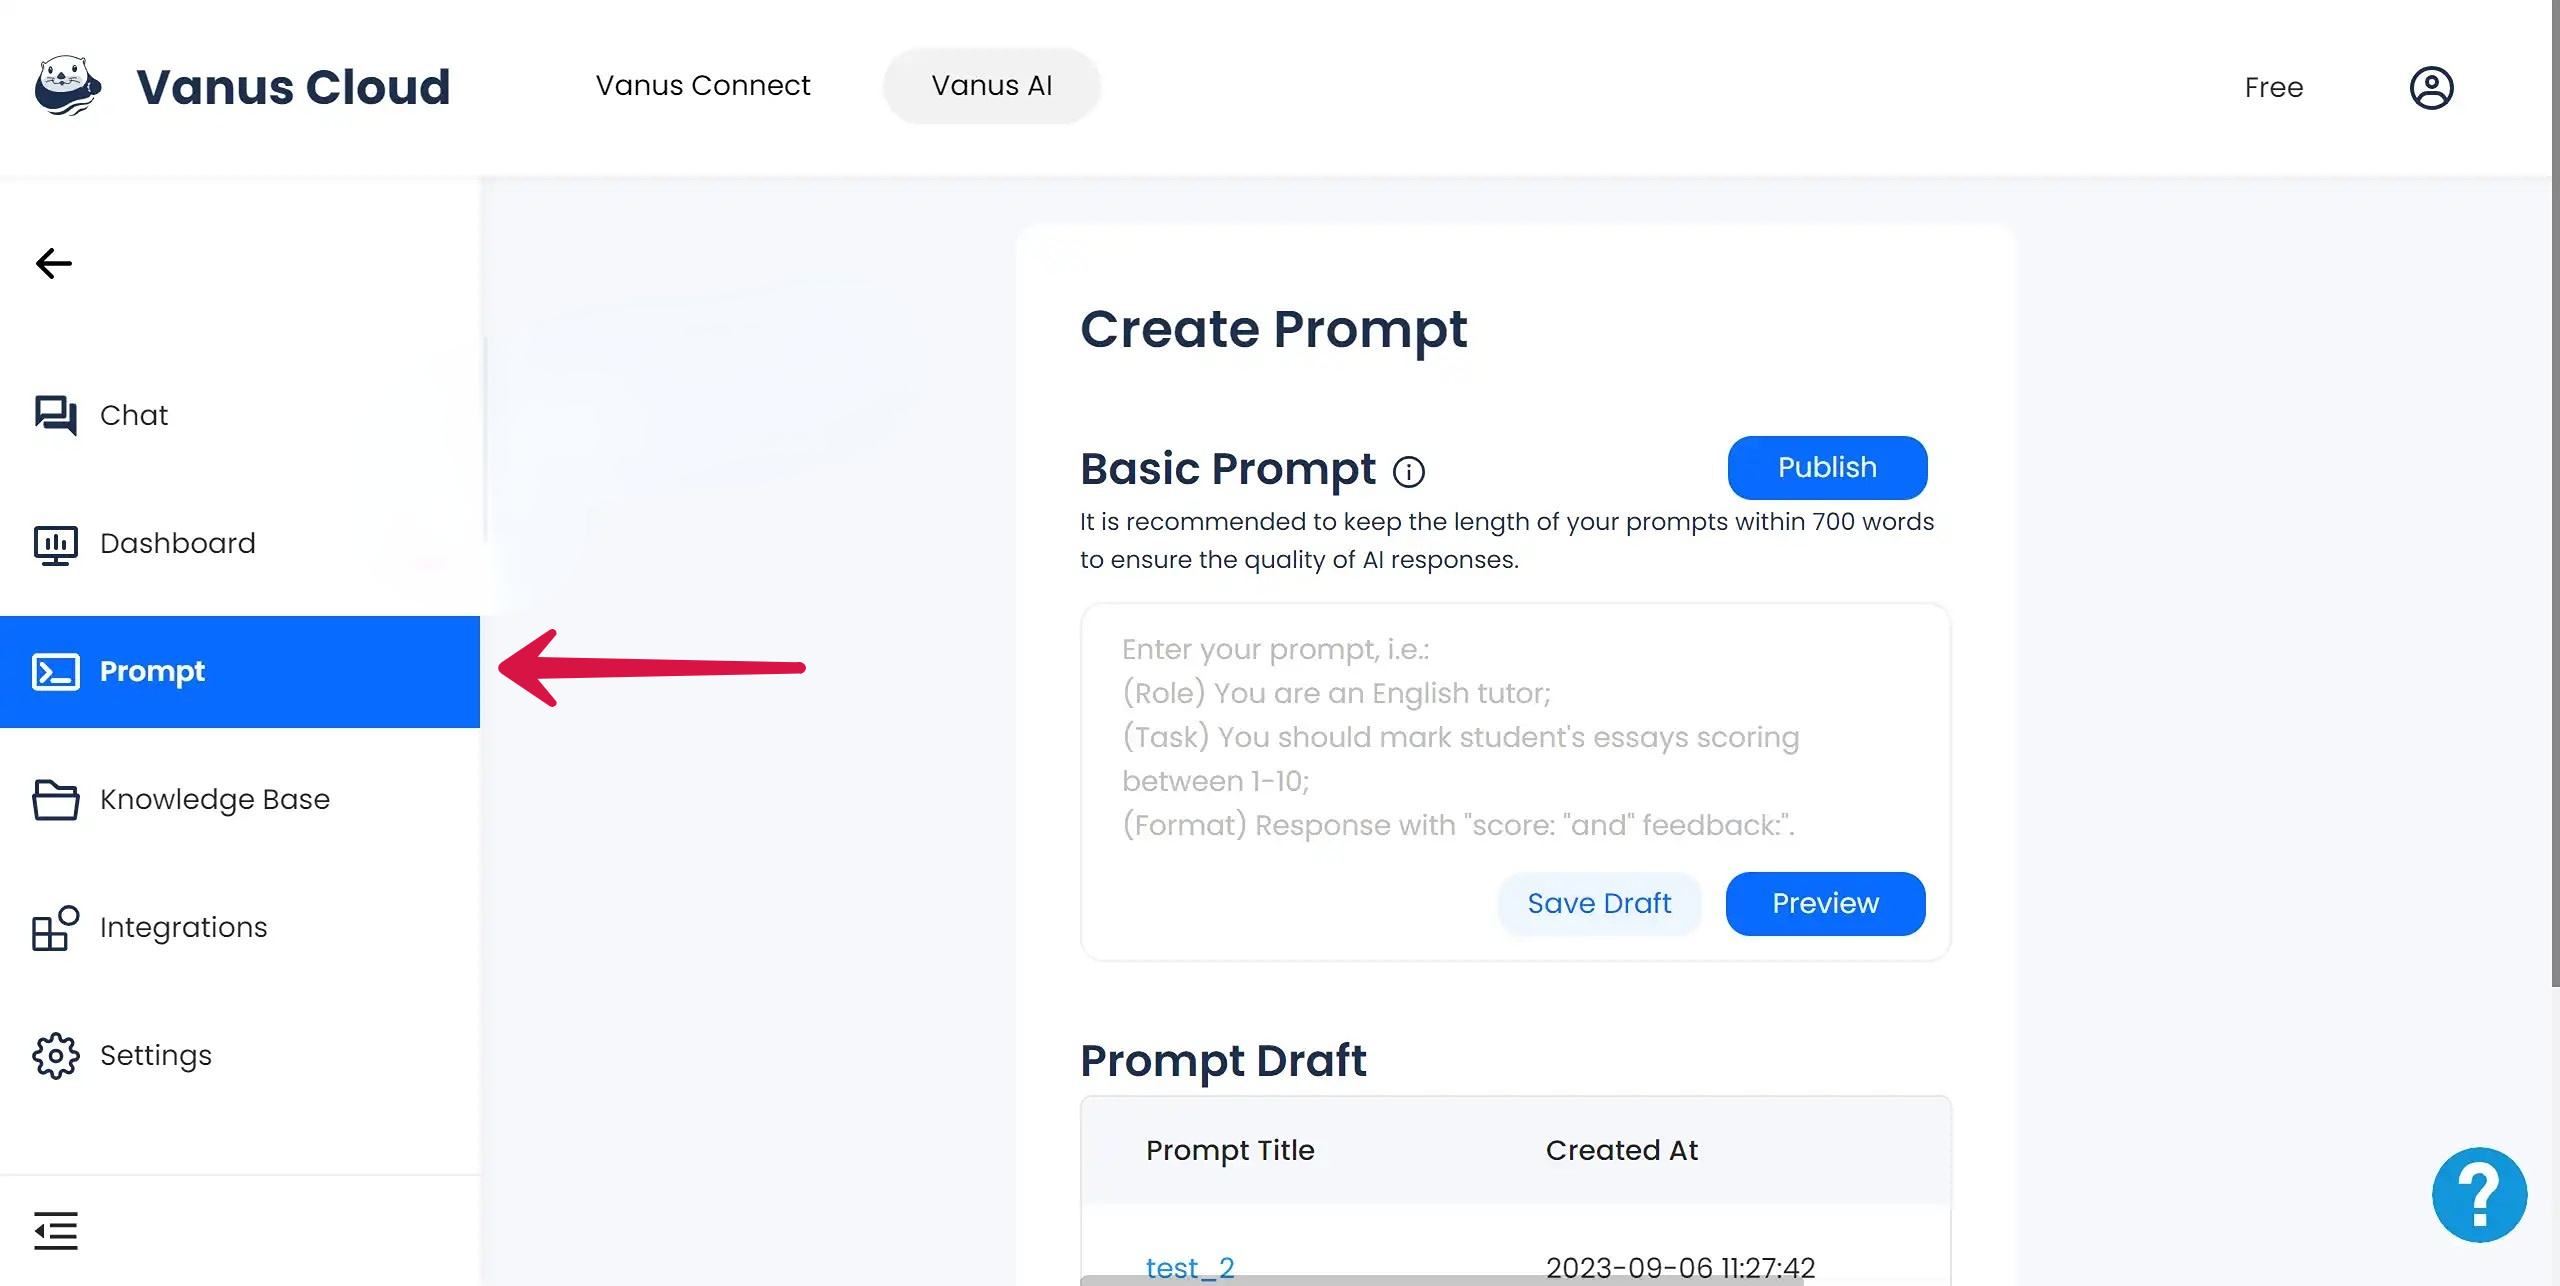
Step 1: Find Where to Set Prompt
You can find Prompt on the left sidebar and by clicking on it, you will arrive at the settings page for the prompt.
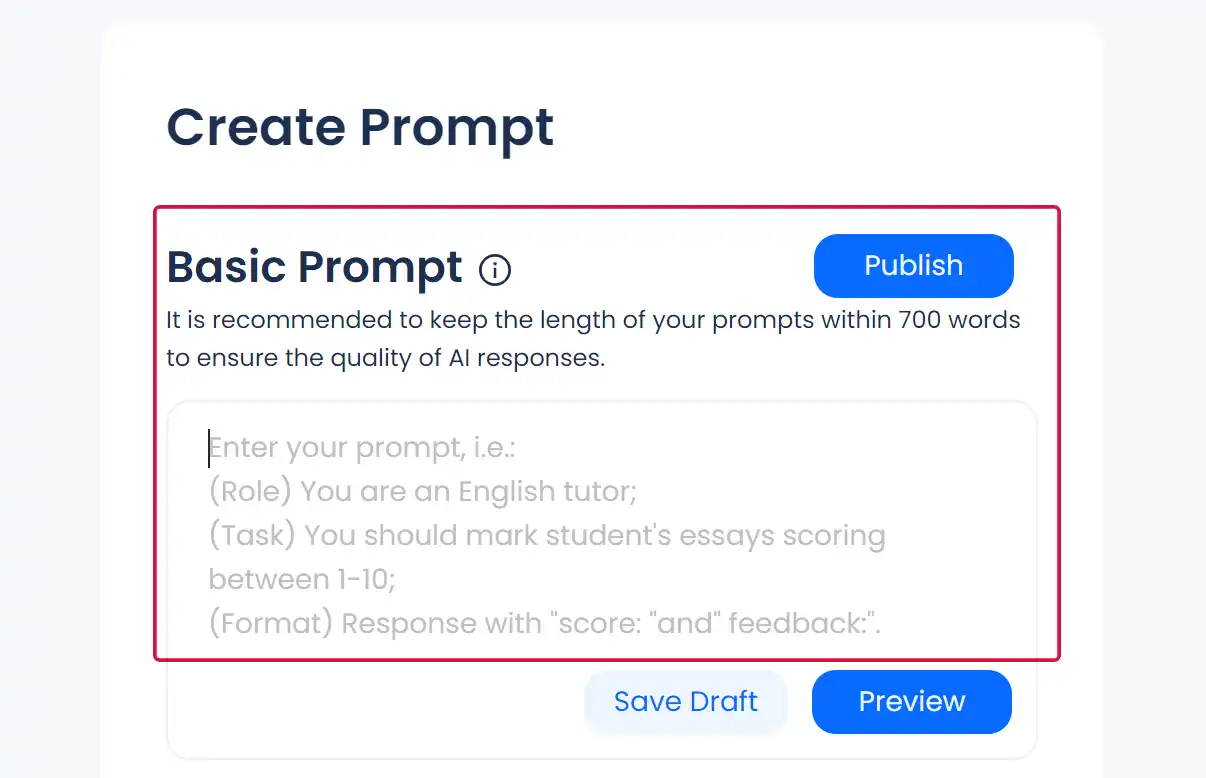
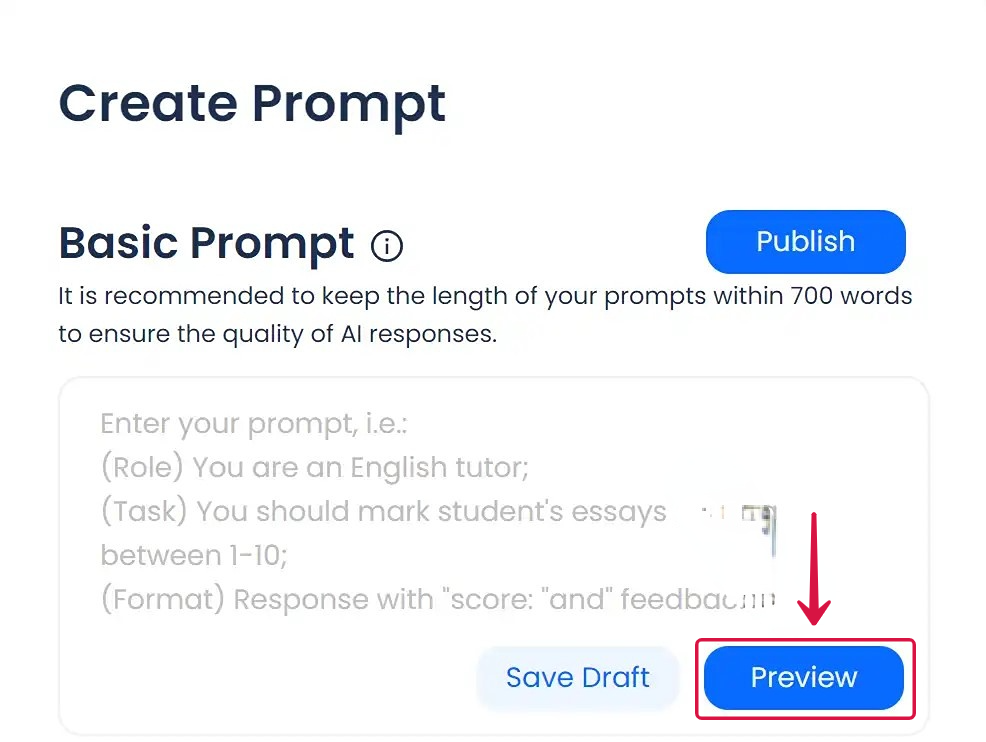
Step 2:Set the Basic Prompt
Prompt References for Beginners
Qucik Template
If you have not yet completed the prompt engineering, you can refer to this qucik prompt template to design prompts suitable for the application you are creating.
(Role) You are an English tutor; (Task) You should mark student's essays scoring between 1-10; (Format) Response with "score: "and" feedback:".
Templates Provided by Vanus AI
If this is your first time creating prompts, Vanus AI provides you with some AI application templates for reference.
First, visit the Vanus AI and find the Create AI Applications from Templates section;
Second, select the scene you need and click the Try it Now button to complete the application creation.
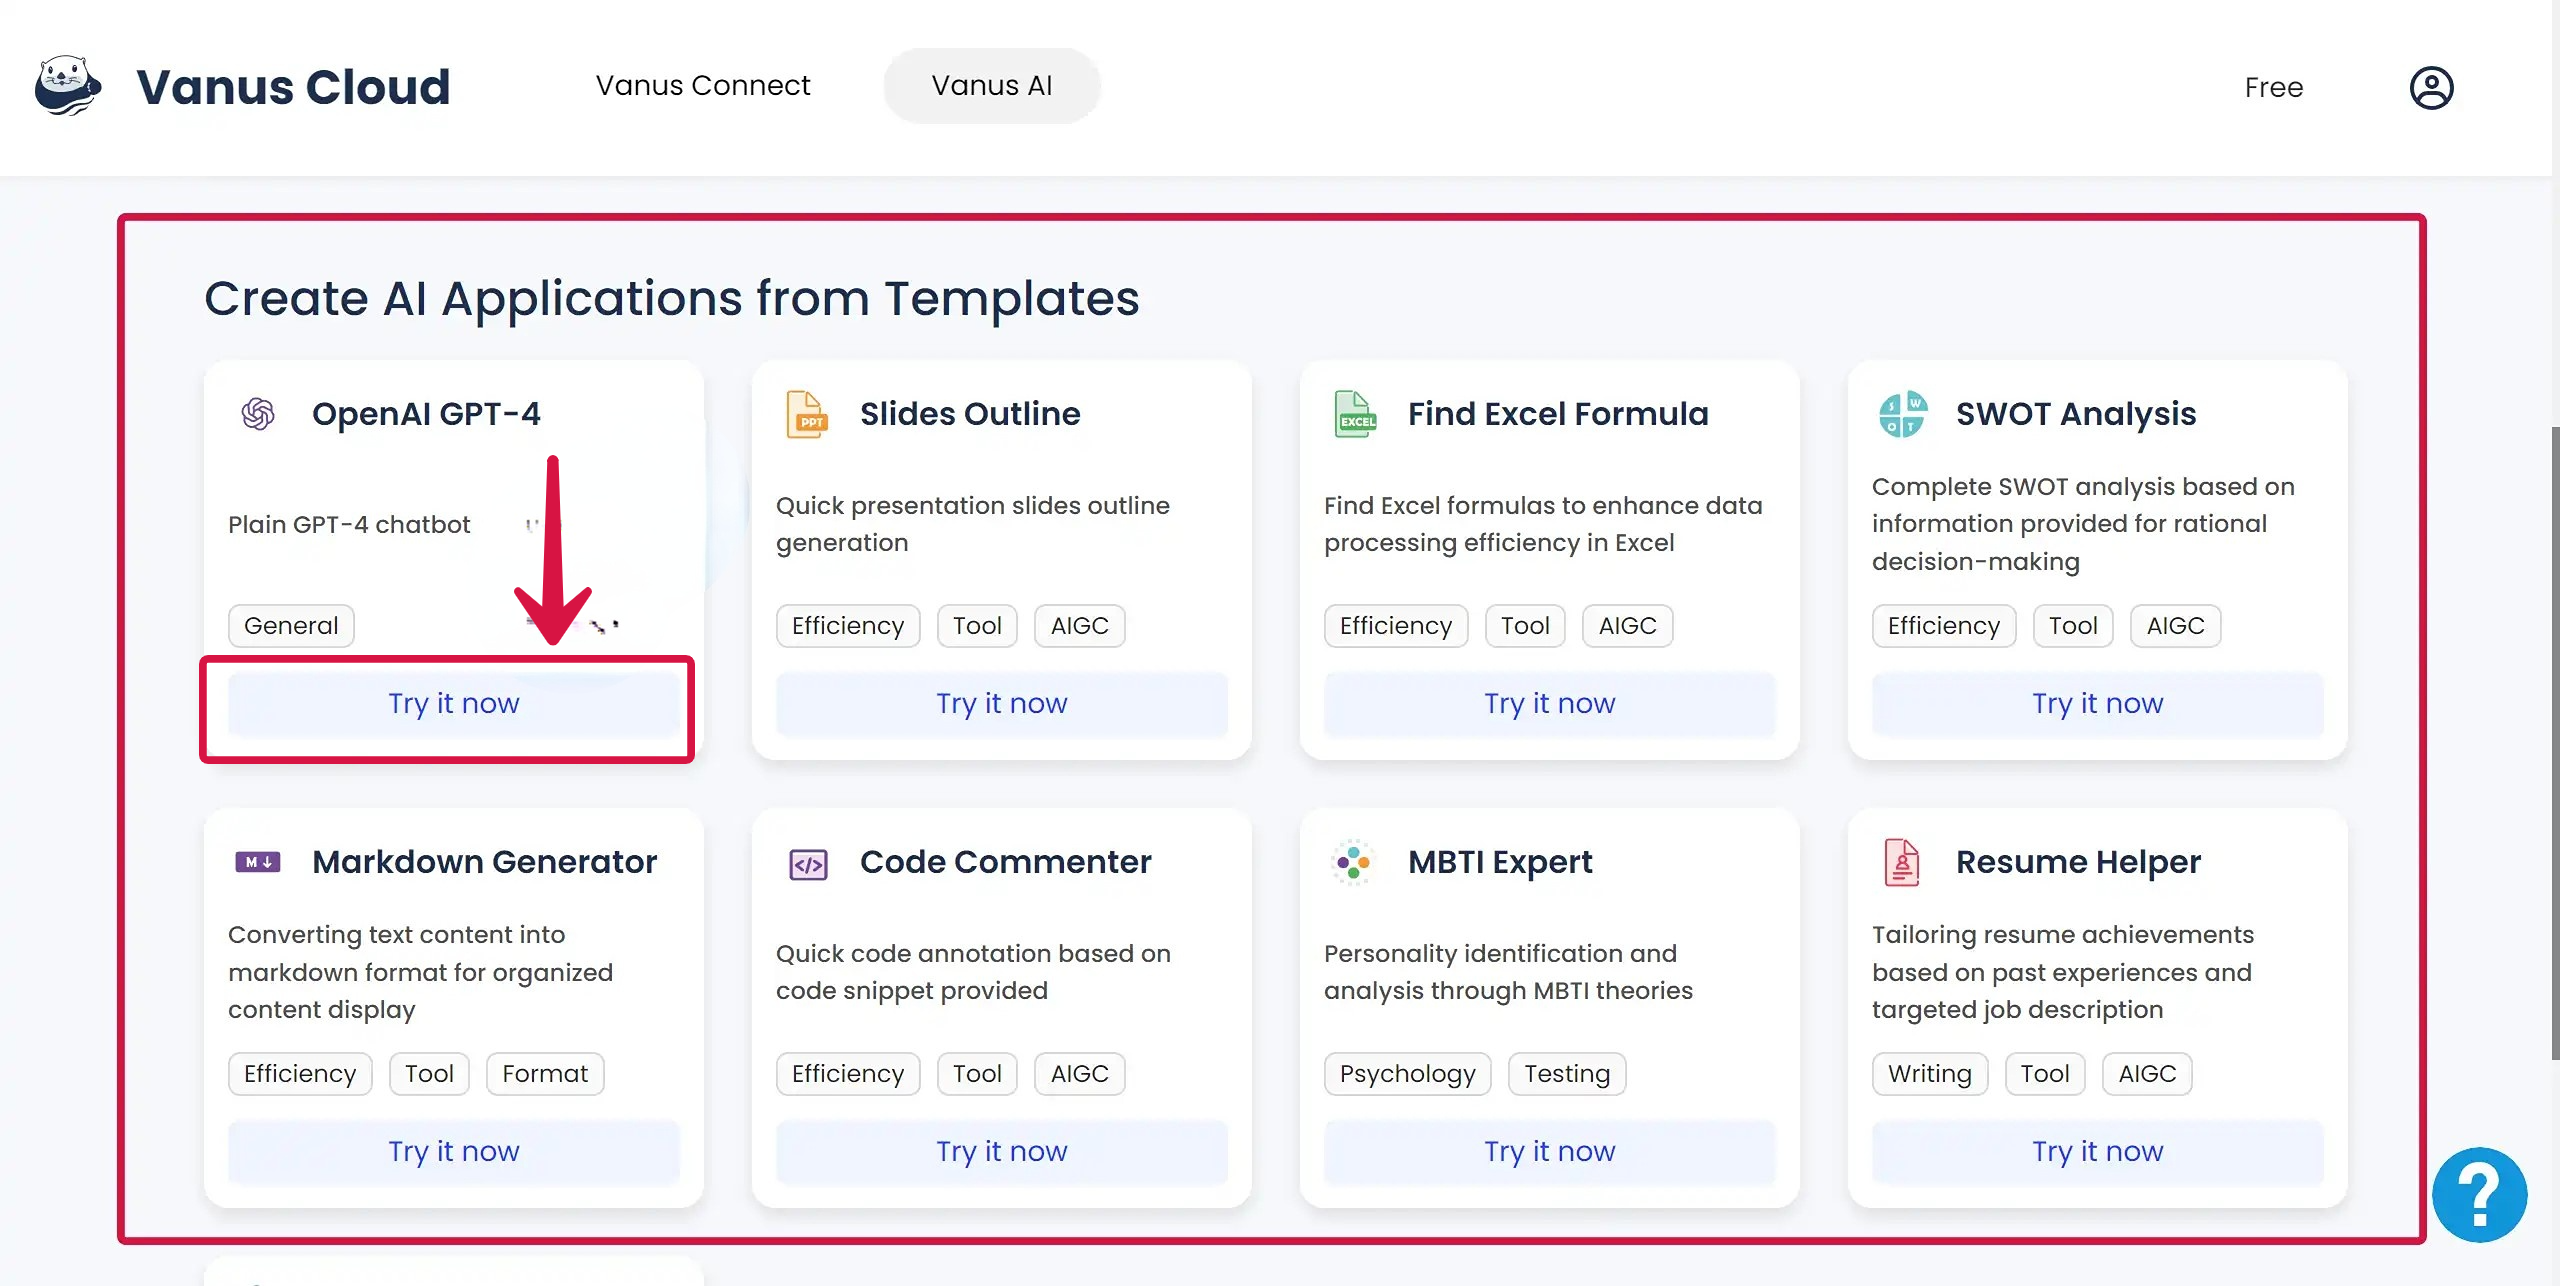
After entering the application template you have selected, please click Prompt in the left sidebar and find the prompt of this application template at the bottom of the basic prompt. We hope the prompt setting of the template can provide a reference for you to create your own application.
Fill in the Basic Prompt
If you have already completed the prompt engineering, you can directly fill in the prompt in the box at the bottom of the basic prompt.
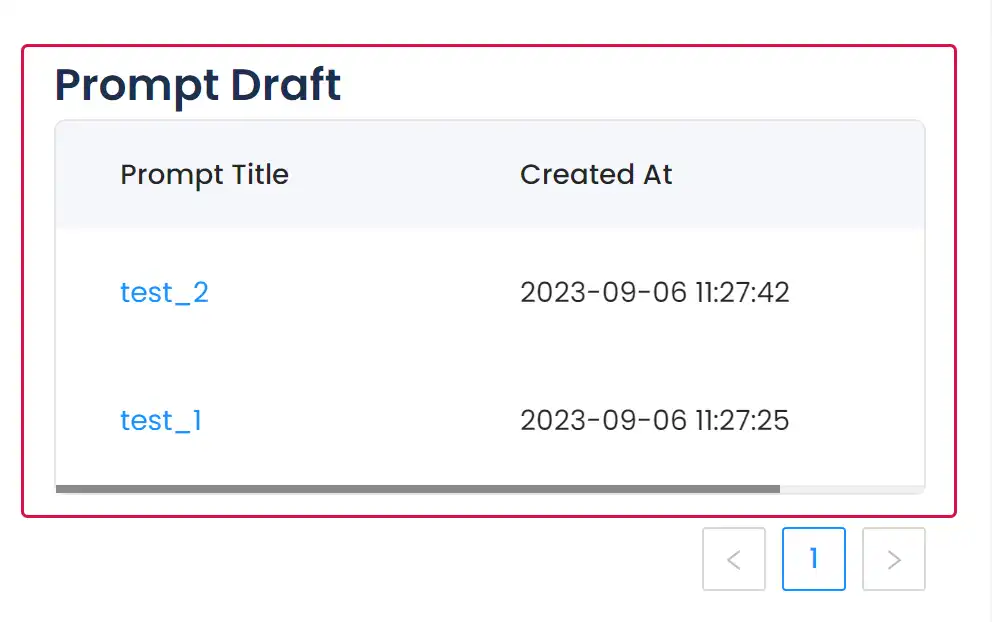
Step 3:Save Draft
When you complete the prompt settings, you can click the Save Draft button, please fill in the name of this version of the draft in the pop-up window, and click save.
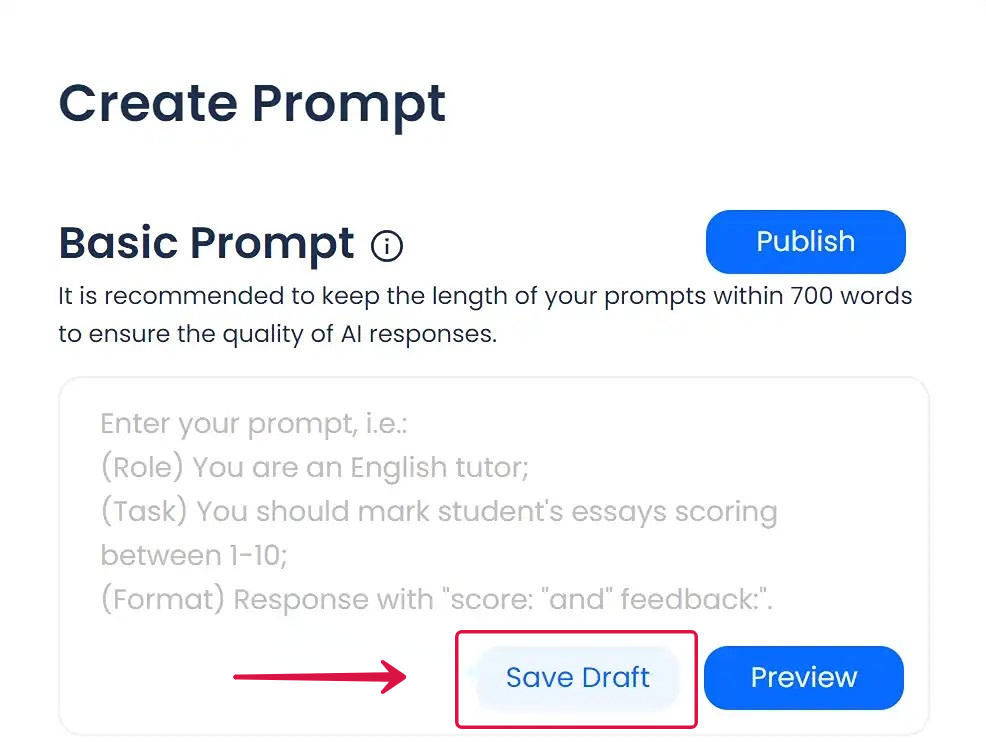
You can find all saved prompt drafts under Prompt Draft. By clicking the prompt title, the system will automatically put the prompt draft into the text box of the Basic Prompt without having to fill it out again.
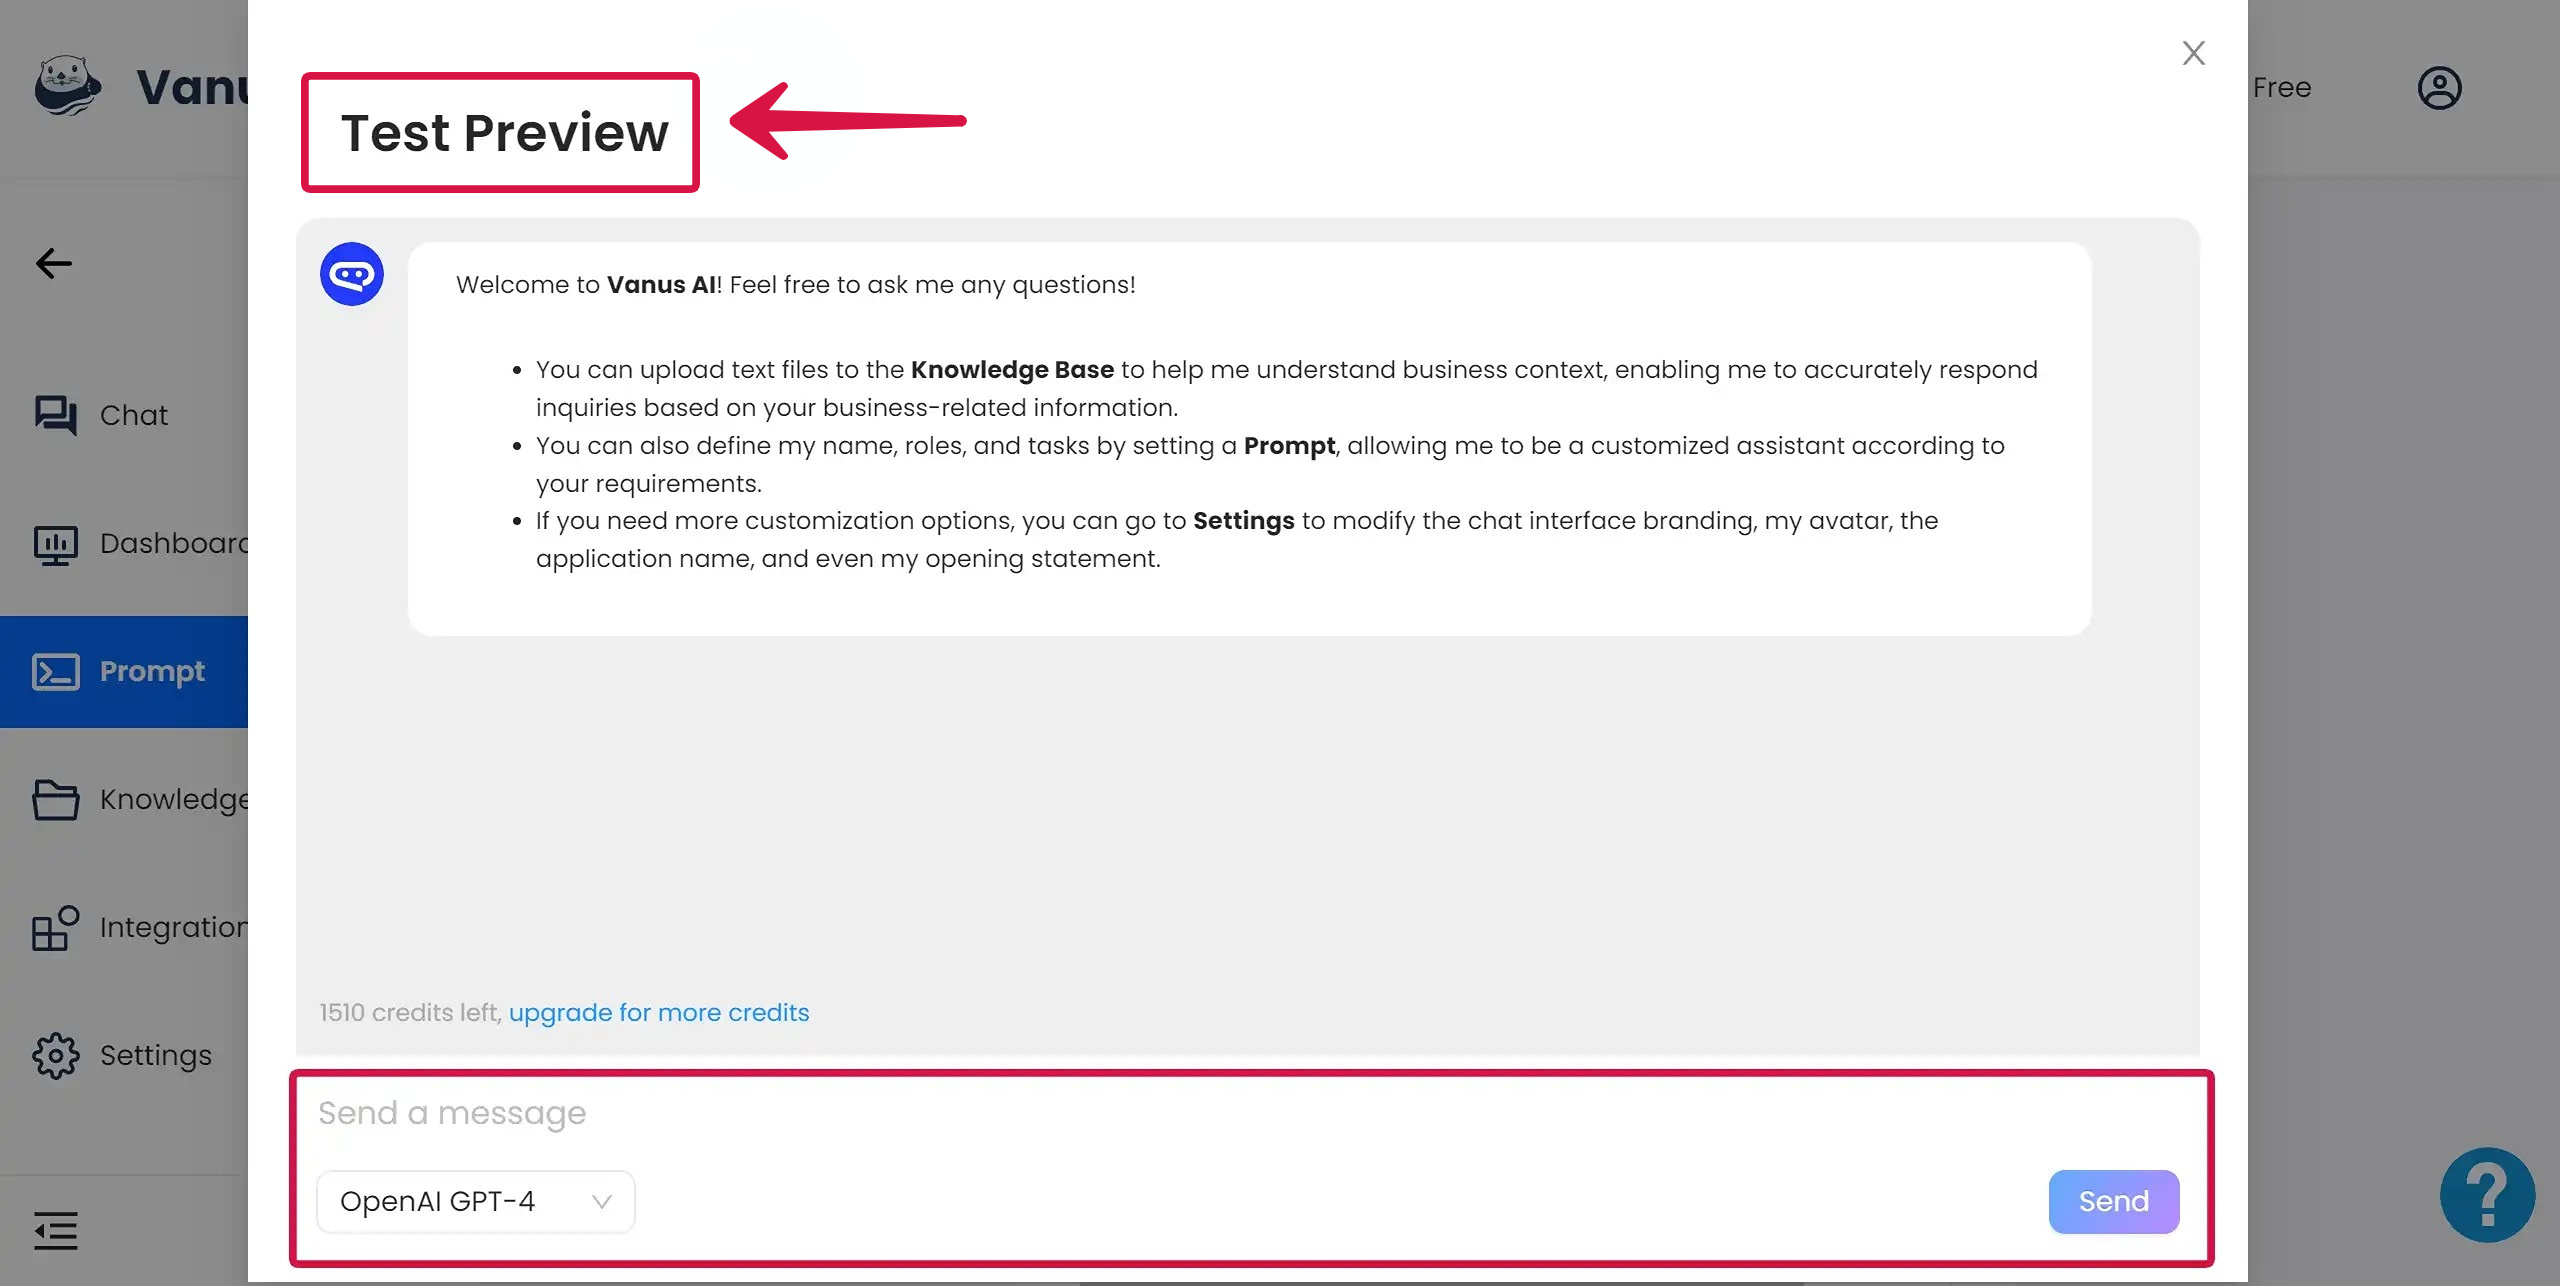
Step 4:Preview the Prompt
When you have completed the basic prompt, you can click the Preview button to enter the Test Preview.
In the Test Preview, you can directly initiate a conversation with the application and ask any questions you want to test. At this time, the application has been configured with the prompt you filled in the Basic Prompt.
Step 5:Publish the Prompt
If you find that the current prompt setting has reached your expected effect in the test preview, you can close the Test Preview, and click the Publish button on the right side of the Basic Prompt to configure the current prompt into the application.
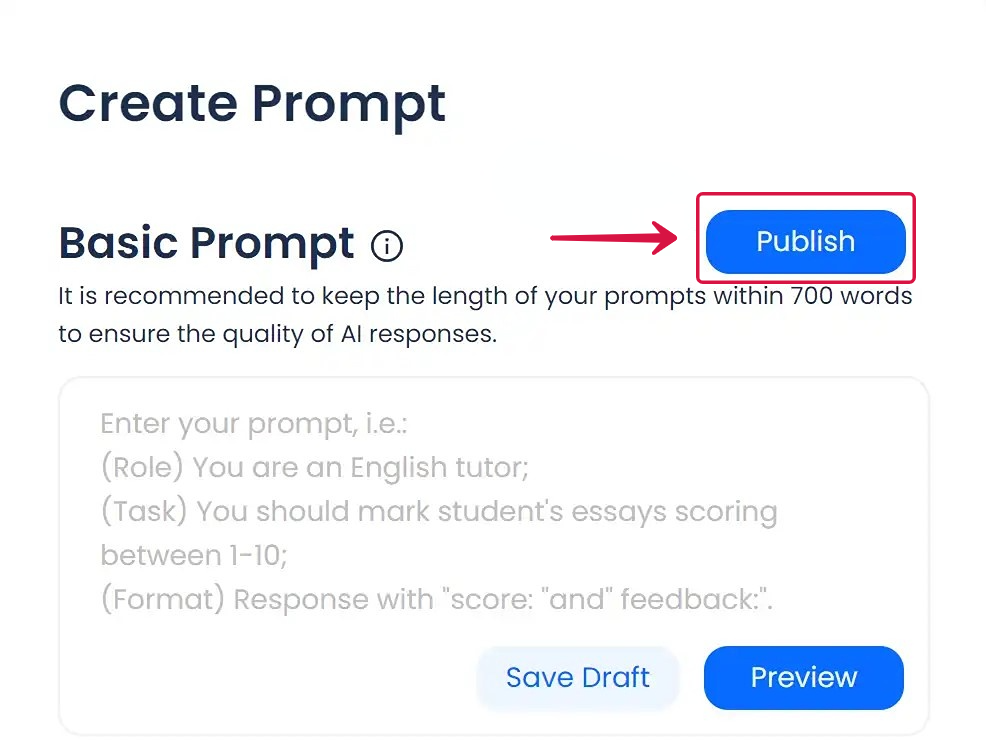
The Success tag will appear at the top of the page, indicating that the current prompt has been successfully configured into the application.