Elasticsearch
This guide contains information to set up a Elasticsearch Sink in Vanus Connect.
Introduction
Elasticsearch is a fast and scalable search and analytics engine used as a backend for search-heavy applications. One of the key features of Elasticsearch is its scalability, which allows it to handle large volumes of data across multiple nodes in a cluster. It also has a powerful query language and a rich set of APIs that make it easy to interact with and integrate into a wide range of applications and systems.
The Elasticsearch Sink simplifies the process of delivering data to your Elasticsearch cluster. With this tool, you can easily and efficiently transfer your data to your Elasticsearch cluster, making it searchable and accessible for analysis and other processing needs.
Prerequisites
Before forwarding events to Elasticsearch, you must have:
- A Vanus Cloud account.
- Have an Elasticsearch cluster.
Getting Started
Step 1: Create a Deployment
Go to the Elasticsearch official website.
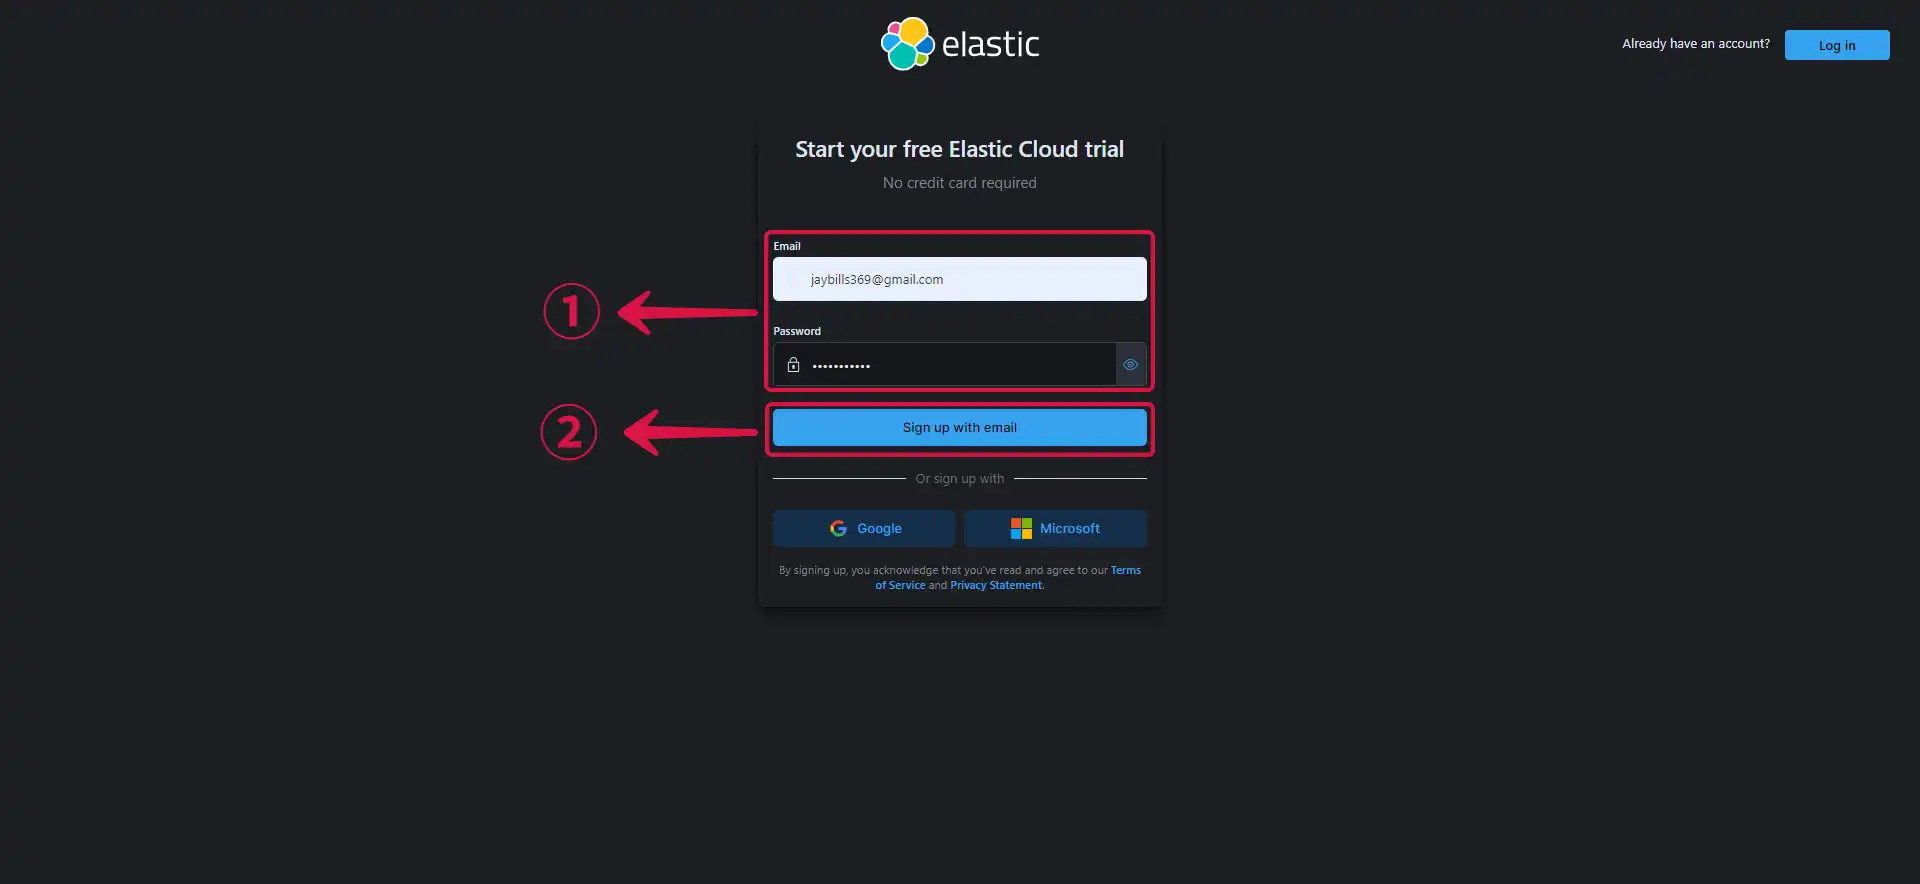
Input your Email and Password①, then click Sign up with email②.
- Give your deployment a Name③ and click Create deployment④.
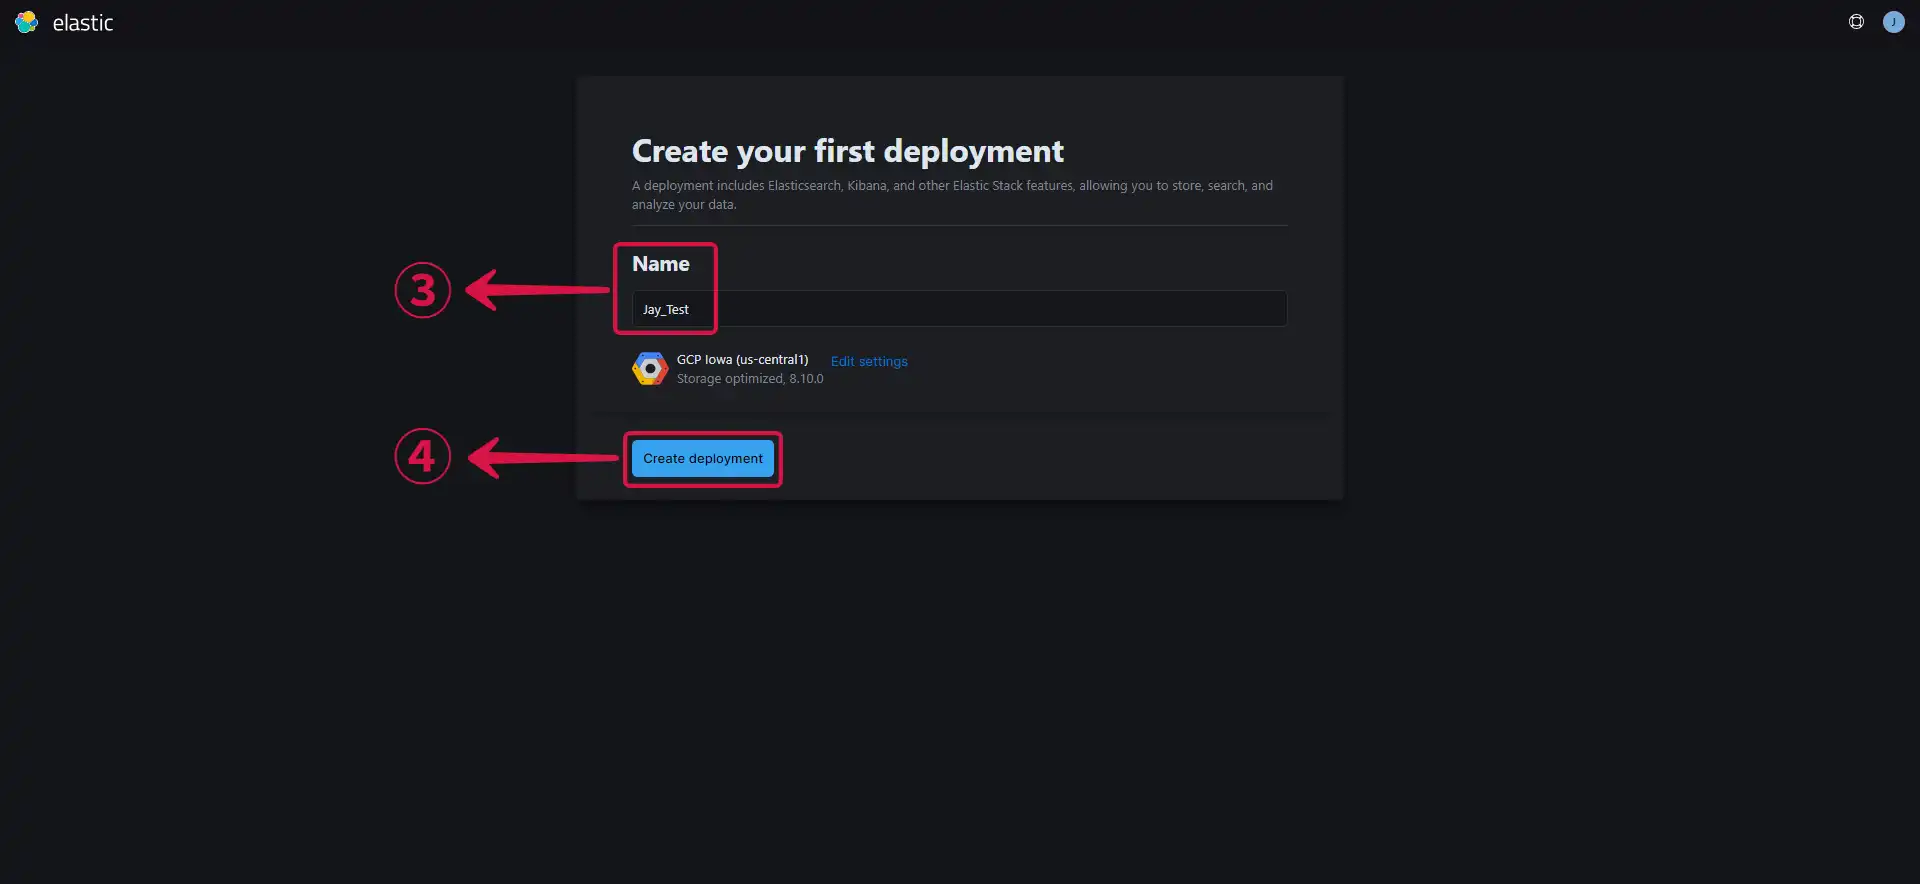
A deployment includes Elasticsearch, Kibana, and other elastic stack features.
- Click on the Cloud Provider⑤ field to change your cloud provider and the Region⑥ field to change your region.
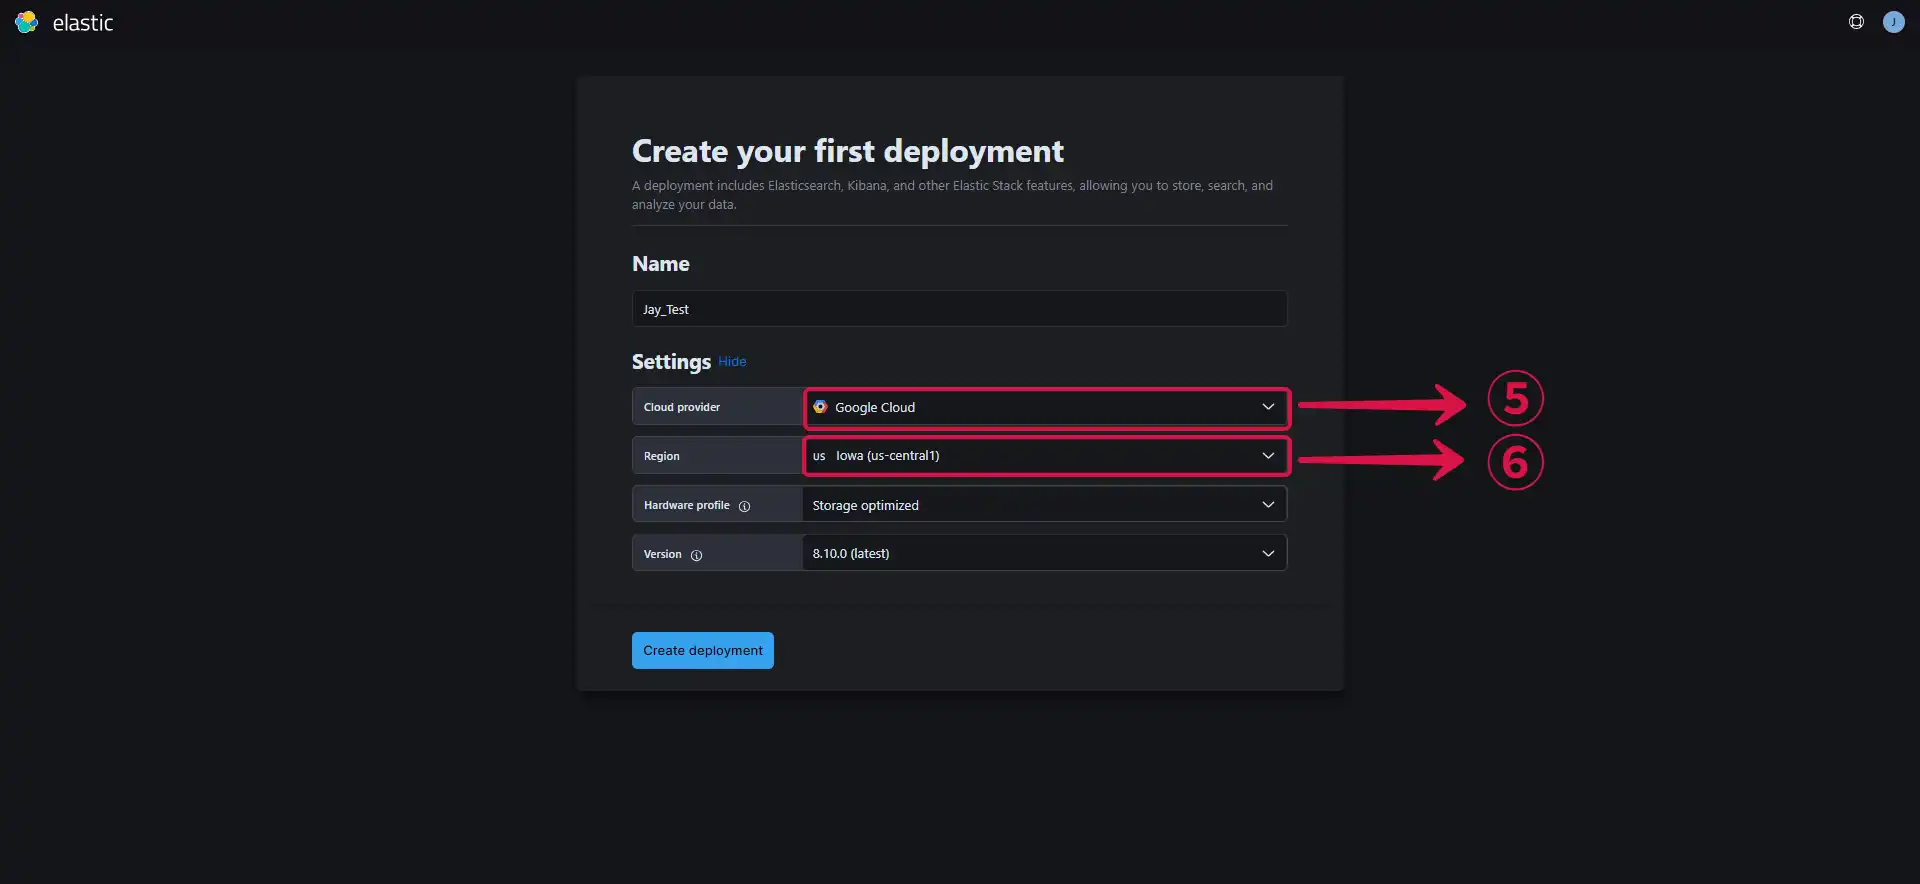
You can leave the other settings on default or customize your settings further, depending on your use case.
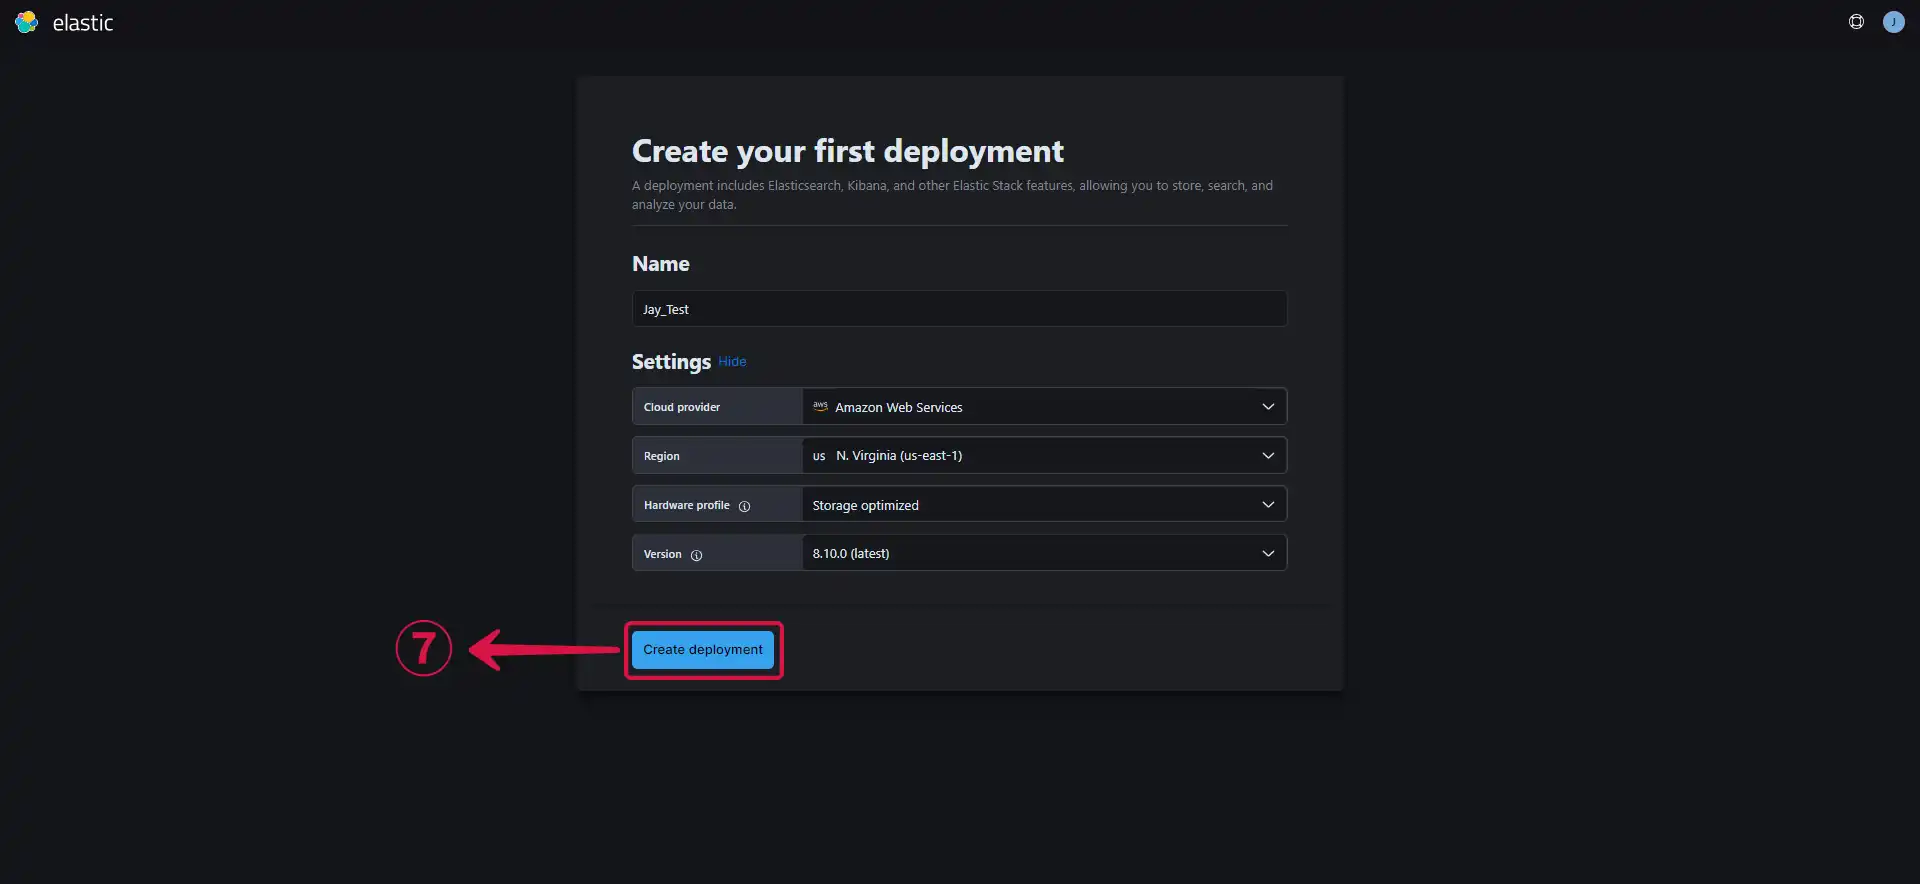
- Click on Create deployment⑦ to finish creating your deployment.
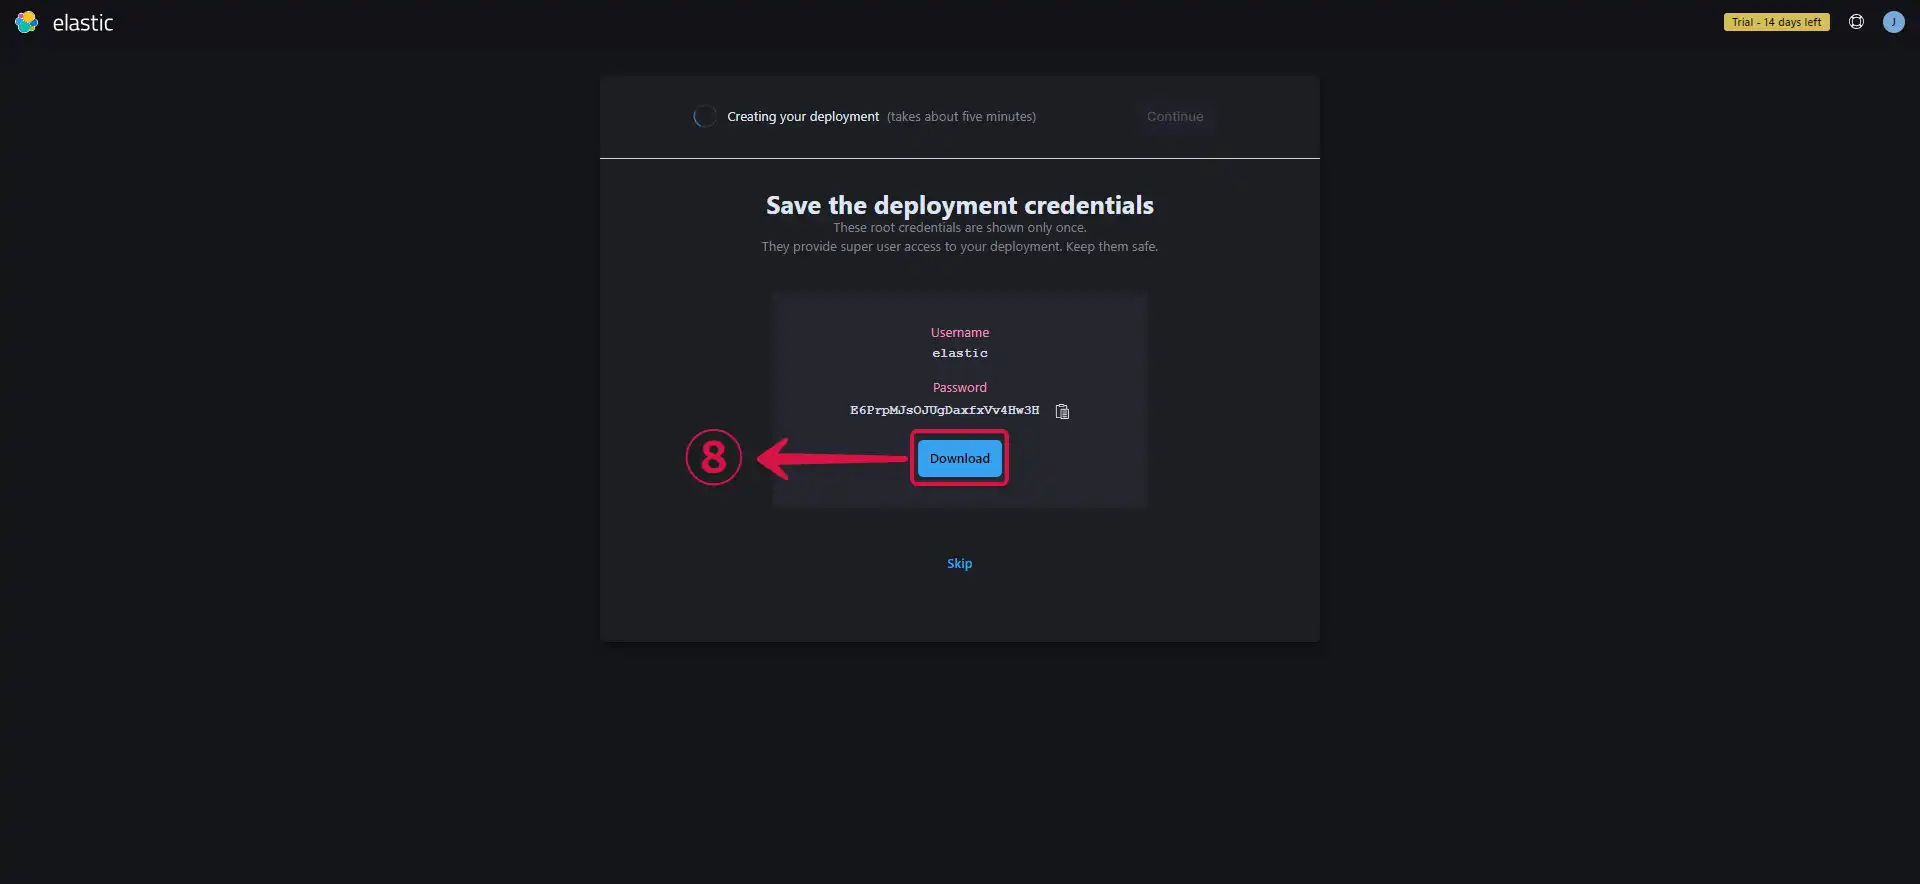
- Download⑧ your deployment credentials, you will need them to log in to your endpoint, and they will also be needed for your Vanus connection.
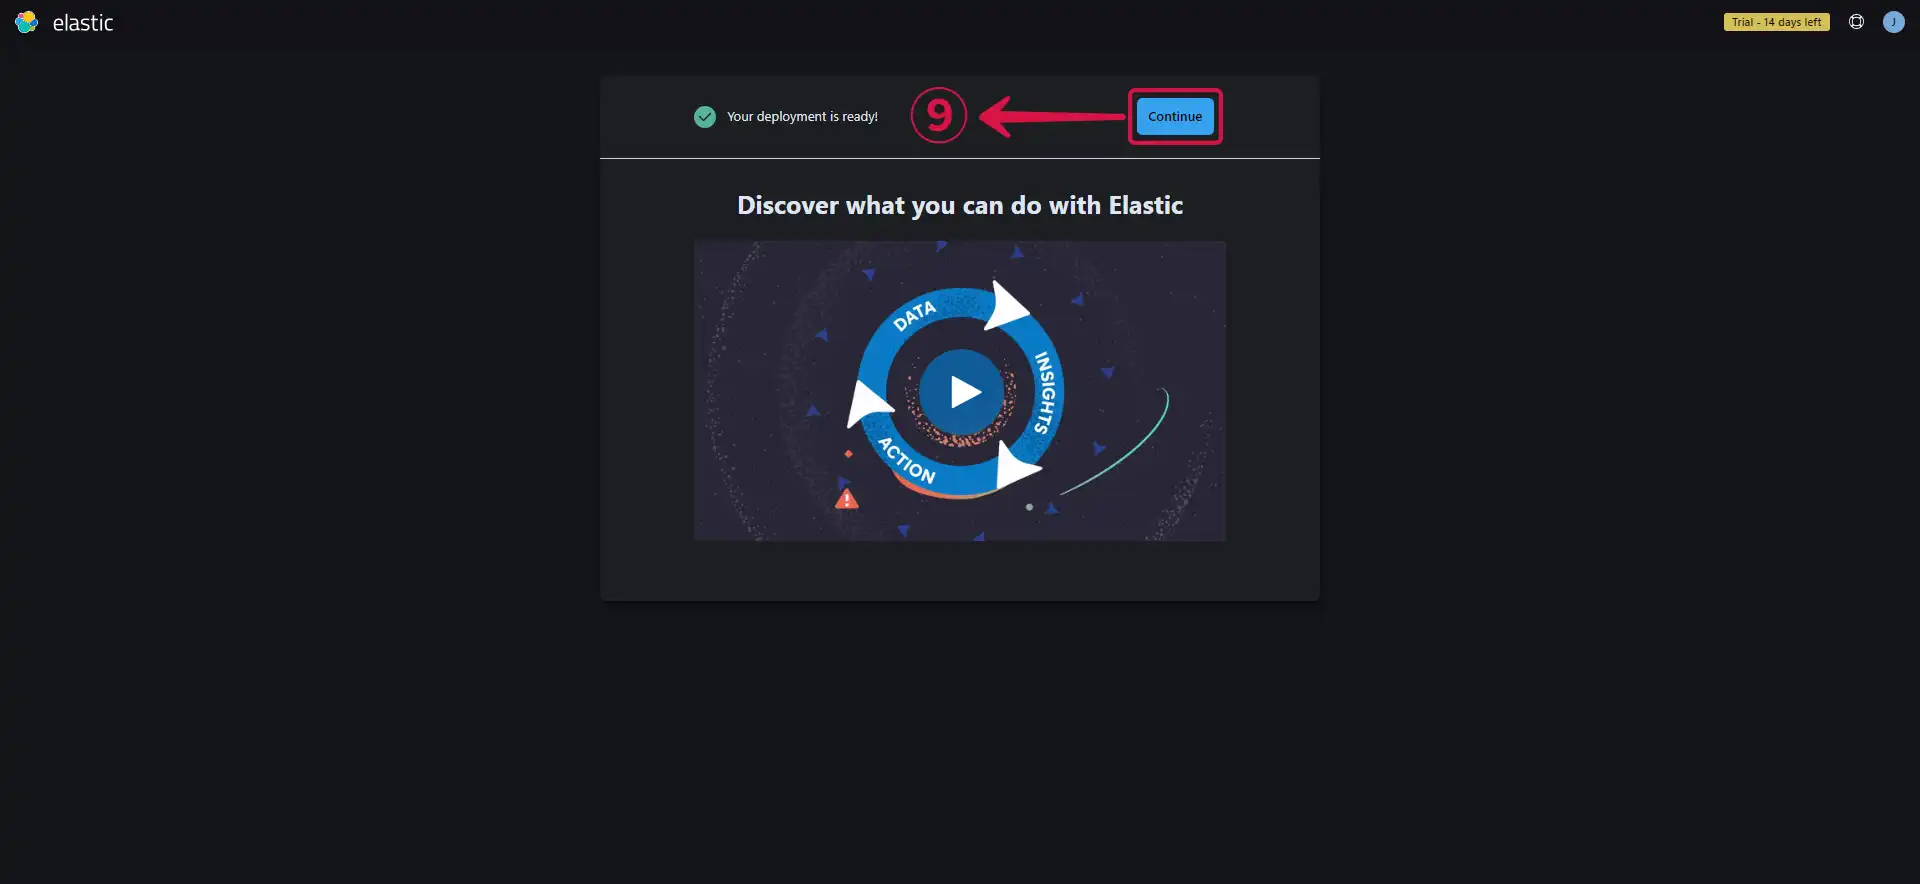
- Your deployment has been successfully created, now click Continue⑨.
Getting your server endpoint
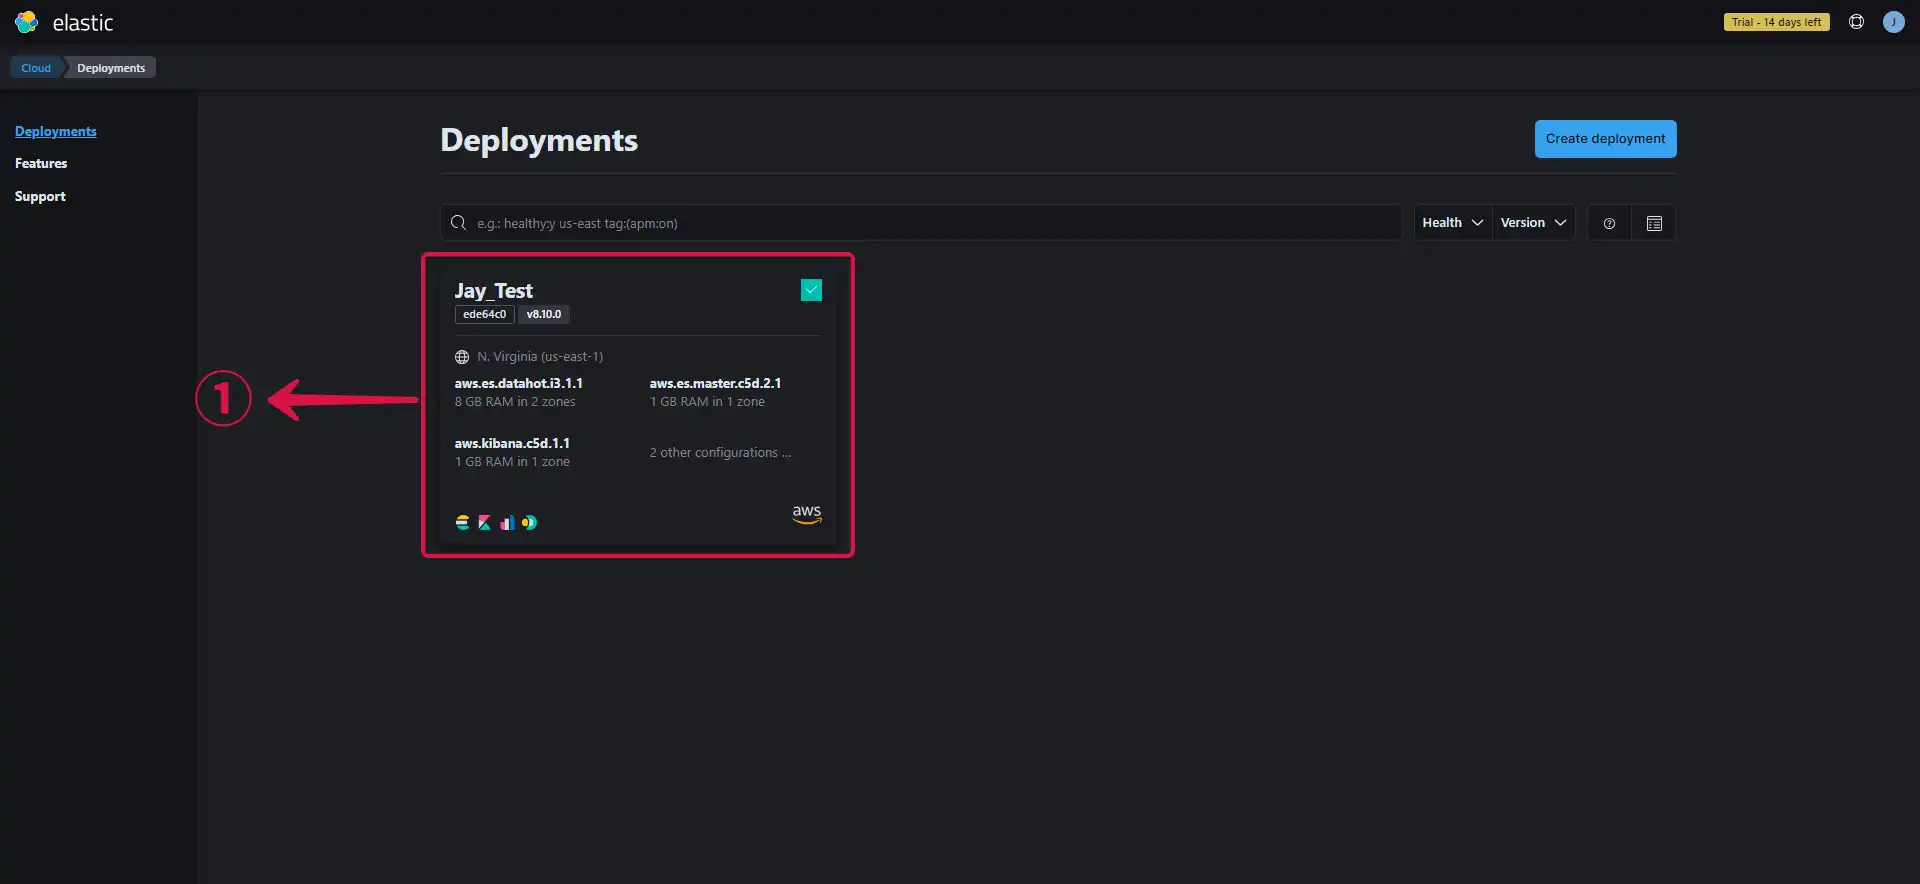
Navigate to the Deployment Page to see your deployments.
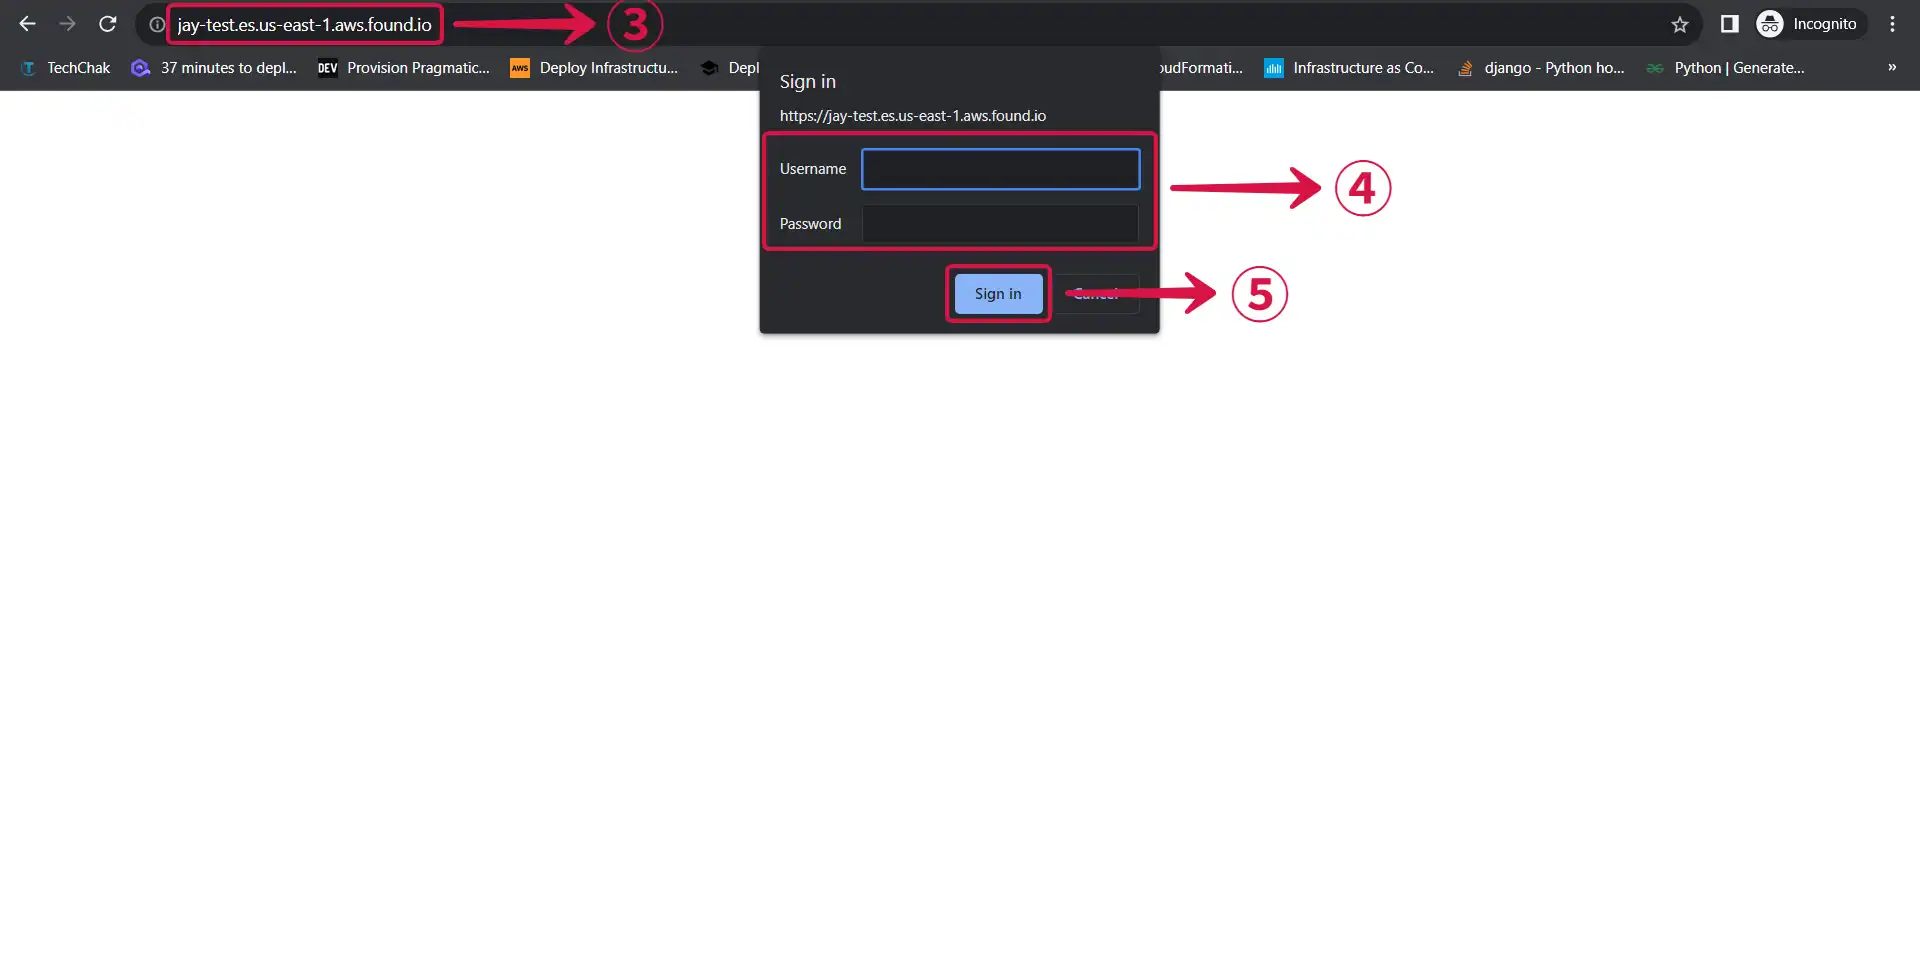
Click on the the created deployment①.
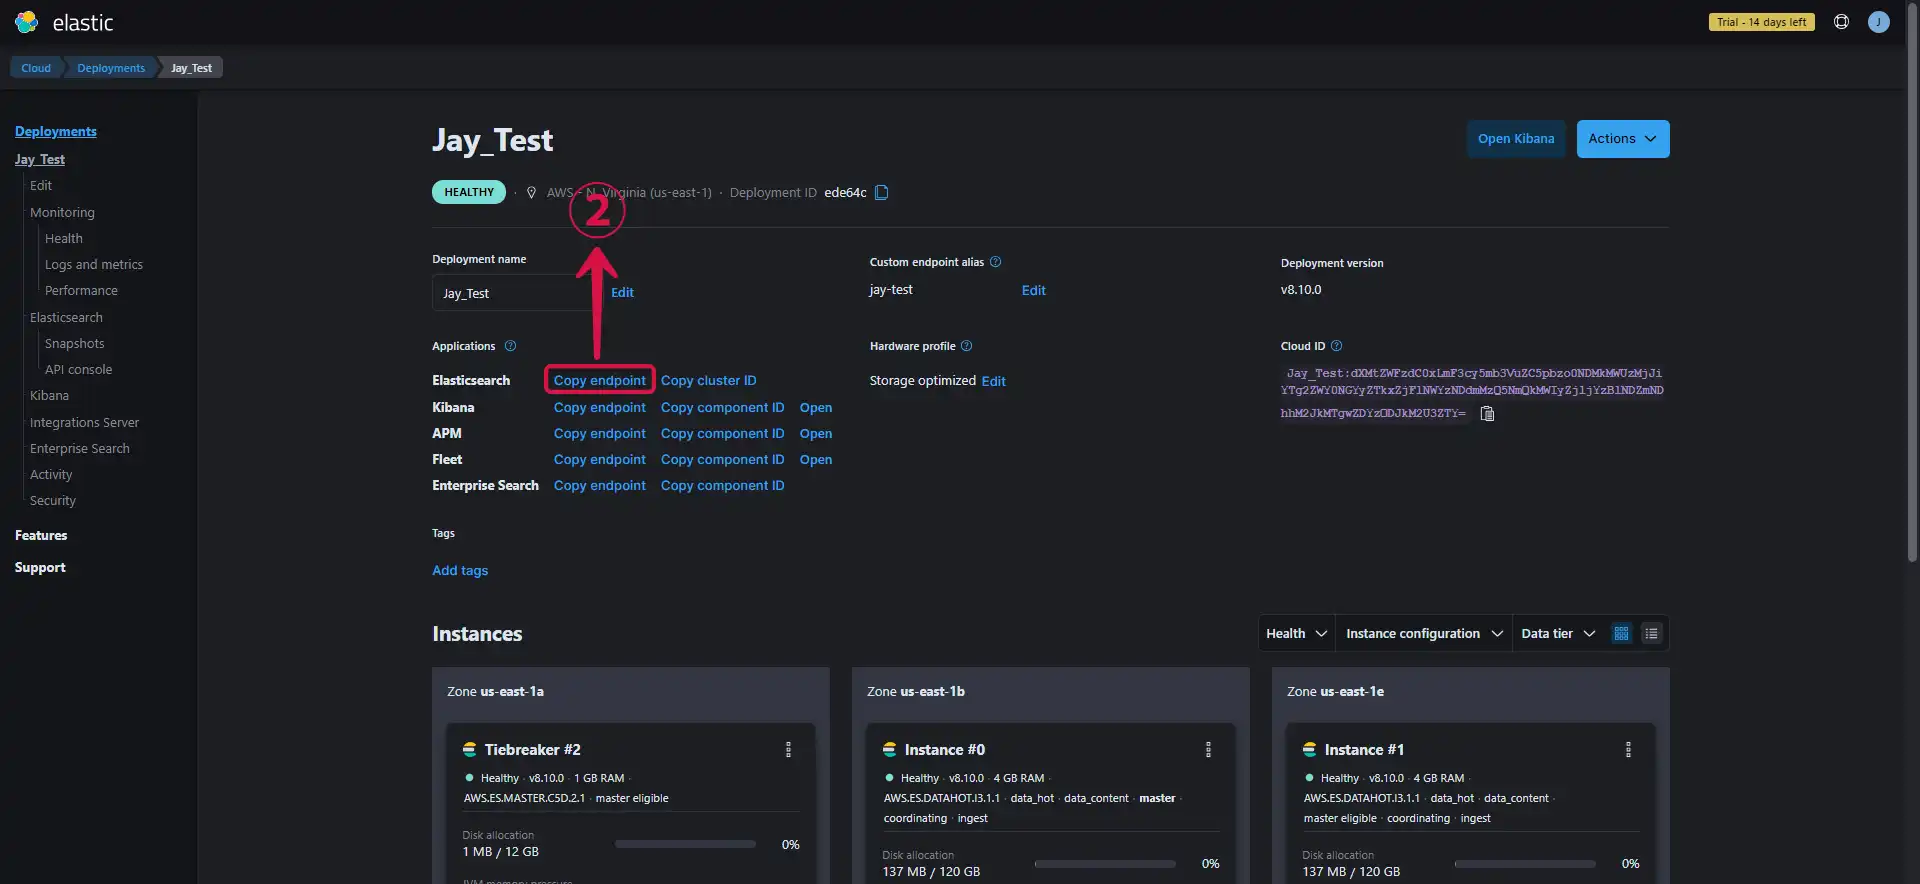
- Copy your Elasticsearch endpoint by clicking on Copy endpoint②.
- Paste the copied endpoint③ in your browser, fill in the credentials④ you downloaded while creating your deployment and click on Sign in⑤.

Creating an Index
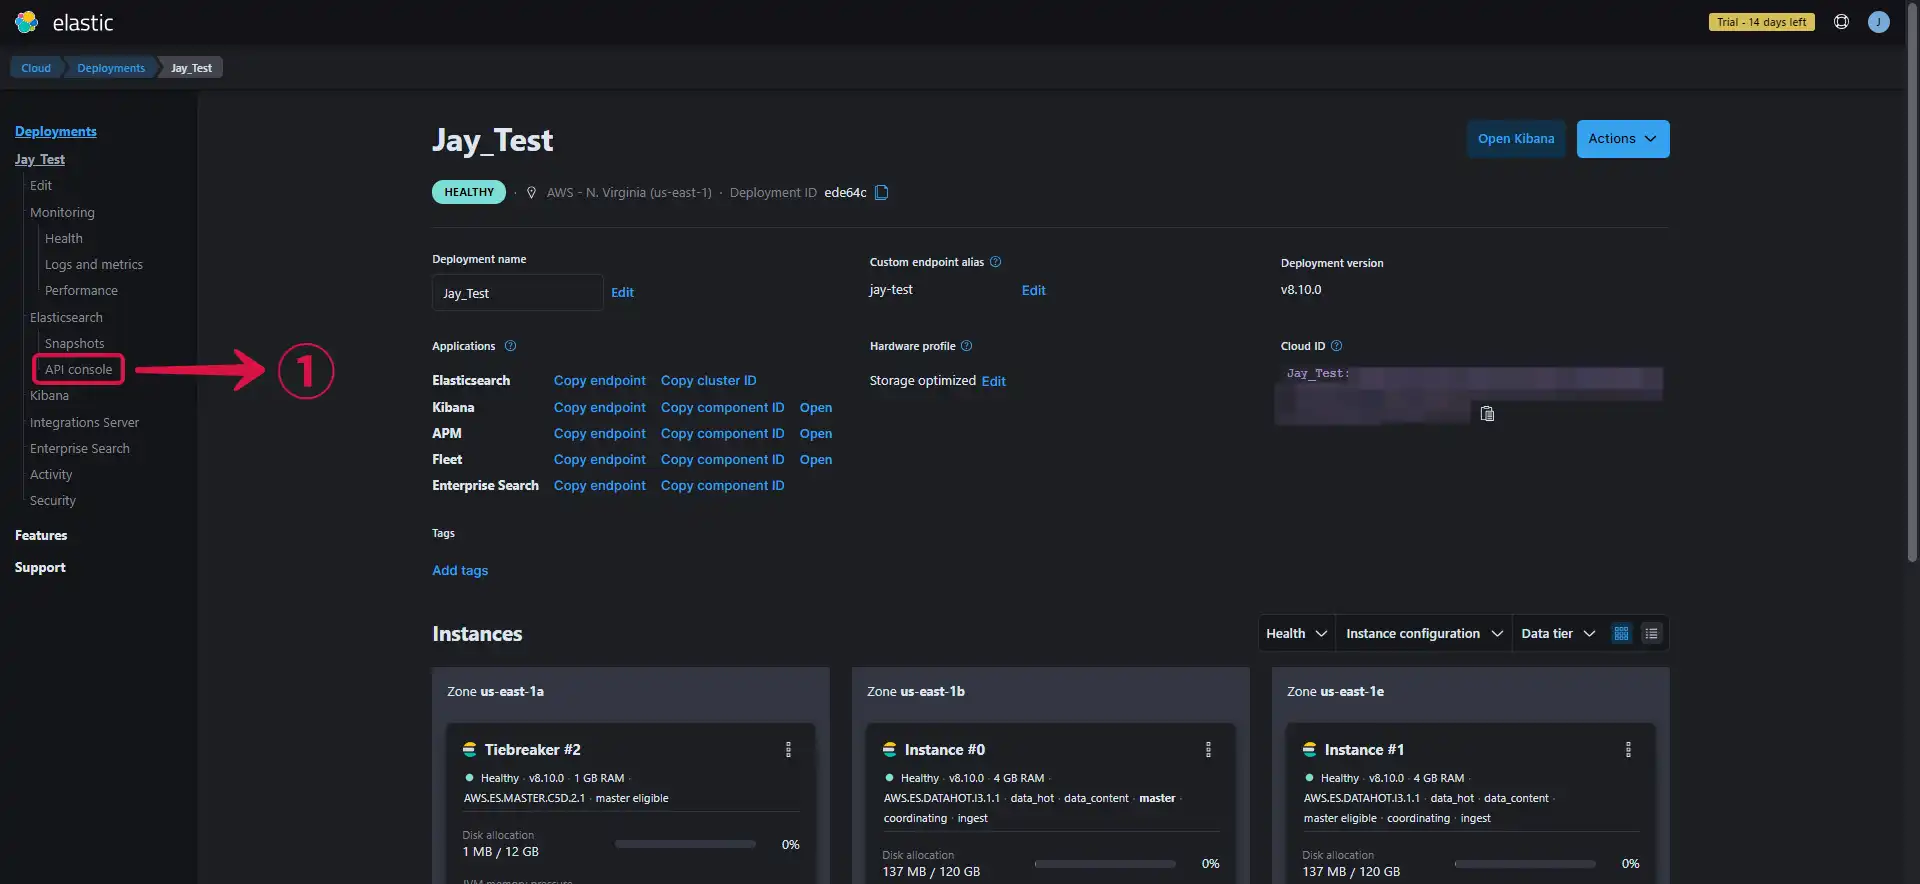
- Click on API Console①.
- Select the PUT② option, write the name of your index③, and click Submit④.
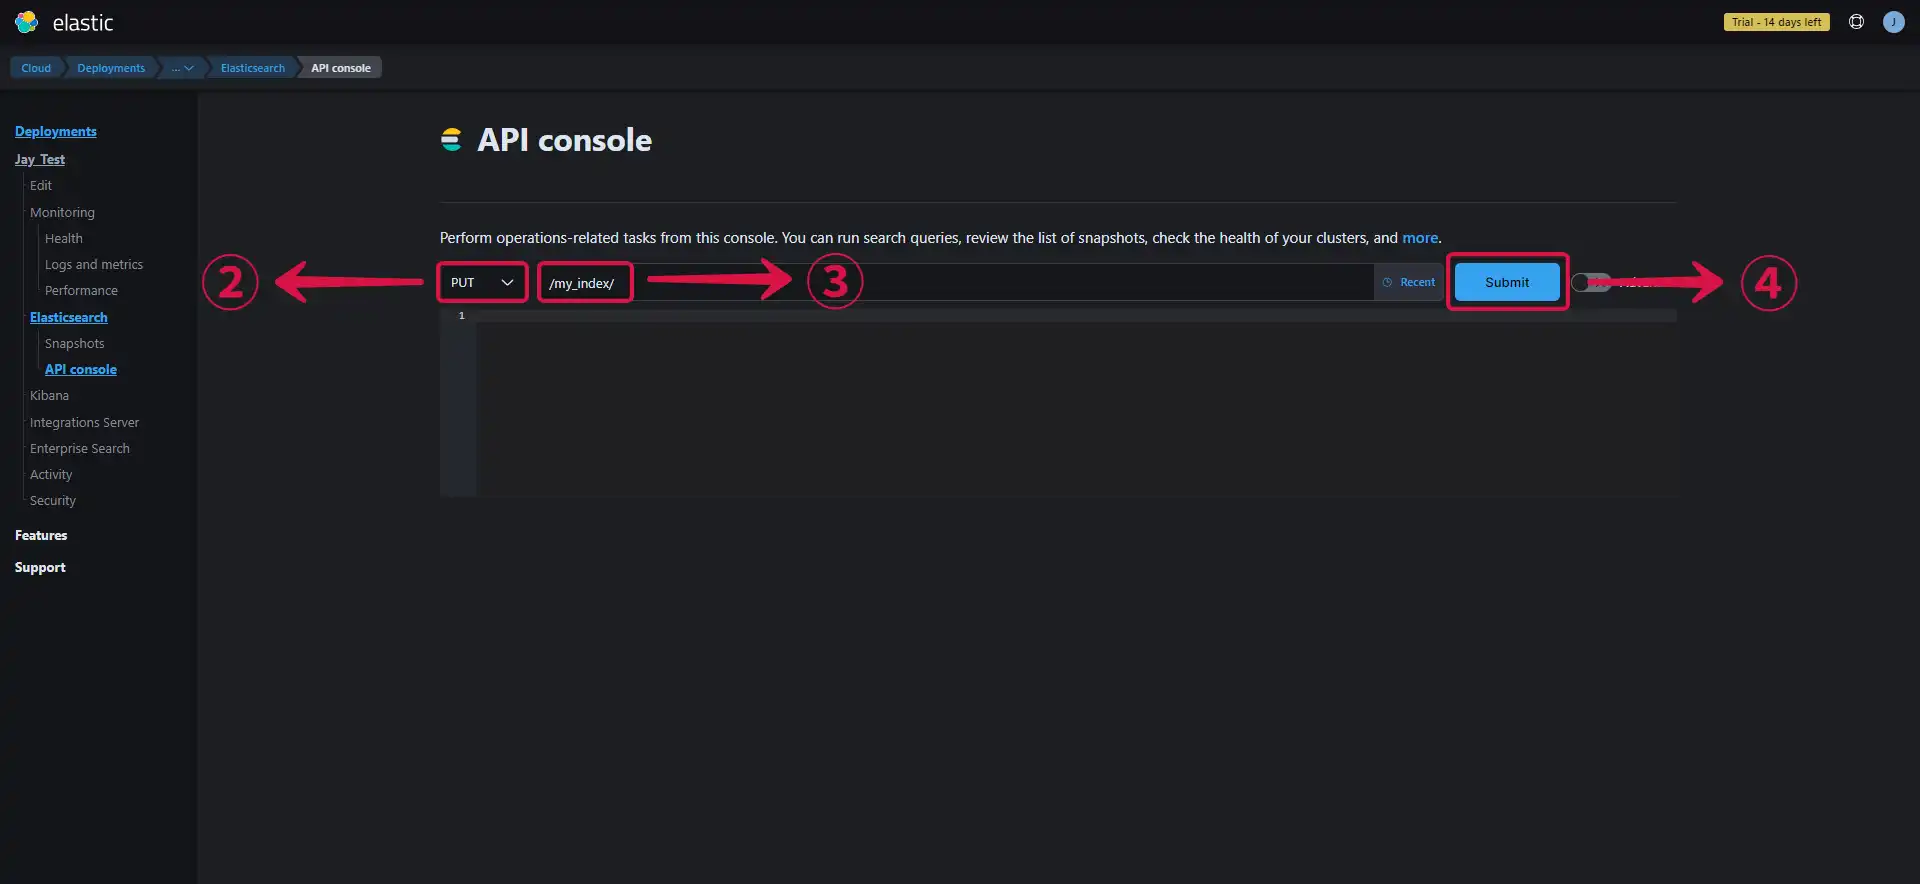
- You'll get a 200-OK⑤ message if your index was successfully created.
- Add a backslash and your index name⑥ to your endpoint to see the content of your index.

Step 2: ElasticSearch Connection Settings
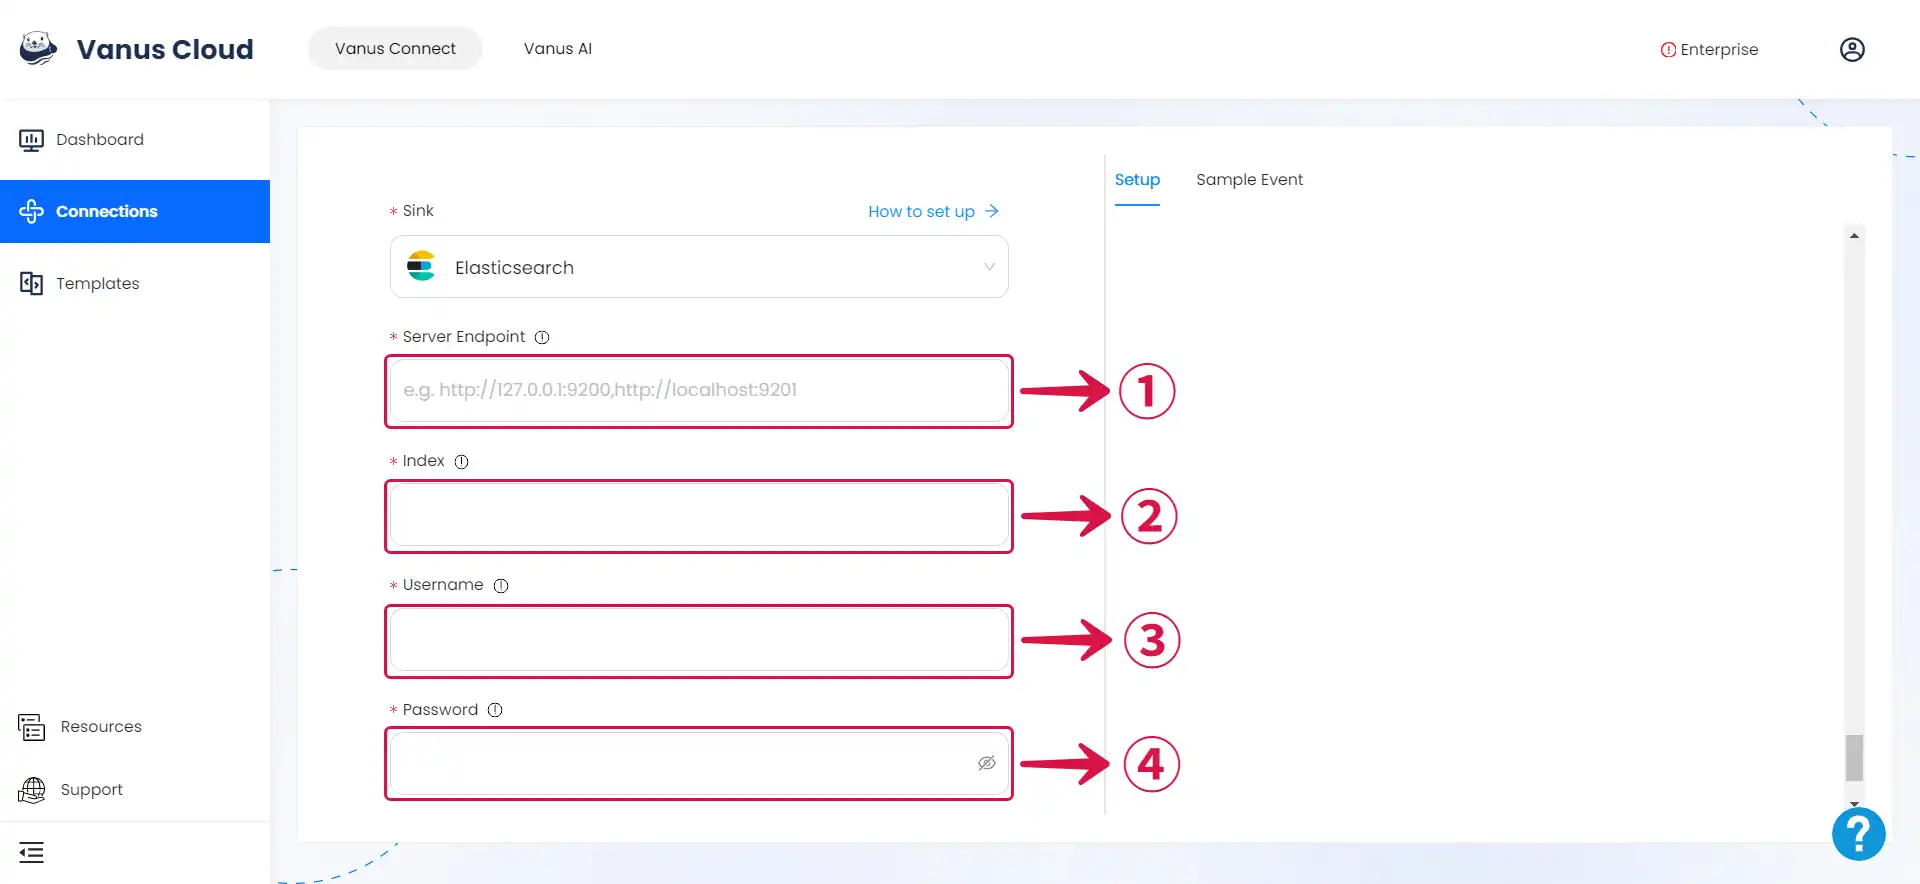
- Provide the following credentials.
Server Endpoint①: The endpoint of your ElasticSearch cluster.
Index②: The name of the index you created.
Username③: The username you downloaded during the creation of your deployment.
Password④: The password you downloaded during the creation of your deployment.
Step 3: Personalize Event Structure
This is a general instruction on how to personalize your event structure. You can structure your events to suit your specific requirements and create connections for different scenarios.
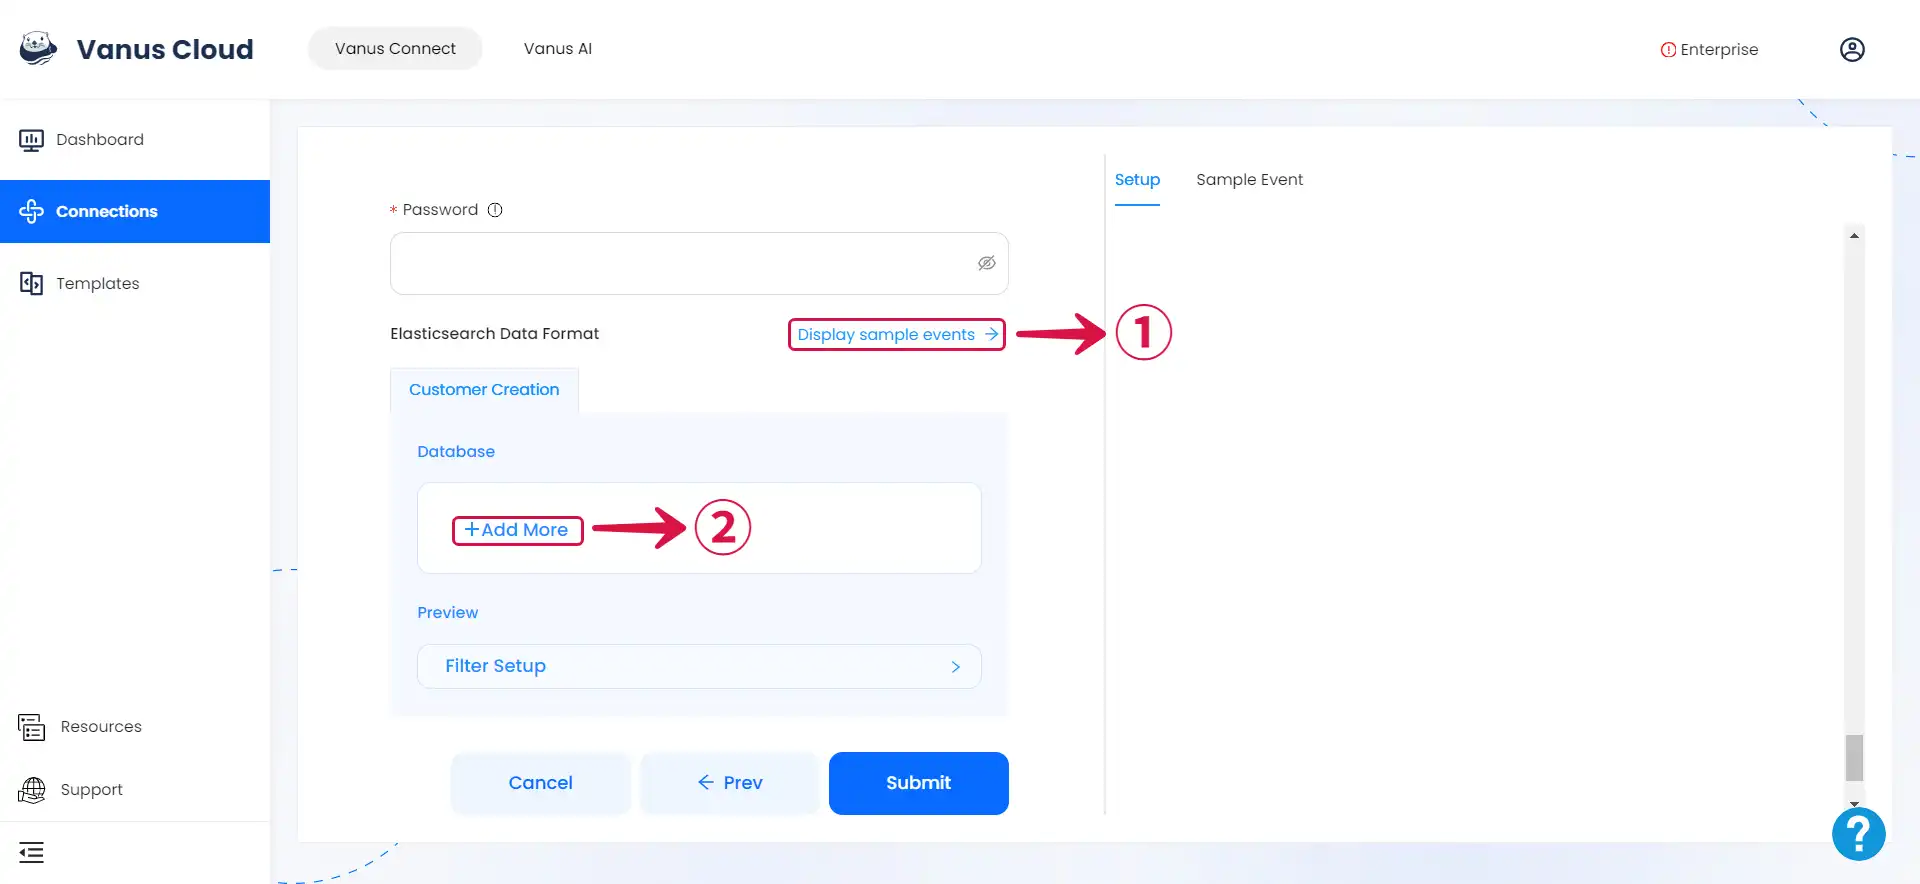
- Click on Display sample events① for reference and click on Add More② to add events.
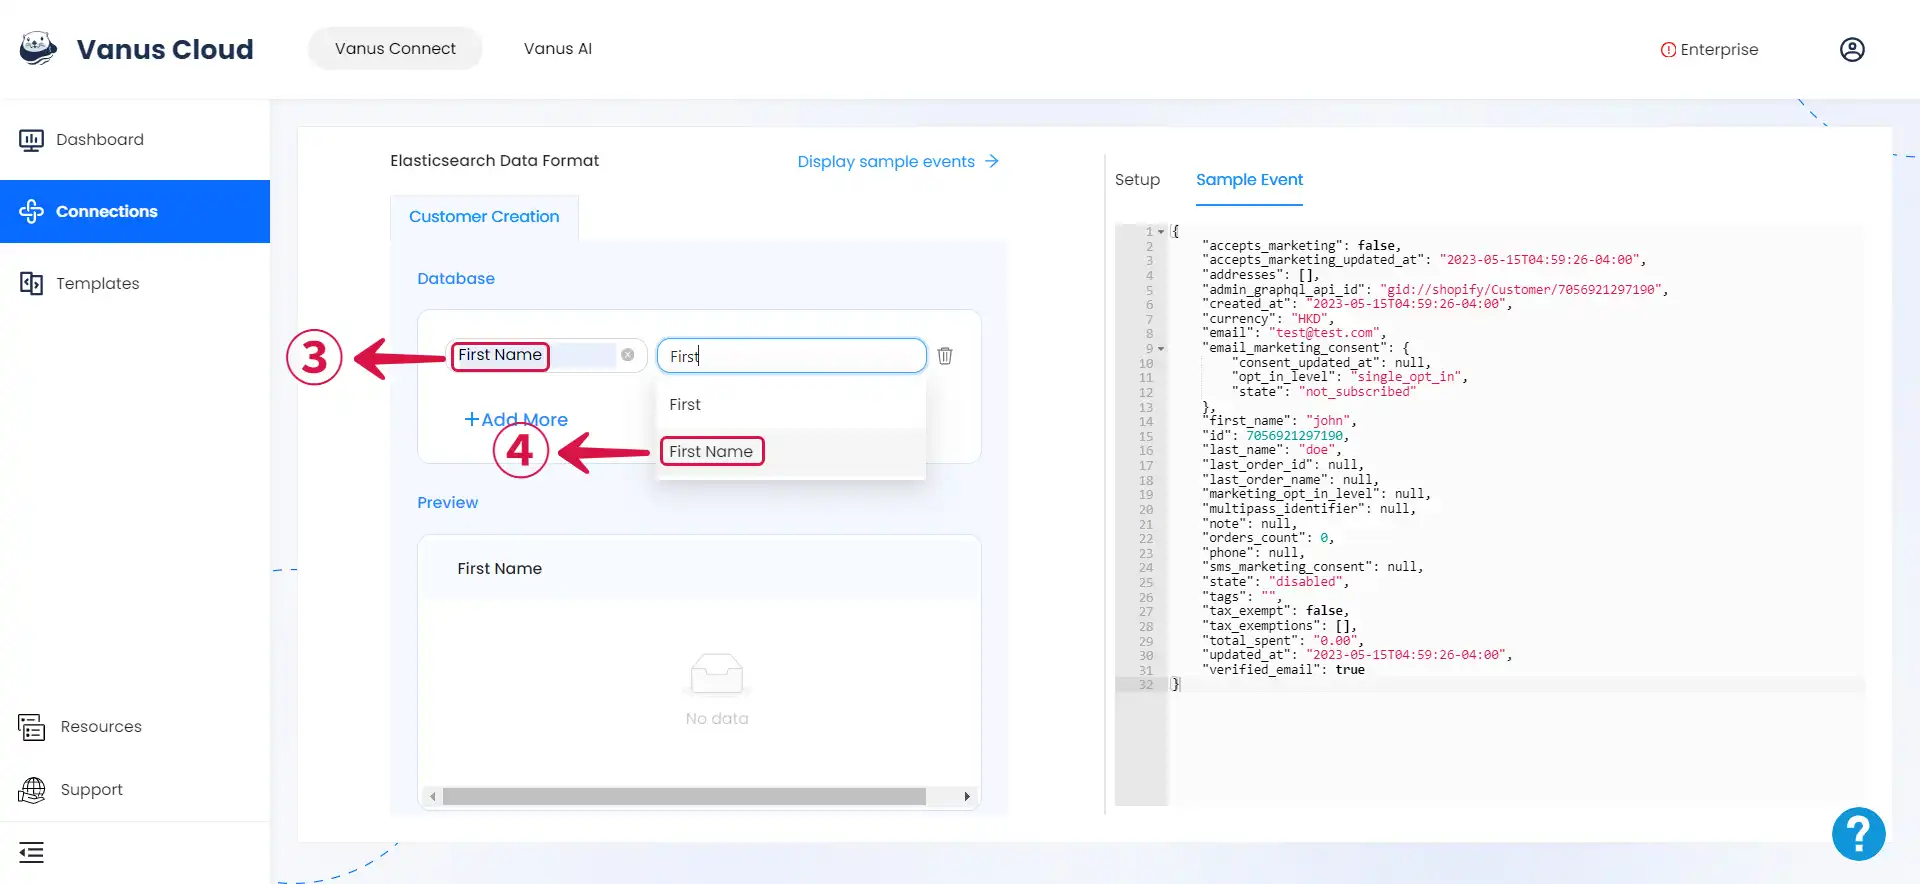
- Input key③ and search for the corresponding value④ for the event you want.
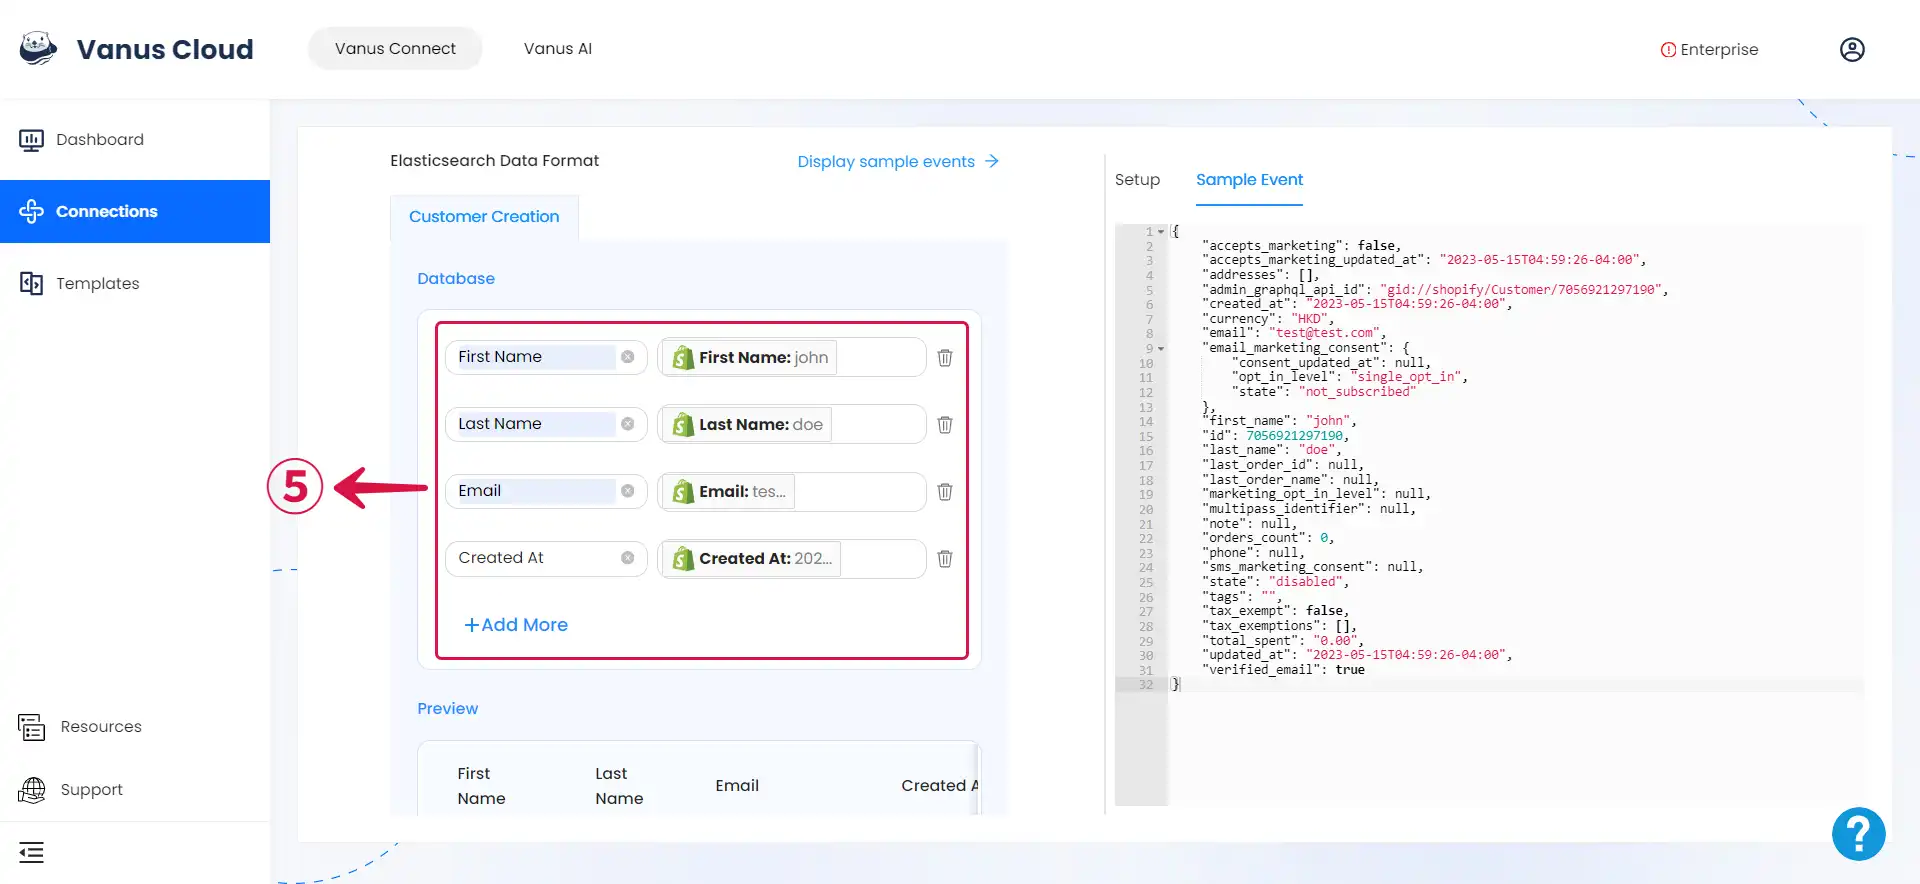
- You can fill in as many key-value pairs⑤ as you wish to receive.
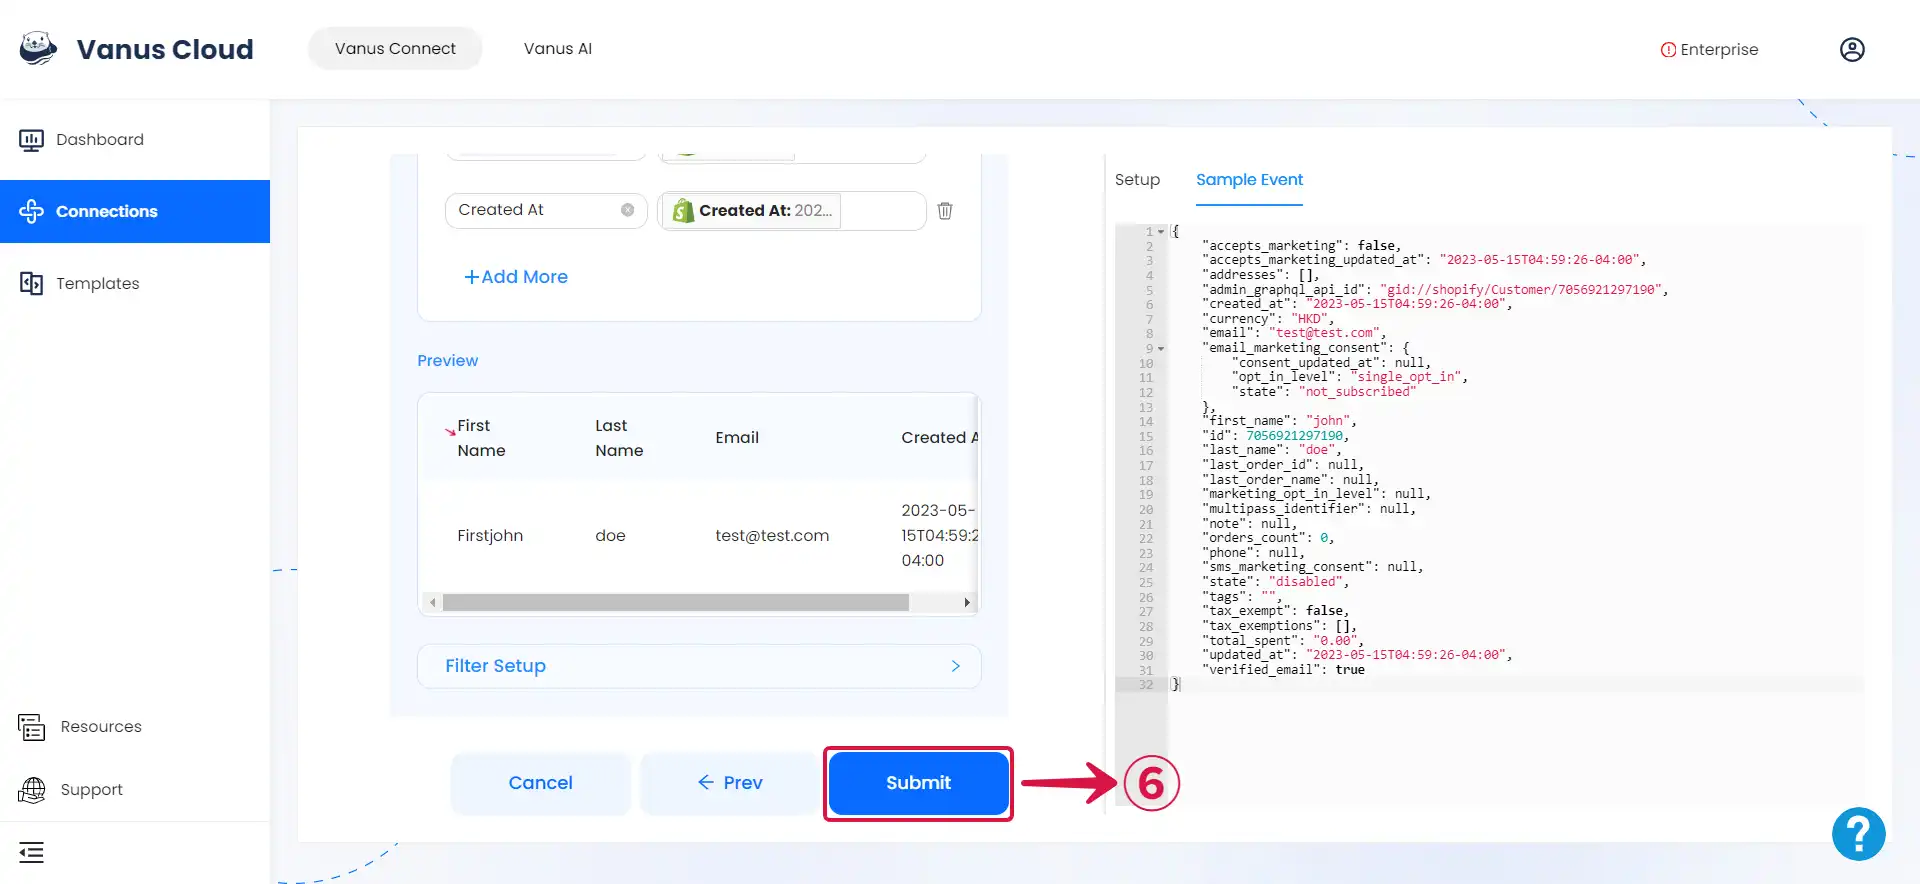
- Click Submit⑥ to finish the configuration process.
Custom Connection
Create your template following the structure of your database, an example:
{
  "_index": "vanus_test",
  "_type": "_doc",
  "_id": "CqFnBIEBzJc0Oa5TERDD",
  "_version": 1,
  "_source": {
    "id": 123,
    "date": "2022-06-13",
    "service": "test data"
  }
}