Snowflake
This guide contains information to set up a Snowflake Sink in Vanus Connect.
Introduction
Snowflake is a cloud-based data warehousing platform that allows users to store, manage, and analyze large amounts of structured and semi-structured data using a SQL interface.
Using Snowflake sink, you can receive EventClouds and effortlessly transfer them to your Snowflake warehouse.
Prerequisites
Before forwarding events to Snowflake, you must have:
- A Vanus Cloud Account.
- A Snowflake account with administrative privileges
- The user has either an
ACCOUNTADMINorSECURITYADMINrole in Snowflake.
Getting Started
If you have a Snowflake account already, you can skip Step 1 and directly go to Step 2.
Step 1: (Optional) Creating a Snowflake Account
When you sign up for an account on Snowflake, you'll receive 30 days of free access and $400 credits. However, any usage beyond this limit will be charged. The free trial begins once you complete the sign-up process and activate your account.
If you end up utilising all $400 credits before the 30-day trial period is over, your account will be suspended, and you won't be able to use any of its features. You can still log in to your account, but you won't be able to perform any actions, such as running a virtual warehouse, loading data, or running queries.
Let's get started:
Go to Snowflake Sign Up
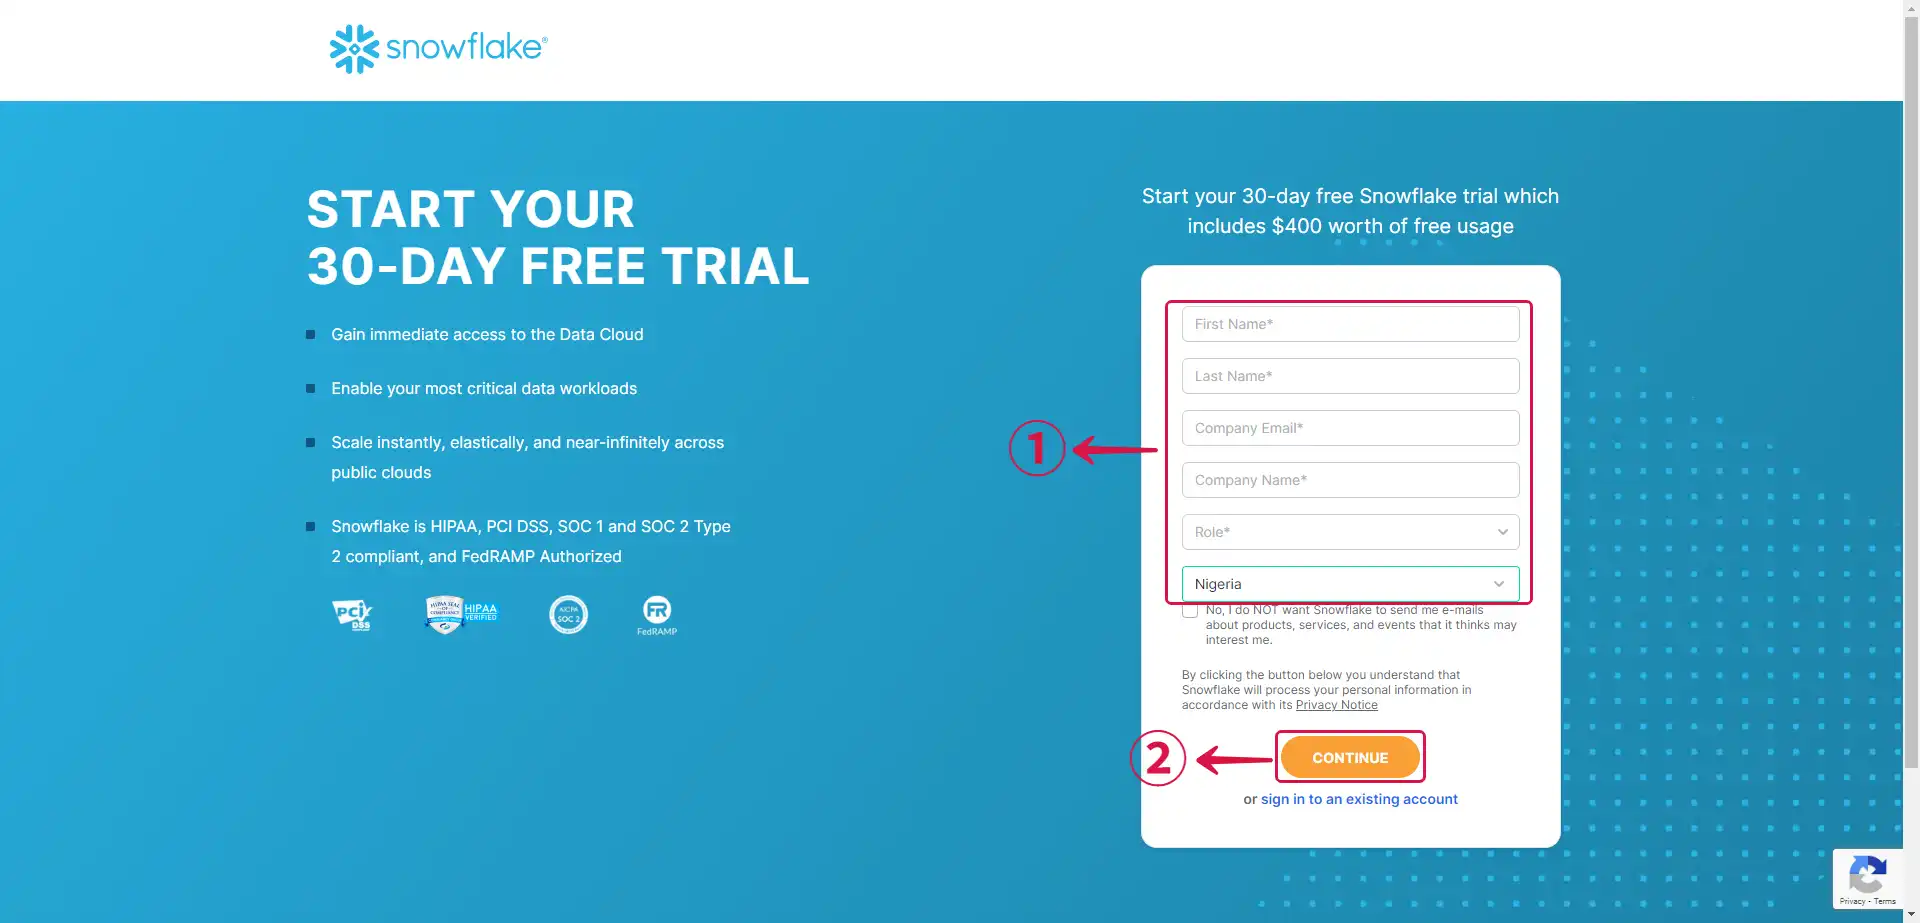
On the Sign Up page, provide the required details① and click CONTINUE②.
- Select the Snowflake edition③ you want to use, choose your cloud provider④, select your preferred region⑤, agree to the Snowflake Self Service On Demand Terms⑥ and click GET STARTED⑦.
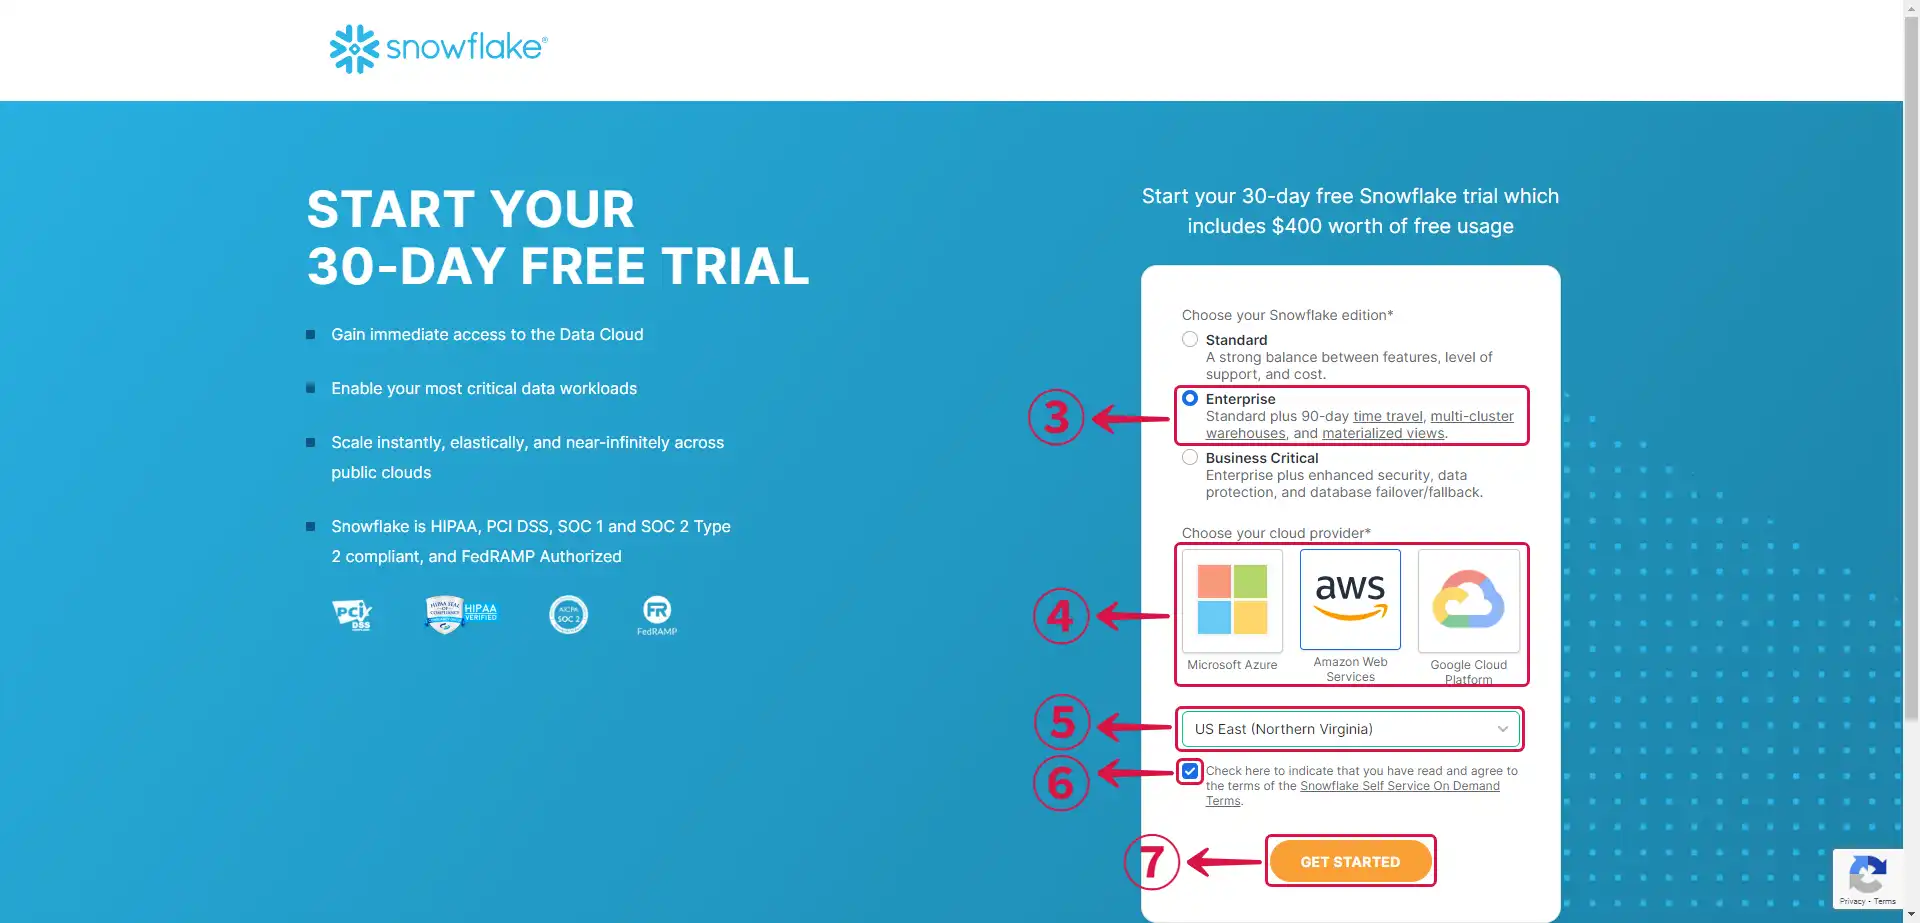
To make an informed choice that aligns with your organisation's requirements, Snowflake offers multiple editions and supported cloud platforms. Please explore the Snowflake Editions documentation to understand the various edition options available. Additionally, for detailed pricing and specifics of each supported cloud platform, refer to the Supported Cloud Platforms documentation.
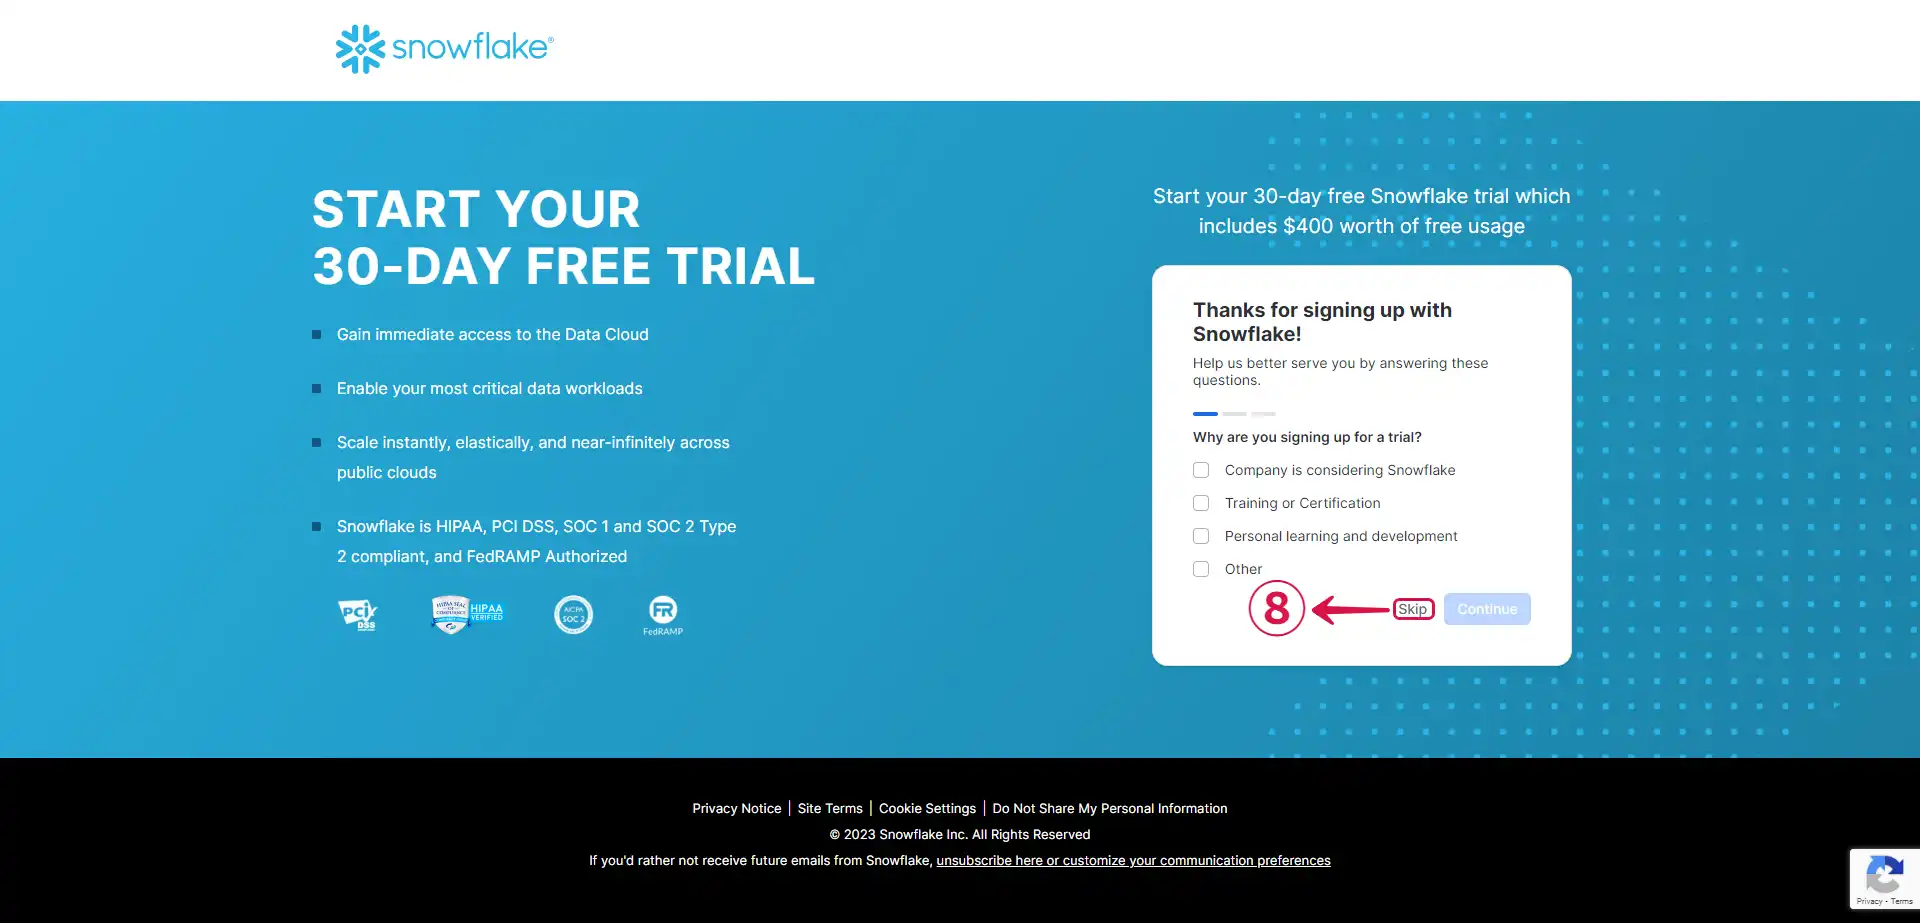
- Click on Skip⑧ to continue your configuration.
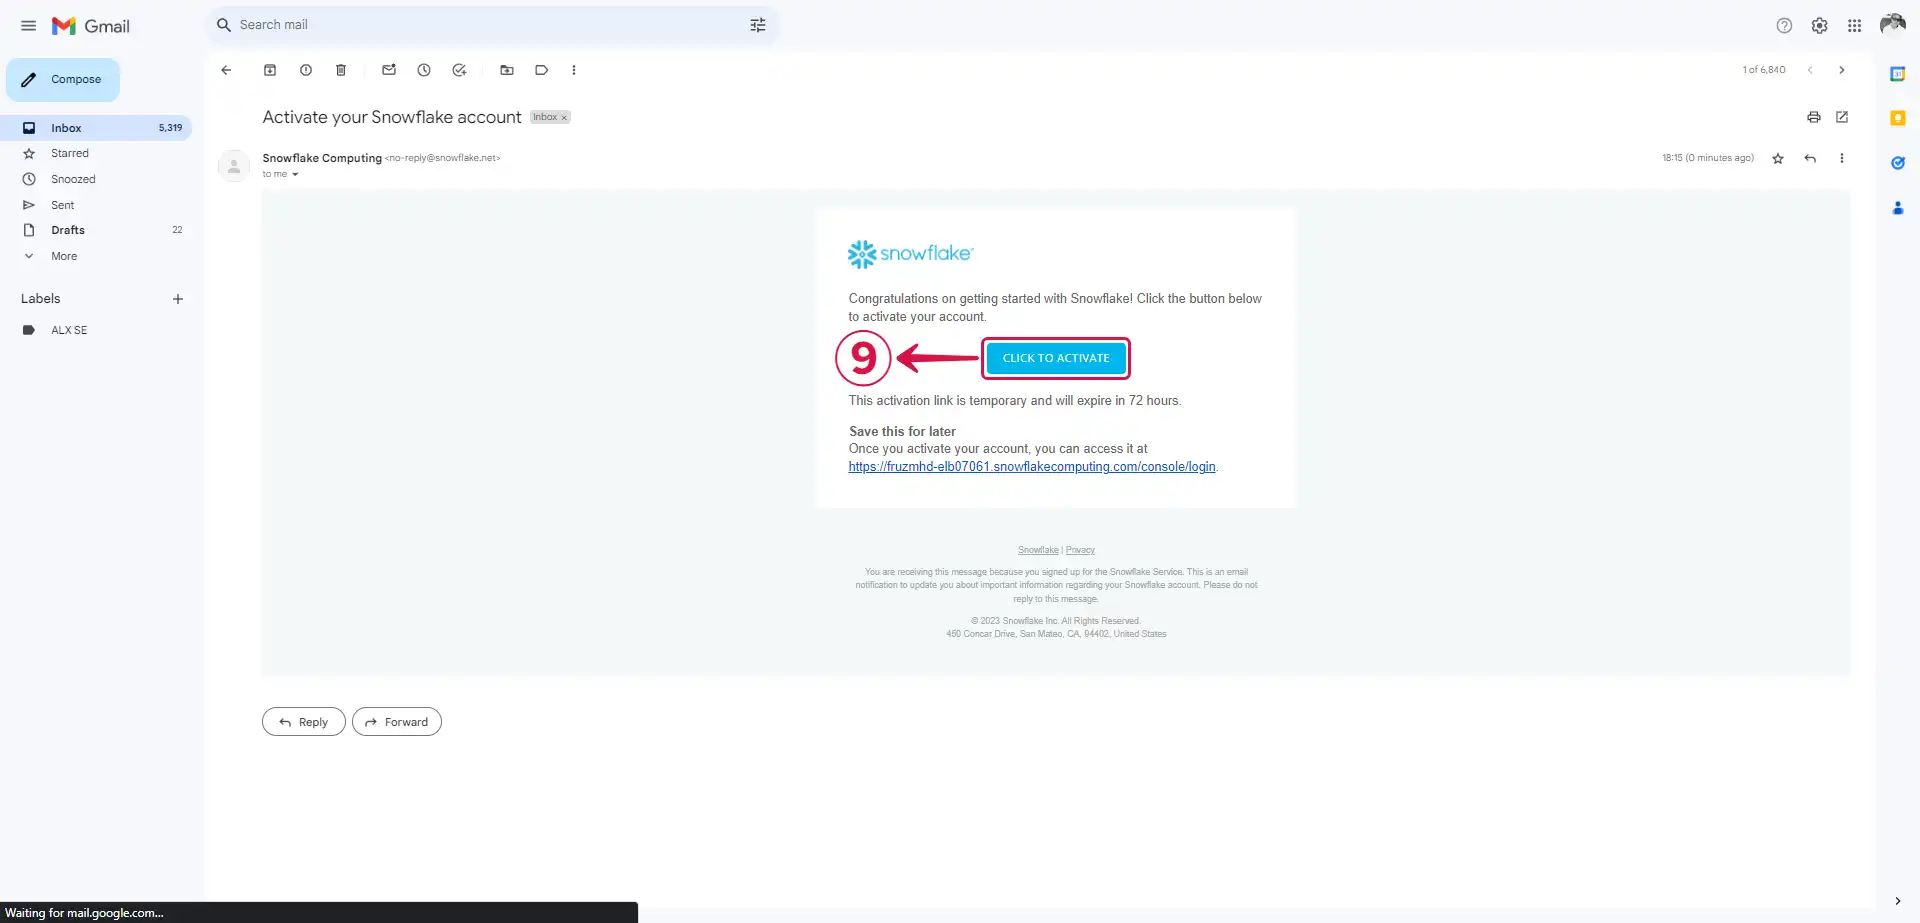
- An activation email from Snowflake has been sent to your registered email address. Click on CLICK TO ACTIVATE⑨ to activate your account.
- Provide your preferred Username⑩ and Password⑪, Confirm Password⑫ and click Get started⑬.
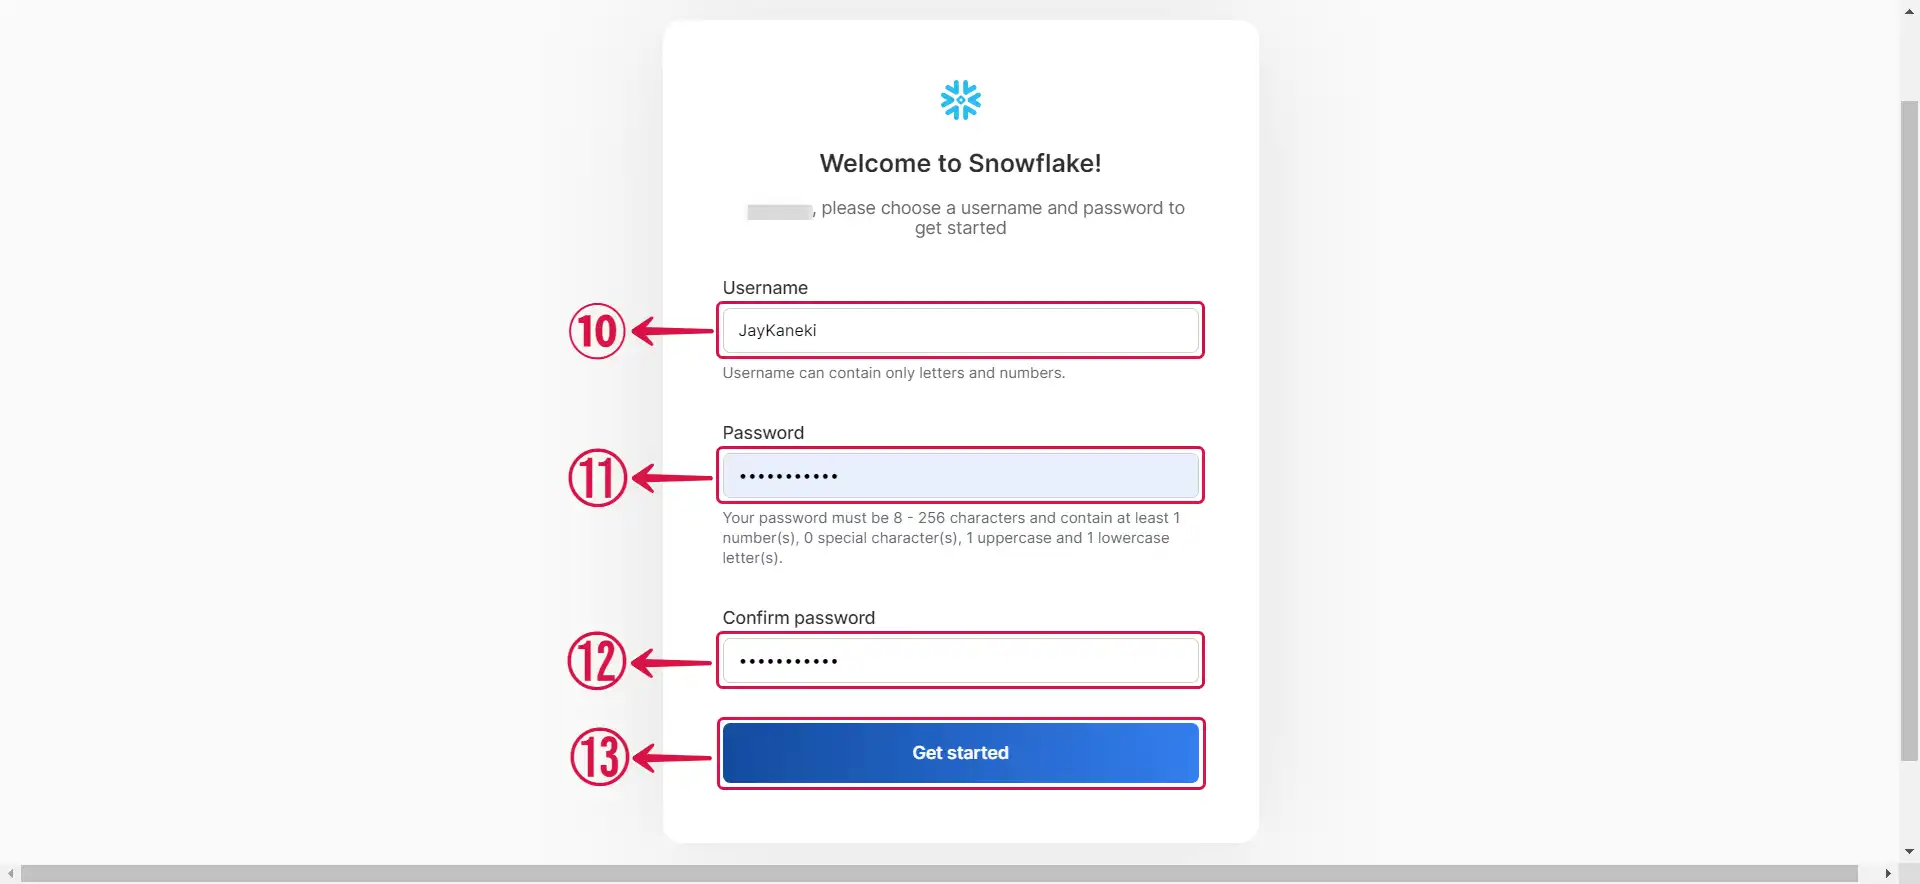
Step 2: Obtain Essential Snowflake Data
- Get your account URL by going to Admin① and Accounts② from the side menu. Afterward, click on the ellipsis icon③.
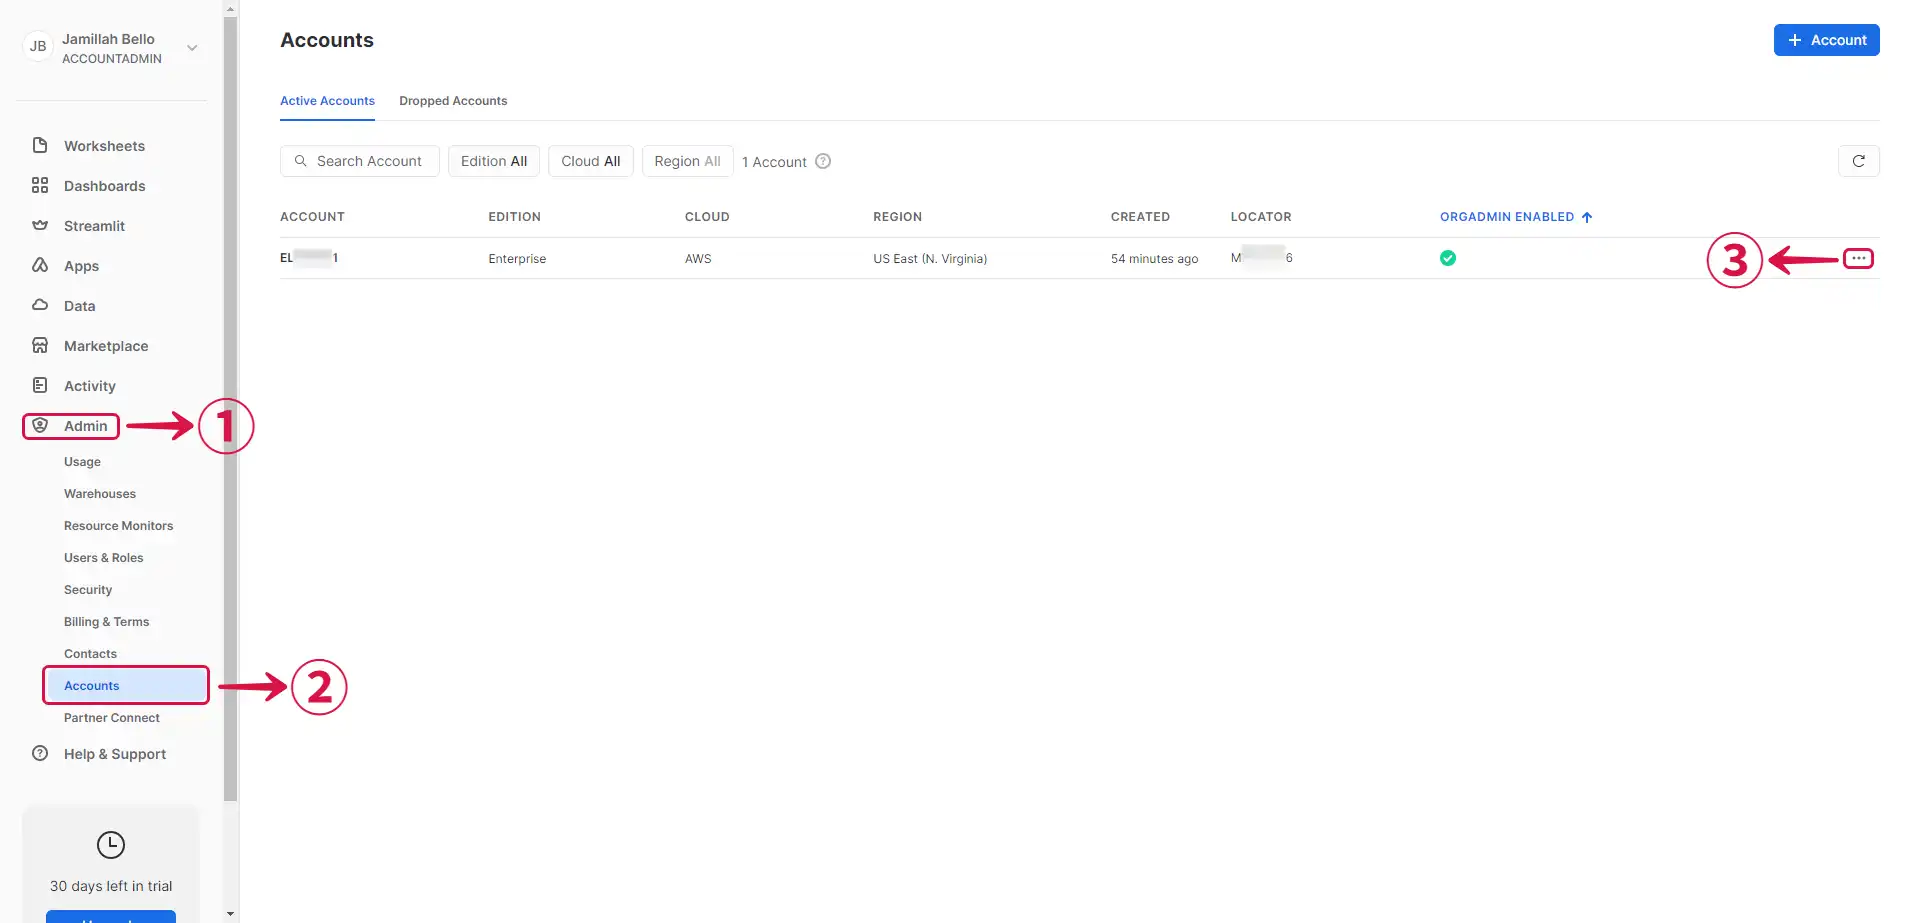
- Select Manage Urls④.
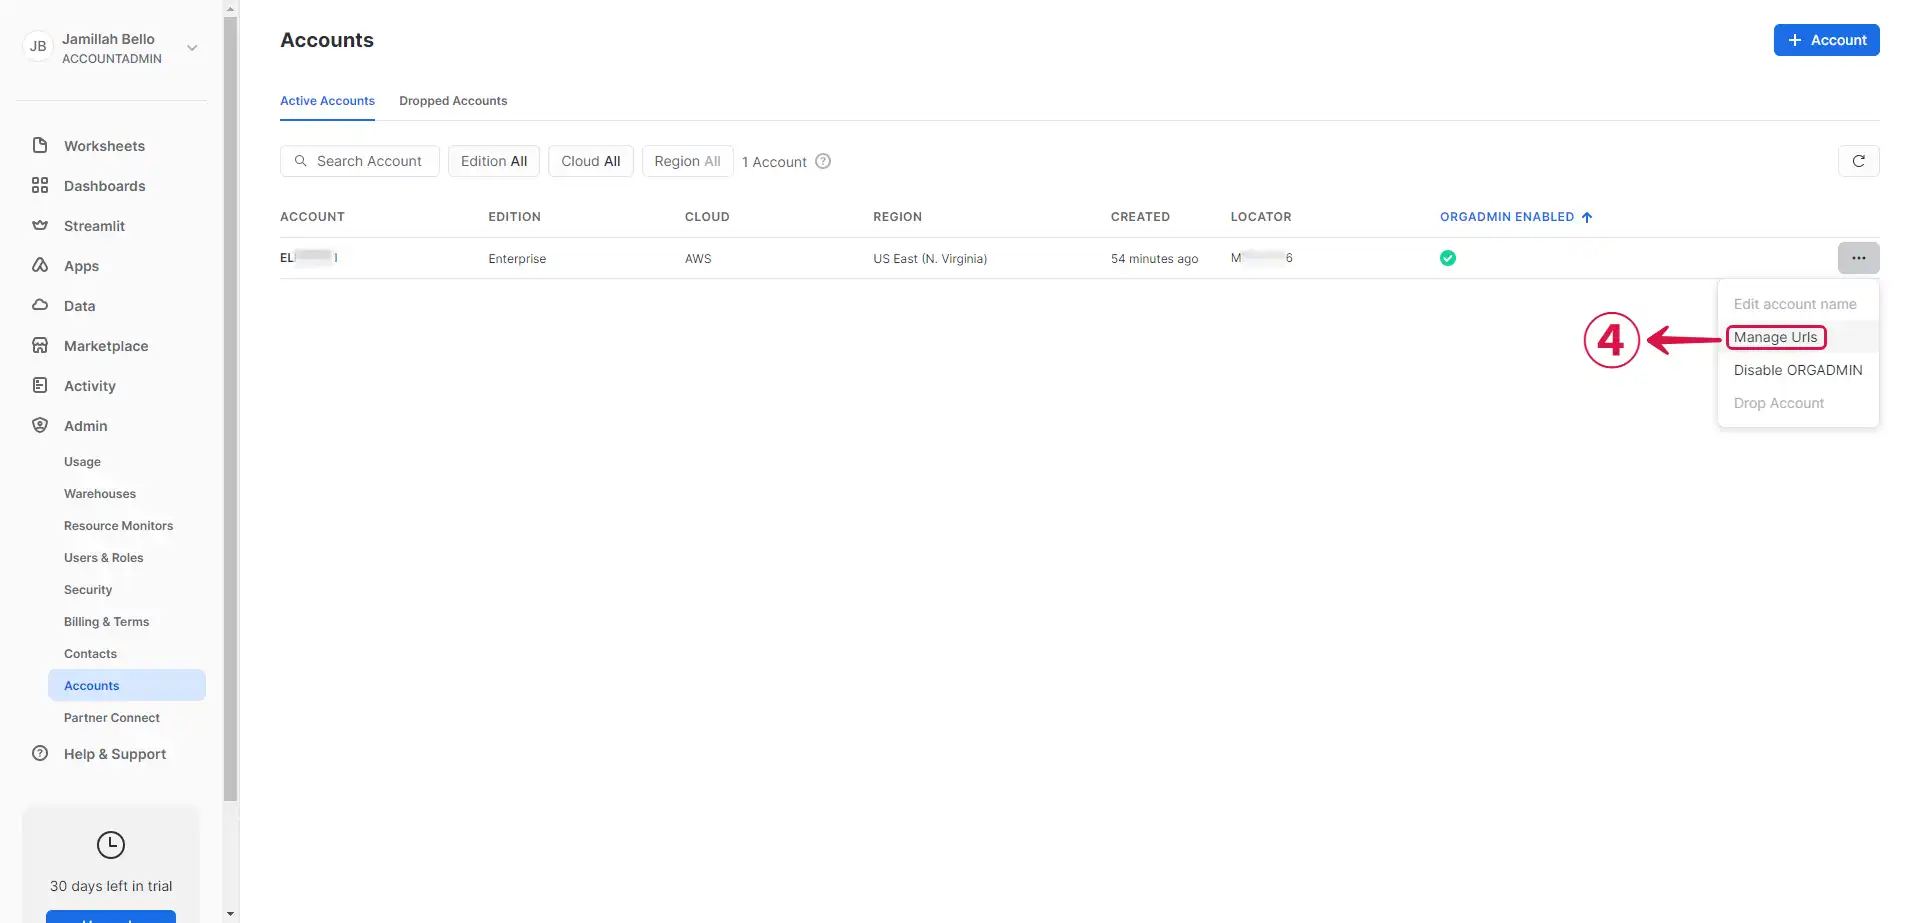
- Click on the chain-link icon⑤ to copy the URL, and then click Close⑥.
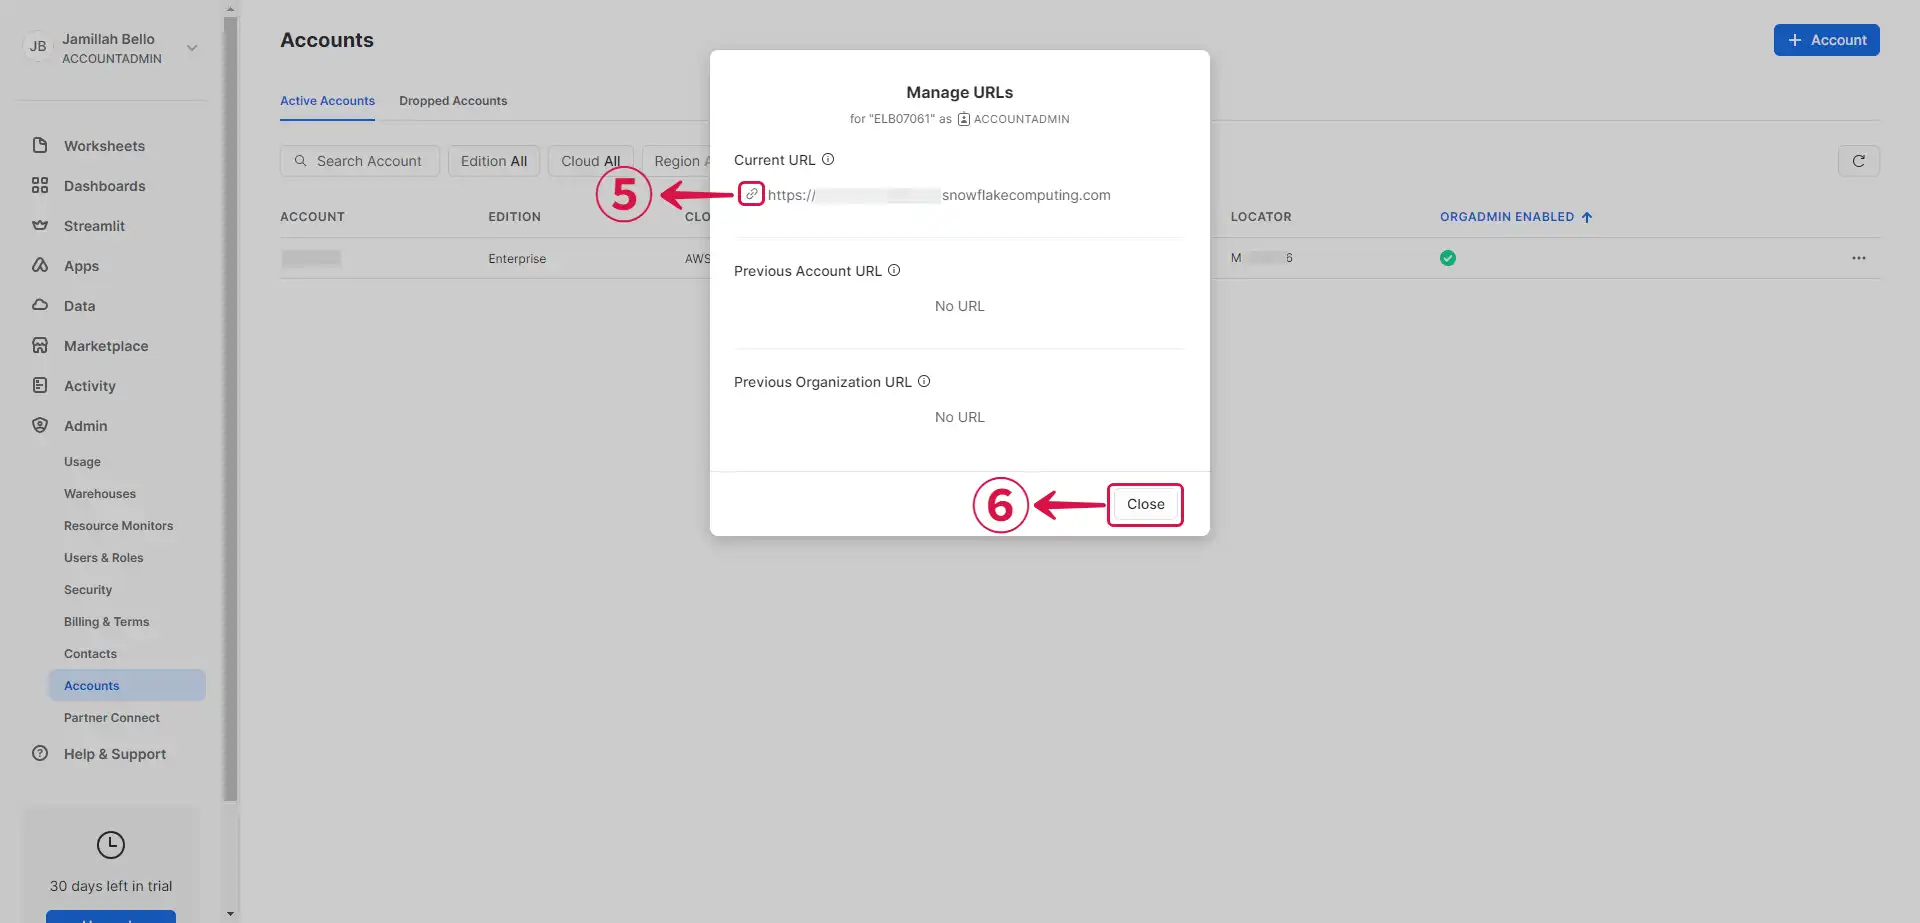
- Navigate to the Worksheets⑦ page.
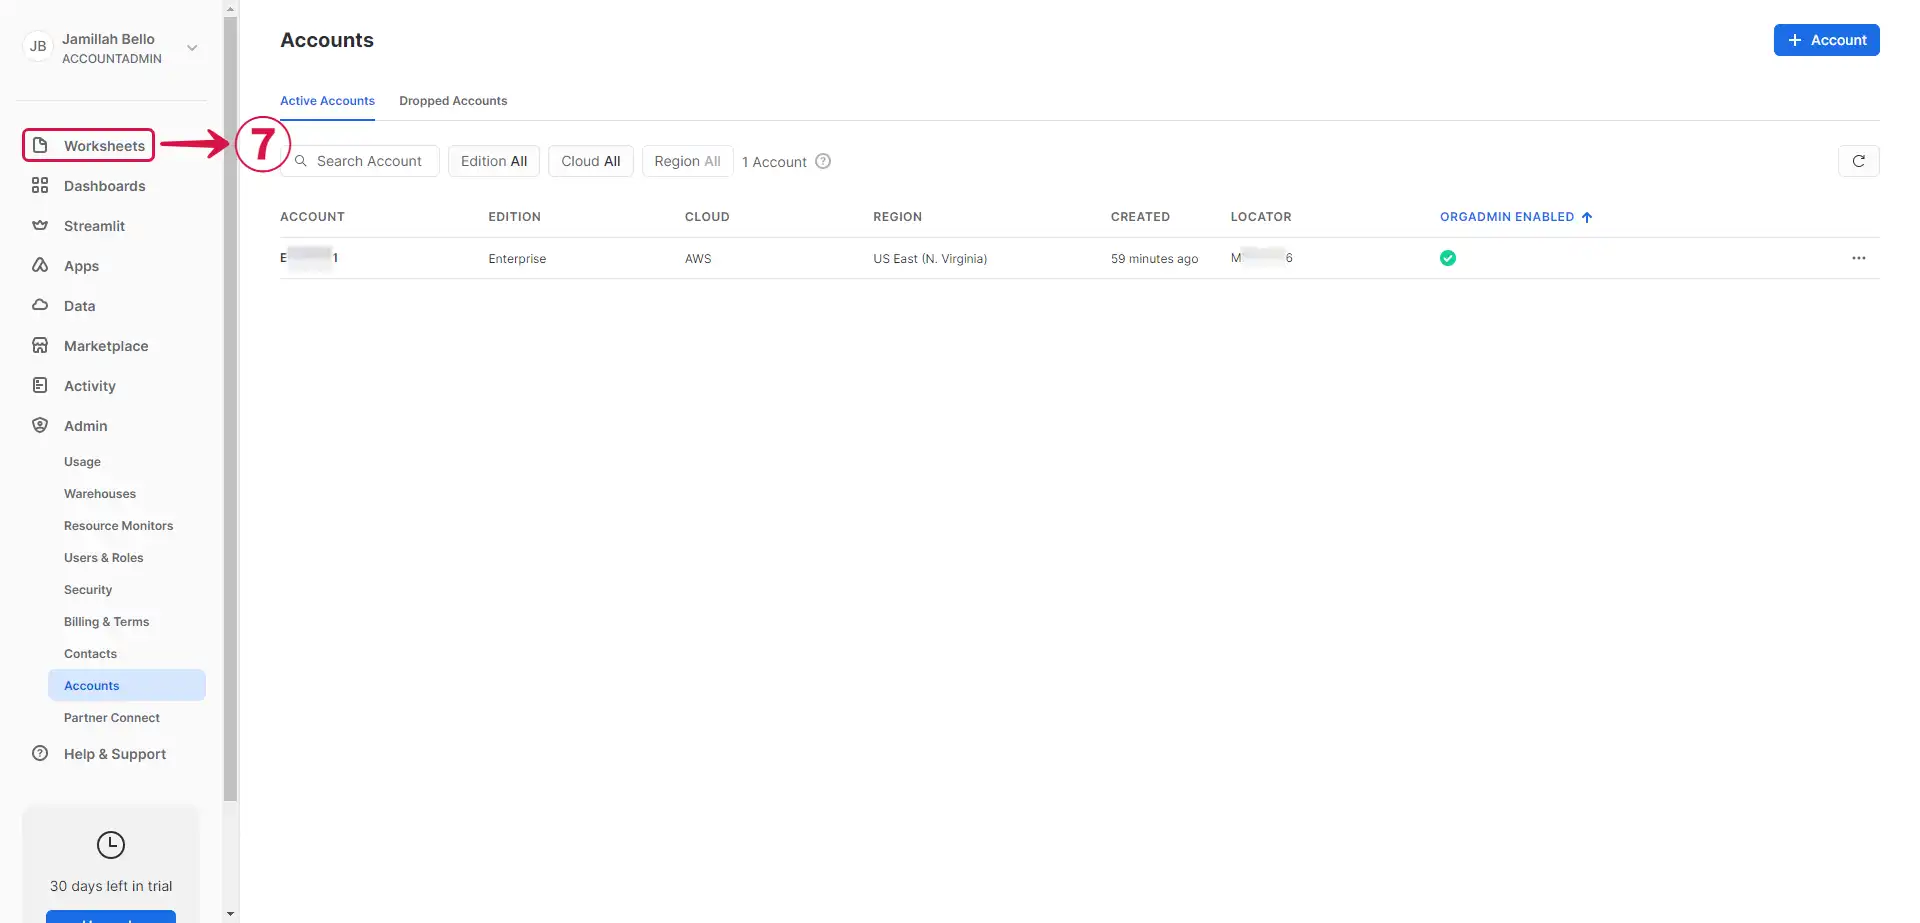
- Click on the
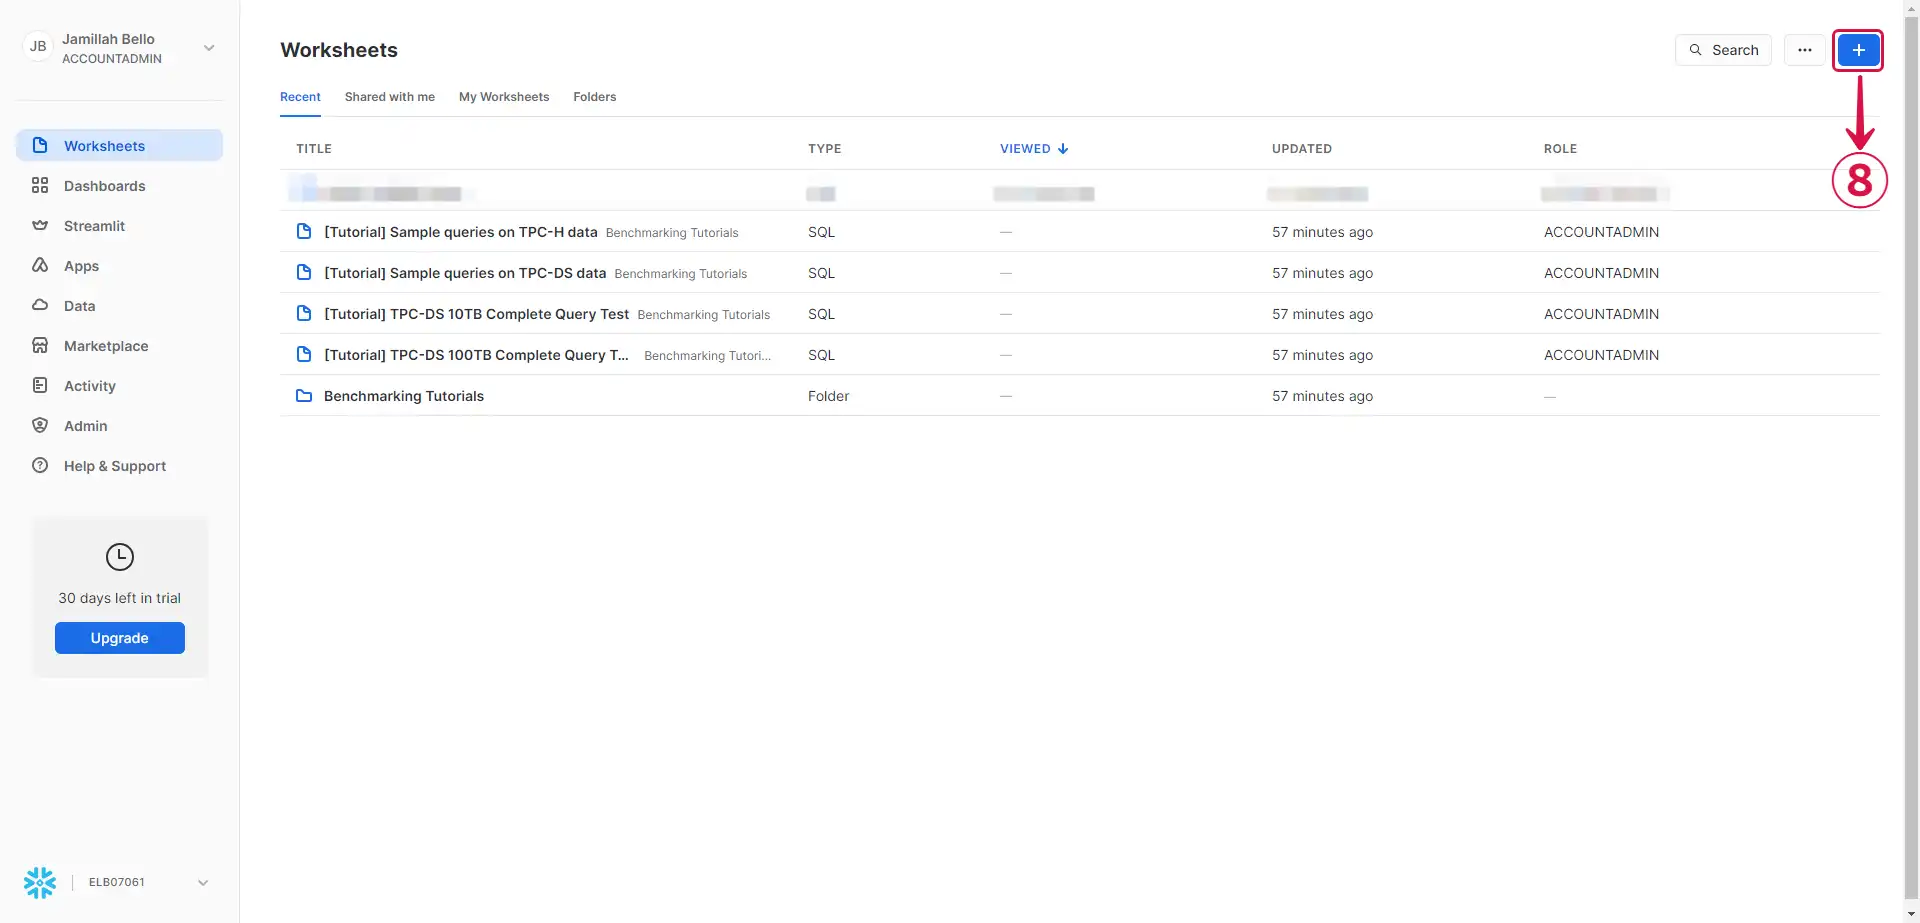
+⑧ button.
- Select SQL Worksheet⑨.
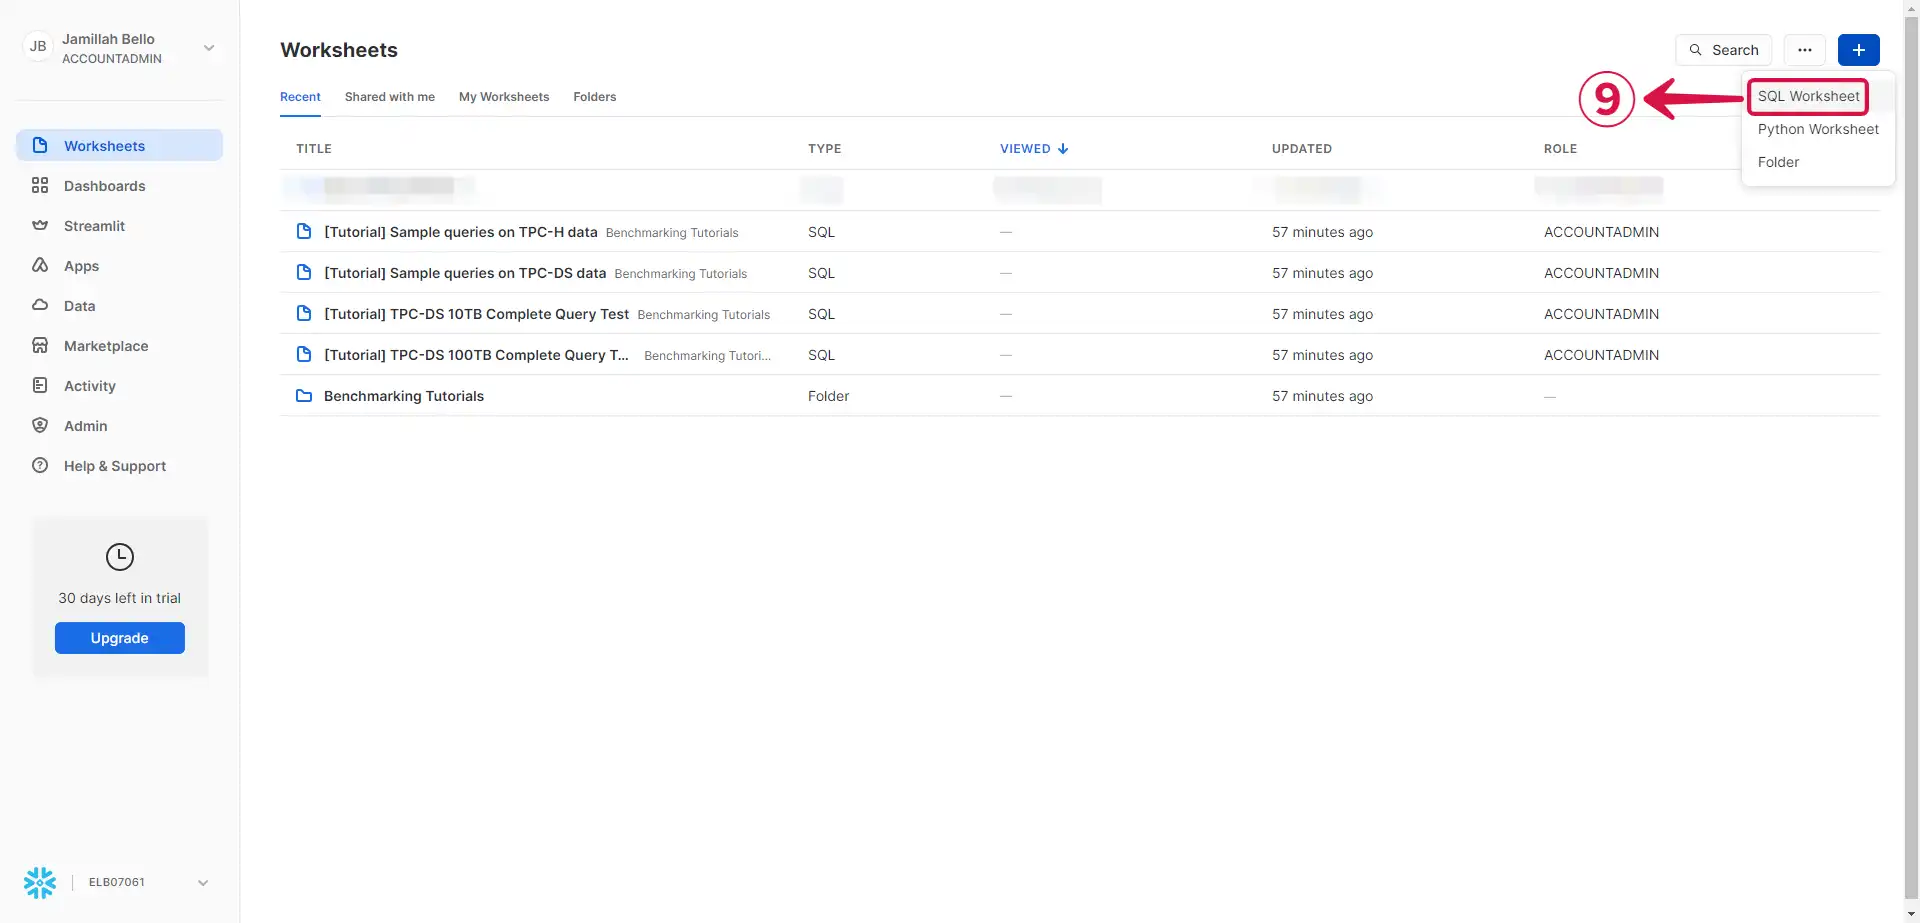
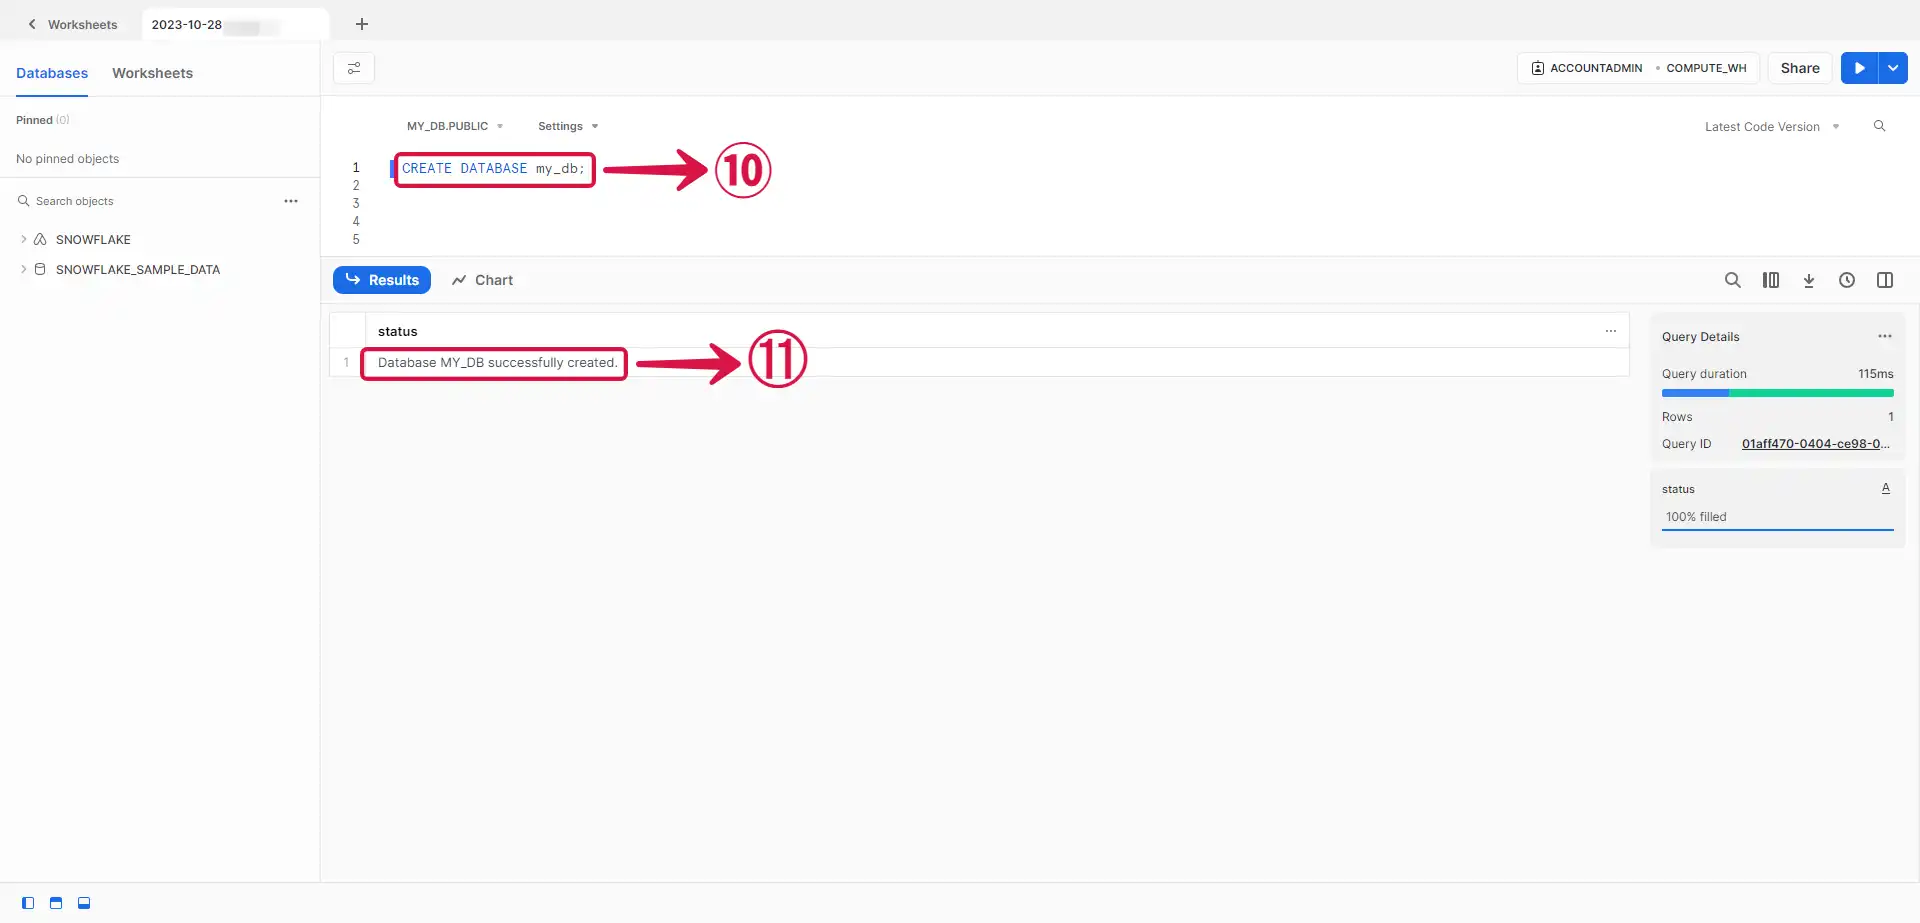
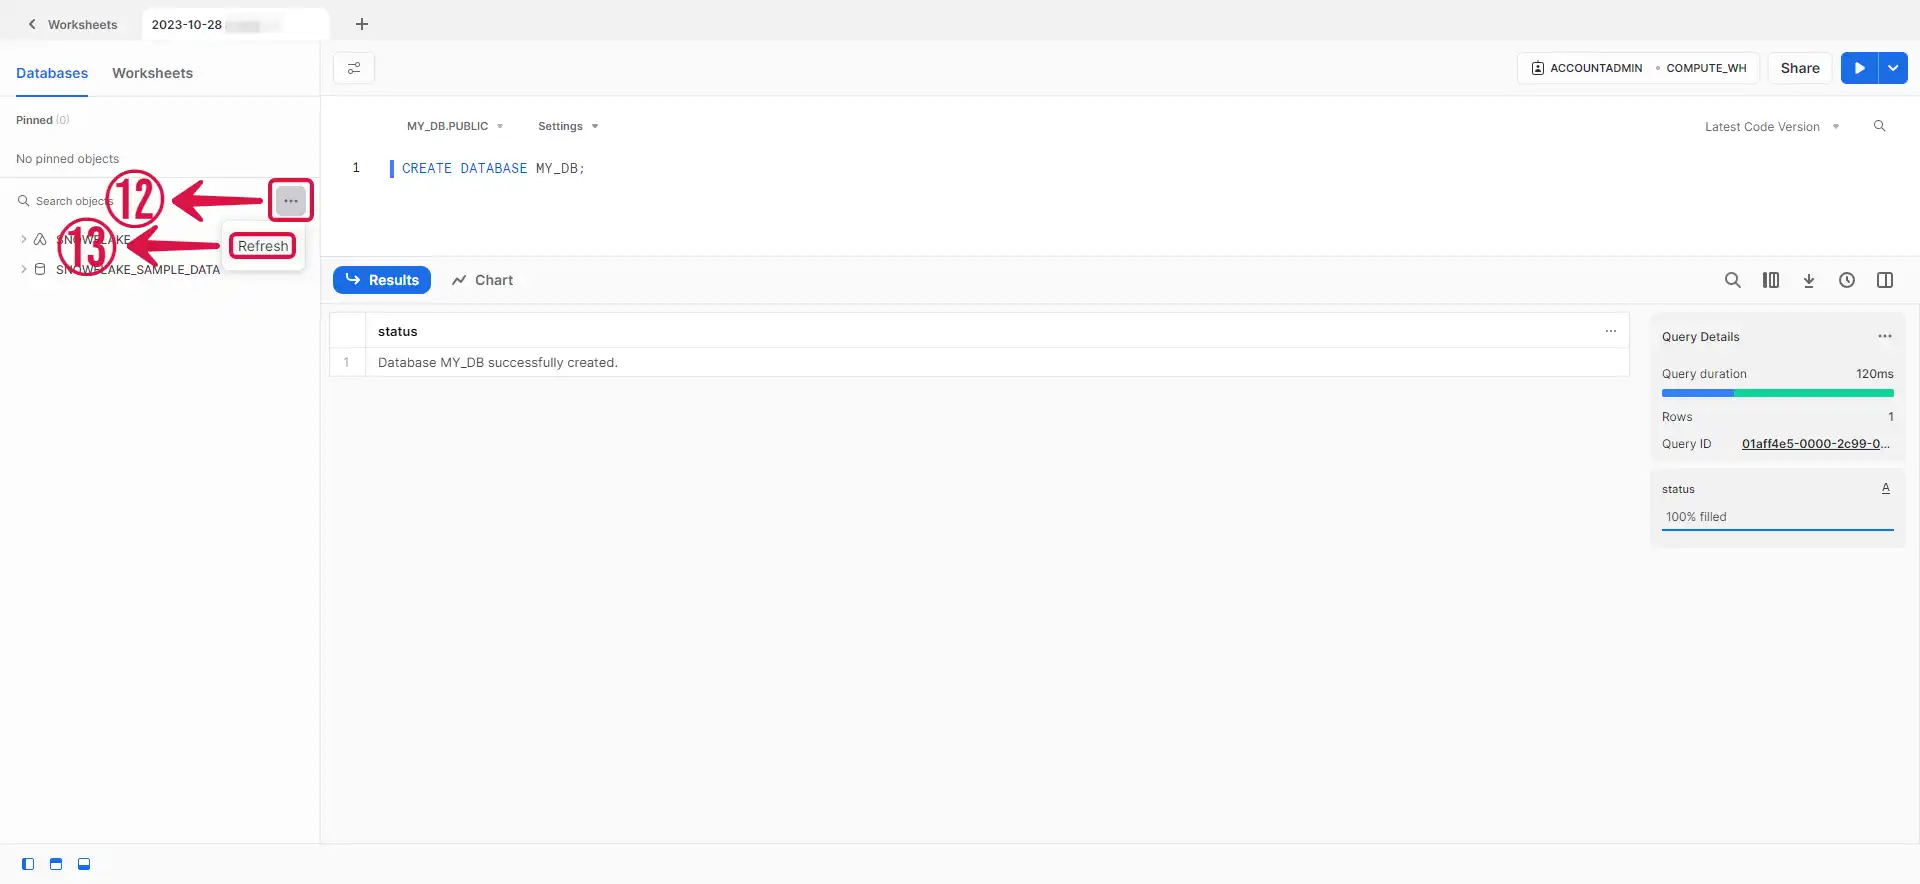
- Run the
CREATE DATABSE my_db;⑩ command to create a database named MY_DB⑪.
- Click on the ellipsis icon⑫ and click Refresh⑬ to reflect the changes.
- Take note of your Role⑭ and Warehouse⑮, and then execute the
SHOW SCHEMAS;⑯ command to identify the active schema⑰, which will be indicated by aY⑱ next to its name in theis_currentfield.
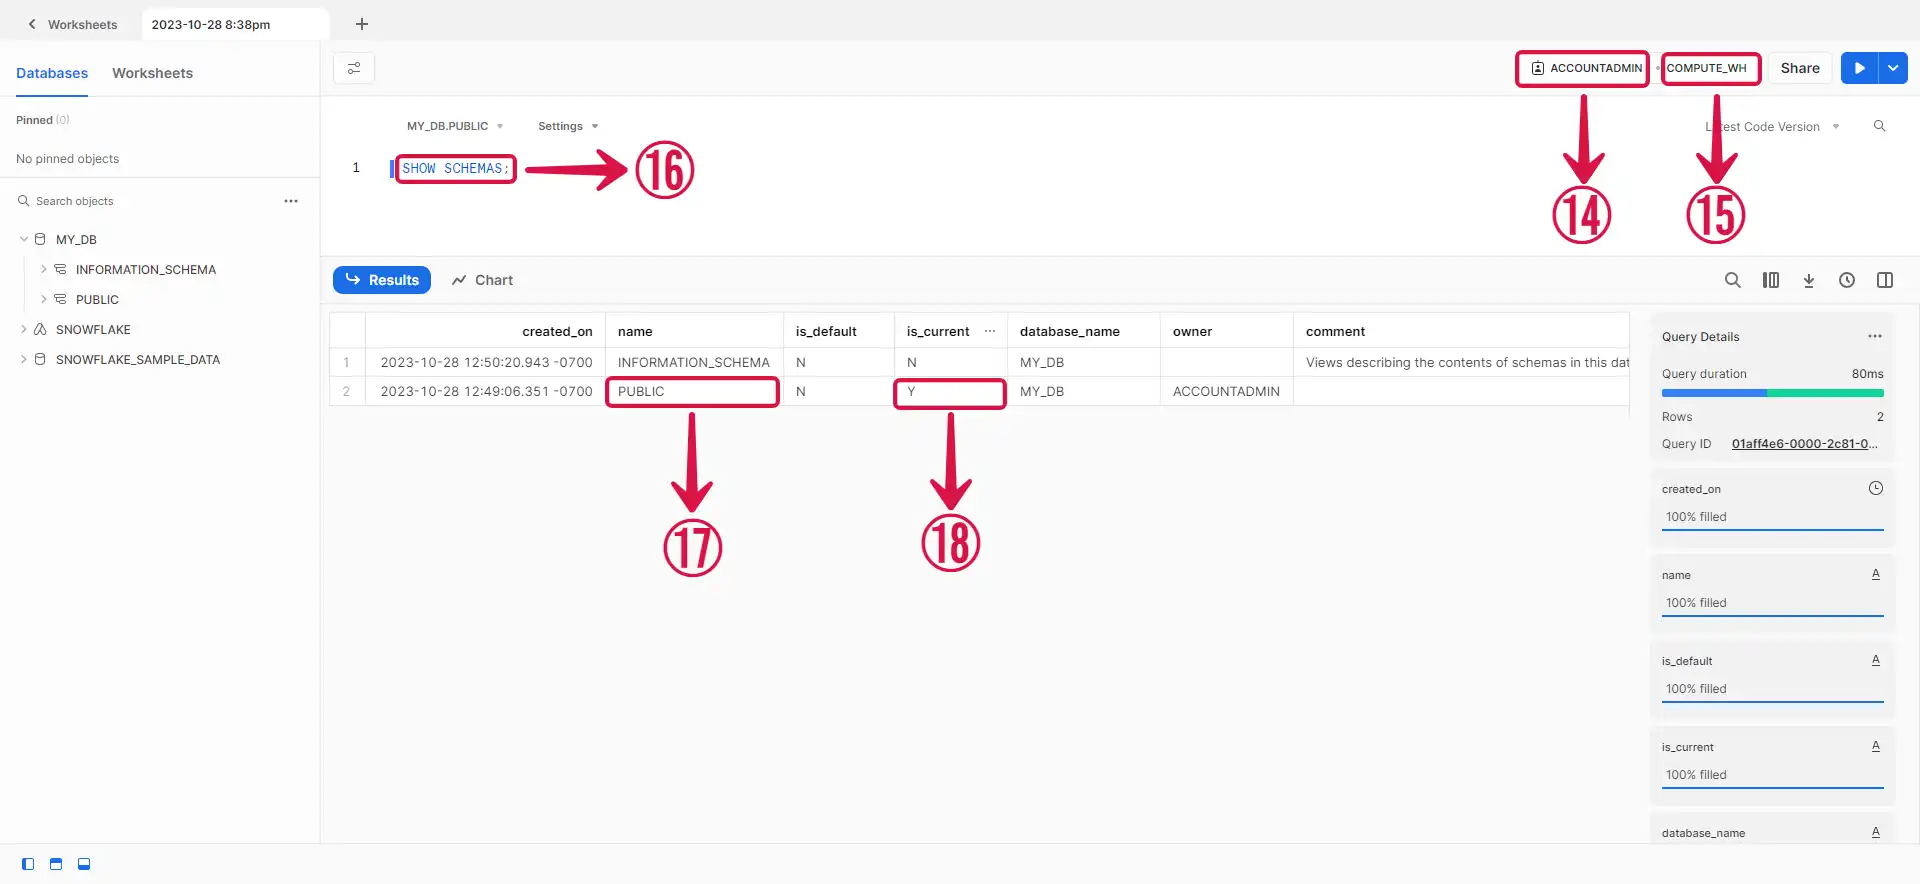
We utilized the default role, warehouse, and schema, but you have the option to create your own if you prefer.
Step 3: SnowFlake Connection Settings
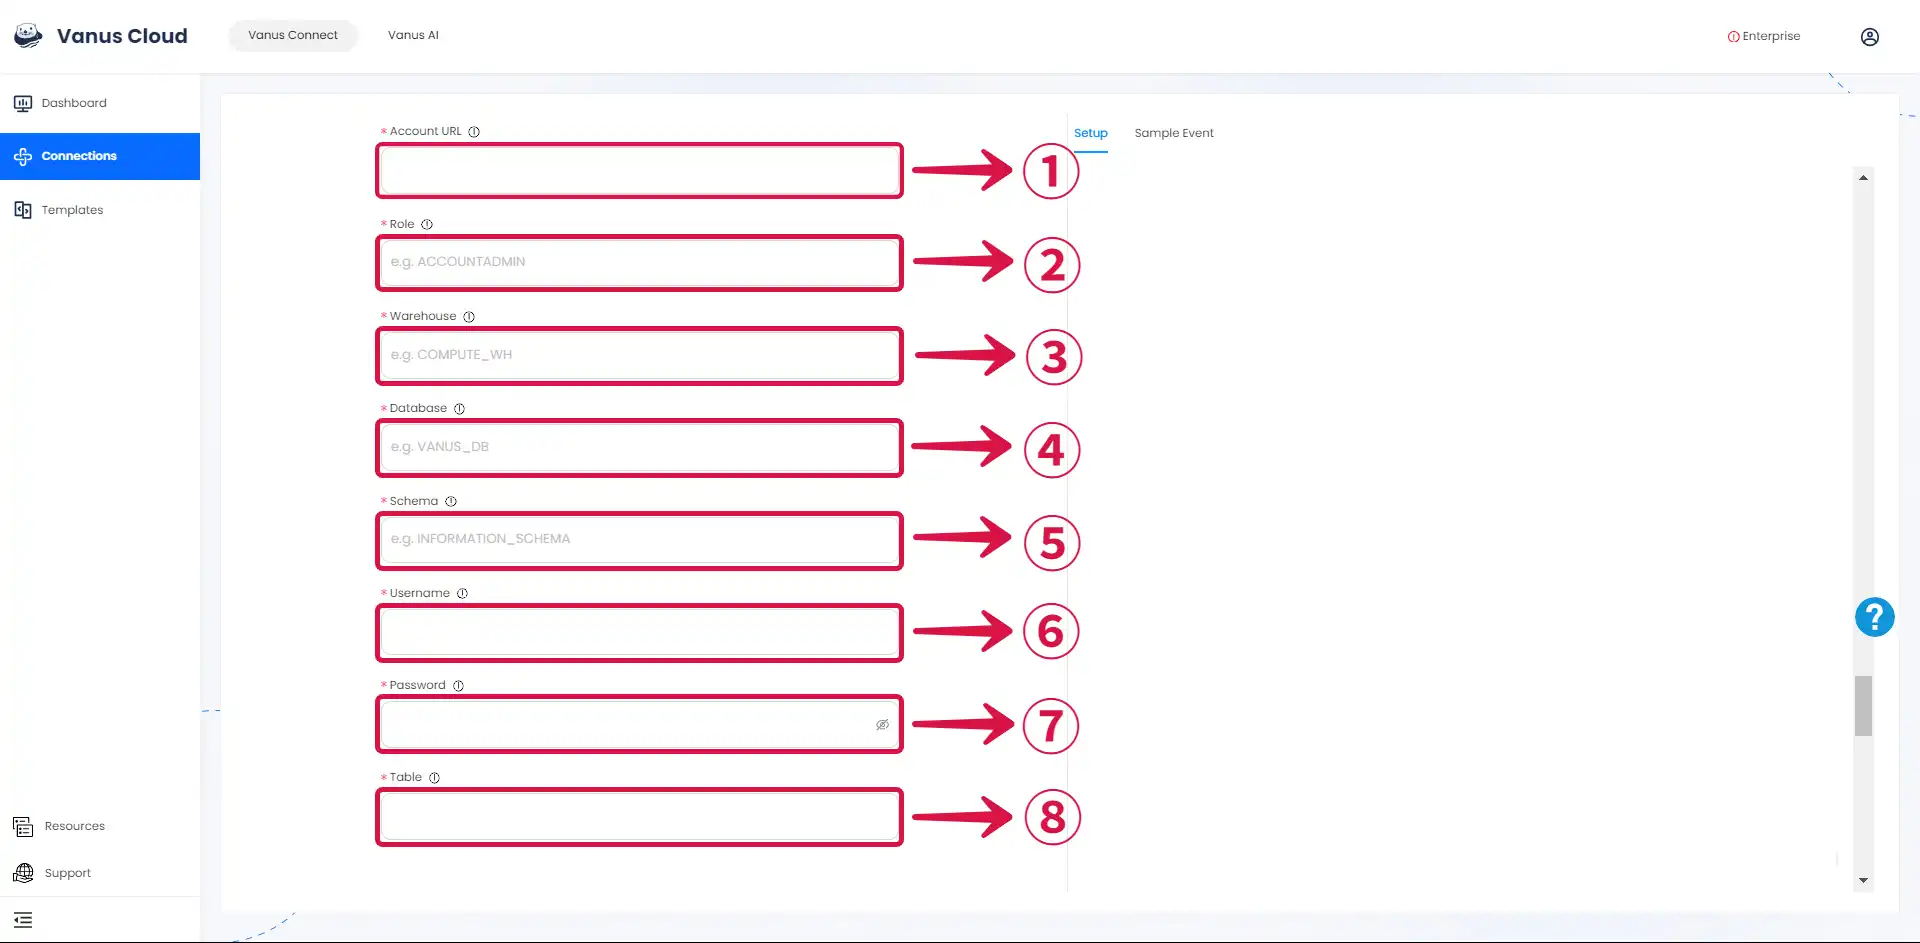
- Write the following information from the previous steps.
- Account URL①: This is the web address used to access and interact with your Snowflake data warehouse in the cloud.
- Role②: This is the Role name with the necessary privileges to perform operations on the Snowflake table.
- Warehouse③: This is the warehouse name that will execute queries for the Snowflake table.
- Database④: This is the name of the database that contains the Snowflake table.
- Schema⑤: This is the name of the schema that contains the Snowflake table.
- Username⑥: This is the username for your Snowflake account.
- Password⑦: This is the password for your Snowflake account.
- Table⑧: Generate a table by specifying the desired name for it, and the table will be set up with the required fields for your event.
Step 4: Personalize Event Structure
This is a general instruction on how to personalize your event structure. You can structure your events to suit your specific requirements and create connections for different scenarios.
- Click on Display sample events① for reference and click on Add More② to add events.
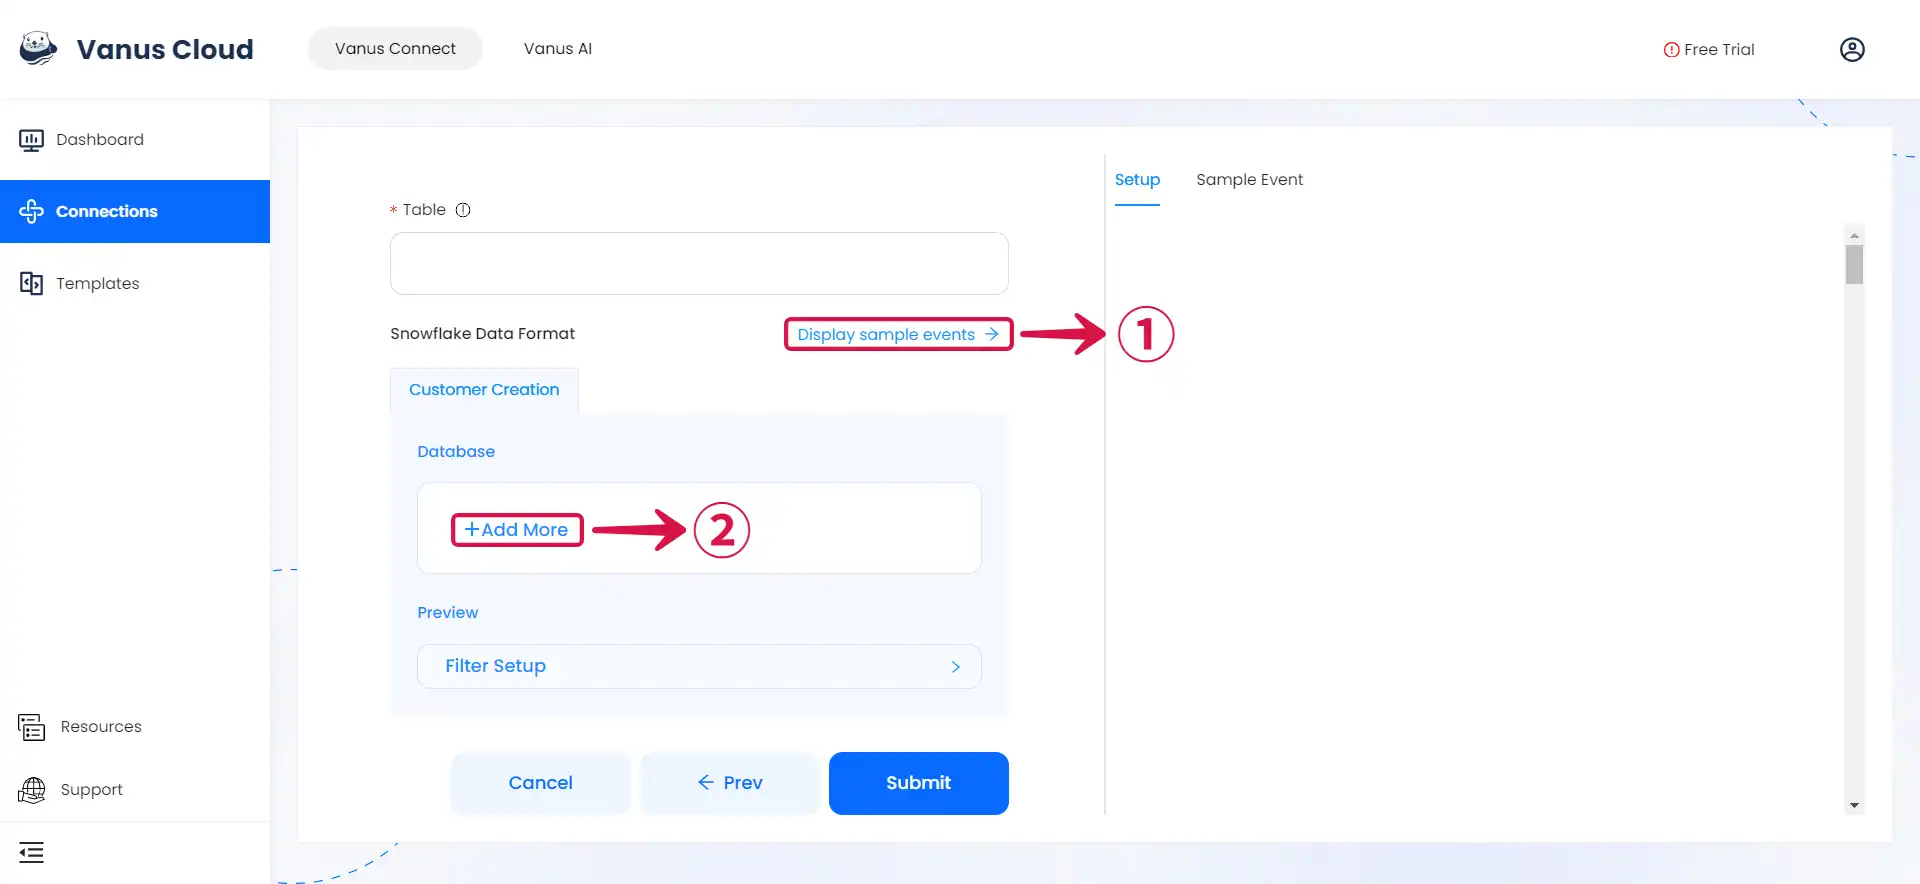
- Input key③ and search for the corresponding value④ for the event you want.
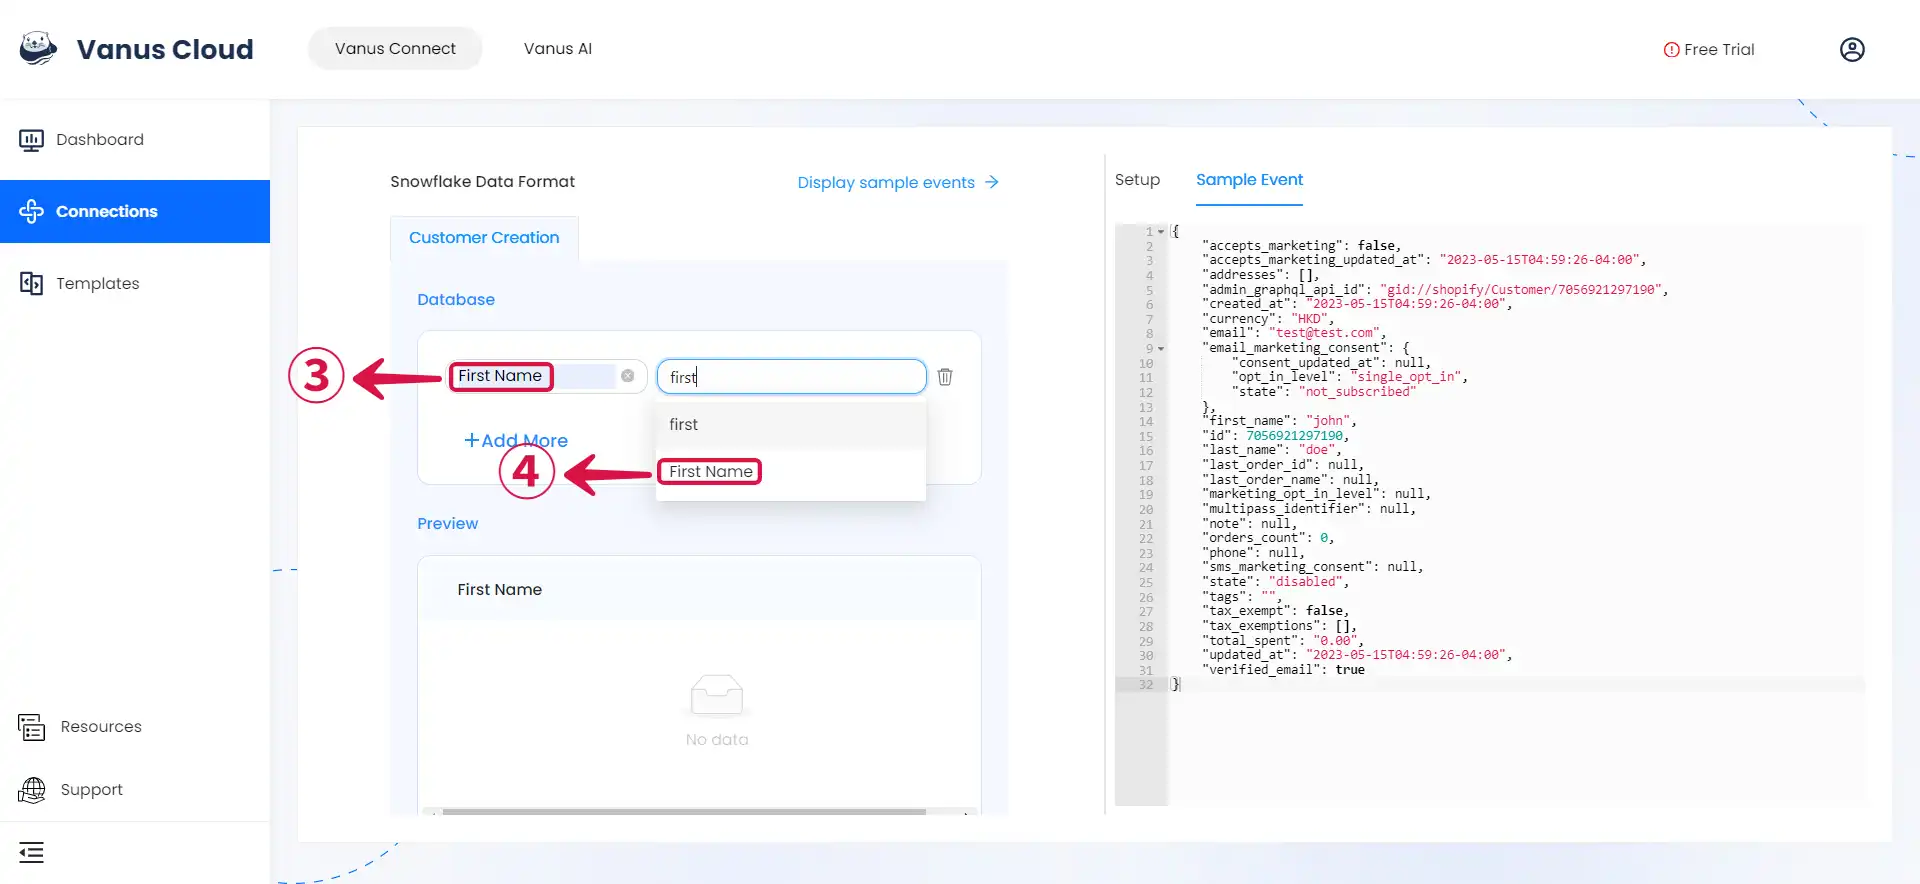
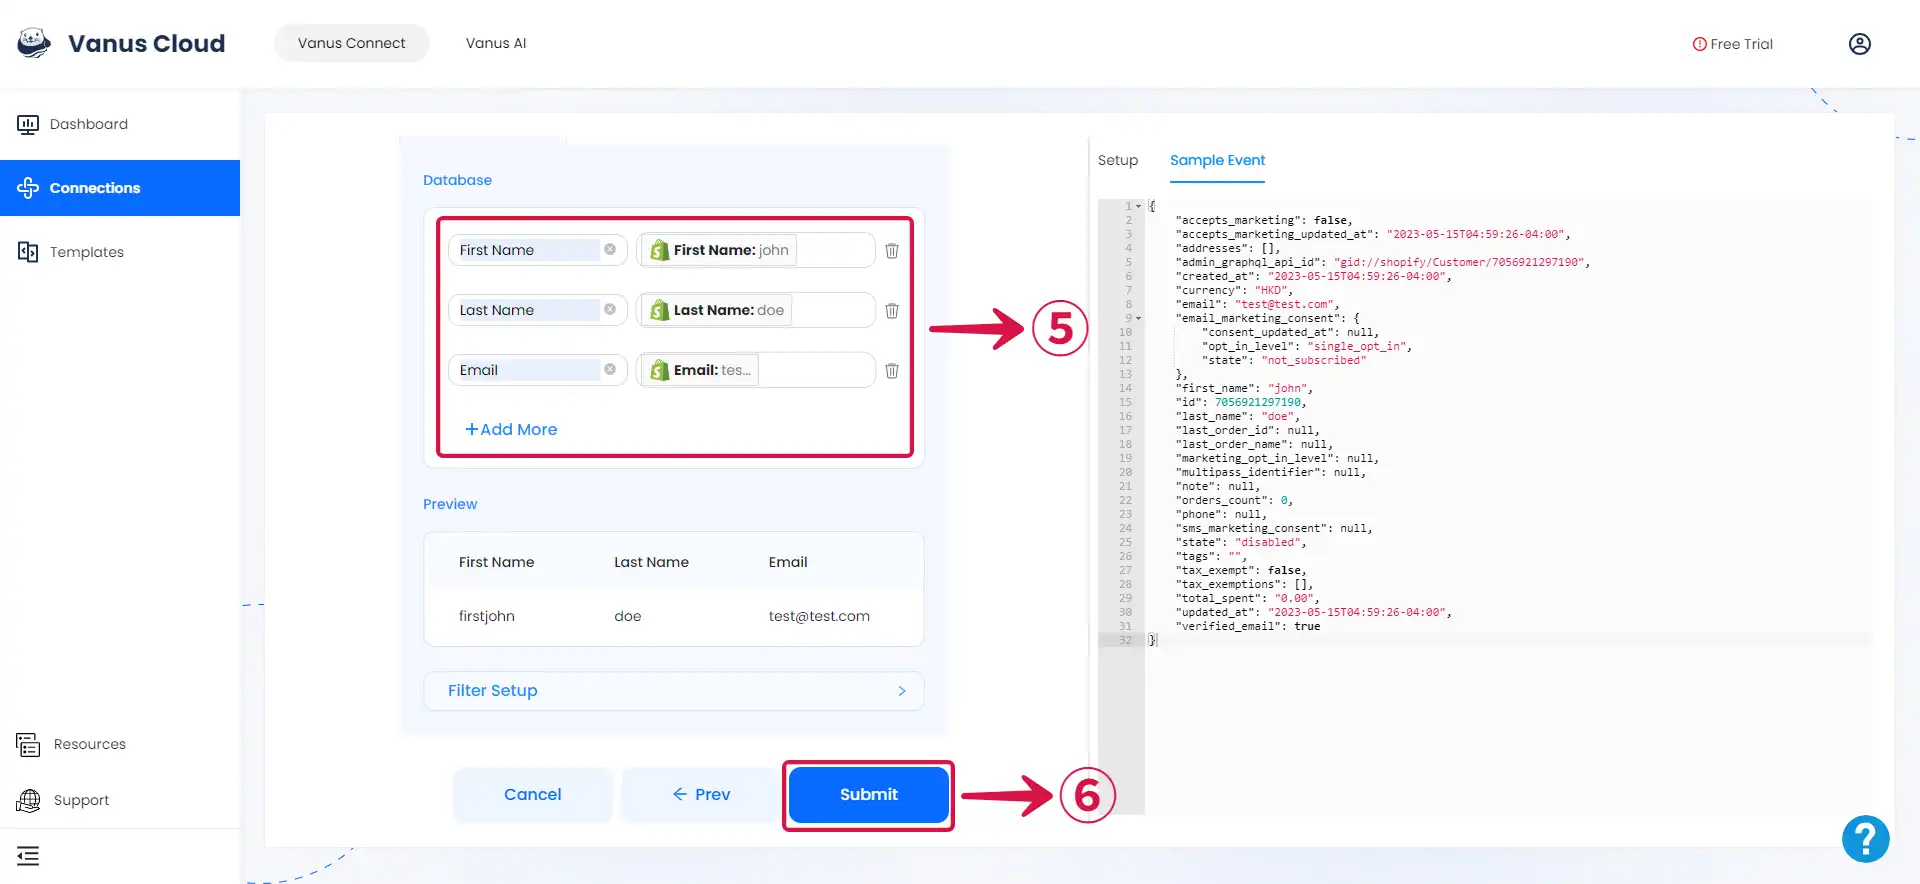
- You can fill in as many key-value pairs⑤ as you wish to receive, and then click Submit⑥ to finish the configuration process.
Required Data Format
The event data must be in JSON format with the following keys:
{
    "column1": "value1",
    "column2": "value2",
    "column3": "value3",
    "etc...": "etc..."
}