MongoDB
This guide contains information to set up a MongoDB Sink in Vanus Connect.
Introduction
MongoDB is a popular open-source NoSQL document database that stores data in a flexible, JSON-like format.
The MongoDB Sink connector let you insert events into a mongoDB database automatically.
Prerequisites
Before forwarding events to MongoDB, you must have:
Getting Started
Step 1: Setting up your MongoDB Cluster
Log in to your MongoDB Account
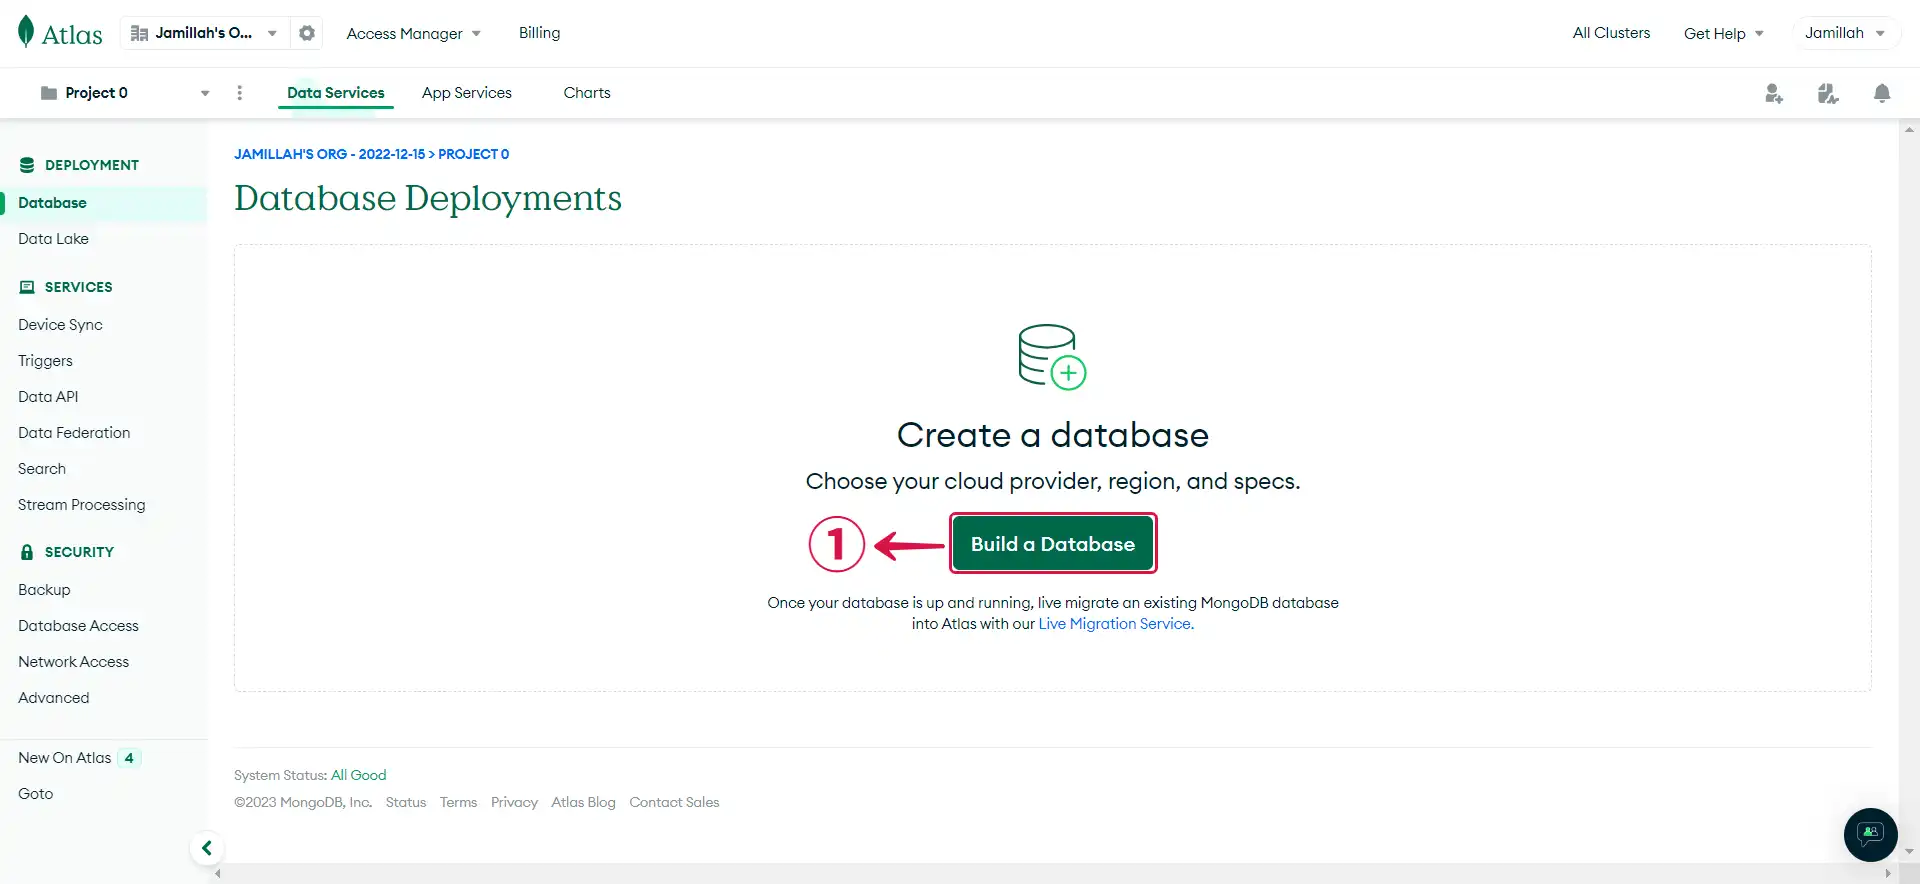
Click on Build a Database①.
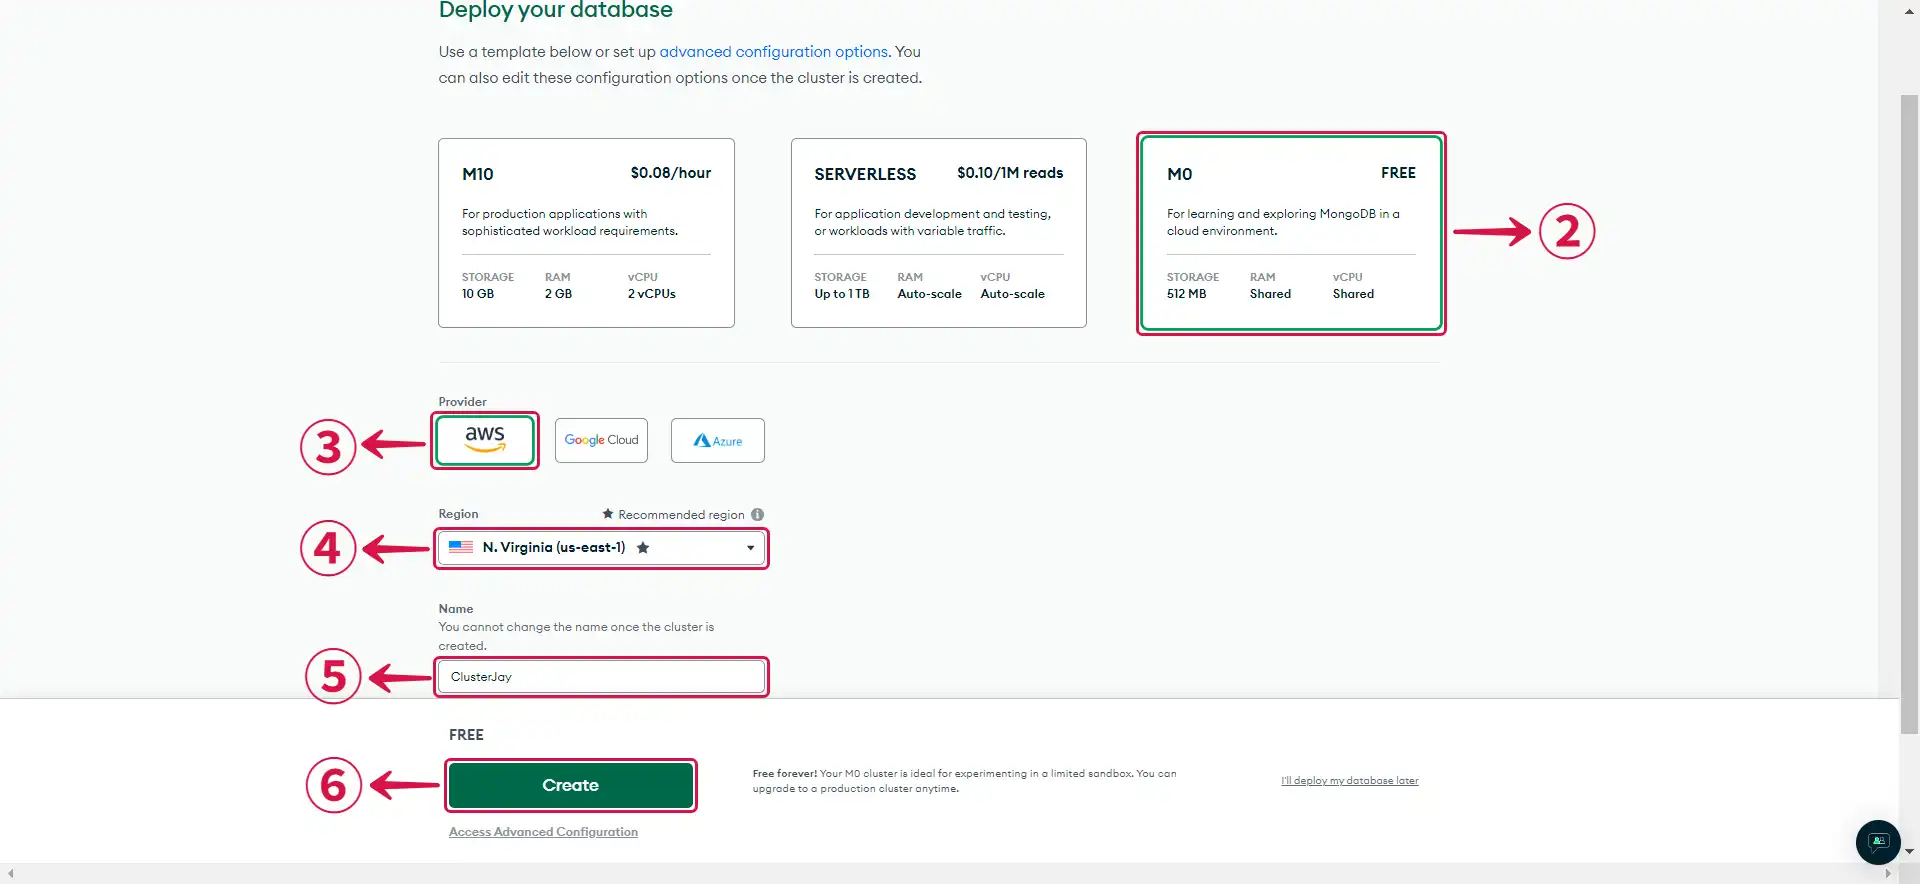
- Select the MO② template for a free deployment, pick your preferred cloud Provider③ and Region④, provide a Name⑤ for your cluster and then click Create⑥.
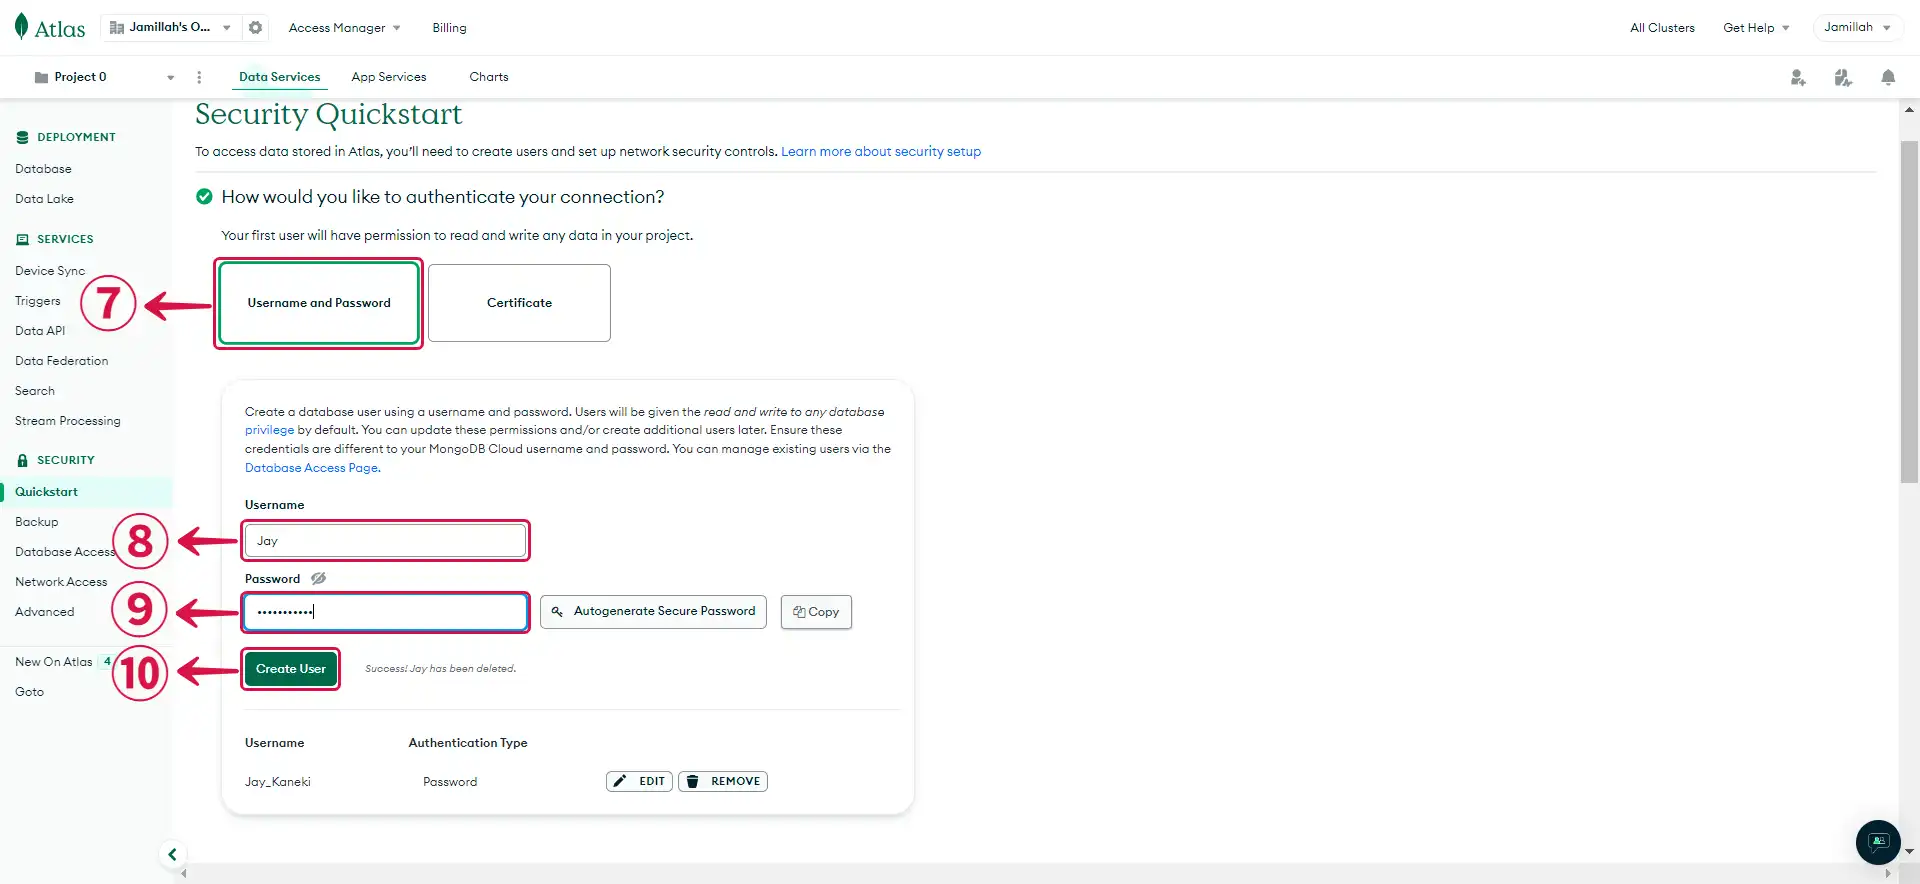
- Choose Username and Password⑦ as your authentication method, enter your Username⑧ and Password⑨, and then click Create User⑩.
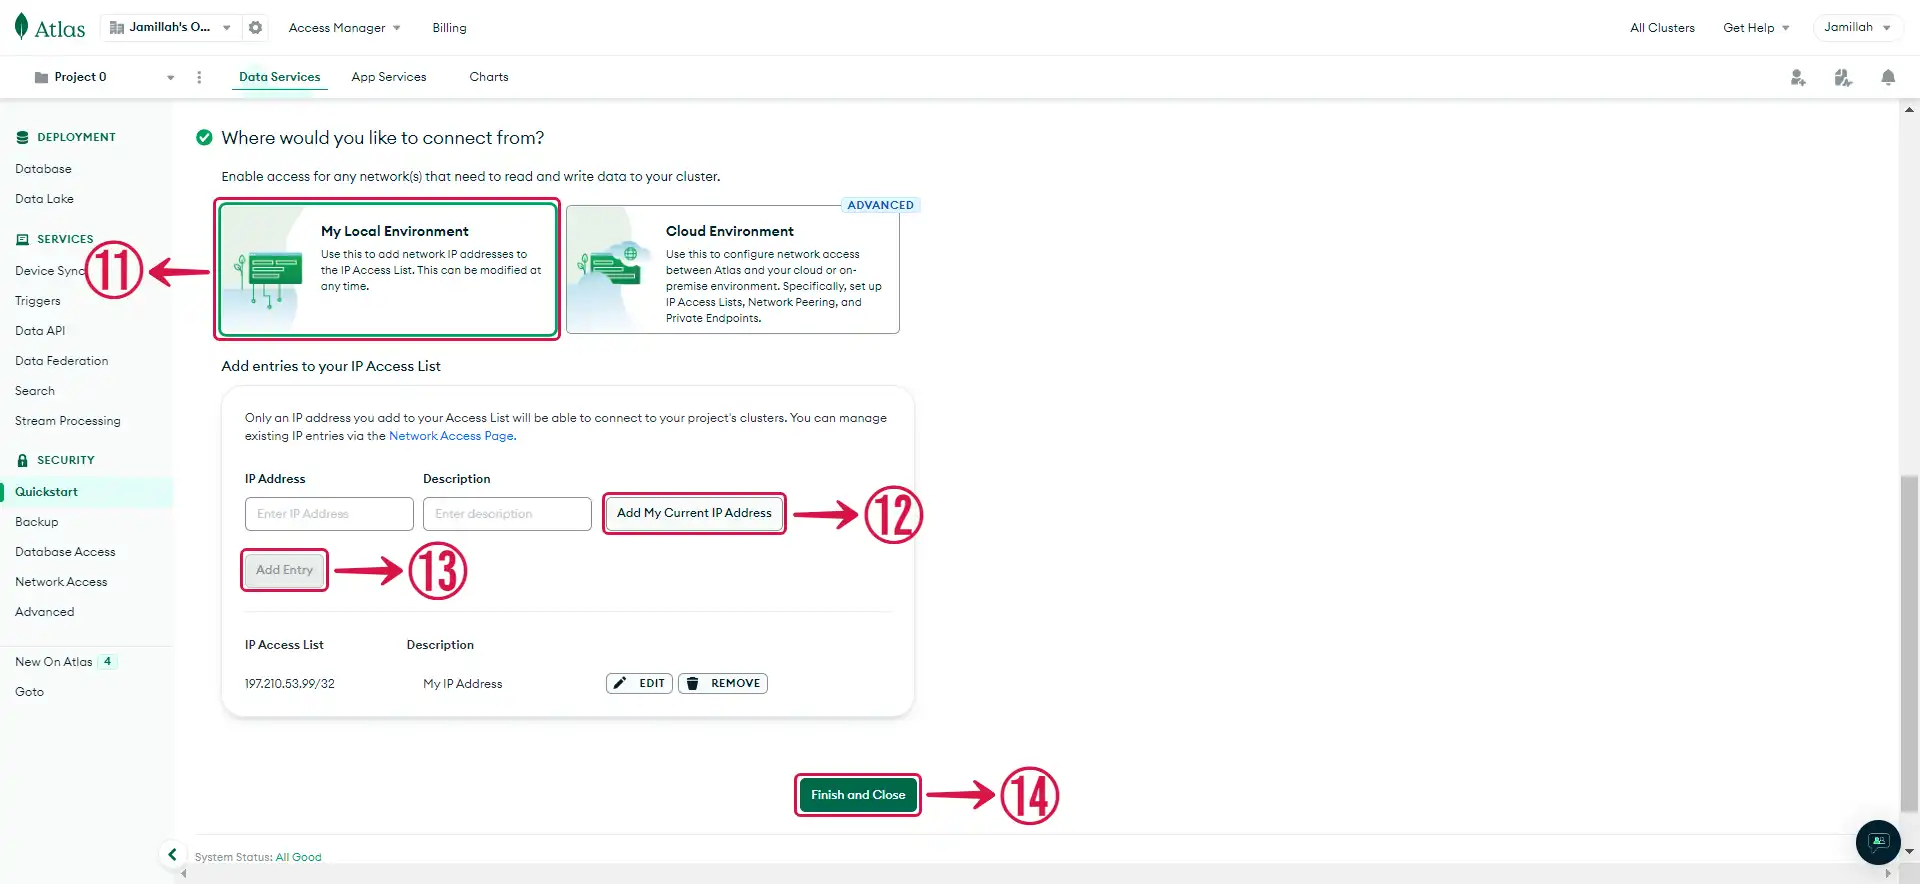
- Choose My Local Environment⑪ to connect to your MongoDB database from your local machine. Click on Add My Current IP Address⑫ and then hit the Add Entry⑬ button to grant your device access to your MongoDB cluster. Then, click Finish and Close⑭.
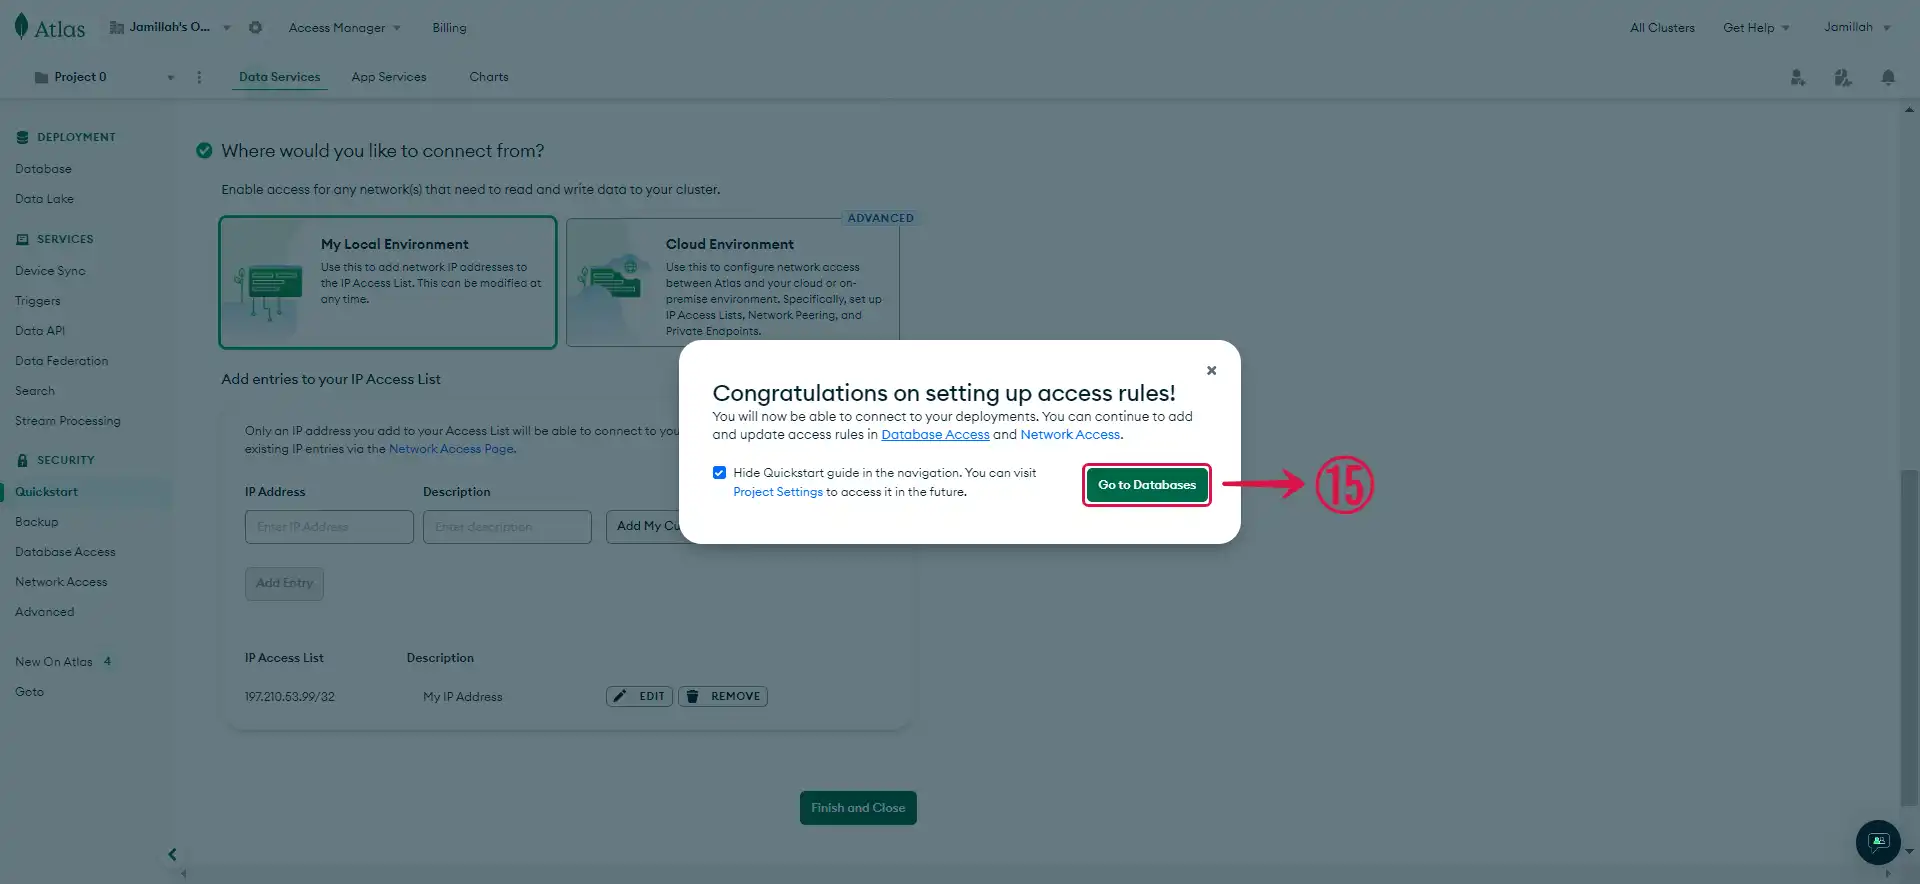
- Click on Go to Databases⑮ to access your database page.
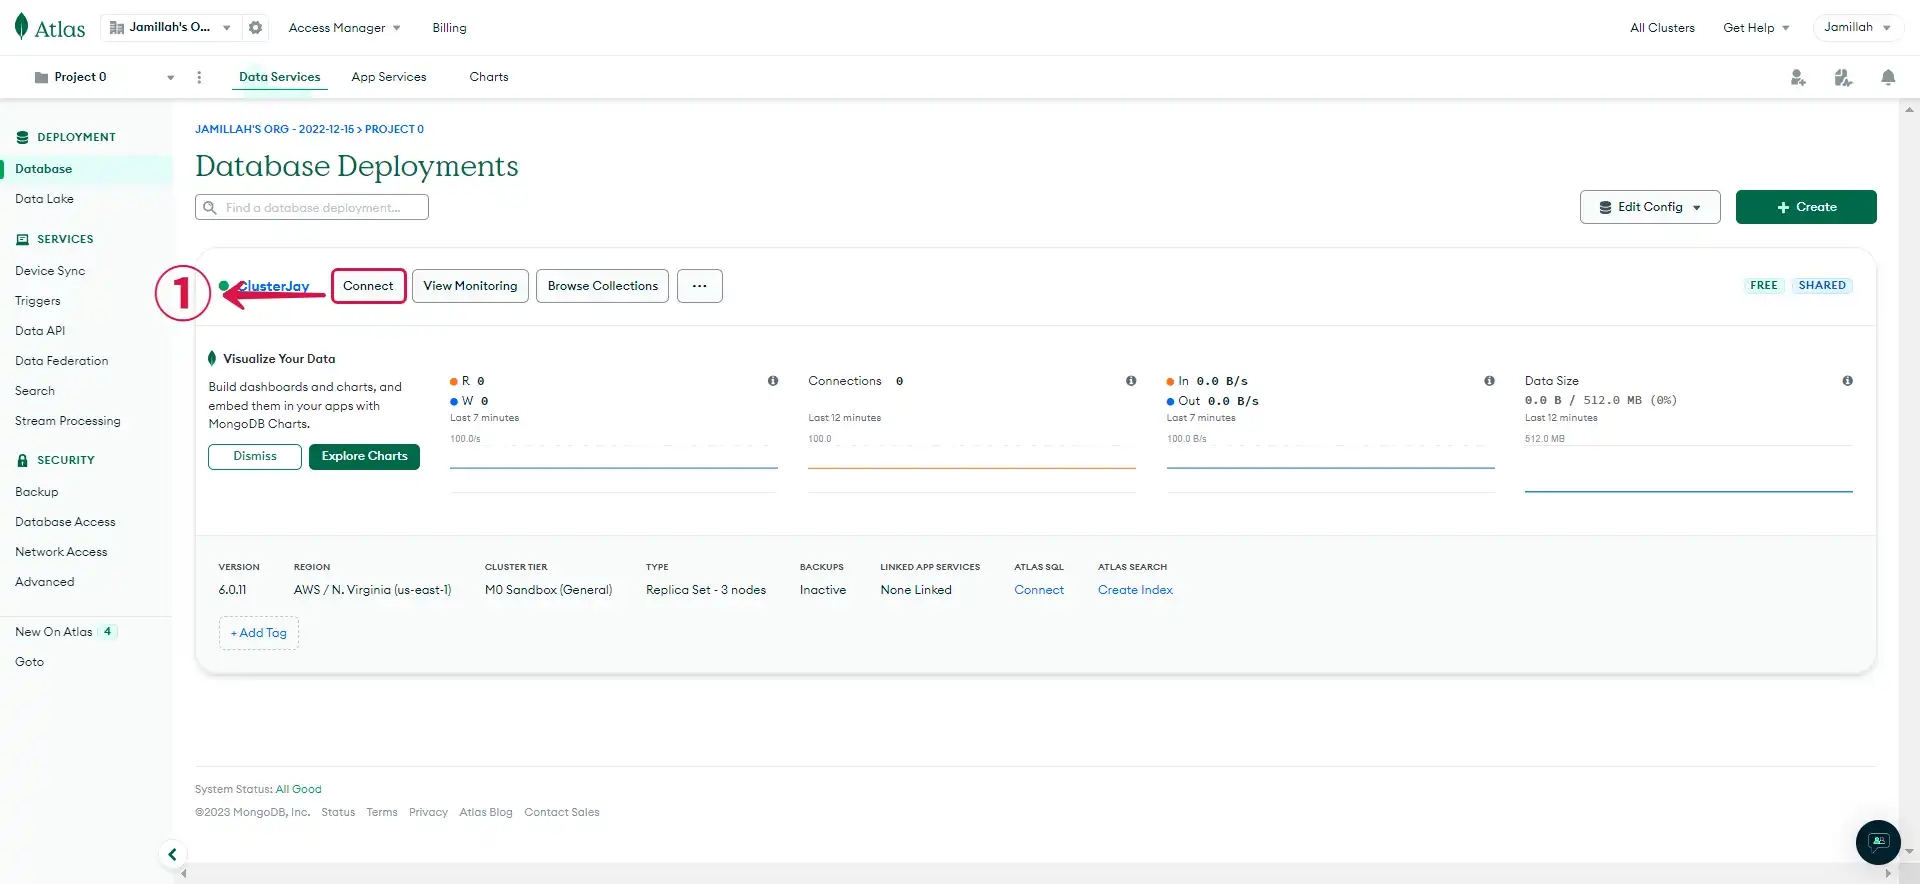
Step 2: MongoDB Cluster Connection Settings
- Click on the Connect① button.
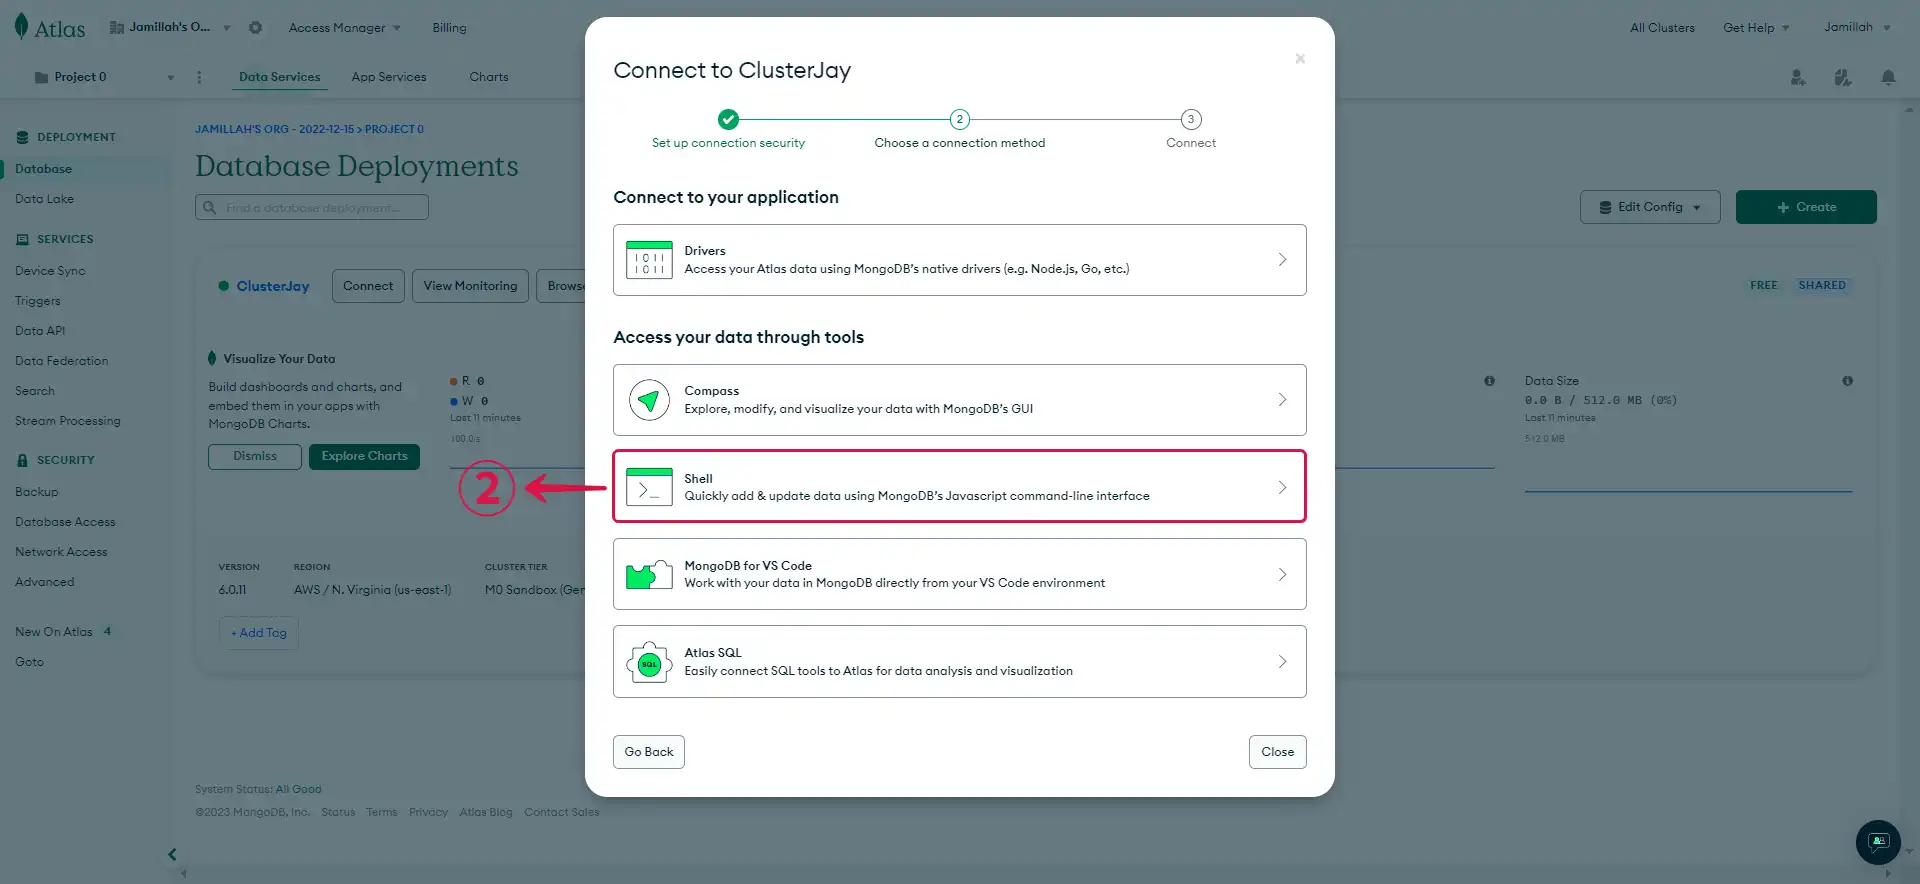
- Choose the method you'd like to use for connecting to your database. In our case, we selected the Shell②.
- Select your operating system③, Download mongosh④, and open the How to⑤ link in a new tab to get step-by-step instructions on how to add your mongosh directory to your $PATH variable.
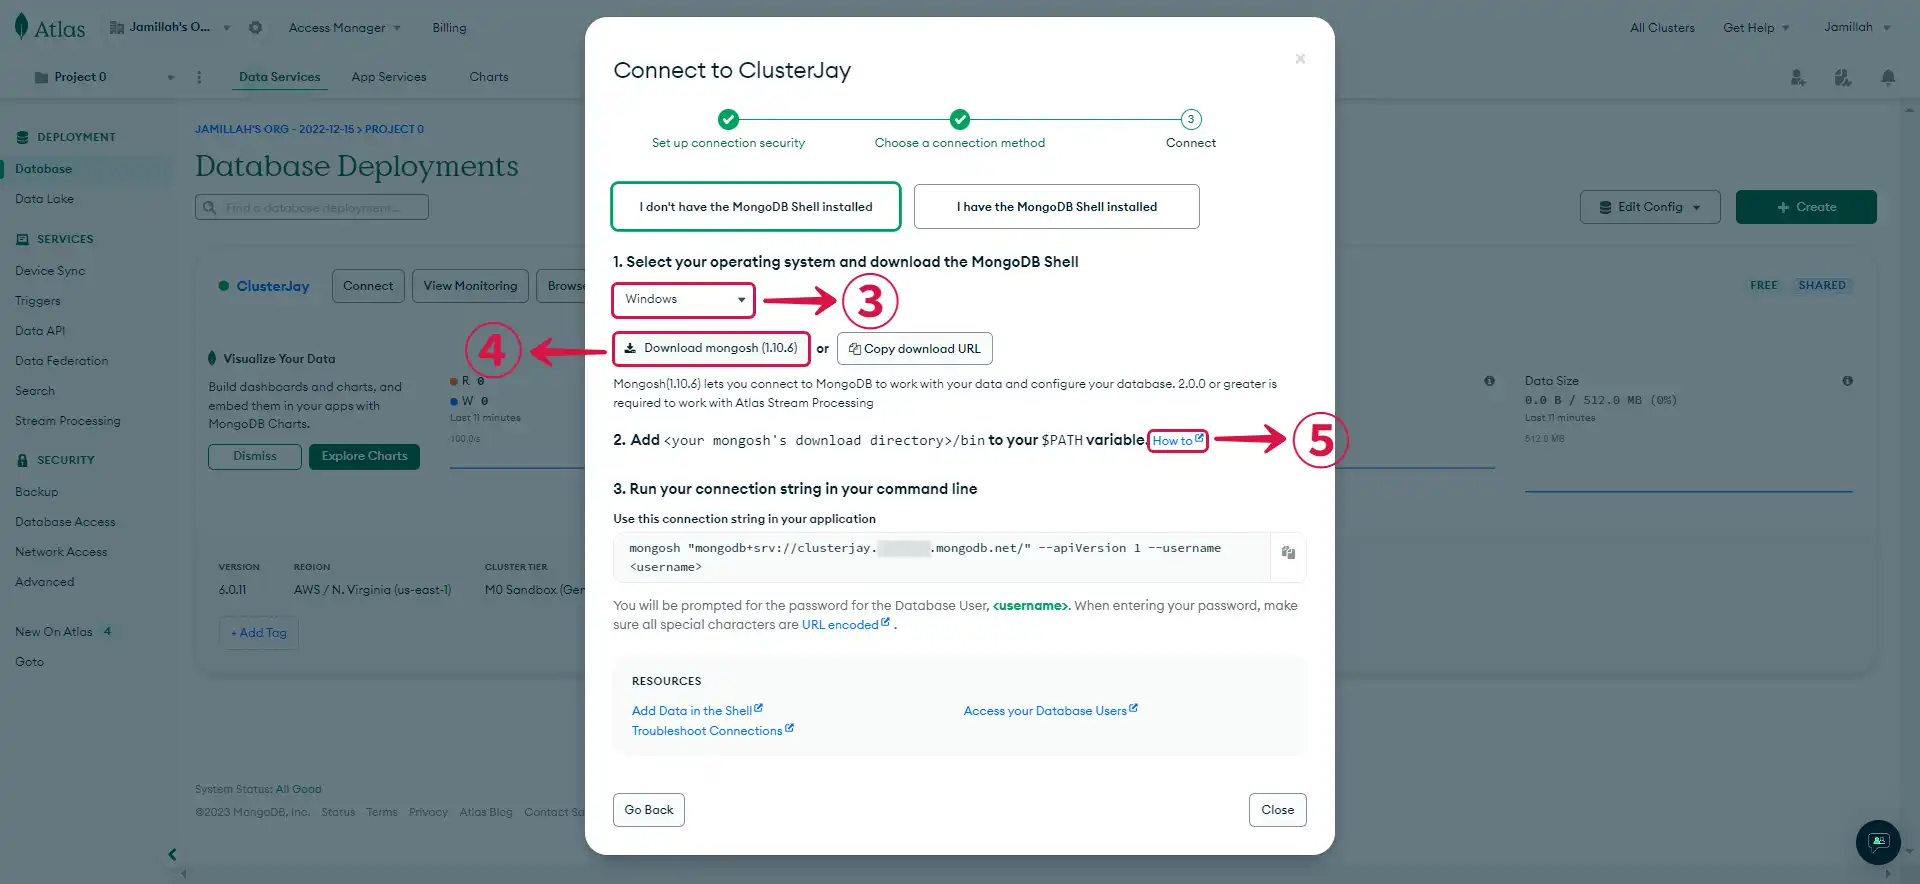
- After completing the Mongosh set-up, return to the Atlas page and Copy⑥ the connection string provided.
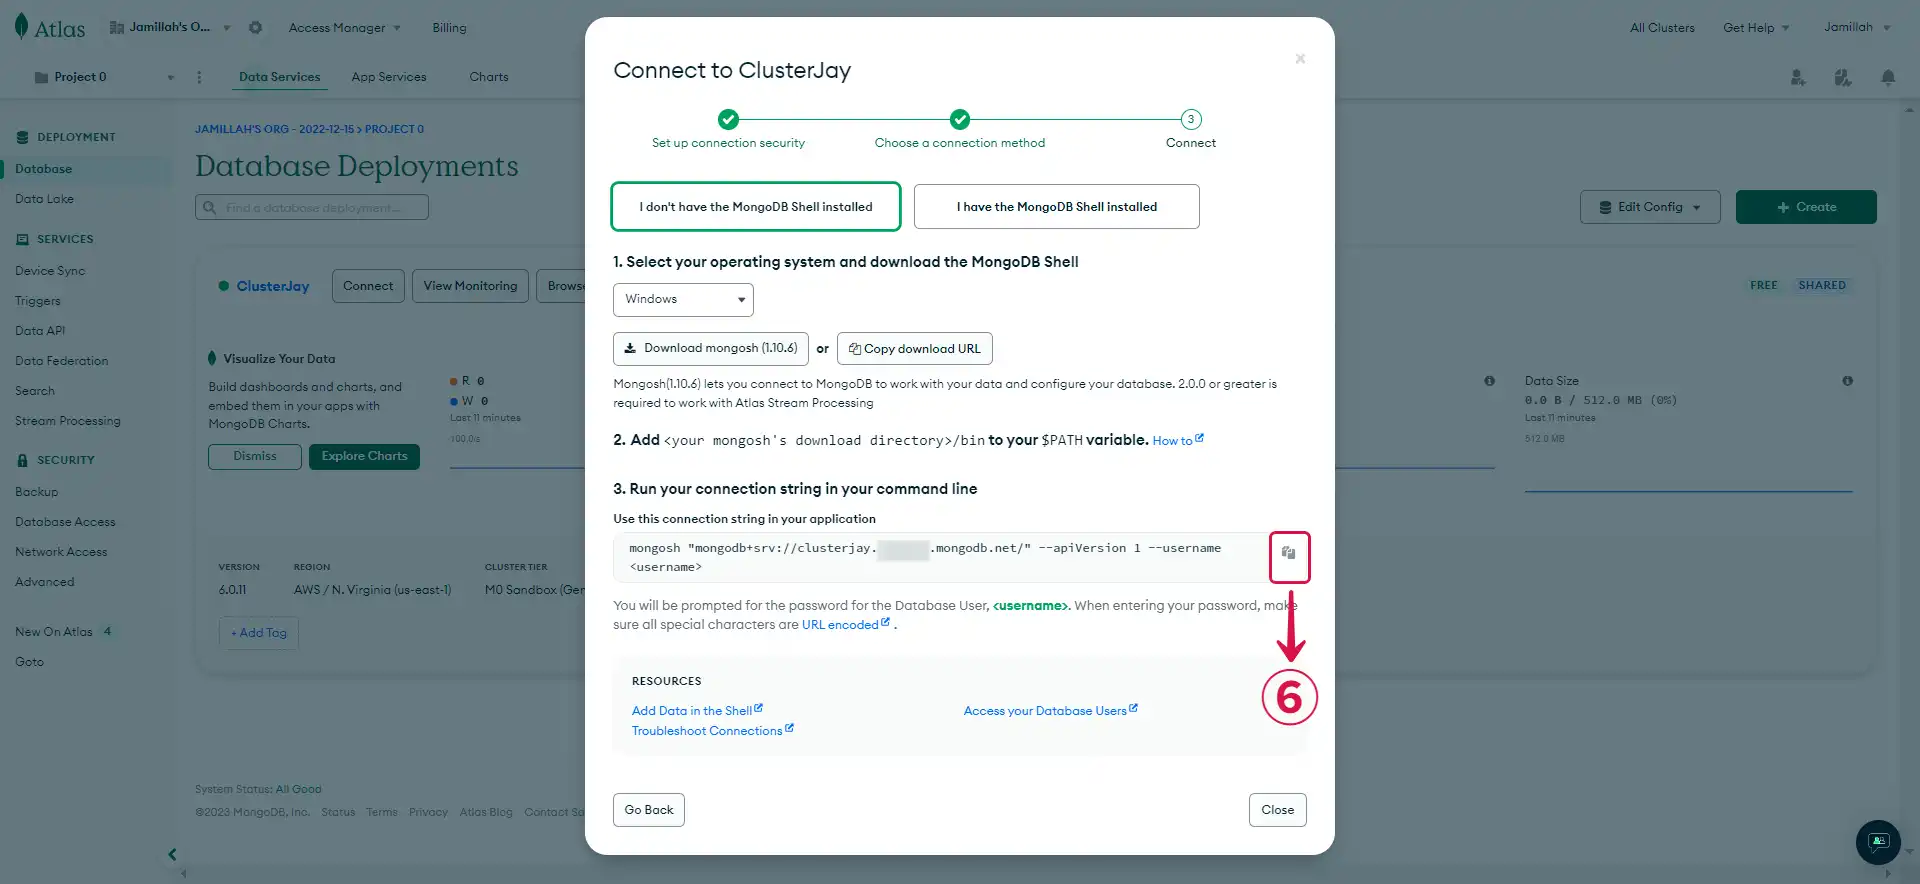
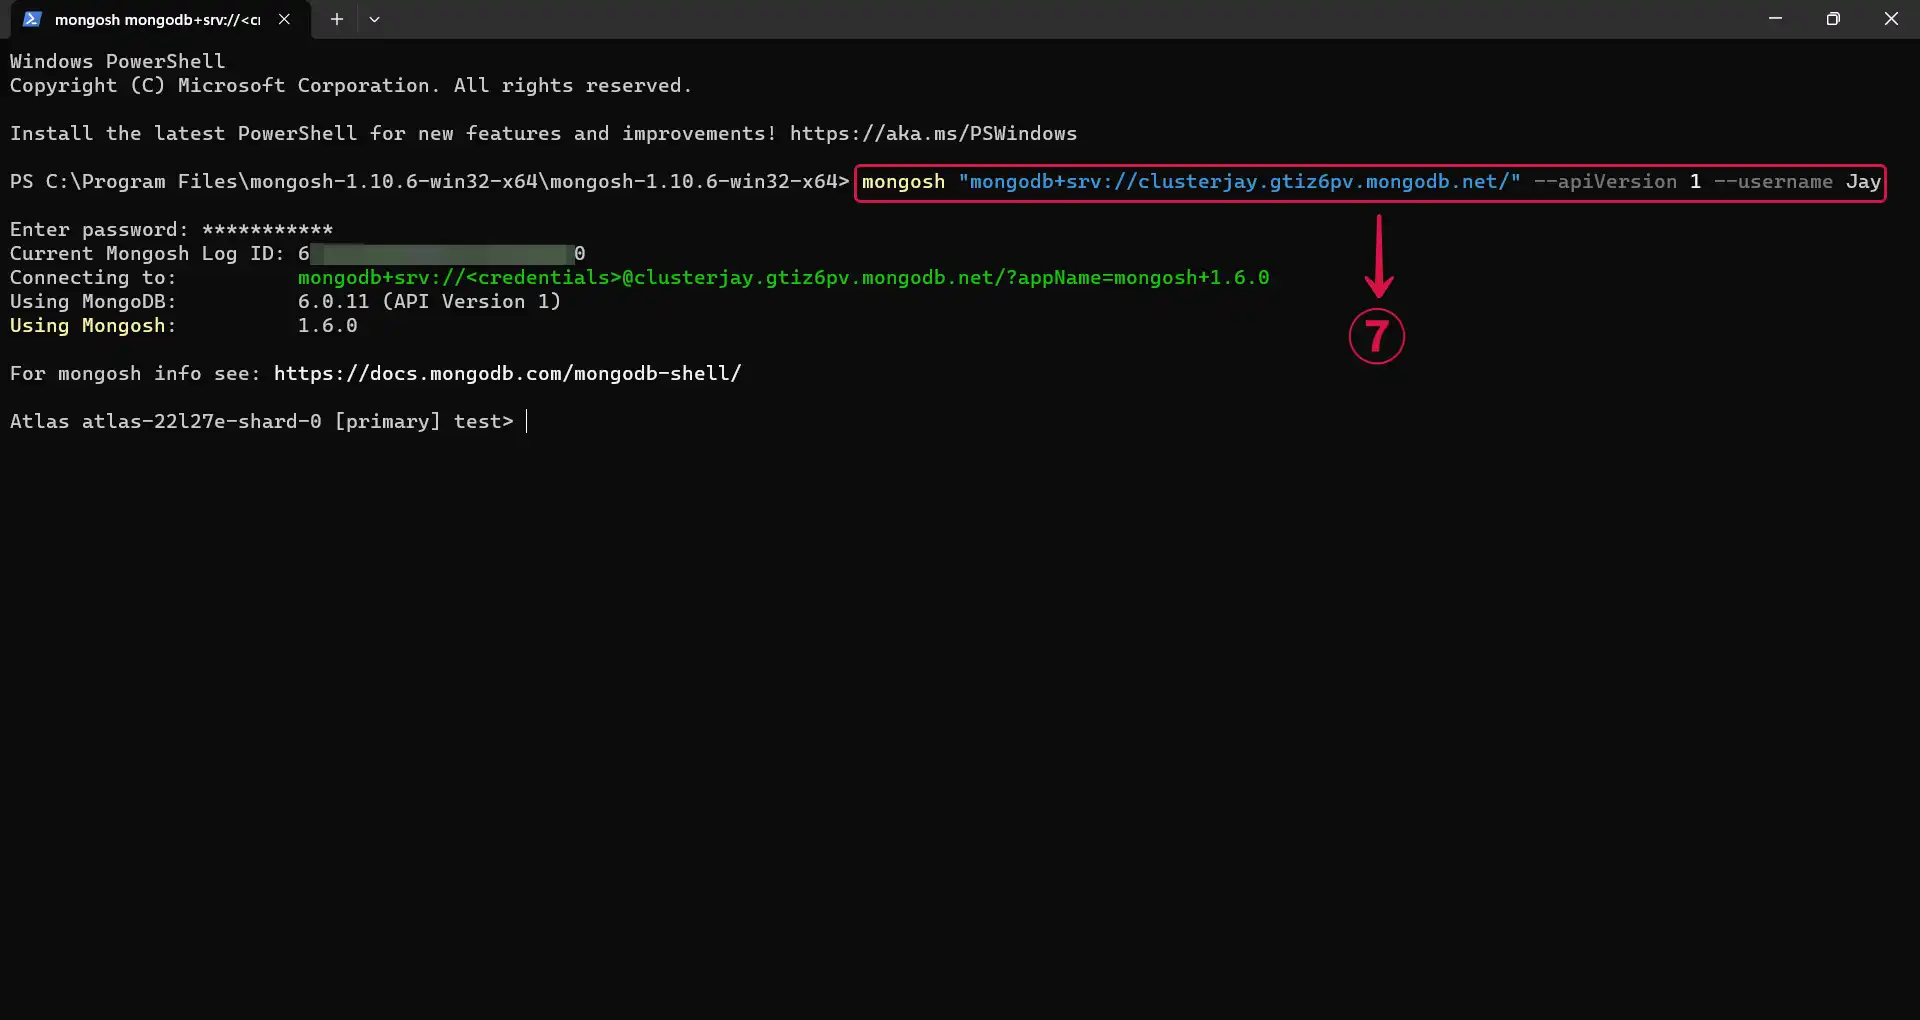
- Paste the command⑦ in your terminal, and you will be prompted to enter the password you set for database authentication.
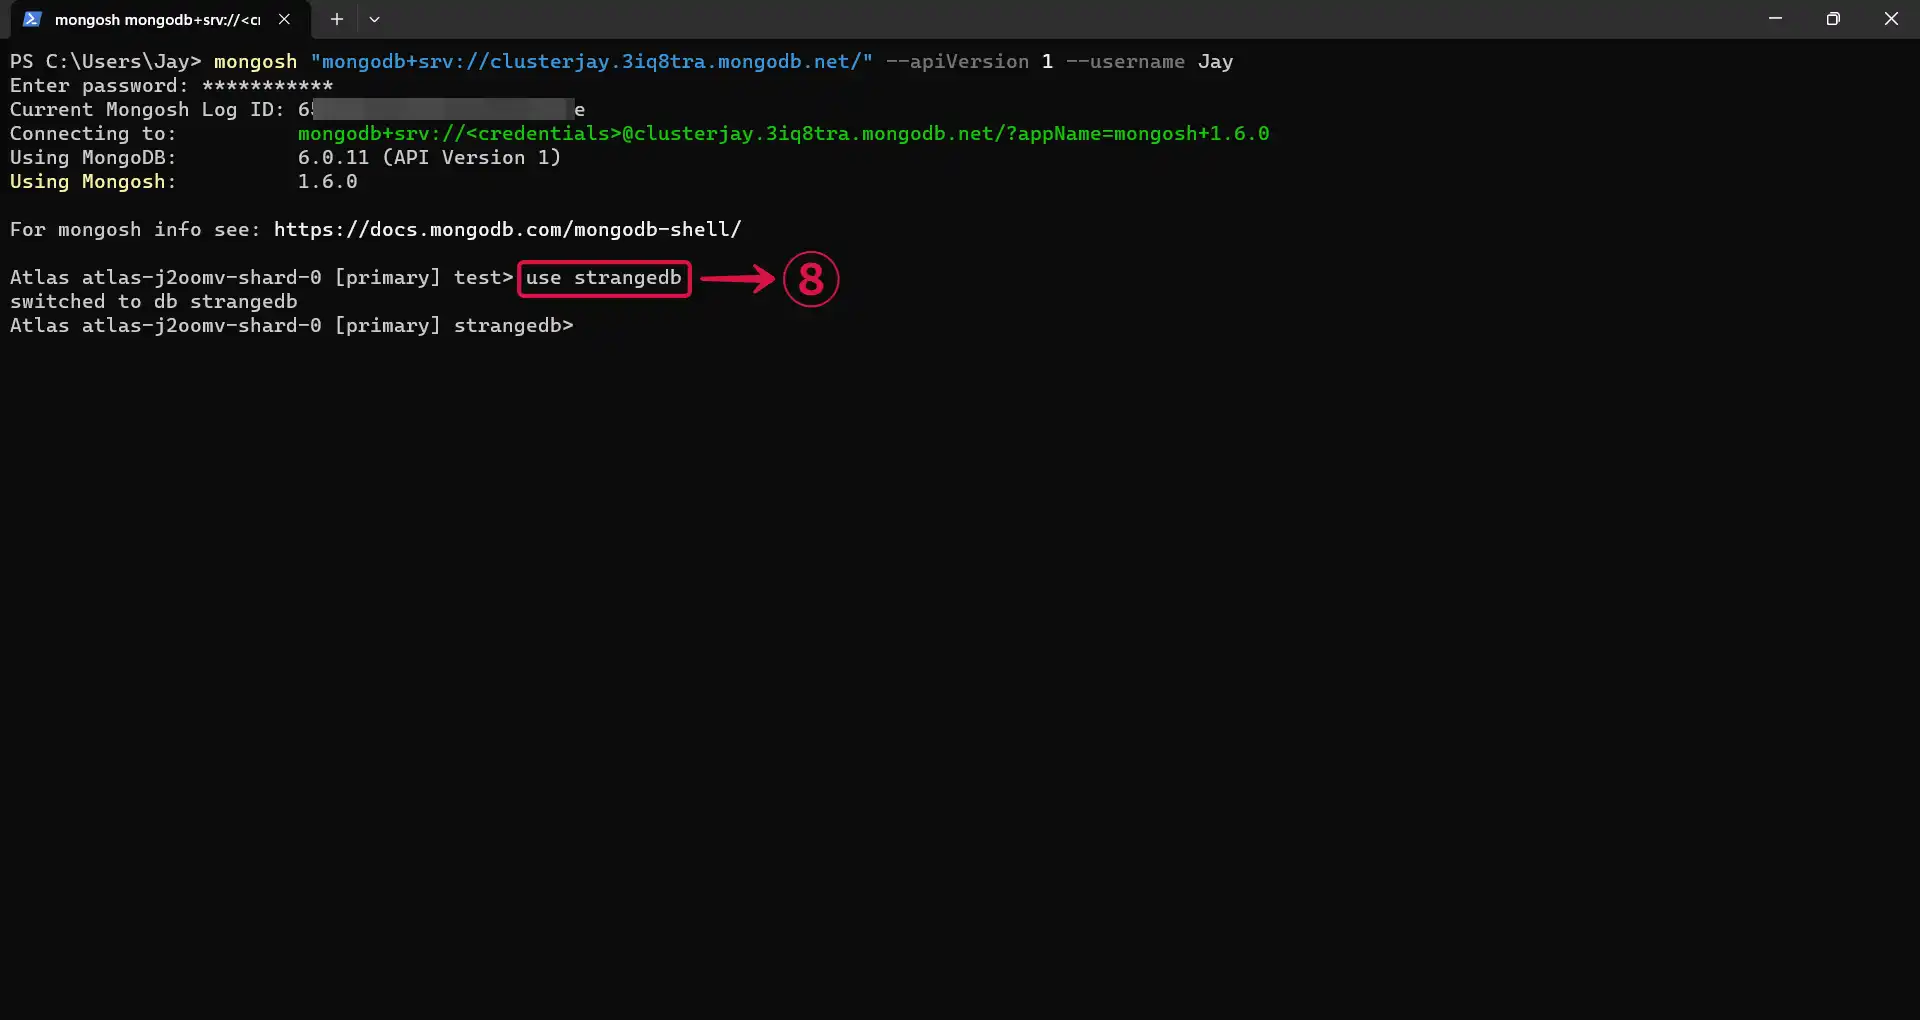
- Run the
use <databasename>⑧ command to create a database.
- Run the command below to create a collection and insert values in it.
db.<collectionname>.insertMany([
  { name: "John", age: 30 },
  { name: "Jane", age: 25 },
  { name: "Bob", age: 35 }
]);
备注
Substitute <databasename> and <collectionname> with the names you prefer for your database and collection.
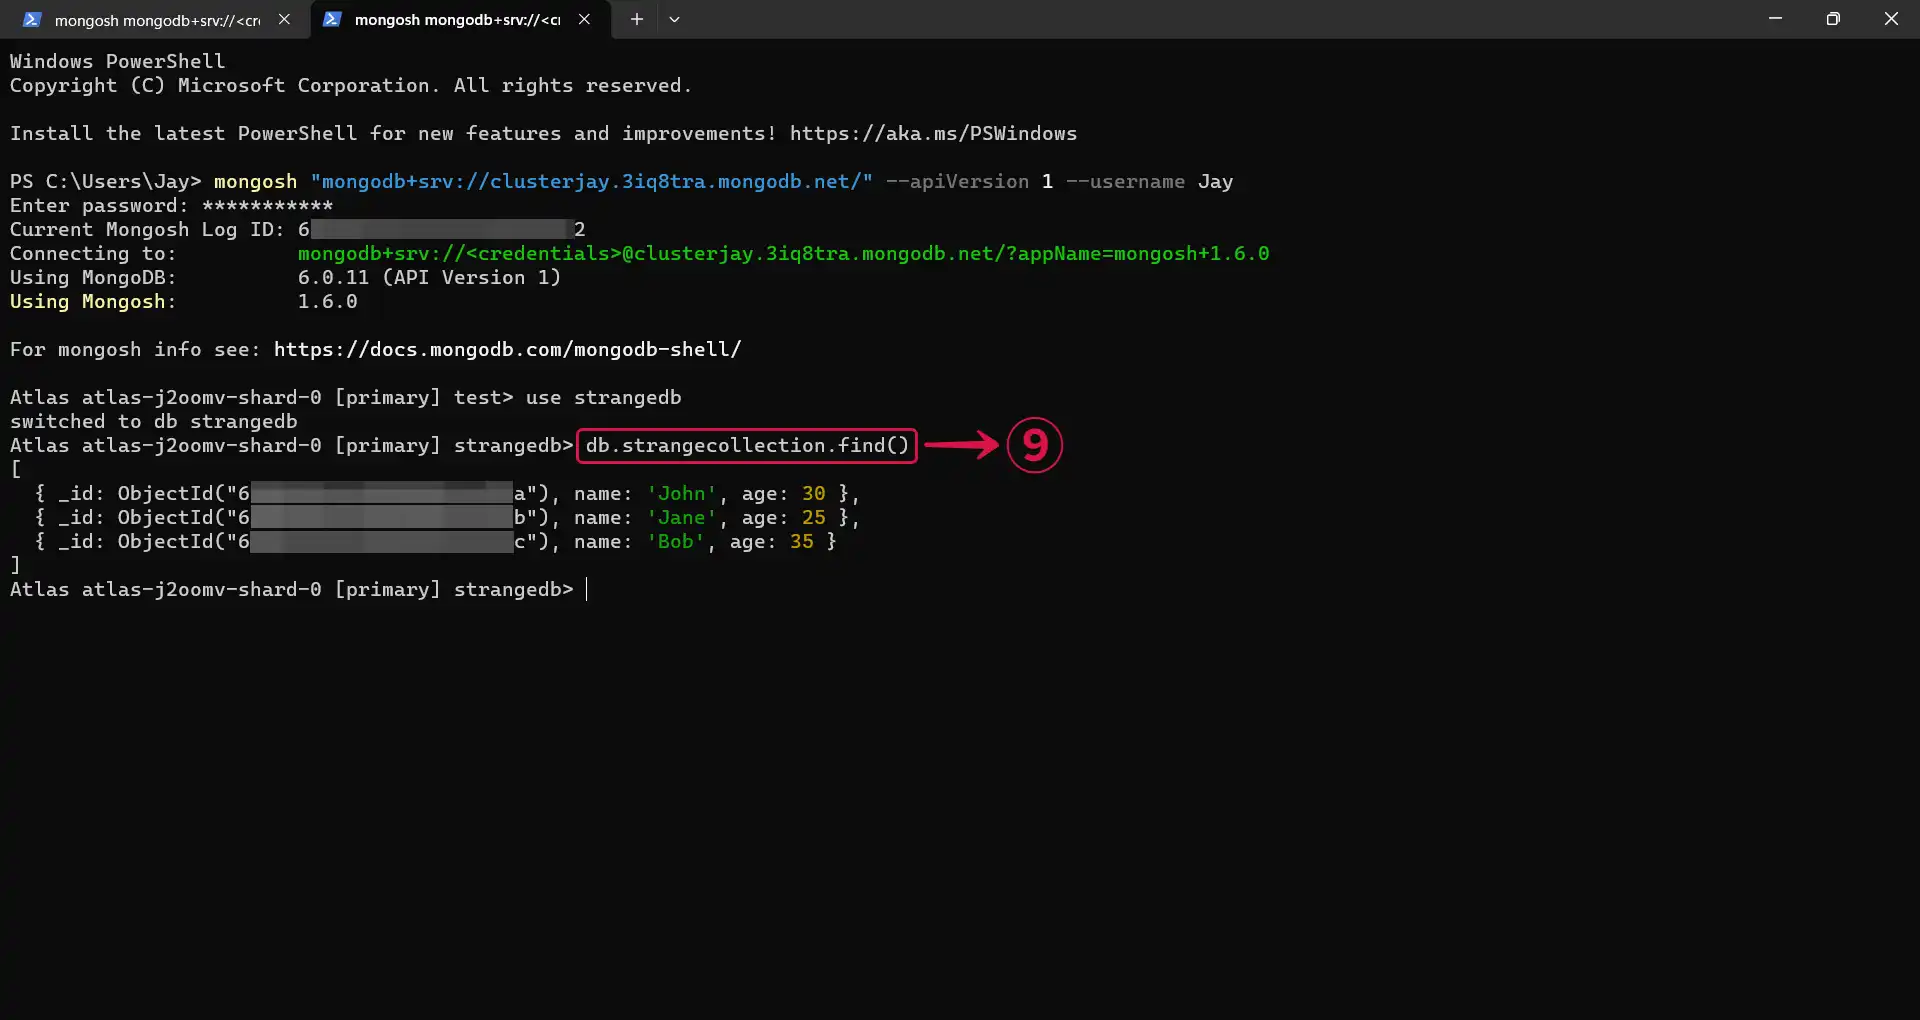
- Run the
db.your_collection_name.find()⑨ command to confirm that your collection has been created with its inserted values.
Step 3: Set up MongoDB Sink in Vanus Connect
- Navigate to the Vanus Cloud platform and fill in the following credentials.
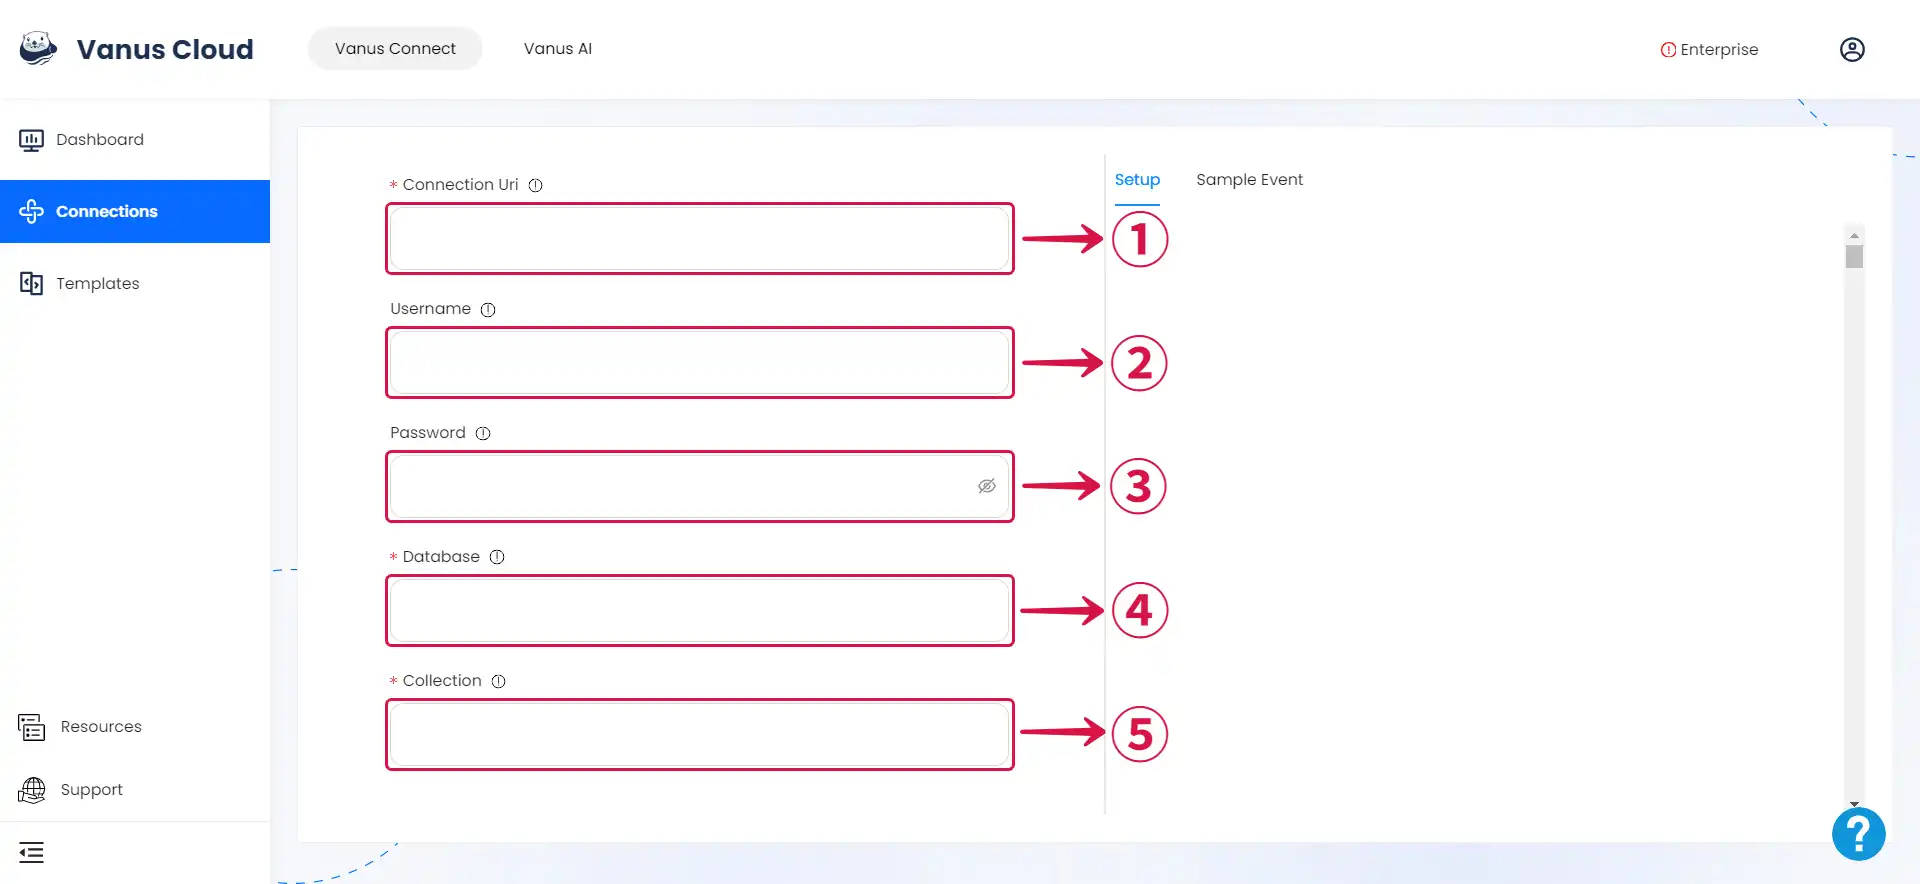
- Connection Uri: The URI to connect MongoDB, view Connection String URI Format for more details.
- Username: MongoDB username.
- Password: MongoDB user's password.
- Database: This is the database name, not to be confused with the cluster name.
- Collection: Collection Name
Step 4: Personalize Event Structure
备注
This is a general instruction on how to personalize your event structure. You can structure your events to suit your specific requirements and create connections for different scenarios.
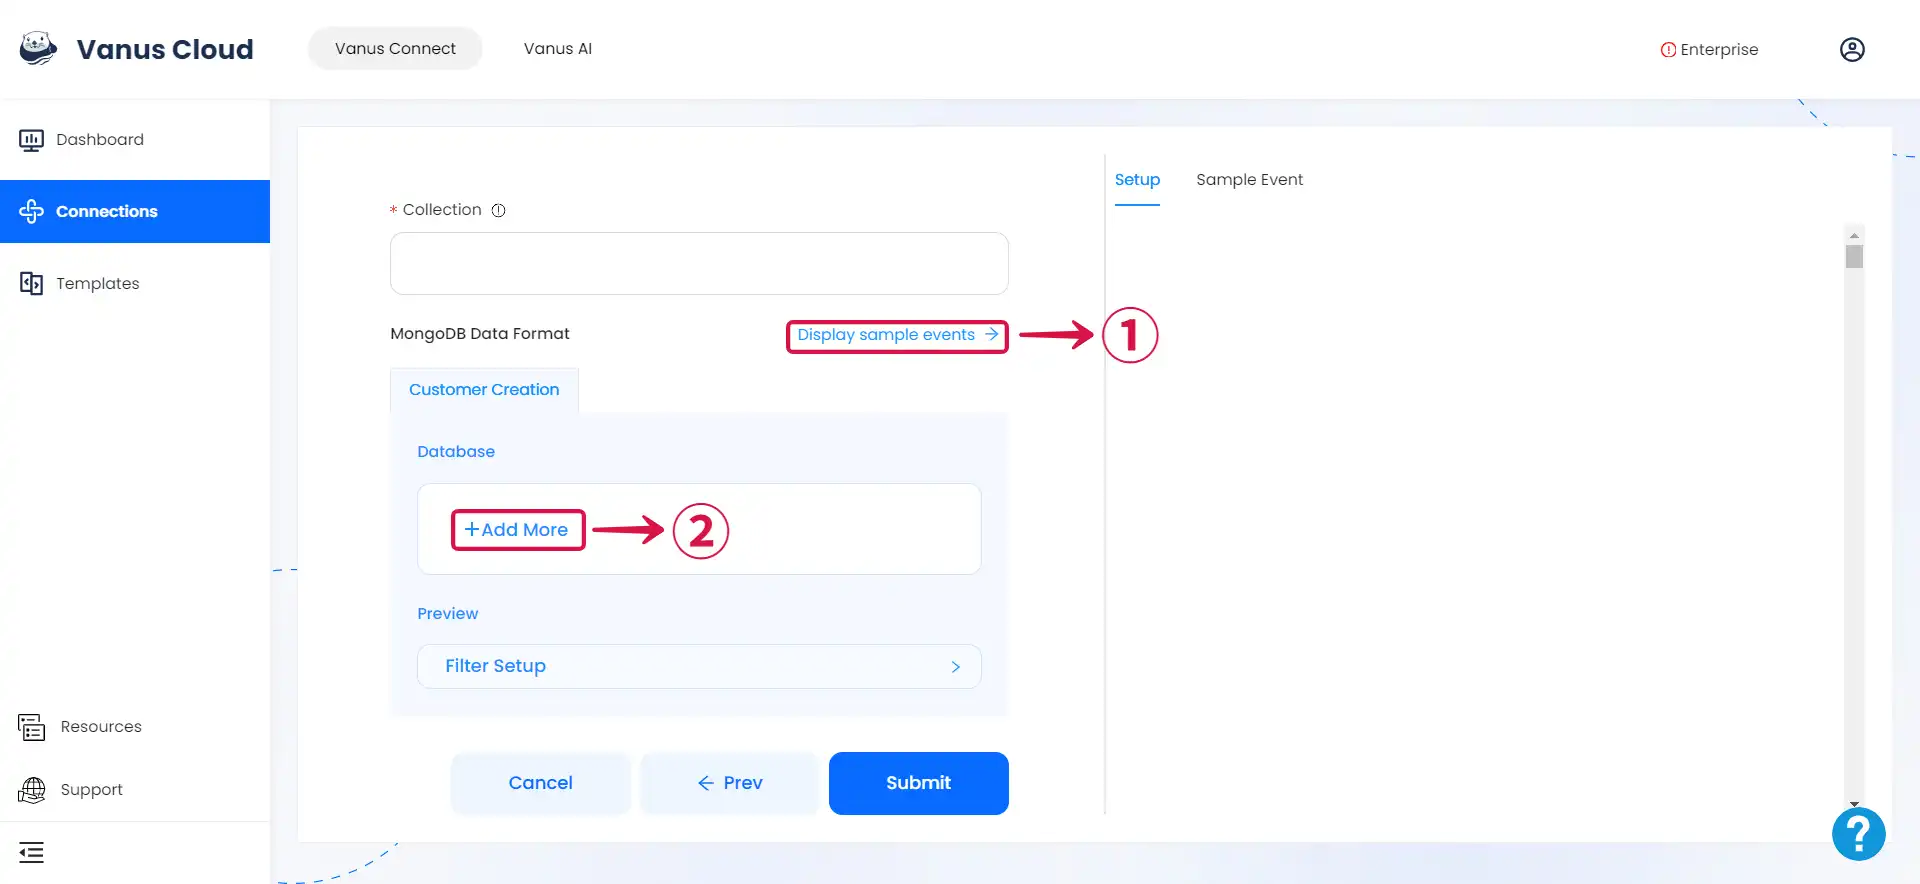
- Click on Display sample events① for reference and click on Add More② to add events.
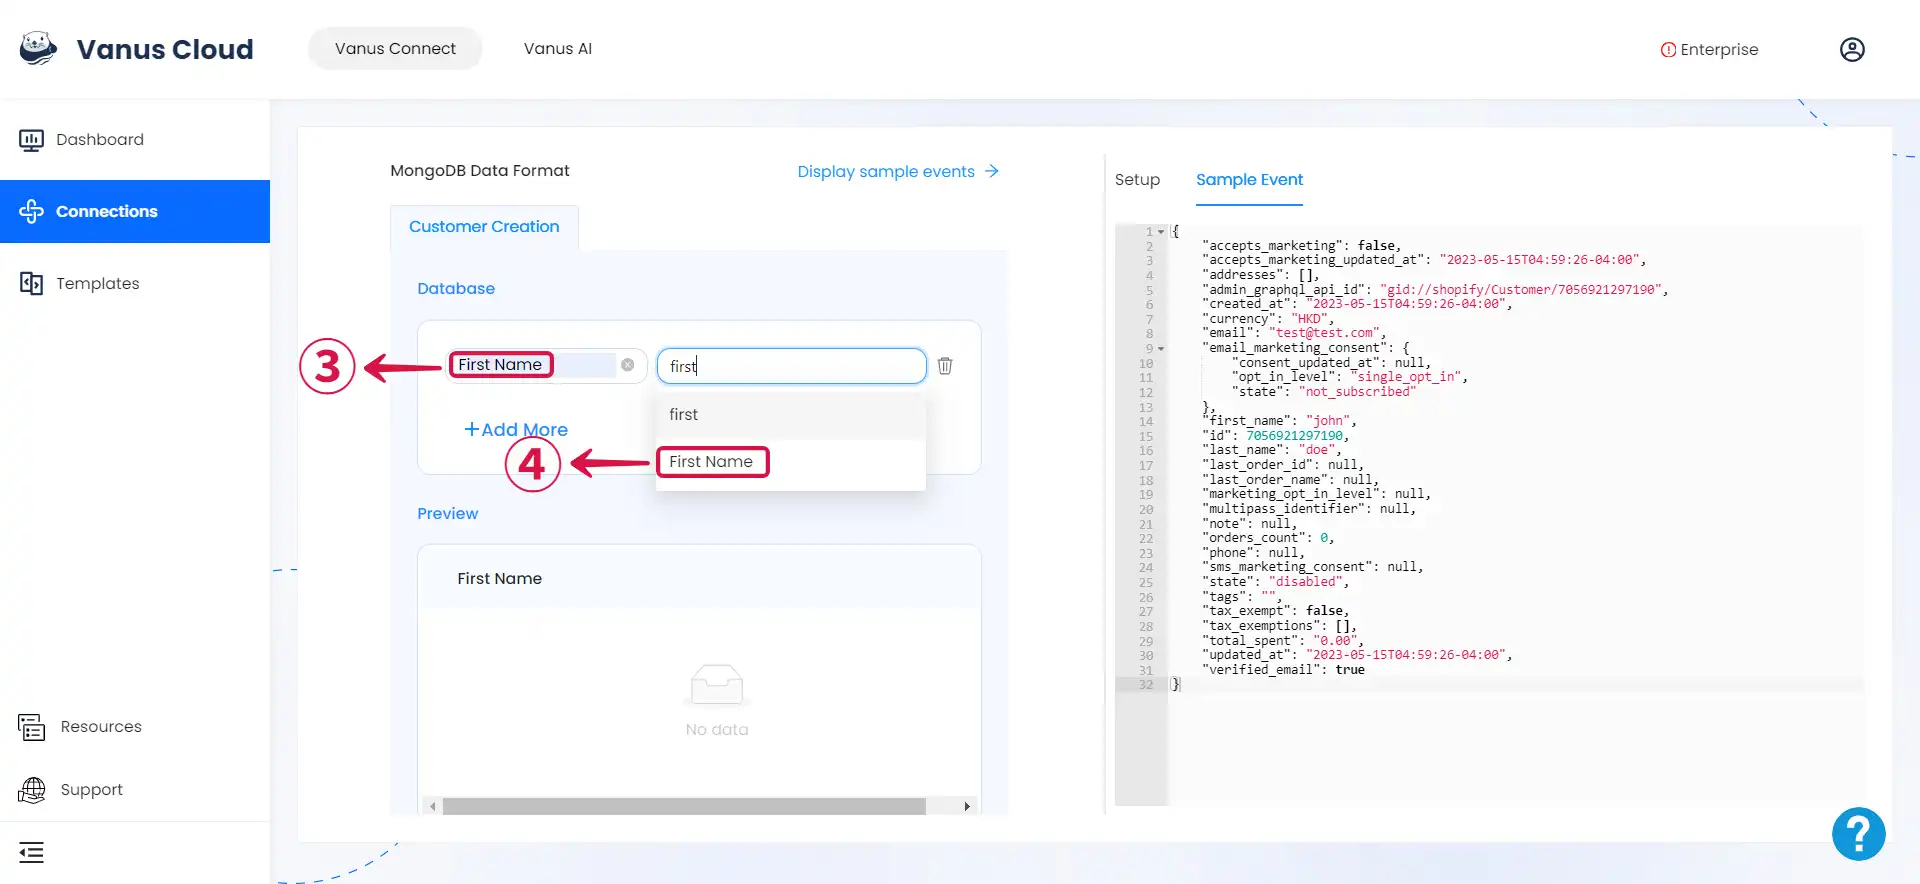
- Input key③ and search for the corresponding value④ for the event you want.
- You can fill in as many key-value pairs⑤ as you wish to receive.
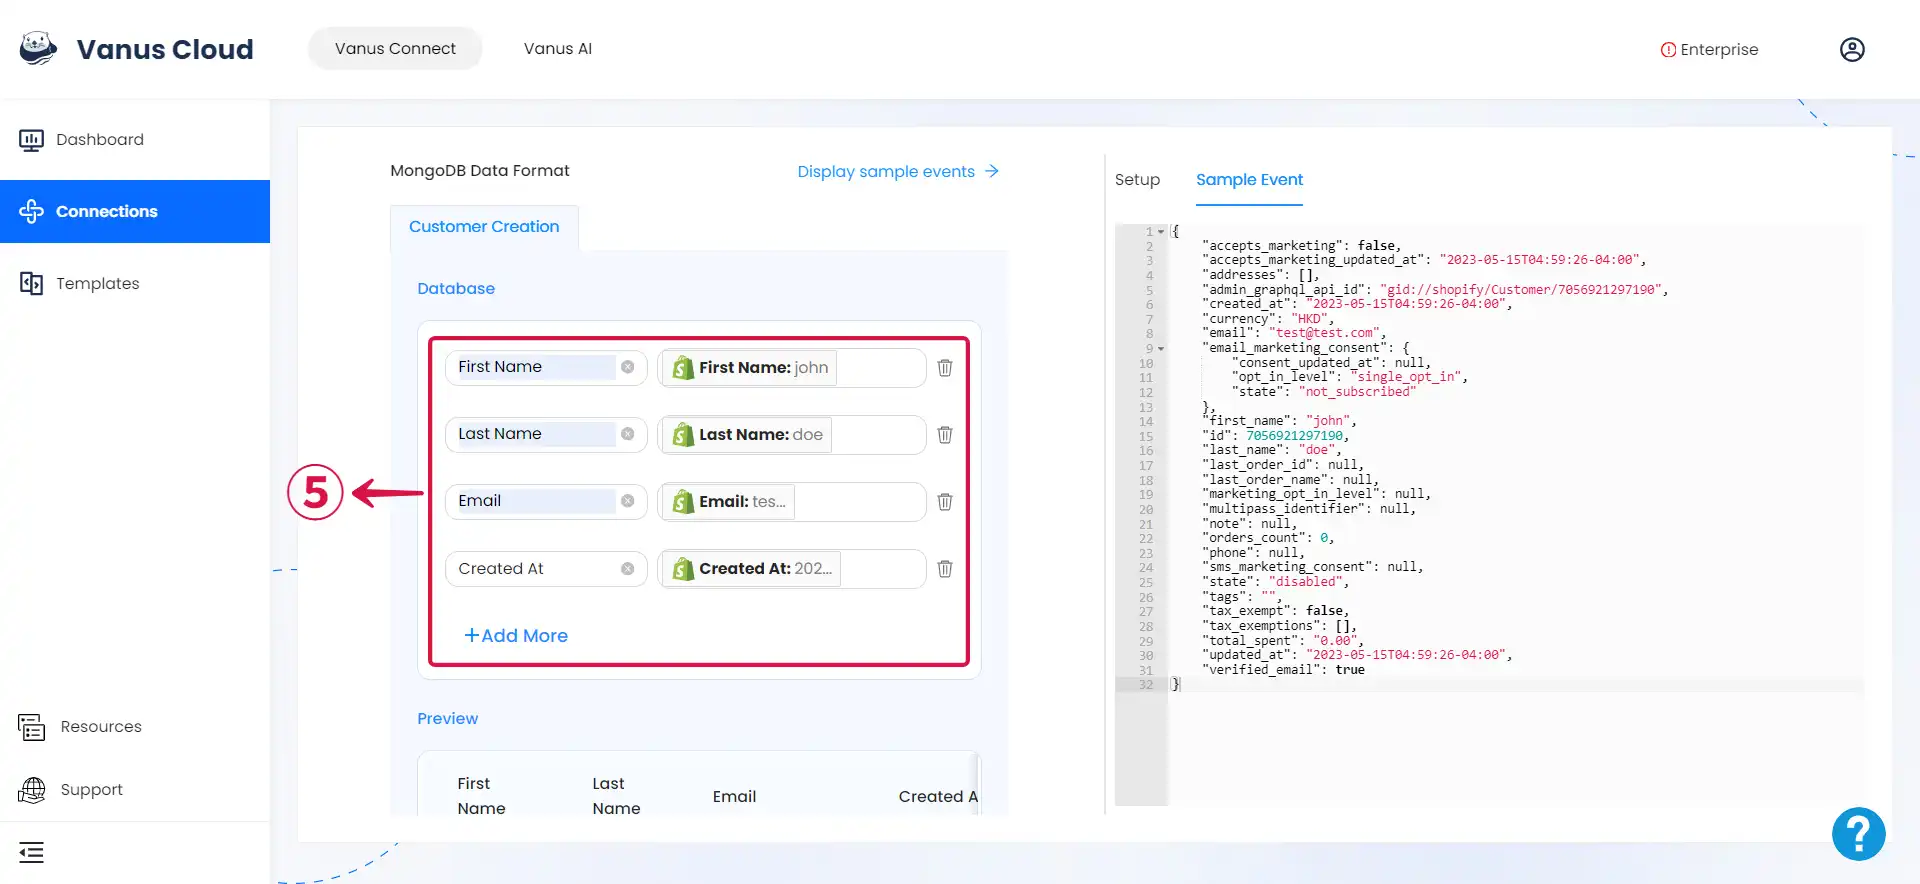
- Click Submit⑥ to finish the configuration process.
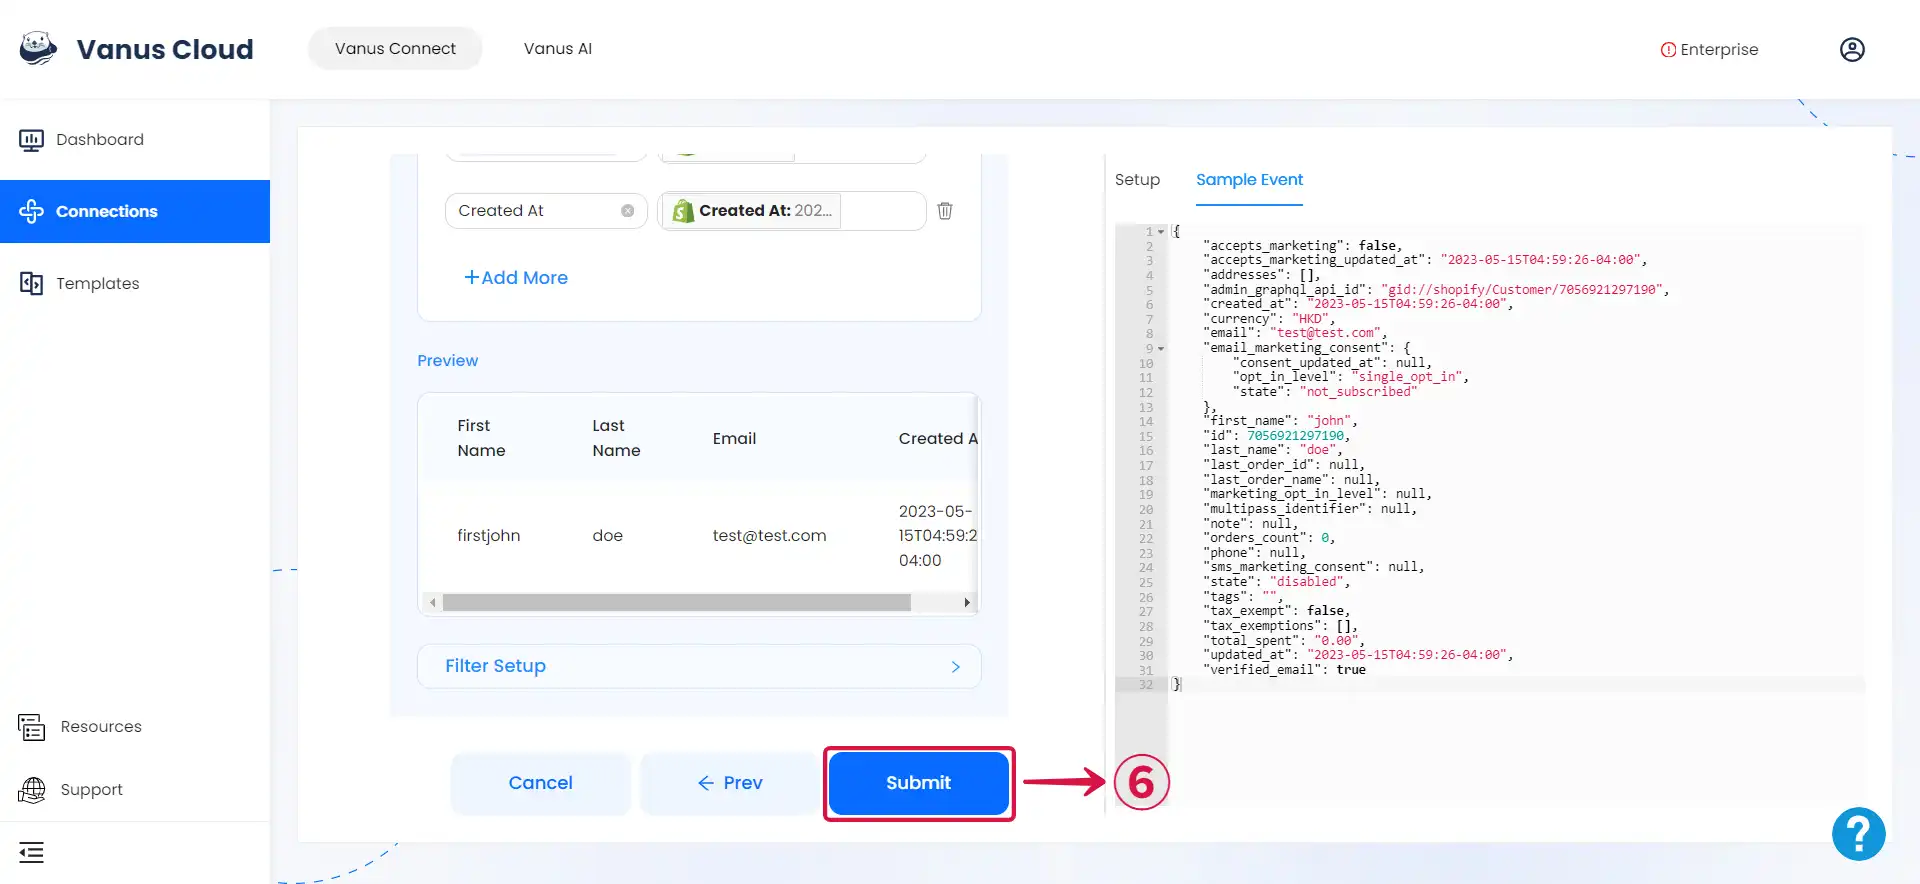
Custom Connection
Create your template following the structure of your database, an example:
{
   "inserts": [
      {
        "scenario": "quick-start"
      }
  ]
}