Mailchimp
This guide contains information to set up a Mailchimp Sink in Vanus Connect.
Introduction
Mailchimp is a widely used marketing automation platform and email marketing service that helps businesses and individuals create, manage, and analyze email marketing campaigns.
With Mailchimp Sink connector in Vanus Connect, you can easily forward real-time updates to a designated Mailchimp account, allowing you to track events generated by your application.
Prerequisites
Before forwarding events to Mailchimp, you must have:
A Mailchimp Account
Getting Started
To set up a Mailchimp Sink in Vanus Connect:
Step 1: Mailchimp API Key
- Sign in to your Mailchimp account.
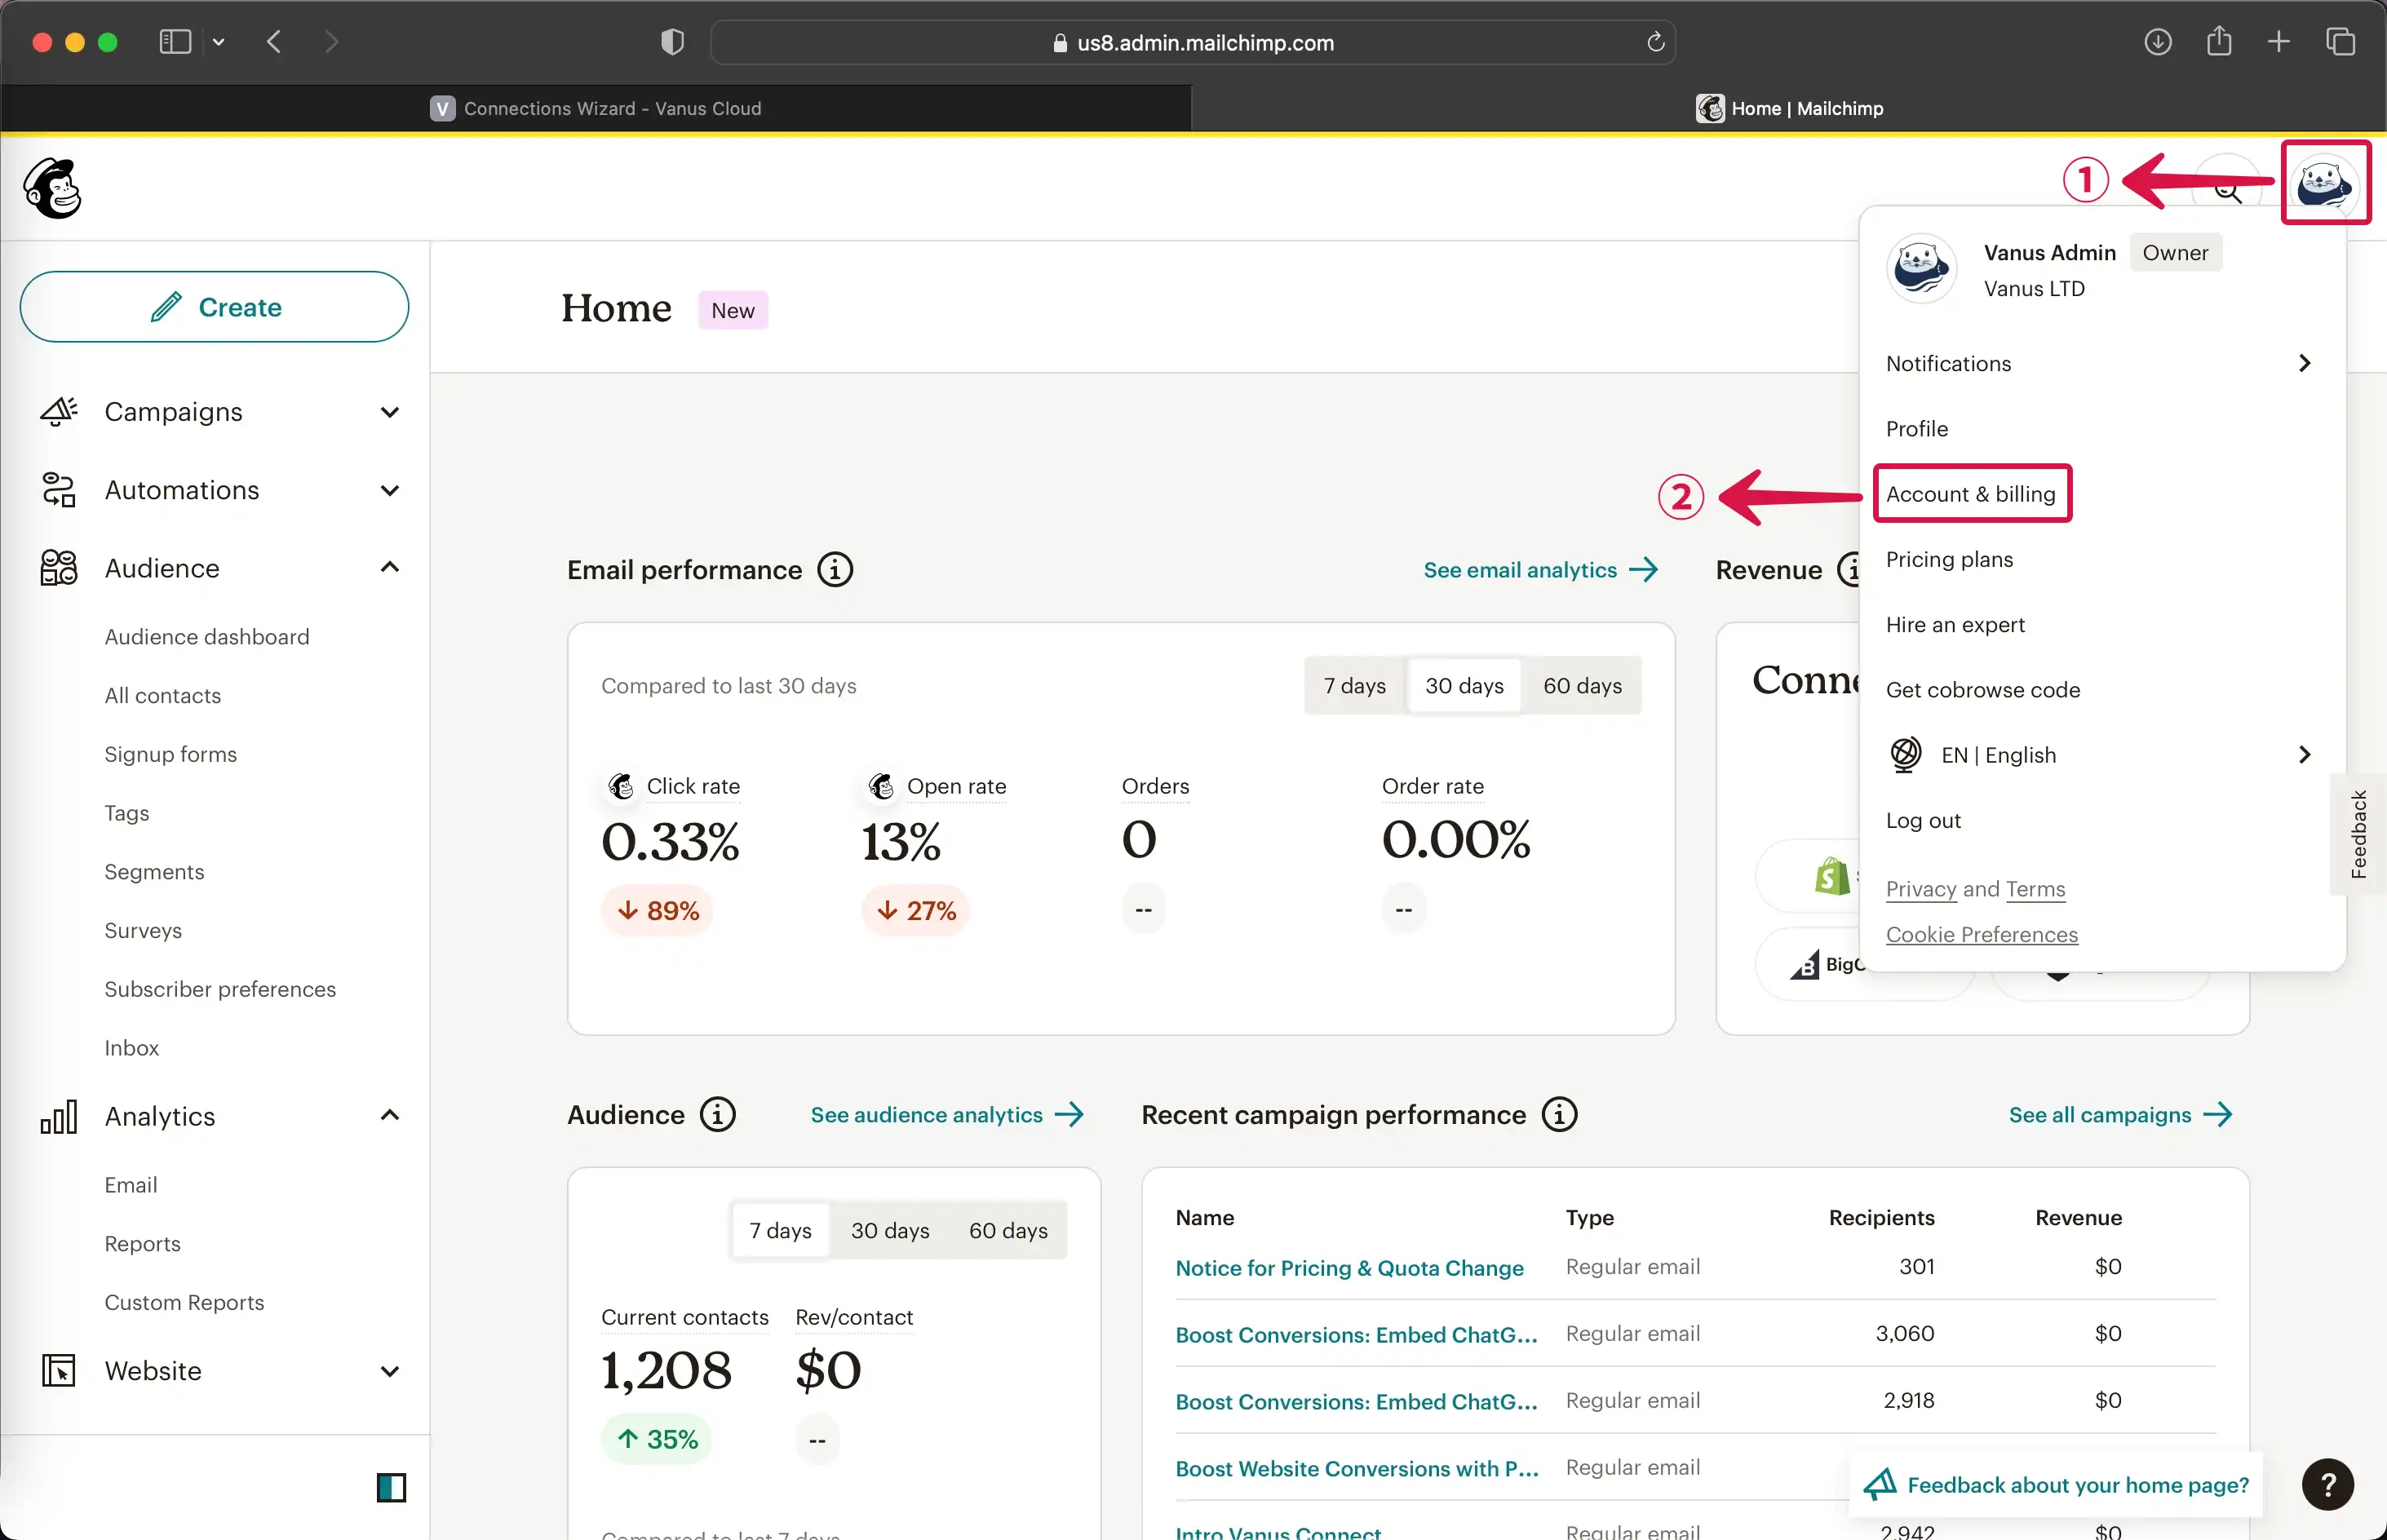
- Click on your Avatar① and then select Account & billing②.
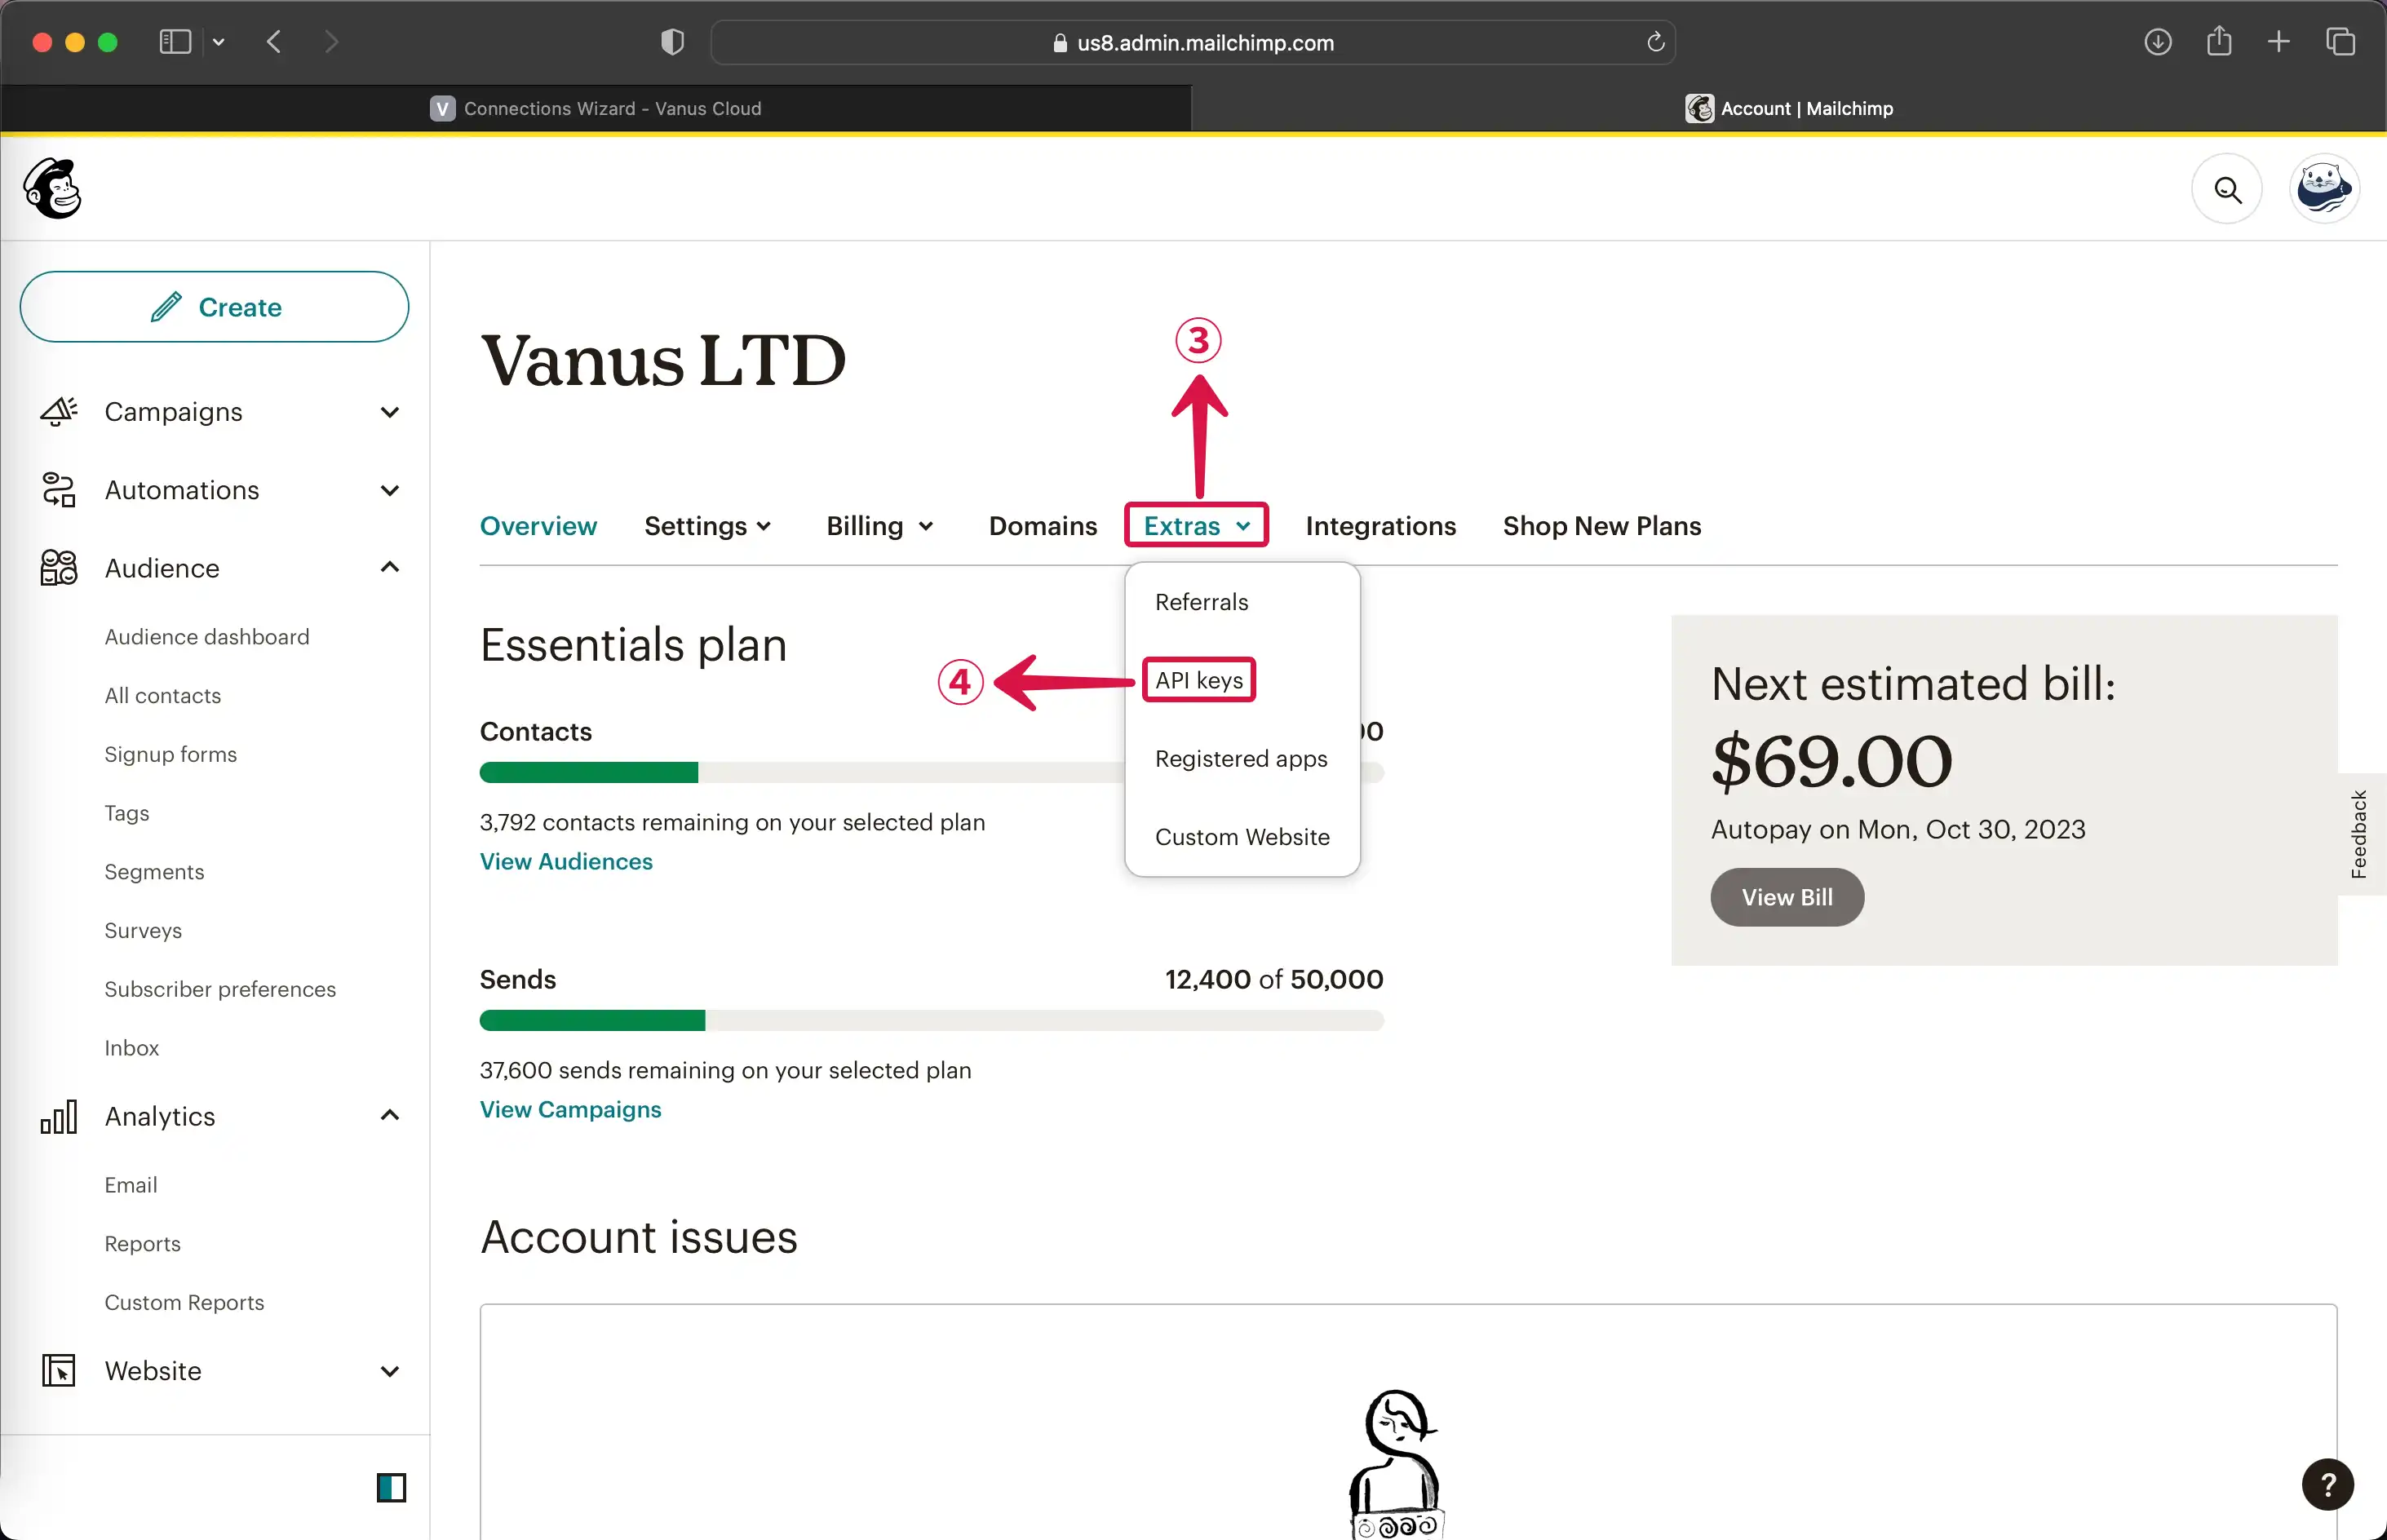
- In the account settings, choose Extras③ and click on API keys④.
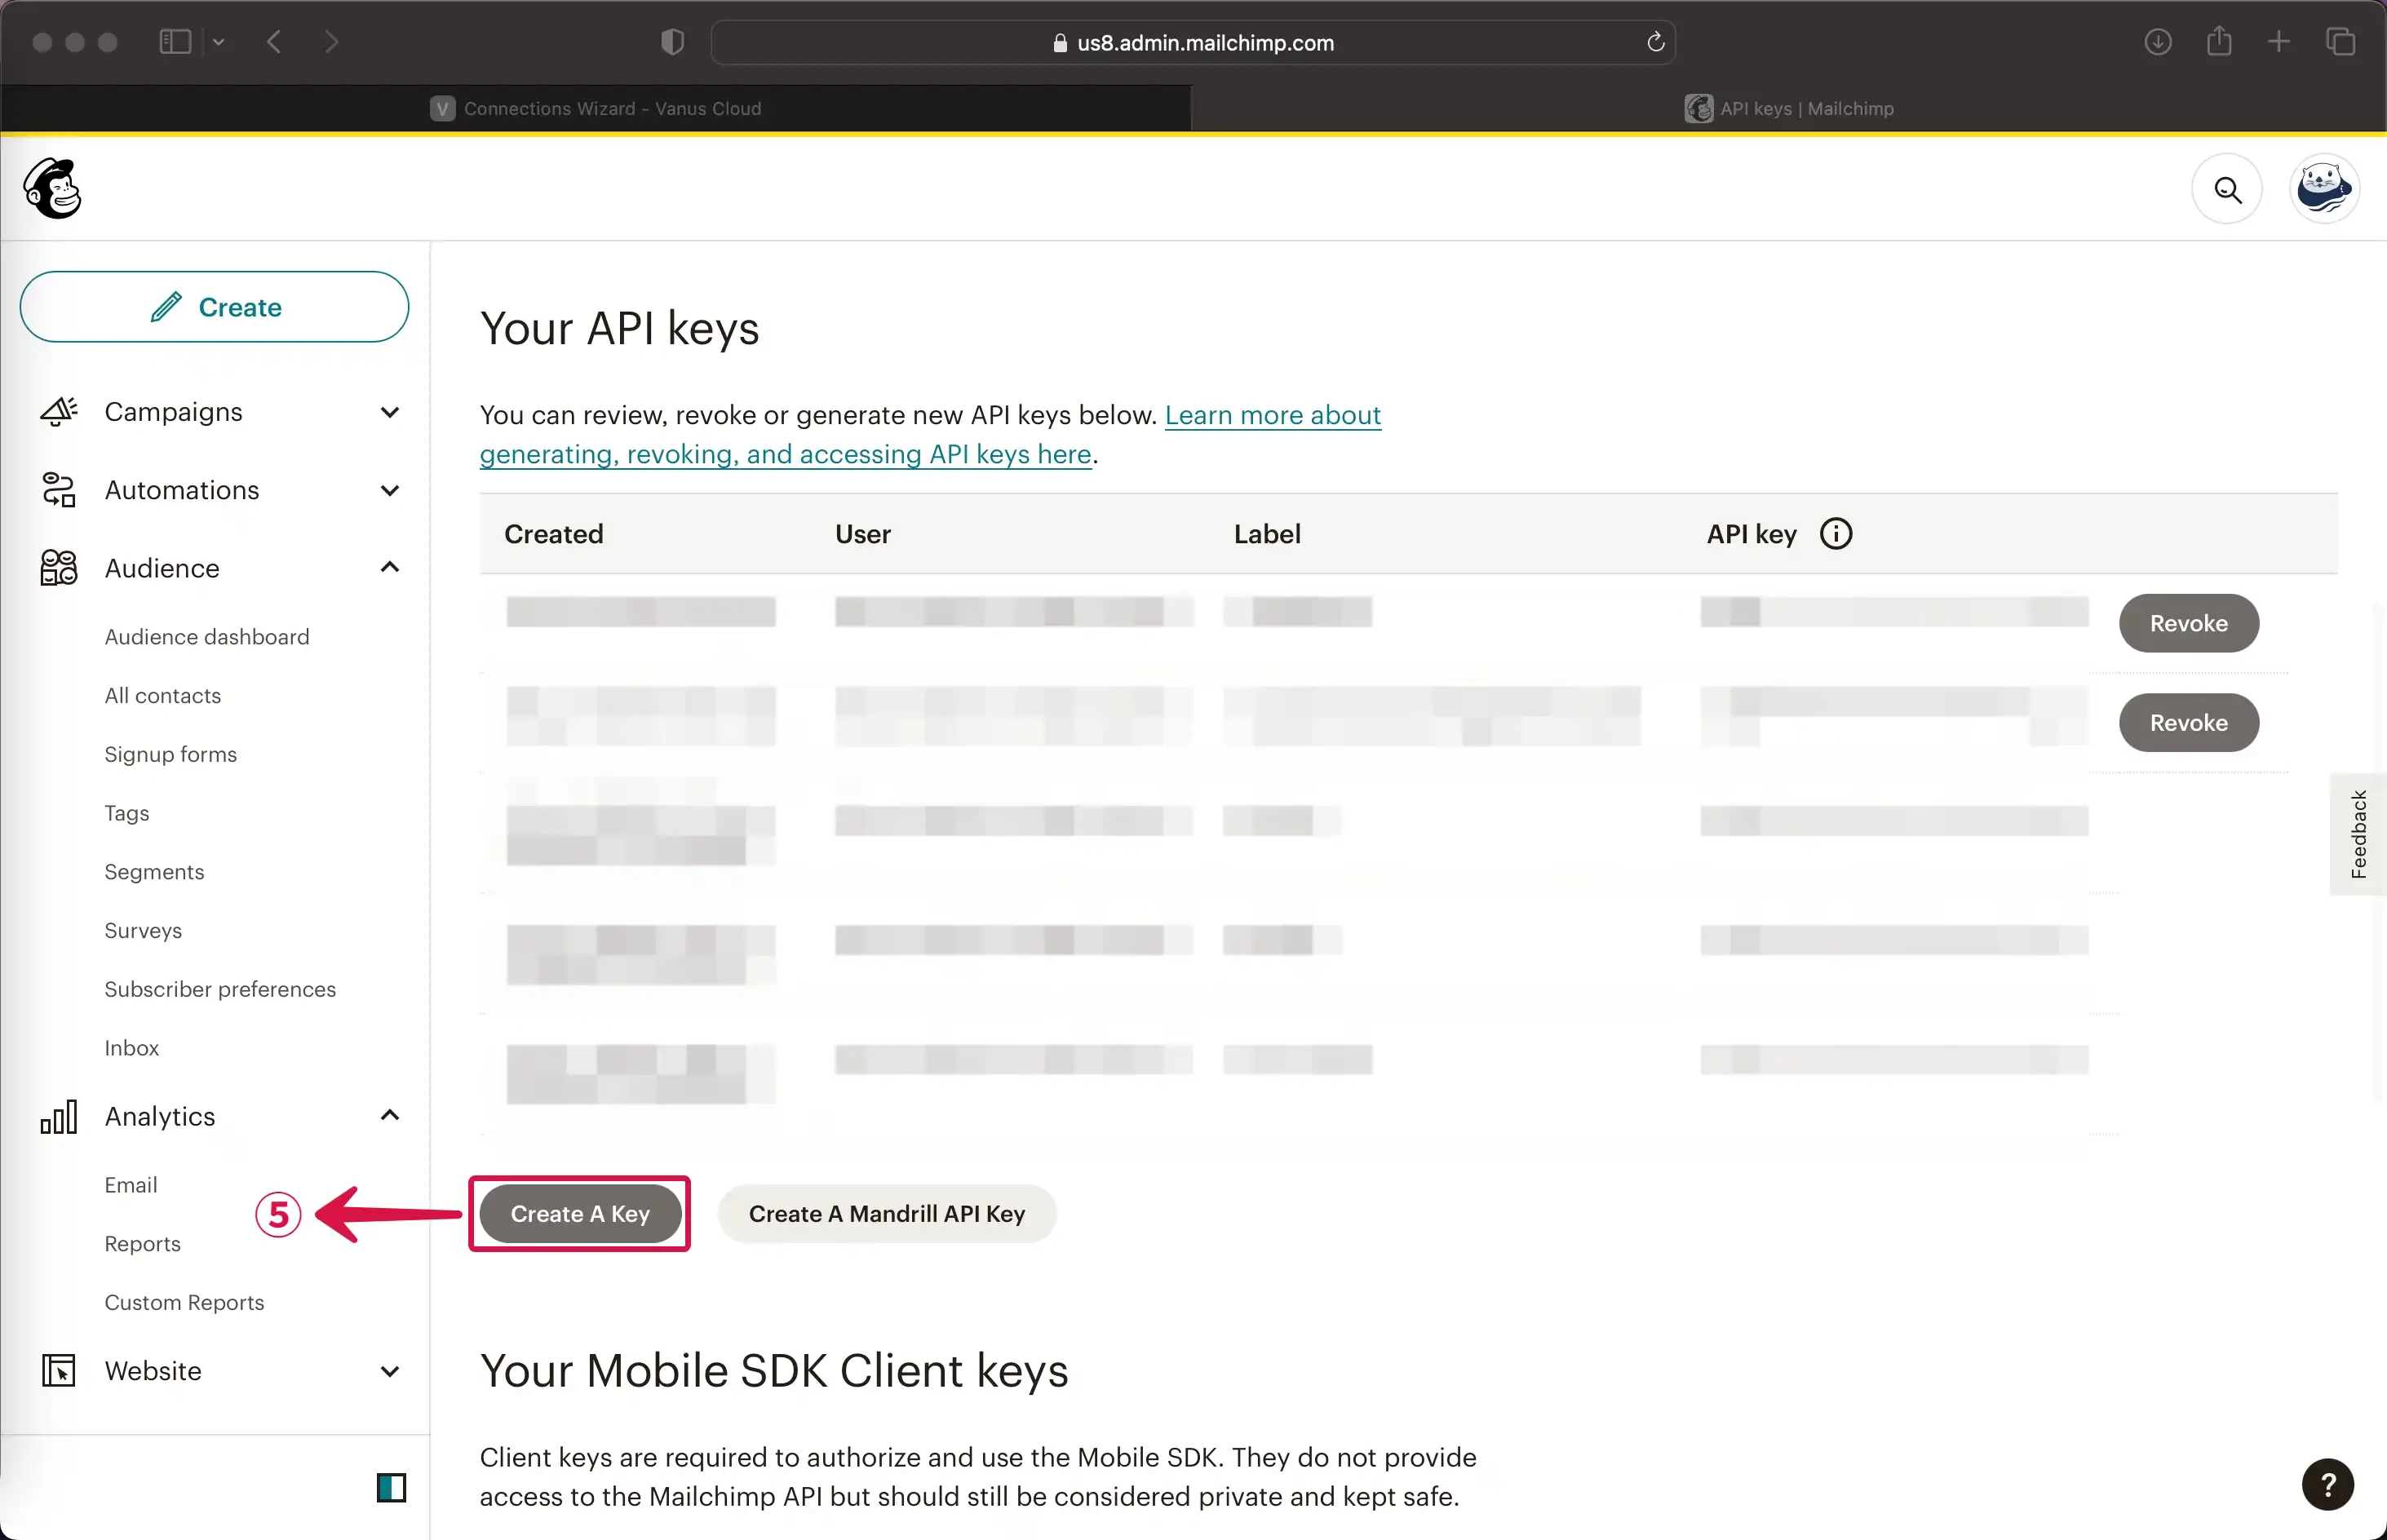
- To create a new API key, click on Create A Key⑤.
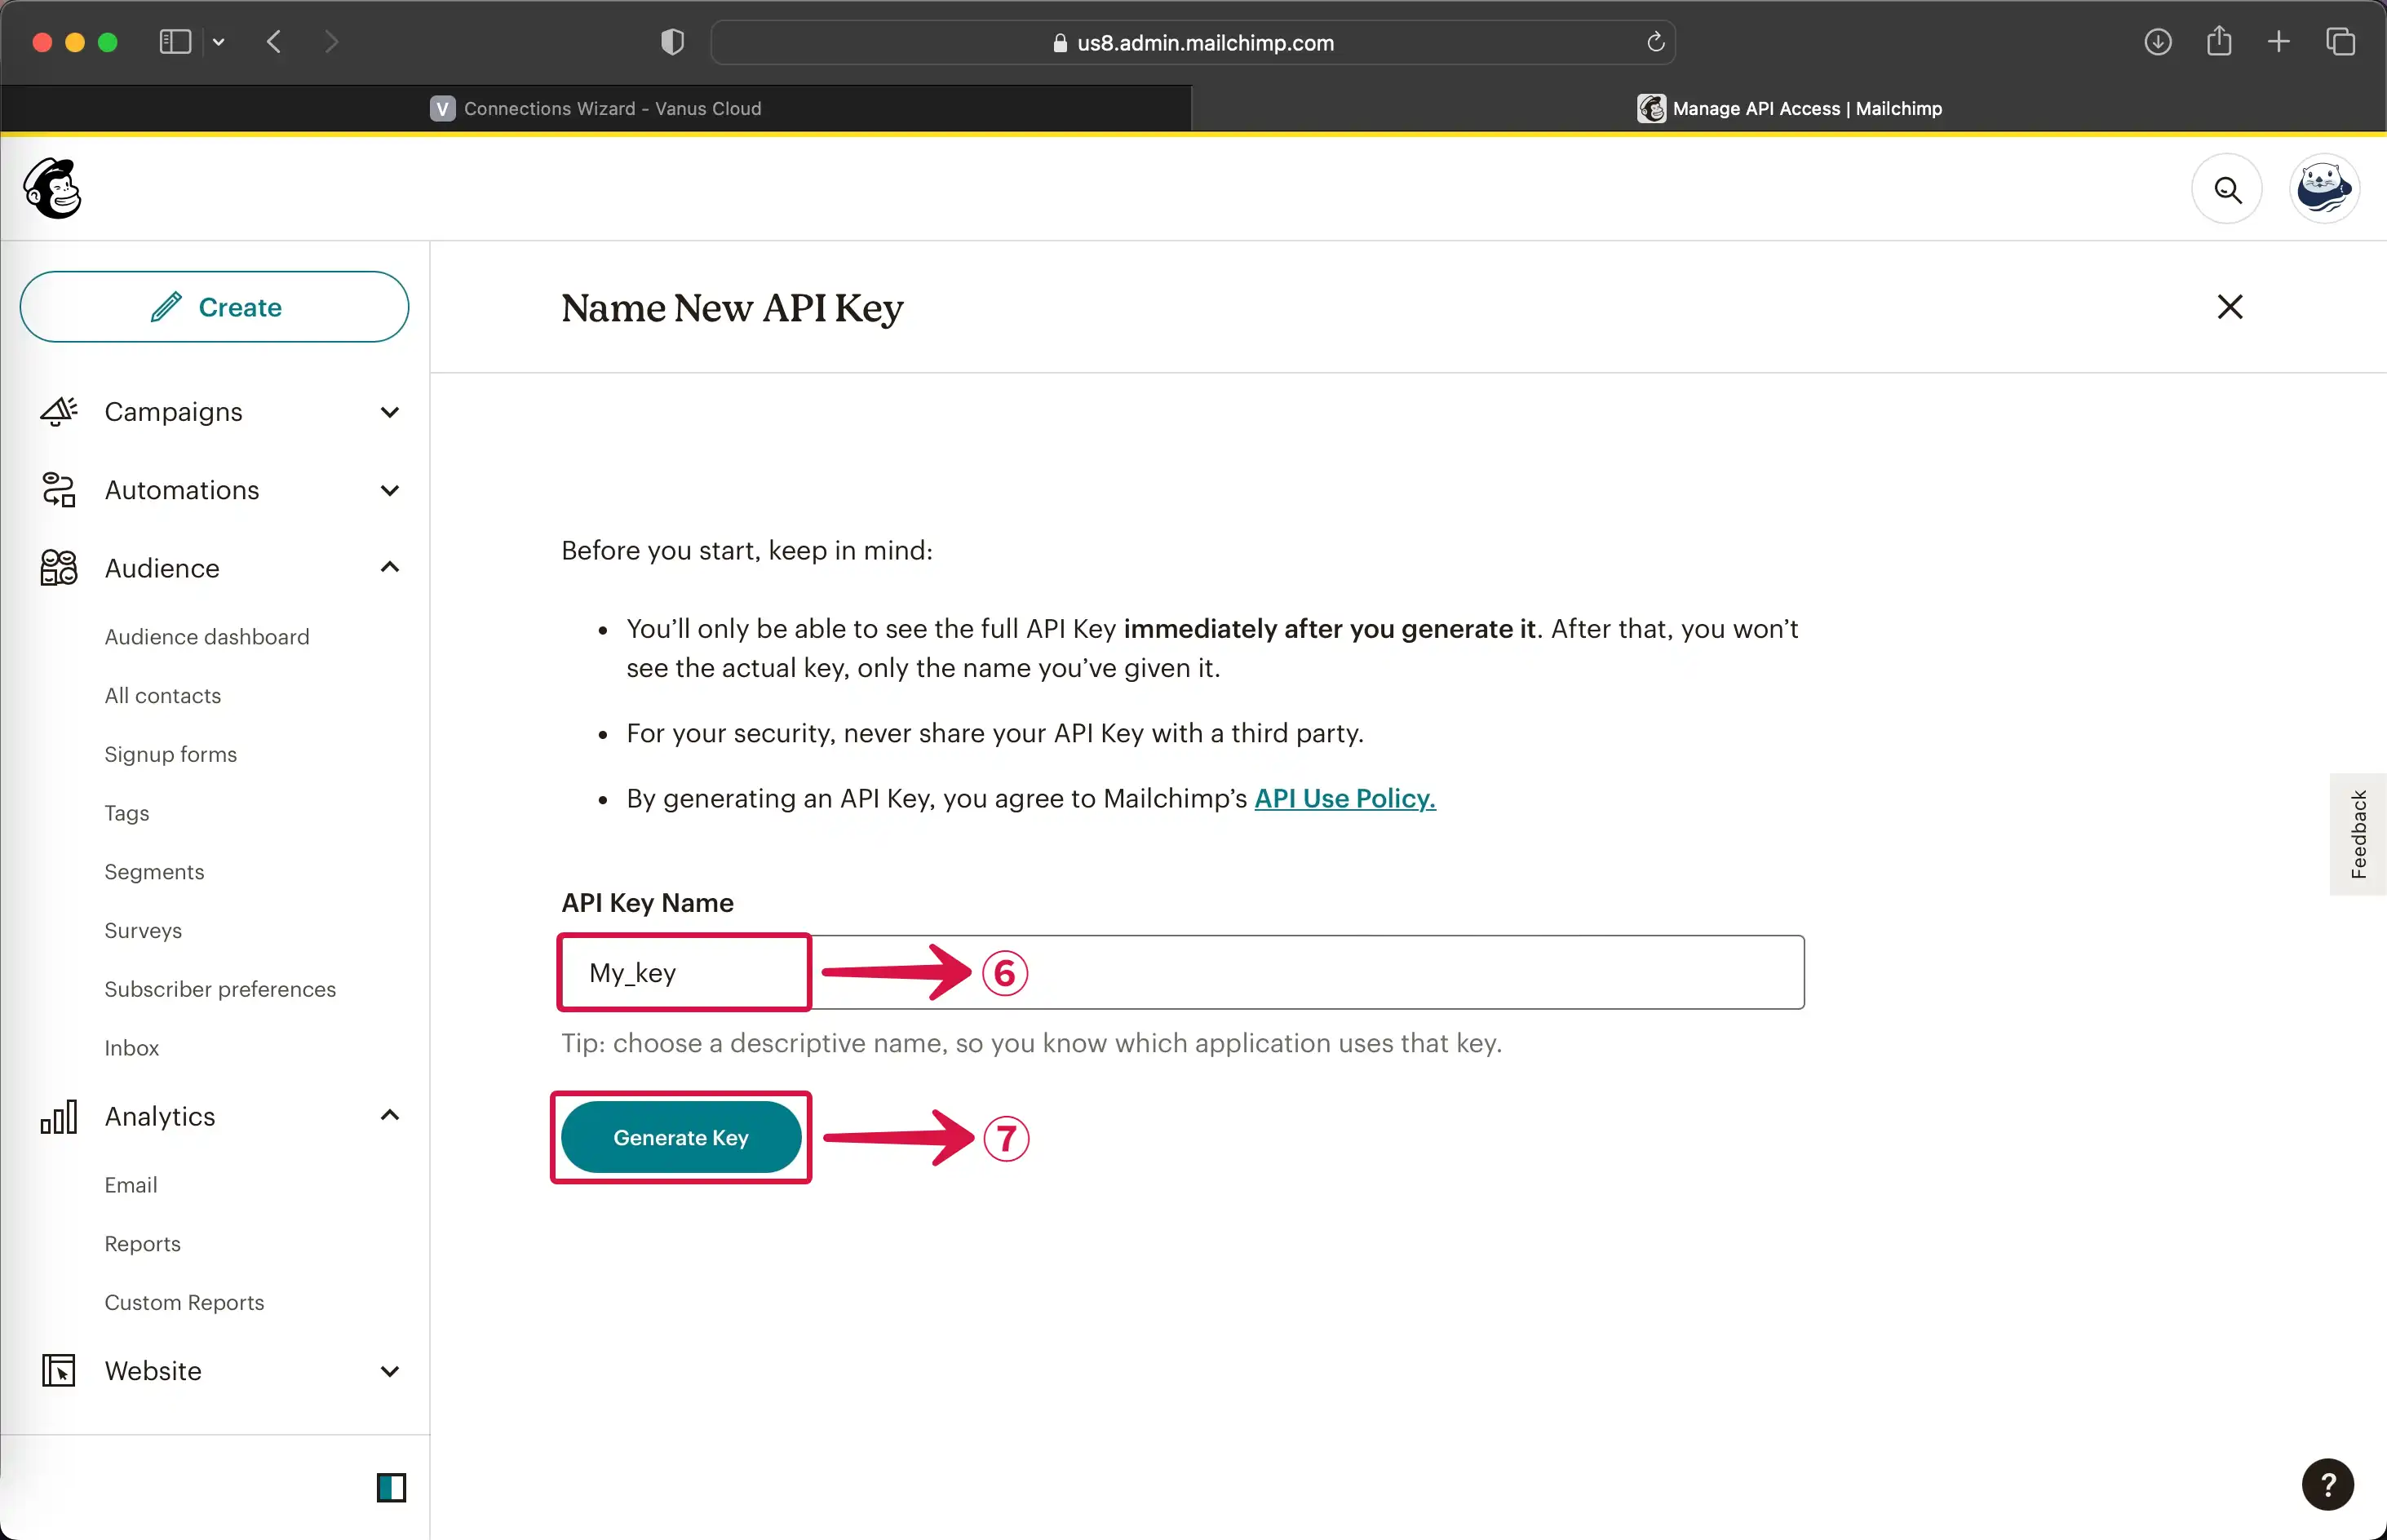
- Provide a name for your new API Key⑥, and then click Generate Key⑦.
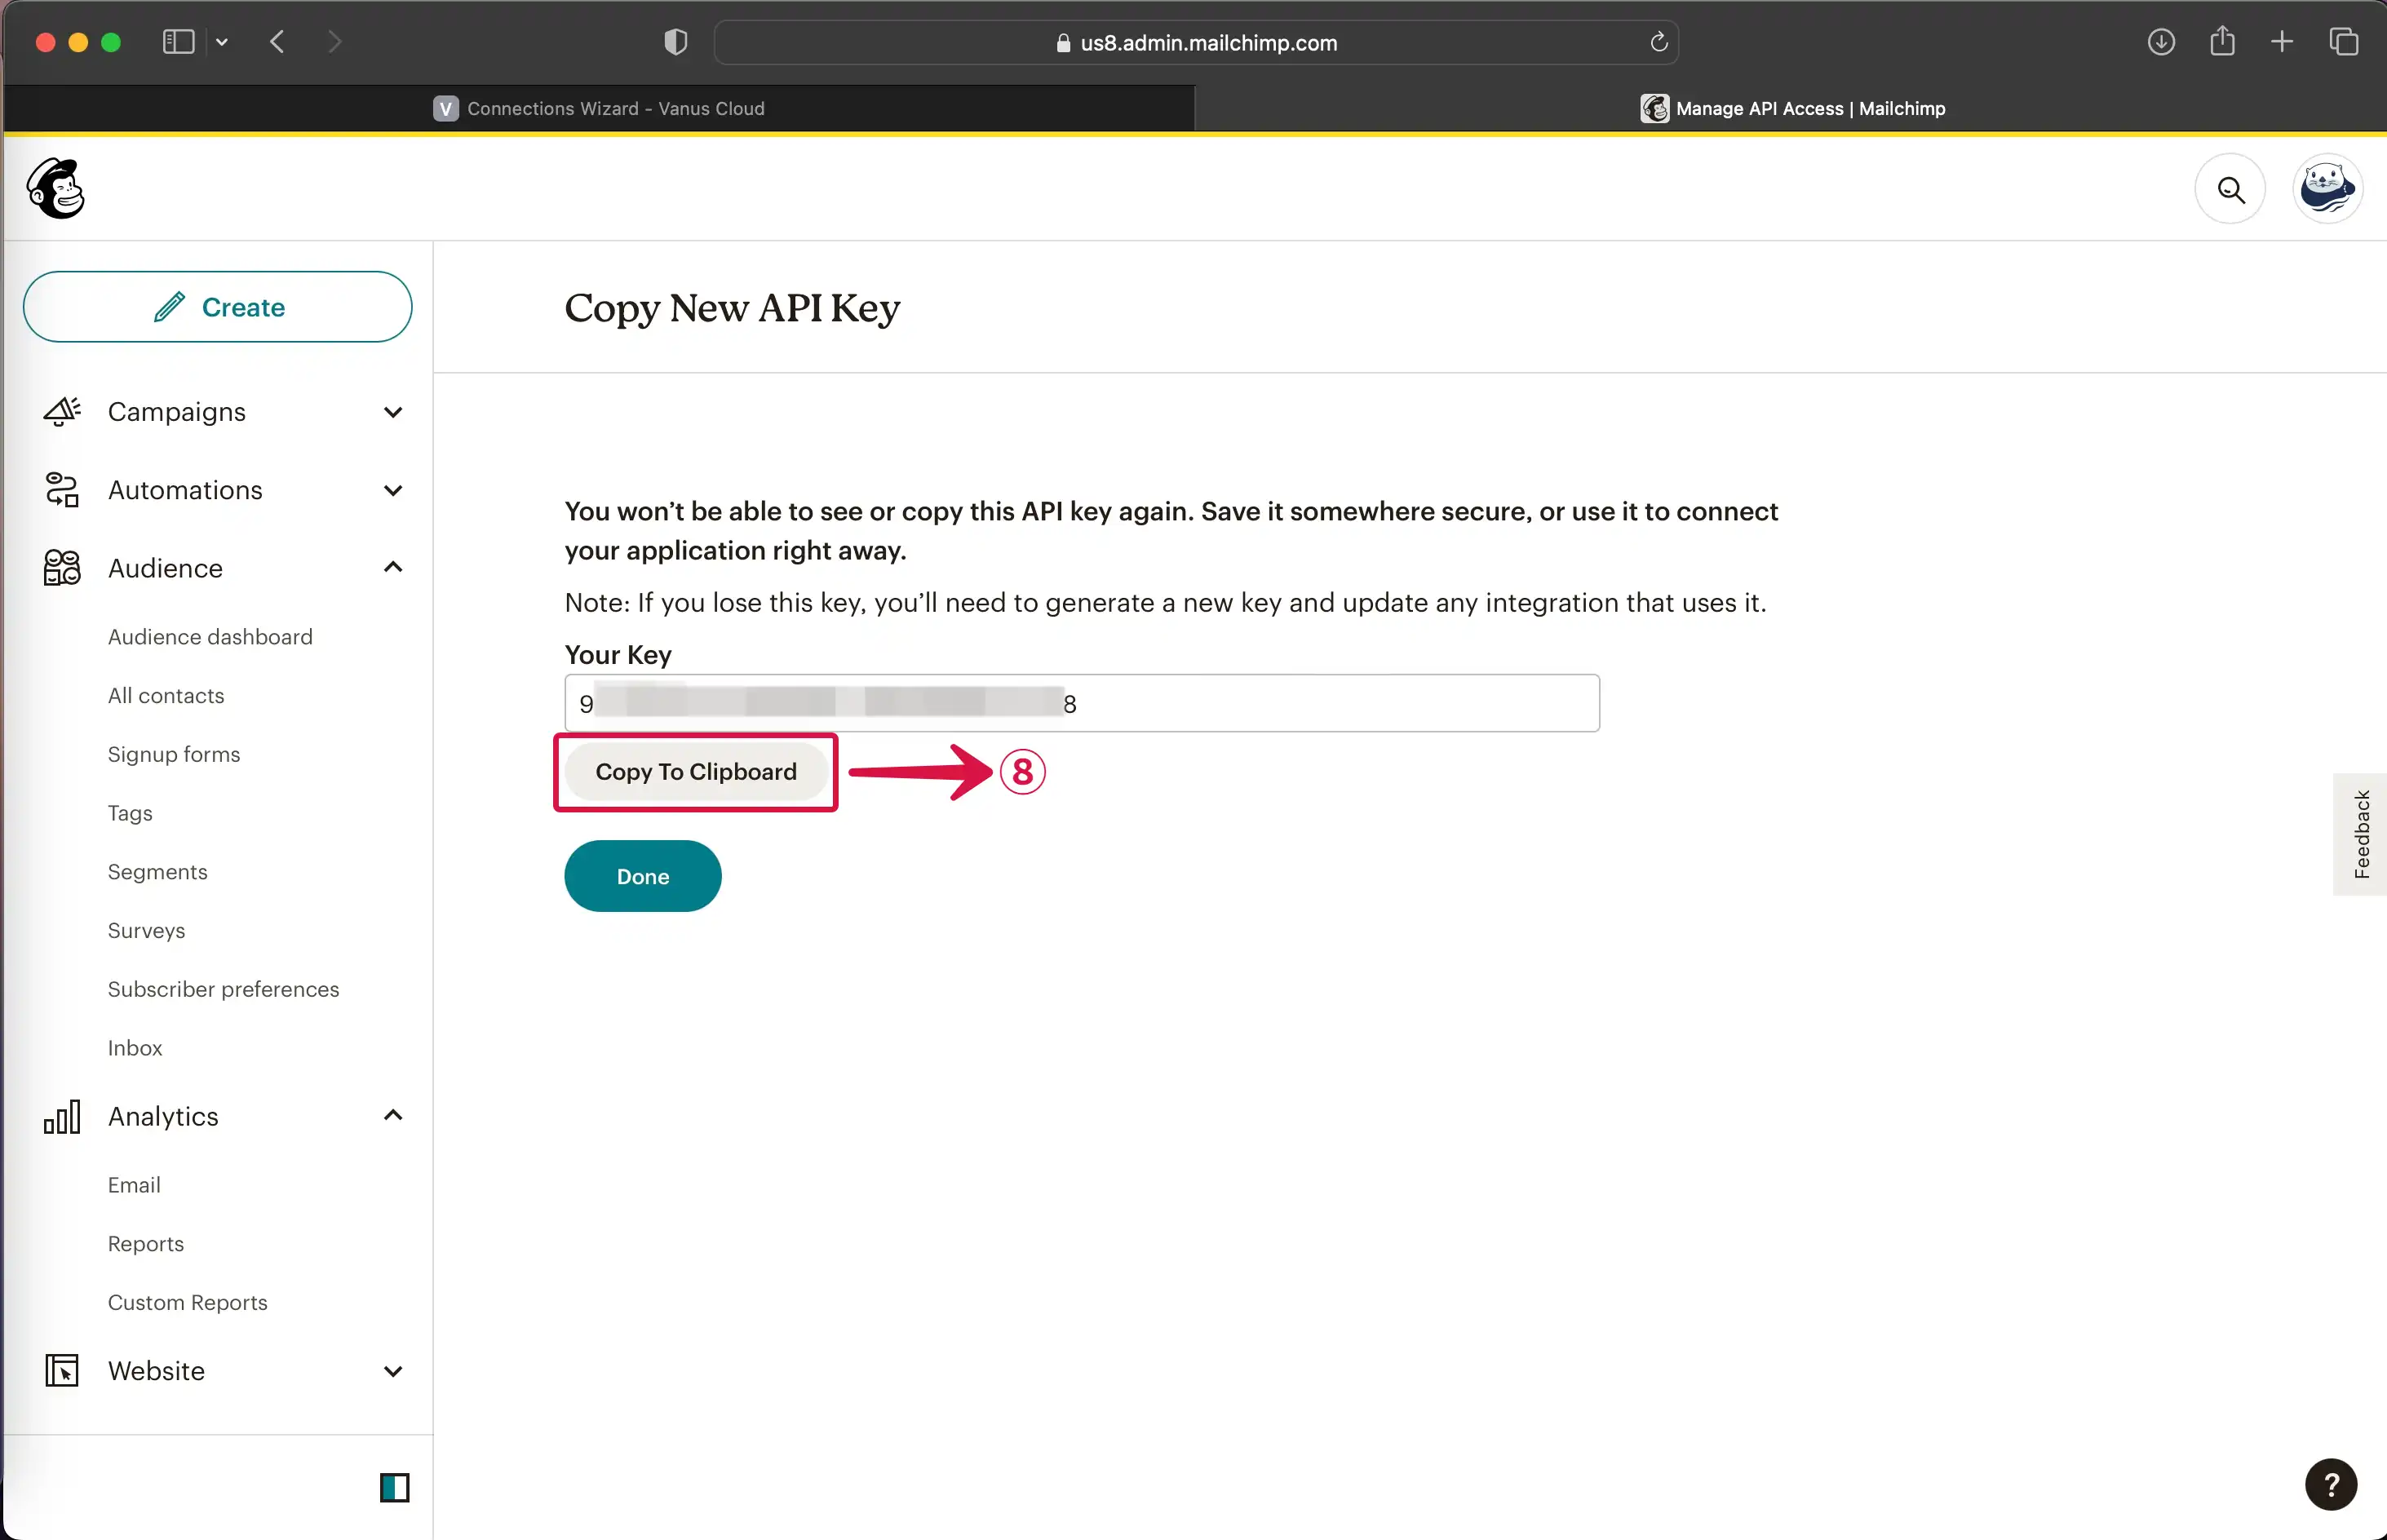
- To copy your private key to your clipboard, click on Copy To Clipboard⑧.
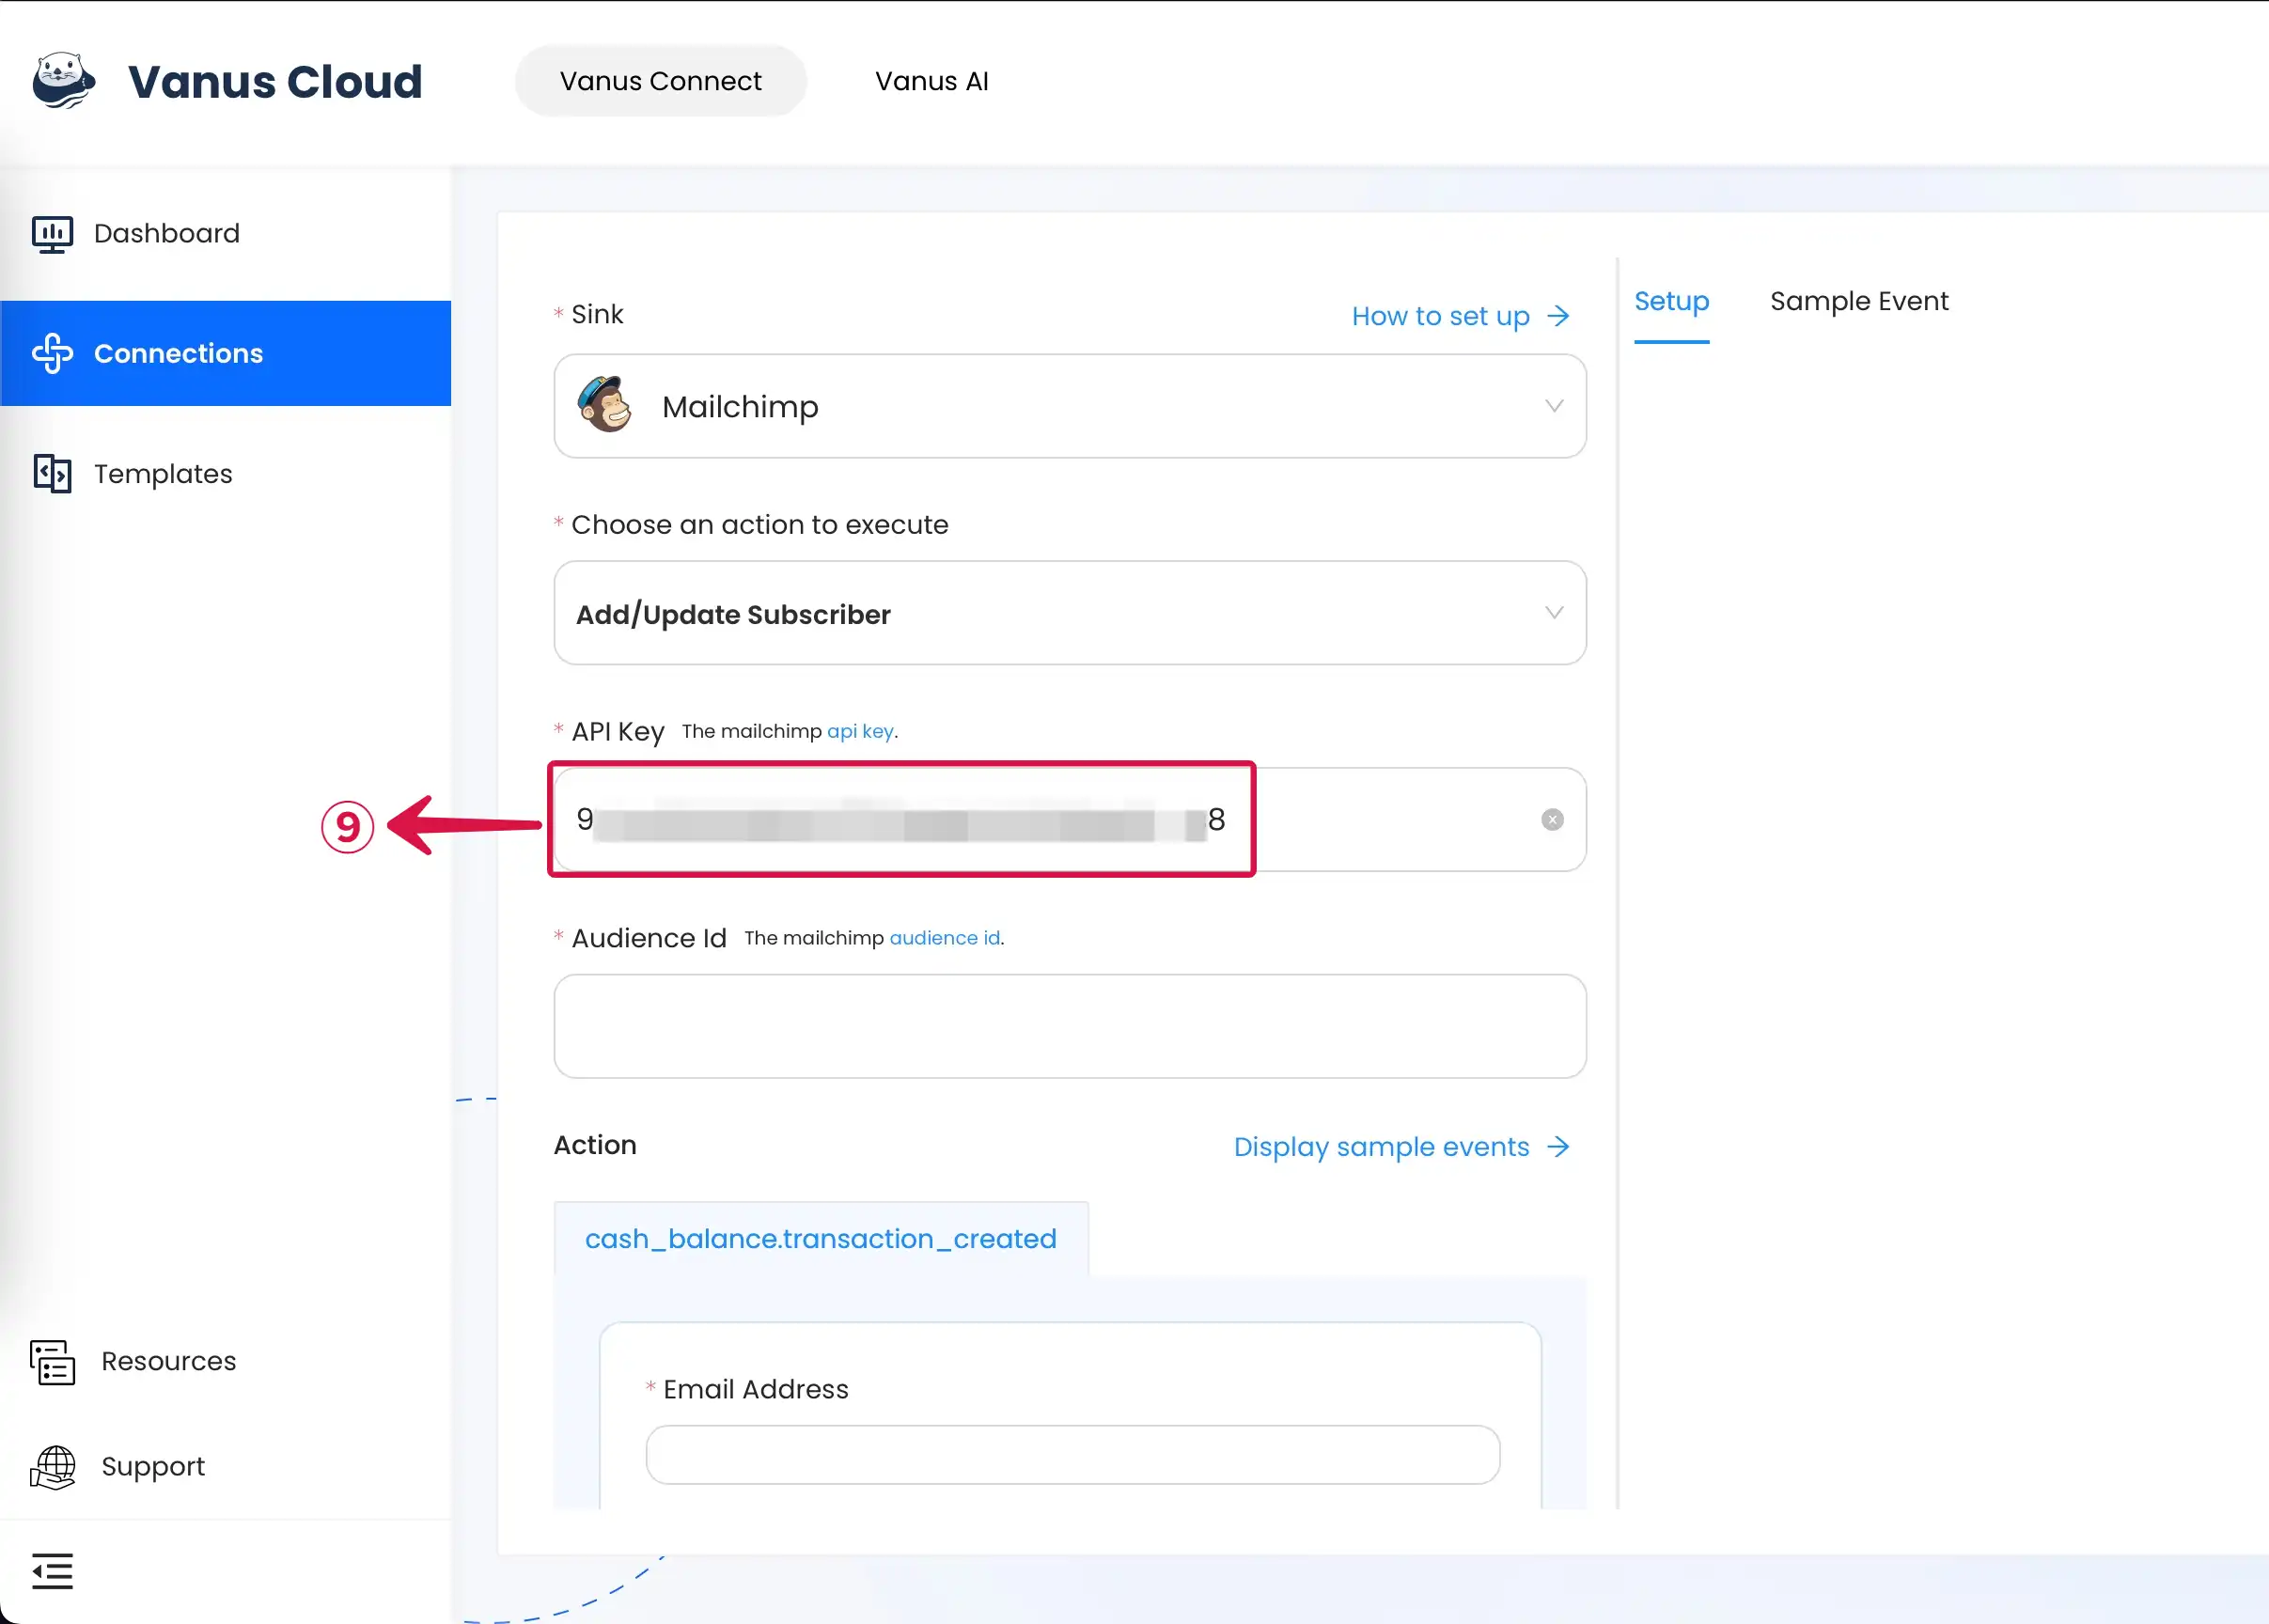
- Finally, Paste⑨ your private API Key into Vanus AI.
Step 2: Mailchimp Audience ID
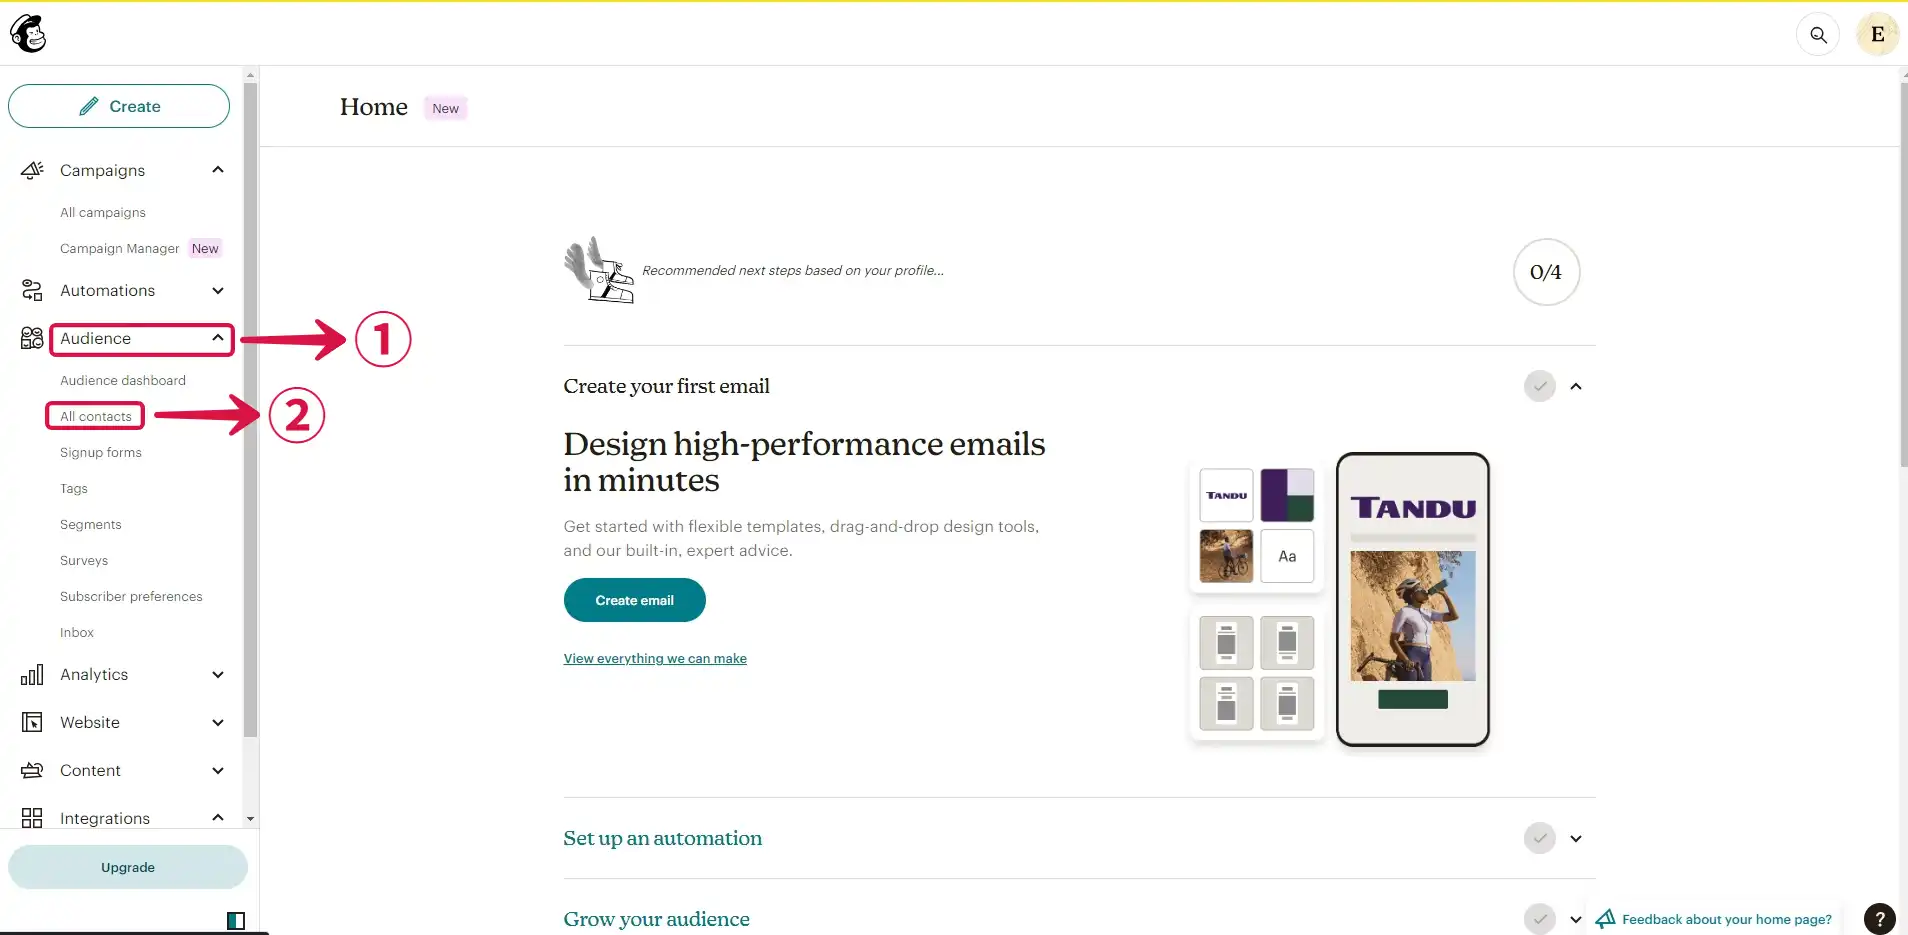
- At the left sidebar of your Mailchimp Dashboard, Click on the Audience① dropdown menu, then click on All contacts②.
- Click on Settings③ dropdown menu and select Audience name and defaults④.
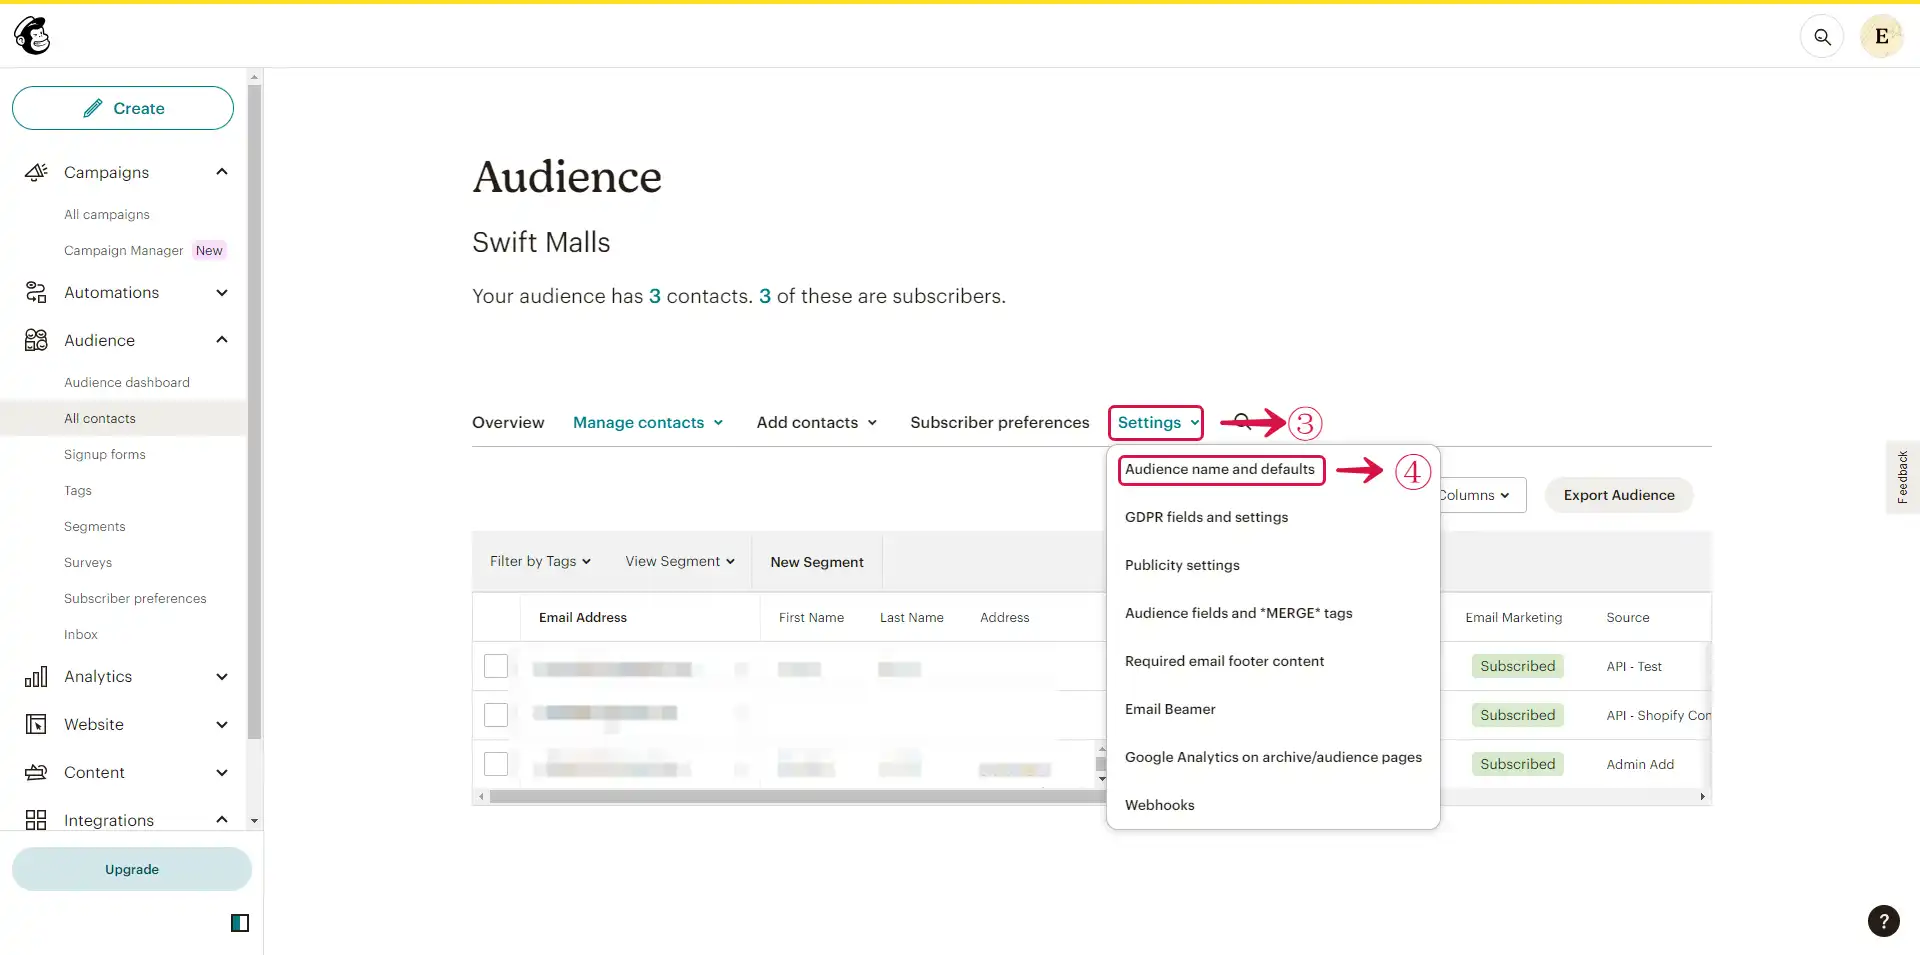
- Copy the Audience ID⑤.
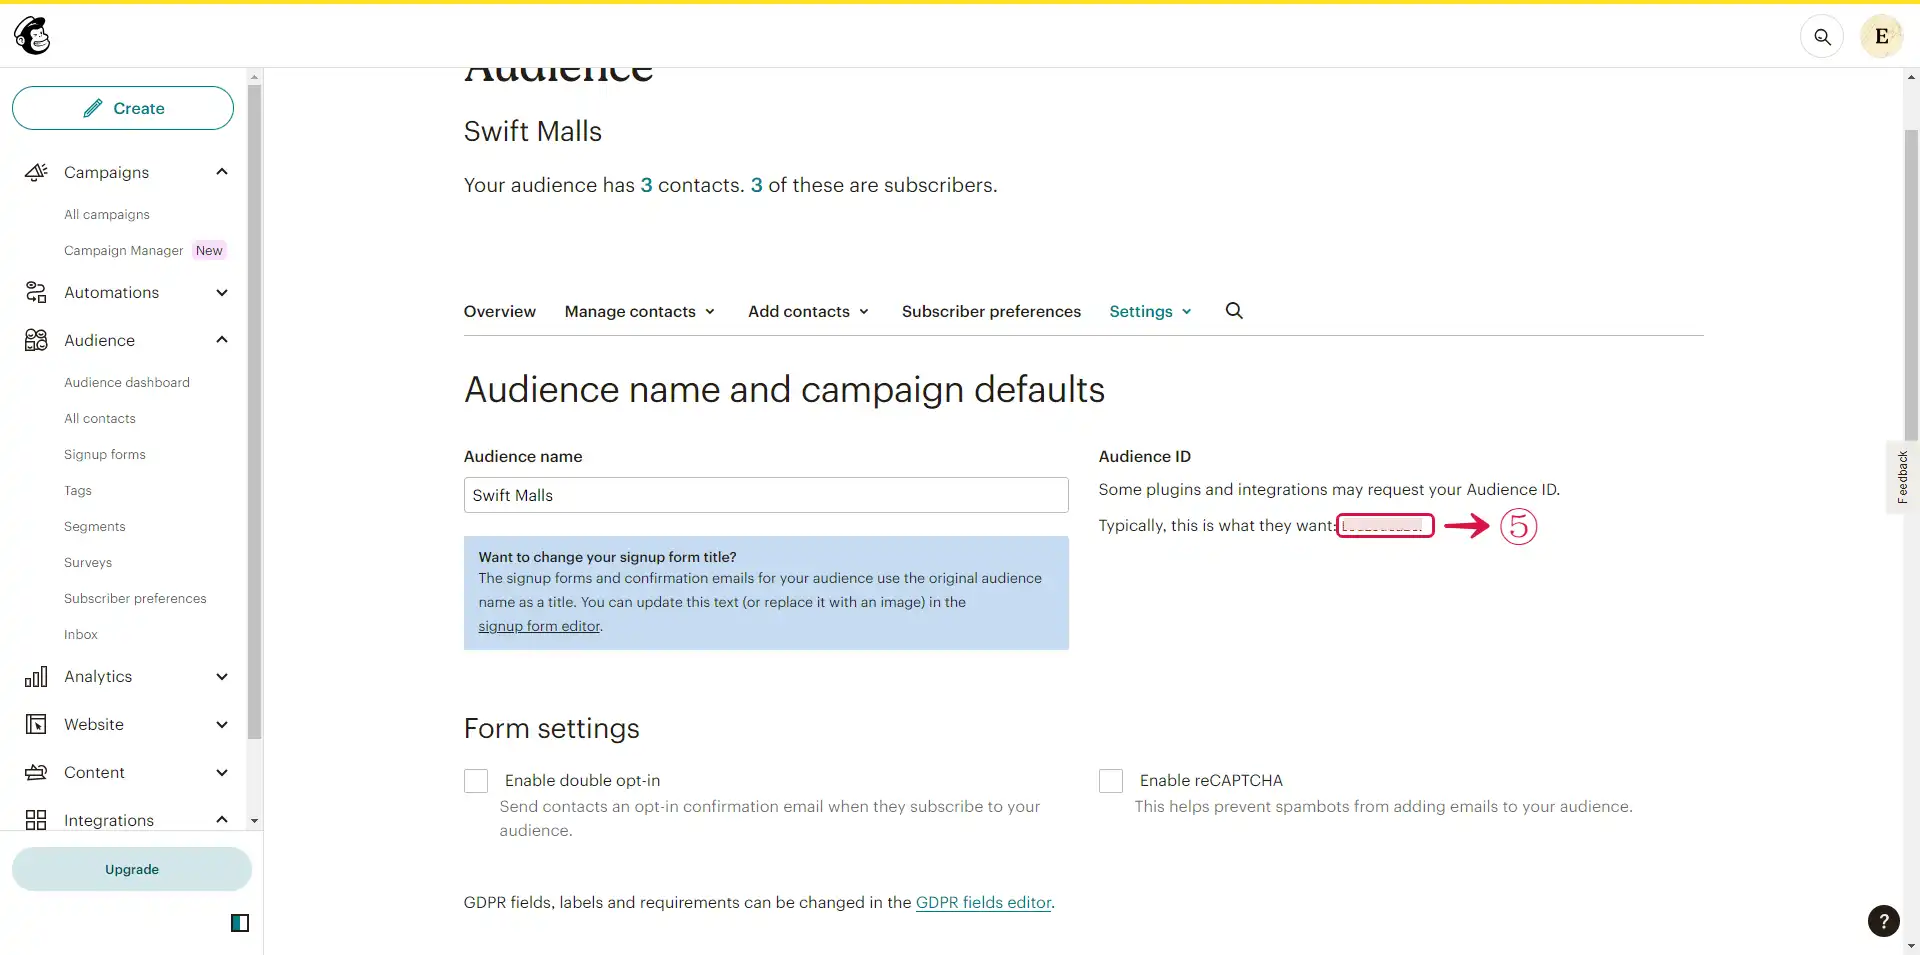
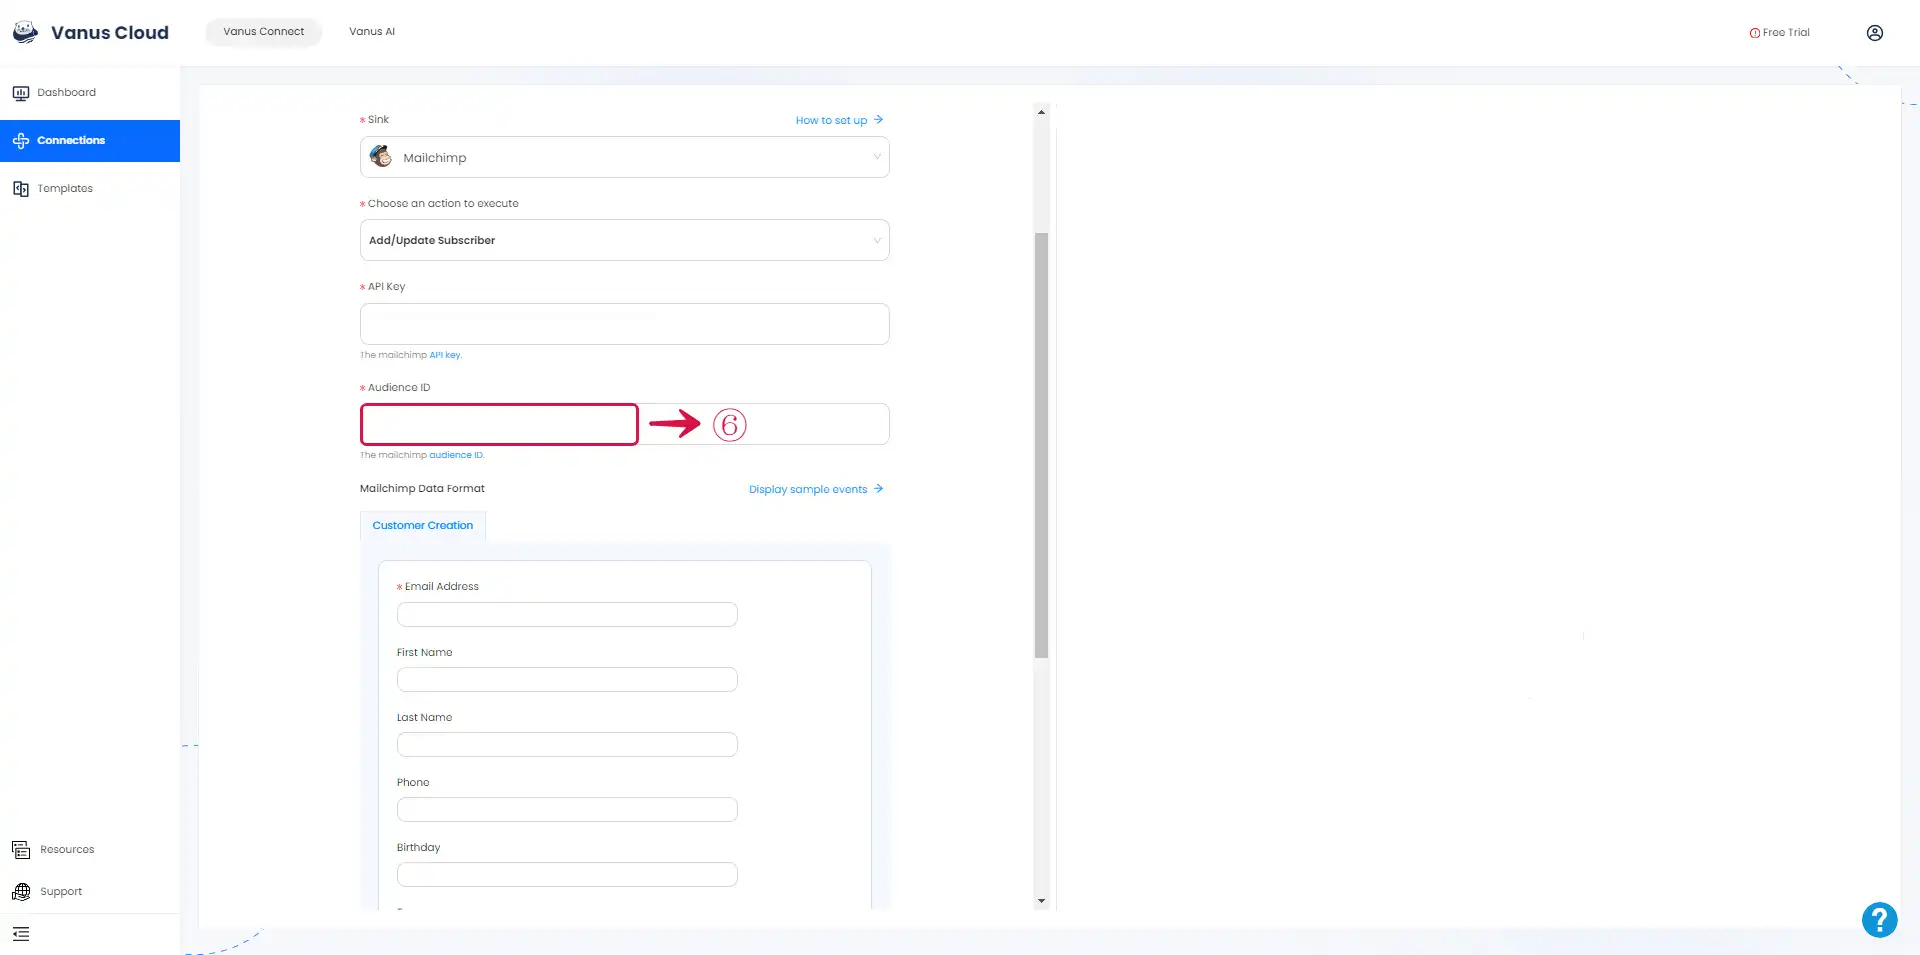
- Paste the Audience ID in the Audience ID⑥ field.
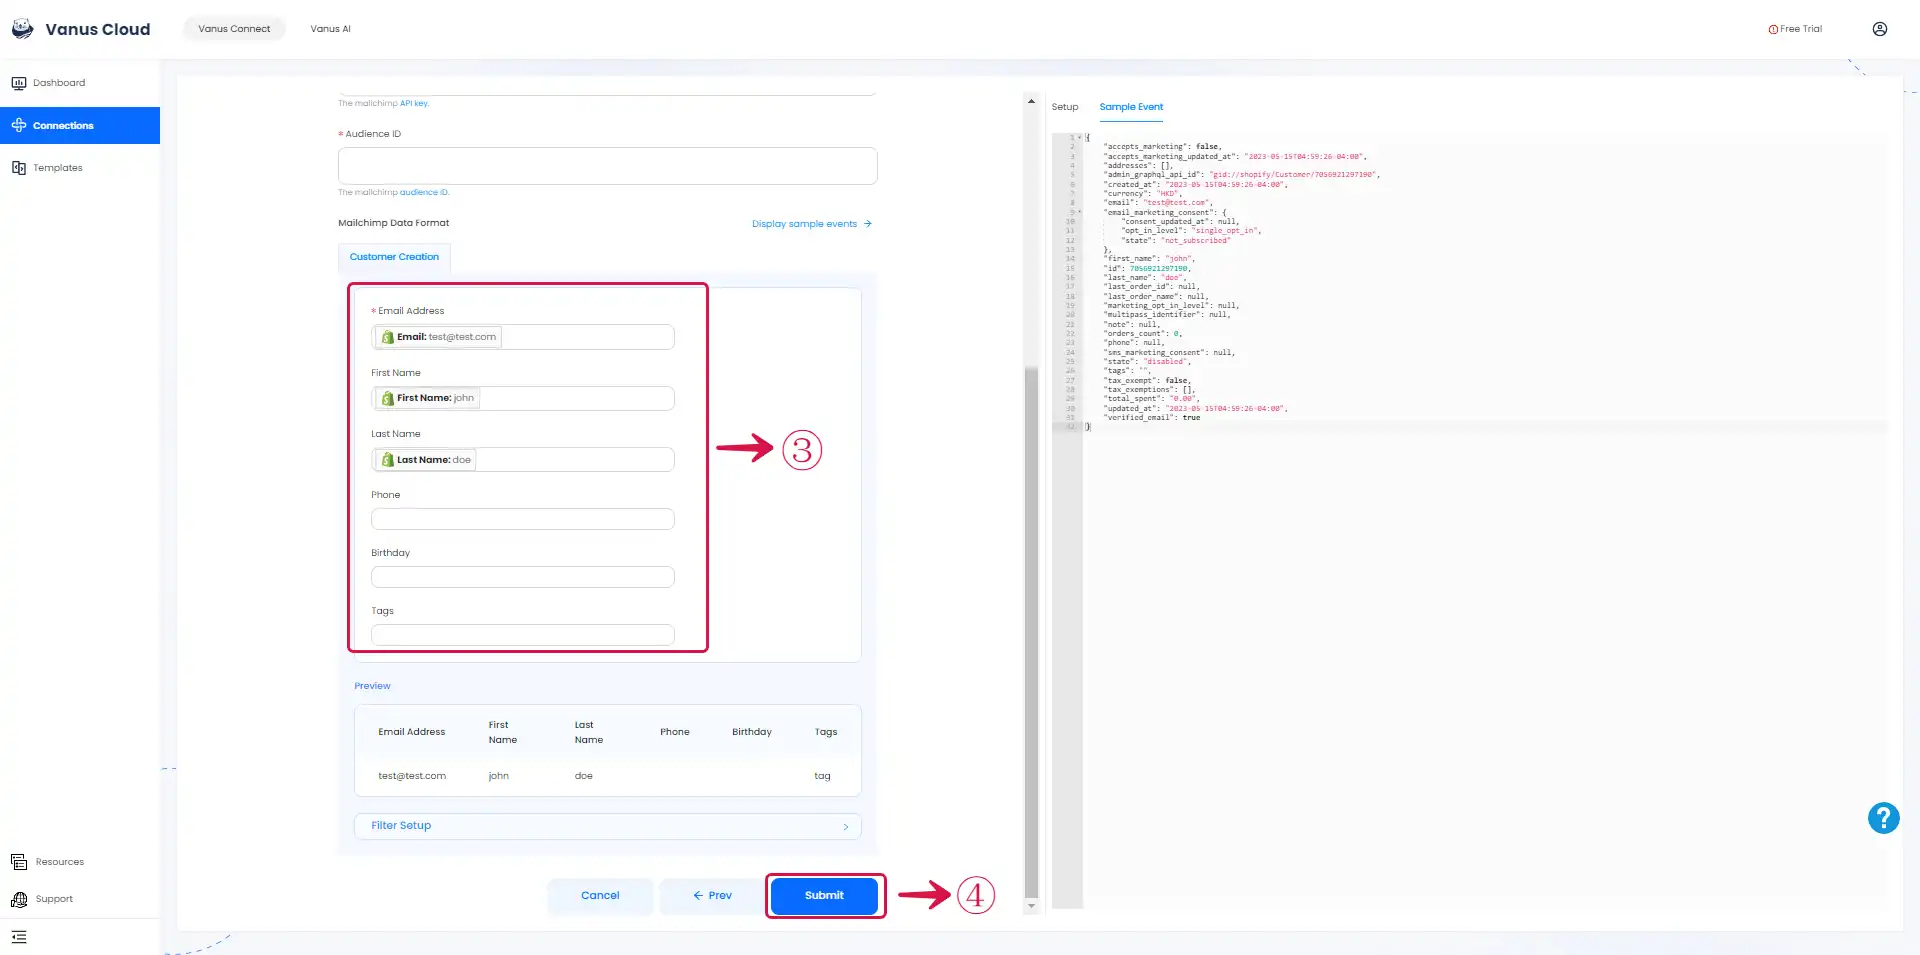
Step 3: Personalize Event Structure
This is a general instruction on how to personalize your event structure. You can structure your events to suit your specific requirements and create connections for different scenarios.
- Click on Display sample events① to see the events. Select② the event field you like to receive on Mailchimp.
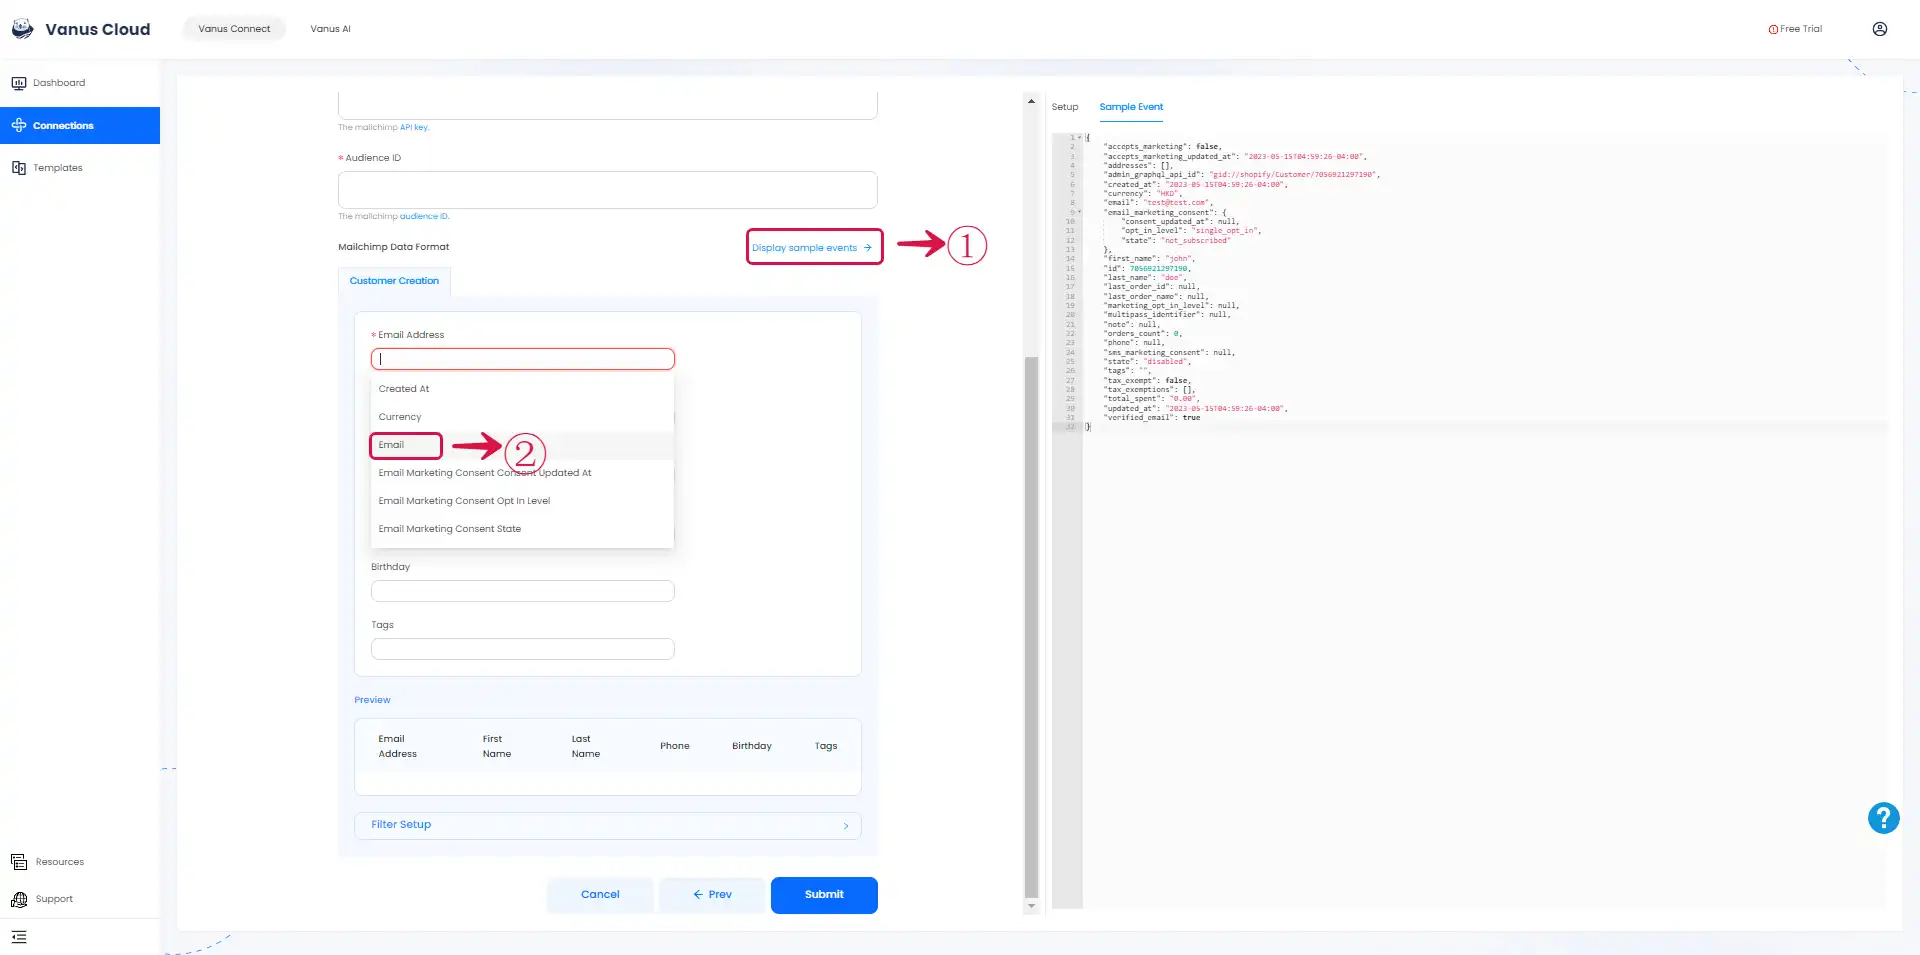
- Customize③ the events as you like and then click the Submit④ button.
Learn more about Vanus and Vanus Connect in our documentation.