Amazon EventBridge CreateBucket | DeleteBucket event triggers a Discord message
GitHub is the largest web-based platform that provides developers with a place to host and manage their software projects.
You can receive notifications when specific events occur in a repository by adding a GitHub Source on Vanus Connect.
This guide will help you get a Discord notification whenever someone opens a new pull request in your repository.
Get Started
Step 1: Configure the Source
- Log in to Vanus Connect and choose the Amazon EventBridge CreateBucket | DeleteBucket event triggers a Discord message template.
Step 2: Configure Sink - Get the Discord Webhook URL
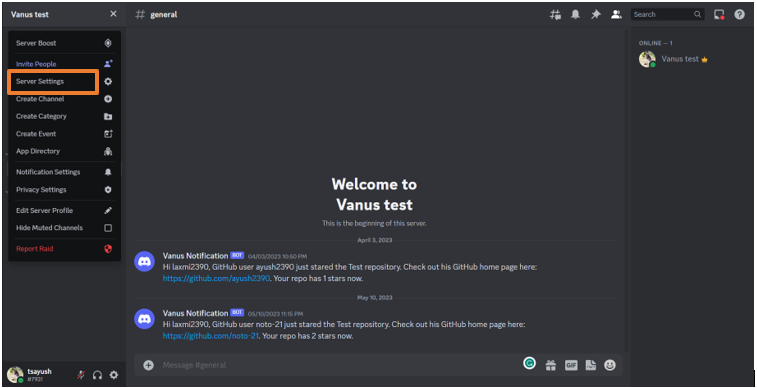
Open Discord in your browser and go to your desired Discord Server.
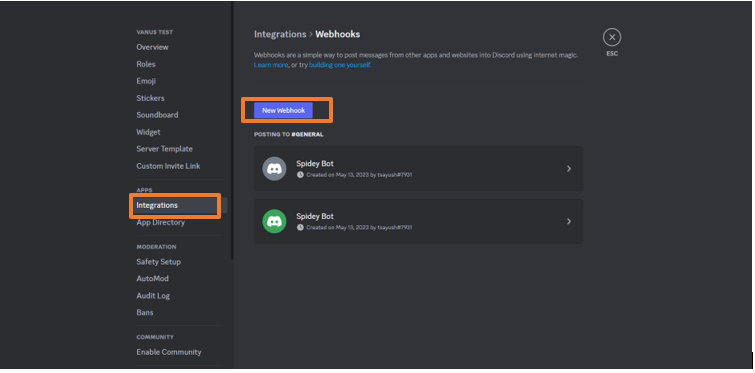
Go to the Server settings and click on Integrations.
Click on New Webhook.
Open the newly created Webhook and Copy the Webhook URL.
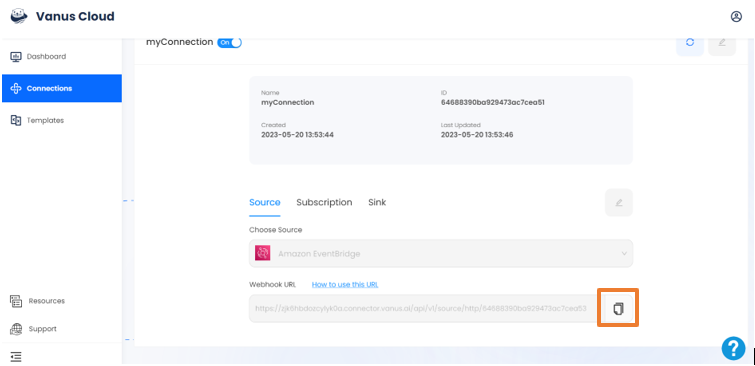
Paste the URL you copied into the "Webhook URL" field within the Sink Configuration and click Submit.
Your connection has been successfully set up.
Step 3: Create an Event in AWS
- Open the newly created connection and copy the webhook URL.
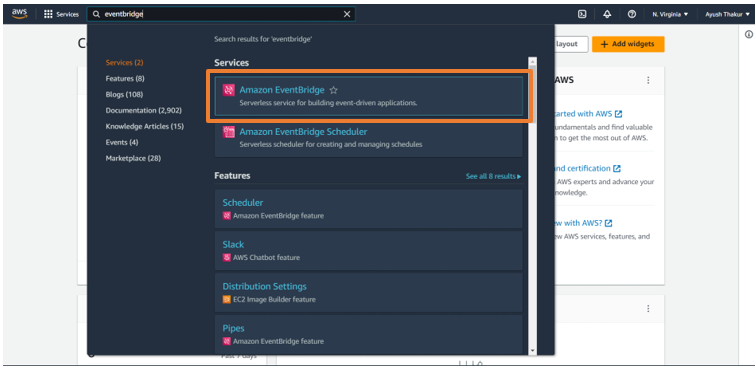
Go to AWS Console and log in with your root account.
Search for the EventBridge service and open it.
- Click on Event Buses on the left sidebar and click on Create event bus.
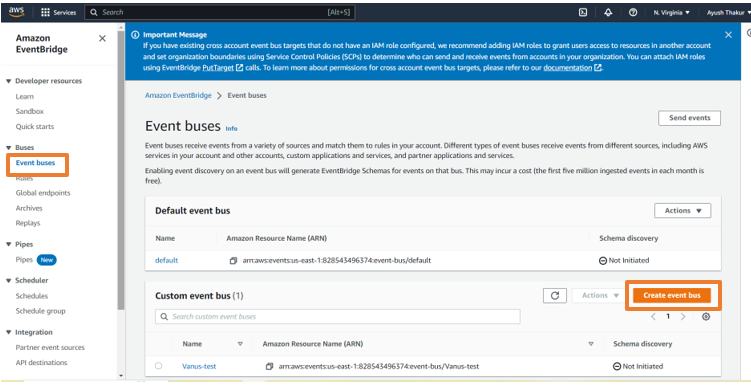
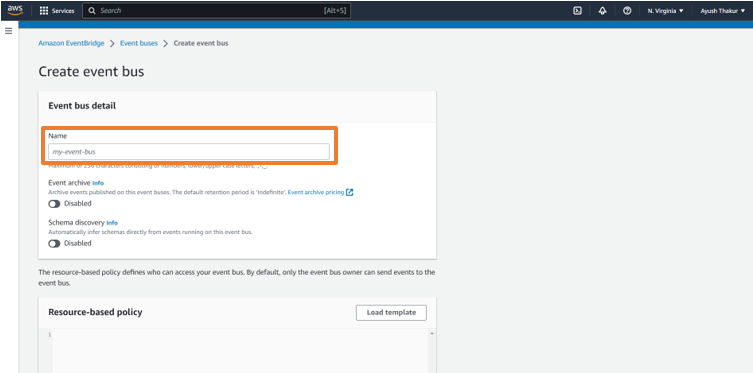
- Give a name to the event bus and click Create.
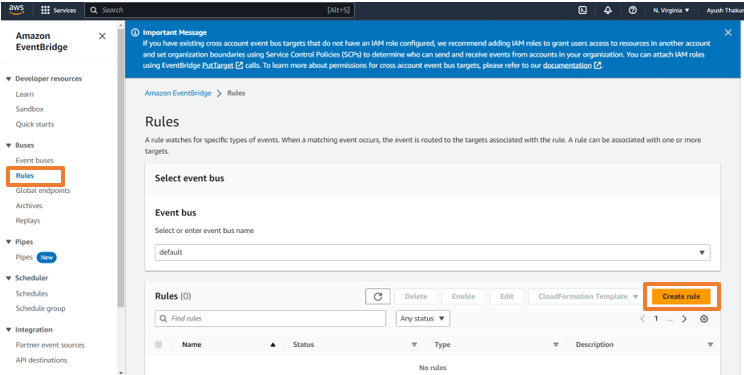
- Now, click on Rules on the left sidebar and click on Create Rule.
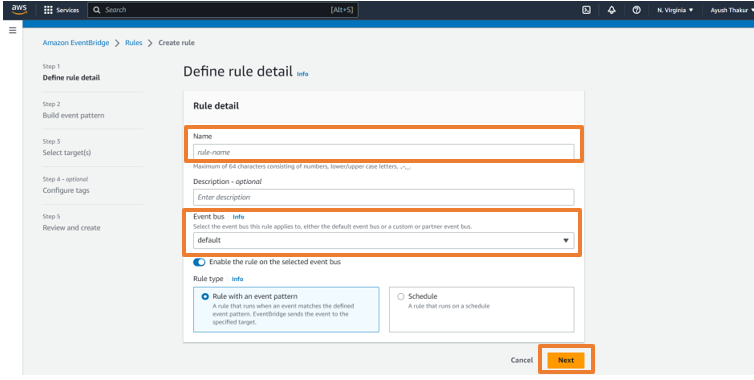
- Give a name to the rule, select the event bus we have created in the Event bus option and click on Next.
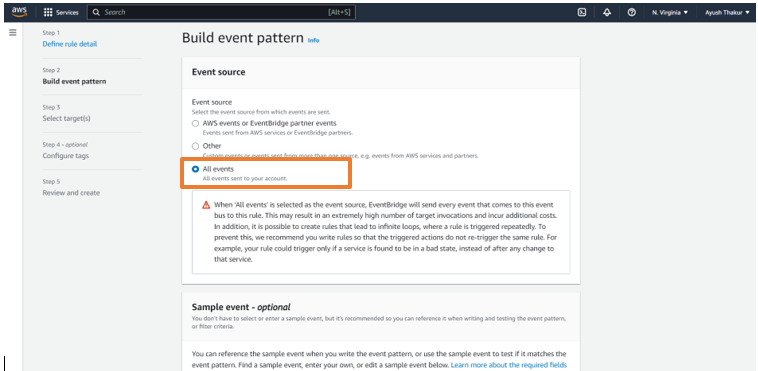
- Select All events and click Next.
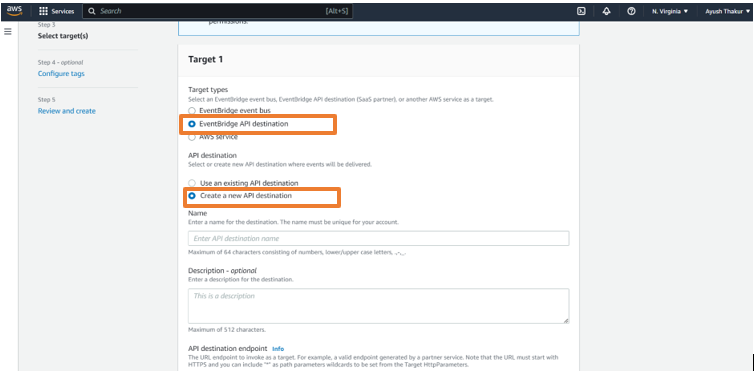
Select EventBridge API destination in Target 1
Select Create a new API destination.
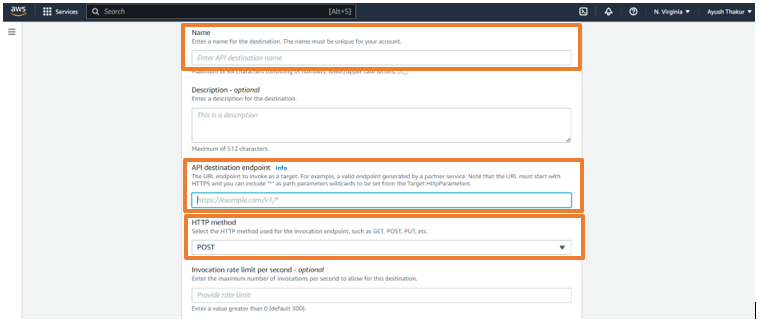
- Provide a name for the connection, then paste the copied URL into the API destination endpoint field, and finally, select "POST" from the HTTP Method option.
- In Connection, select Create a new connection and give a name to the connection.
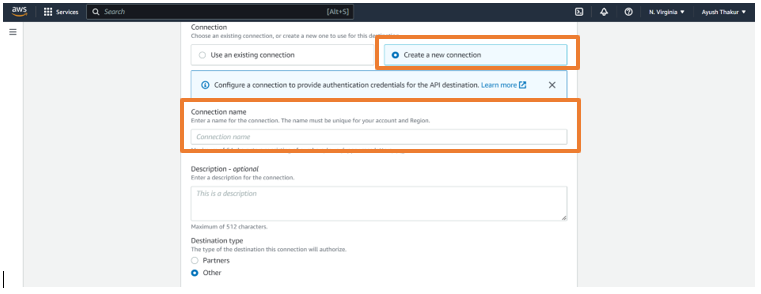
Select Basic (Username/Password) from the Authorization type option.
Add your desired username and password and click Next.
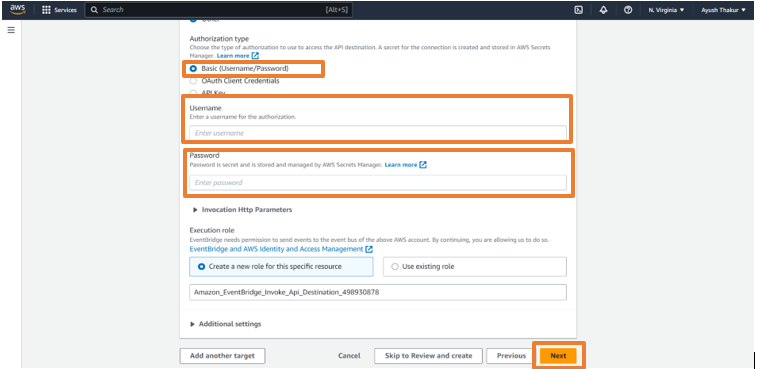
Again, click Next in the Configure Tags section.
Review the whole rule and click Create rule.
Your connection will now work perfectly.