Amazon RDS MySQL
This guide contains the required information to set up an Amazon MySQL Sink in Vanus Connect.
Introduction
MySQL is a popular open-source relational database management system to store, organizes, and retrieves data for websites, applications, and other software.
Vanus Connect's AWS MySQL sink connector simplifies transferring data/events from various sources to a MySQL database/table, with configurable filters and upsert/insert modes.
Prerequisites
Before forwarding events to MySQL, you must have:
- An Amazon Web Services account.
- A Vanus Cloud Account.
Getting Started
Step 1: Set Up a MySQL Server in AWS Using RDS
Log in to the AWS Management Console using your root account credentials.
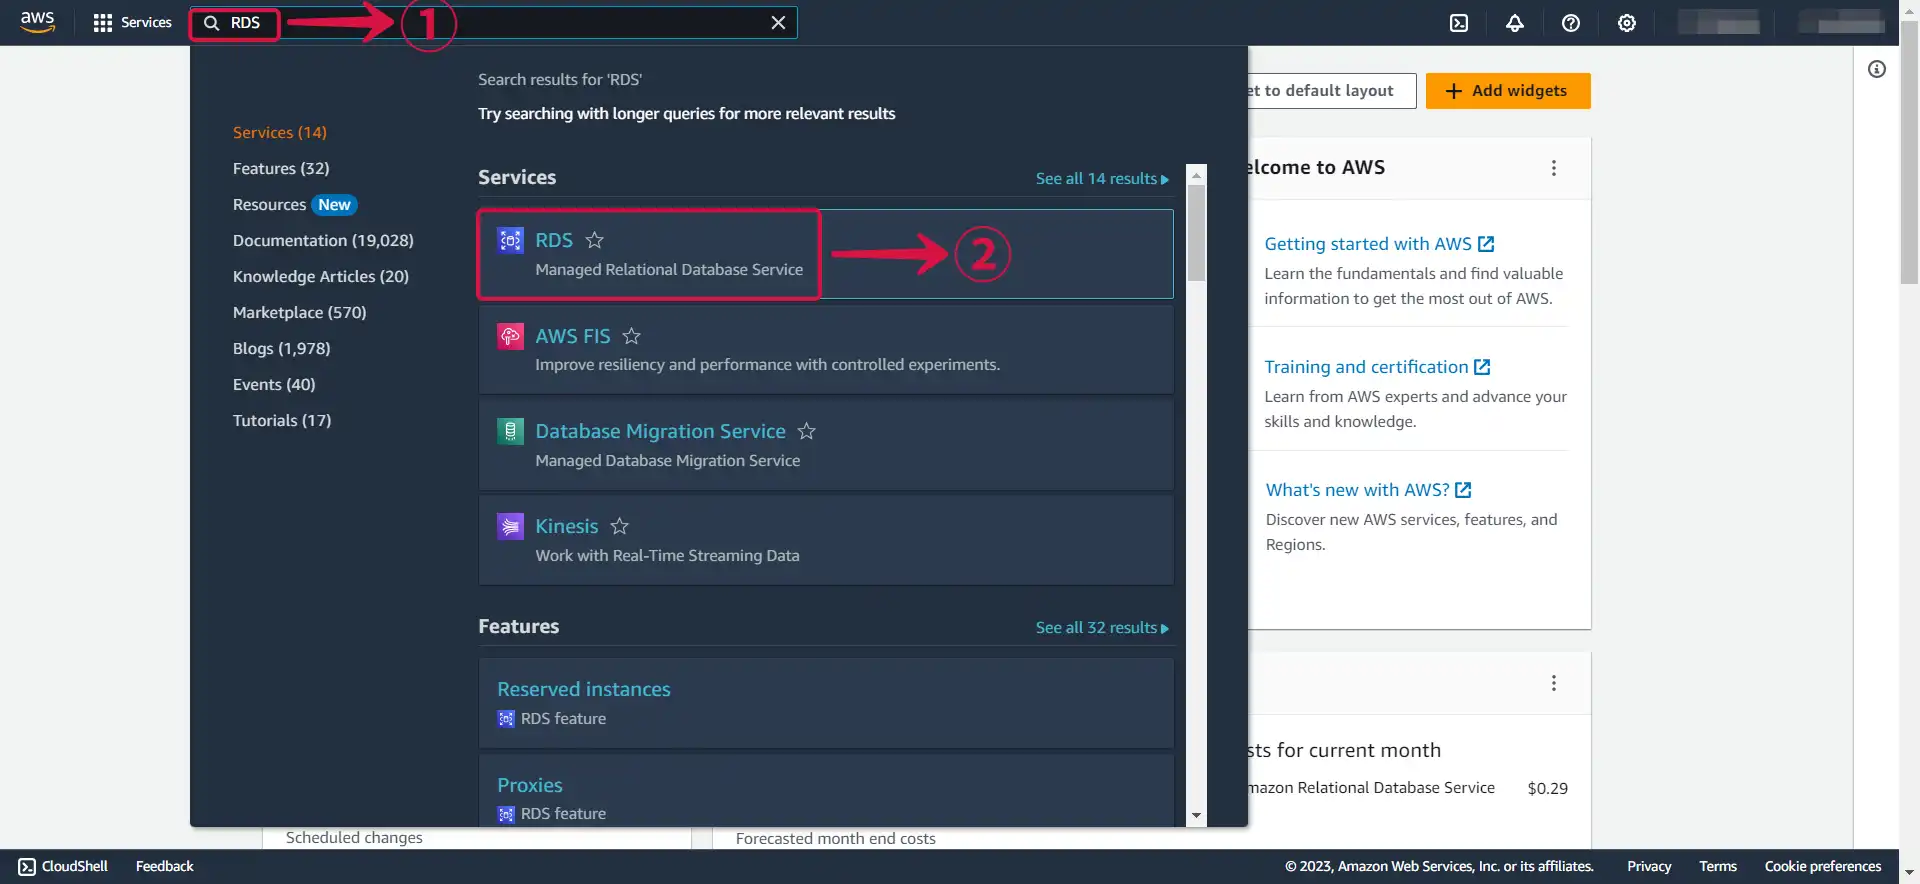
Type RDS① in the search box and select RDS② from the results.
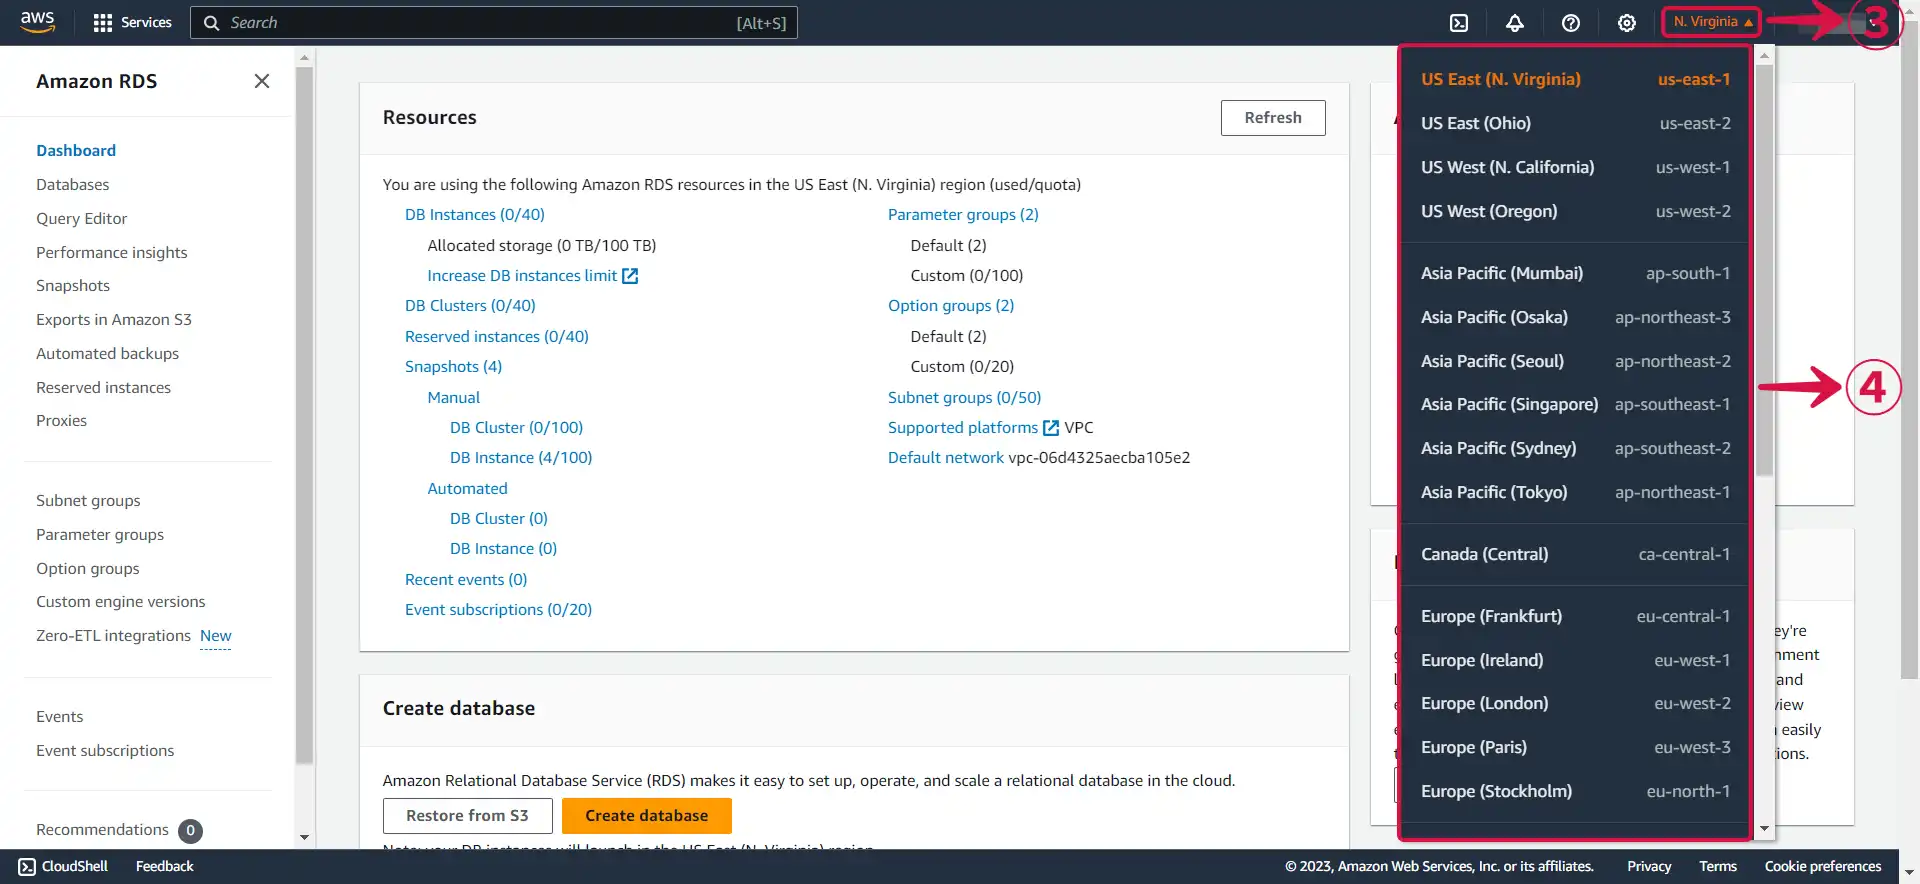
- Click the Region name③ to open the dropdown menu and select the particular Region④ in which you want to create the DB instance.
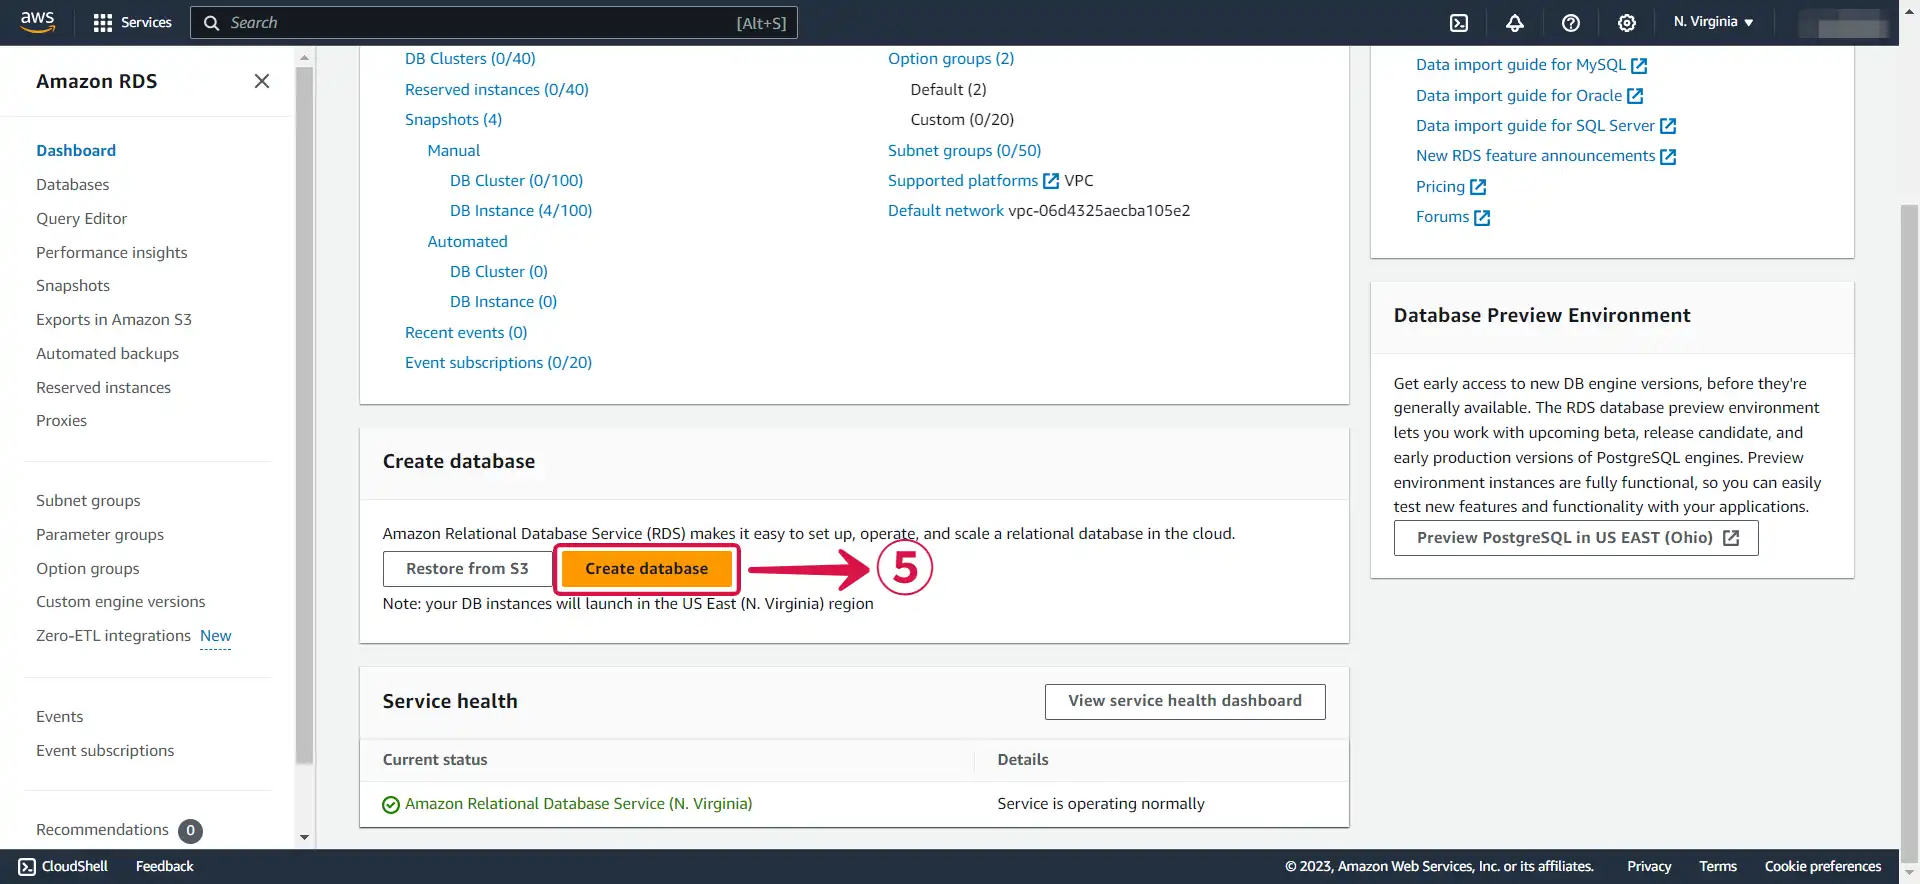
- Click Create database⑤.
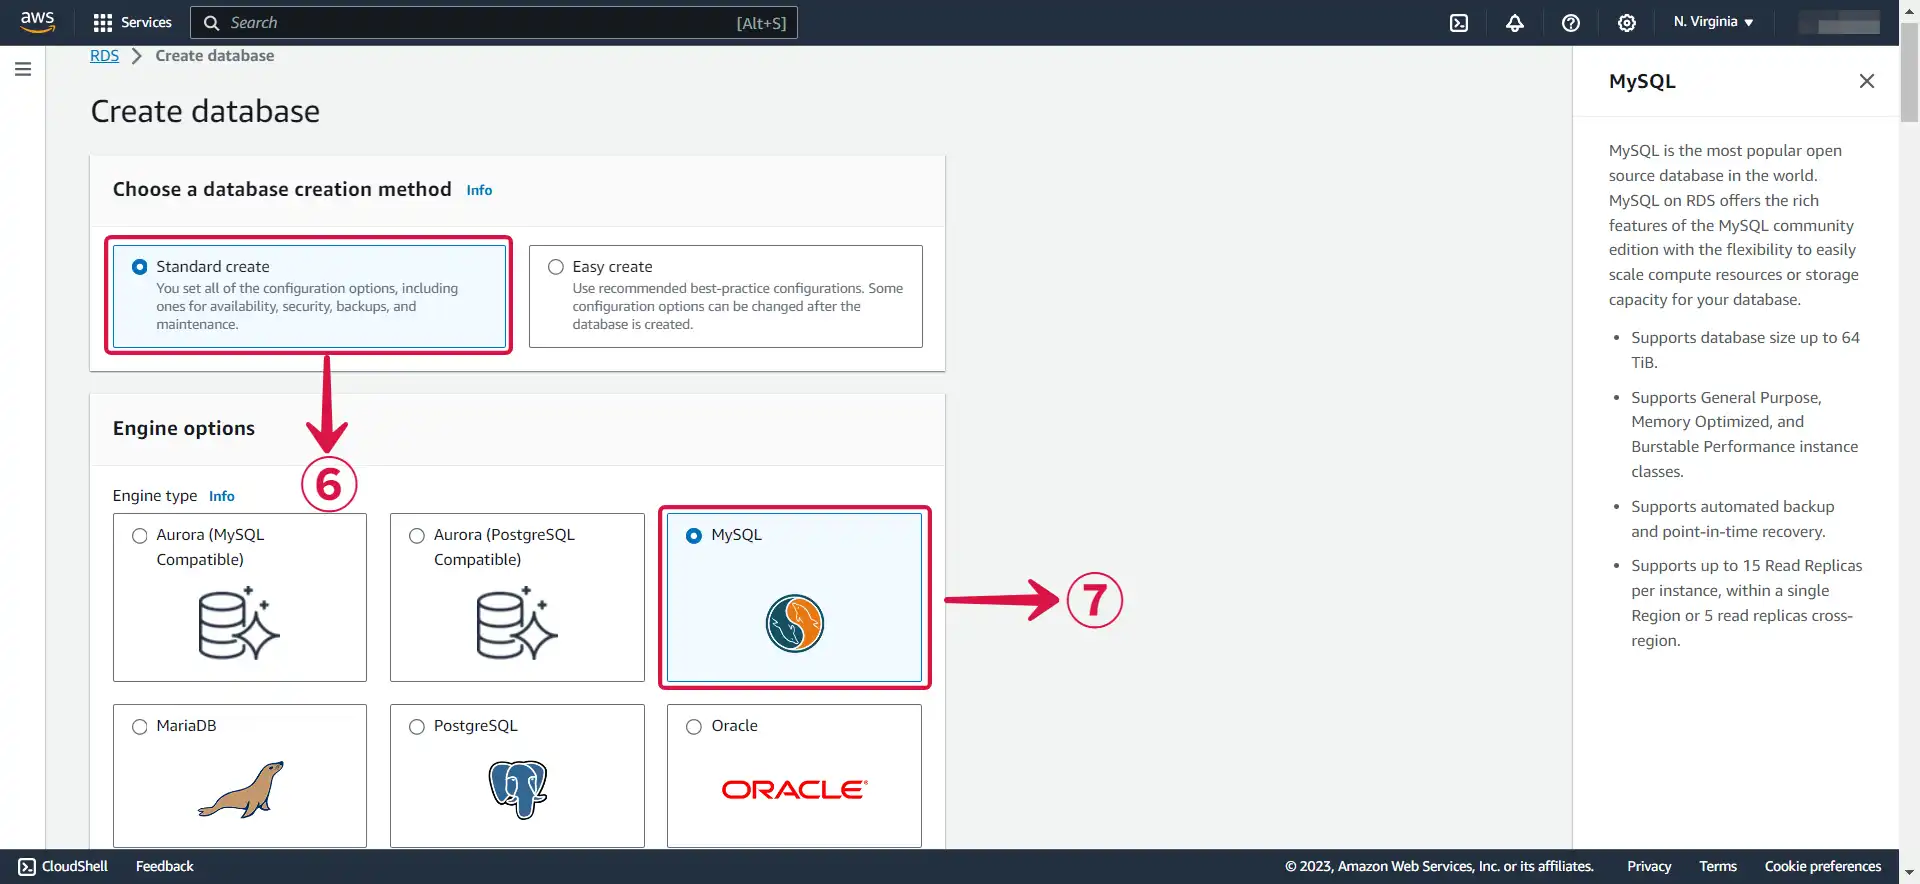
- Select Standard create⑥ and choose the MySQL⑦ icon.
- Select the Free tier⑧ Template for testing, or opt for one of the other available options based on your specific use case.
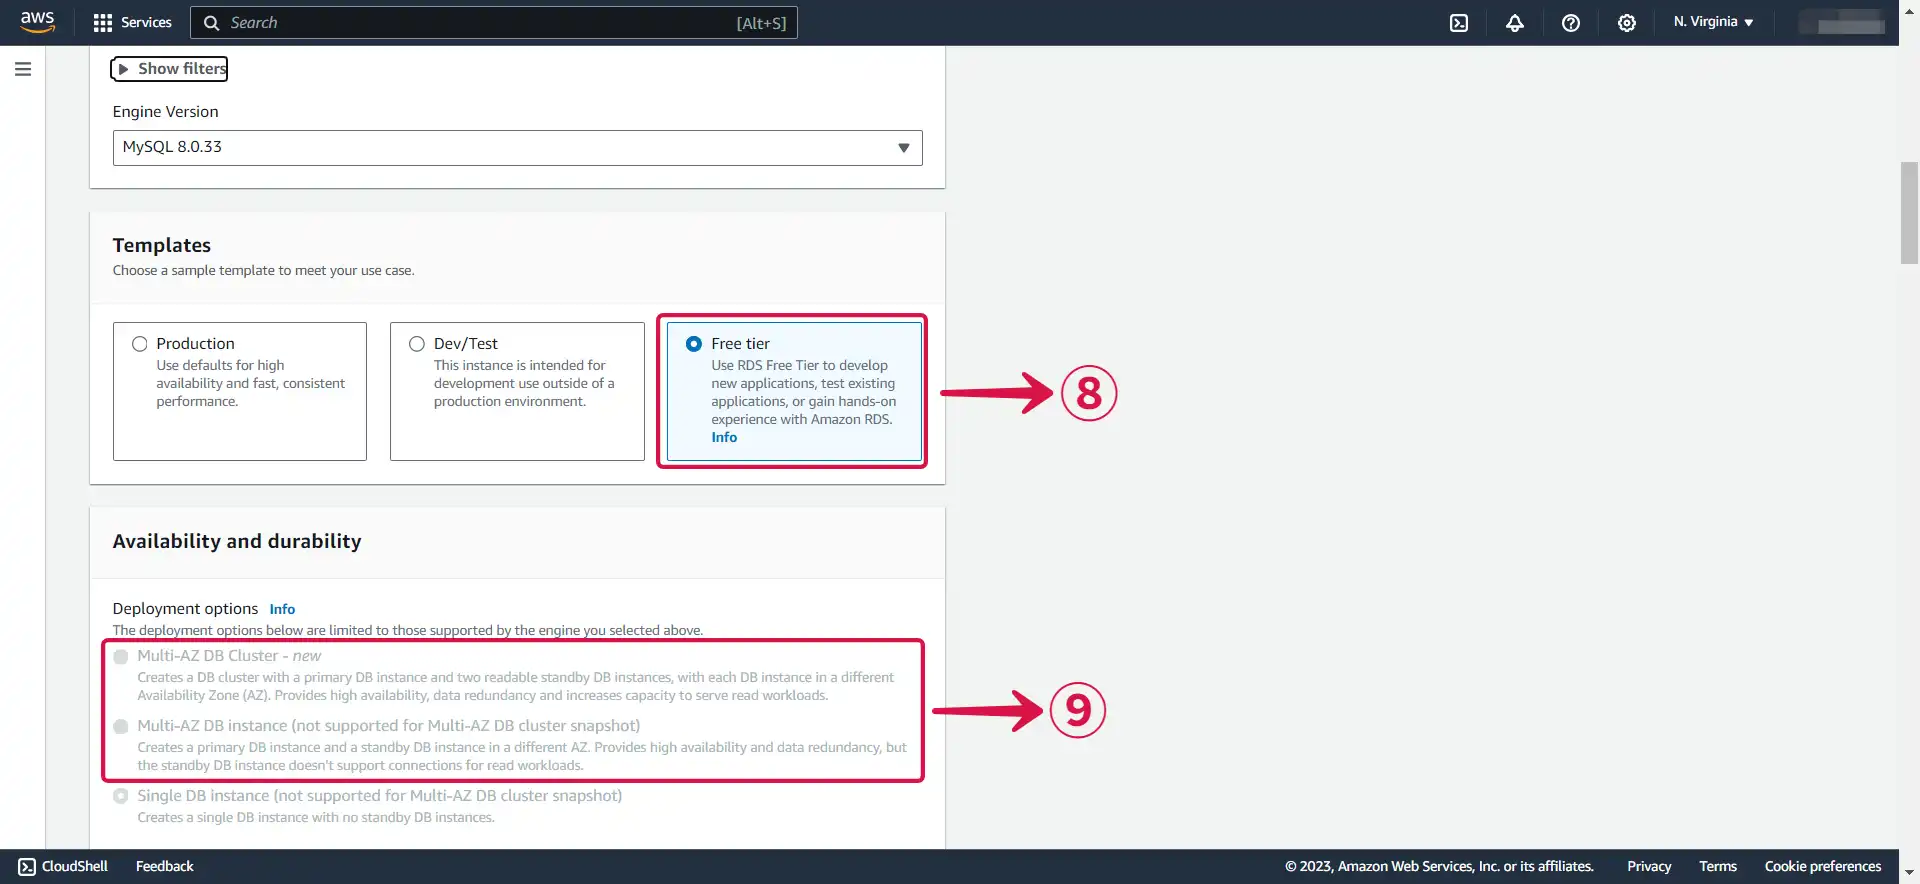
Multi-AZ DB⑨ deployment is only available for the paid tier. A Multi-AZ deployment automatically provisions and maintains a synchronous standby replica in a different Availability Zone.
- Enter the following information.
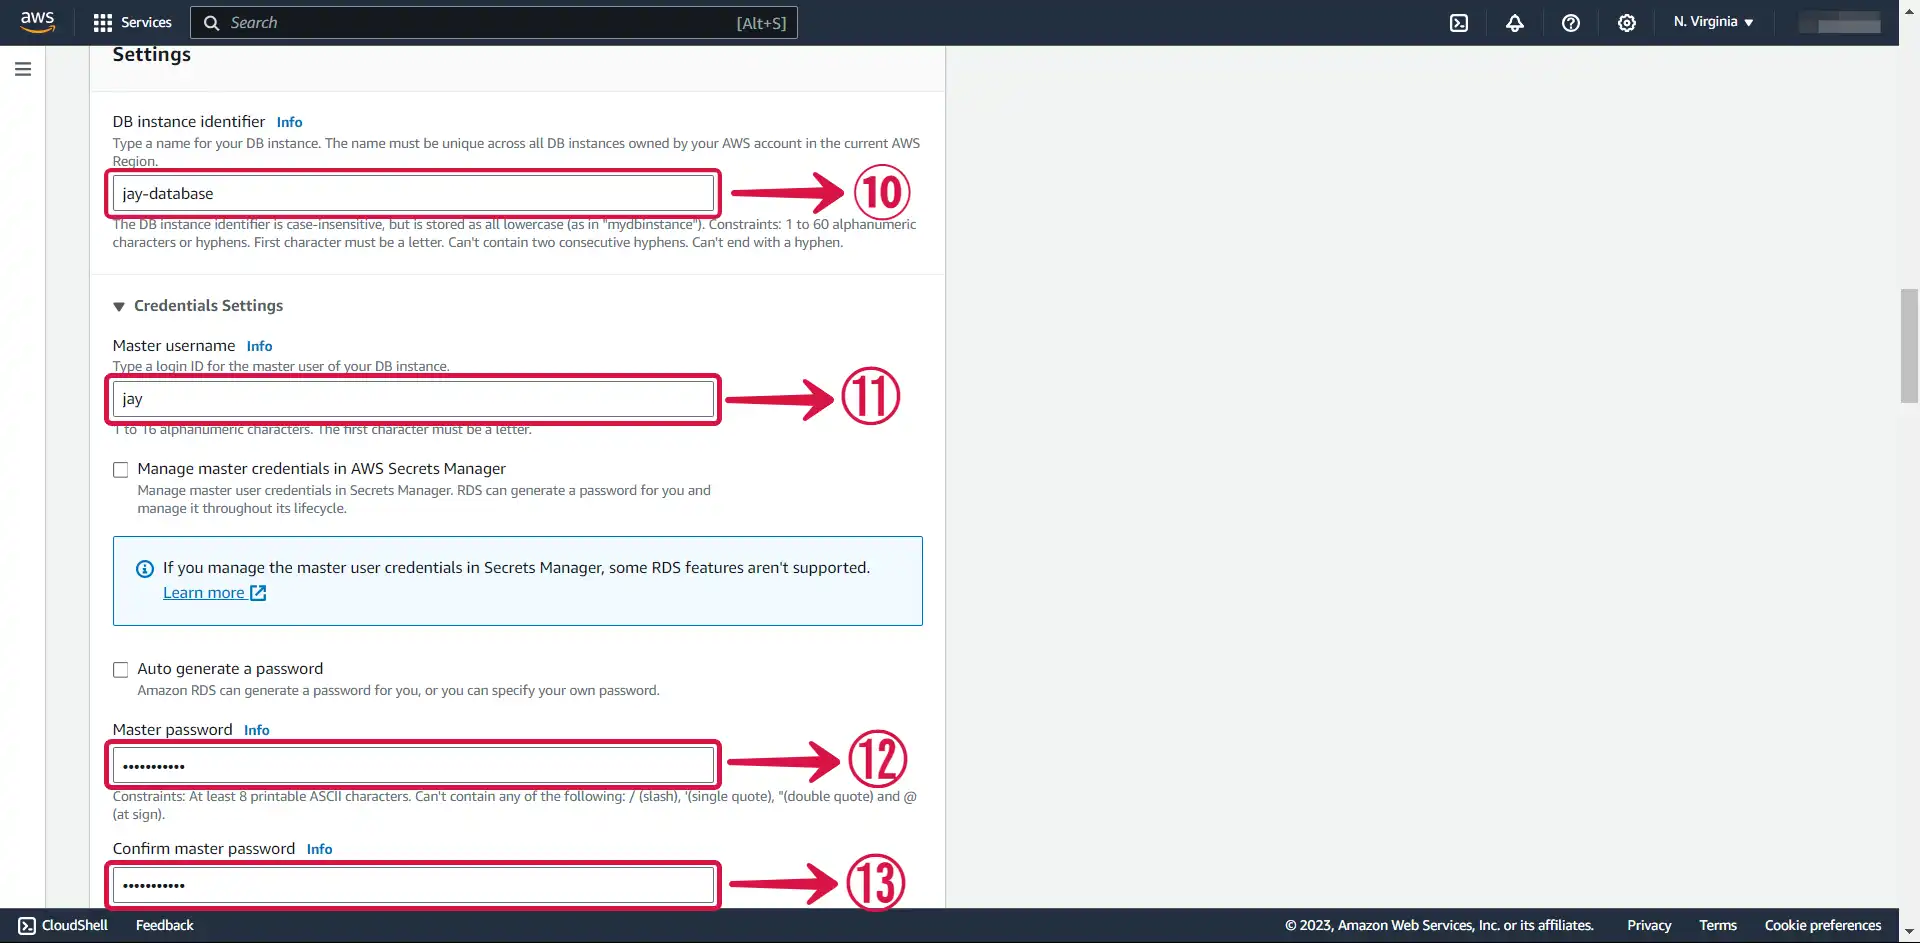
DB instance identifier⑩: Give a unique name to your instance.
Master username⑪: This is the username that will be used to log in to your DB instance.
Master password⑫: This is the password that will be used to log in with the username.
Confirm master password⑬: Write the password again.
- Select the General Purpose SSD (gp2)⑭ storage type. It's efficient and cost-effective for our intended use.

- Enable Public access⑮.
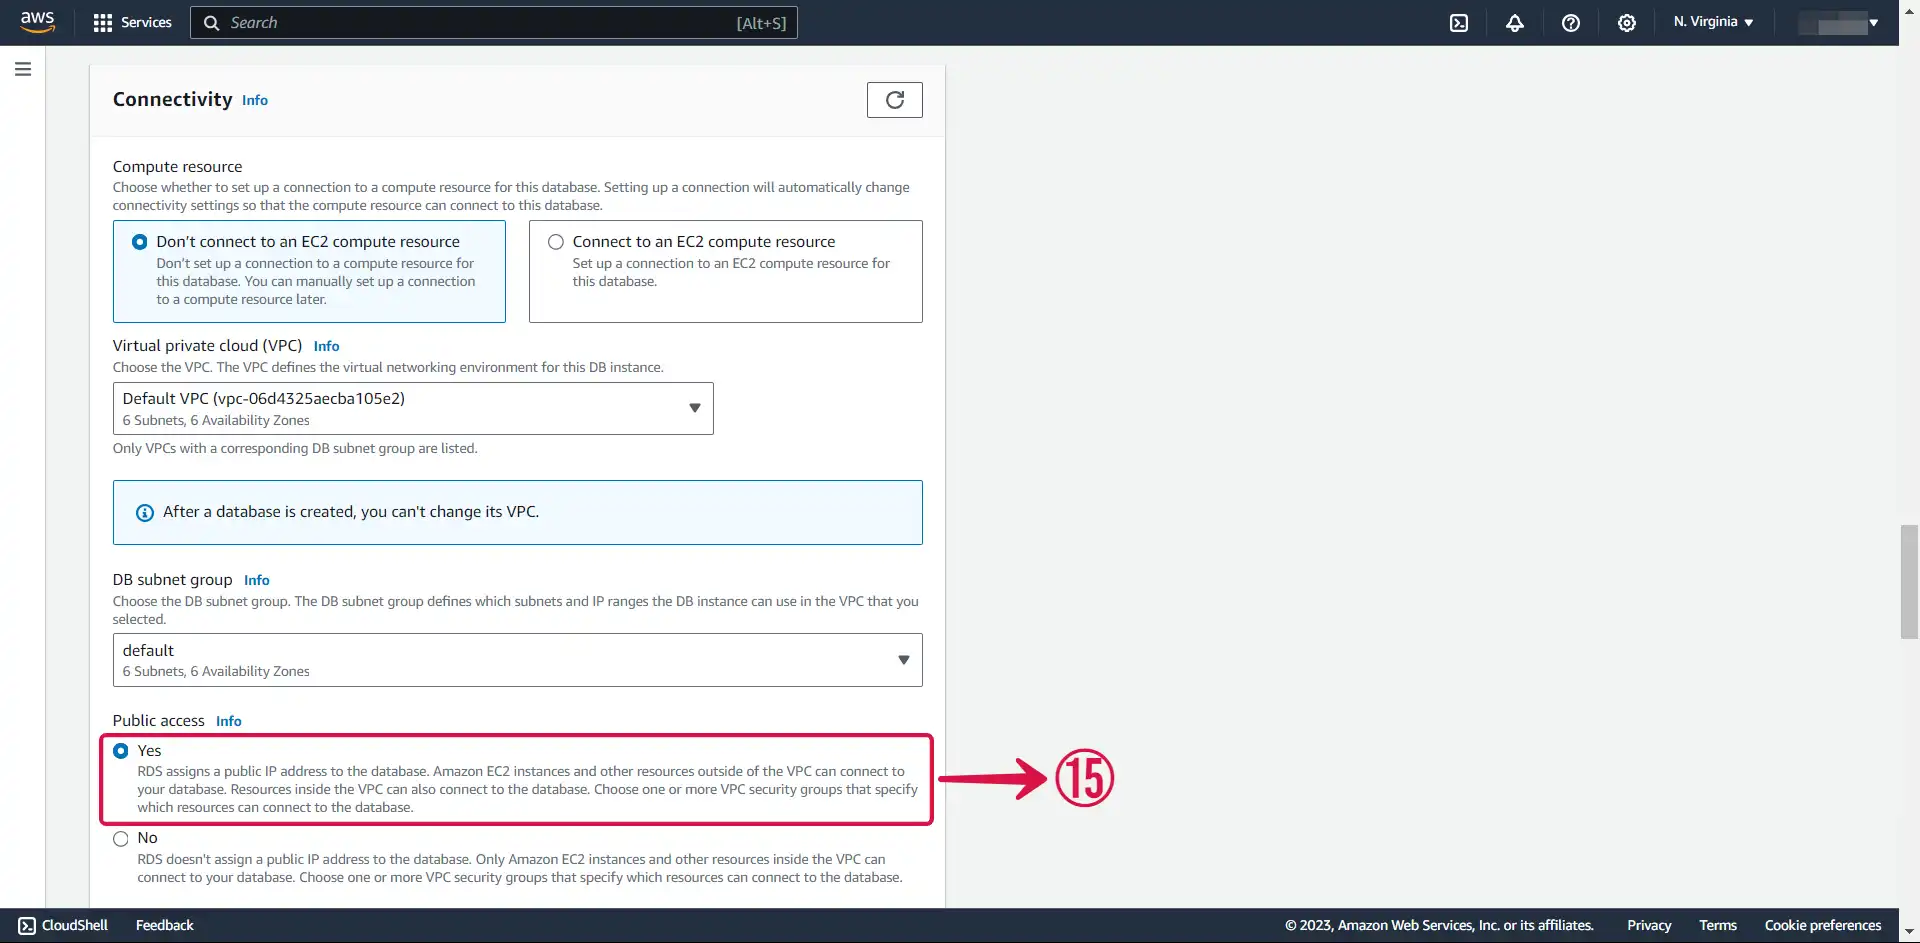
This allocates an IP to your database instance and allows direct connection to the database from the internet.
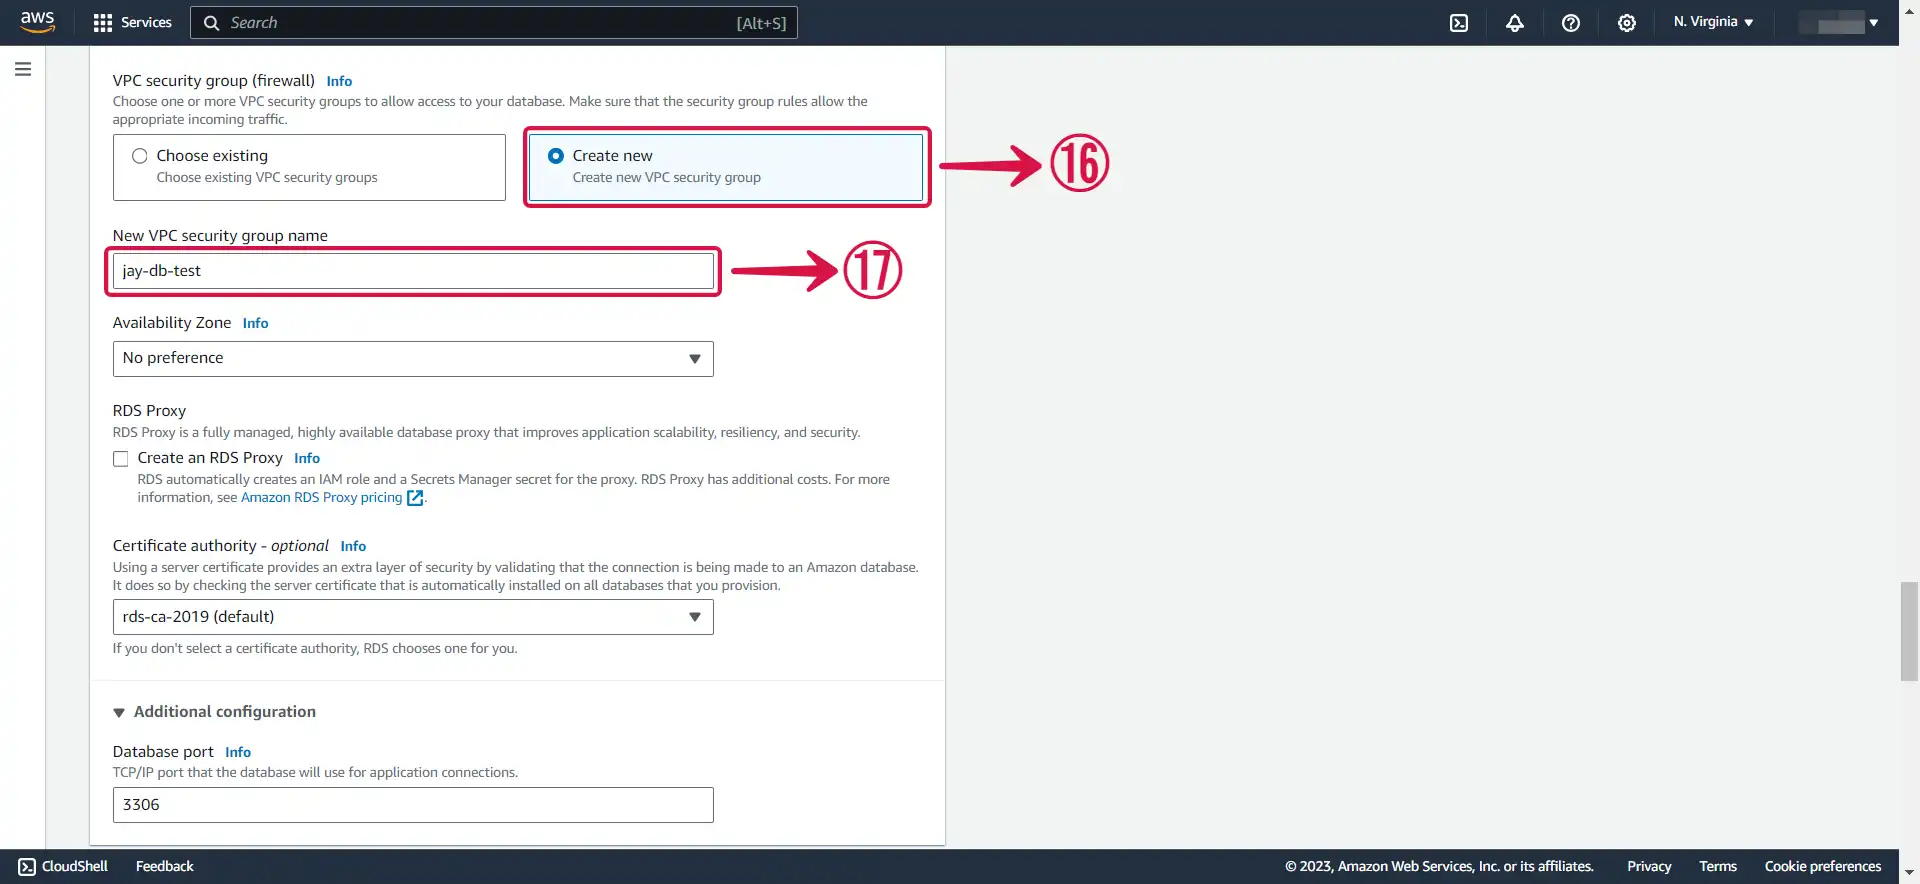
- Select Create new⑯ to create a new VPC security group, then specify your New VPC security group name⑰.
- Select Password authentication⑱.
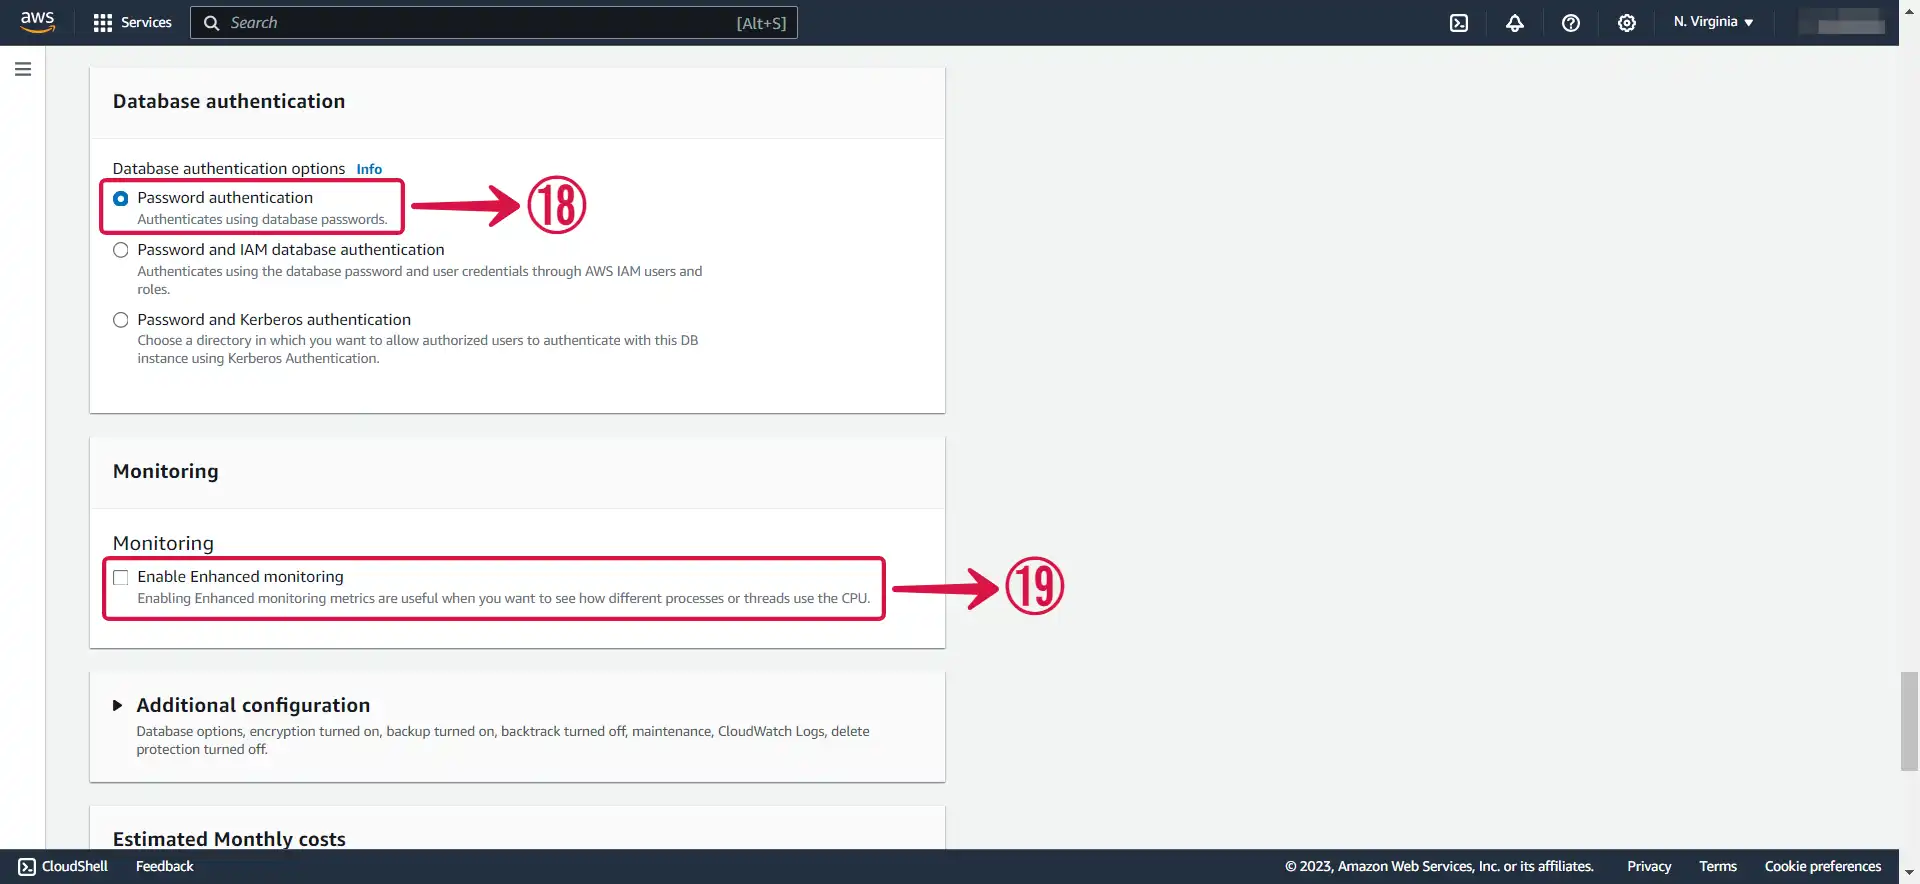
Leave Enable Enhanced monitoring⑲ unchecked to stay within the free tier limit.
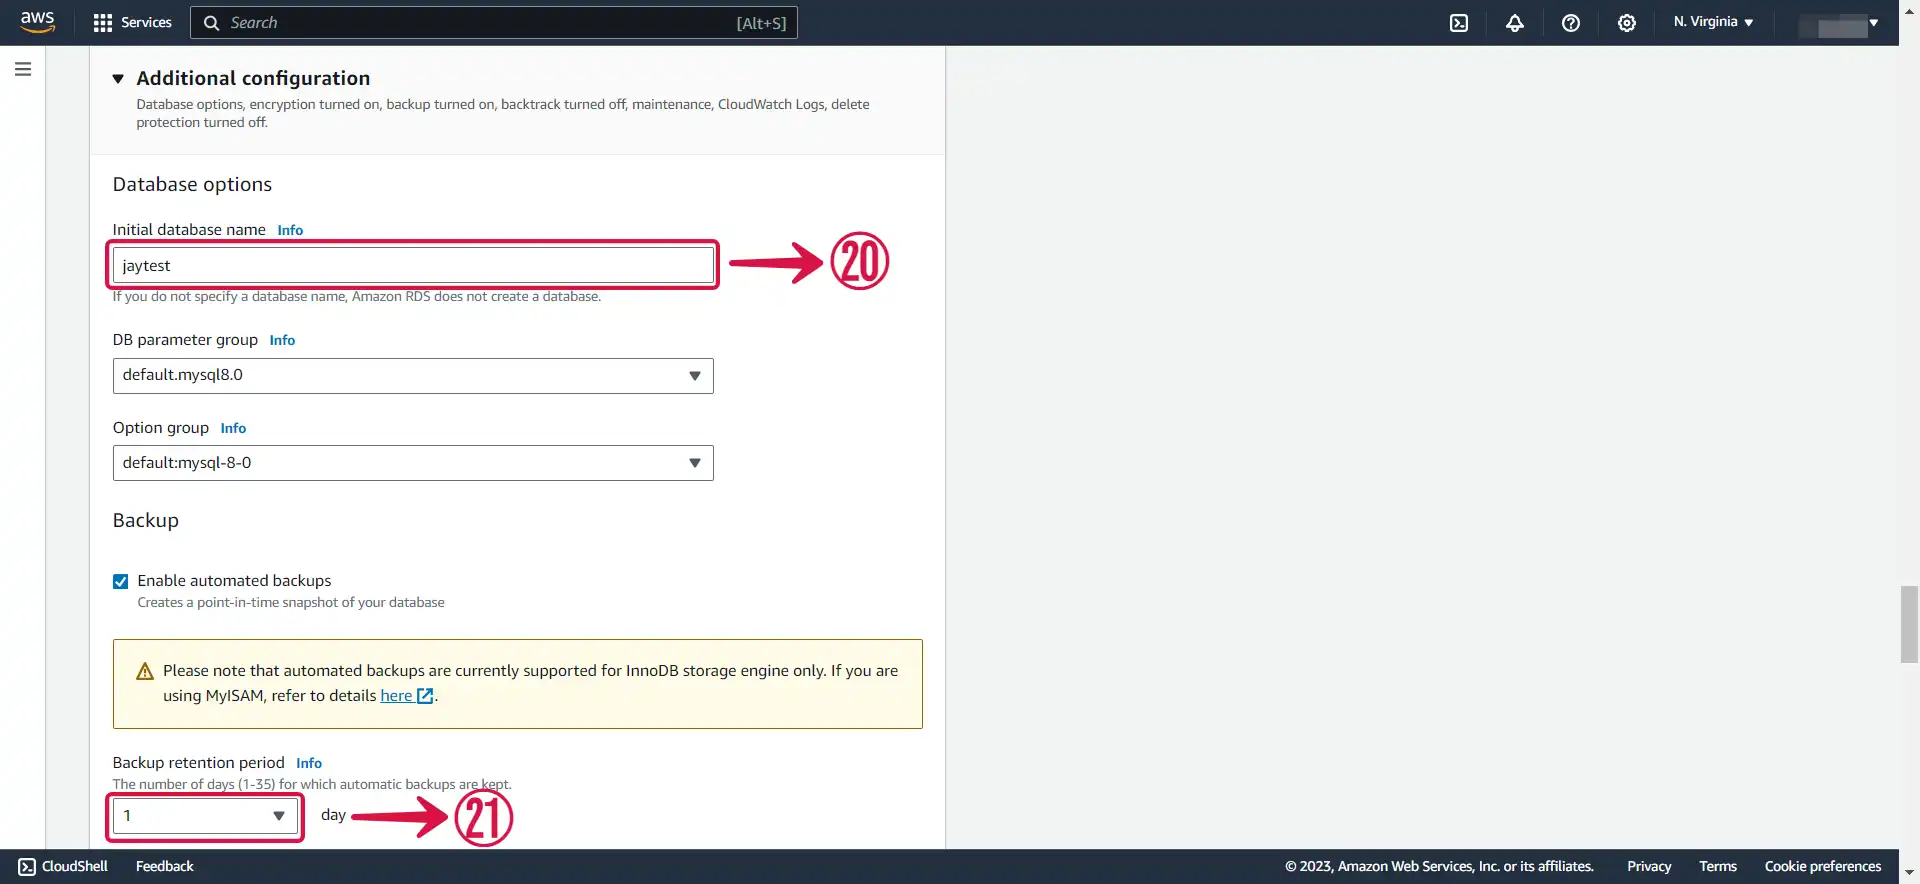
- Input an Initial database name⑳, and set your preferred Backup retention period㉑.
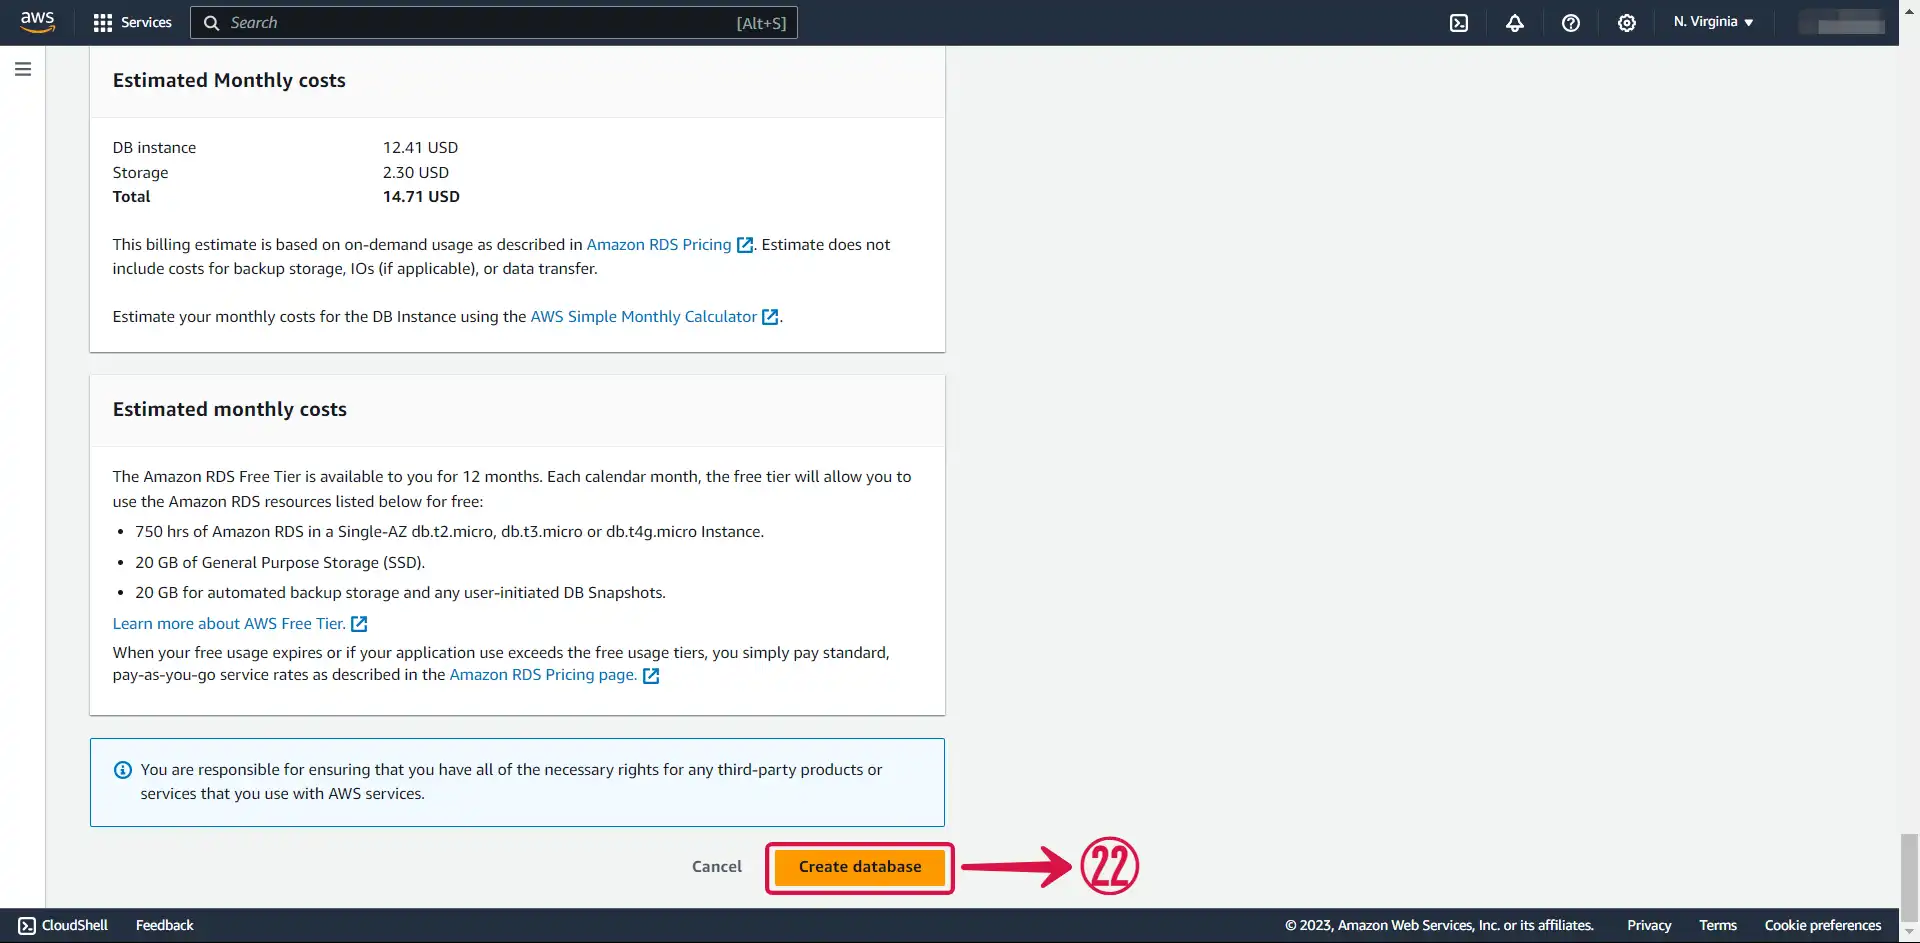
- Click the Create database㉒ button to complete the process of creating your database.
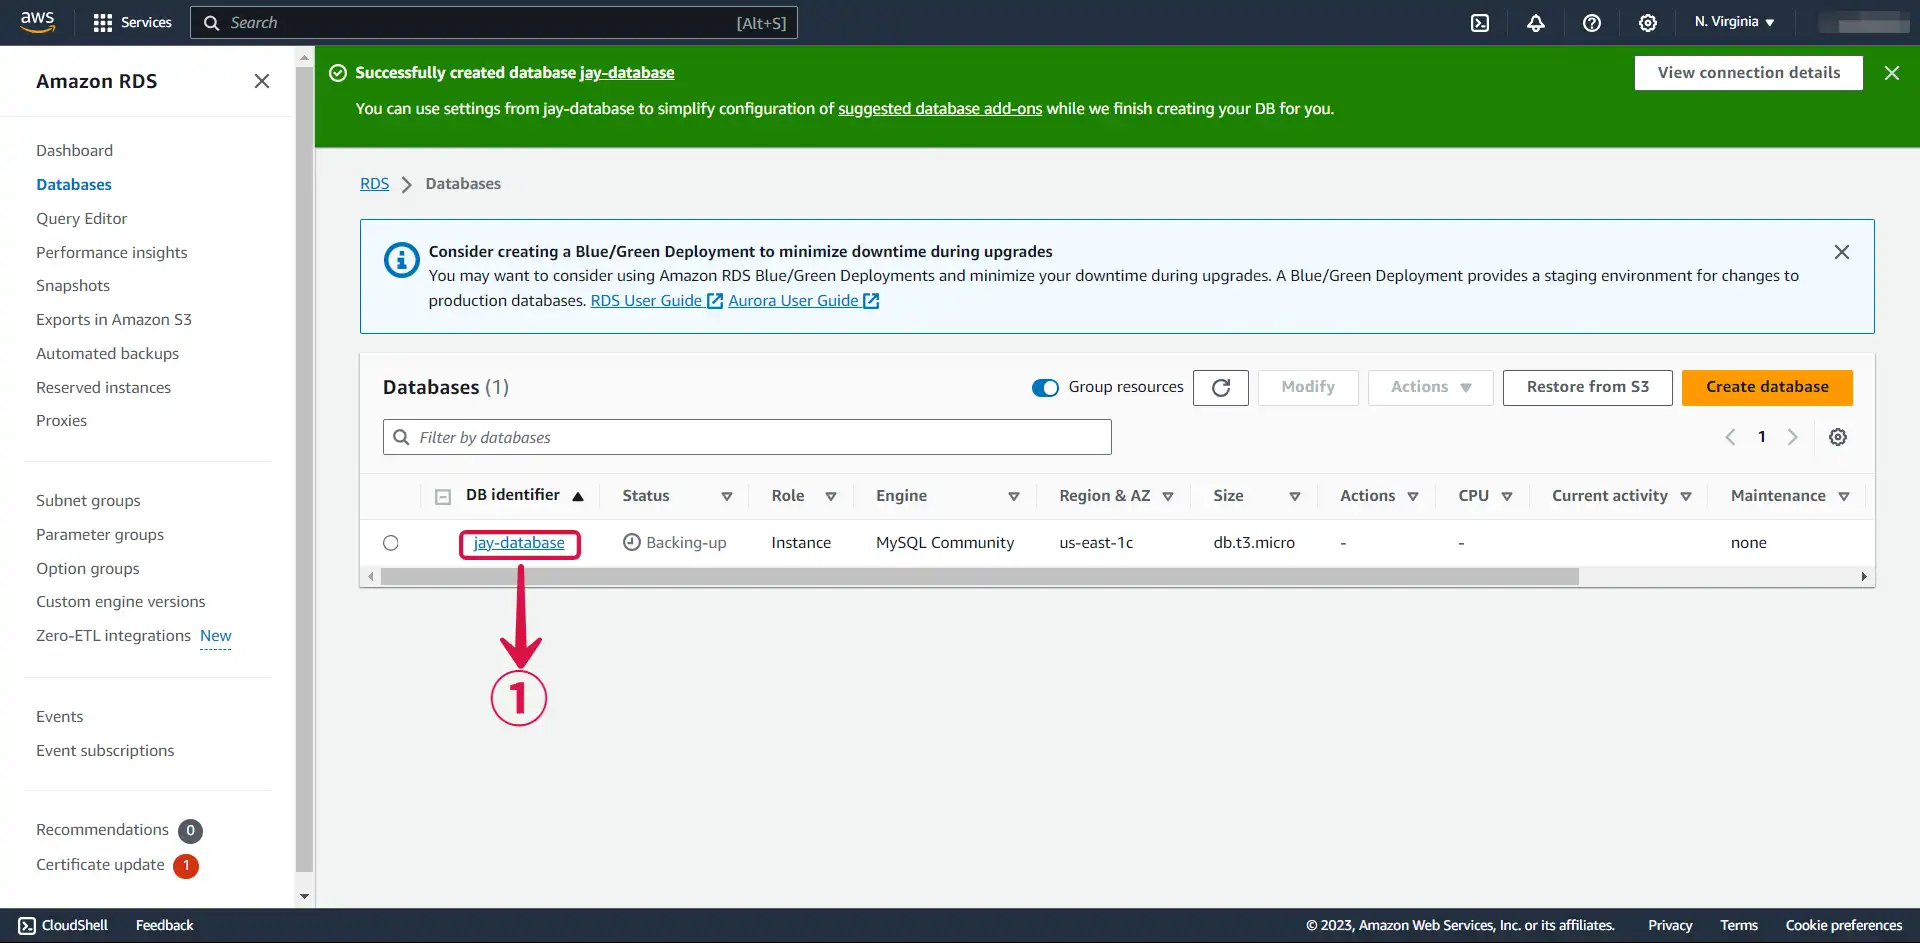
Step 2: Modify Your VPC Security Groups
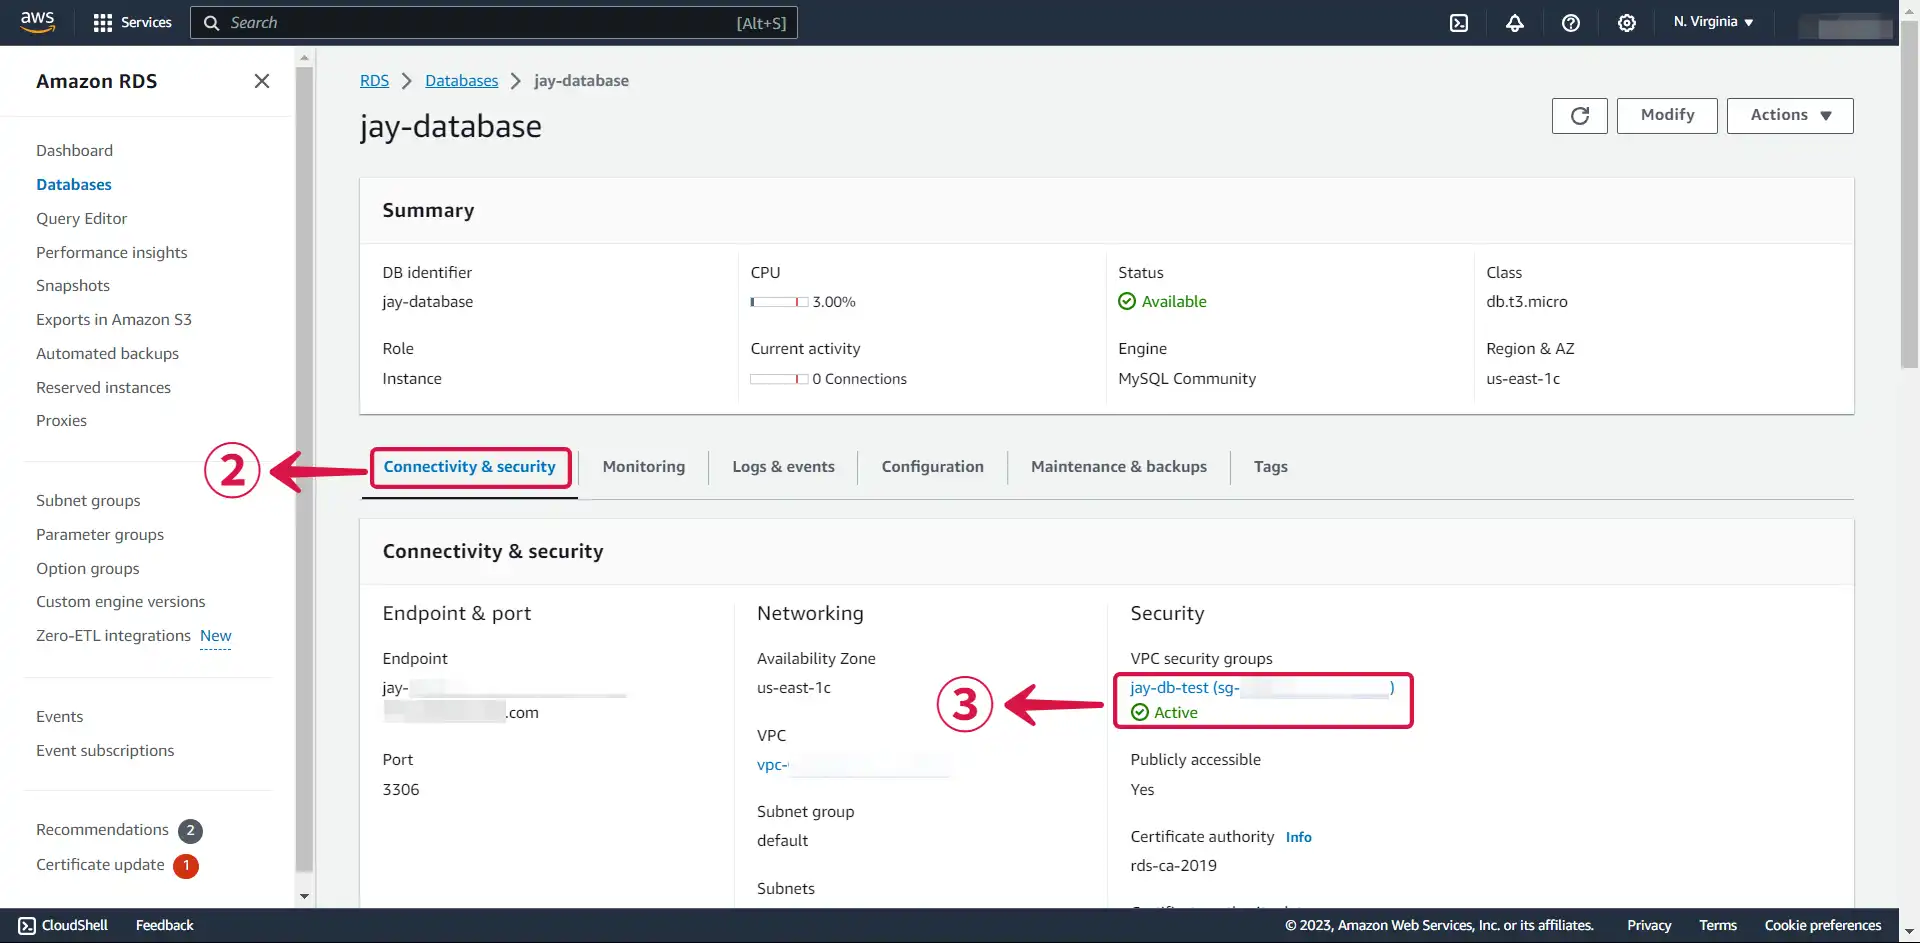
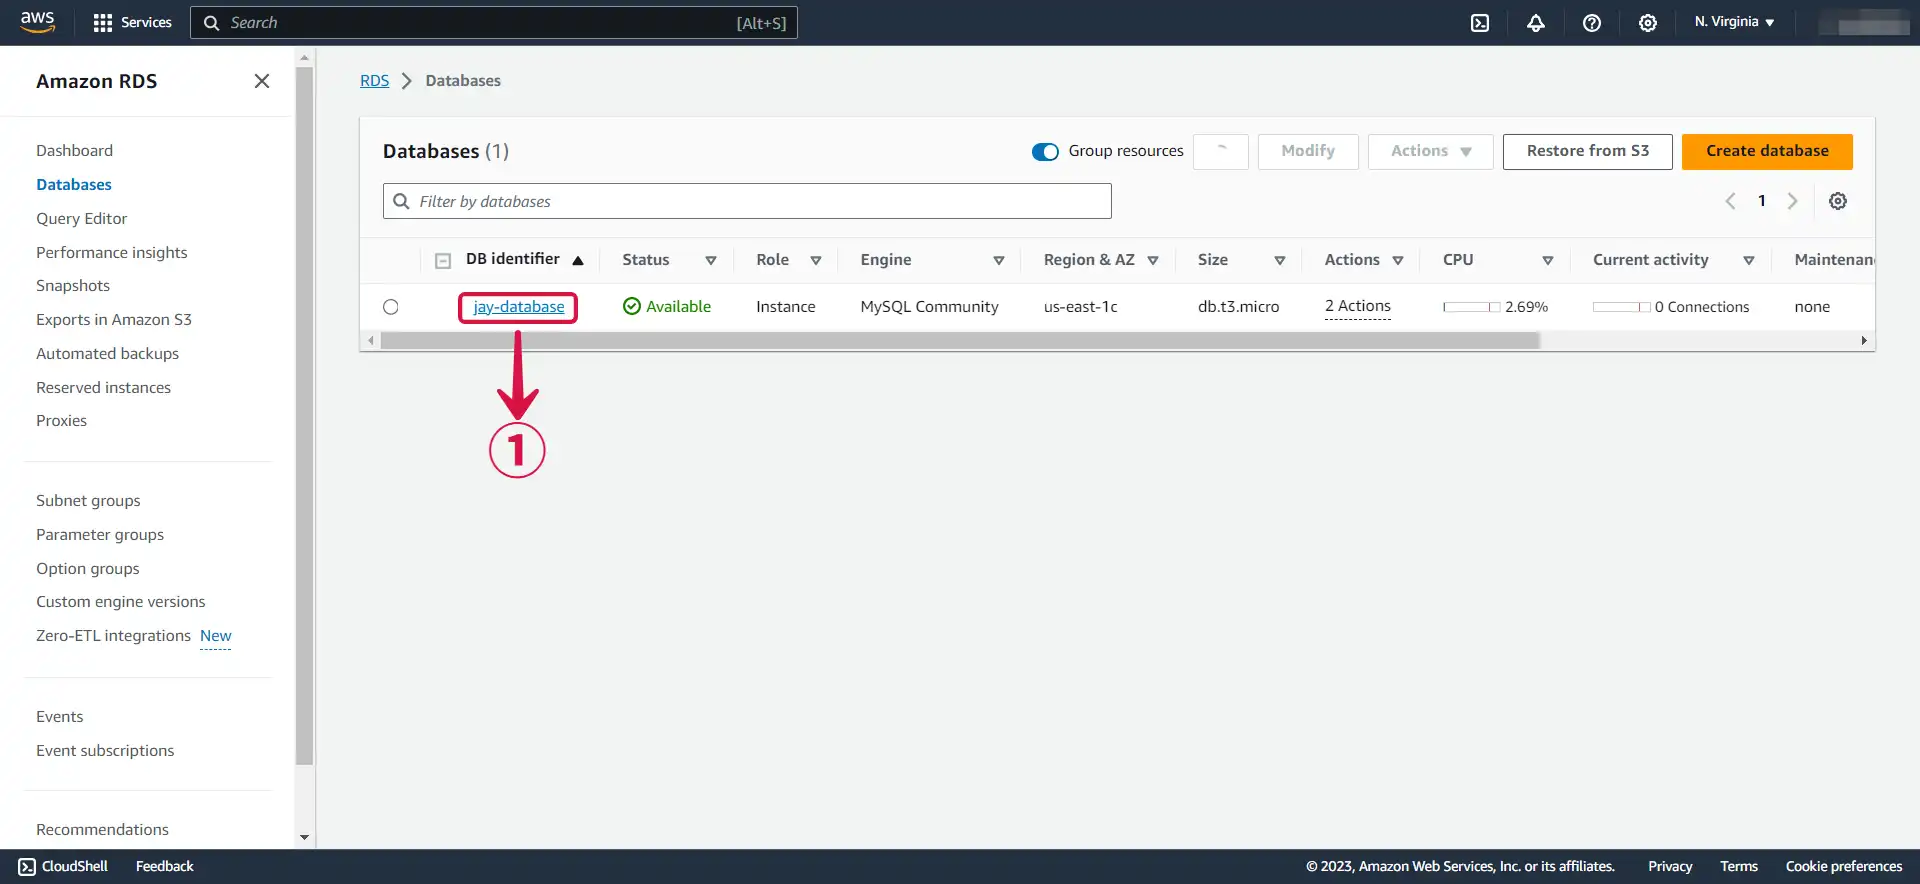
- Click on the Database① you just created in AWS RDS.
- Within the Connectivity & security② section, click on your VPC security group③.
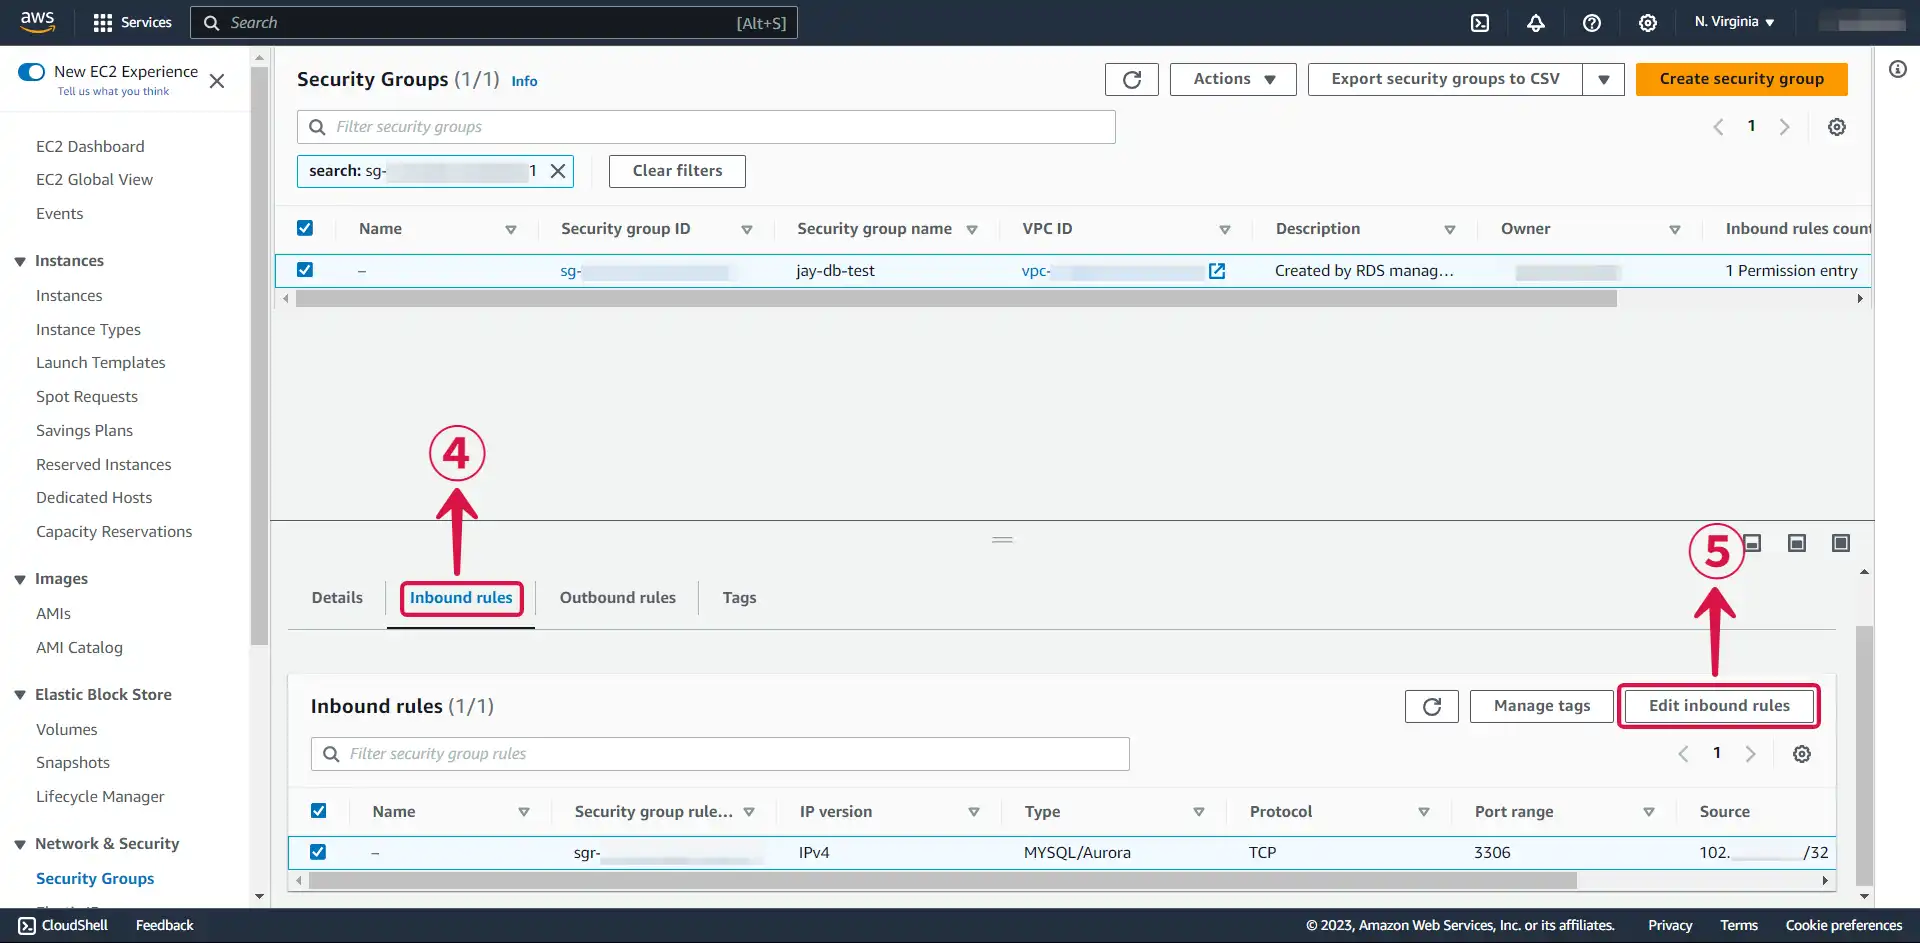
- Within the Inbound rules④ section, click the Edit inbound rules⑤ button.
- Click on the source field⑥ and choose My IP⑦ to allow connectivity exclusively from your IP address, then click Save rules⑧ to save your settings.
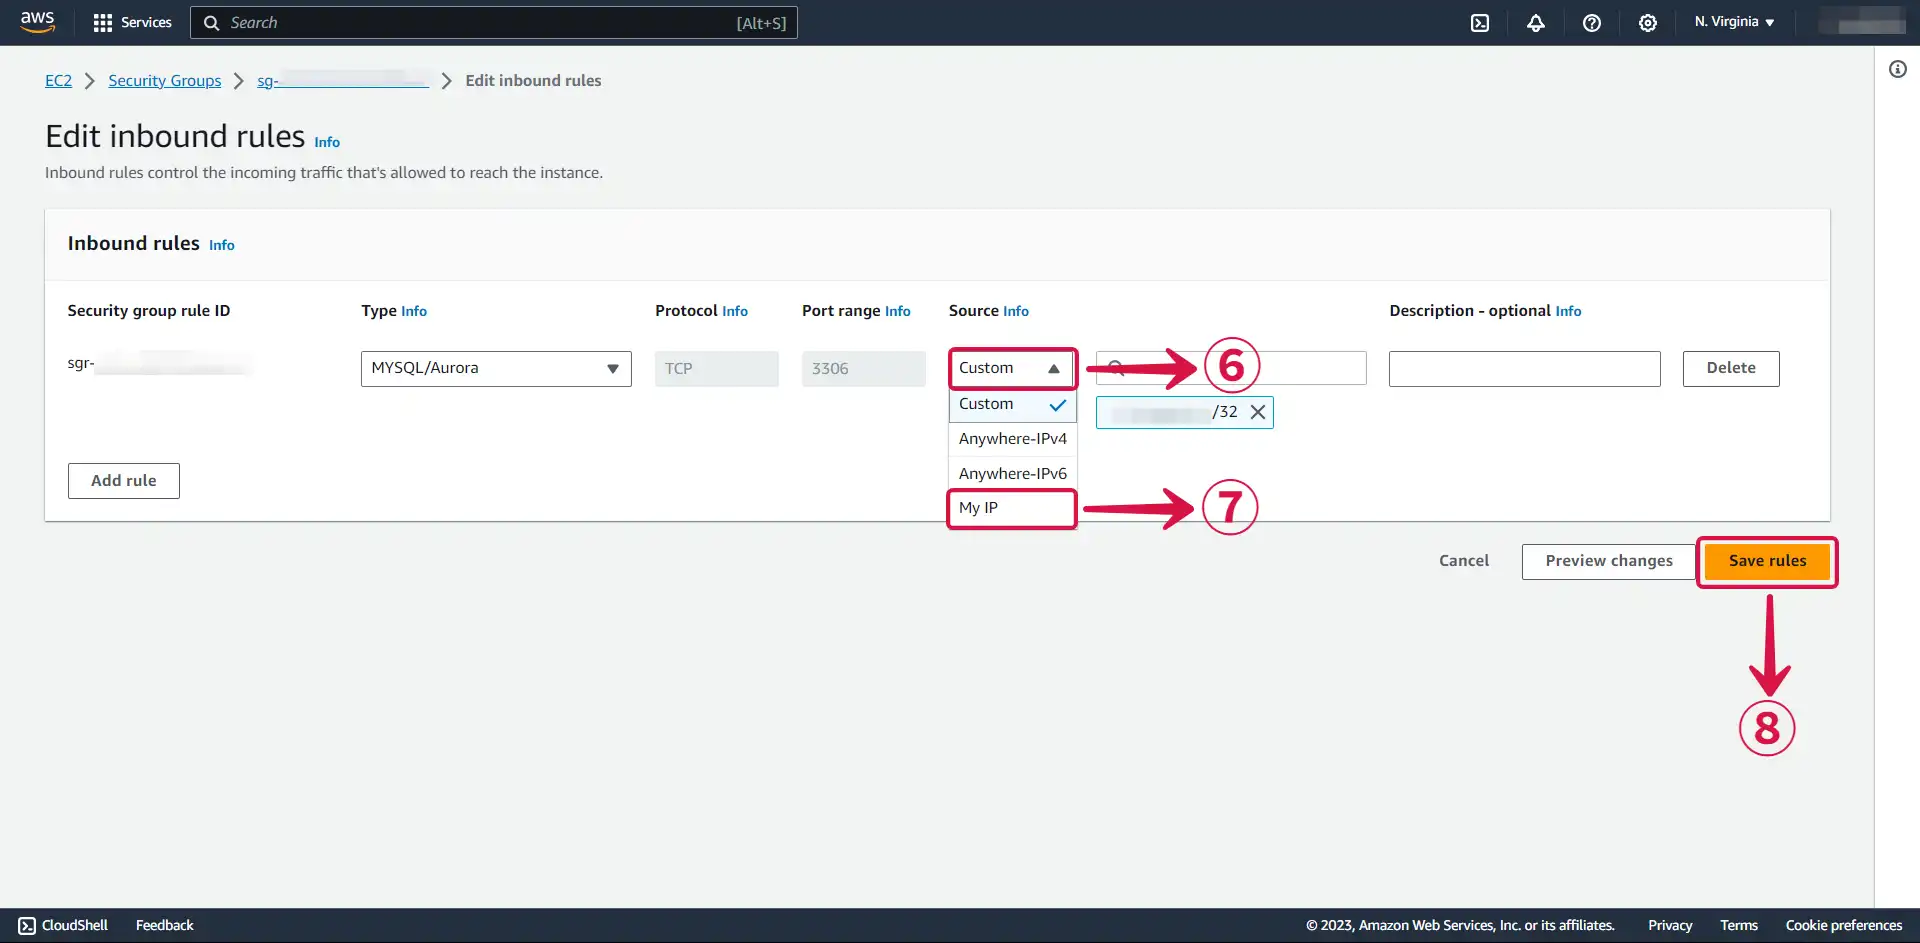
Alternatively, you can opt for Anywhere-IPv4 to enable traffic from any IPv4 address.
Now you can connect to your server and create a table.
Step 3: Amazon RDS MySQL Connection Settings
To set up Amazon RDS MySQL Sink in Vanus Connect:
- Return to the RDS page and click on the database① you just created.
- Copy your Endpoint & port②.

- Navigate to the Vanus Cloud platform and fill in the following credentials.
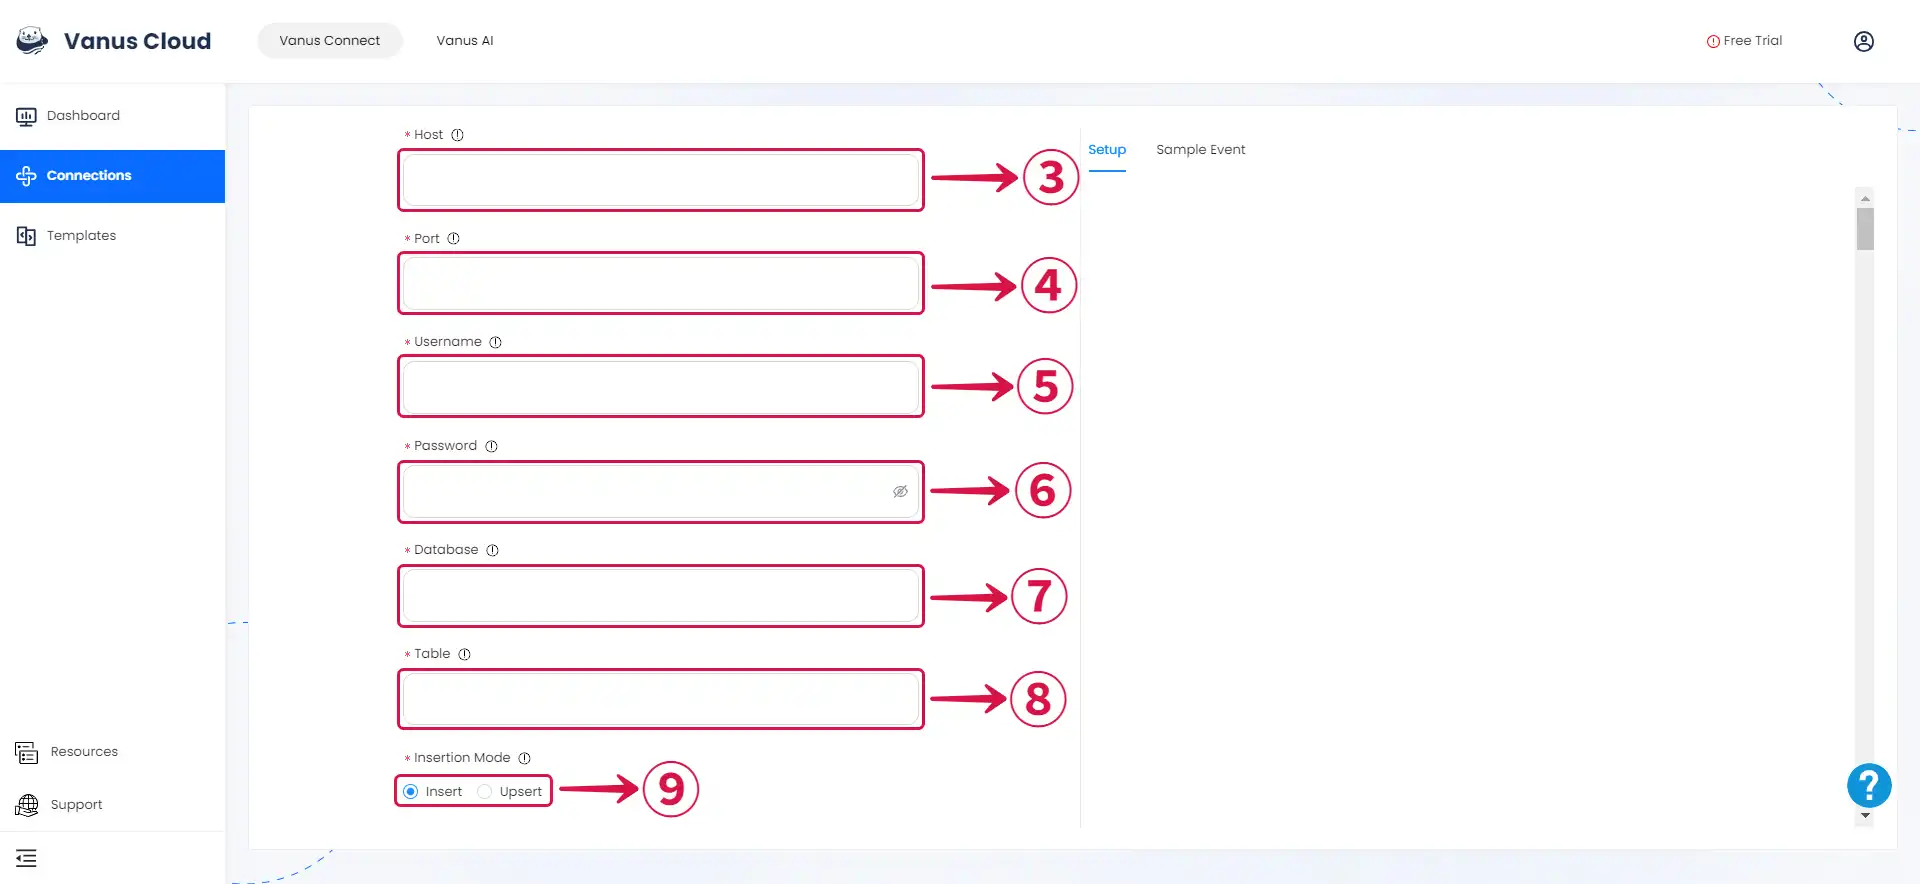
- Host③: This is your RDS endpoint.
- Port④: Enter the port number on which your MySQL server is listening. The default port for MySQL is 3306.
- Username⑤: Master username selected during the database creation.
- Password⑥: User password.
- Database⑦: The initial database name.
- Table⑧: The name of the table you want your events to be sent to.
- Choose the Insertion Mode⑨.
Step 4: Personalize Event Structure
This is a general instruction on how to personalize your event structure. You can structure your events to suit your specific requirements and create connections for different scenarios.
- Click on Display sample events① for reference and click on Add More② to add events.

- Input key③ and search for the corresponding value④ for the event you want.
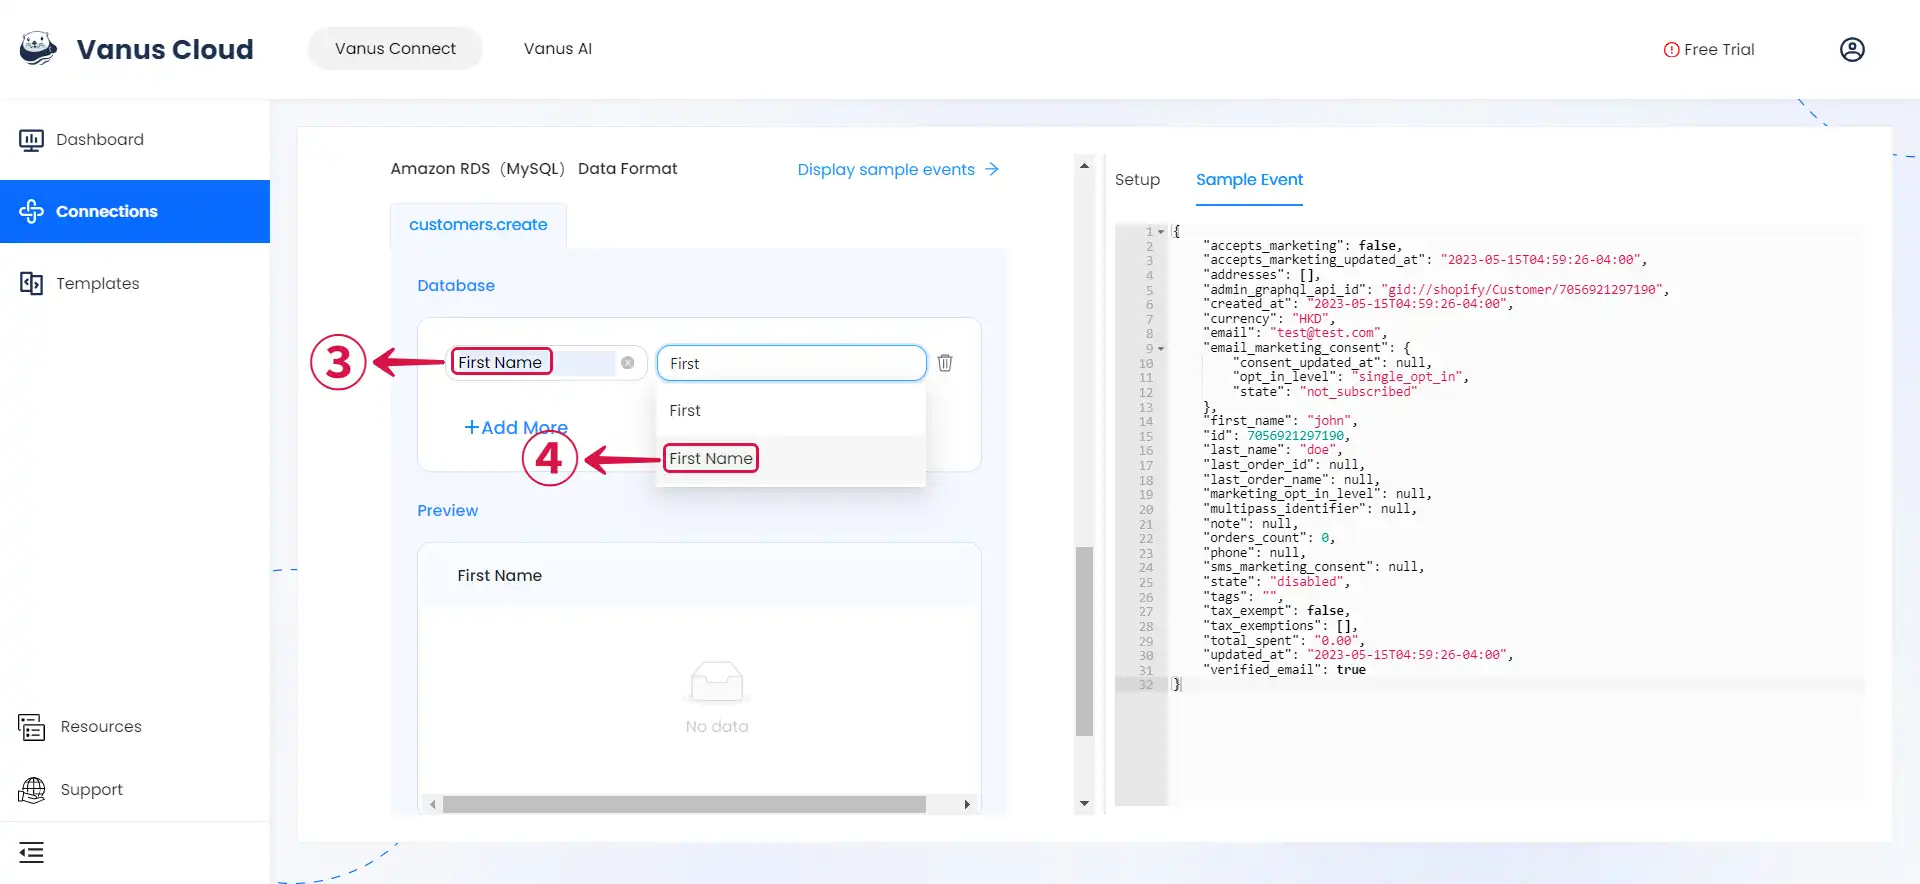
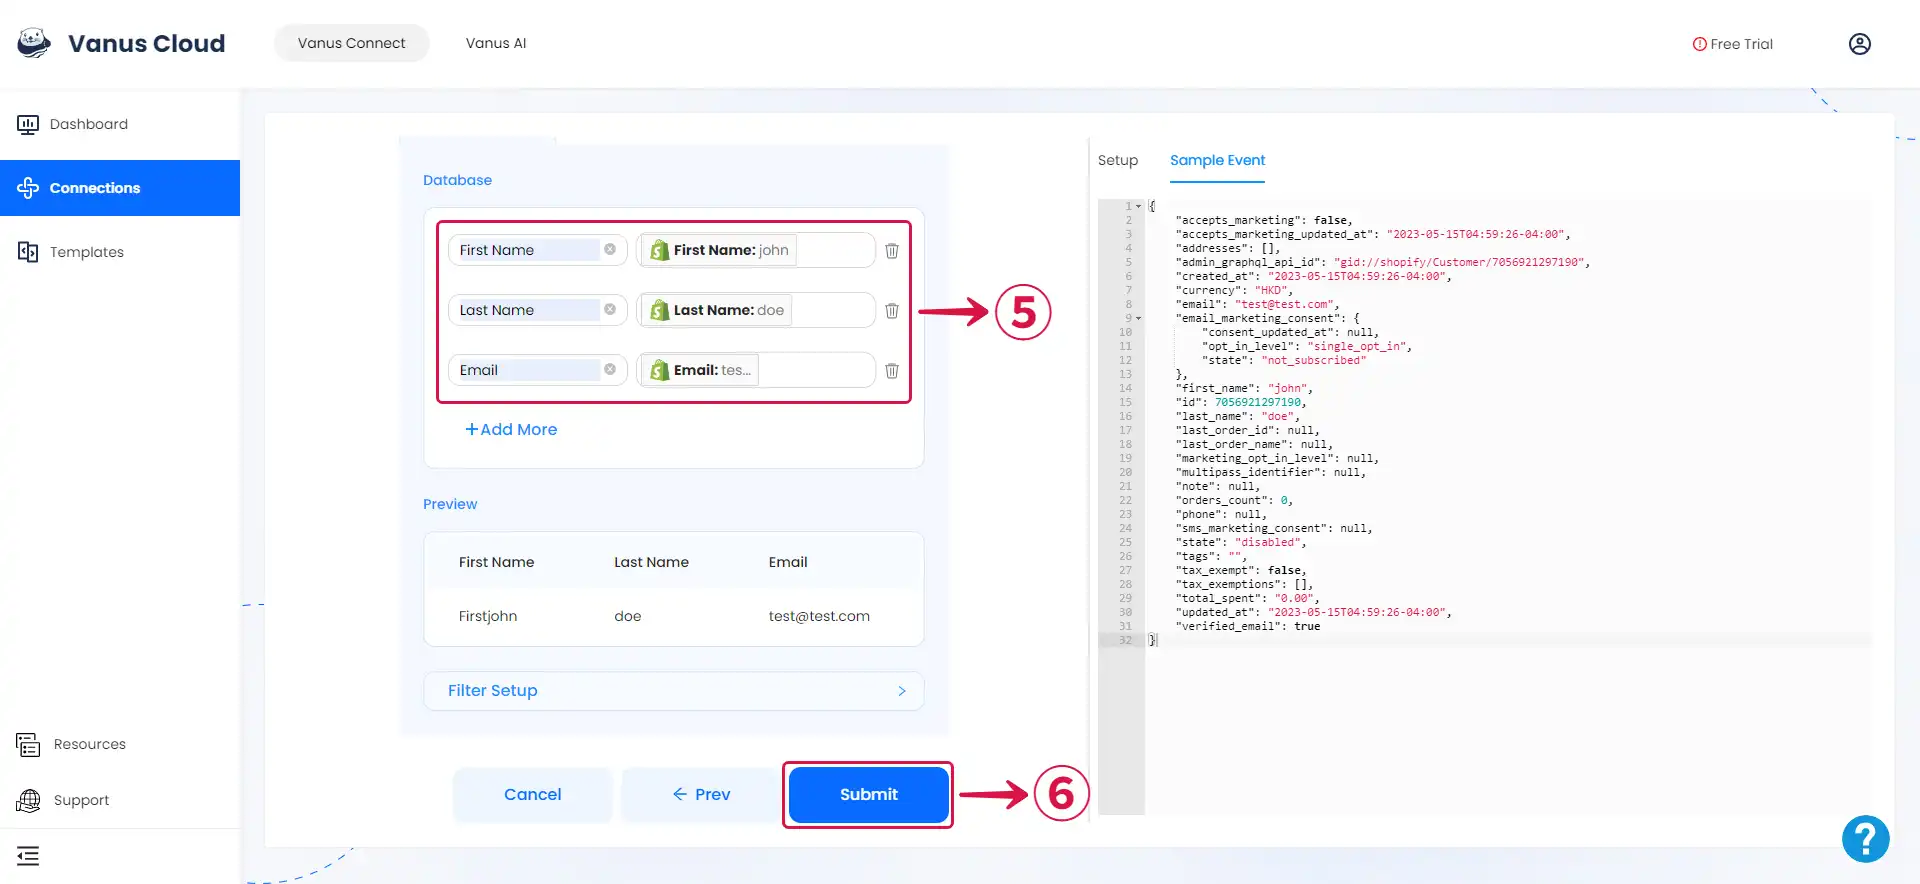
- You can fill in as many key-value pairs⑤ as you wish to receive. And then click Submit⑥ to finish the configuration process.
Custom Connection
The event data must be in JSON format and created following the structure of your database, here's an example:
{
  "title": "value",
  "date": "value",
  "ect...": "value"
}