Amazon RDS MySQL
This guide contains information required in setting up an Amazon MySQL Source in Vanus Connect.
Introduction
MySQL
MySQL is a widely used database management system that helps manage and manipulate data using Structured Query Language (SQL). It offers several capabilities to manage data effectively, including the ability to create indexes, which improves the speed of data retrieval. Replication which allows data to be duplicated across multiple servers, providing backup and fault tolerance. And stored procedures, which are a set of pre-written SQL commands that can be saved in the database and executed later, making it easier to manage complex operations. MySQL is appreciated for its ease of use, flexibility and reliability. It can be integrated with a wide range of programming languages and operating systems.
AWS-MySQL
AWS MySQL is a cloud-based relational database service provided by Amazon Web Services, which utilizes the open-source MySQL database management system. This service allows users to deploy and manage MySQL databases in the cloud without the need to configure and administer infrastructure on their own. AWS MySQL provides numerous features, including automatic backups, scalability, high availability, and security, making it a highly sought-after option for businesses of all sizes. Furthermore, AWS MySQL supports seamless integration with popular open-source MySQL tools and applications, which enables users to migrate their existing MySQL databases to the cloud effortlessly.
Prerequisites
Before creating your MySQL connection, you must have:
- A Vanus Cloud account
- An SQL client
- A running MySQL server
- A database and Table
Getting Started
Step 1: Setup A Mysql database server in AWS using RDS
Create an RDS account
Log in to the AWS Management Console using your root account credentials.
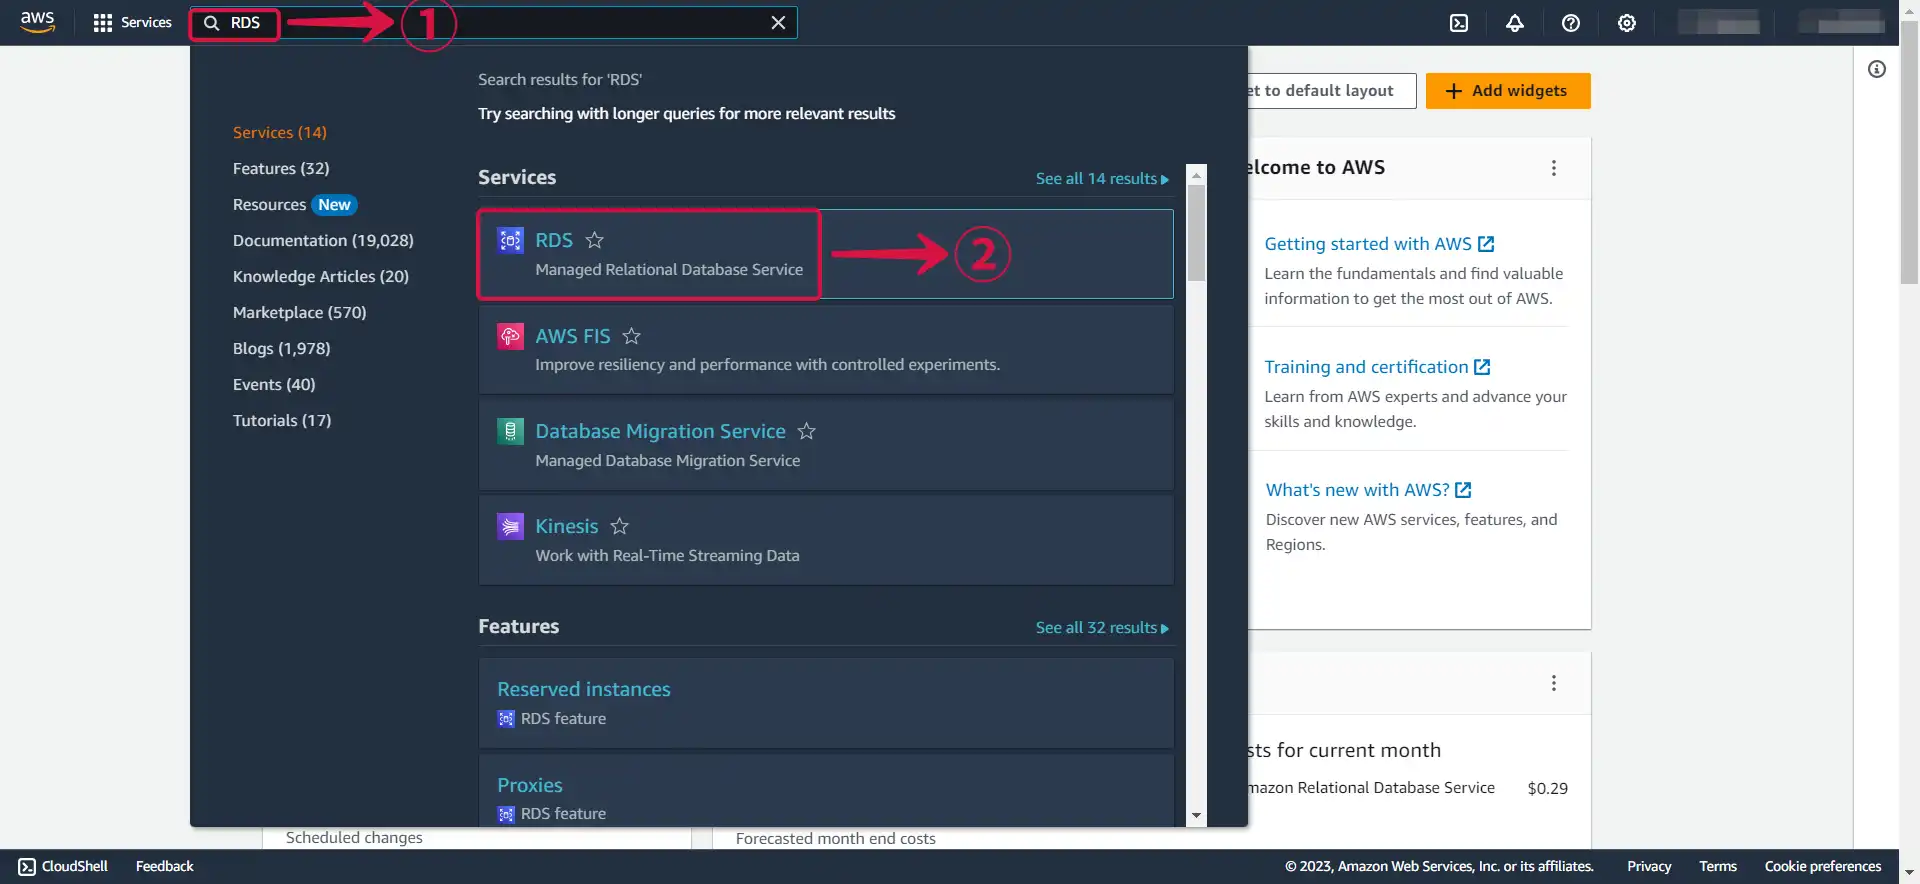
Type RDS① in the search box and select RDS② from the results.
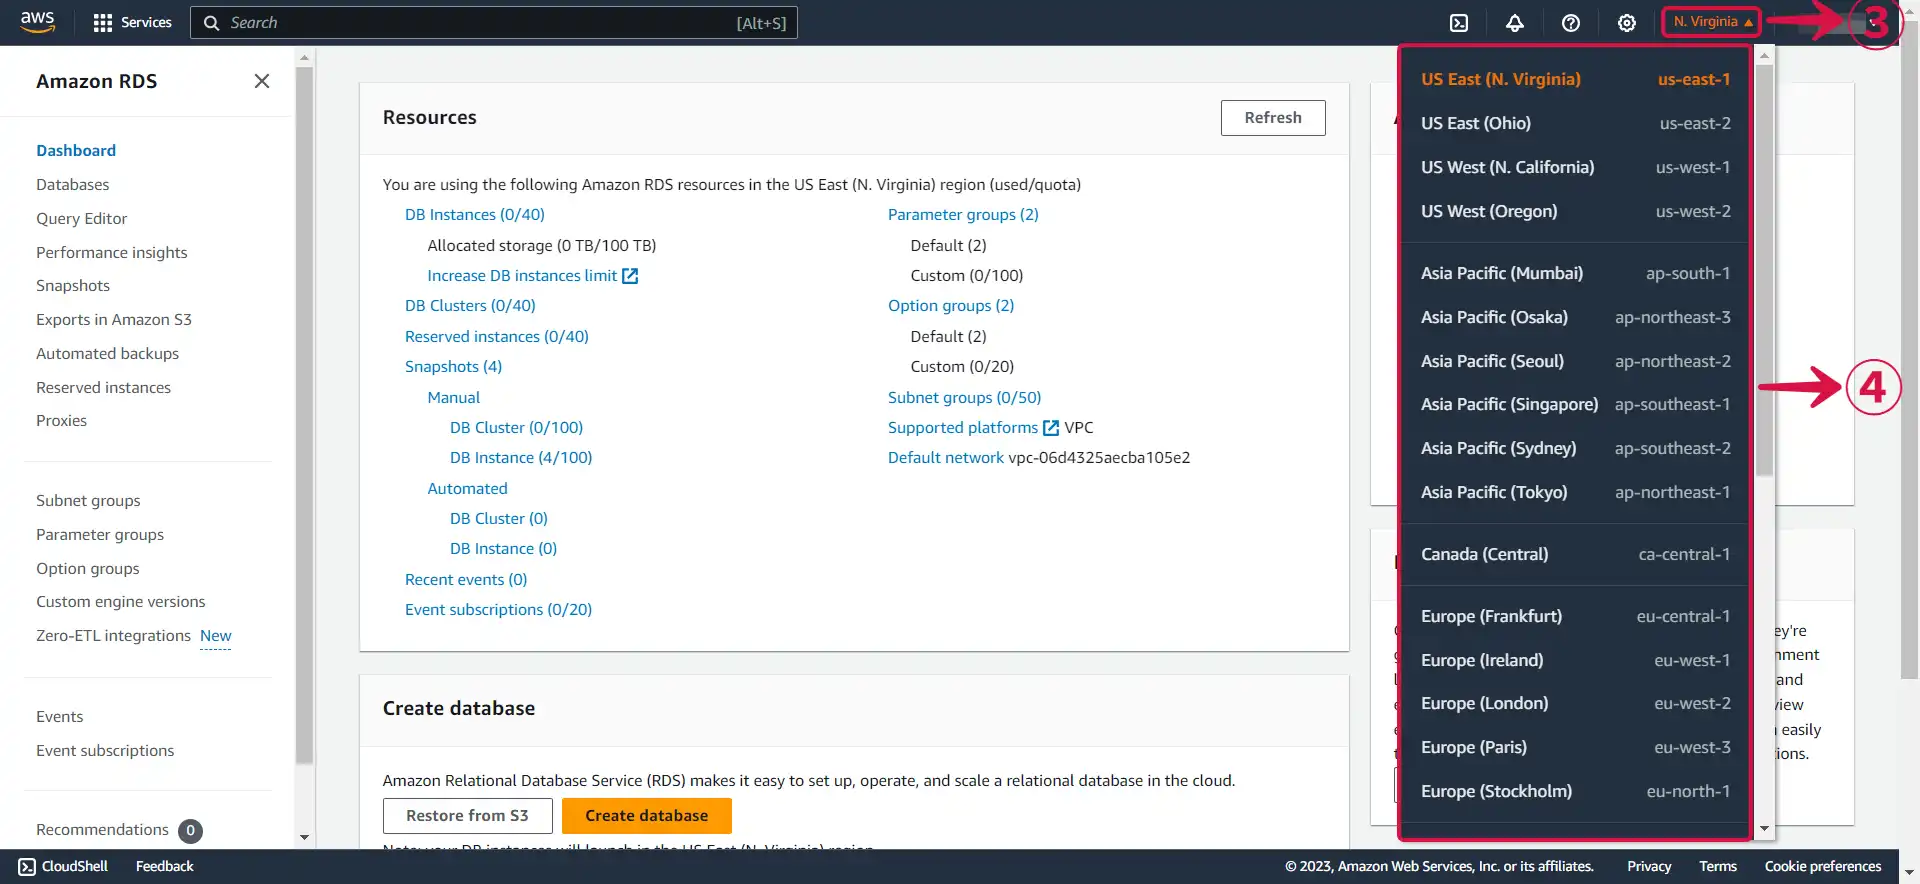
- Click the Region name③ to open the dropdown menu and select the particular Region④ in which you want to create the DB instance.
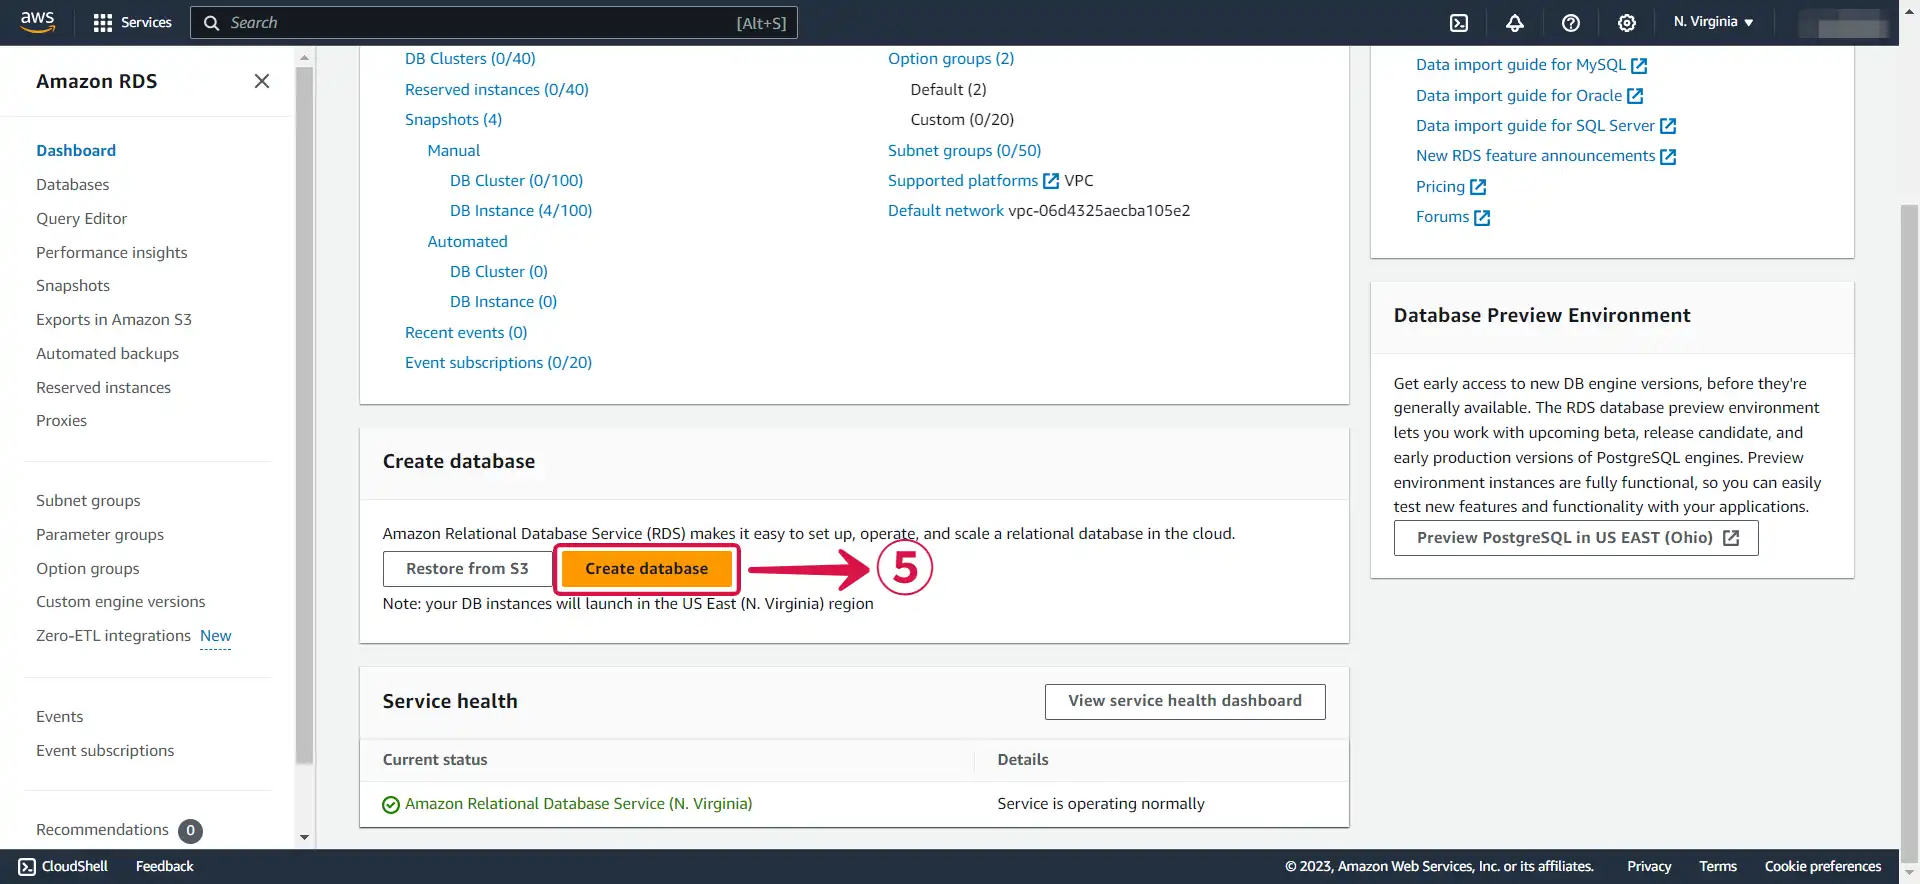
- Click Create database⑤.
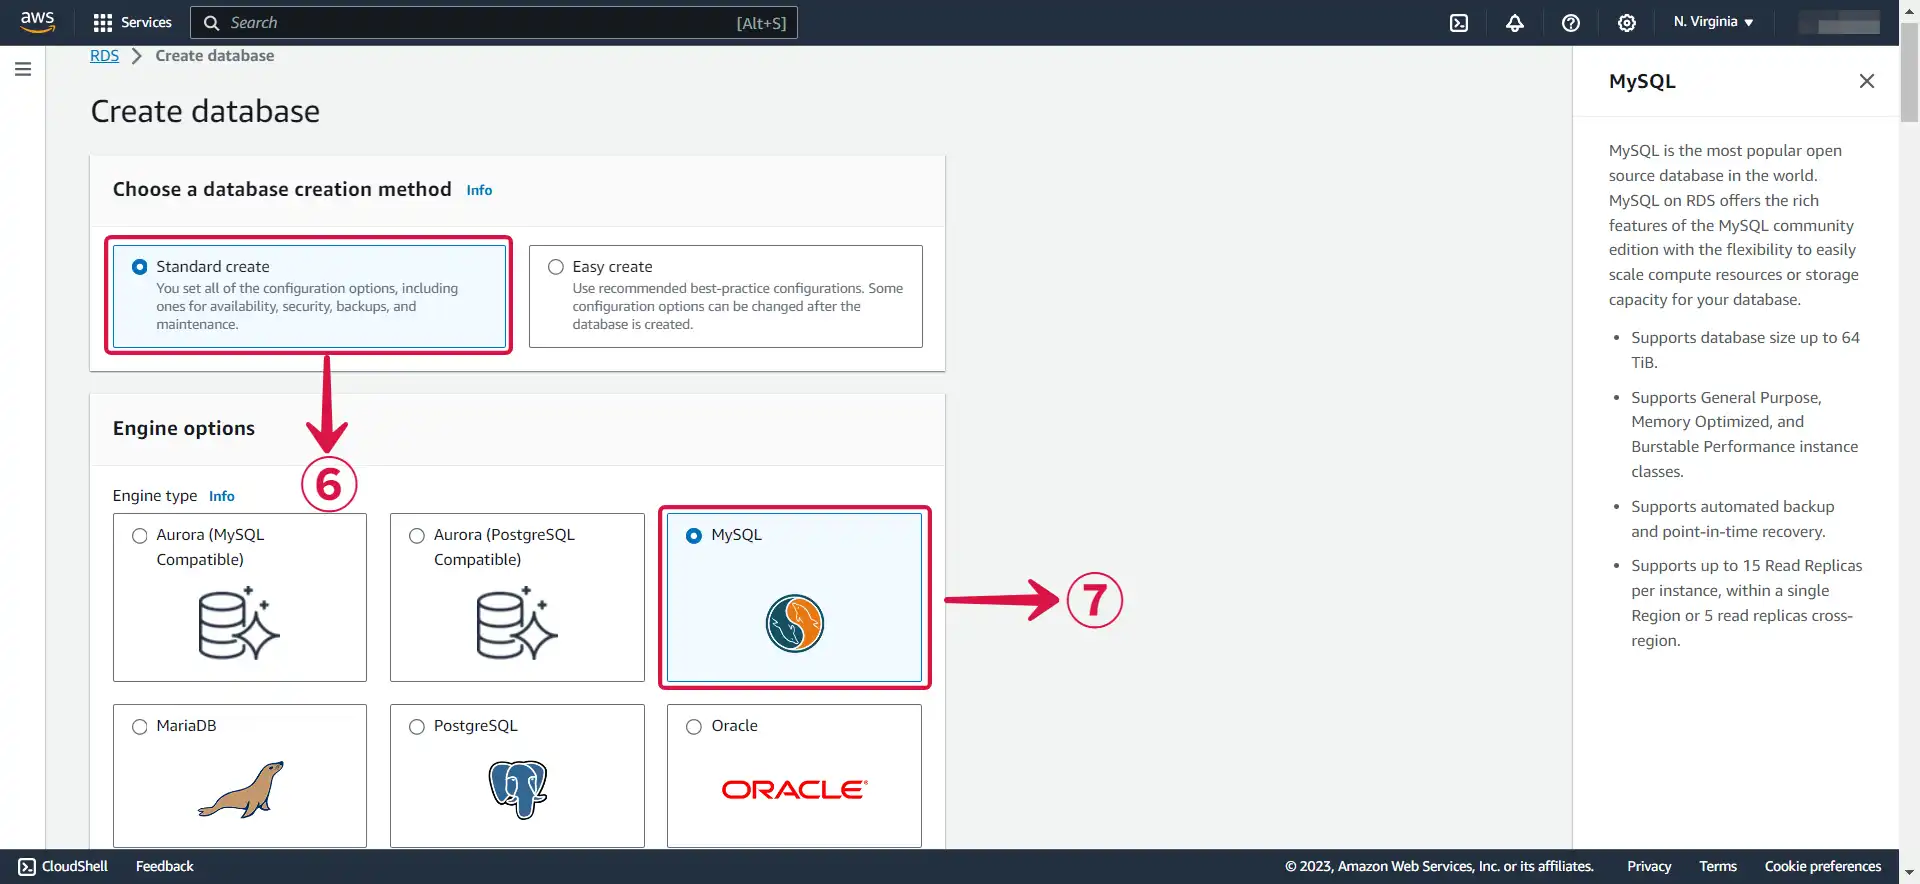
- Select Standard create⑥ and choose the MySQL⑦ icon.
- Select the Free tier⑧ Template for testing, or opt for one of the other available options based on your specific use case.
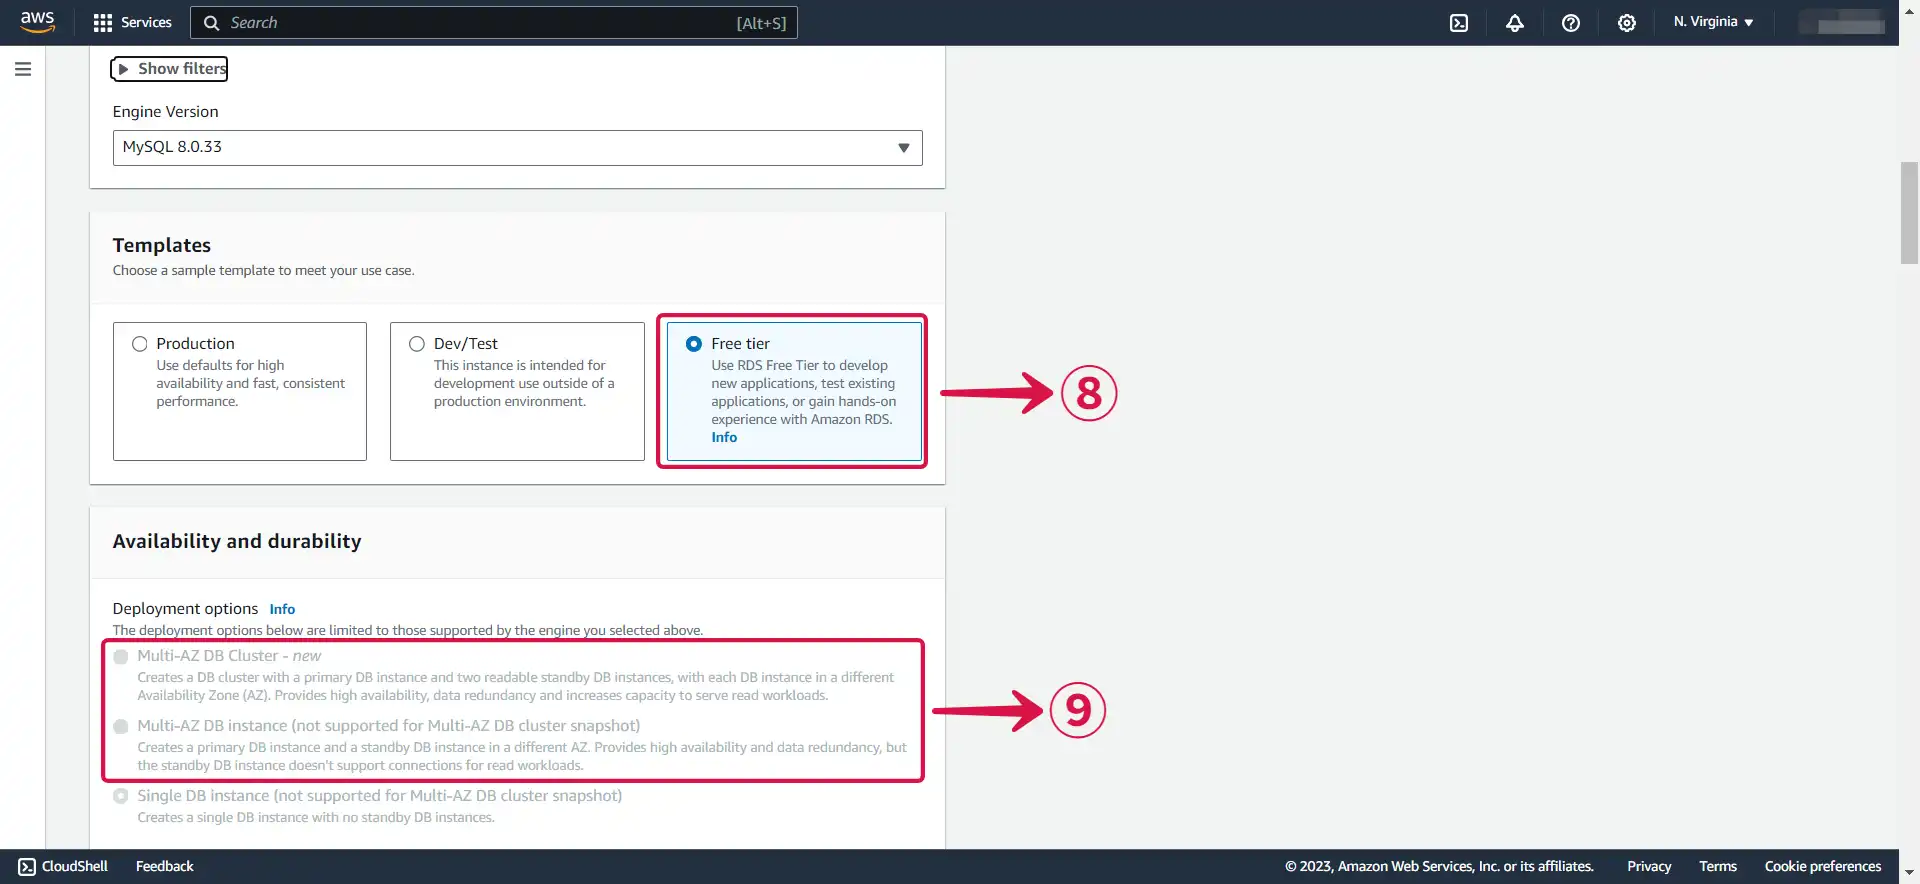
Multi-AZ DB⑨ deployment is only available for the paid tier. A Multi-AZ deployment automatically provisions and maintains a synchronous standby replica in a different Availability Zone.
- Enter the following information.
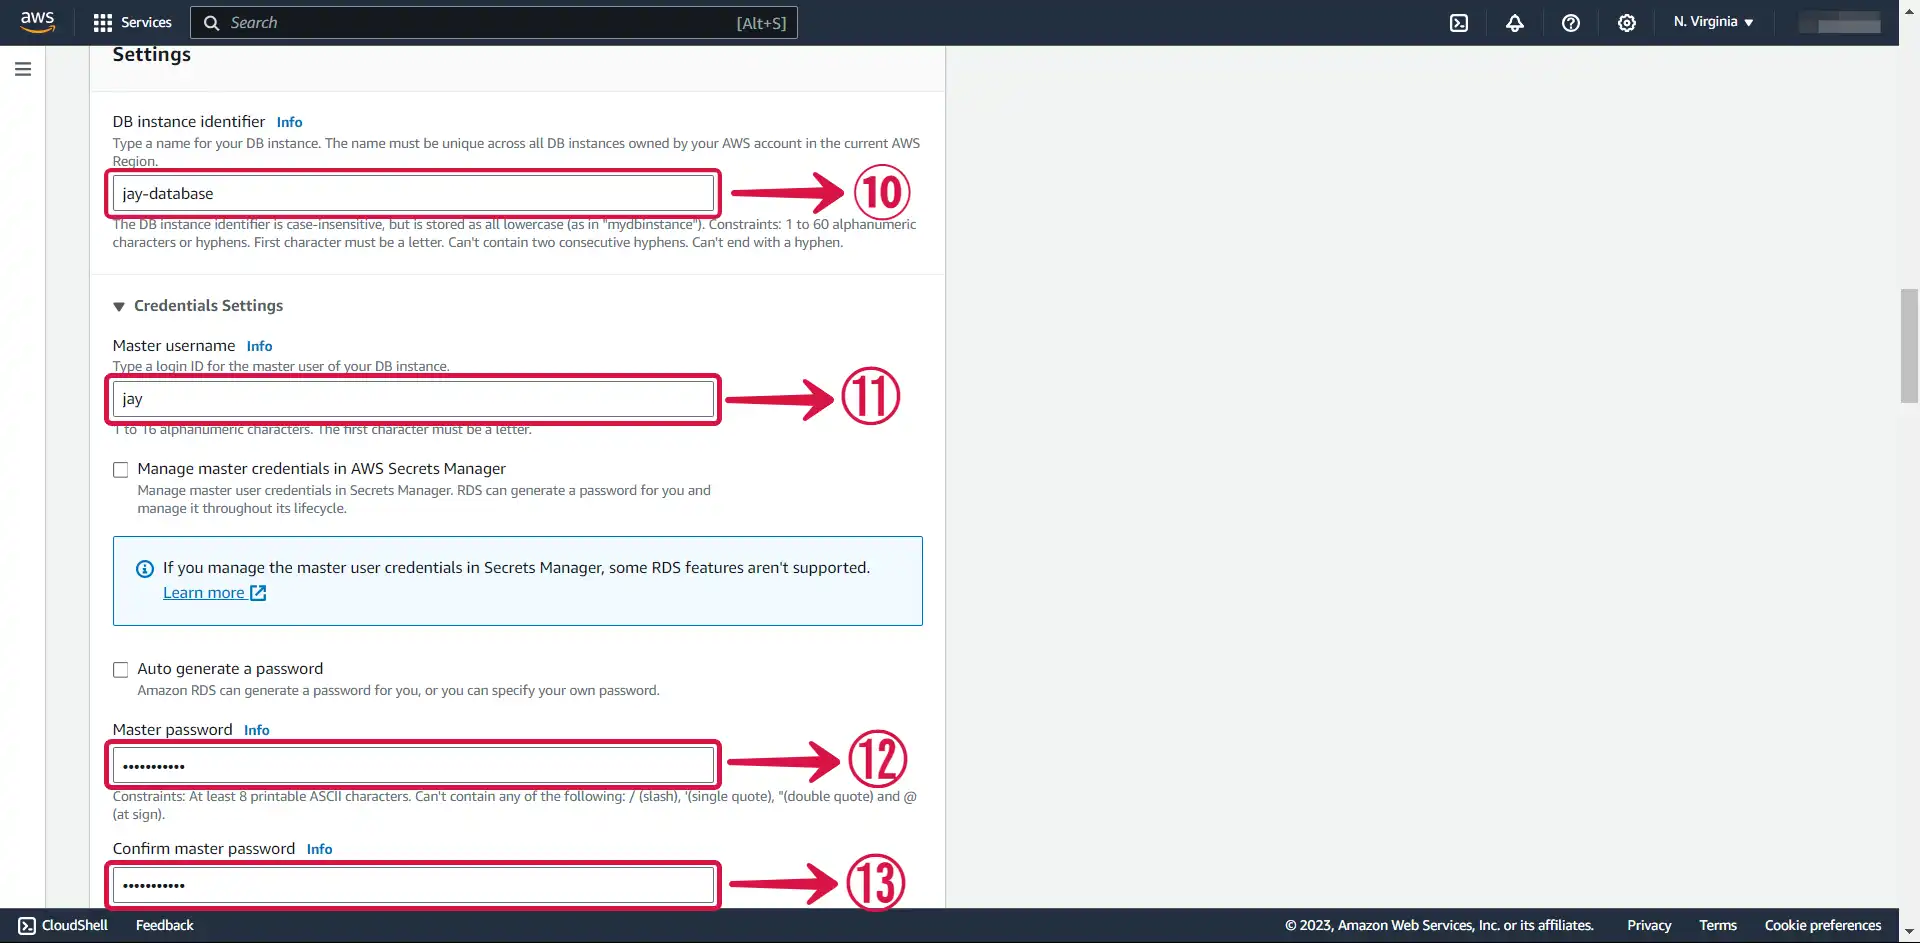
DB instance identifier⑩: Give a unique name to your instance.
Master username⑪: This is the username that will be used to log in to your DB instance.
Master password⑫: This is the password that will be used to log in with the username.
Confirm master password⑬: Write the password again.
- Select the General Purpose SSD (gp2)⑭ storage type. It's efficient and cost-effective for our intended use.

- Enable Public access⑮.
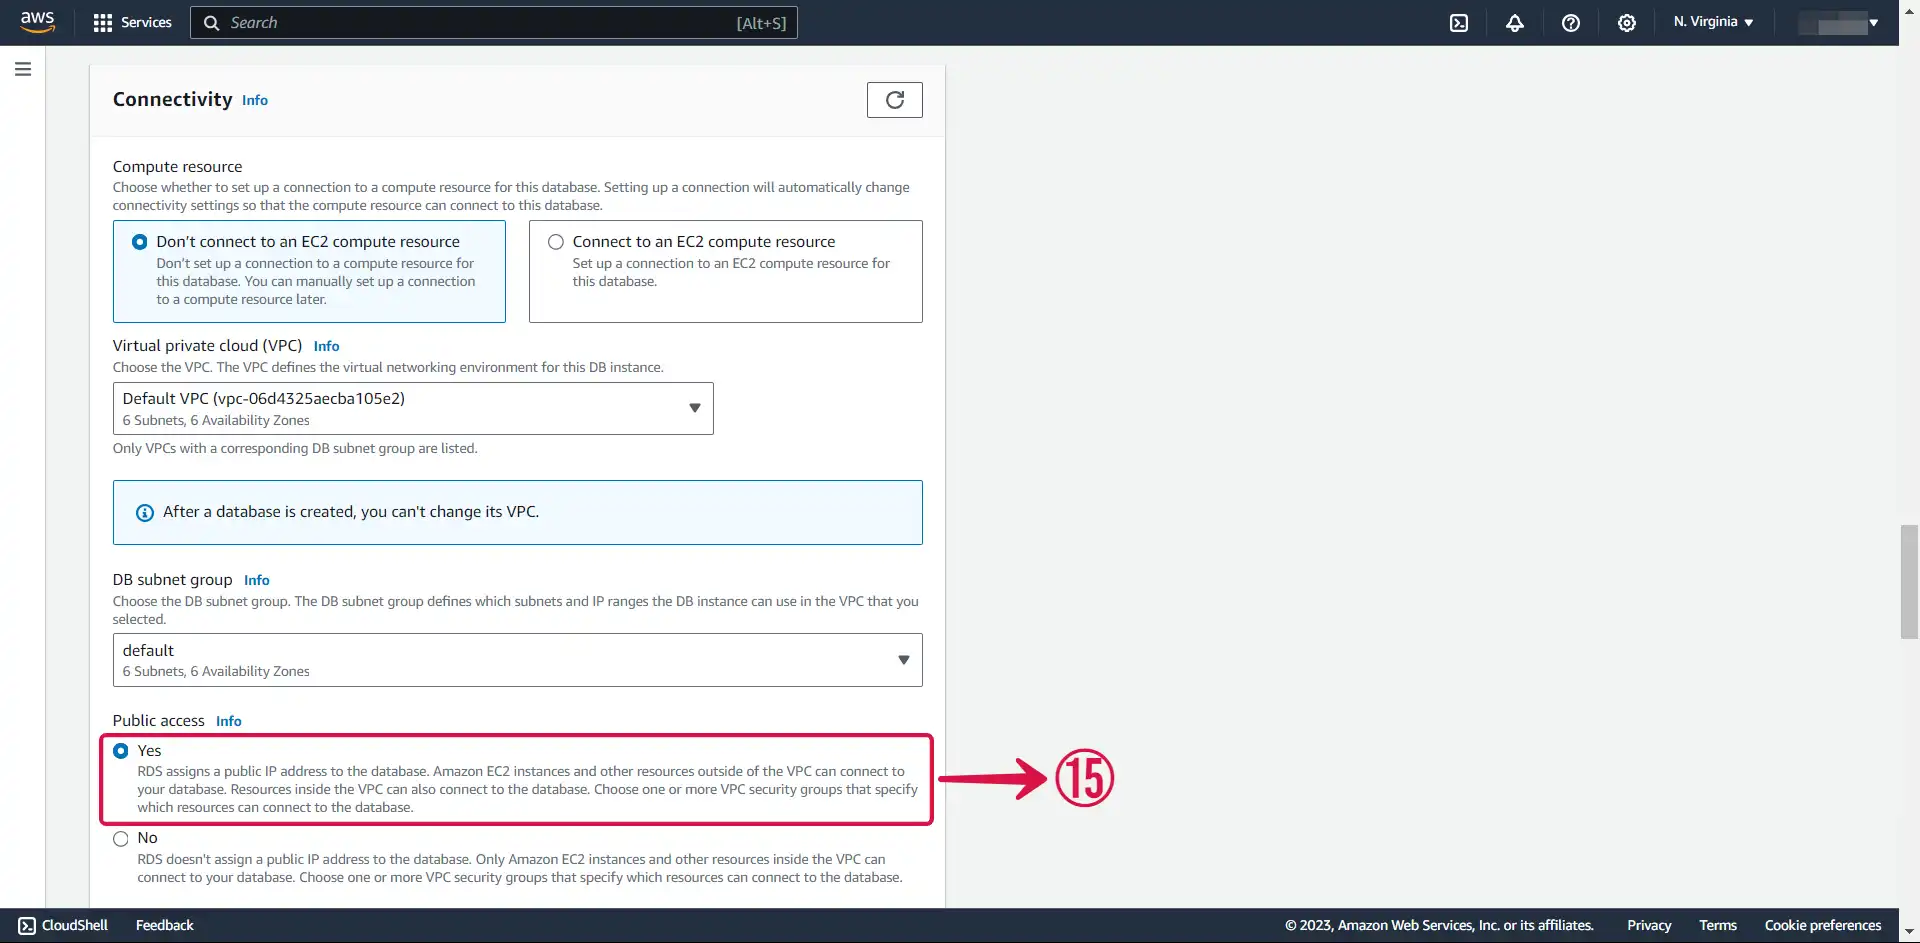
This allocates an IP to your database instance and allows direct connection to the database from the internet.
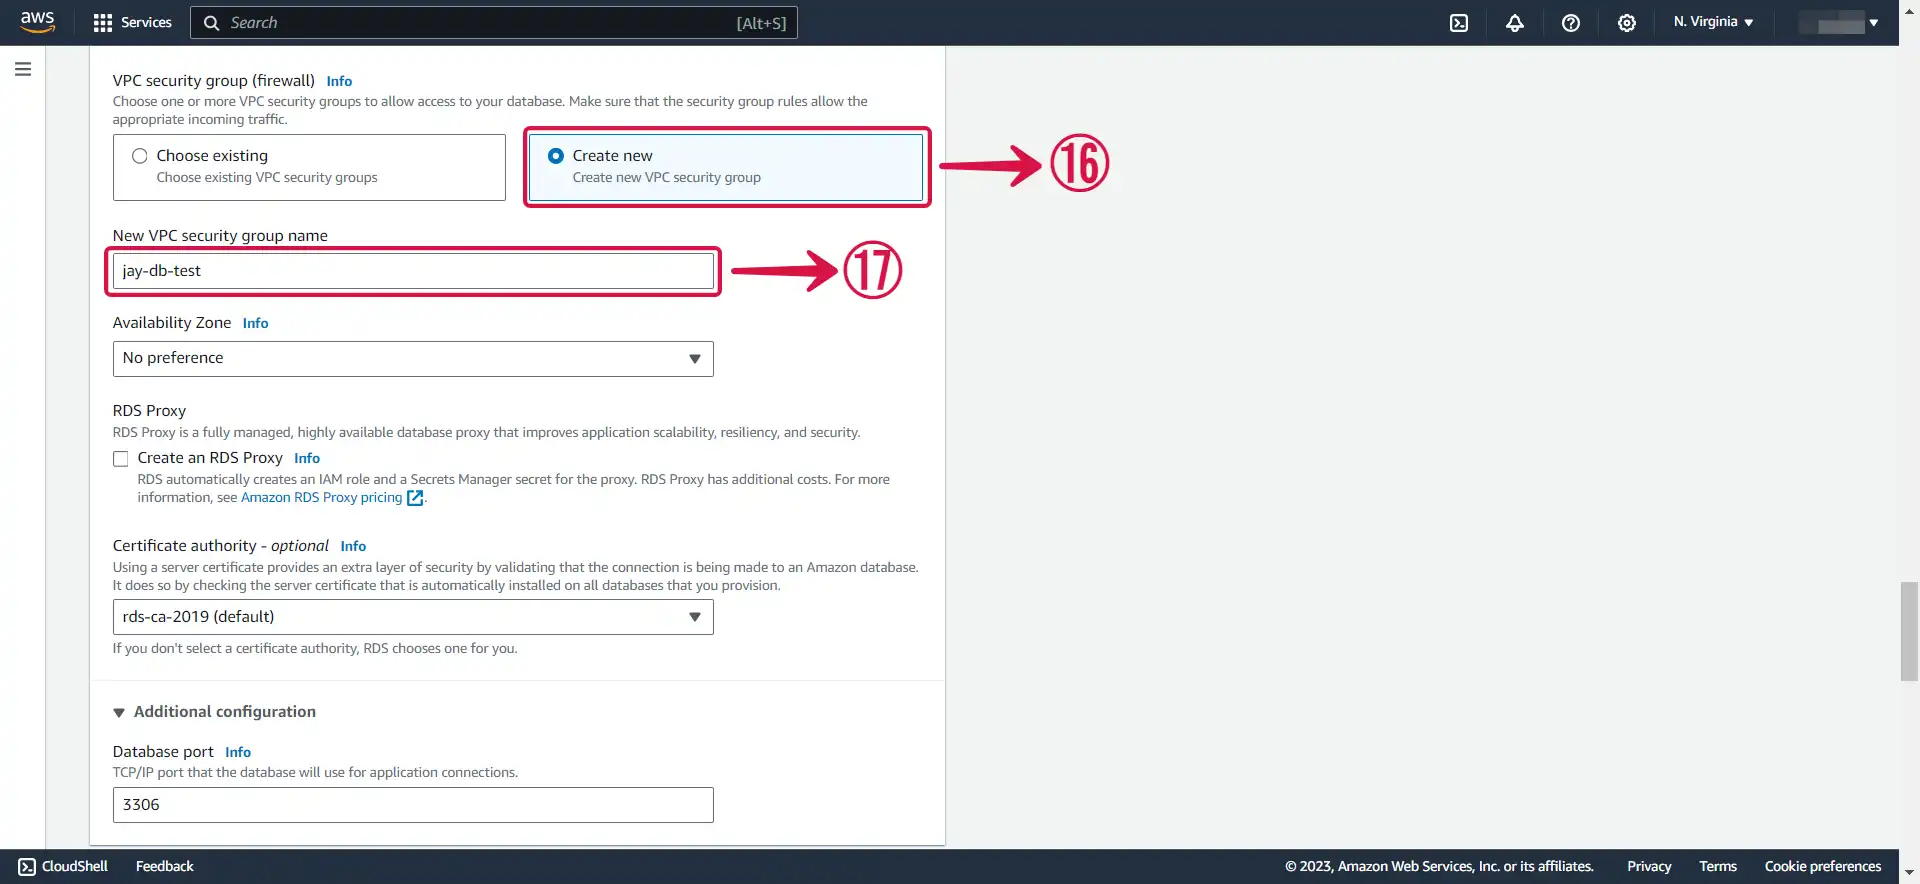
- Select Create new⑯ to create a new VPC security group, then specify your New VPC security group name⑰.
- Select Password authentication⑱.
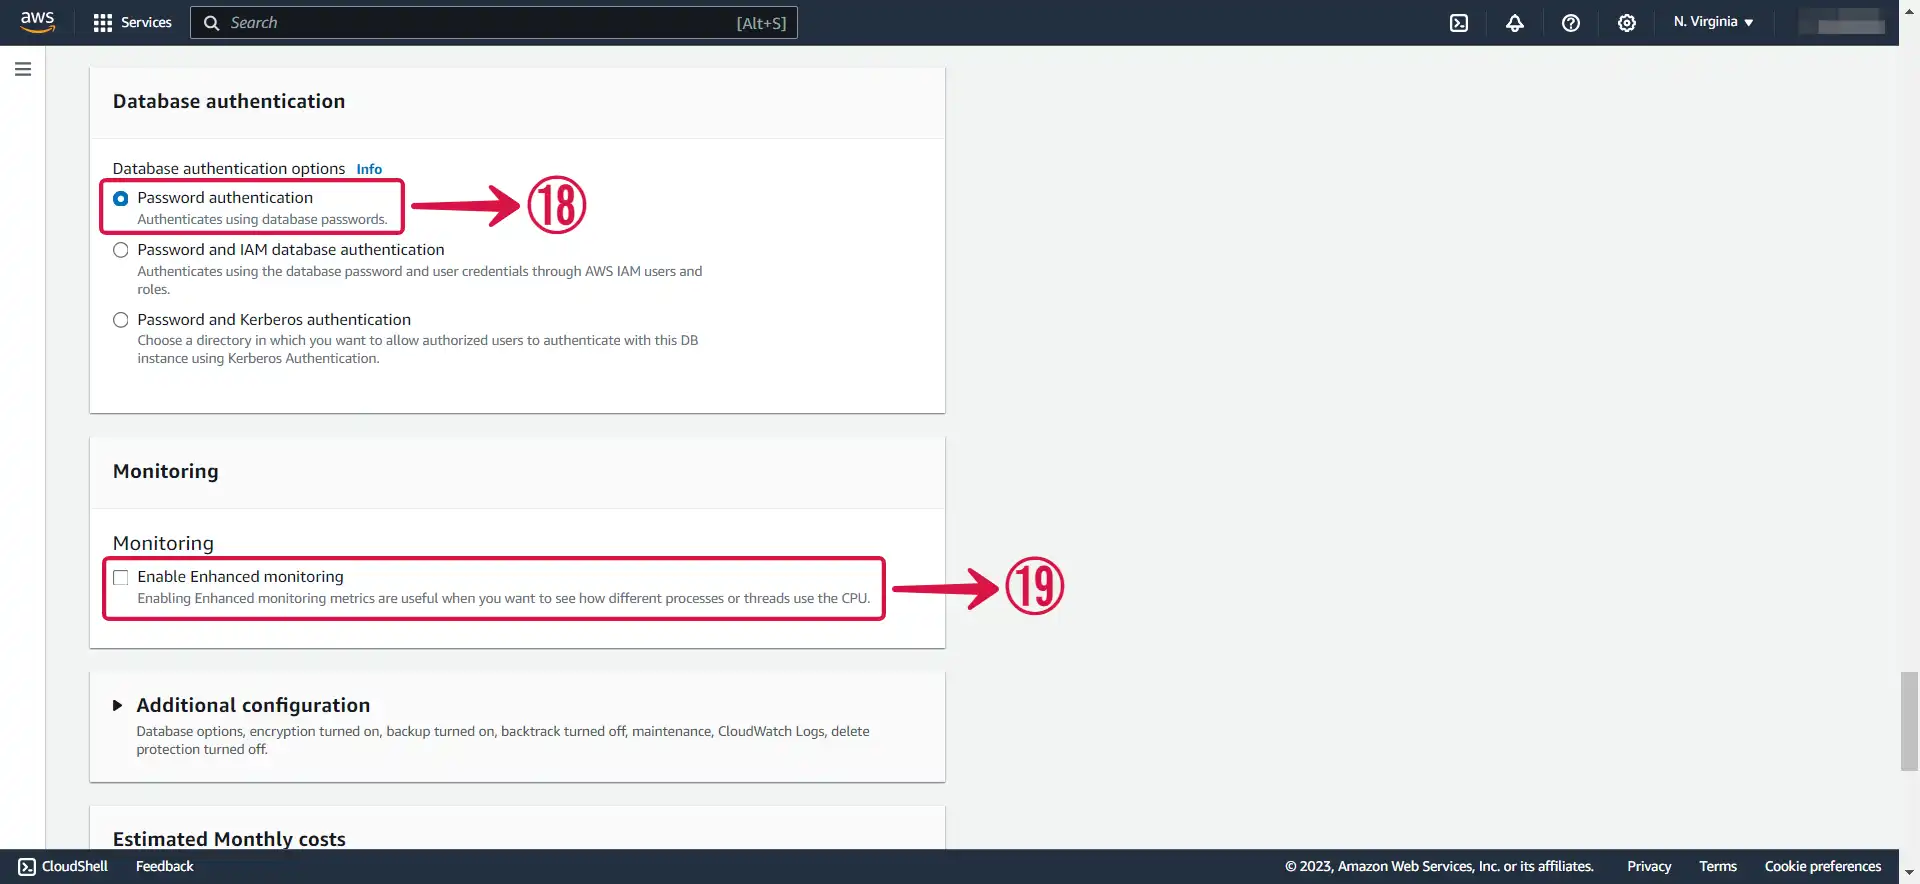
Leave Enable Enhanced monitoring⑲ unchecked to stay within the free tier limit.
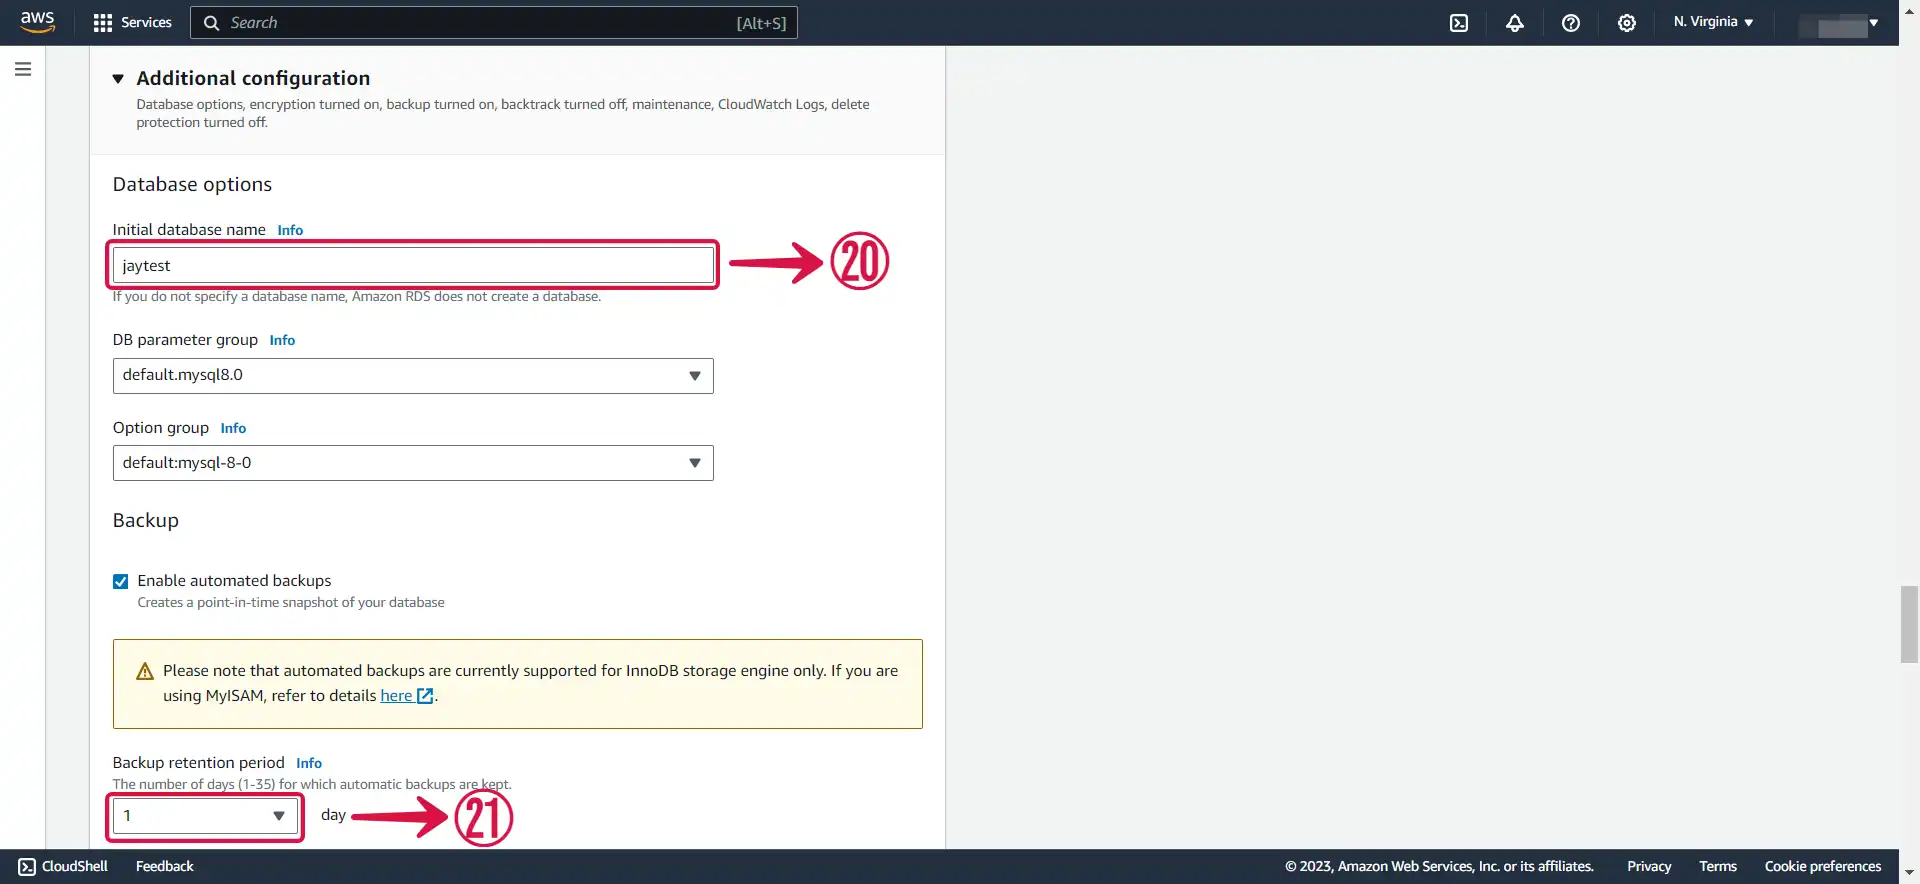
- Input an Initial database name⑳, and set your preferred Backup retention period㉑.
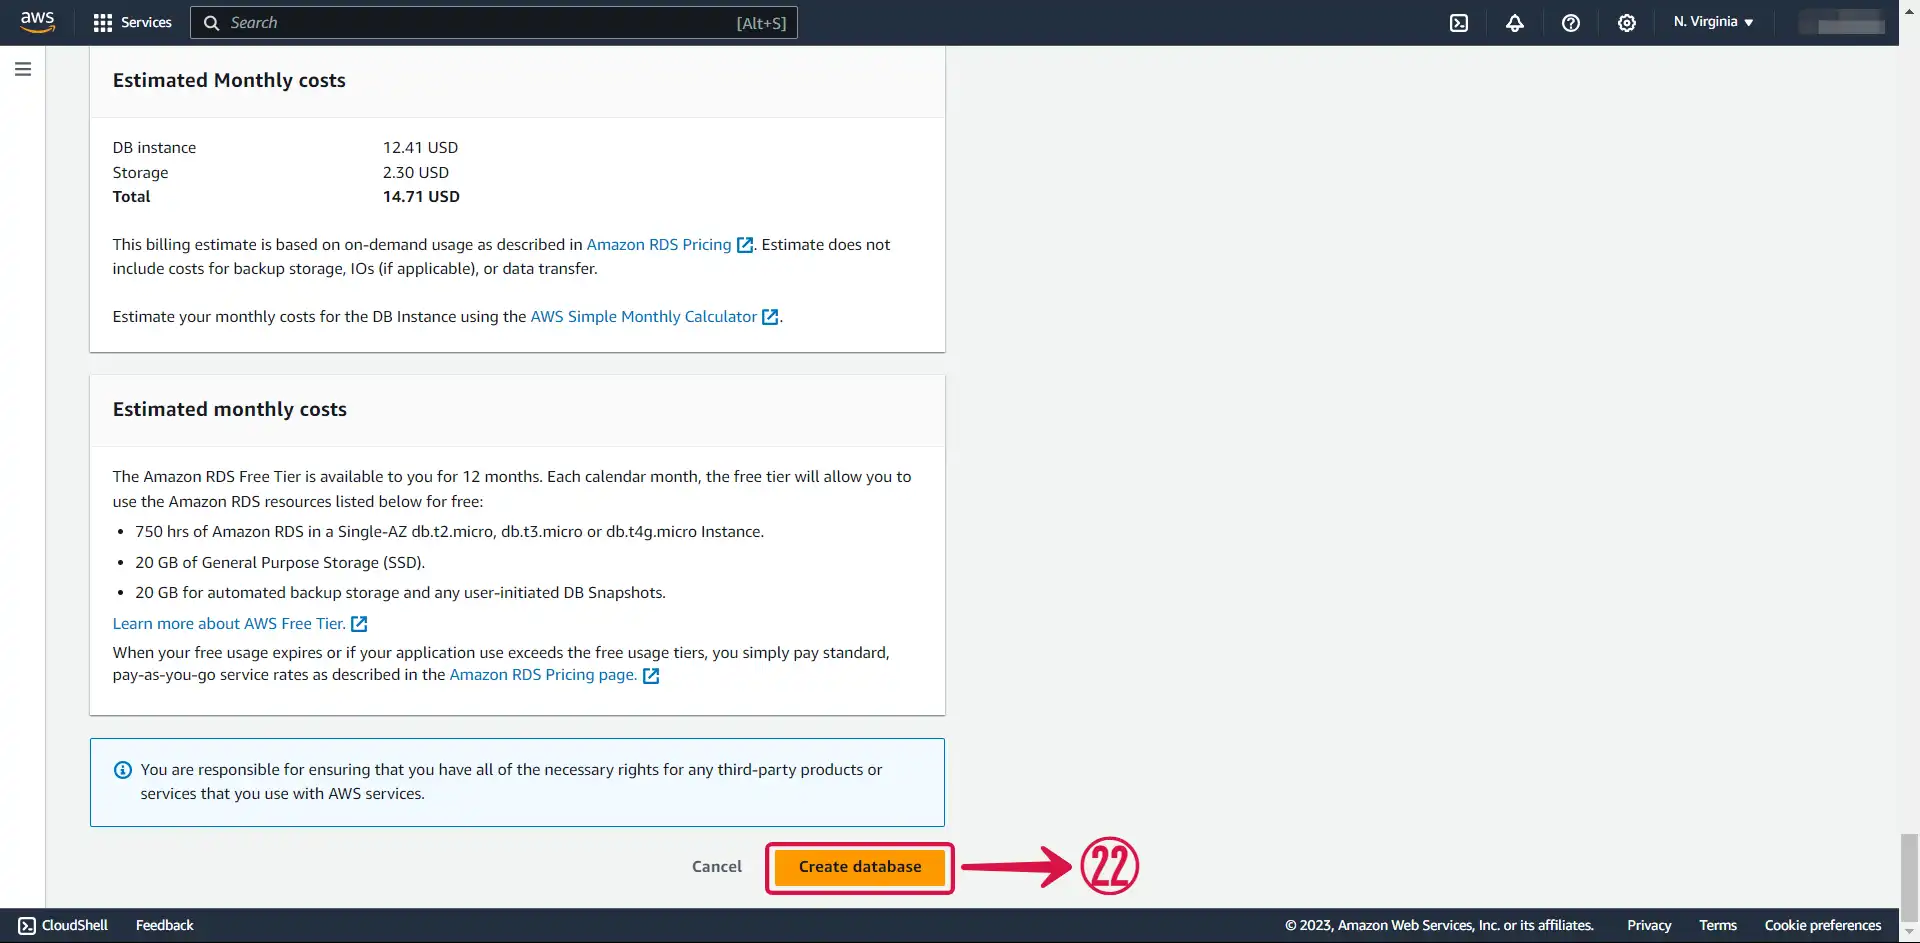
- Click the Create database㉒ button to complete the process of creating your database.
Step 2: Modify Your VPC Security Groups
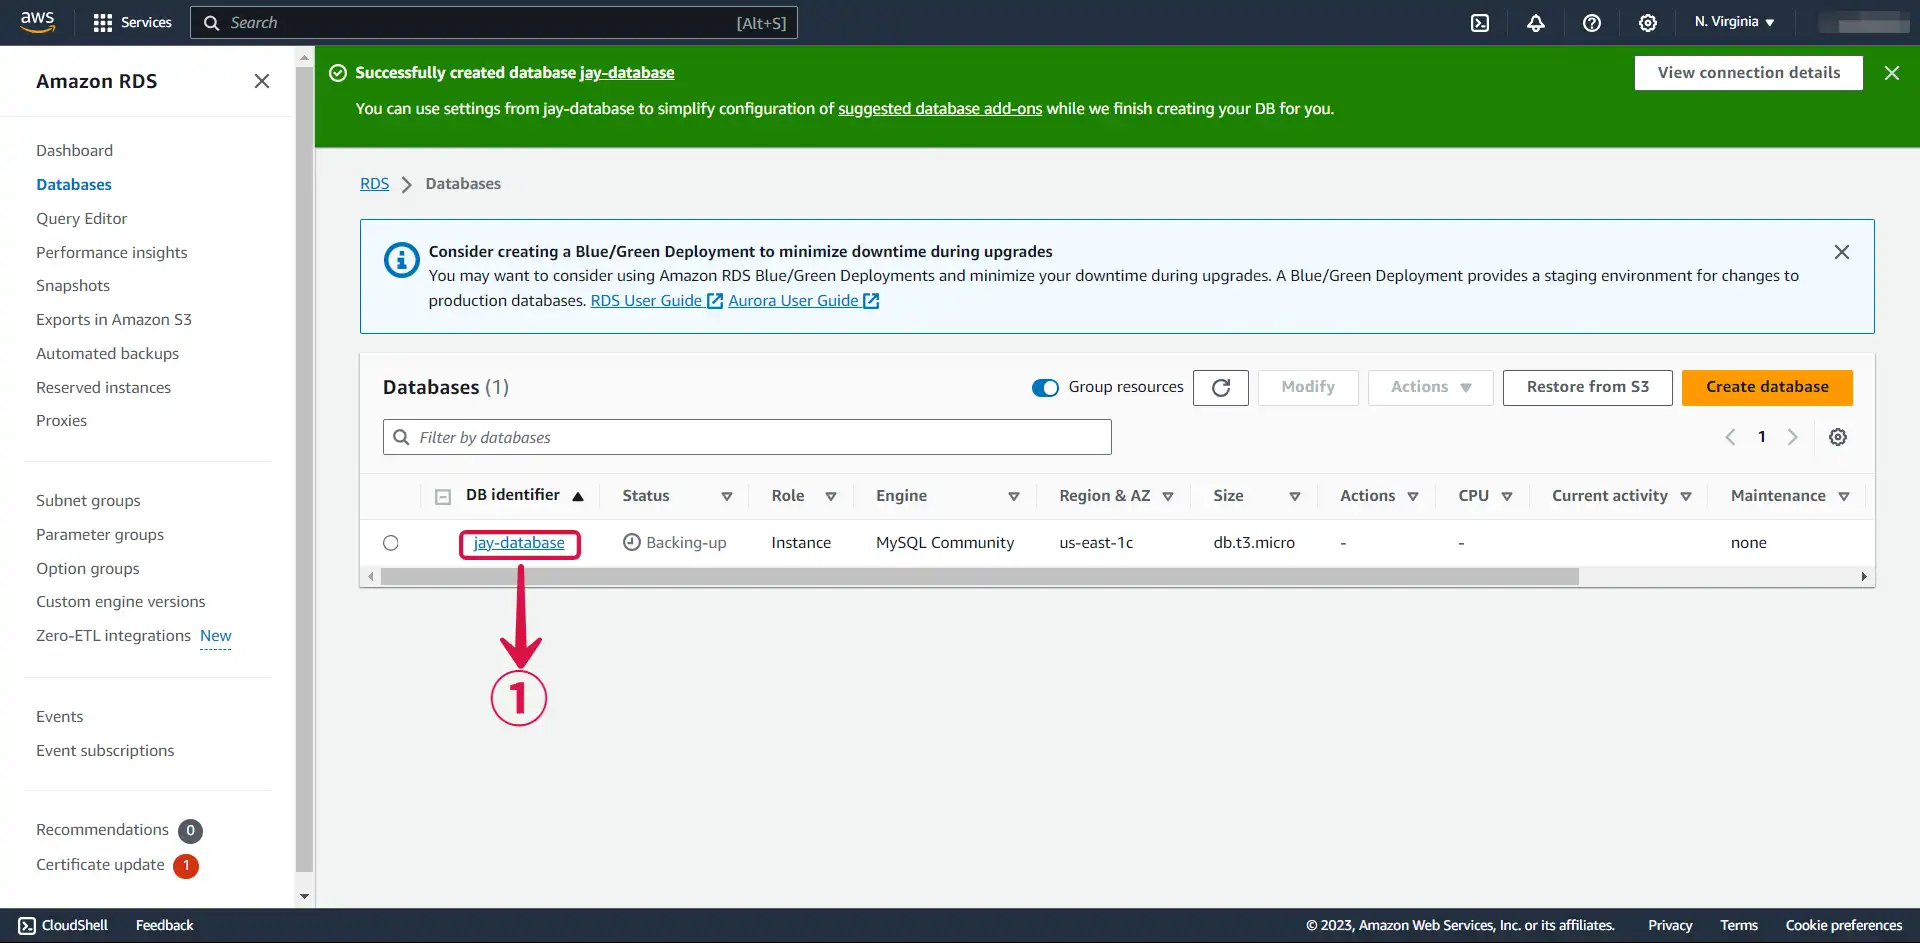
- Click on the Database① you just created in AWS RDS.
- Within the Connectivity & security② section, click on your VPC security group③.
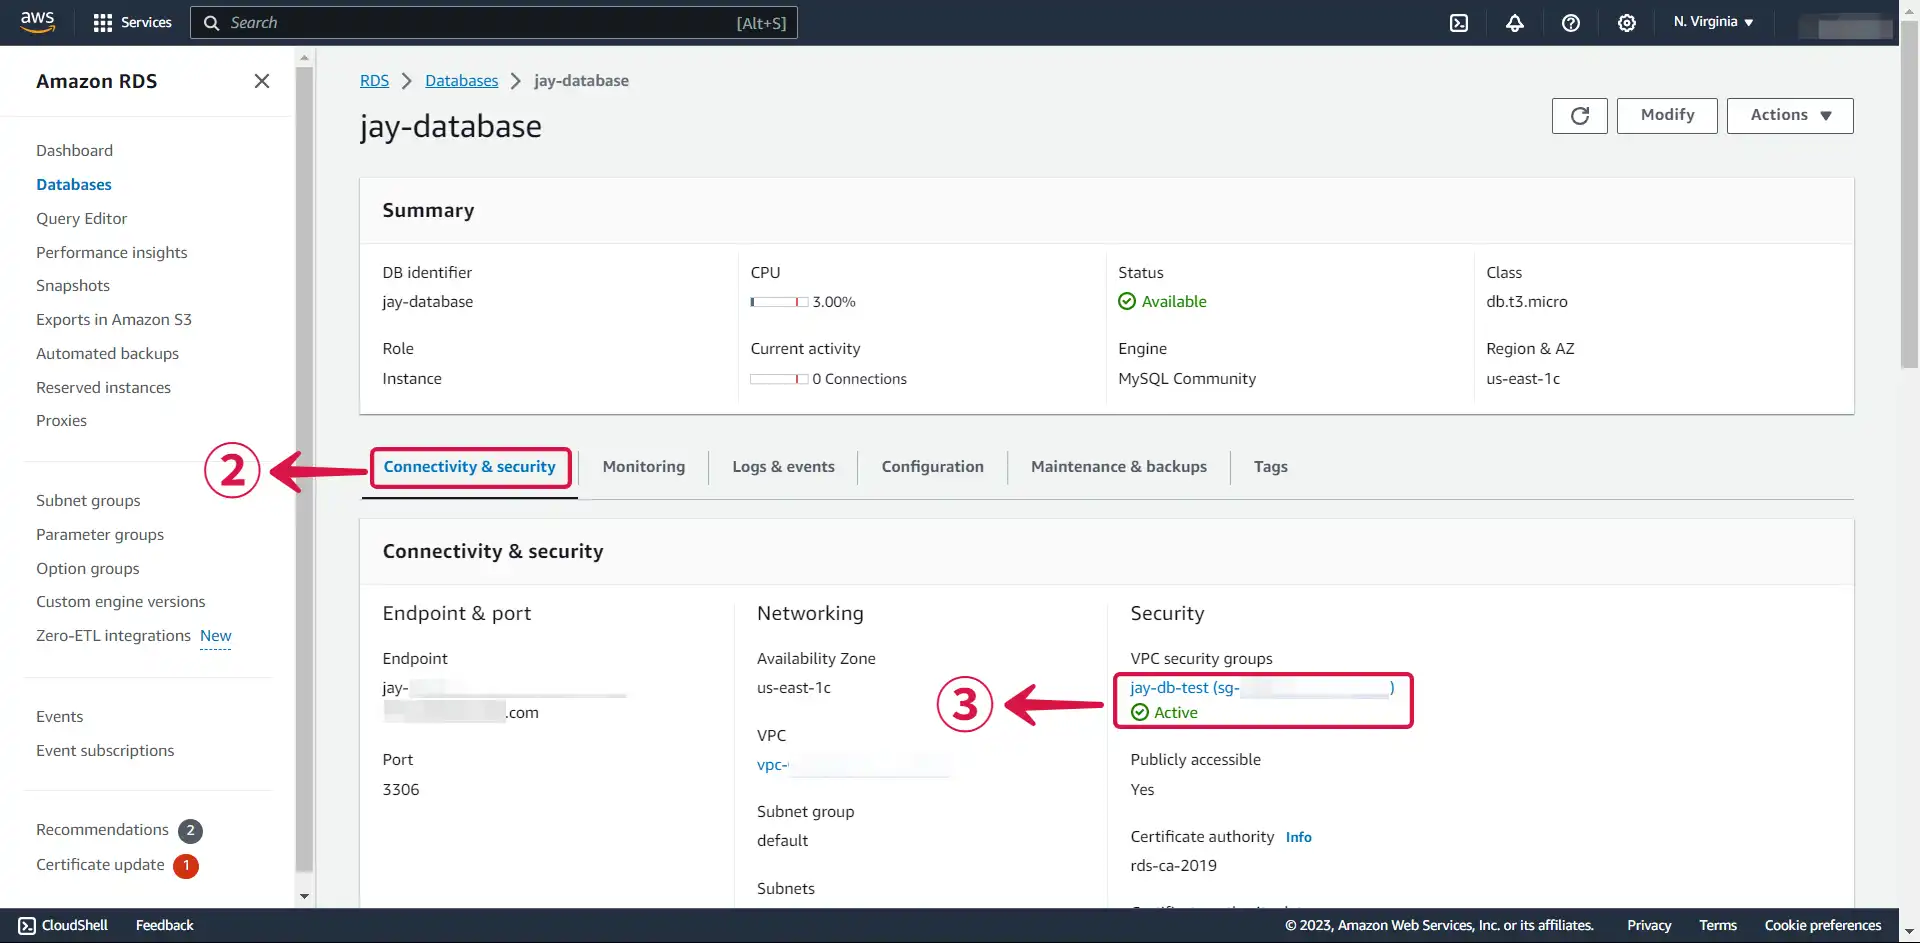
- Within the Inbound rules④ section, click the Edit inbound rules⑤ button.
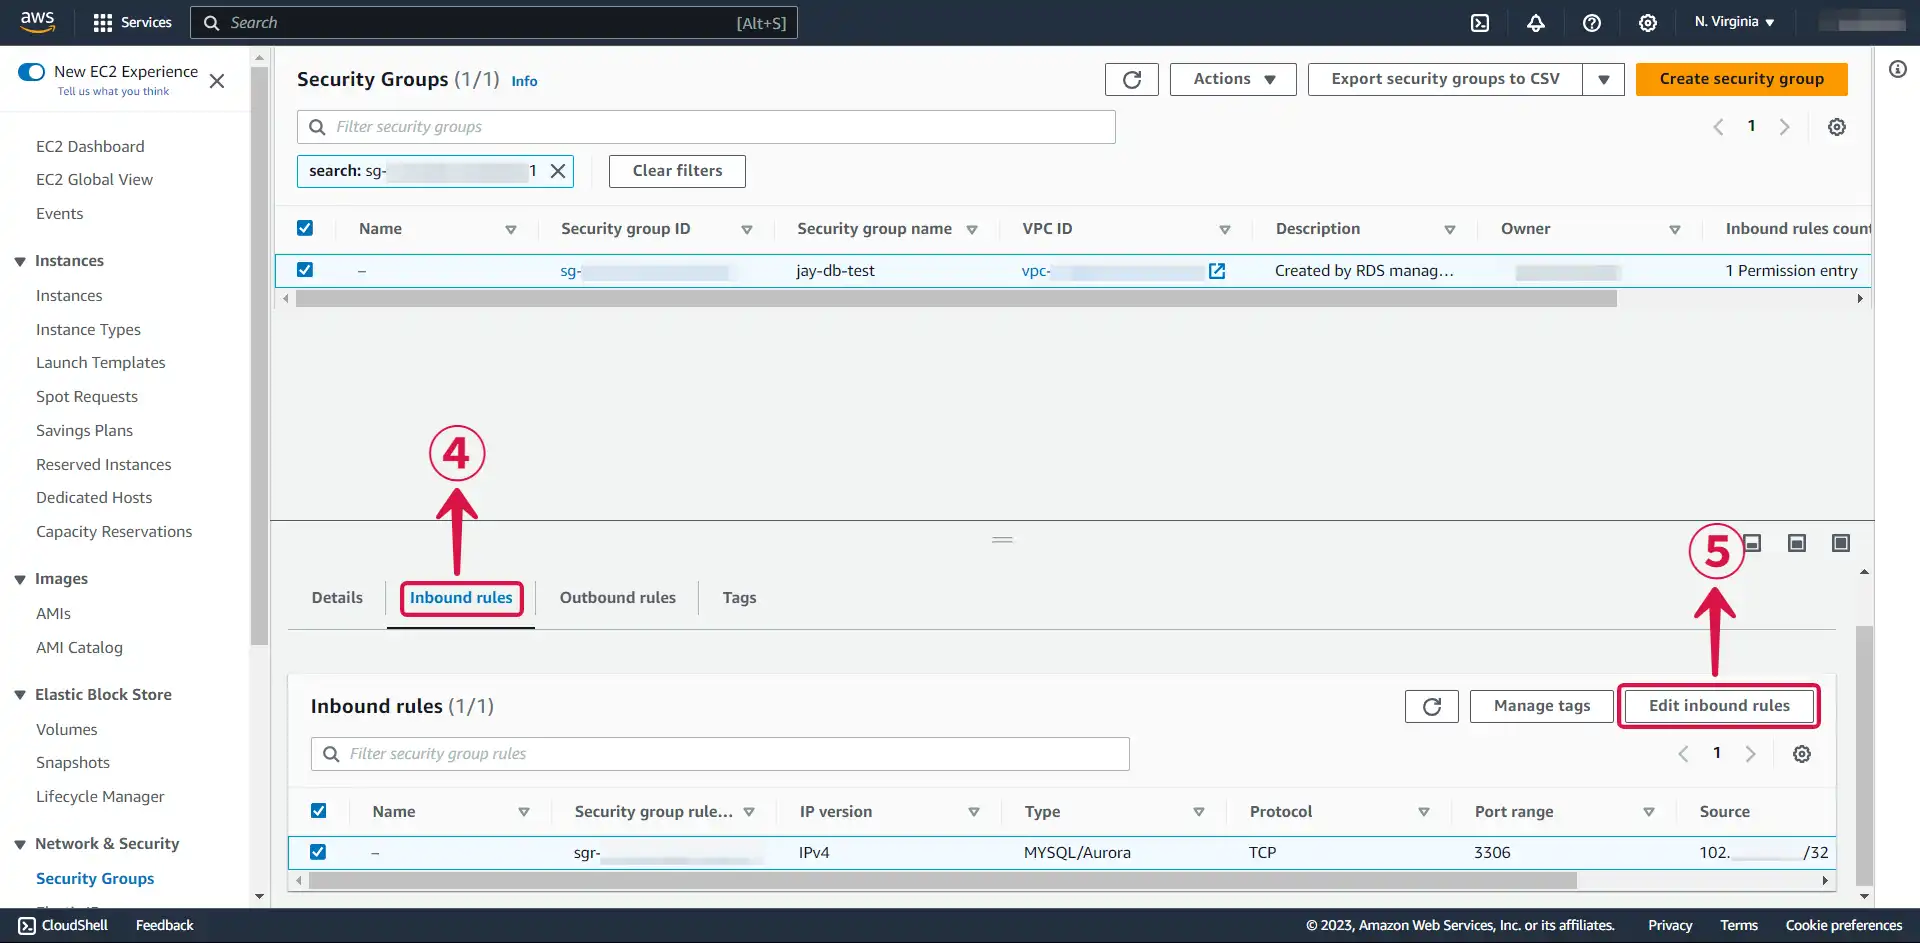
- Click on the source field⑥ and choose My IP⑦ to allow connectivity exclusively from your IP address, then click Save rules⑧ to save your settings.
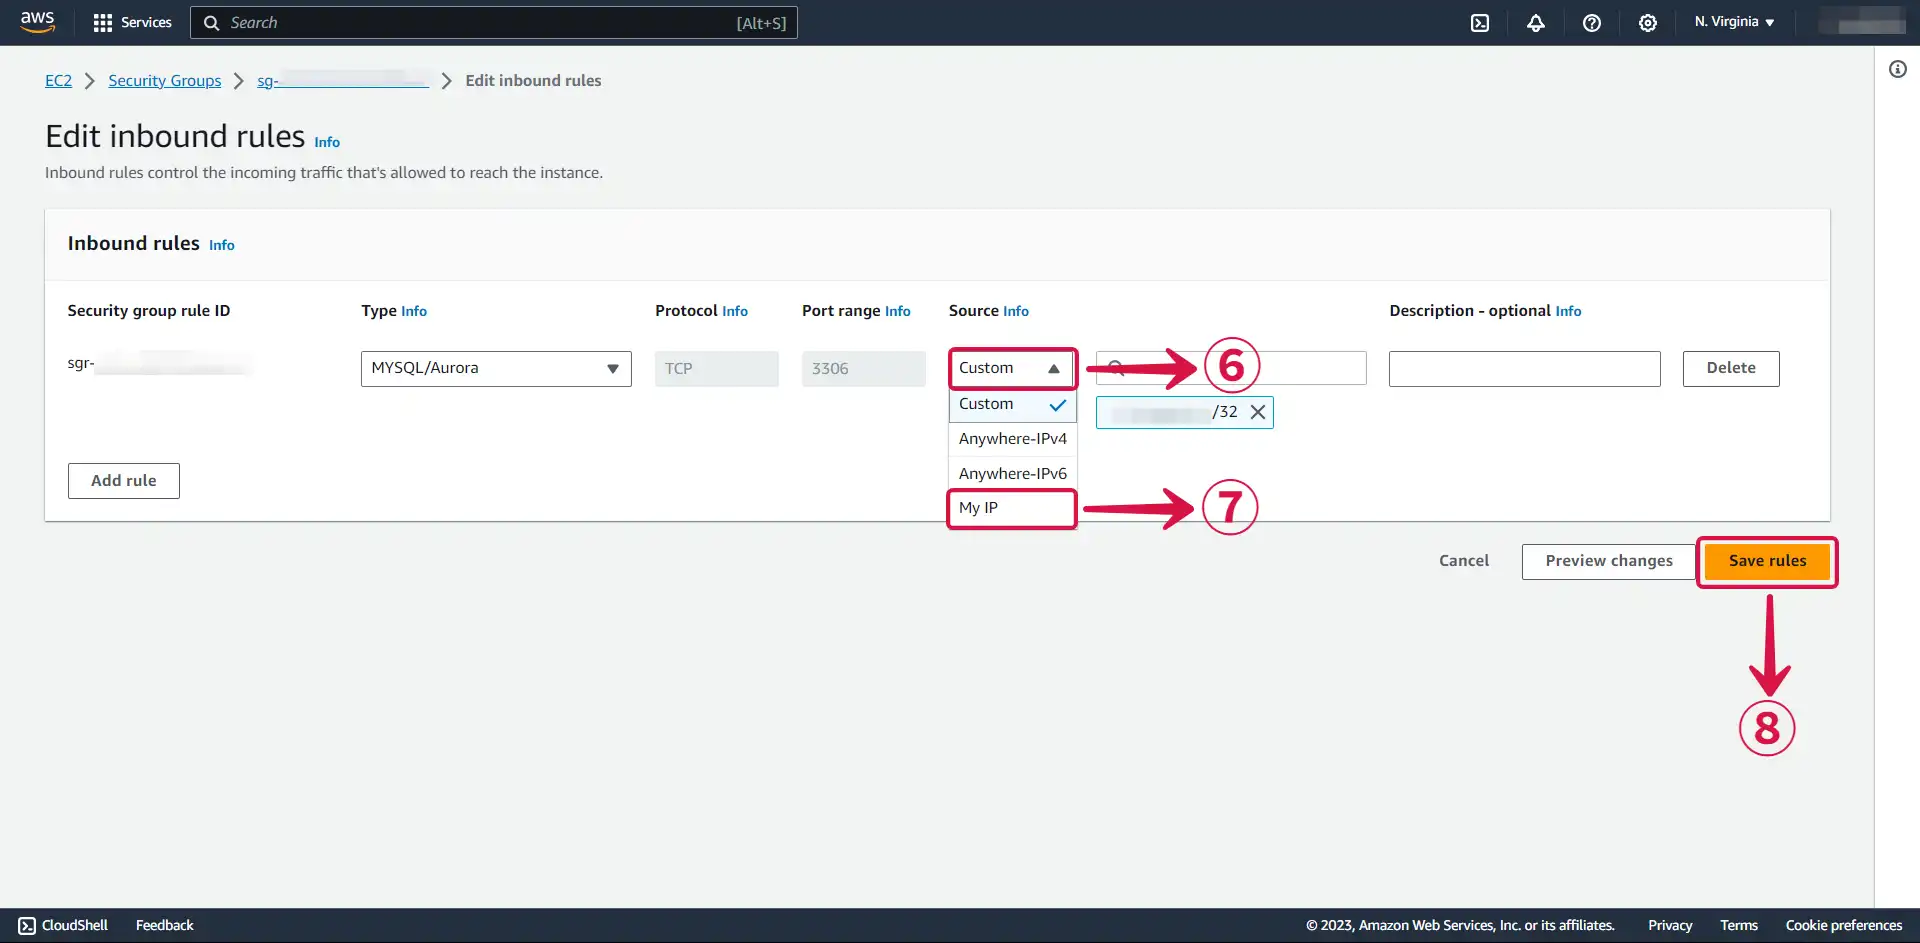
Alternatively, you can opt for Anywhere-IPv4 to enable traffic from any IPv4 address.
Now you can connect to your server and create a table.
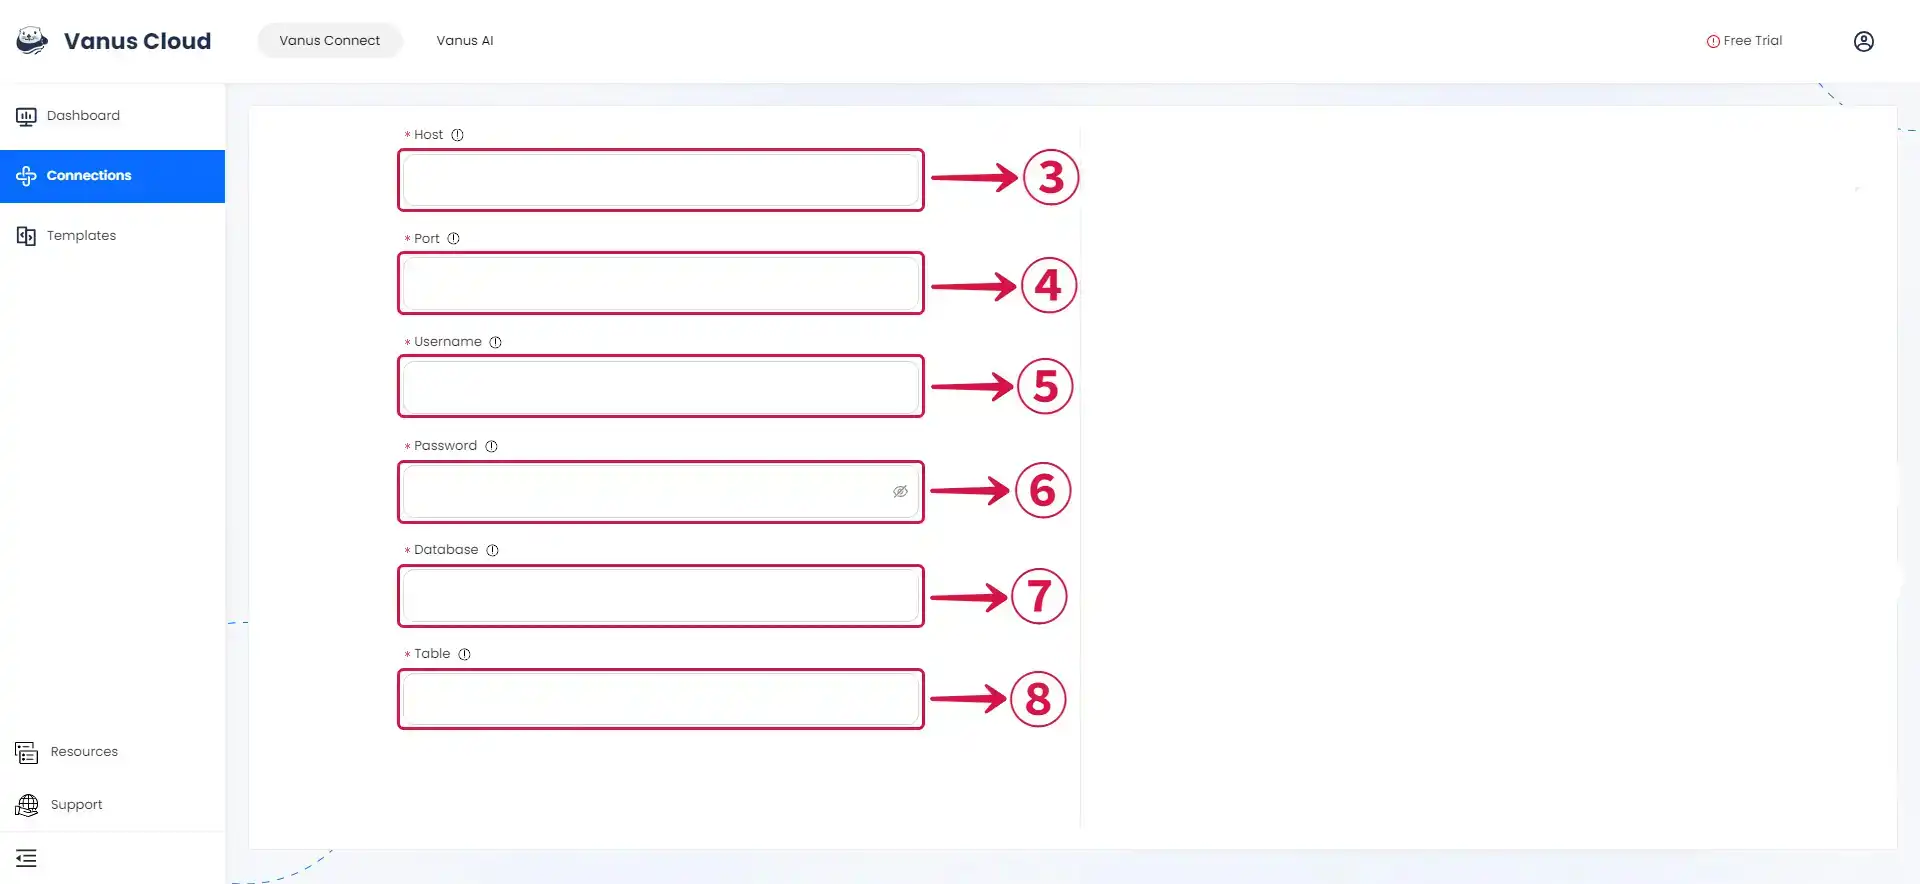
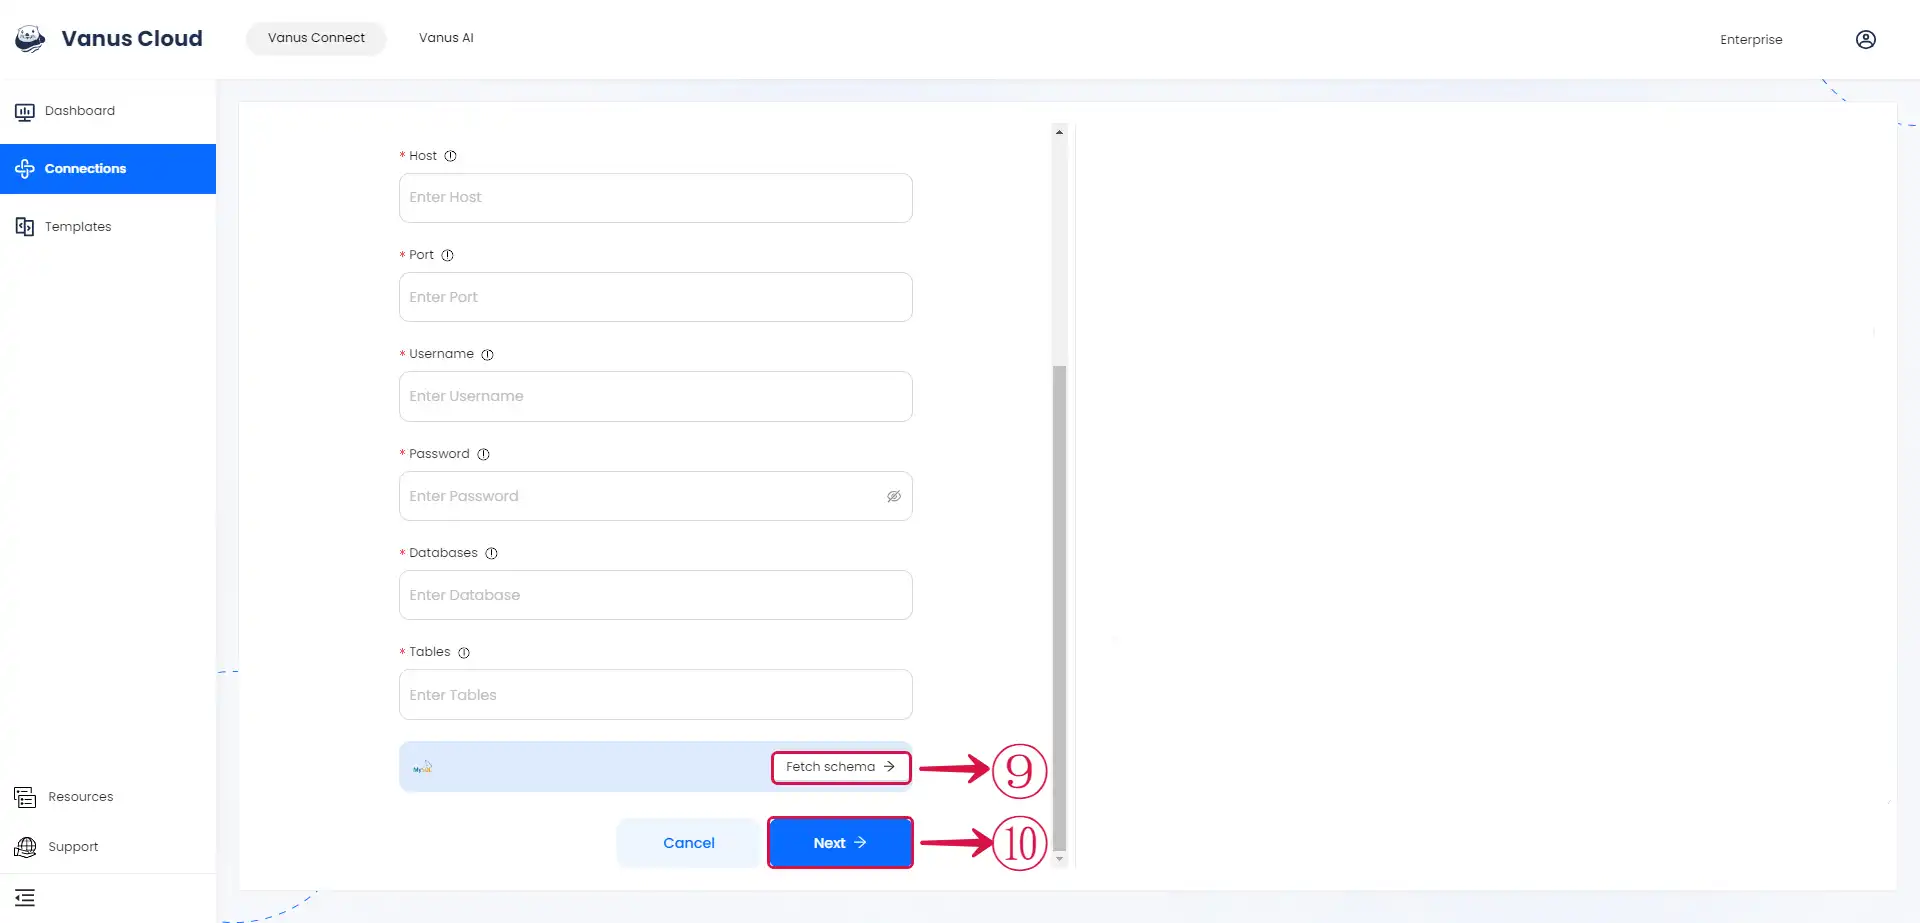
Step 3: Amazon RDS MySQL Connection Settings
To set up Amazon RDS MySQL Sink in Vanus Connect:
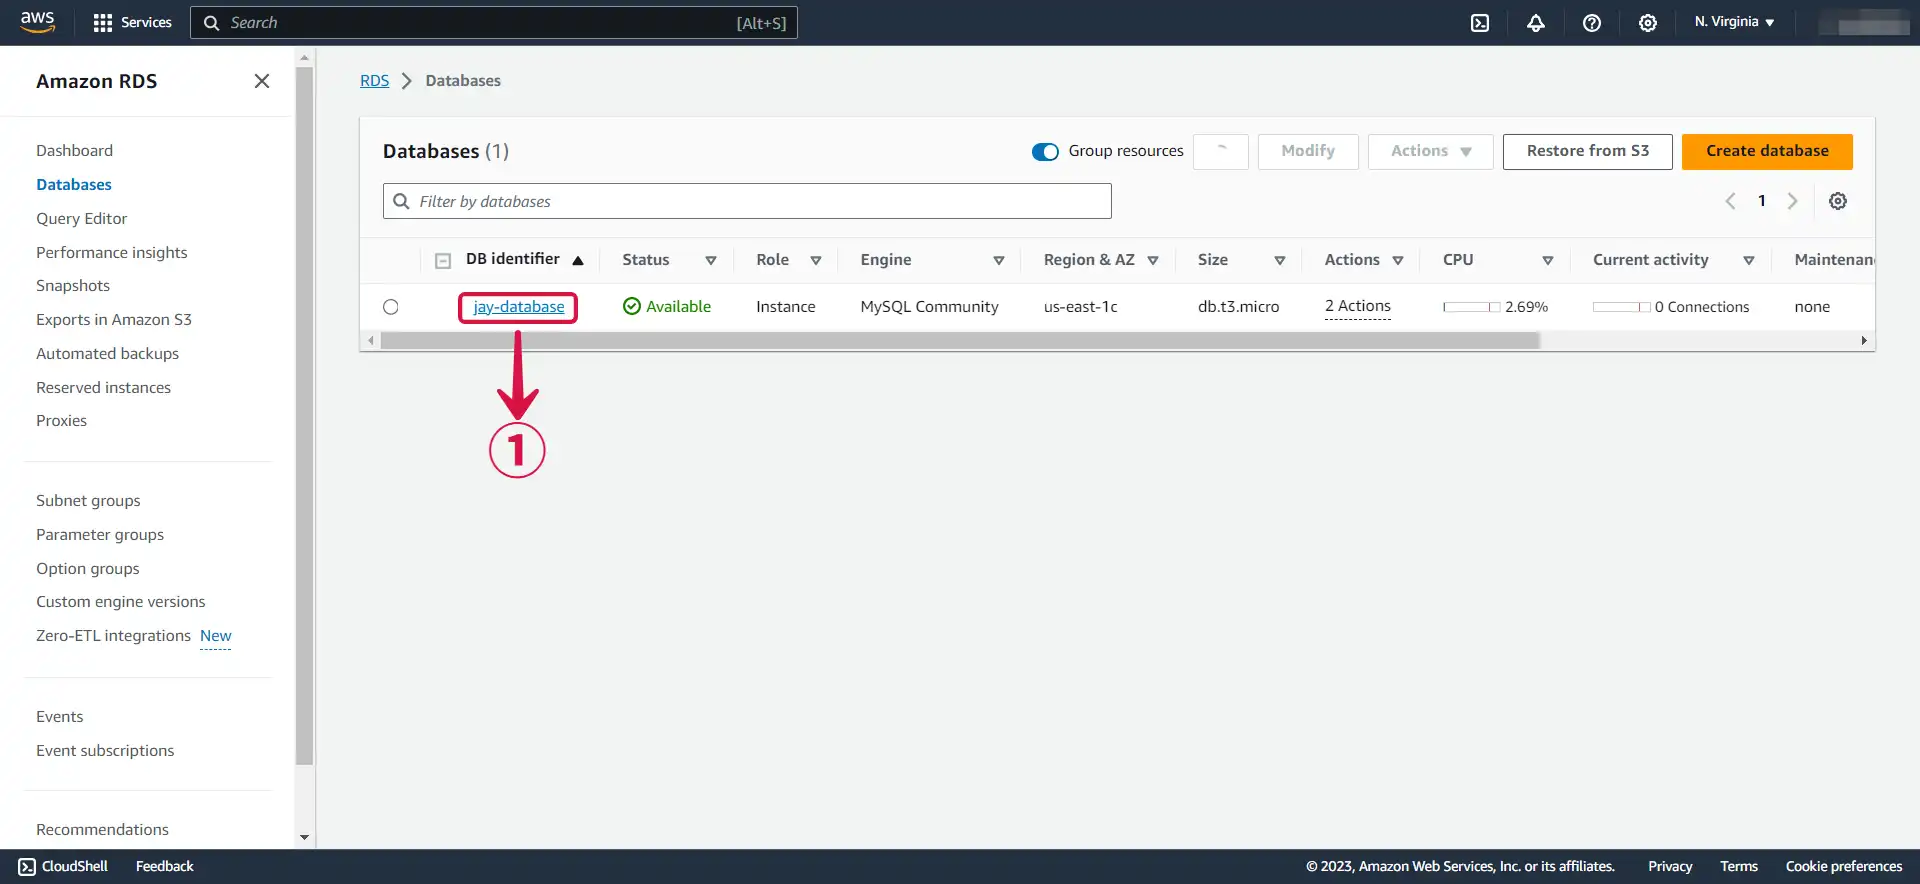
- Return to the RDS page and click on the database① you just created.
- Copy your Endpoint & port②.

- Navigate to the Vanus Cloud platform and fill in the following credentials.
- Host③: This is your RDS endpoint.
- Port④: Enter the port number on which your MySQL server is listening. The default port for MySQL is 3306.
- Username⑤: Master username selected during the database creation.
- Password⑥: User password.
- Database⑦: The initial database name.
- Table⑧: The name of the table you want your events to be sent to.
- Verify the Schema by clicking on Fetch schema⑨. Click Next⑩ to continue the configuration.
Learn more about Vanus and Vanus Connect in our documentation