Dynatrace
This guide contains information to set up a Dynatrace Source in Vanus Connect.
Introduction
Dynatrace is an advanced observability platform designed to provide comprehensive monitoring and performance management solutions for applications, websites, and IT infrastructures. It offers a wide range of features and capabilities to help organizations gain deep insights into their systems, optimize performance, and ensure exceptional user experiences.
The Dynatrace Source is a webhook server that enables you to establish an endpoint for receiving events from your Dynatrace application. To achieve this, it is necessary to establish a connection within Dynatrace.
Prerequisites
Before obtaining Dynatrace events, you must have:
- A Dynatrace account with administrative privileges.
- A Vanus Cloud account.
Getting Started
Create your connection in Vanus Connect
To obtain all Dynatrace events in Vanus Connect, follow these steps:
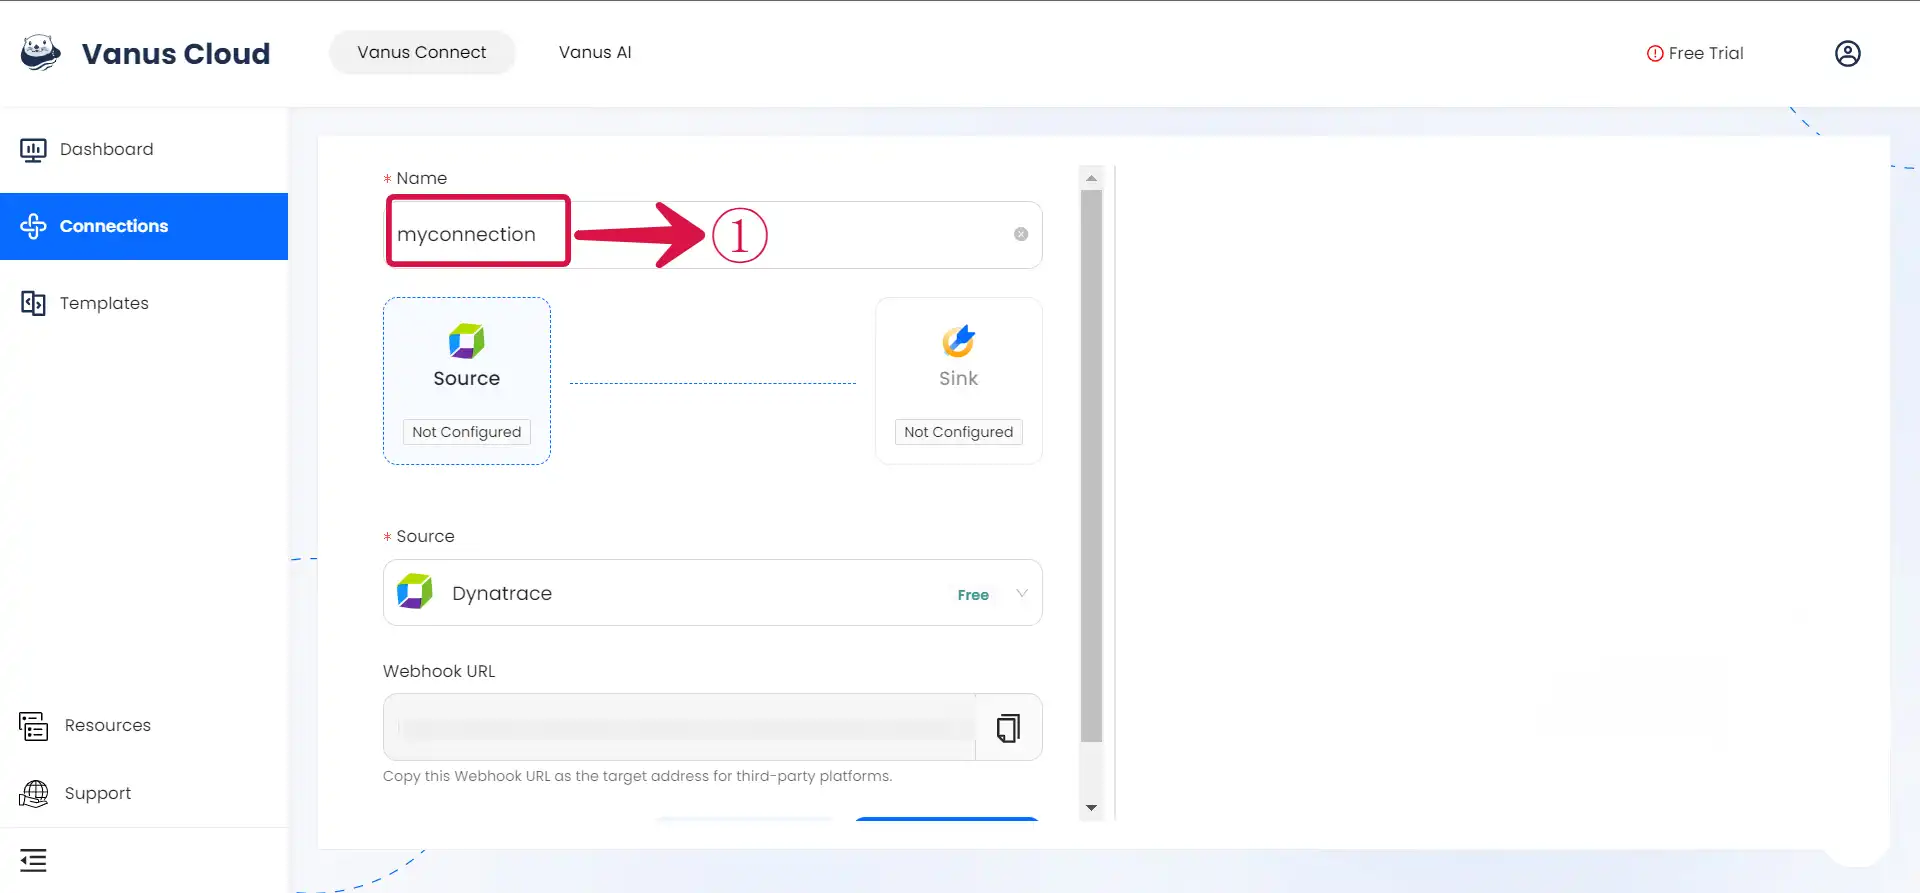
- Write a Name① for your connection in Vanus Connect.
Configuring Dynatrace to Send Webhook Events
Step 1: Configure webhook
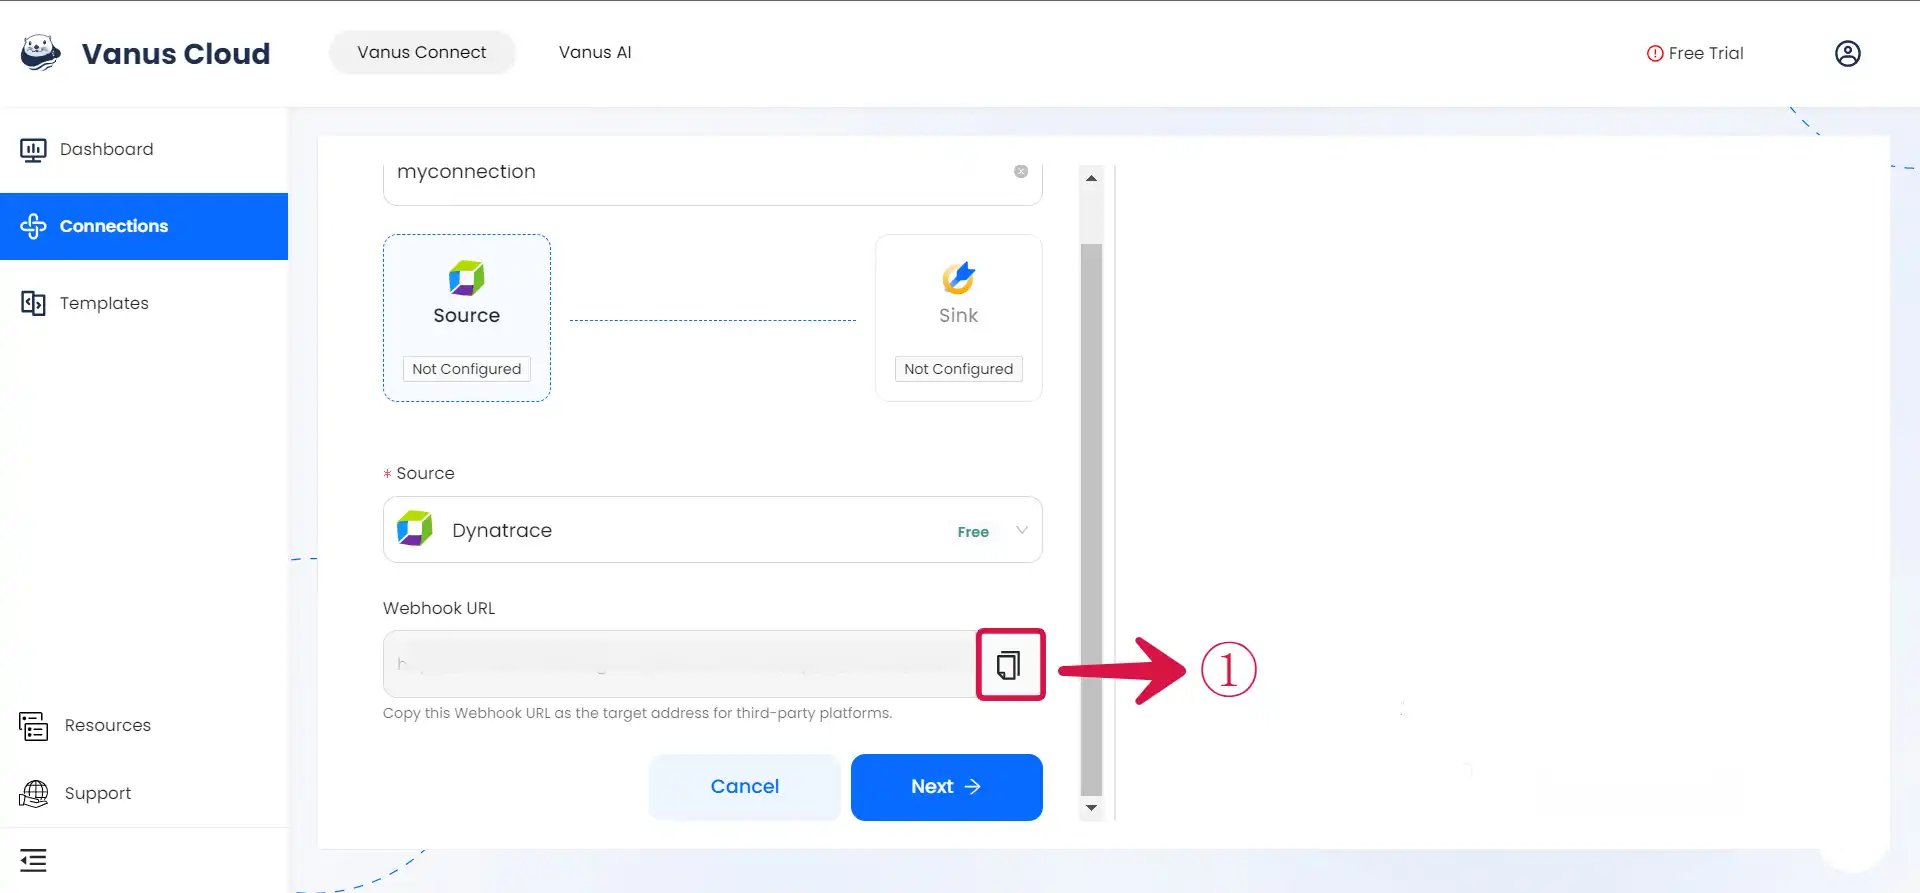
- Click the copy icon① to copy the webhook url.
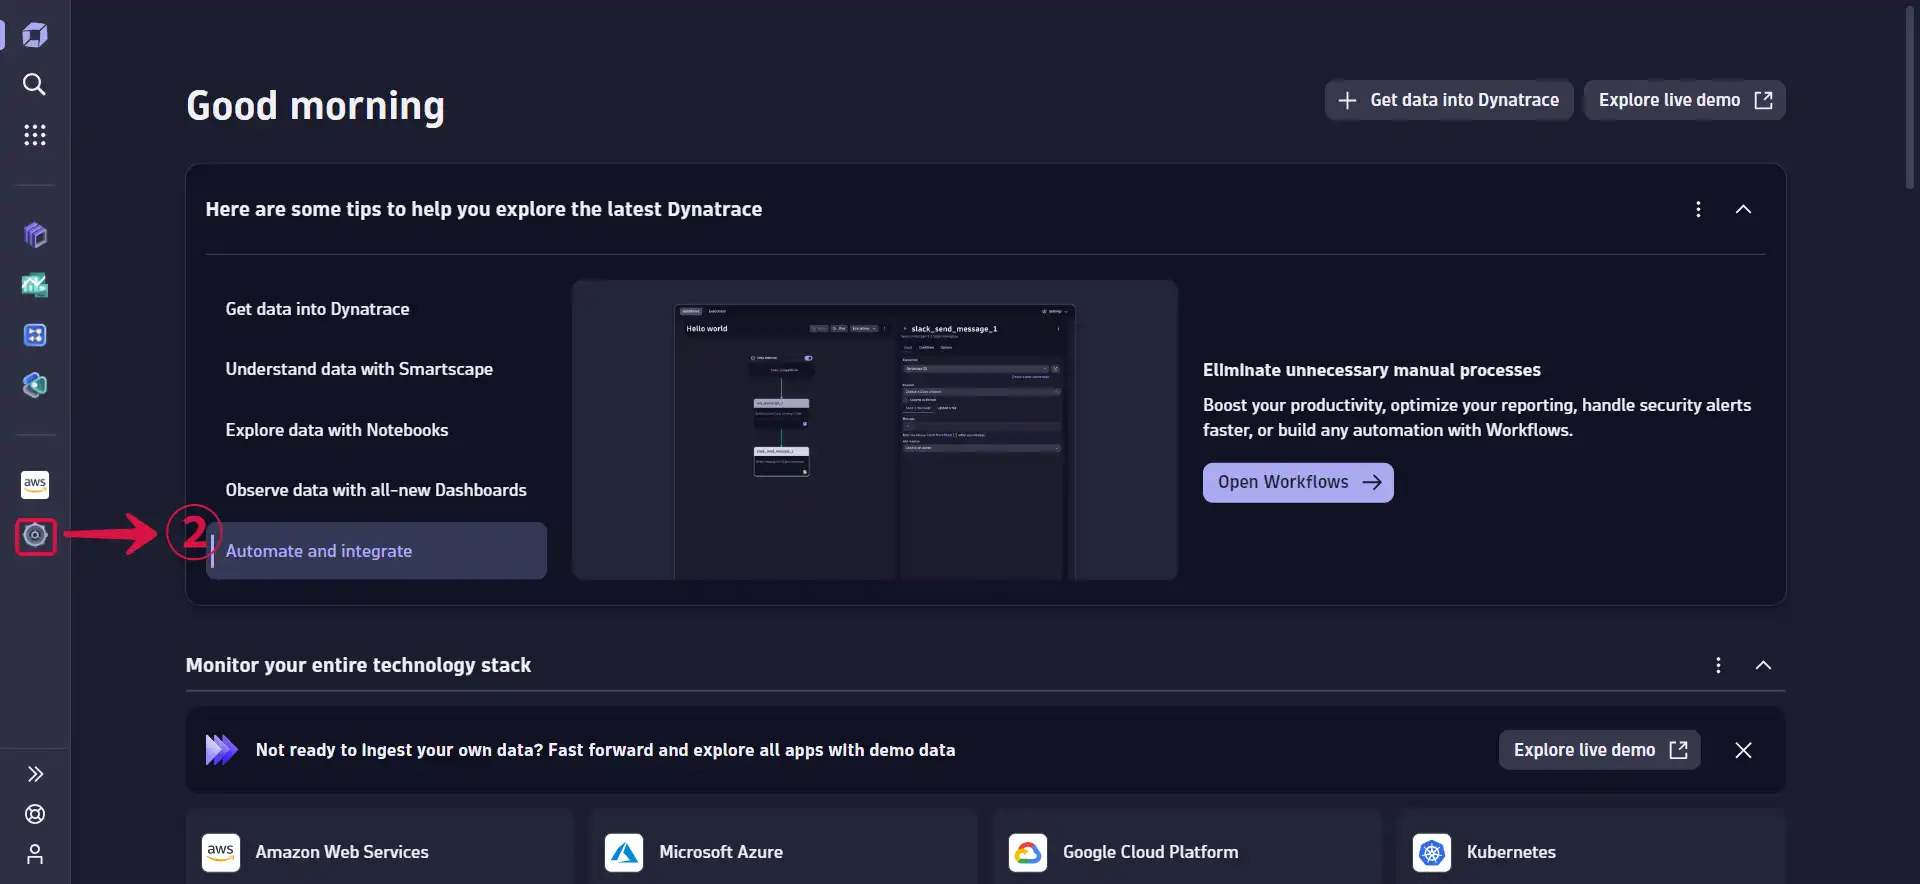
Log in to your Dynatrace account.
Navigate to the Settings page by first clicking on the gear icon②.
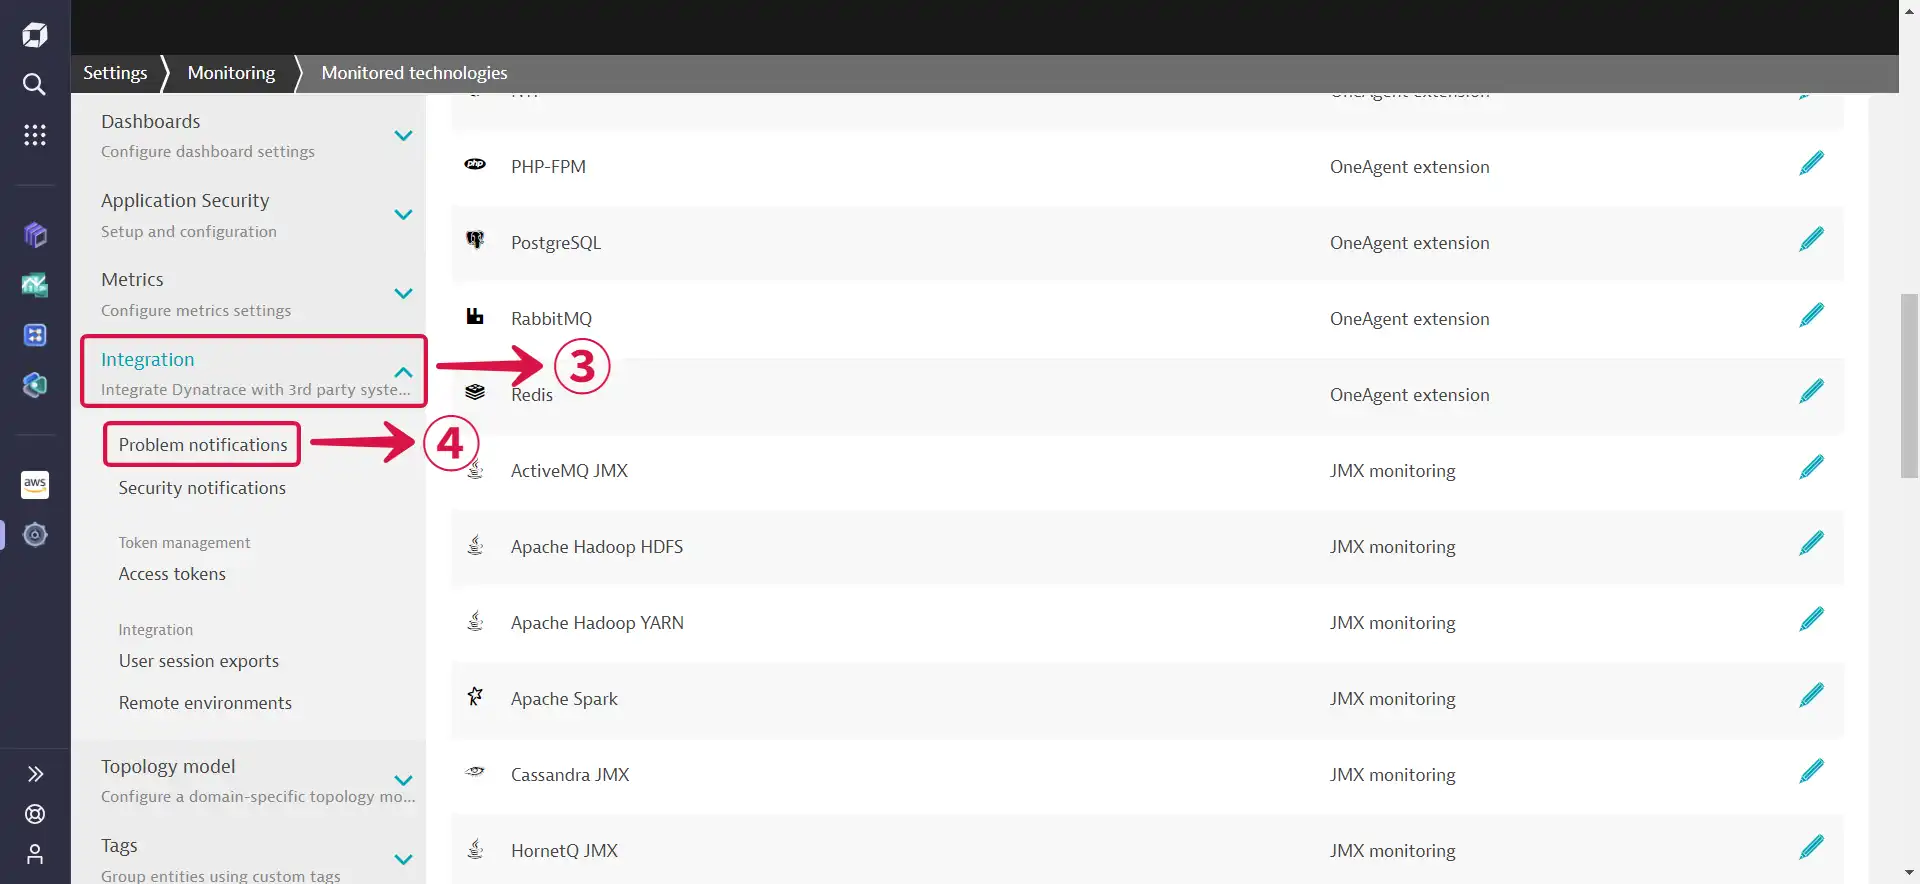
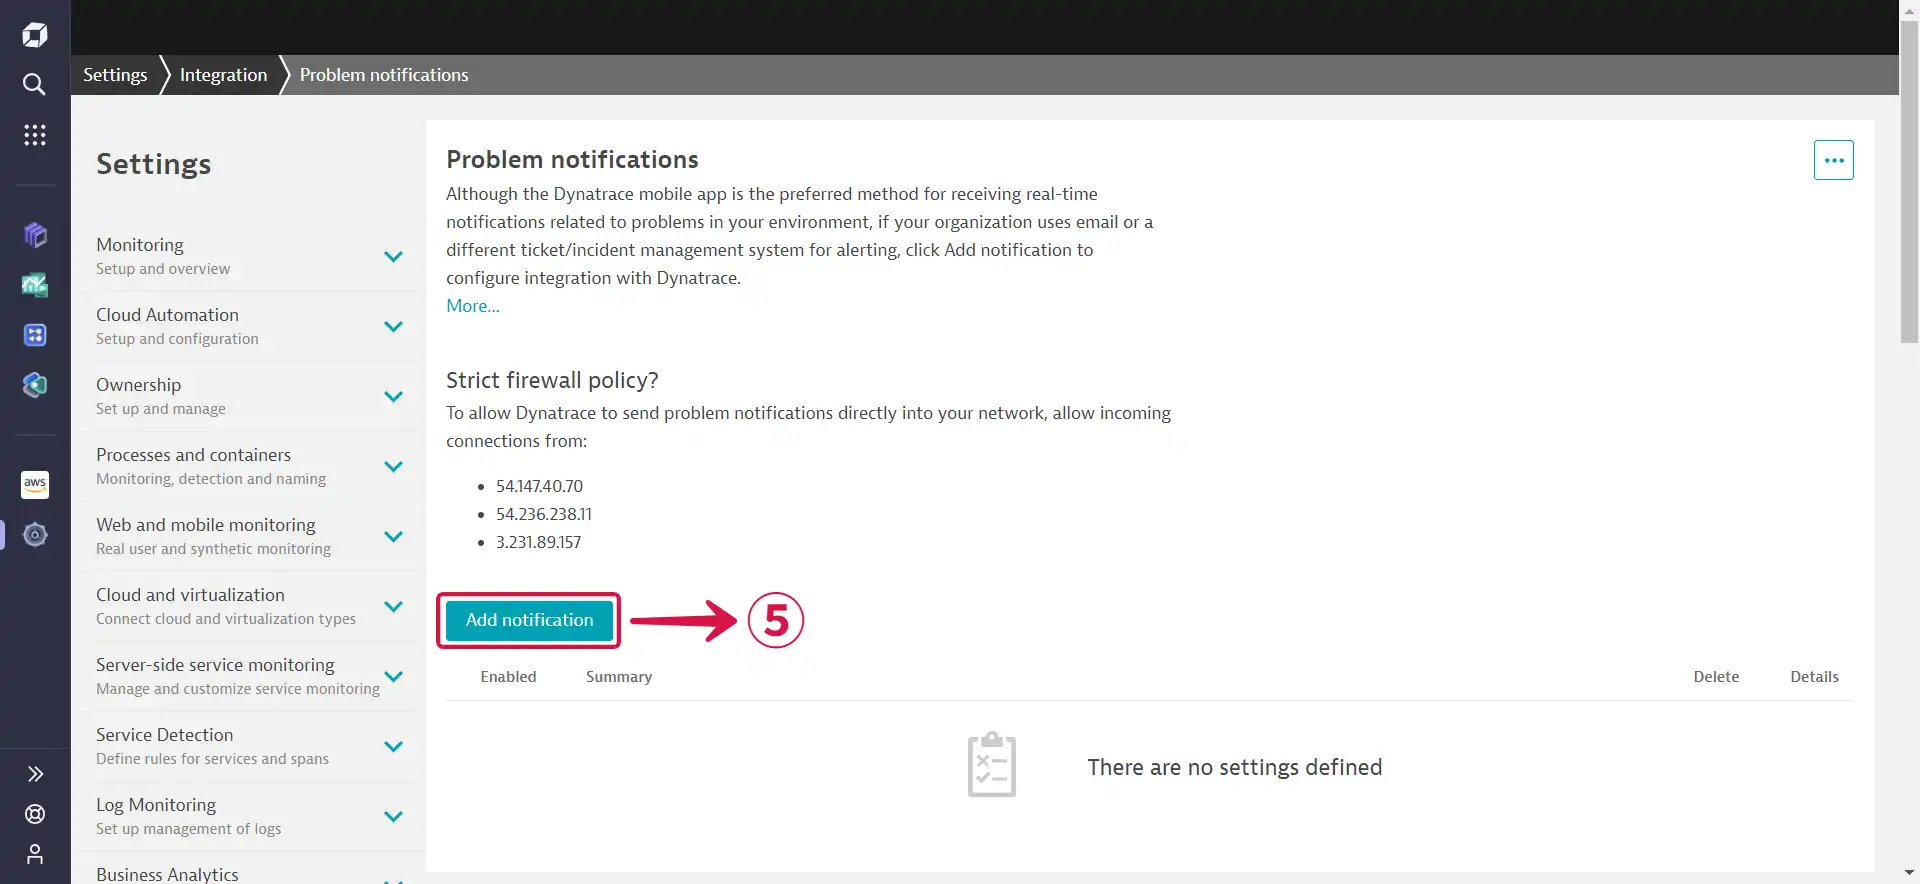
- Scroll downwards and click on Integration③ then select Problem notifications④.
- Click on Add notification⑤.
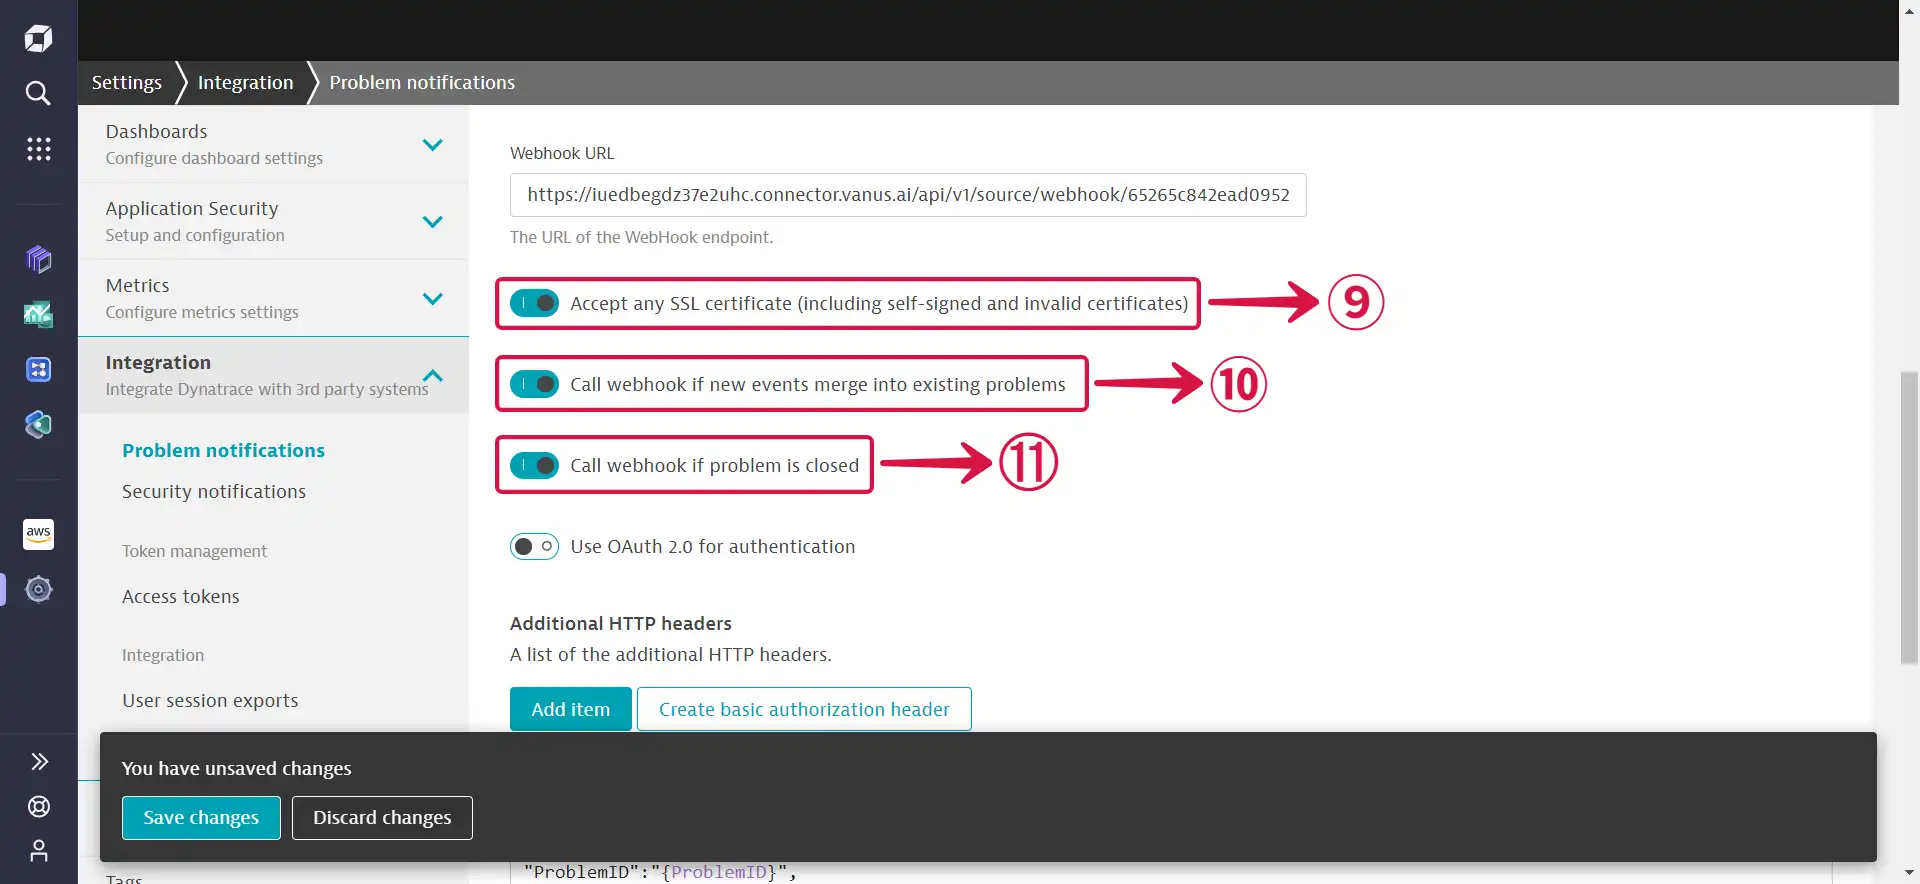
- Select Custom Integration⑥ as the Notification type, choose your preferred Display name⑦, and paste the Webhook URL you copied previously into the Webhook URL⑧ field.

- Toggle the buttons as shown below to Accept any SSL certificate (including self-signed and valid certificates)⑨, Call webhook if new events merge into existing problems⑩ and Call webhook if problem is closed⑪.
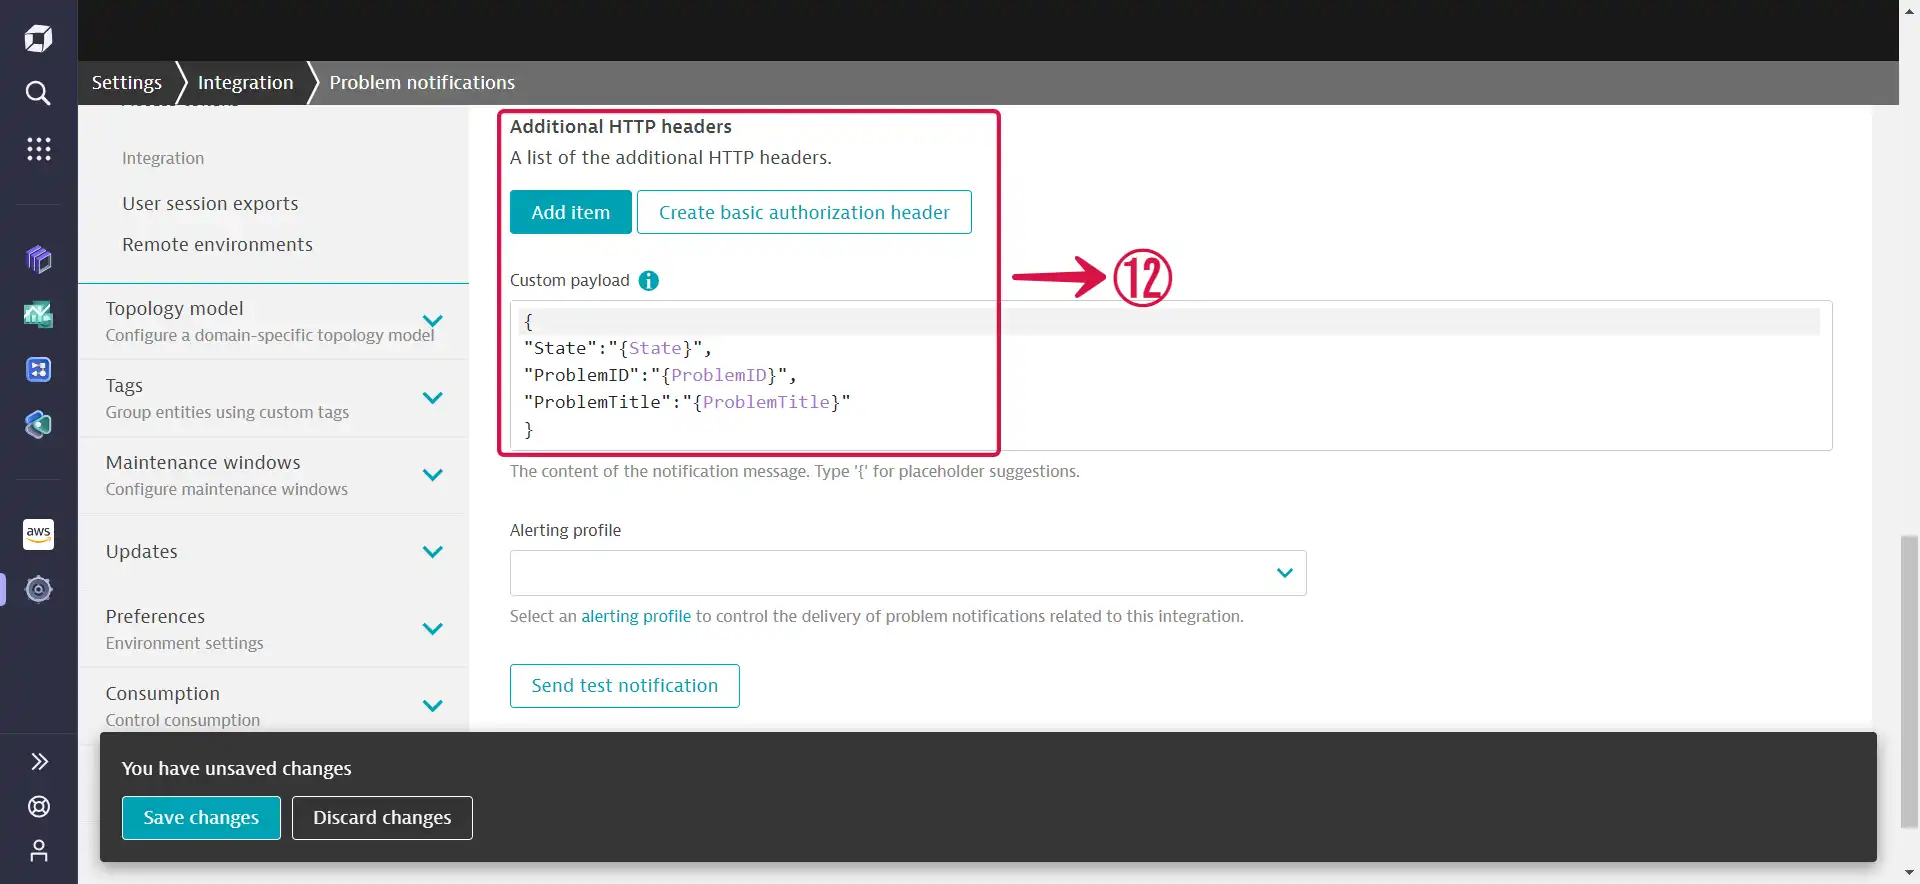
- Leave the Additional HTTP headers⑫ section just the way it is.
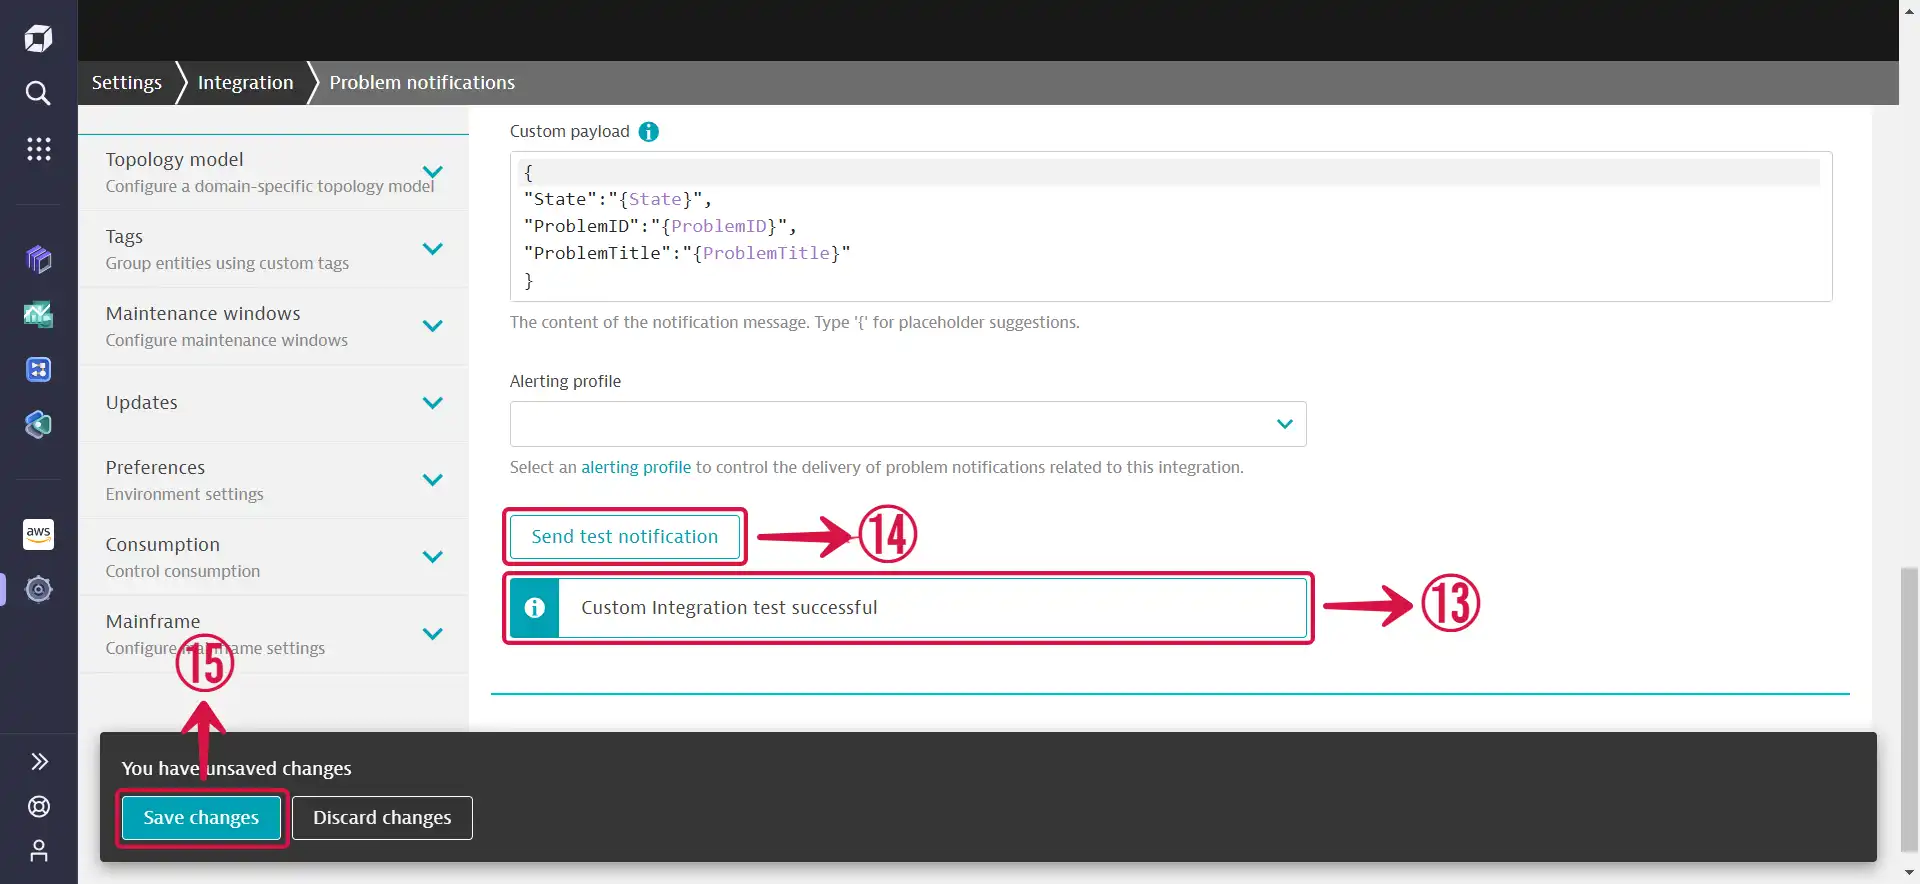
- If the
Custom Integration test successful⑬ message appears after pressing the Send test notification⑭ button, continue by clicking the Save changes⑮ button to save the adjustments.
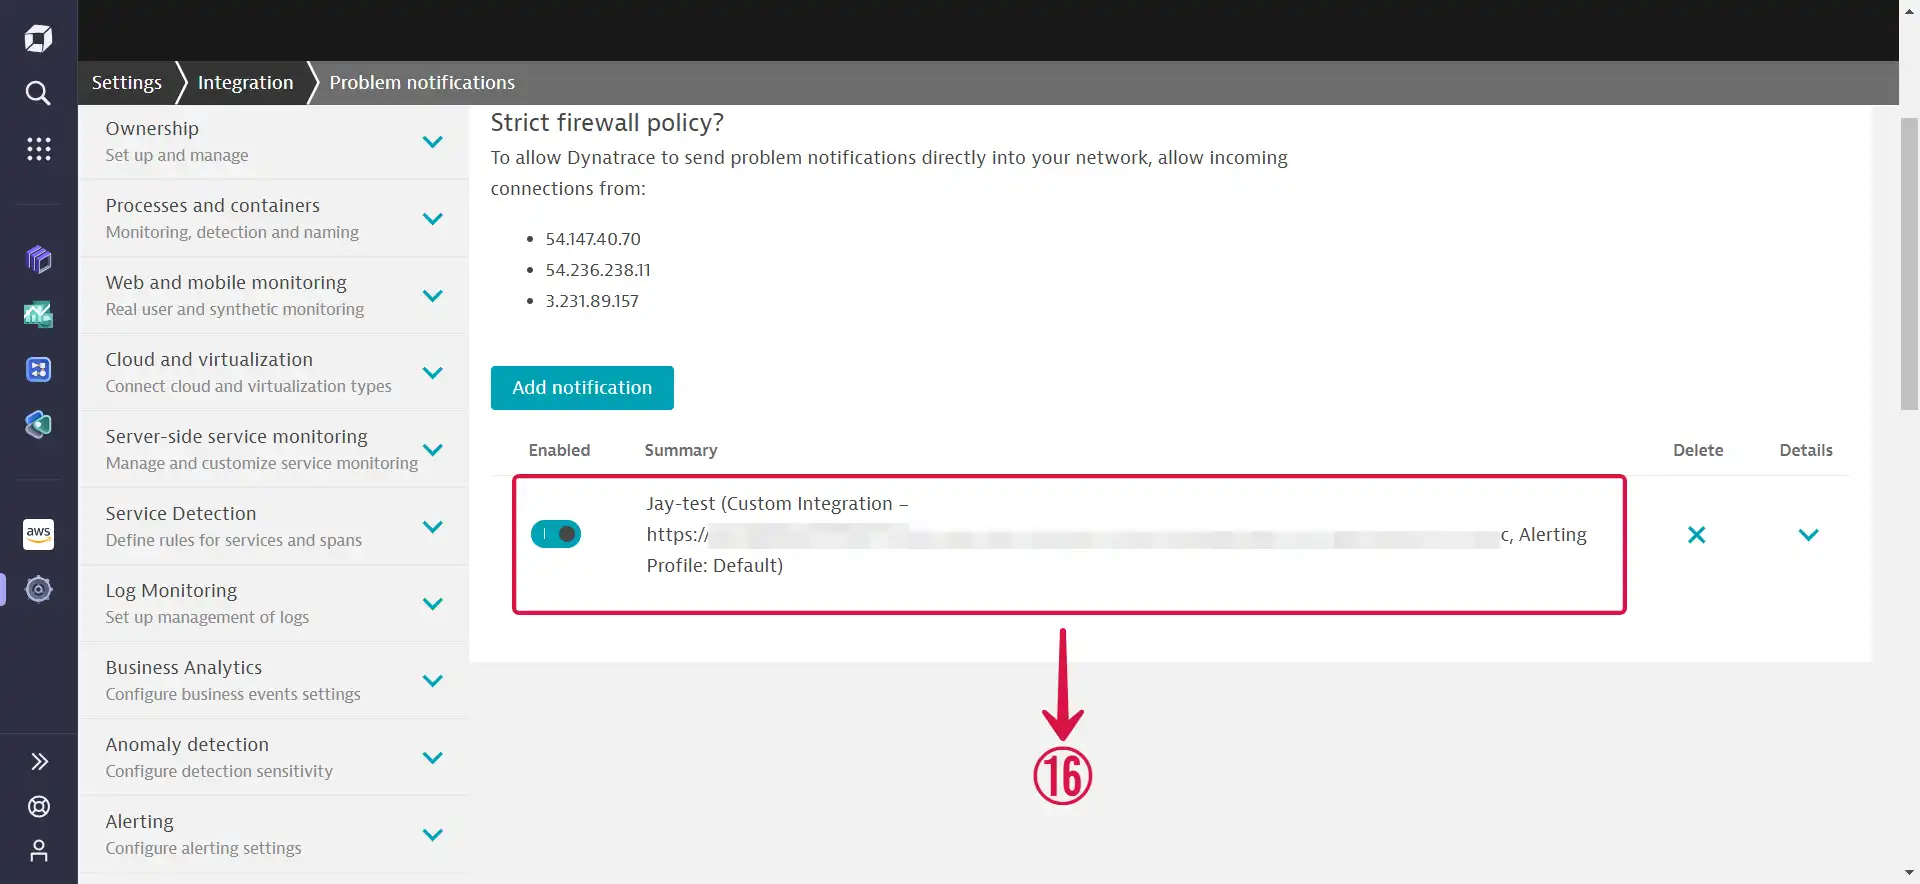
- If successful, you should see this⑯.
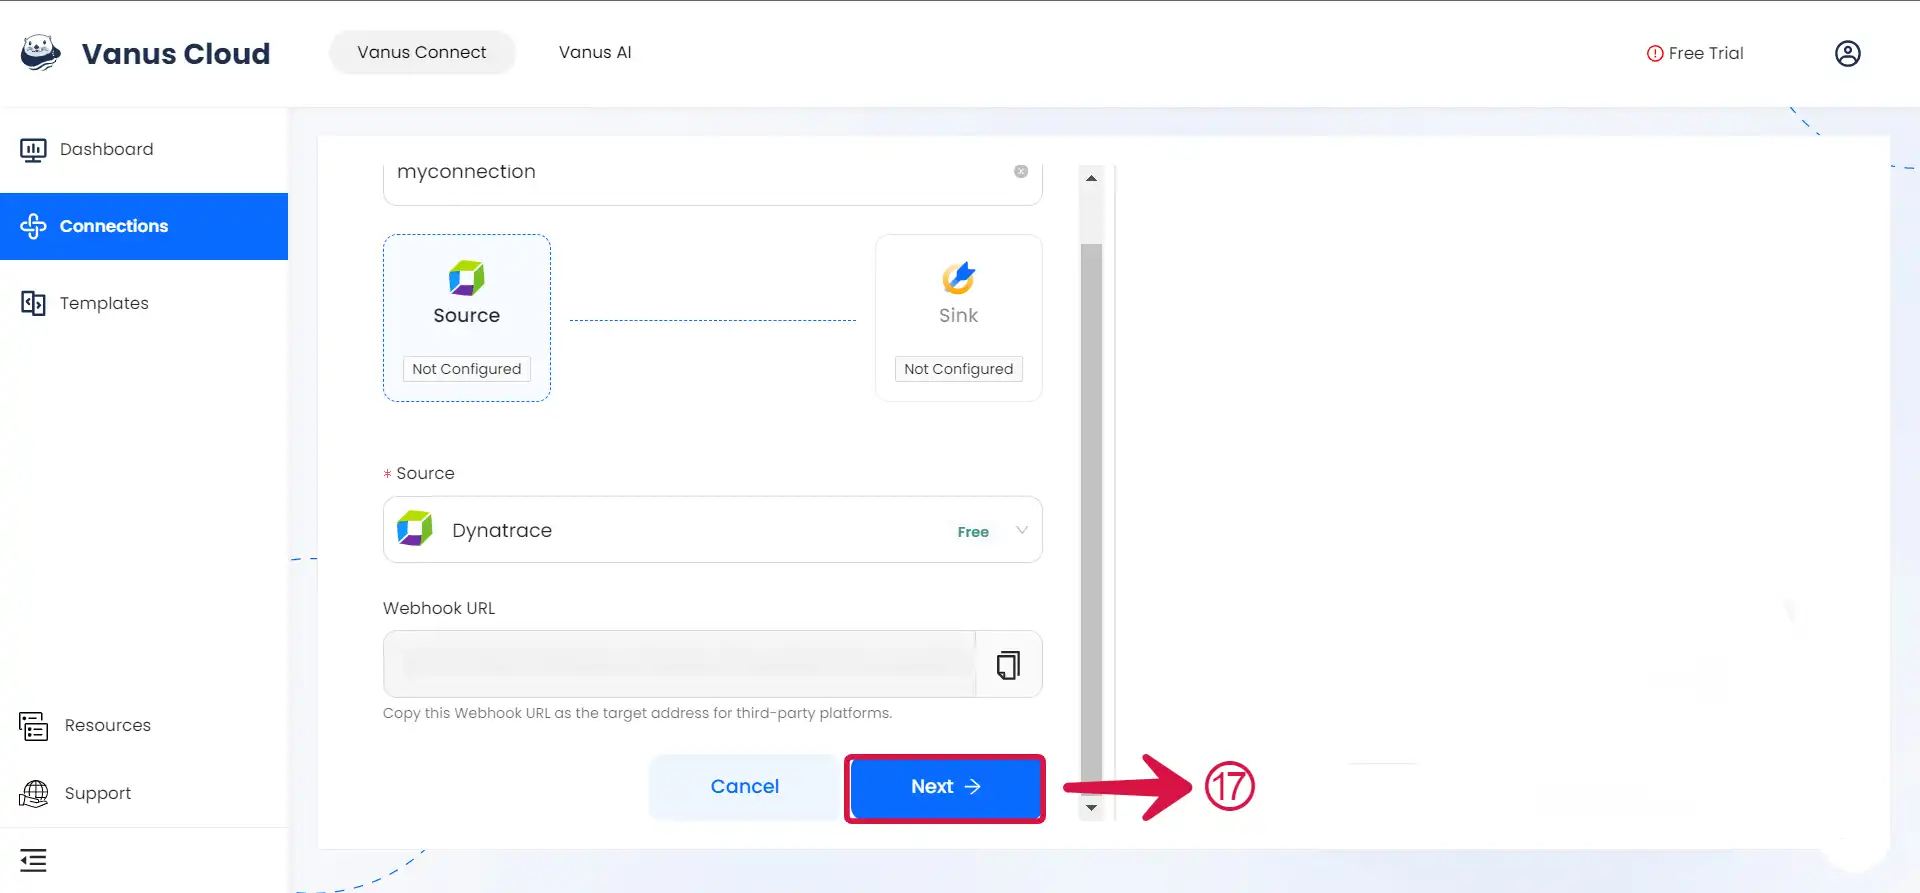
- Go to Vanus Connect and click Next⑰ to continue the configuration.
Learn more about Vanus and Vanus Connect in our documentation.