Amazon S3
This guide contains information to set up a S3 Source in Vanus Connect.
Introduction
S3 is Amazon's cloud storage service that offers scalable and durable storage for various data types. It provides easy management and retrieval of data from anywhere with high availability and low latency.
Vanus Connect provides the Amazon S3 Source connector, which retrieves S3 events from a designated bucket and converts them into CloudEvents. With this connector, users can also set up an SQS queue to receive S3 event notifications. If a queue isn't specified, the connector will create one automatically.
Prerequisites
Before obtaining S3 events, you must have:
- An Amazon Web Services account.
- A Vanus Cloud Account.
Getting Started
Step 1: Create a new AWS user
Log in to the AWS Management Console using your root account credentials.
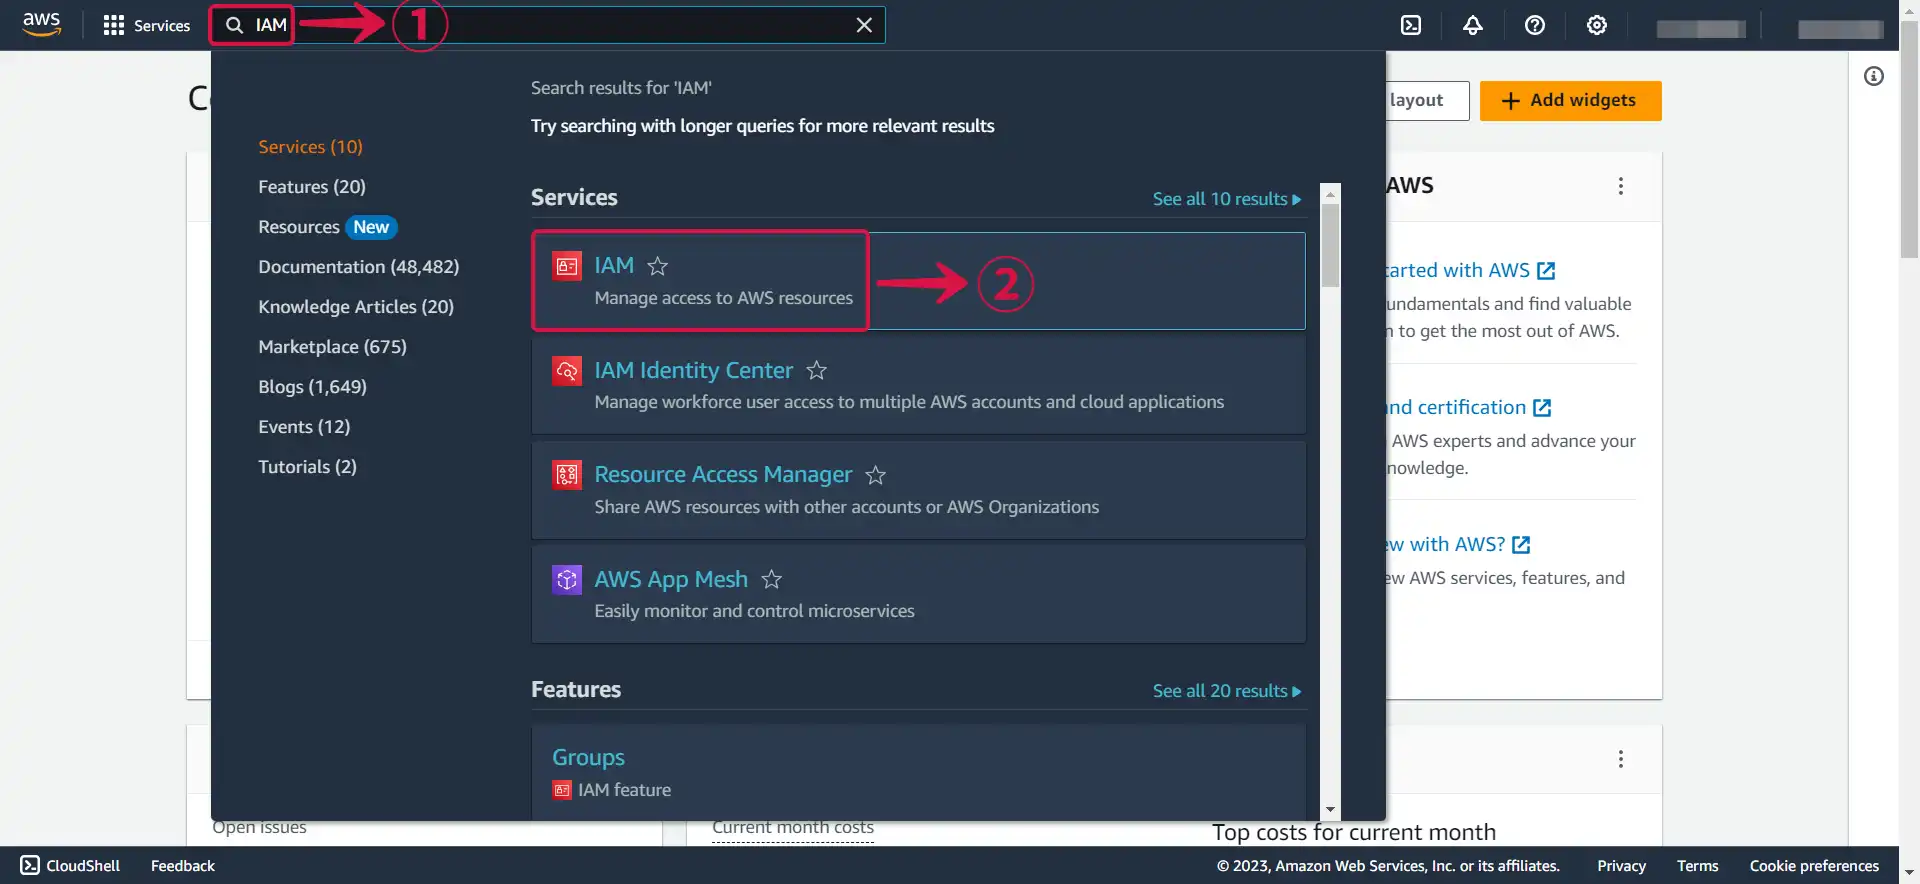
Navigate to the IAM service by searching for IAM① and click the IAM② service.
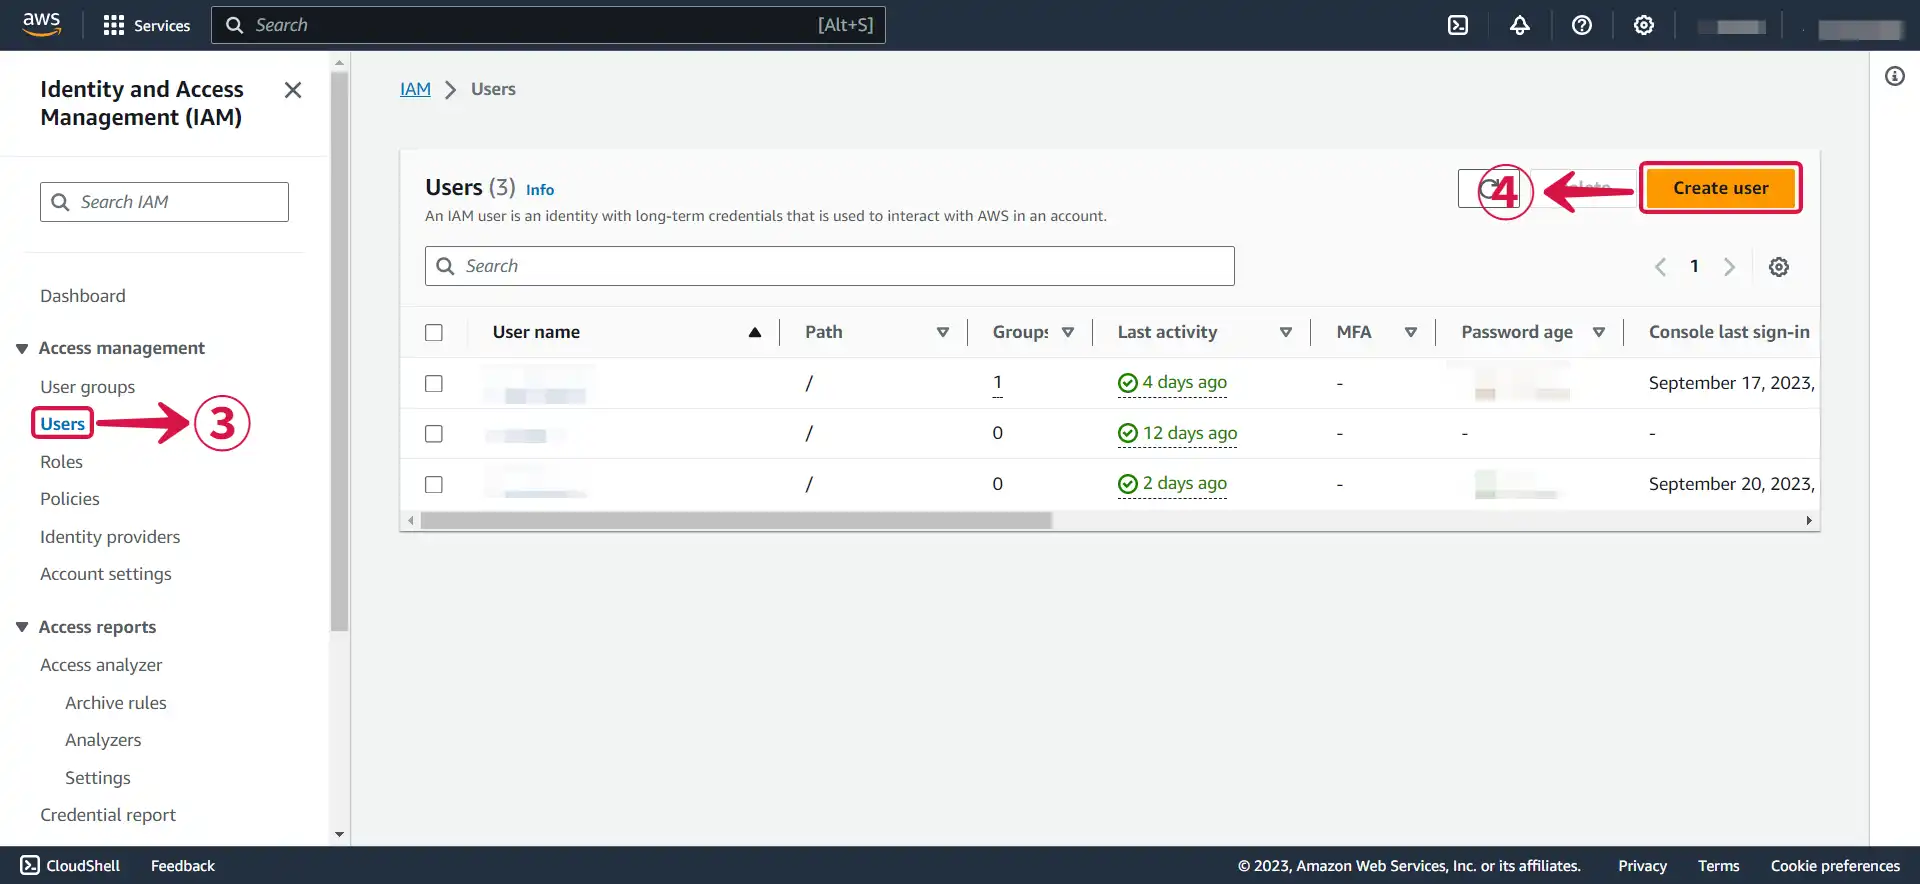
- Click on the Users③ tab in the left navigation menu, and then click the Create user④ button.
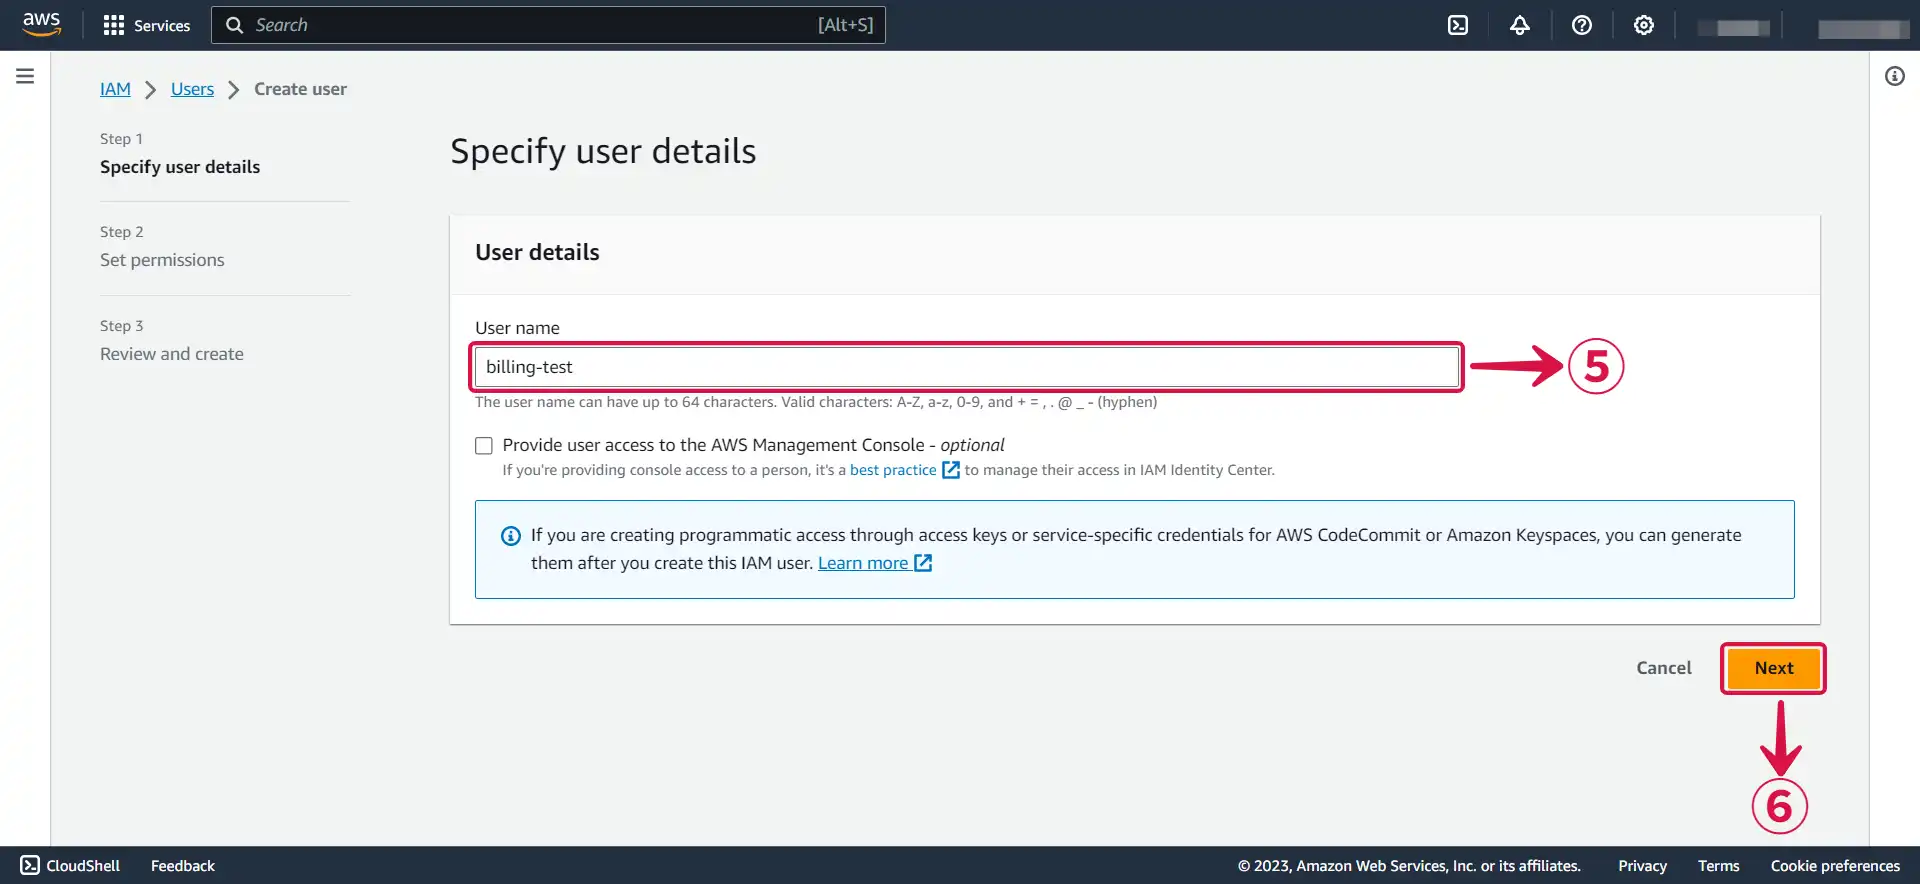
- Write your User name⑤ and click Next⑥.
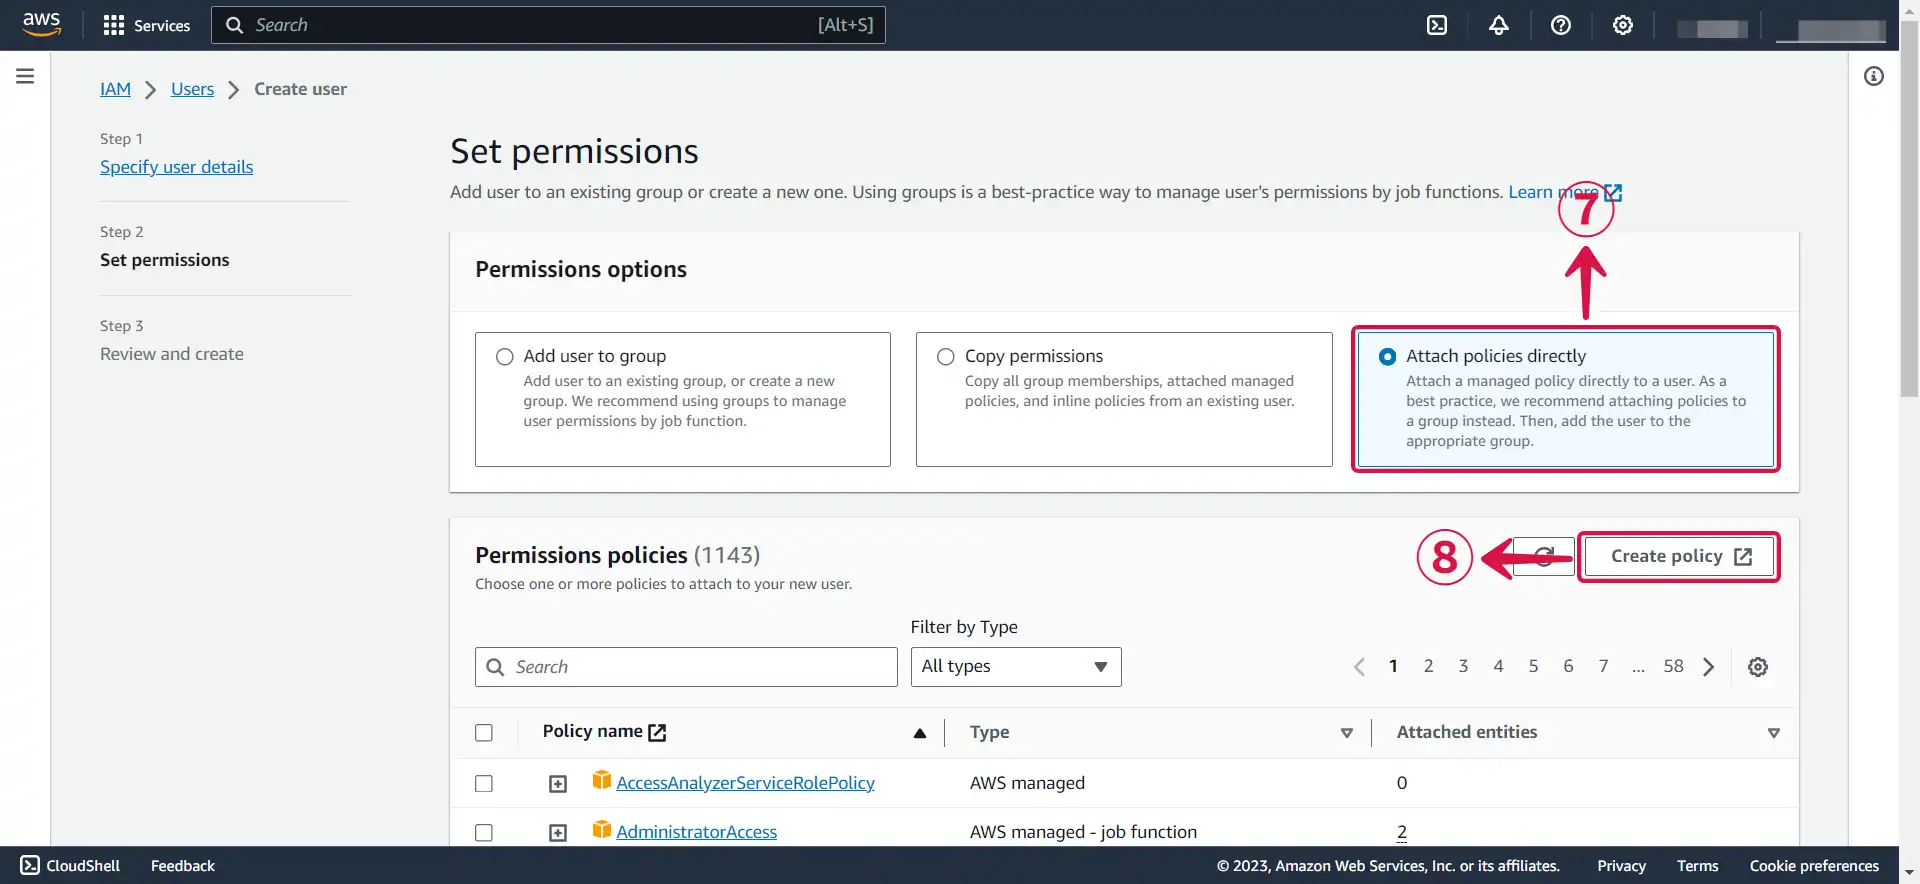
- Select Attach policies directly⑦, and click on Create policy⑧.
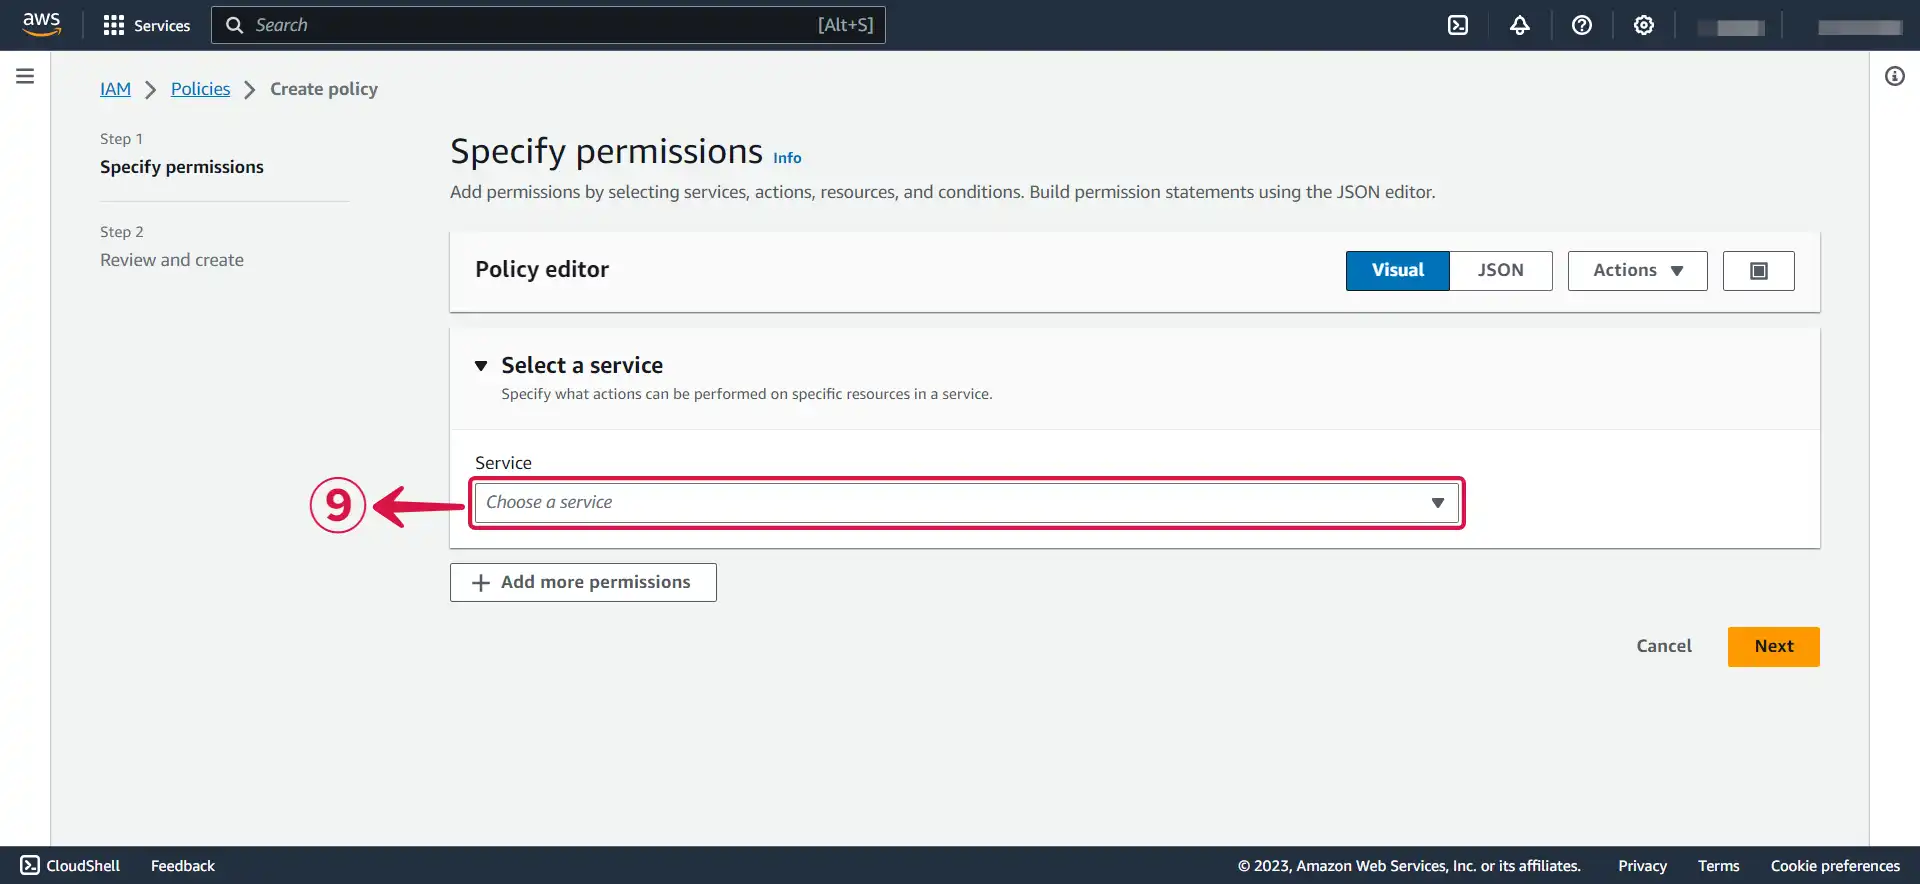
- Click on Choose a service⑨ to open the dropdown menu.
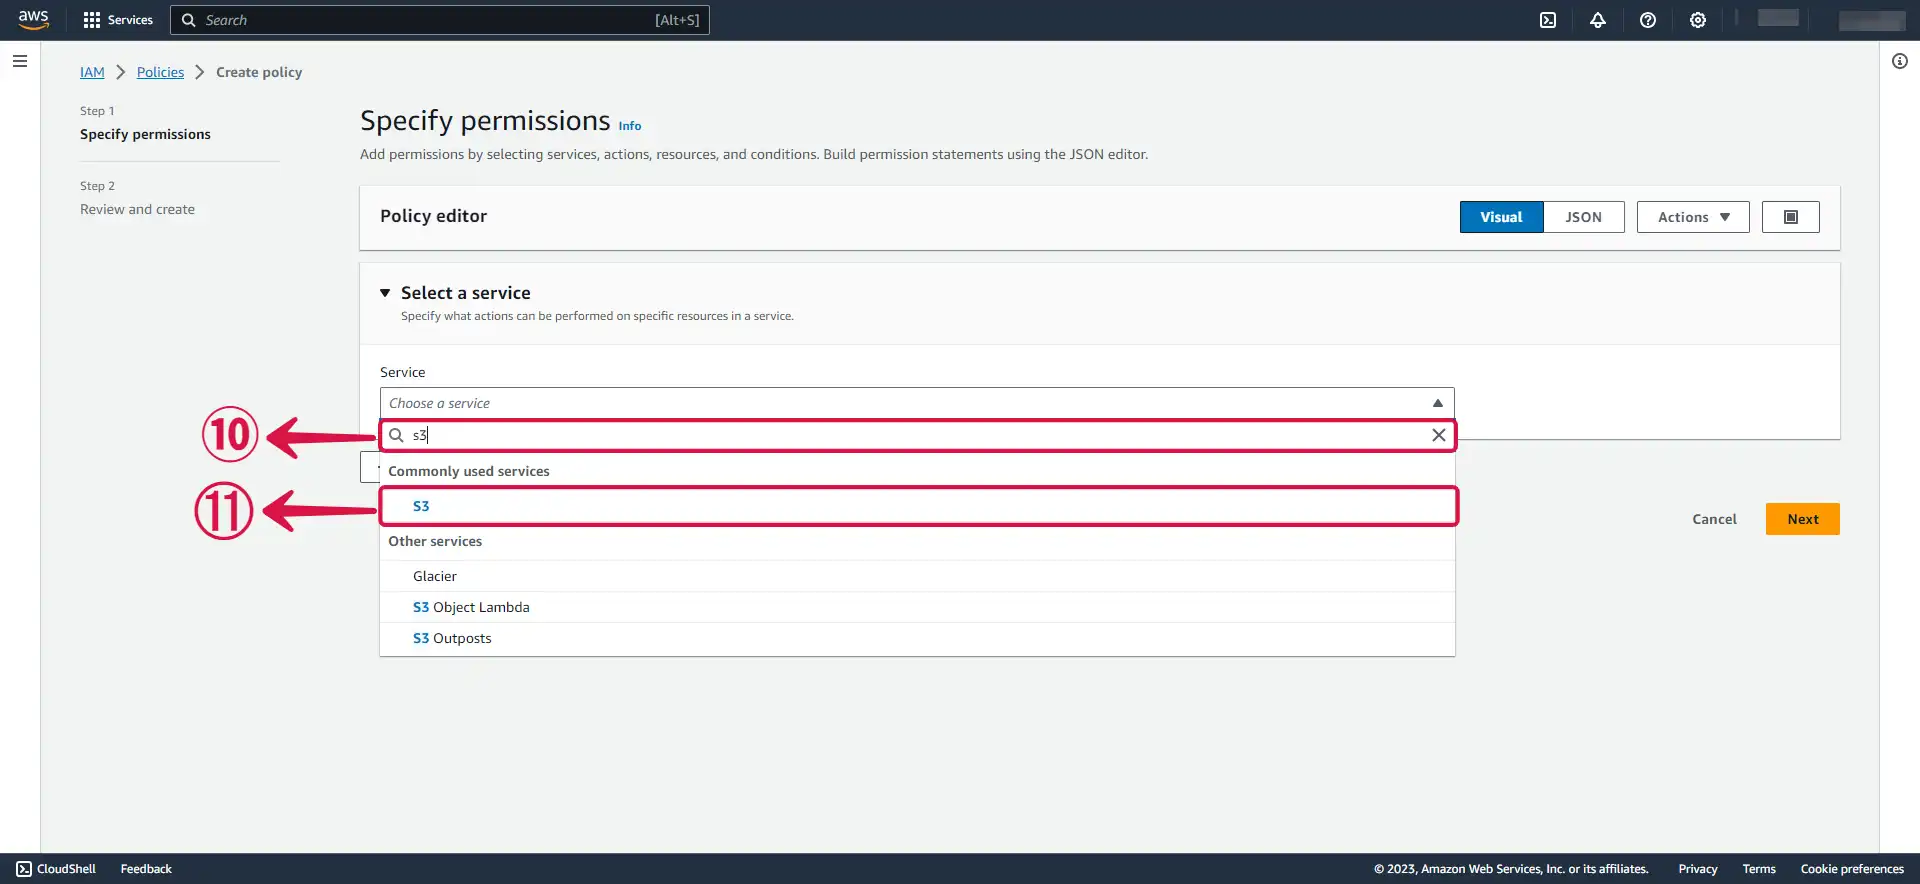
- Search⑩ for s3 and click on it⑪.
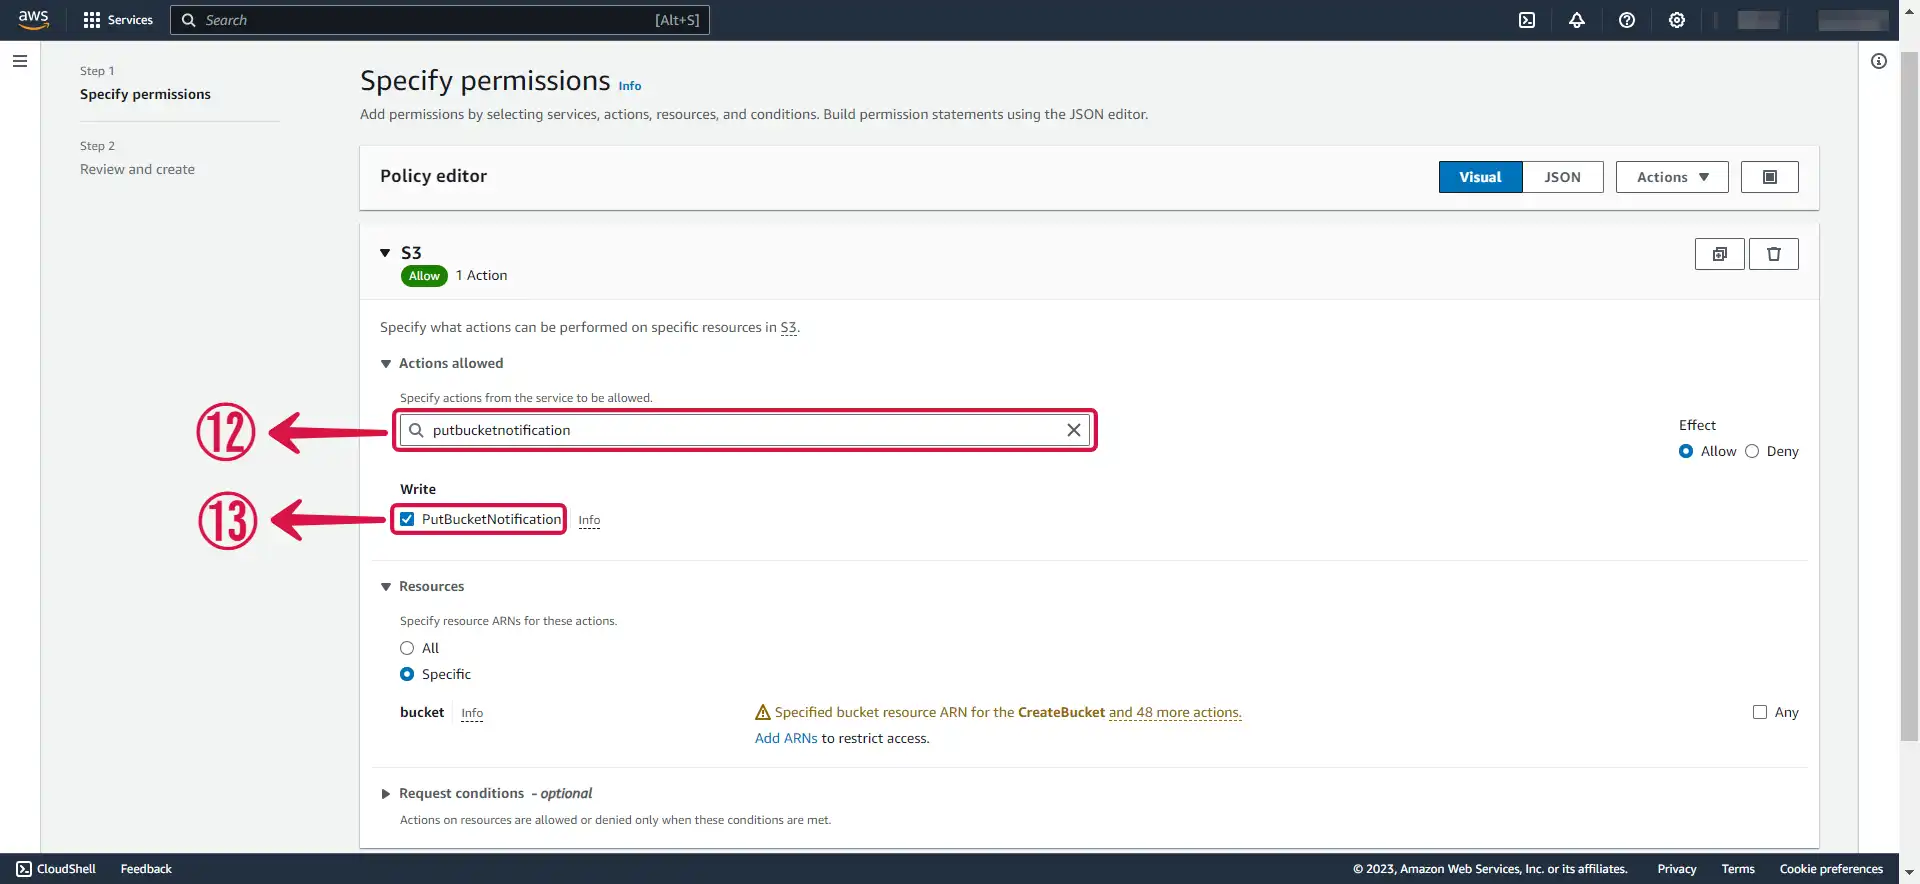
- Search for the following policy: PutBucketNotification⑫, and tick the box⑬ to select it.
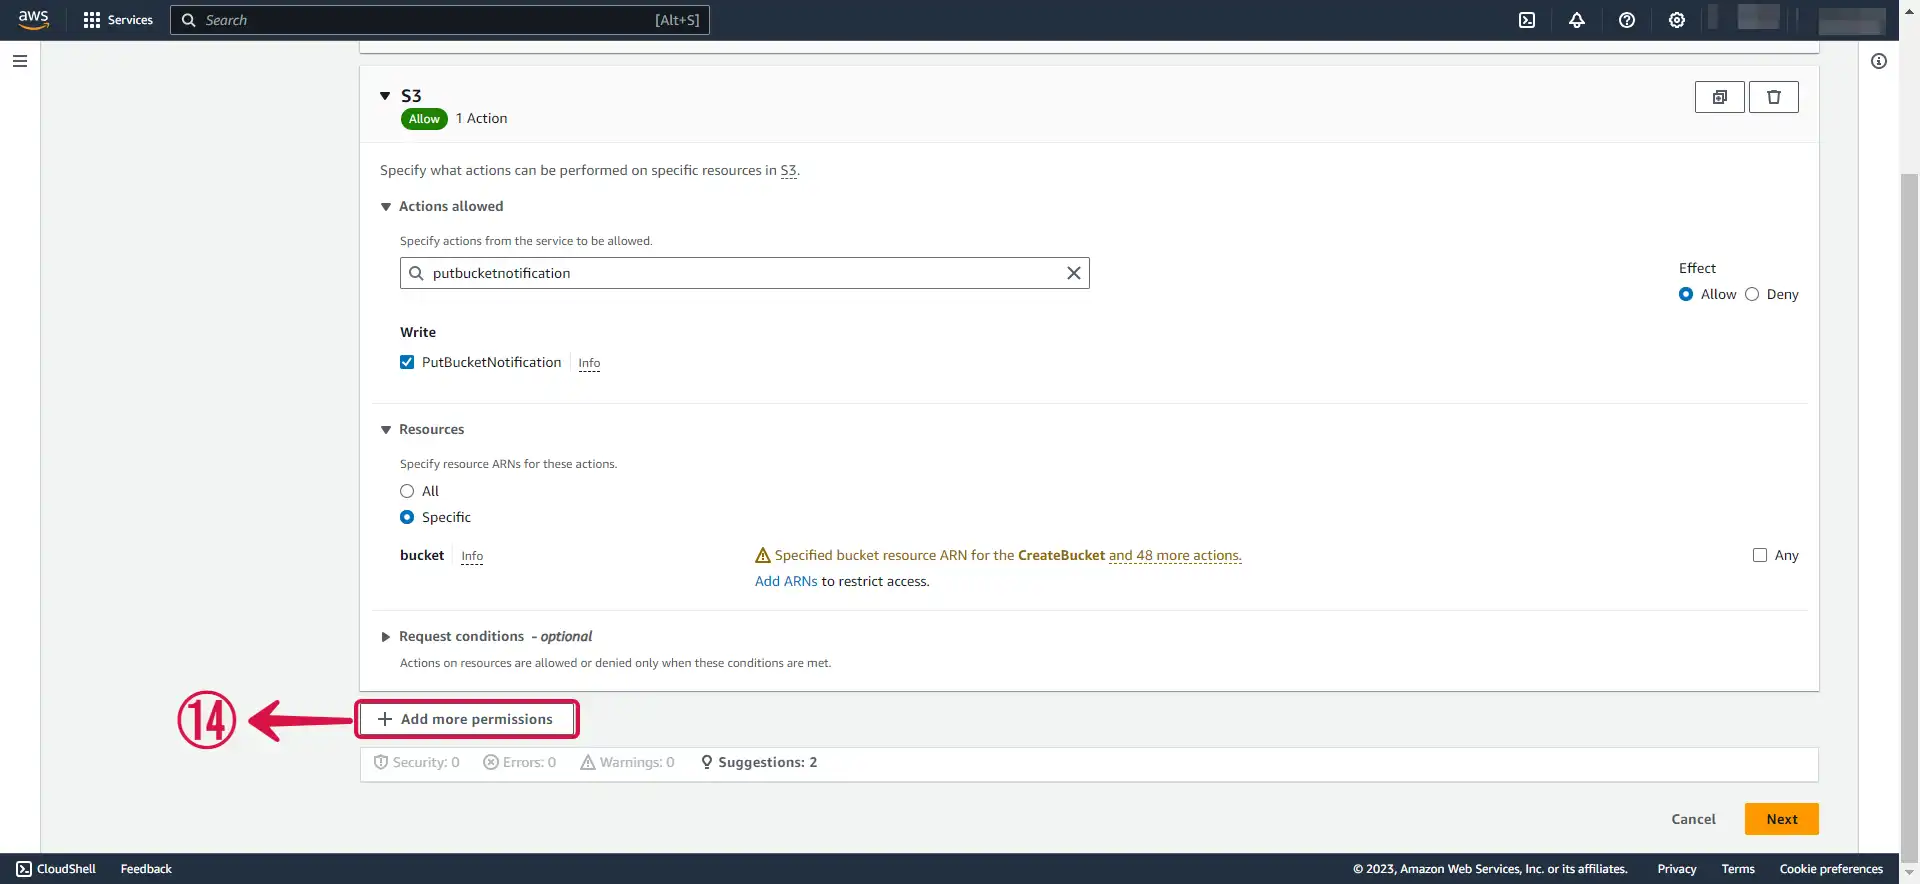
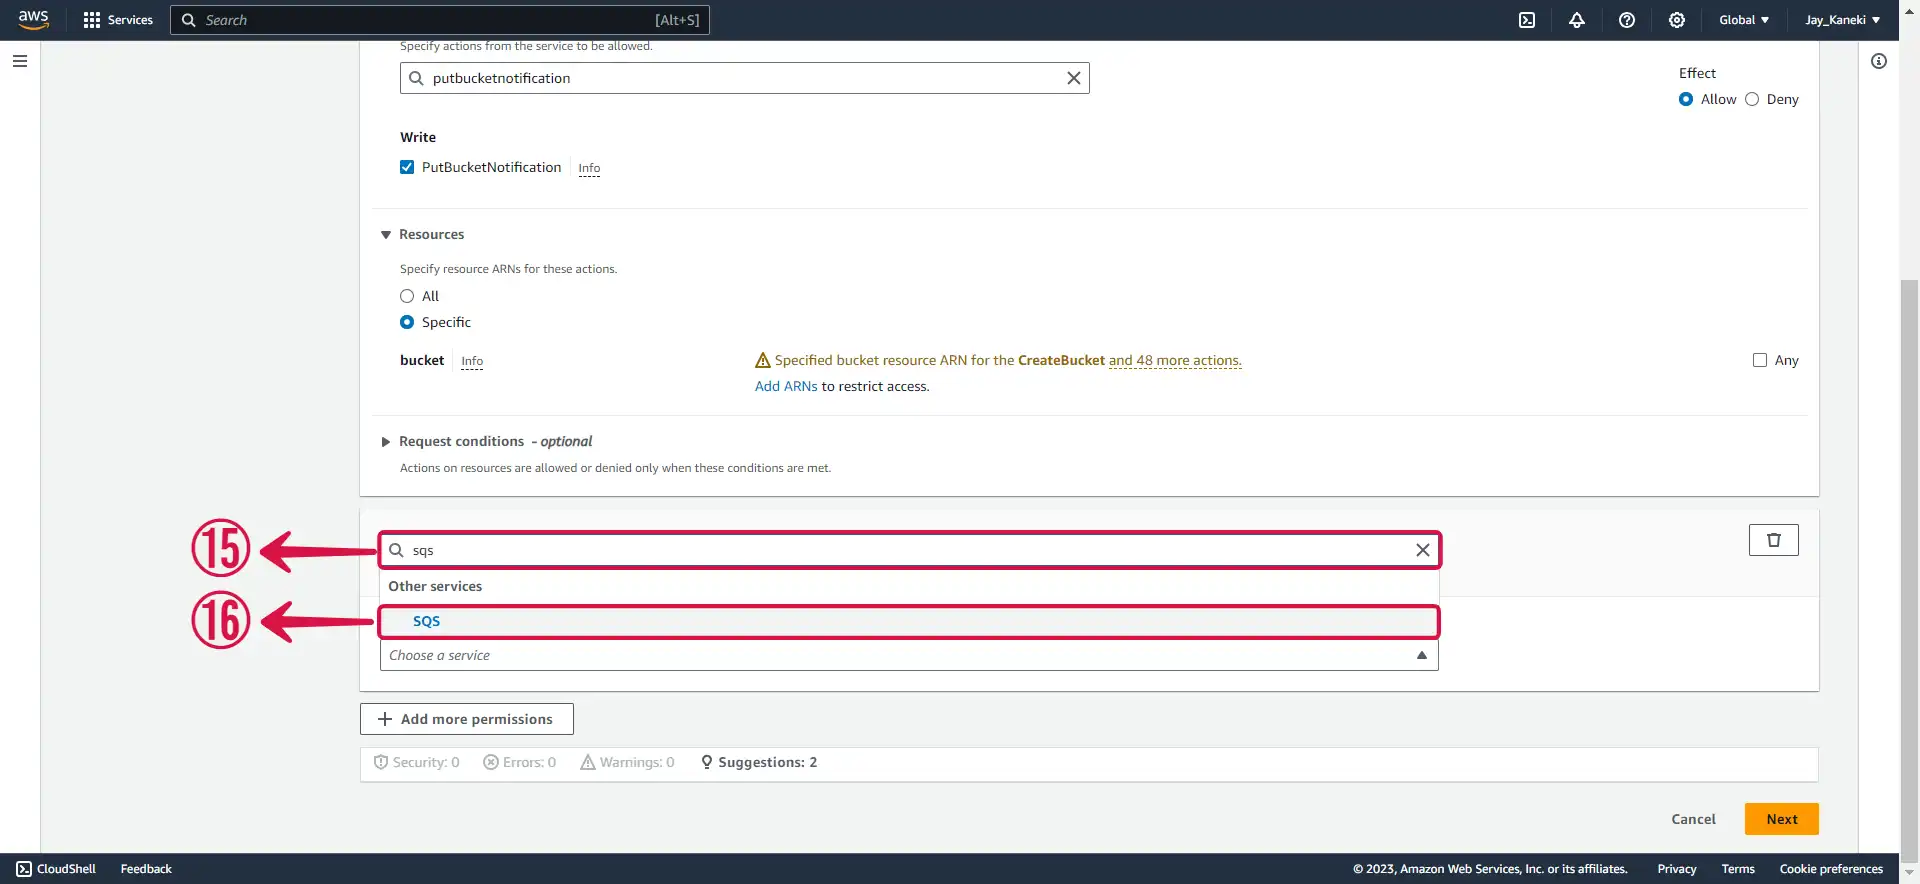
- Click Add more permissions⑭.
- Now search for SQS⑮ and click on it⑯.
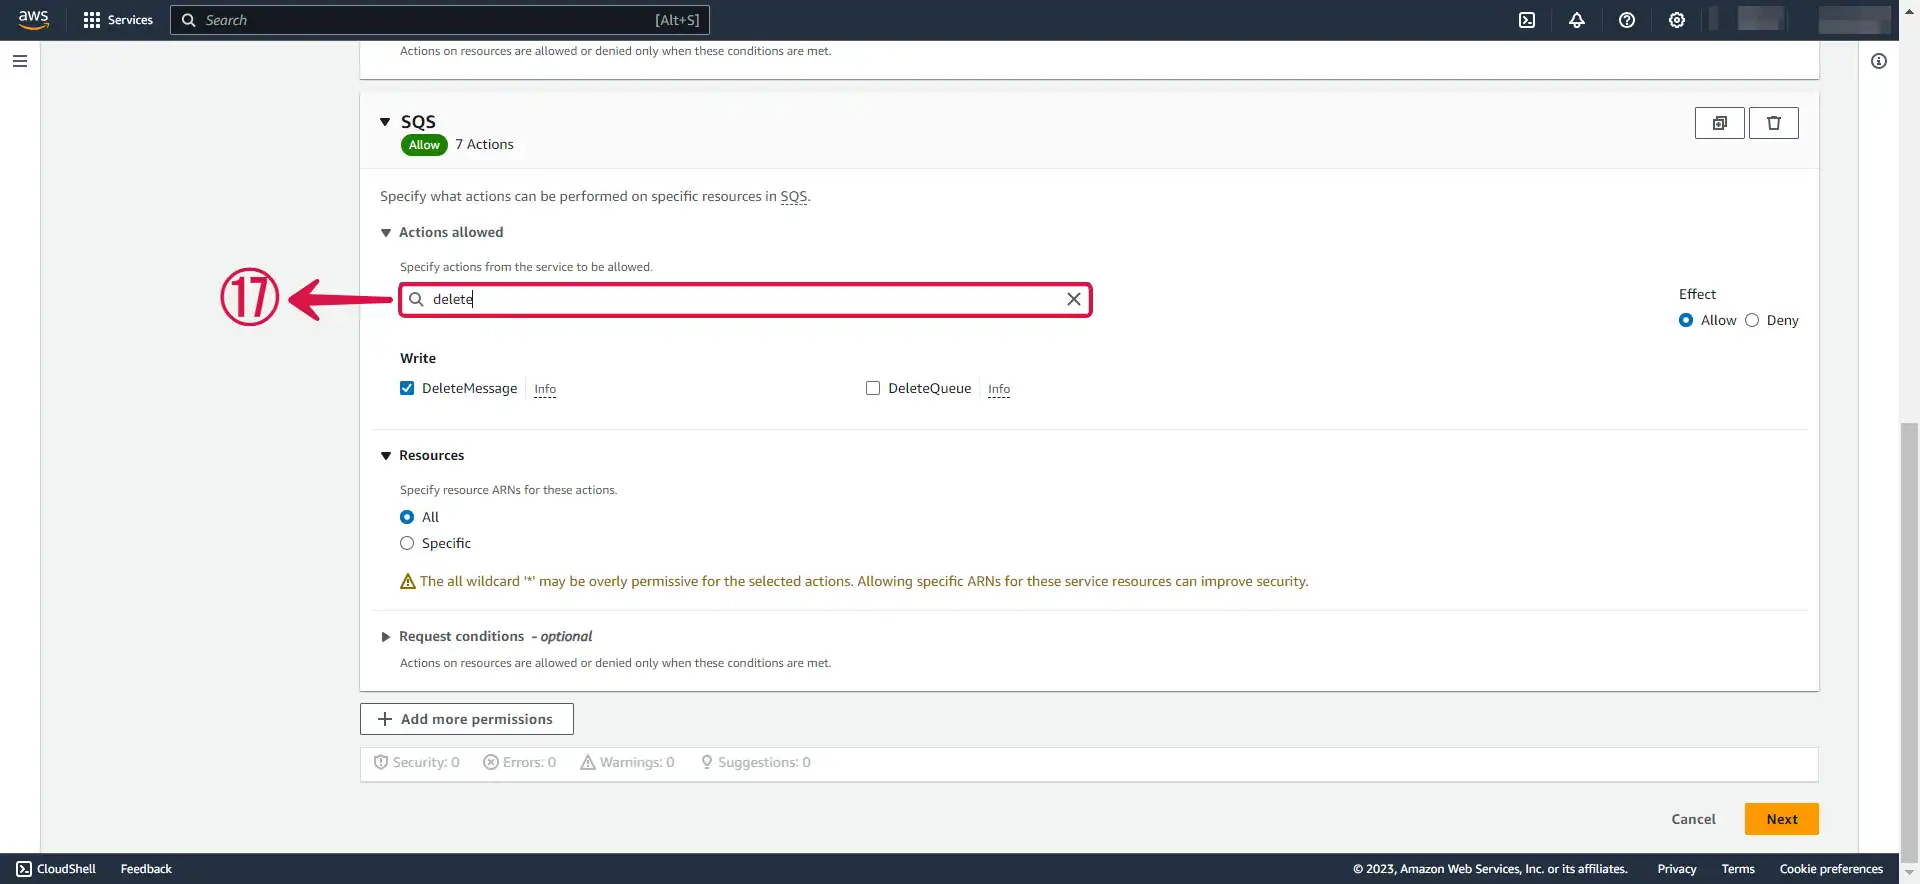
- Search⑰ for the following policies.
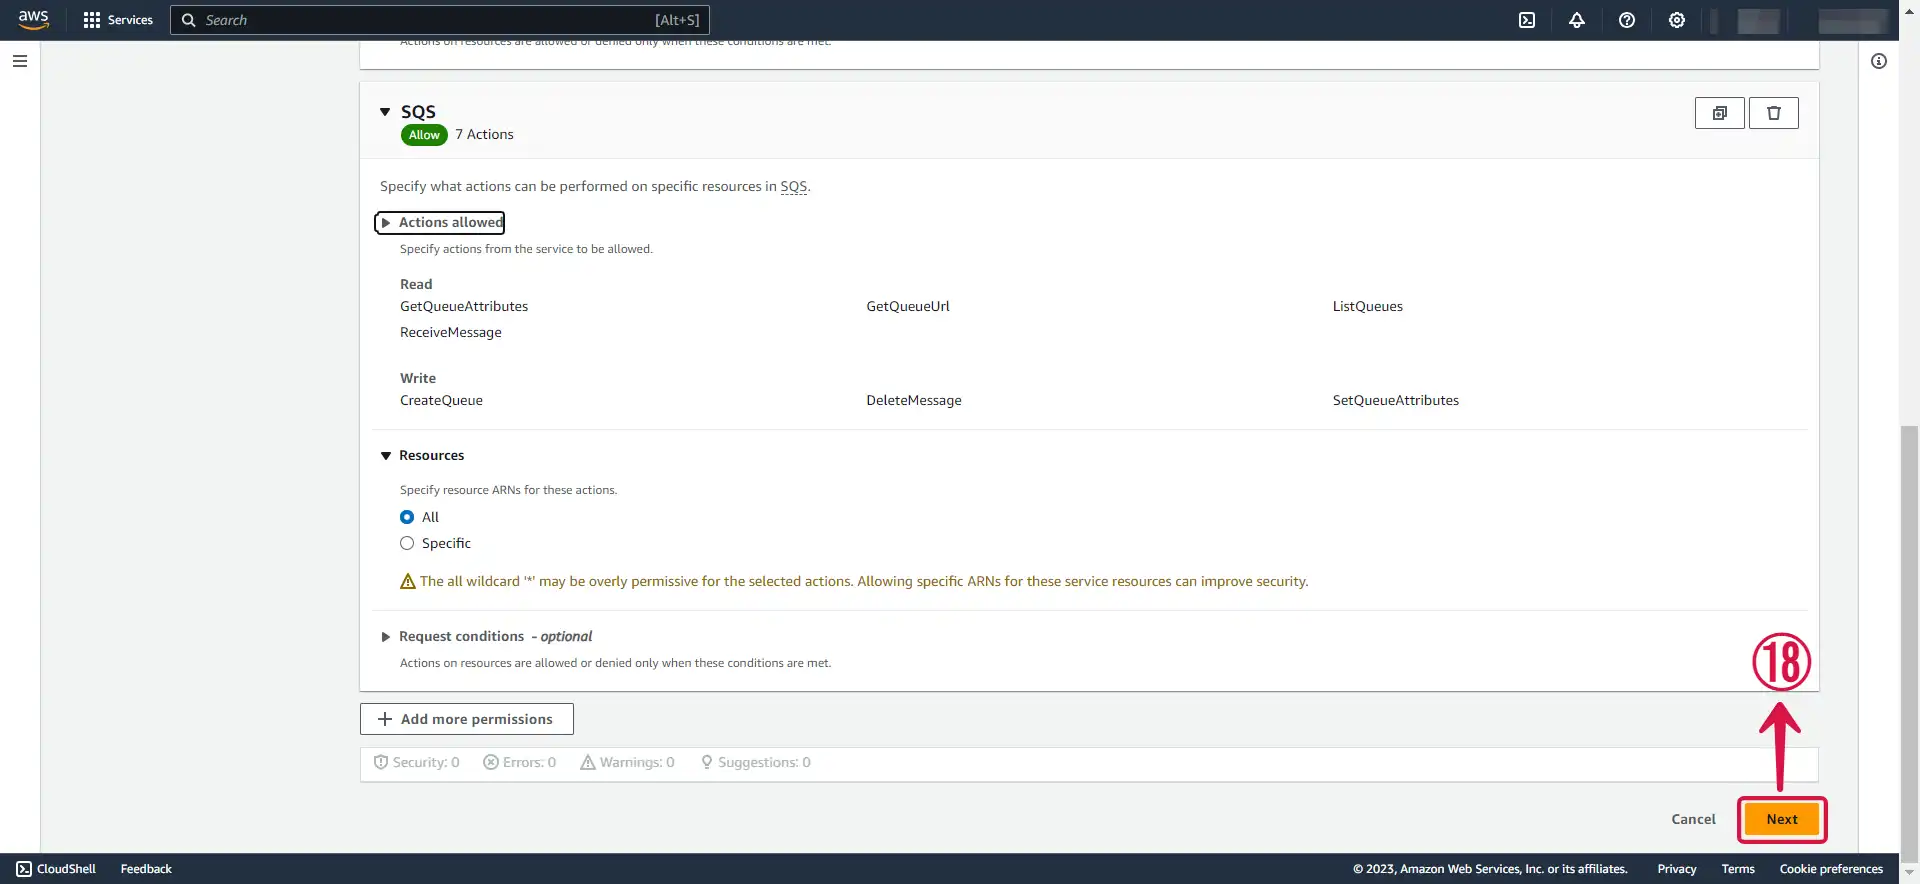
- ListQueues
- GetQueueUrl
- ReceiveMessage
- GetQueueAttributes
- CreateQueue
- SetQueueAttributes
- DeleteMessage
- Press Next⑱ and proceed to the next page.
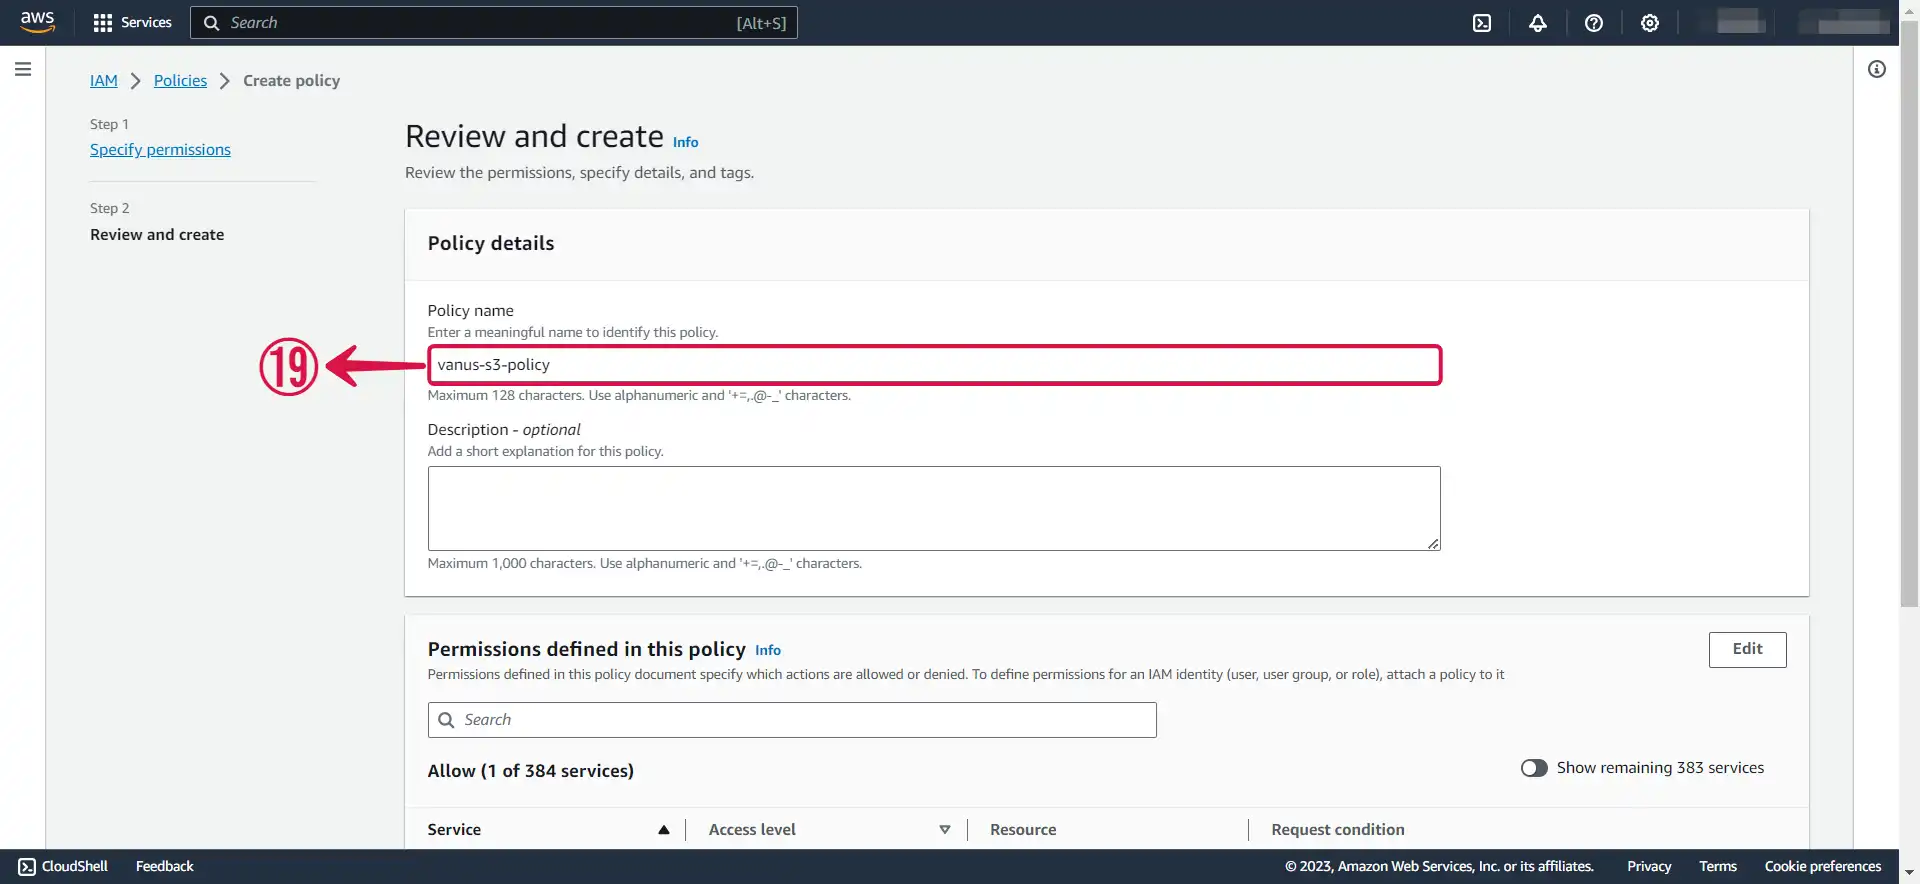
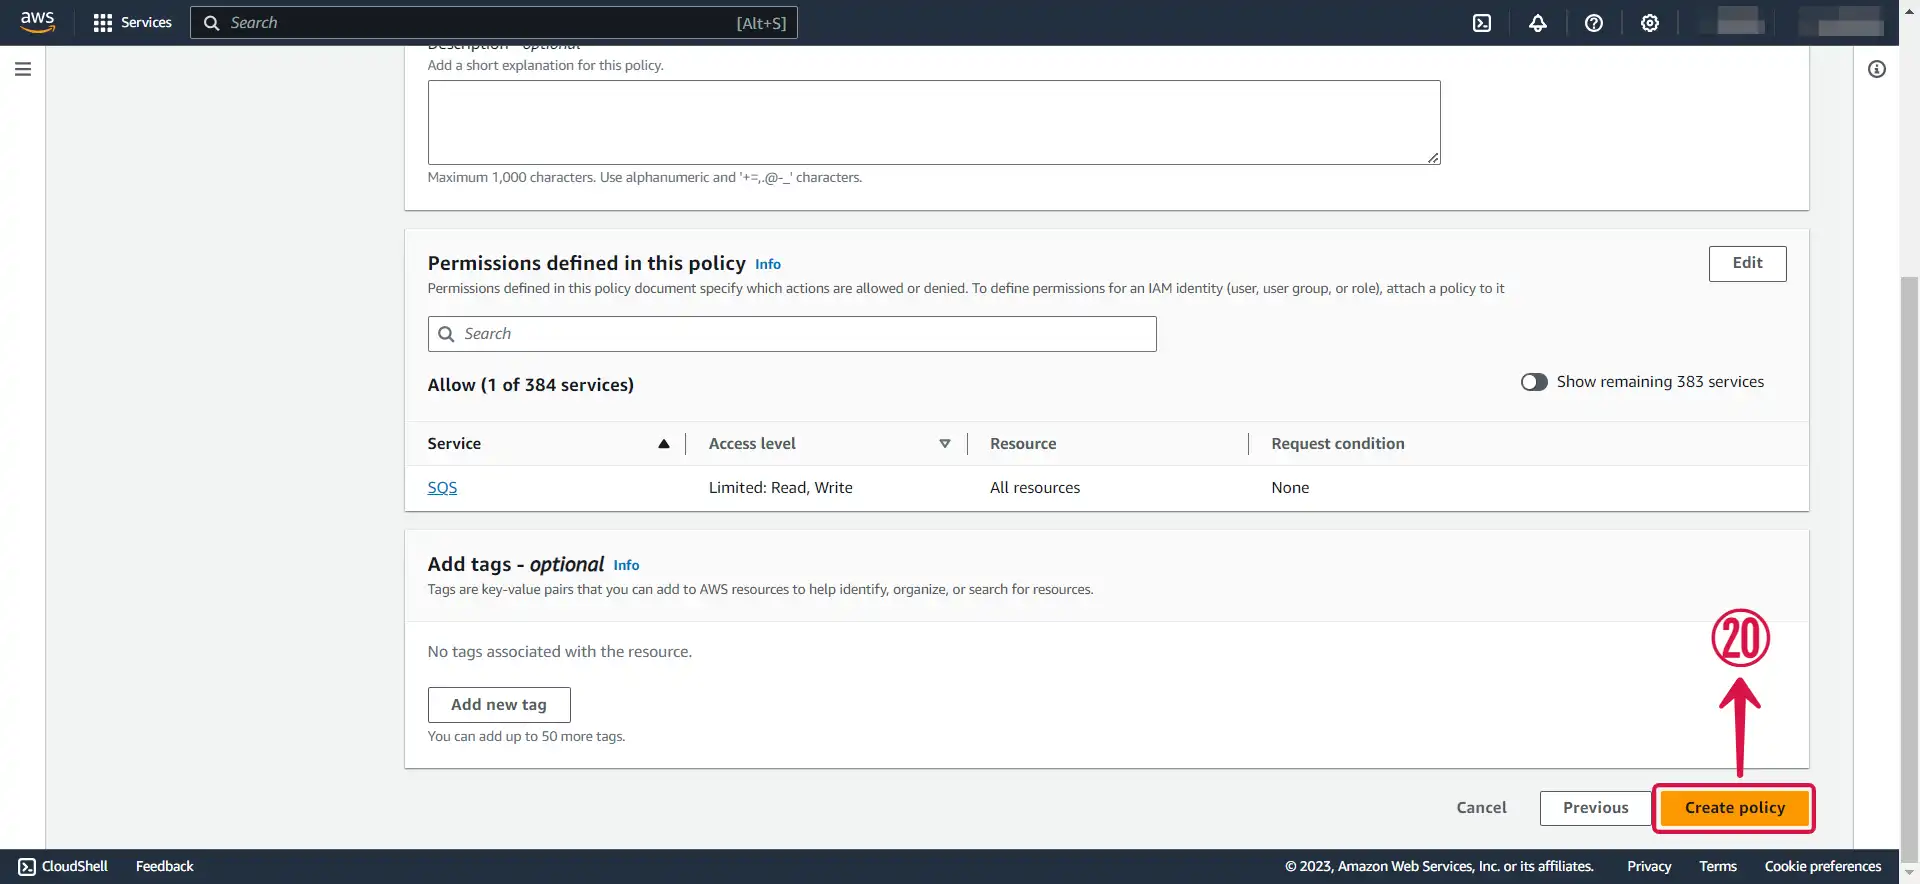
- Name⑲ your policy.
- Click Create policy⑳.
- Return back to your previous
TAB㉑.
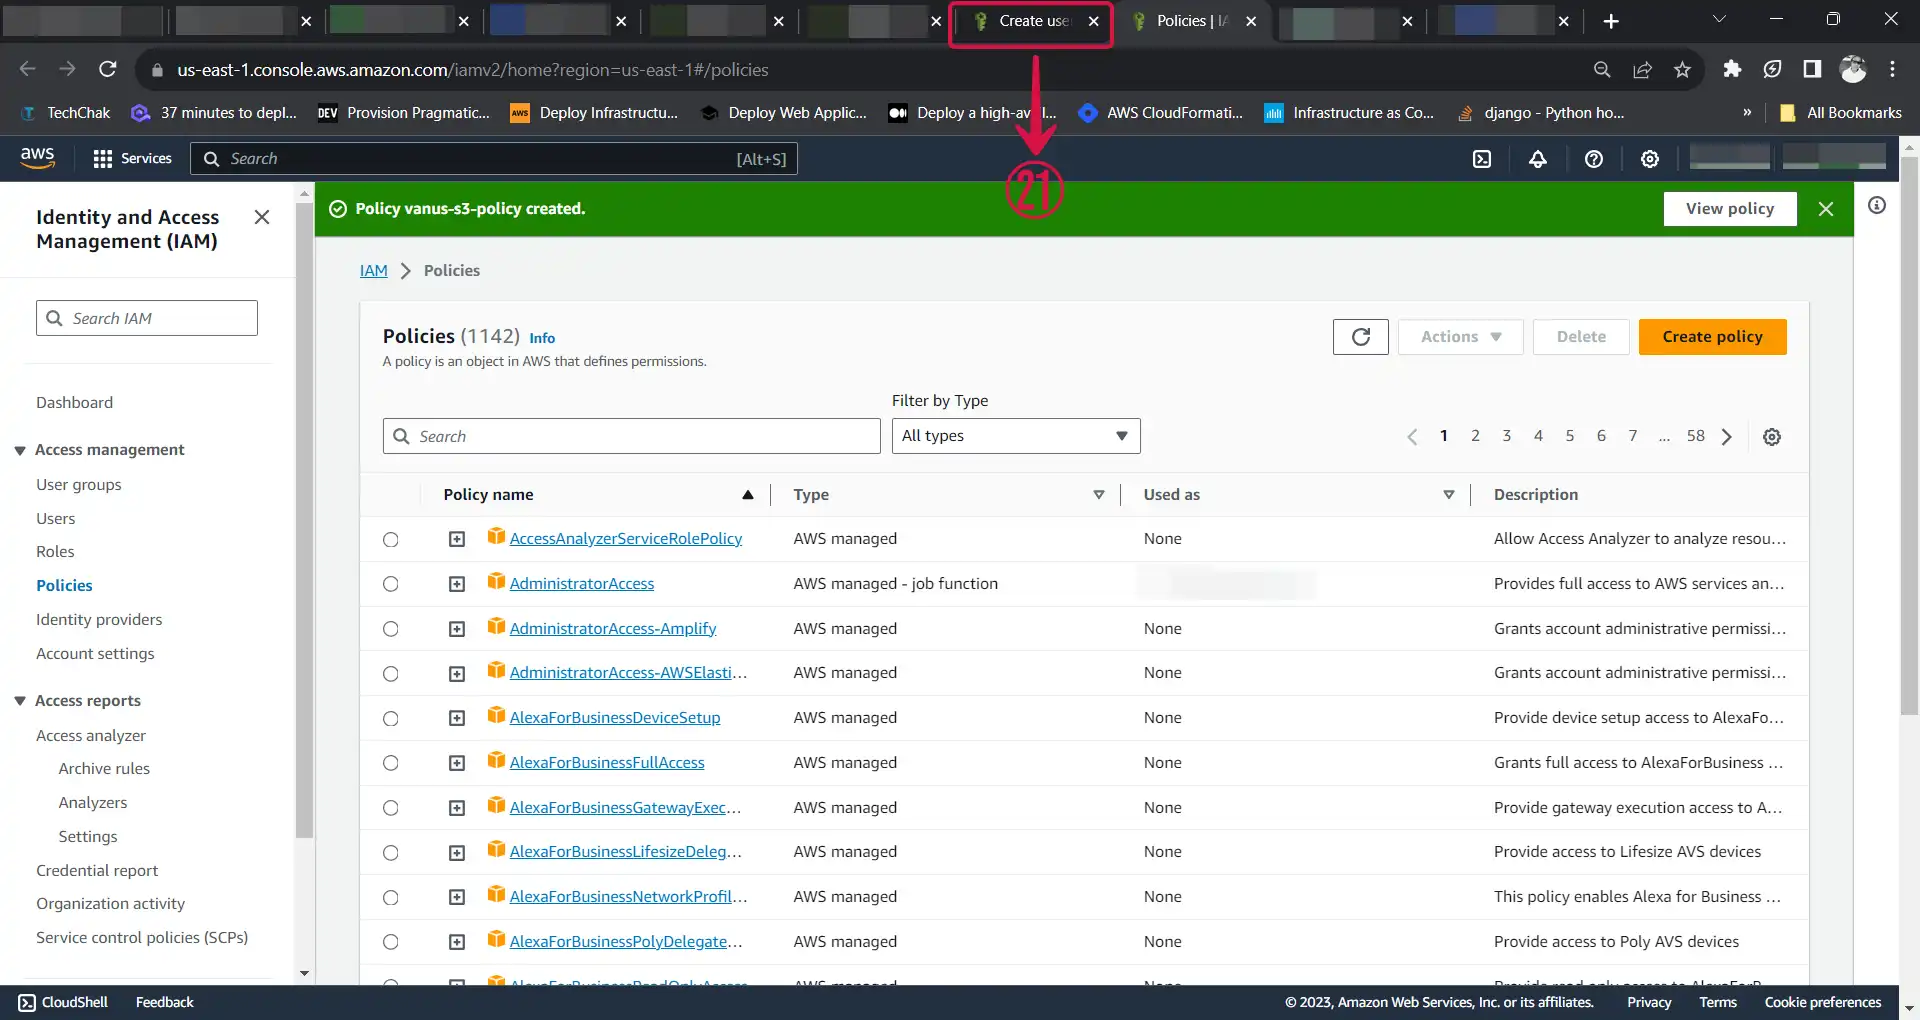
- Refresh㉒ the policy list, search㉓ for your custom policy, check the box㉔ next to it to add it to your account, and then click on Next㉕.
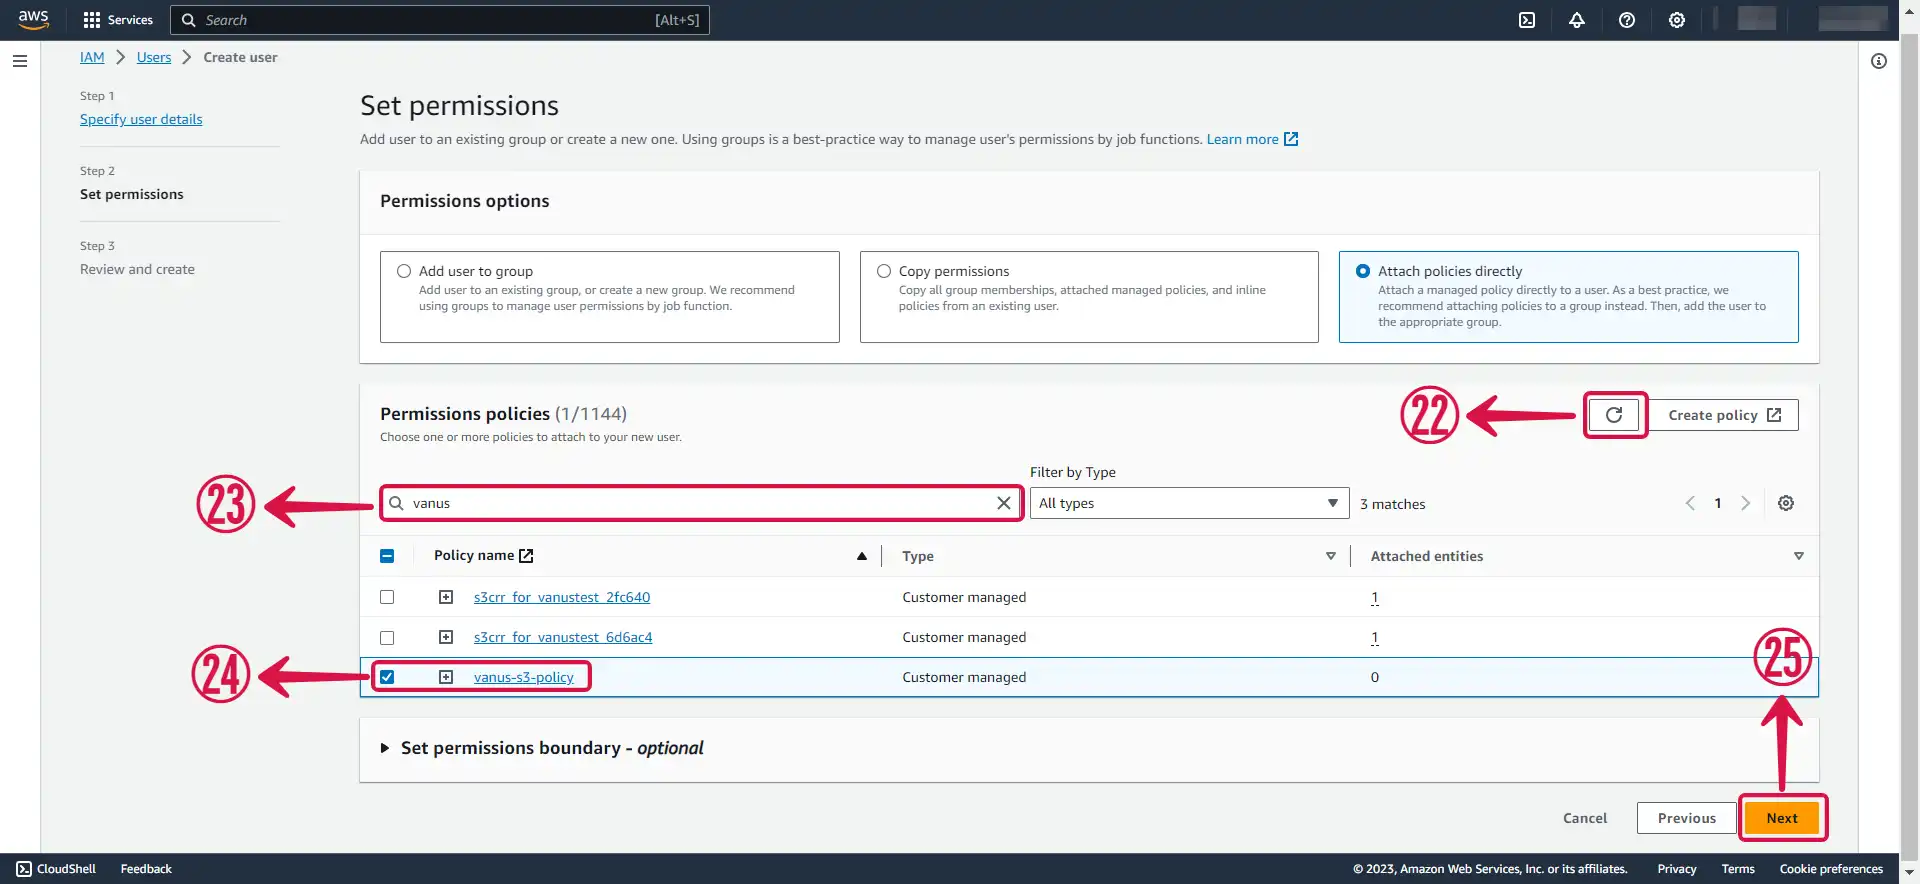
- Review and press Create user㉖.

Step 2: Create an Access key and Secret access Key
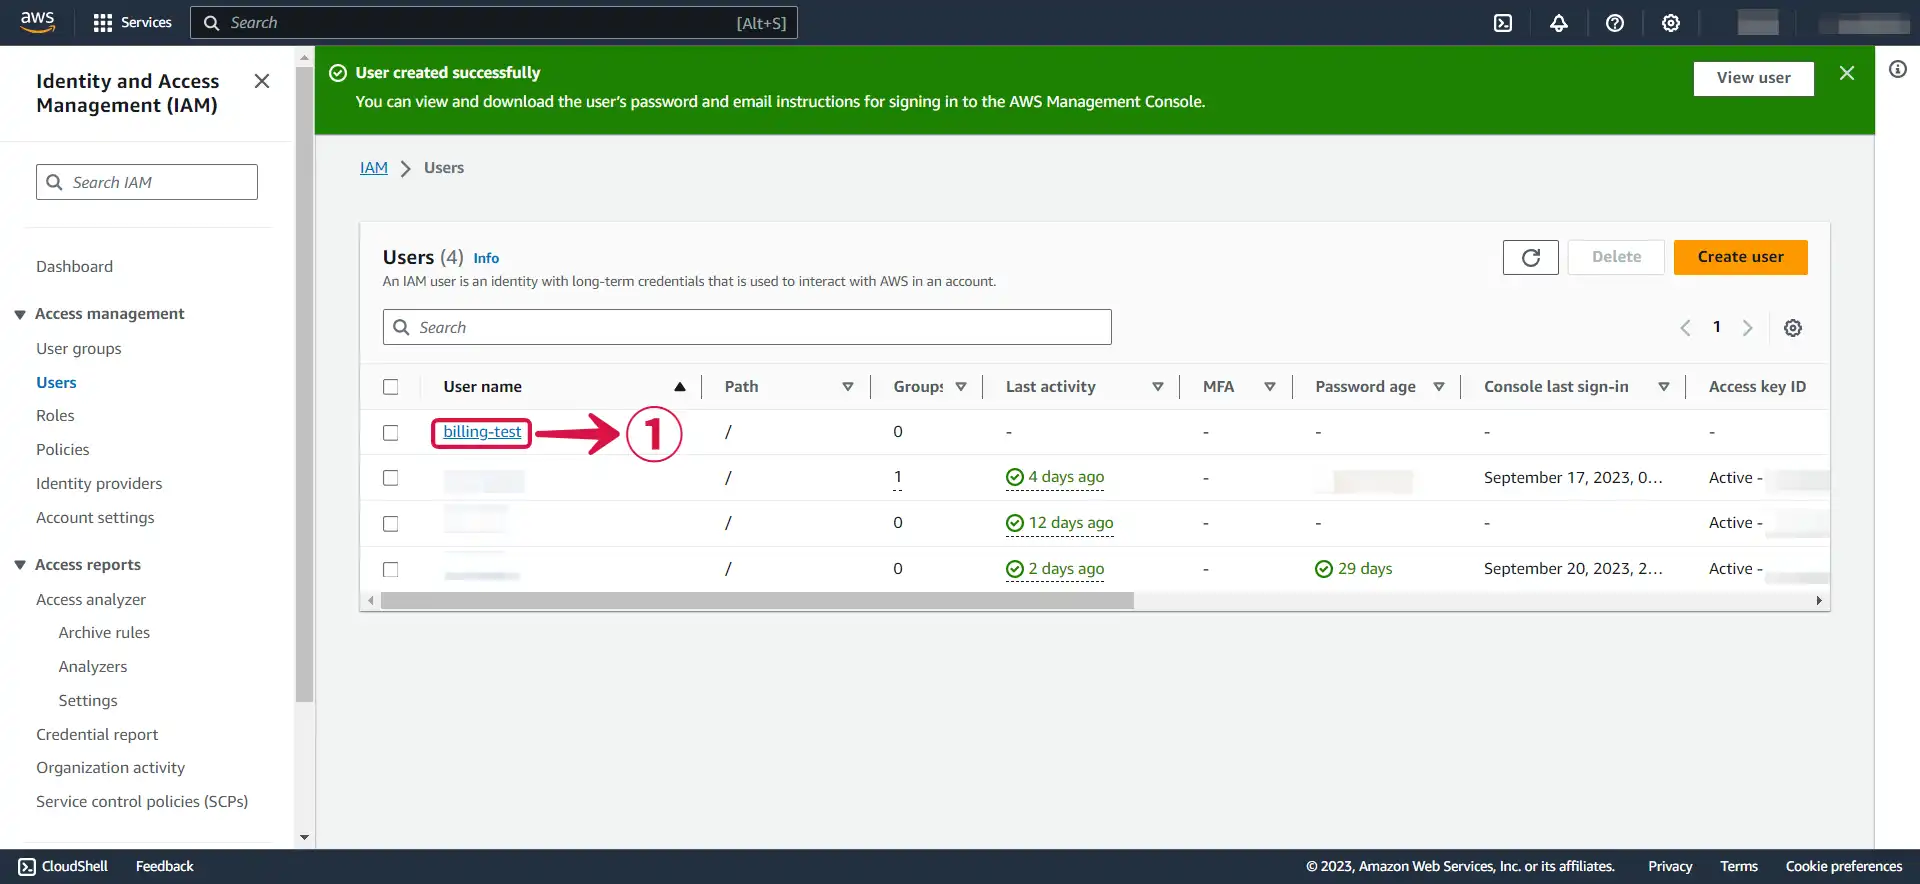
- Now click on the user① you just created.
- Under Security credentials② scroll down the page to
Access Keys, and Click Create access key③.
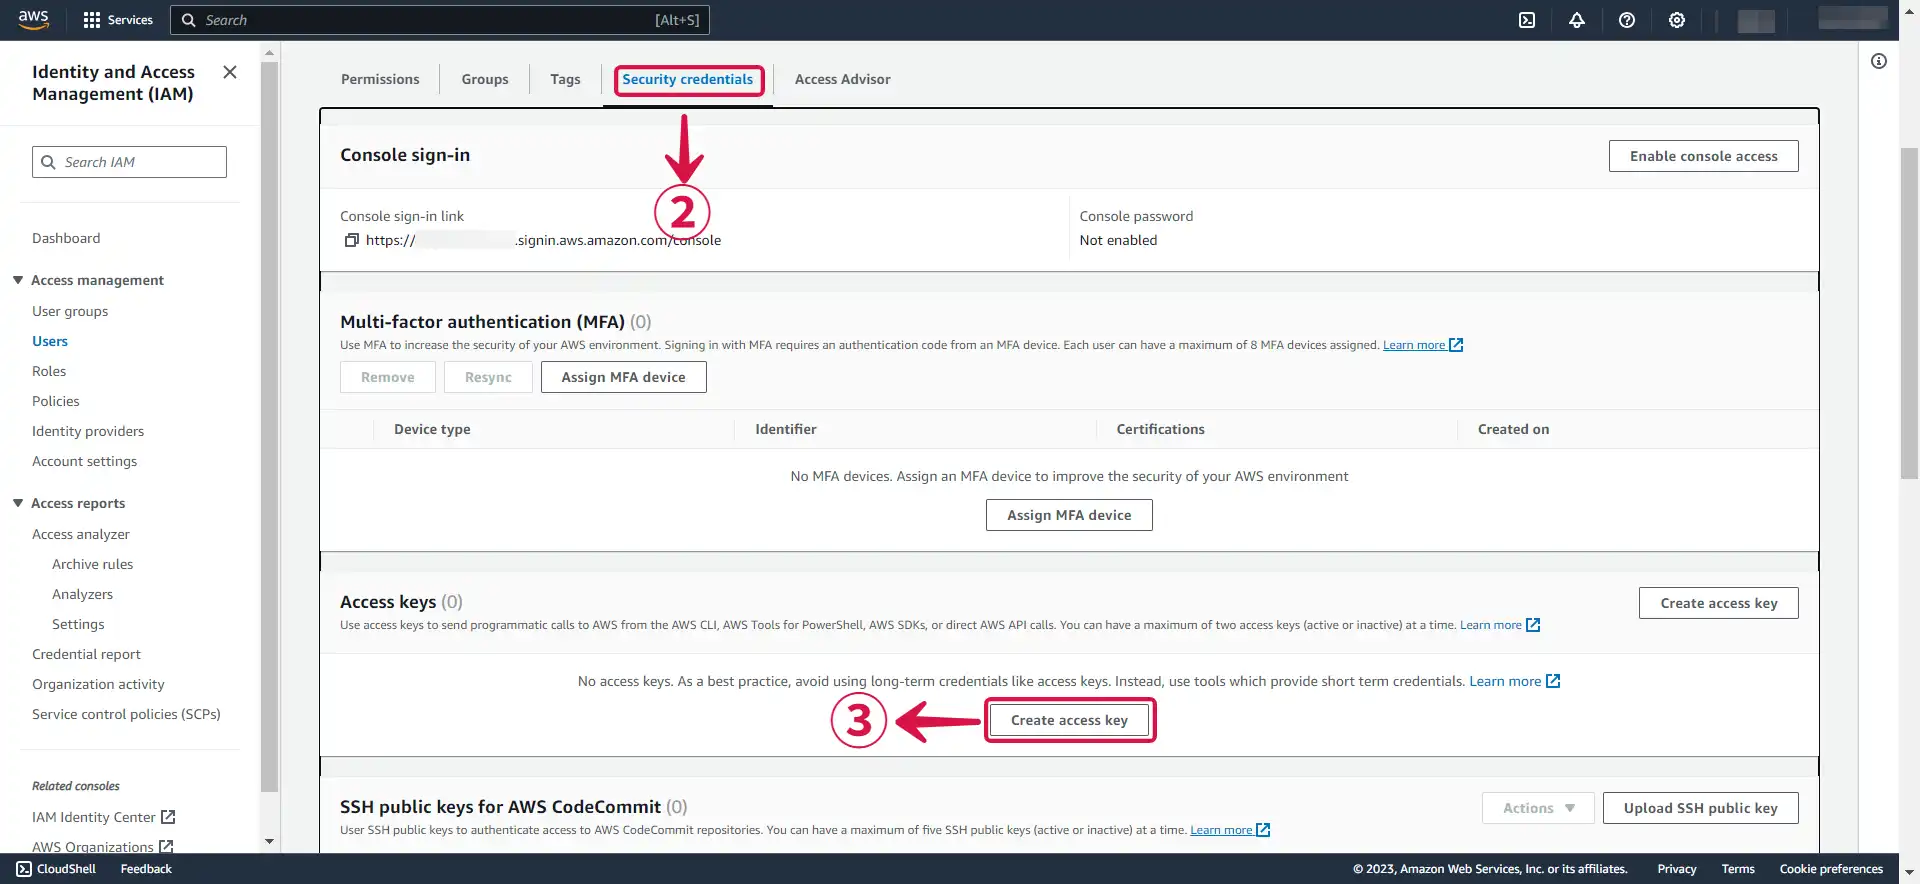
- Select Command Line Interface (CLI)④, tick the Confirmation box⑤ and click Next⑥.
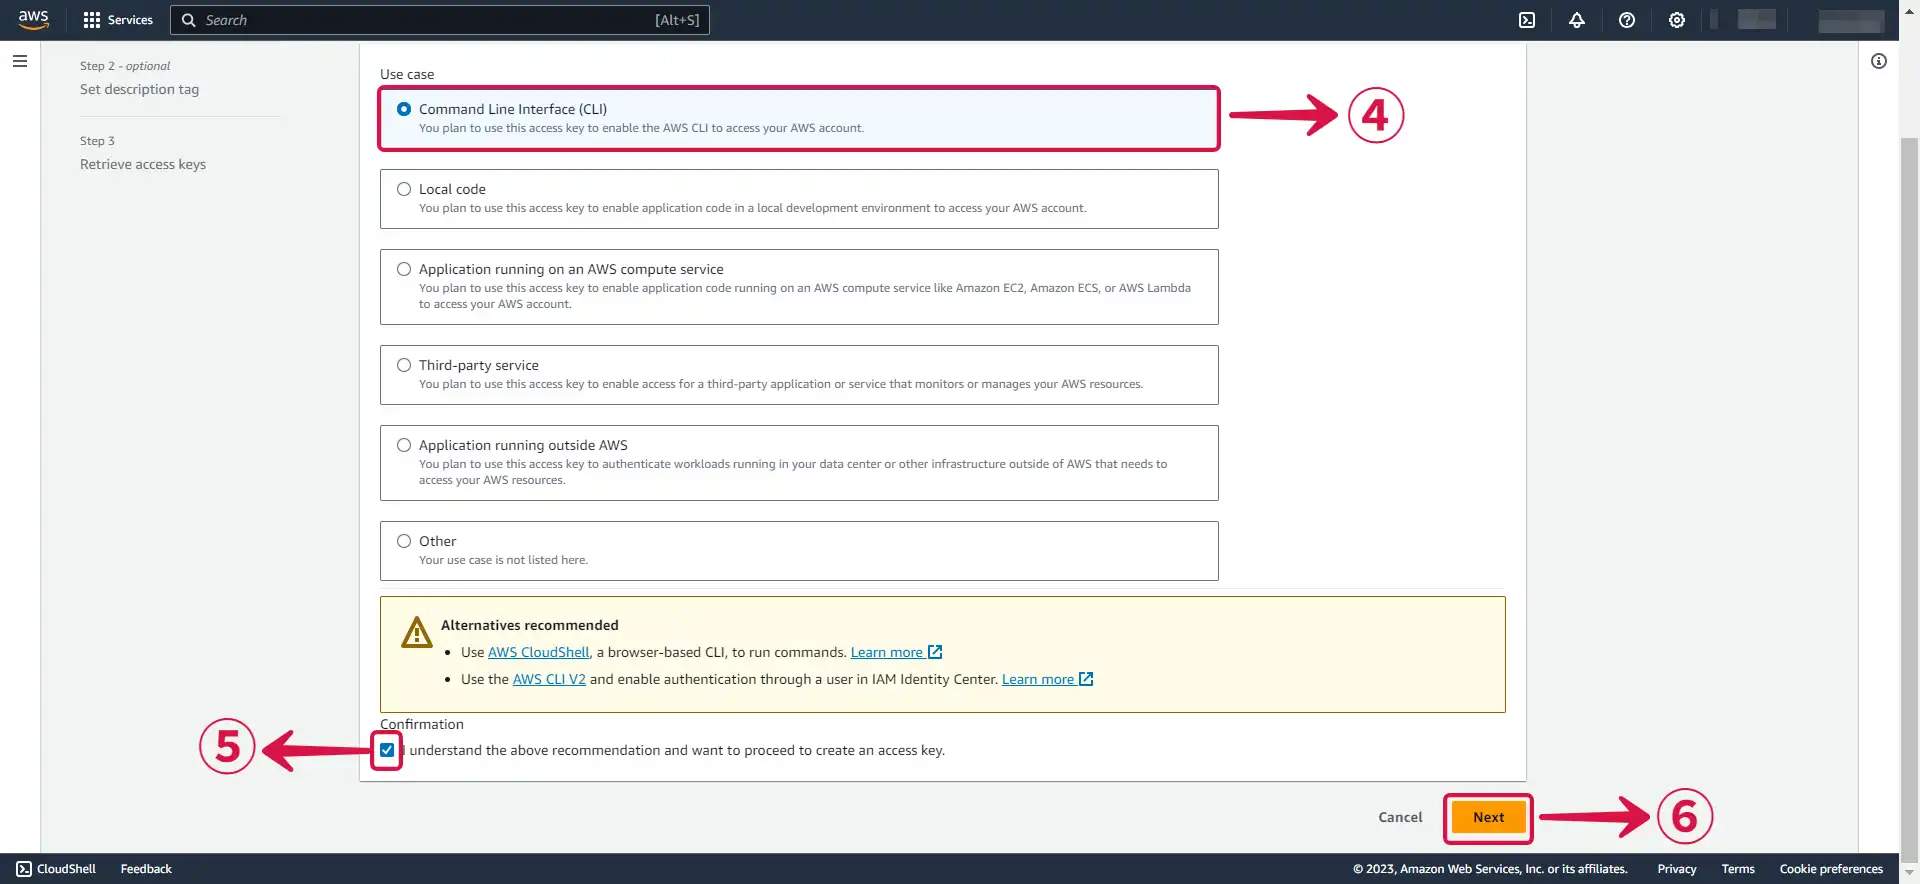
- Click Create access key⑦.
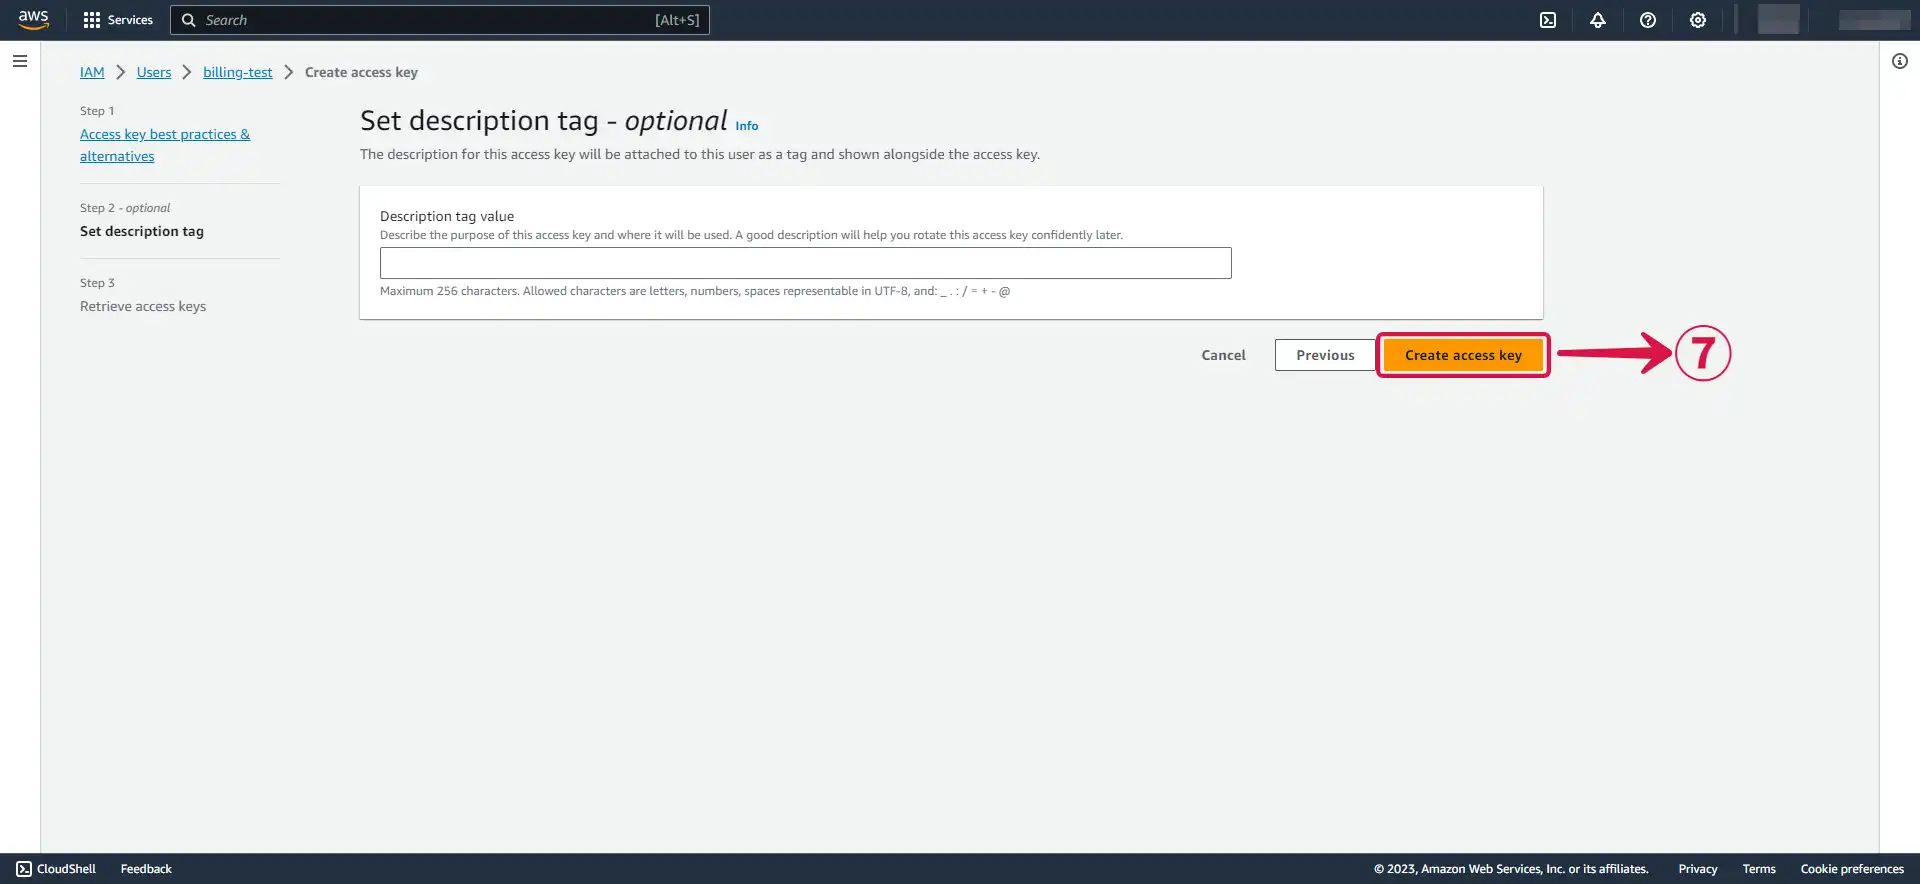
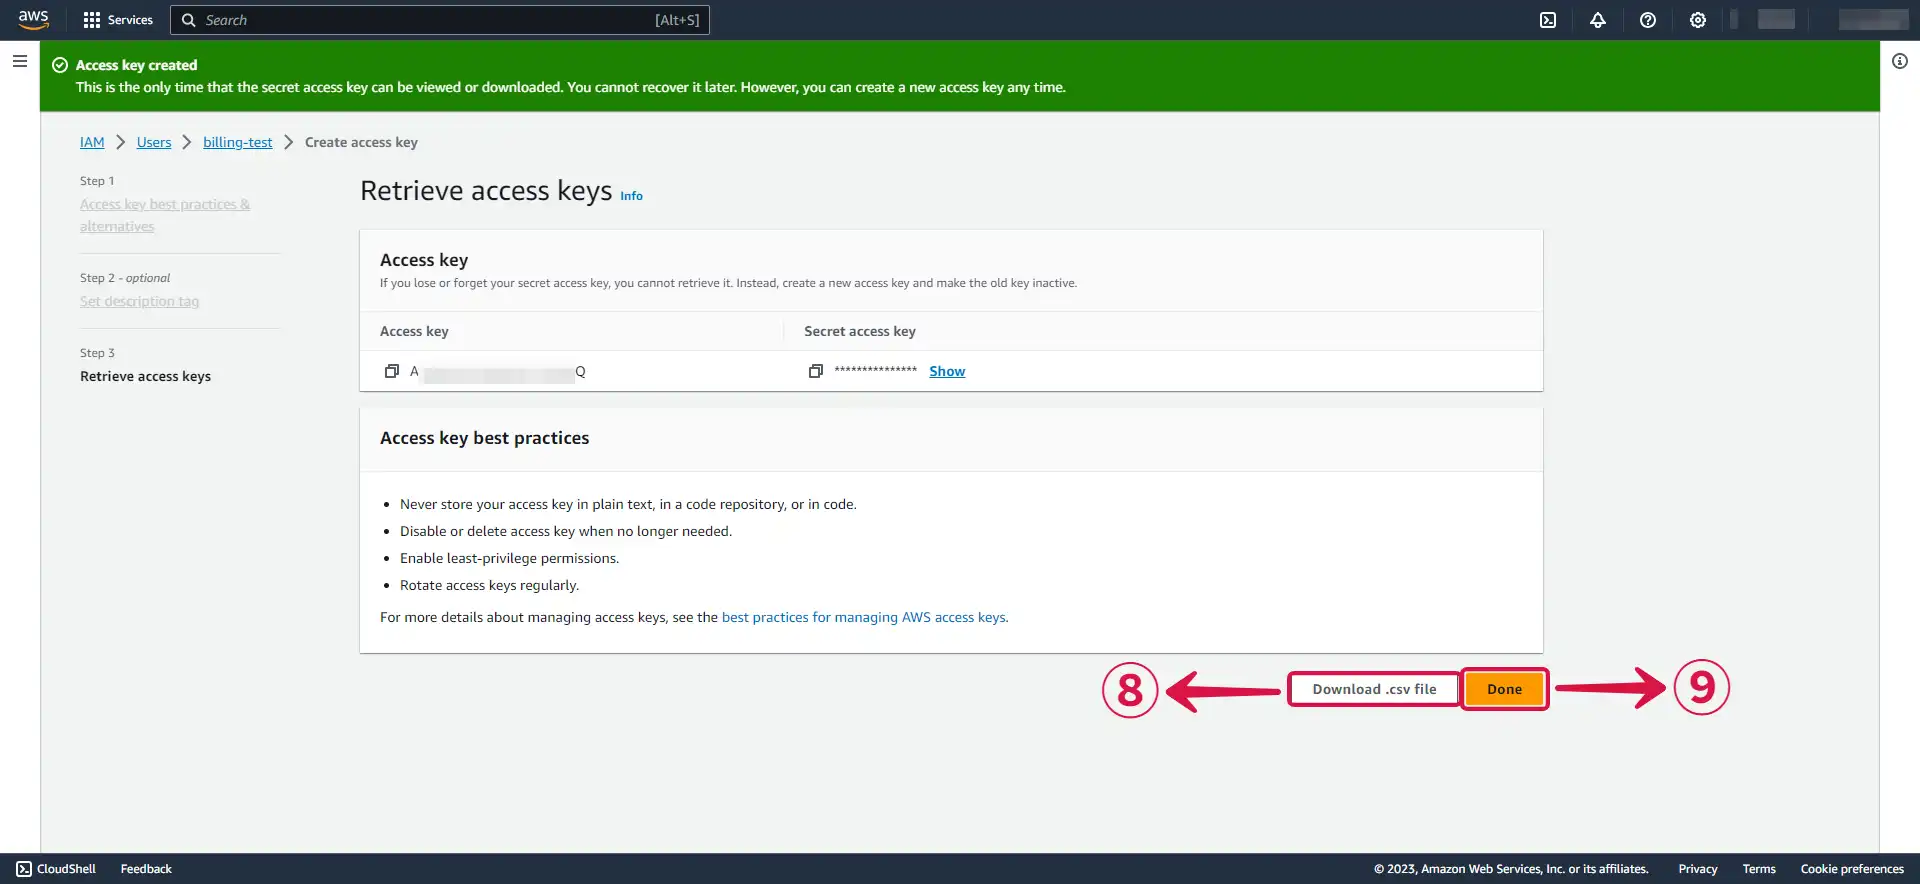
- Download your
Access keyandSecret access keyby clicking the Download .csv file⑧ button, and then click Done⑨.
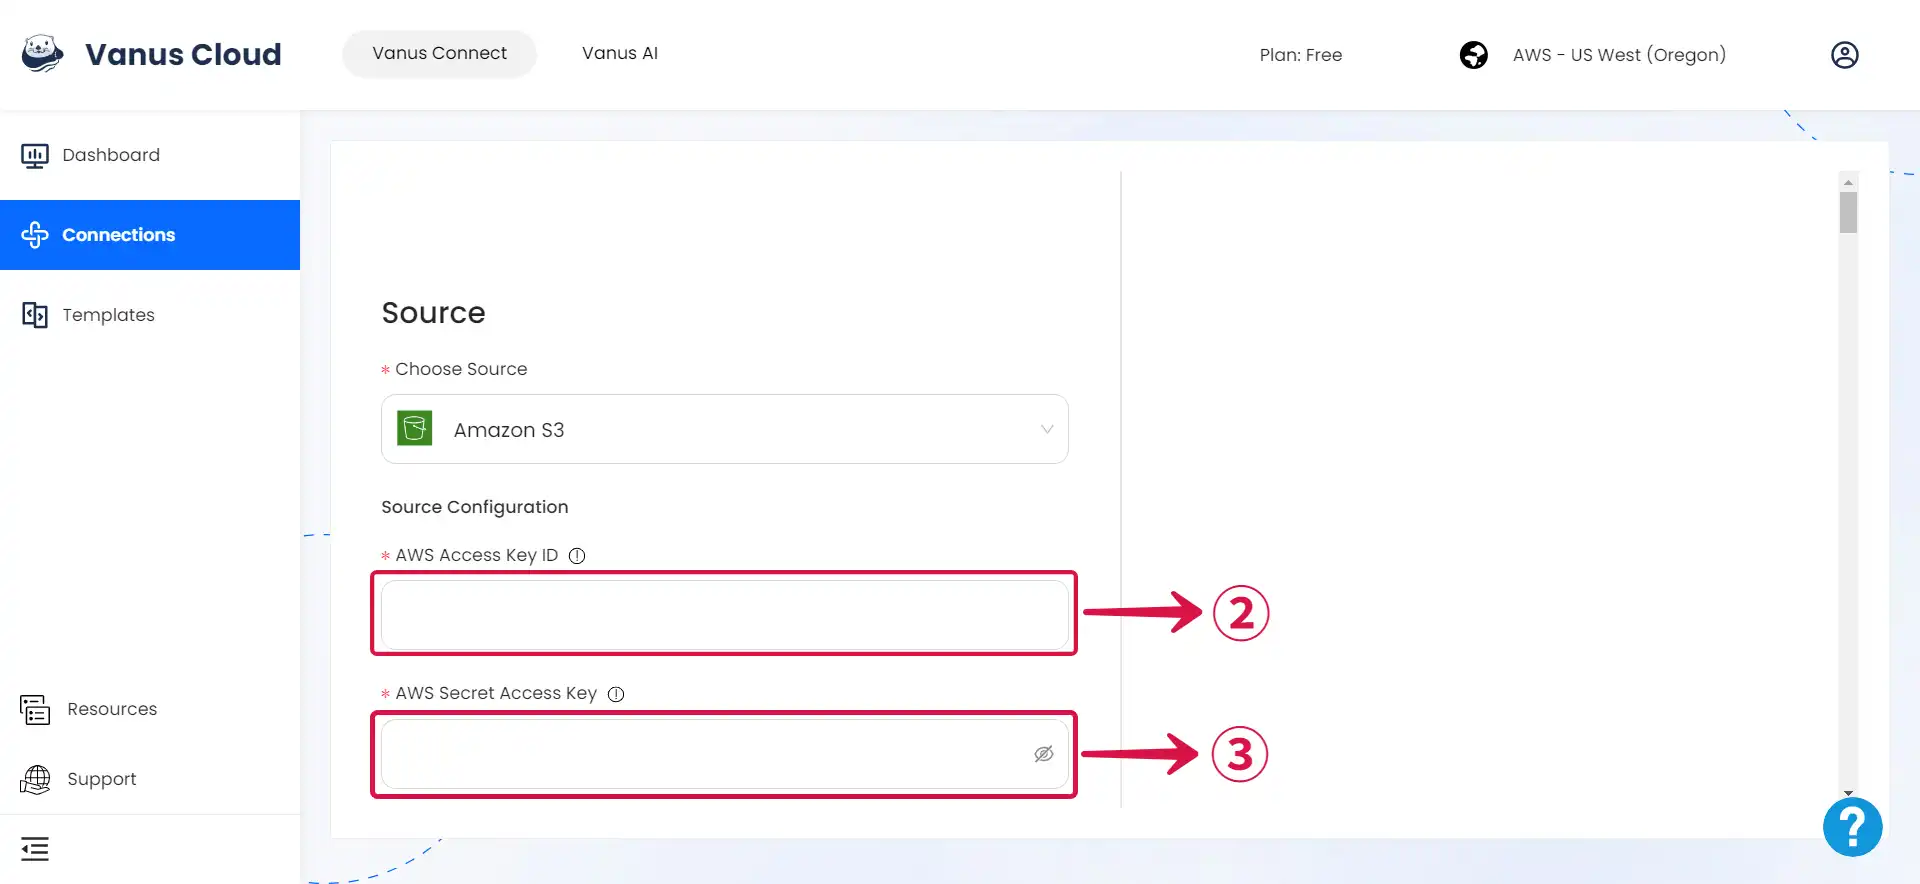
Step 3: Amazon S3 Connection Settings
- Write a Name① for your connection in Vanus Connect.
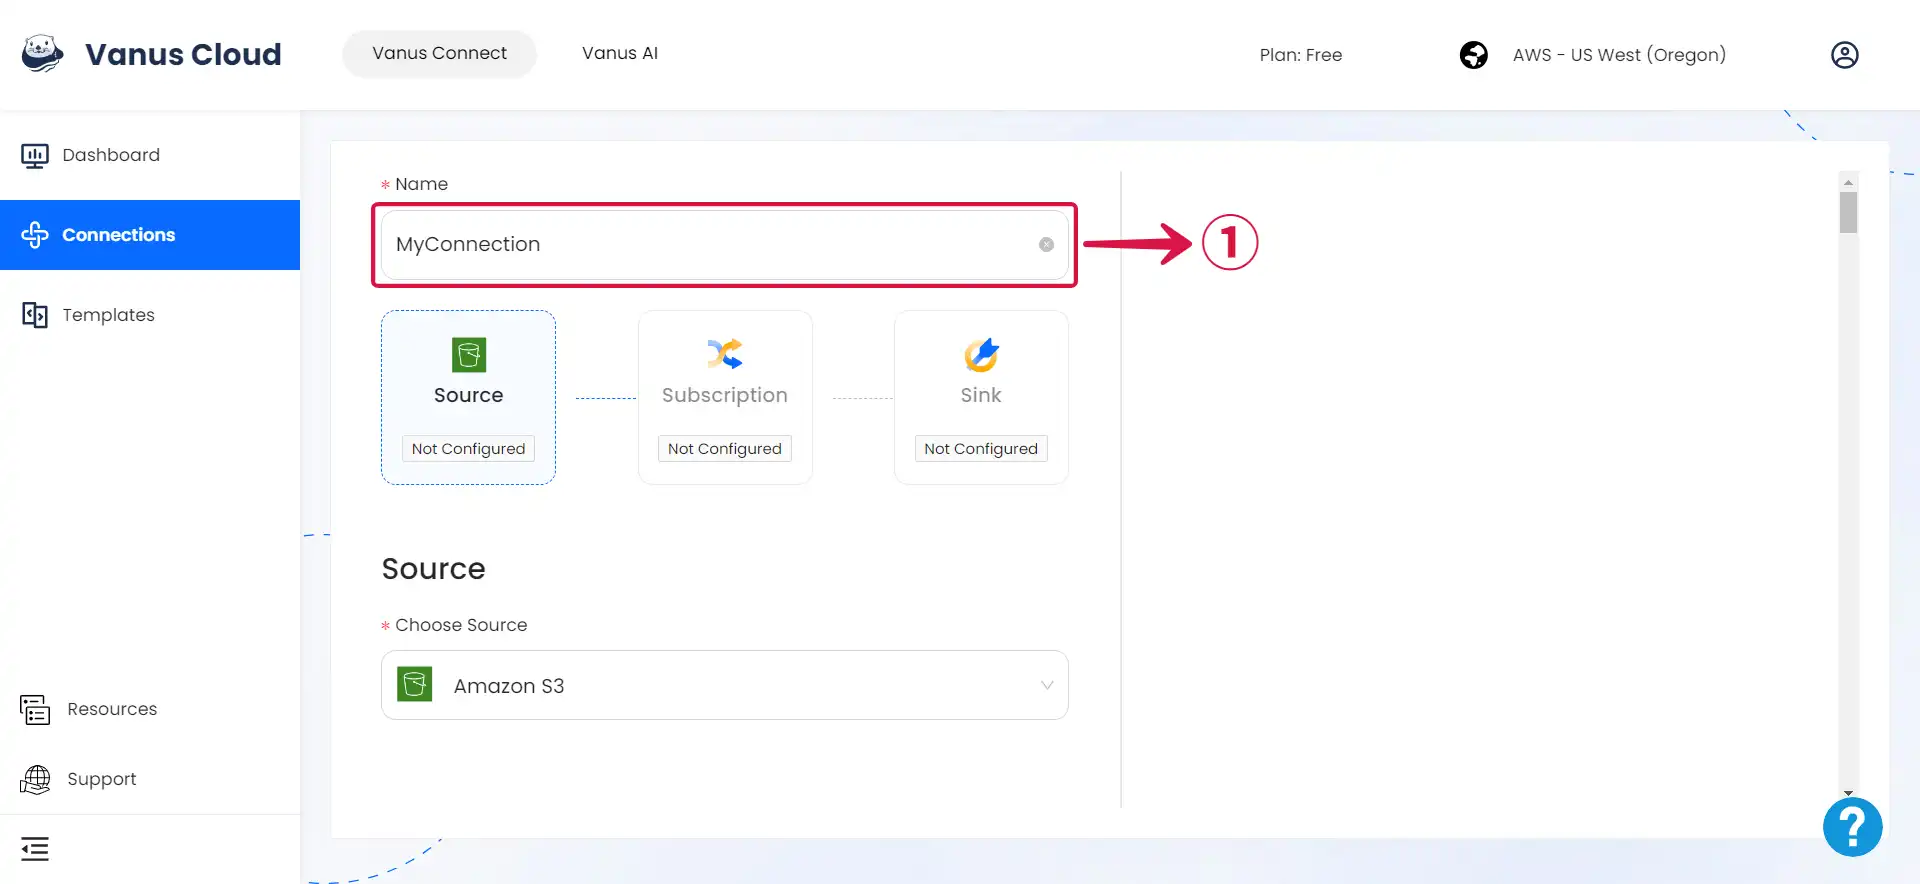
- Enter your
Access Key② andSecret access Key③ in Vanus Connect.
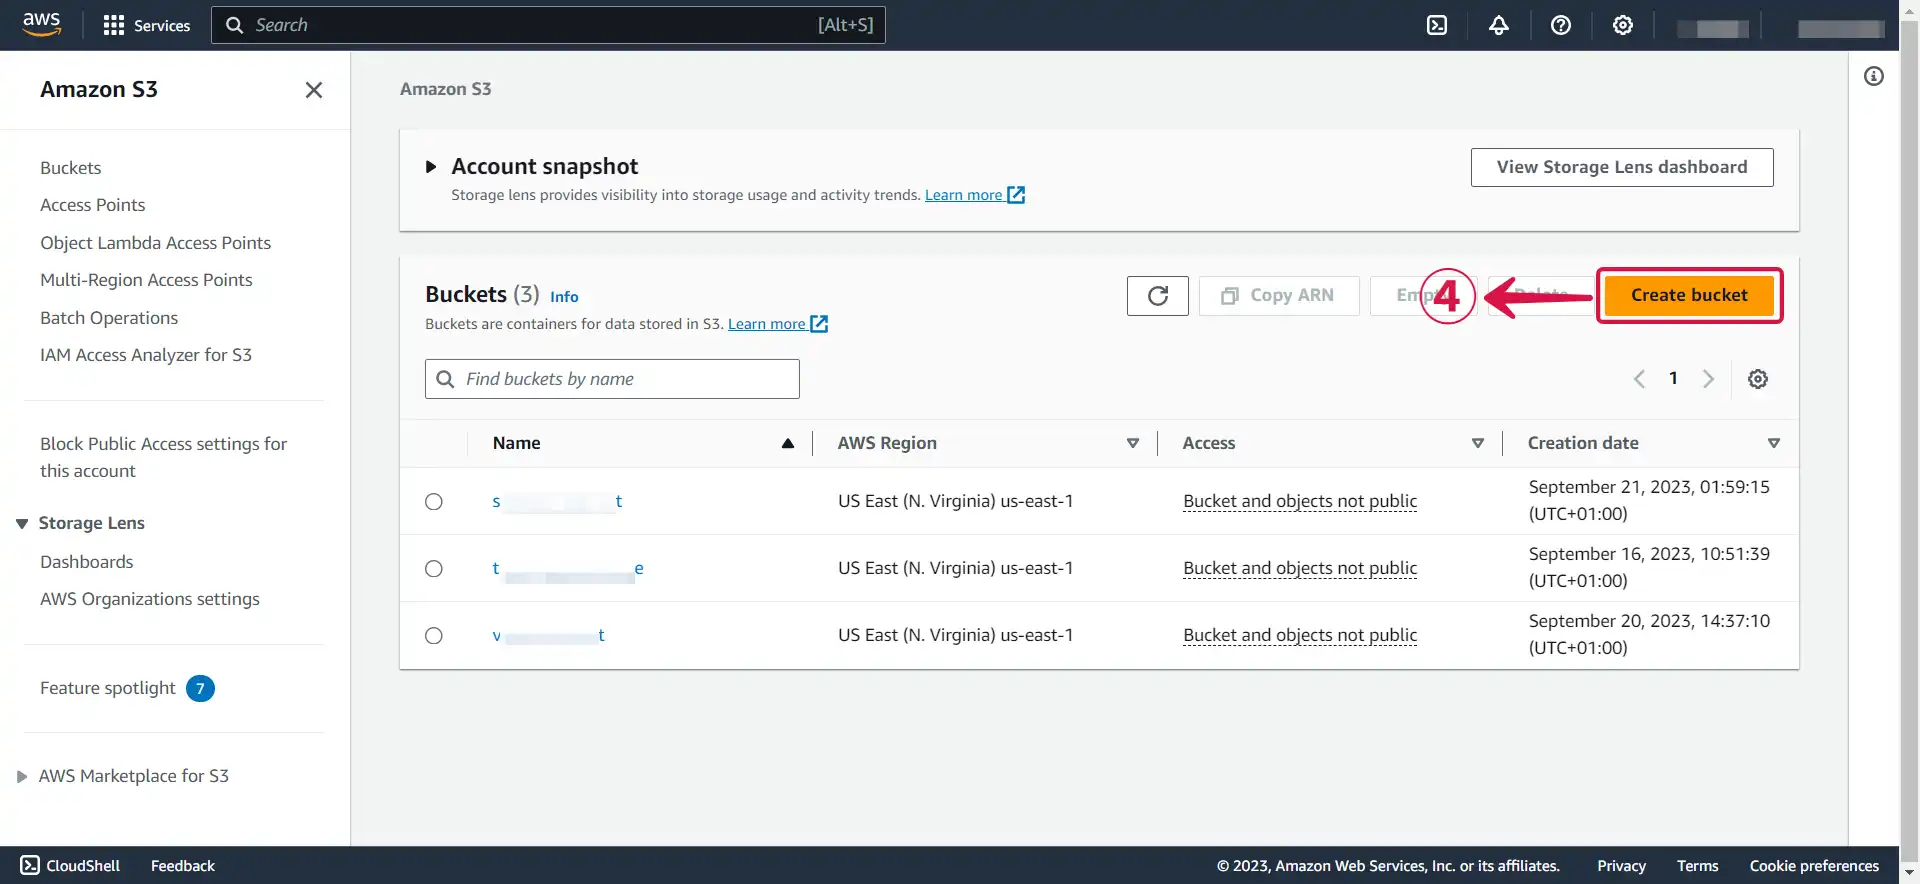
- Navigate to the Amazon S3 service.
At this point, you can either Create a new bucket or select an existing bucket.
- Create a new bucket by clicking the Create bucket④ button.
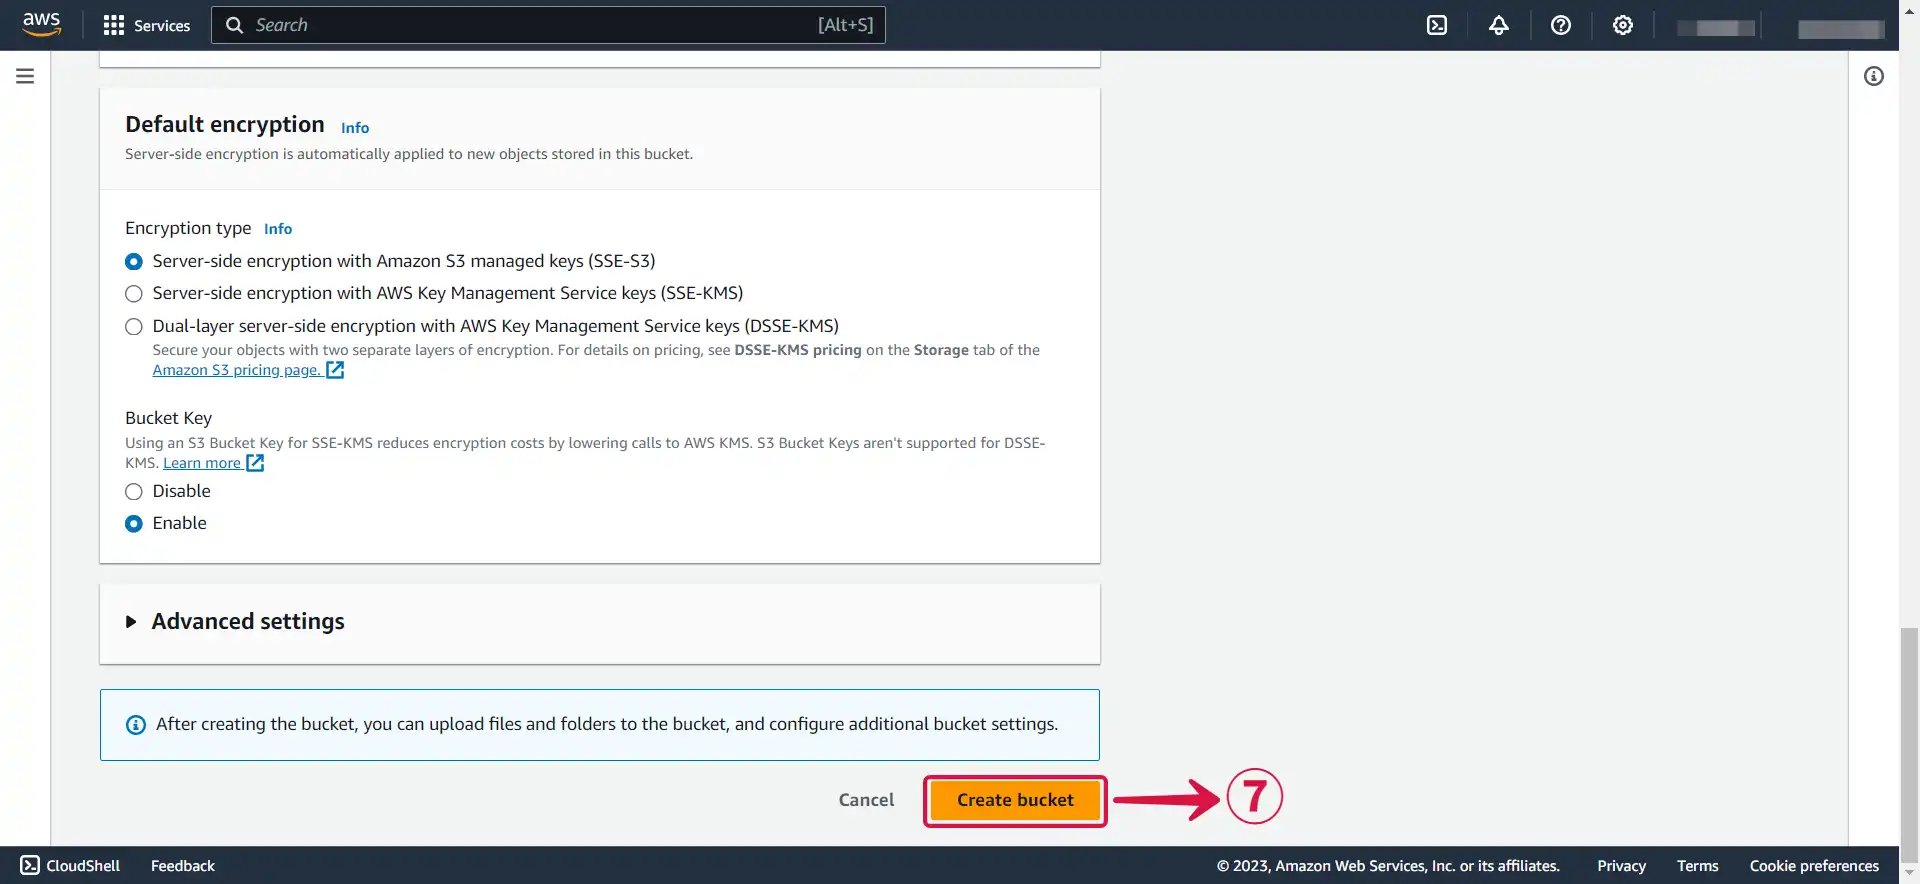
- Specify a Bucket name⑤ and select your desired AWS Region⑥.

- Click on Create bucket⑦ to finish creating your bucket.
- Once selected or created, click on the bucket name⑧.
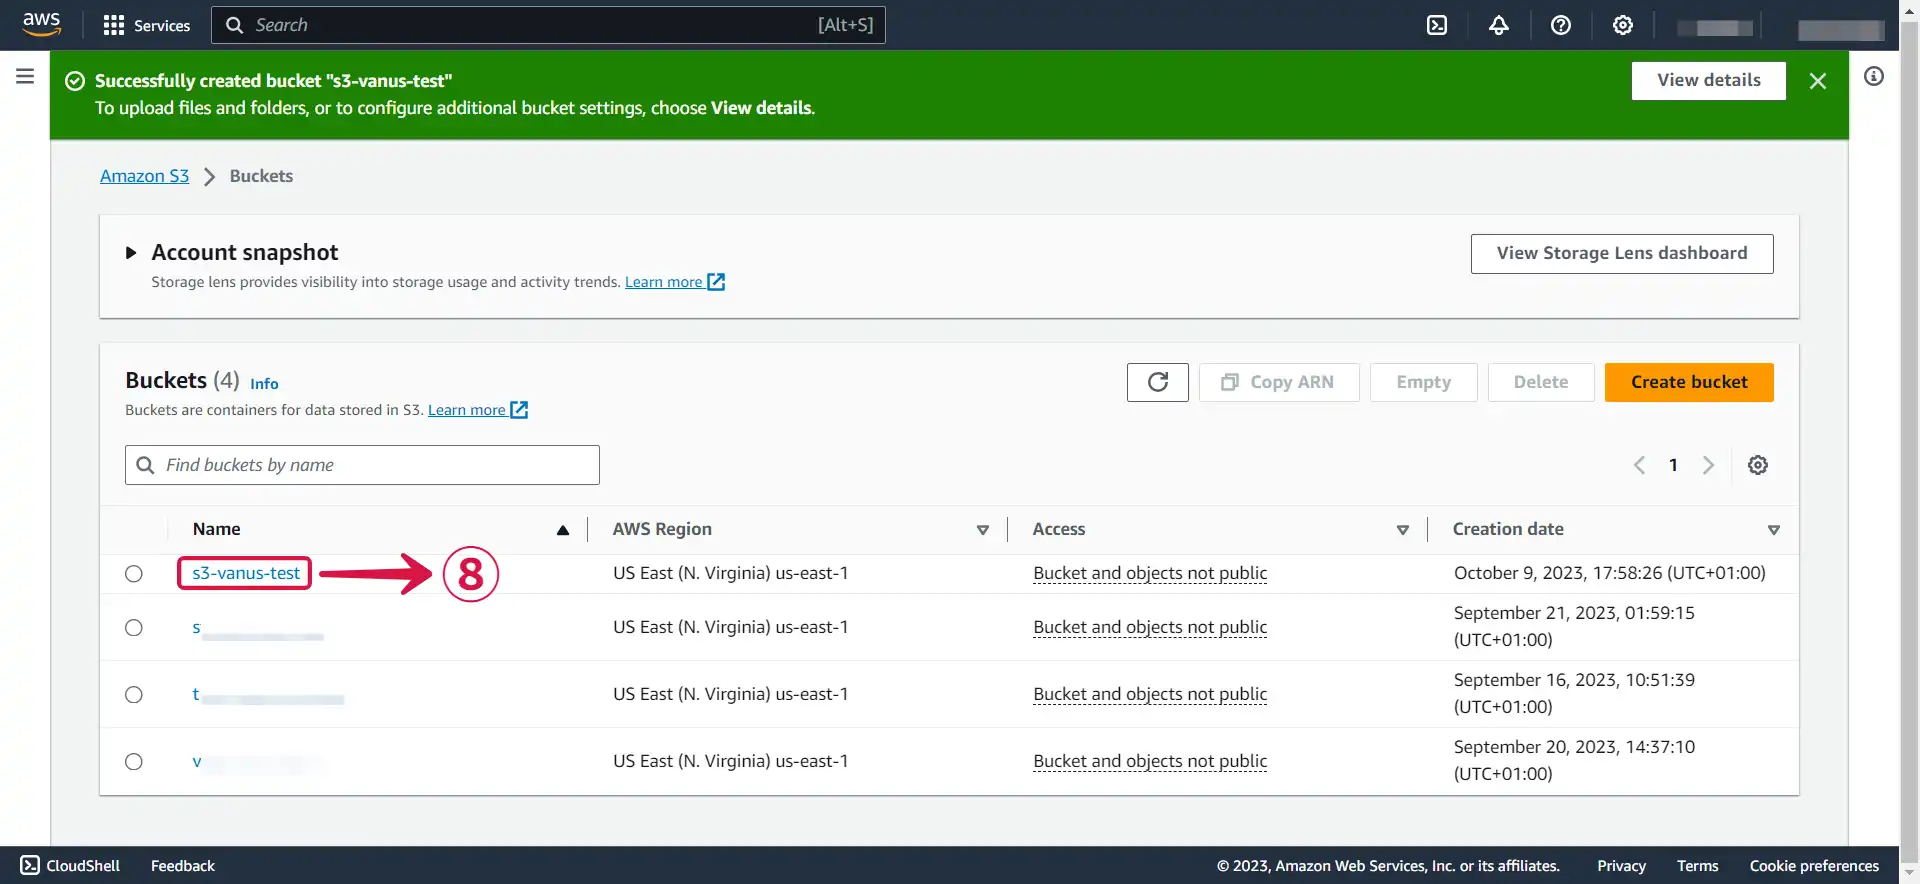
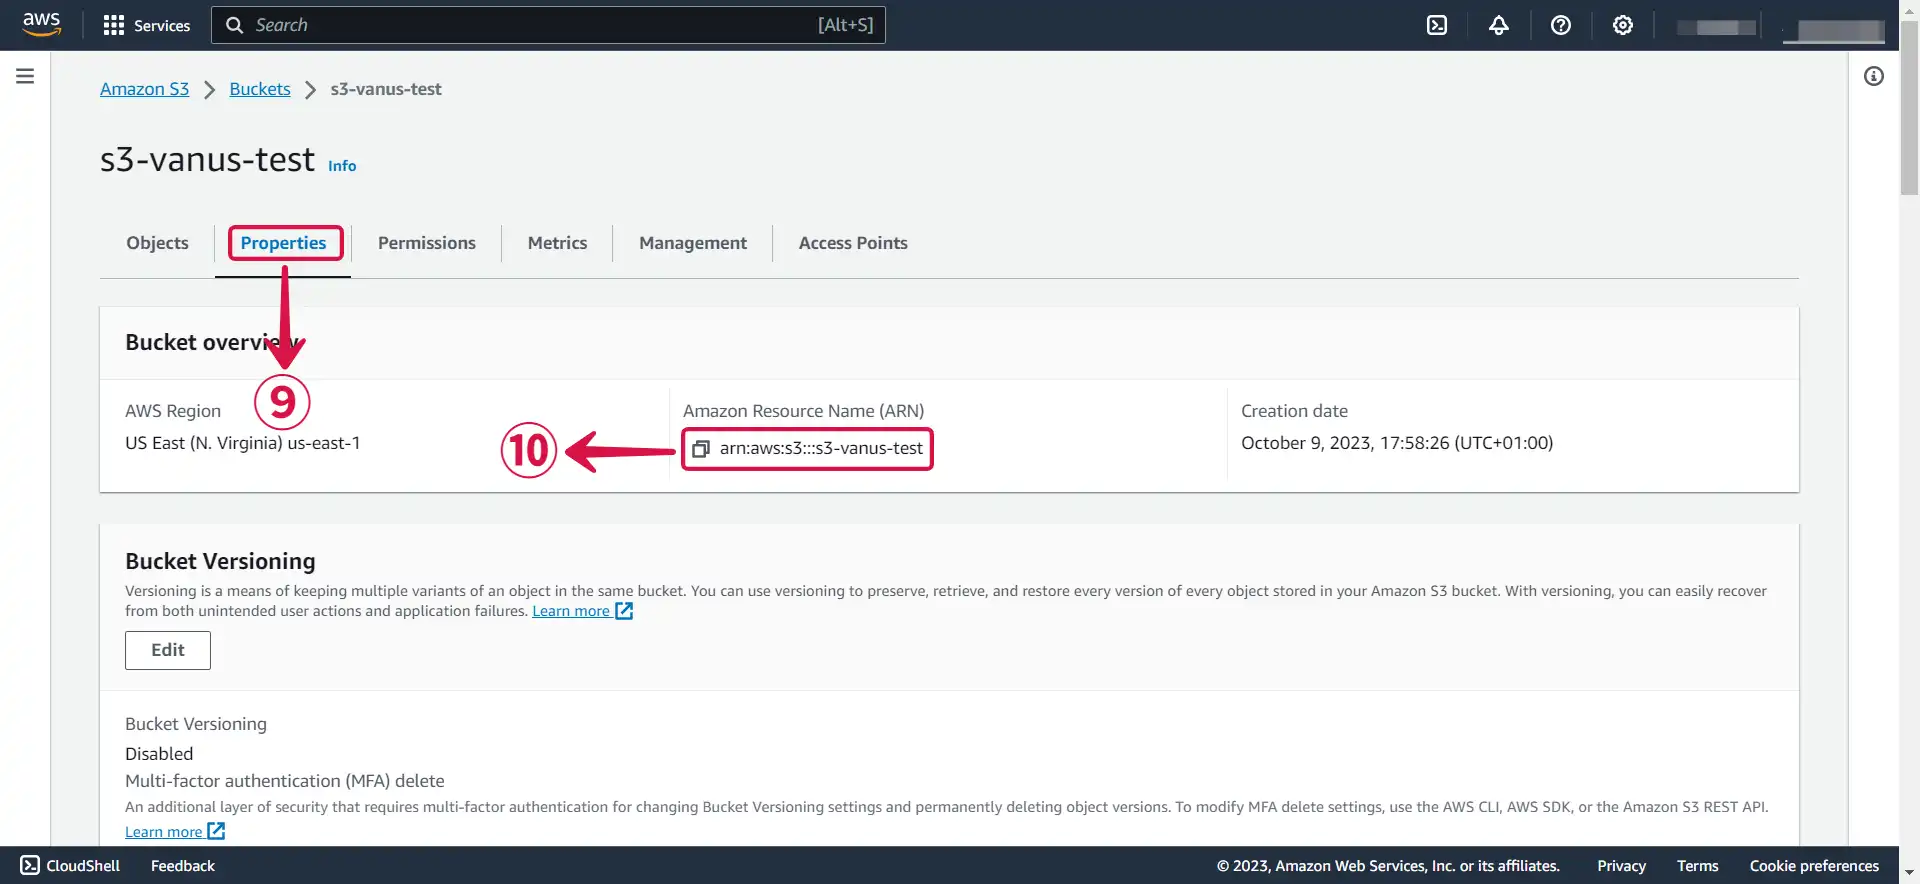
- Go to your bucket Properties⑨ and copy the ARN⑩.
- Paste your Bucket ARN⑪ into vanus connect, Specify the kind of Events⑫ you want to receive from the list.
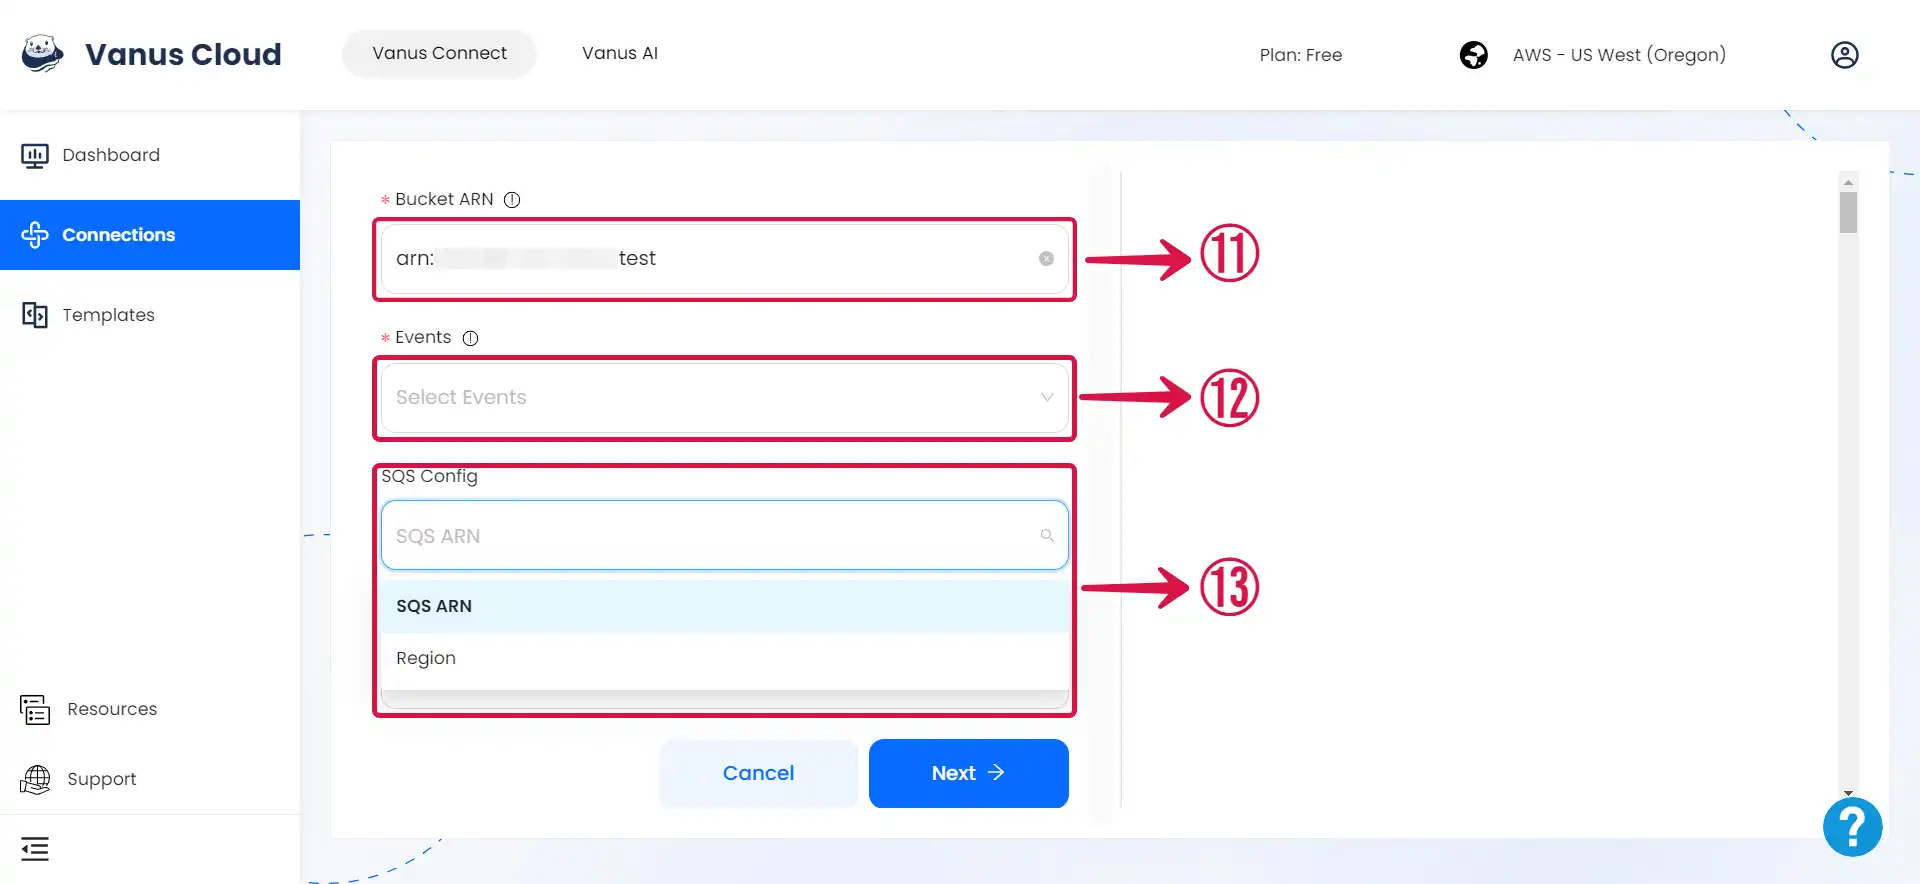
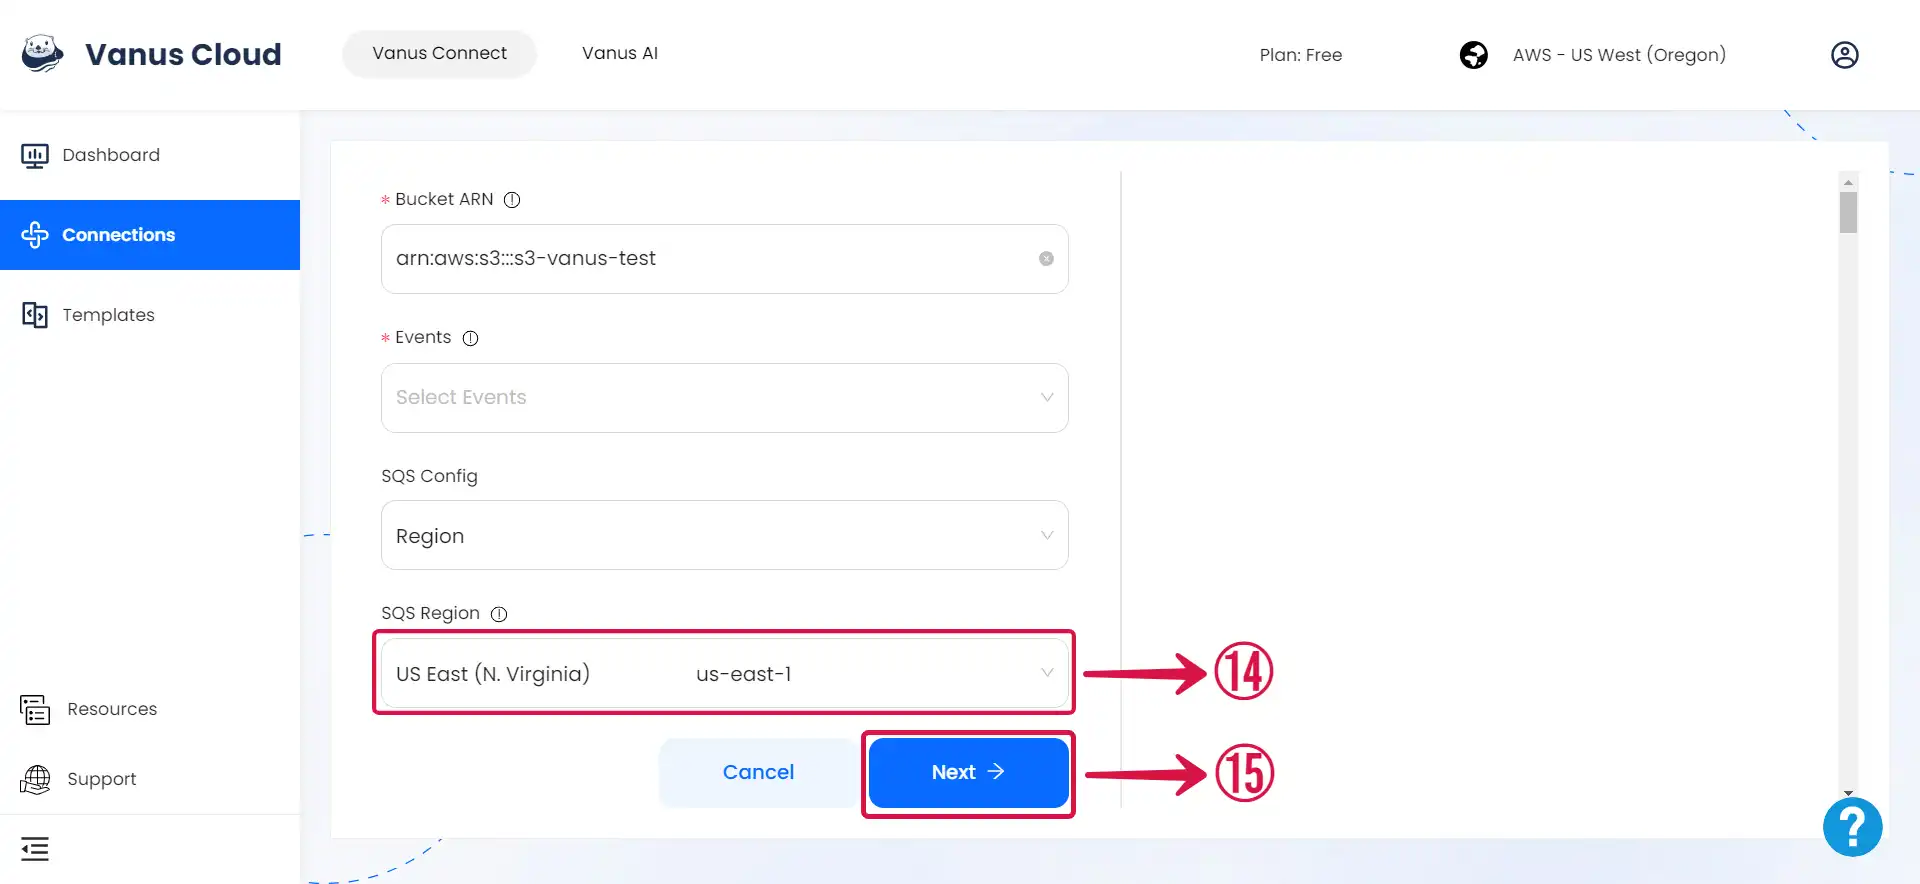
Under SQS config⑬, you can choose to create a new SQS by selecting region, or if you already have an SQS, provide the ARN.
- Set your desired SQS Region⑭ and click Next⑮ to continue the configuration.
Learn more about Vanus and Vanus Connect in our documentation.