Schedule
This guide contains information to set up a Schedule Source in Vanus Connect.
Introduction
Schedule source gives you the ability to schedule messages or events hourly, daily, weekly or monthly.
Prerequisites
Getting Started
Step 1: Schedule Connection Settings
- Write a Name① for your connection in Vanus Connect.
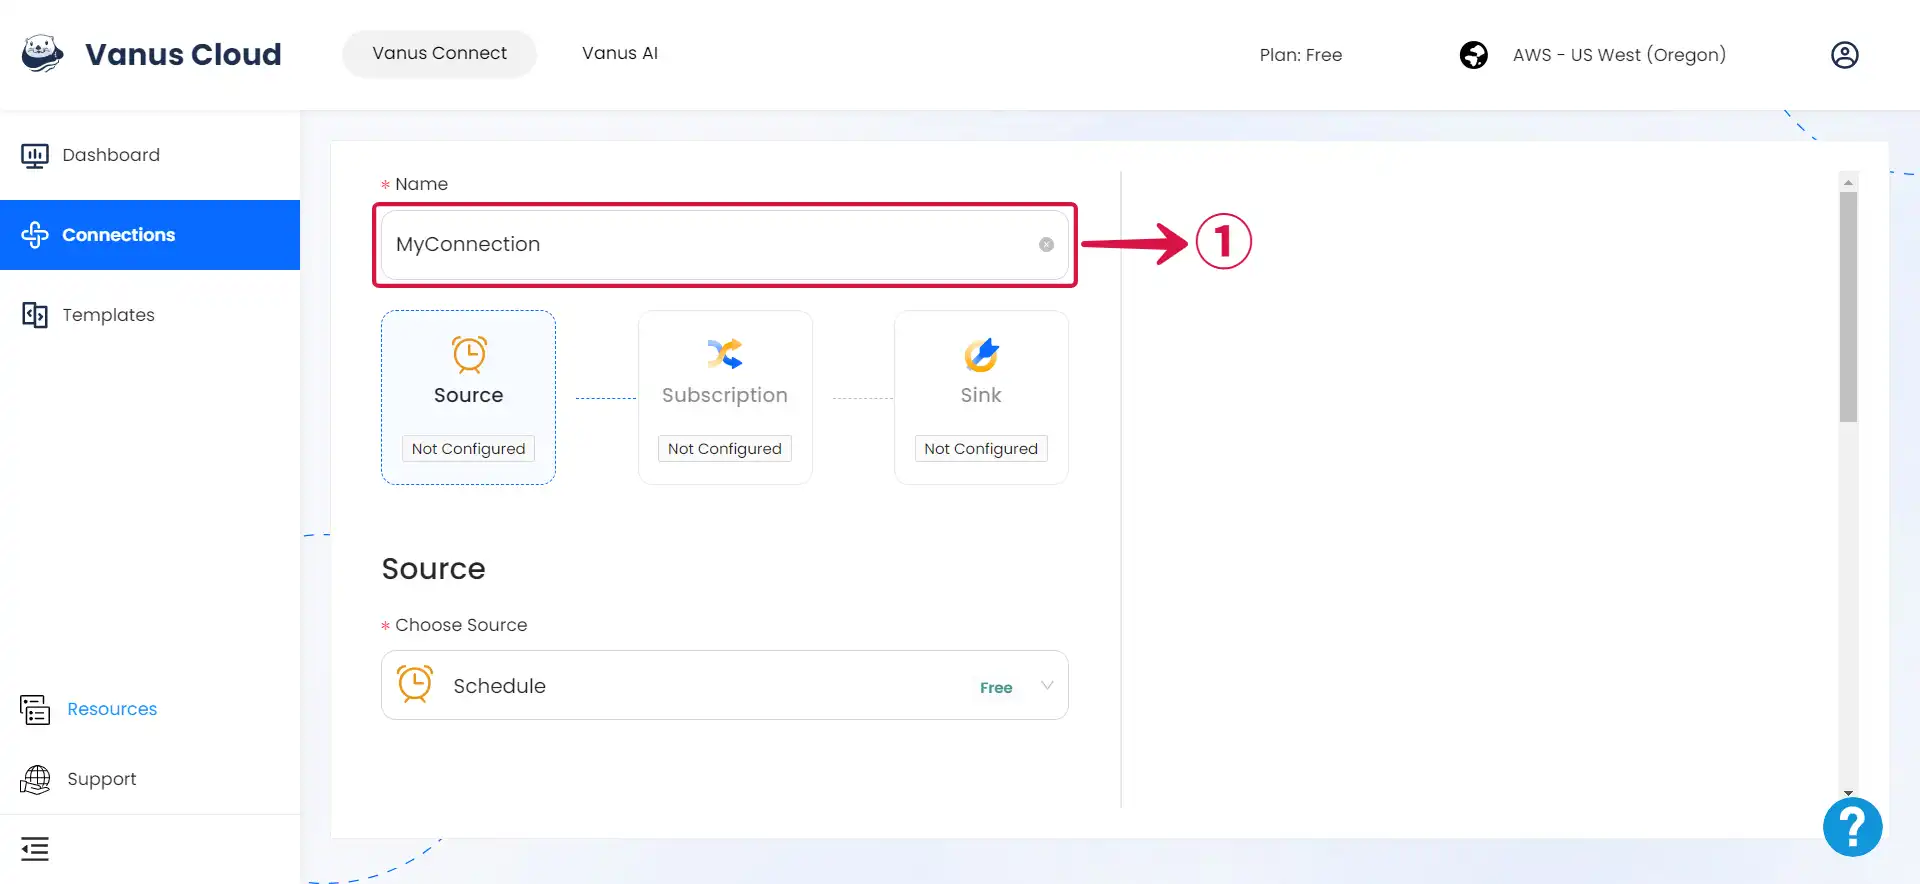
- Click on Schedule Type② to choose your schedule type.
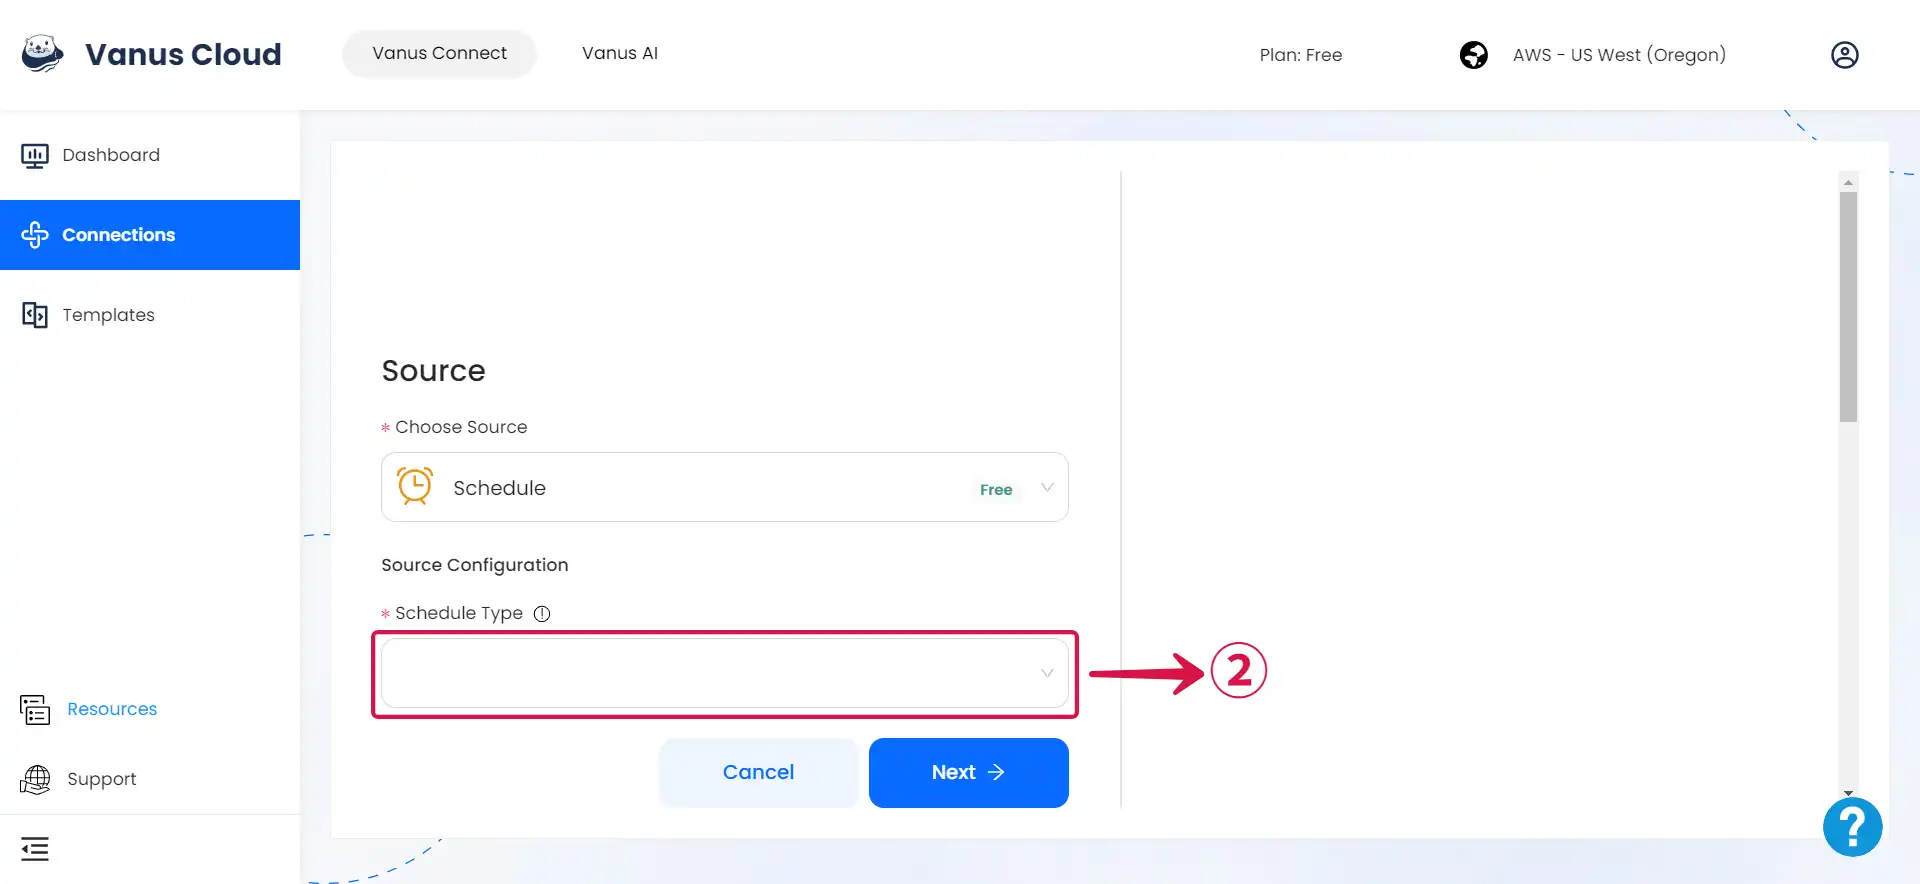
- Hourly
- Daily
- Weekly
- Monthly
- If you opt for an Hourly schedule③, you can choose the specific Minutes and Seconds of the hour④ when the event will be sent.
note
This means that the event will be dispatched at the same minute and second within every subsequent hour that it is scheduled to run.
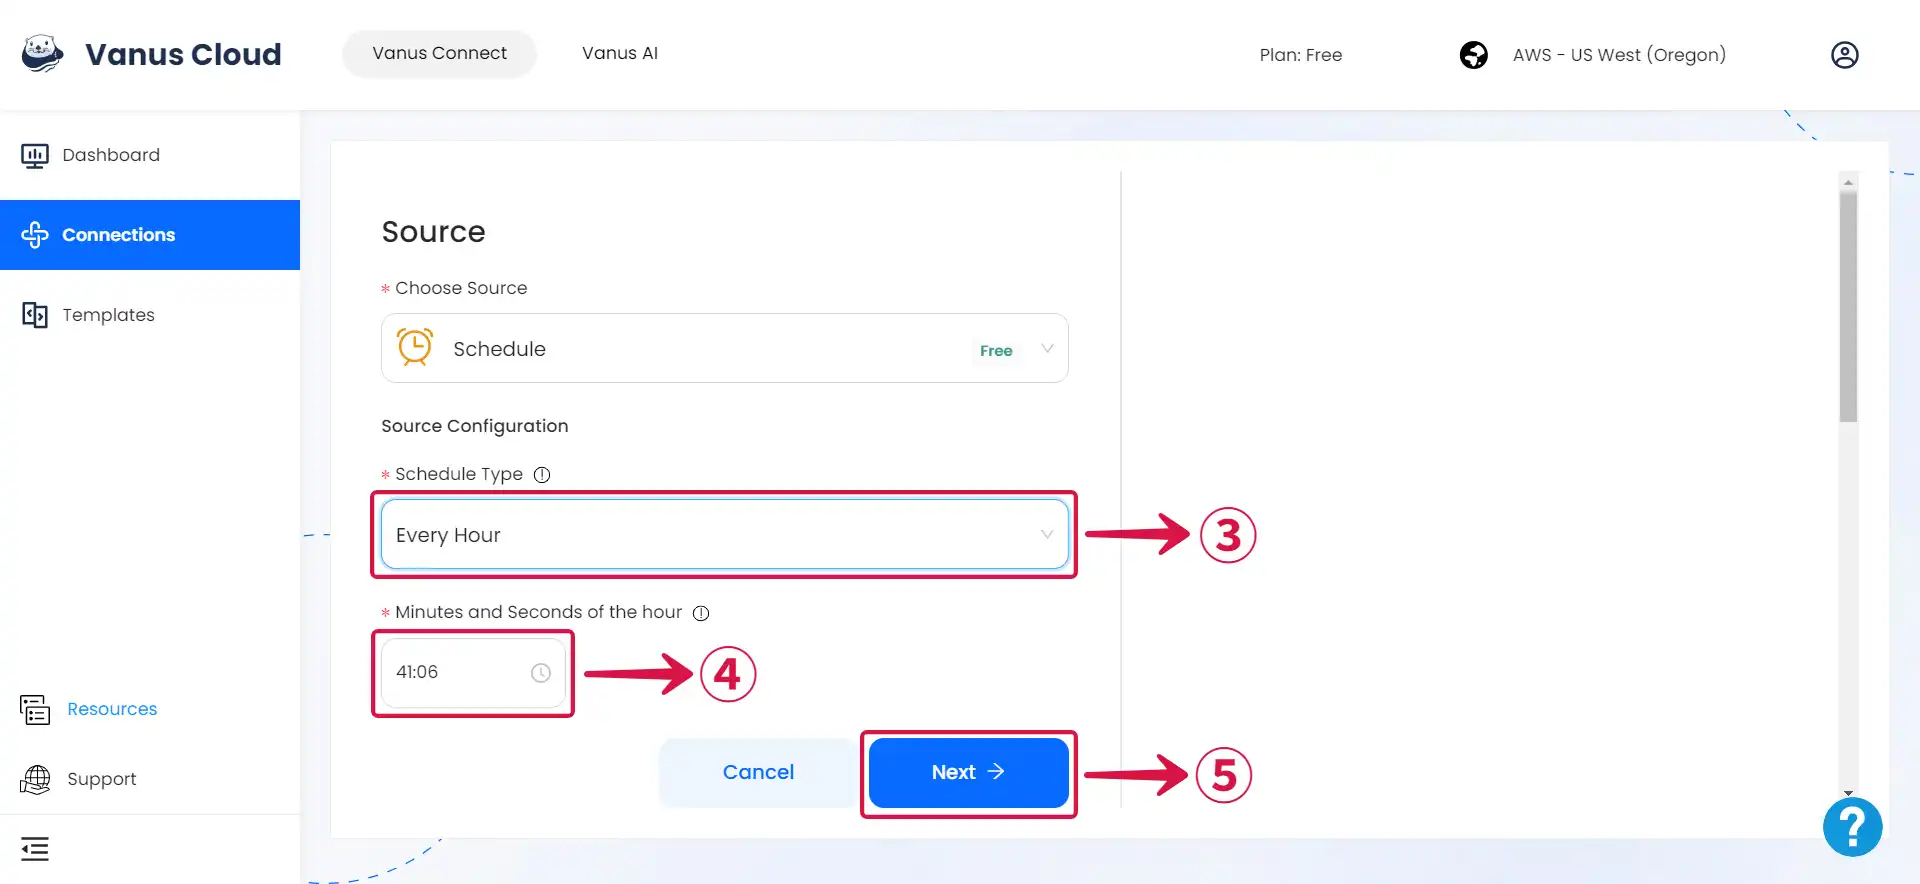
- Click Next⑤ and continue the configuration.
- Choosing a Daily schedule③ provides the freedom to pick the precise Time of the Day④, down to the hour, minute, and second, when the event will be sent each day.
note
This enables you to specify the event's exact dispatch time, and it will continue to occur at that chosen time on all following days based on your schedule.
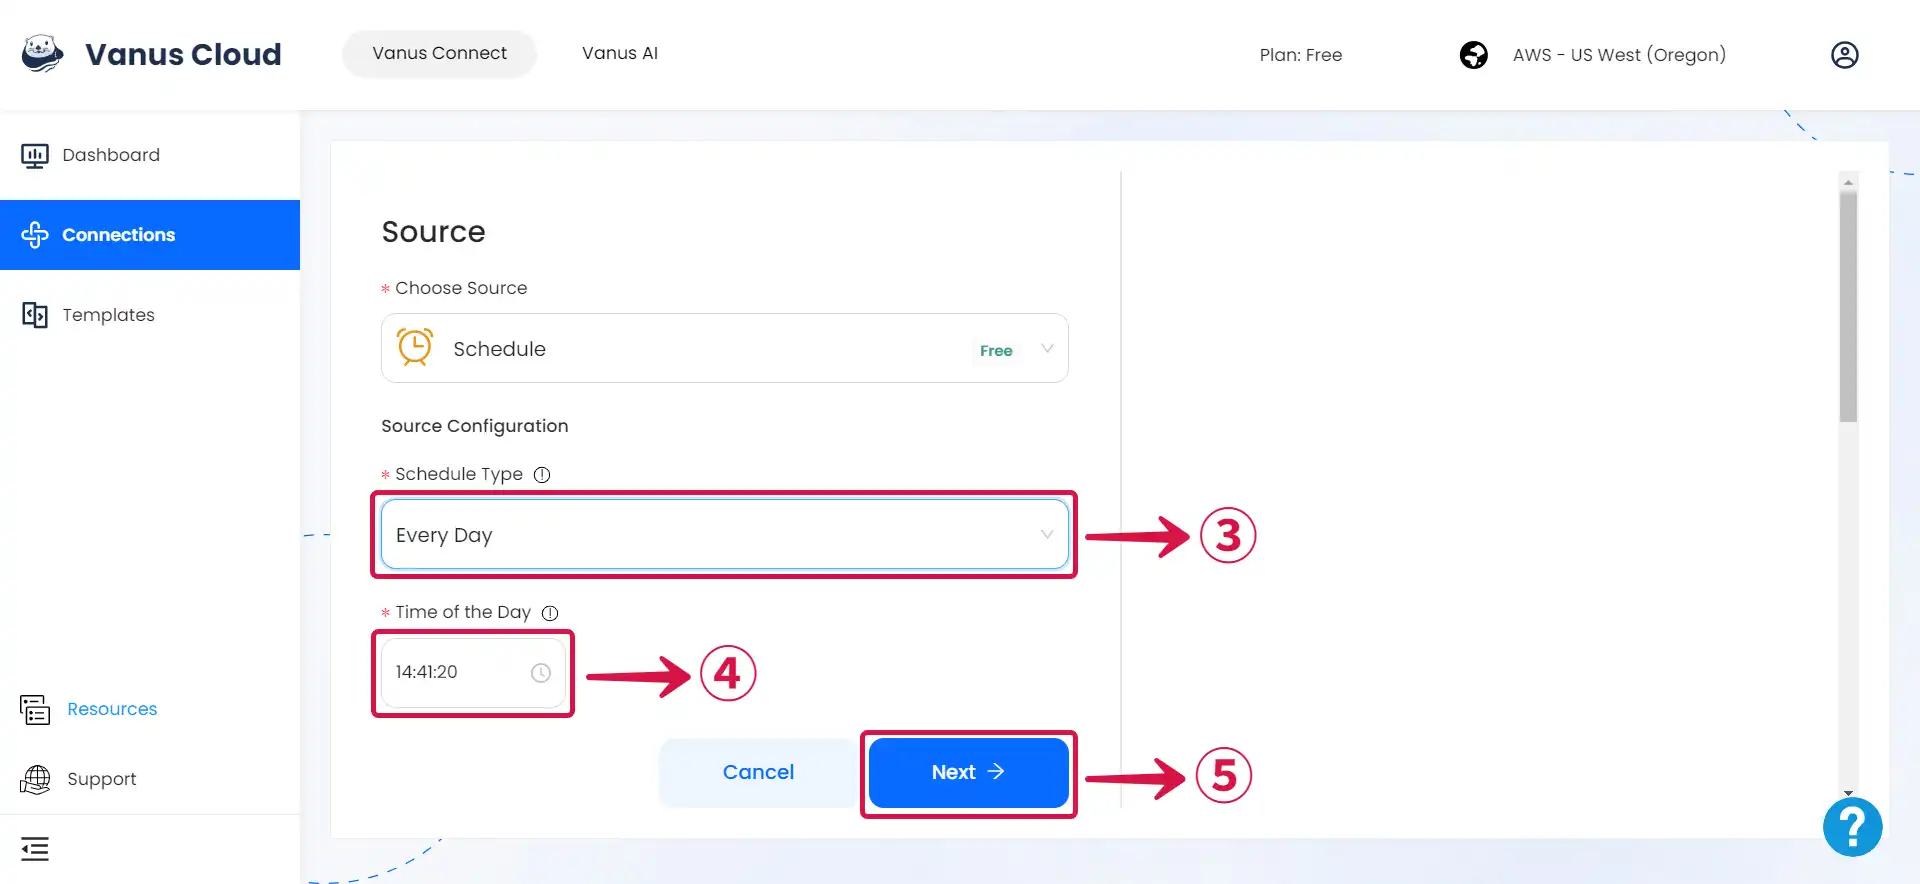
- Click Next⑤ and continue the configuration.
- If you opt for a Weekly schedule③.
- The first step is to choose the Day of the Week④ or multiple days when you want the event to be sent.
- After you've chosen the day or days, you can proceed to the second step, where you'll specify the precise Time of the Day⑤ when the event should be dispatched on that specific day.
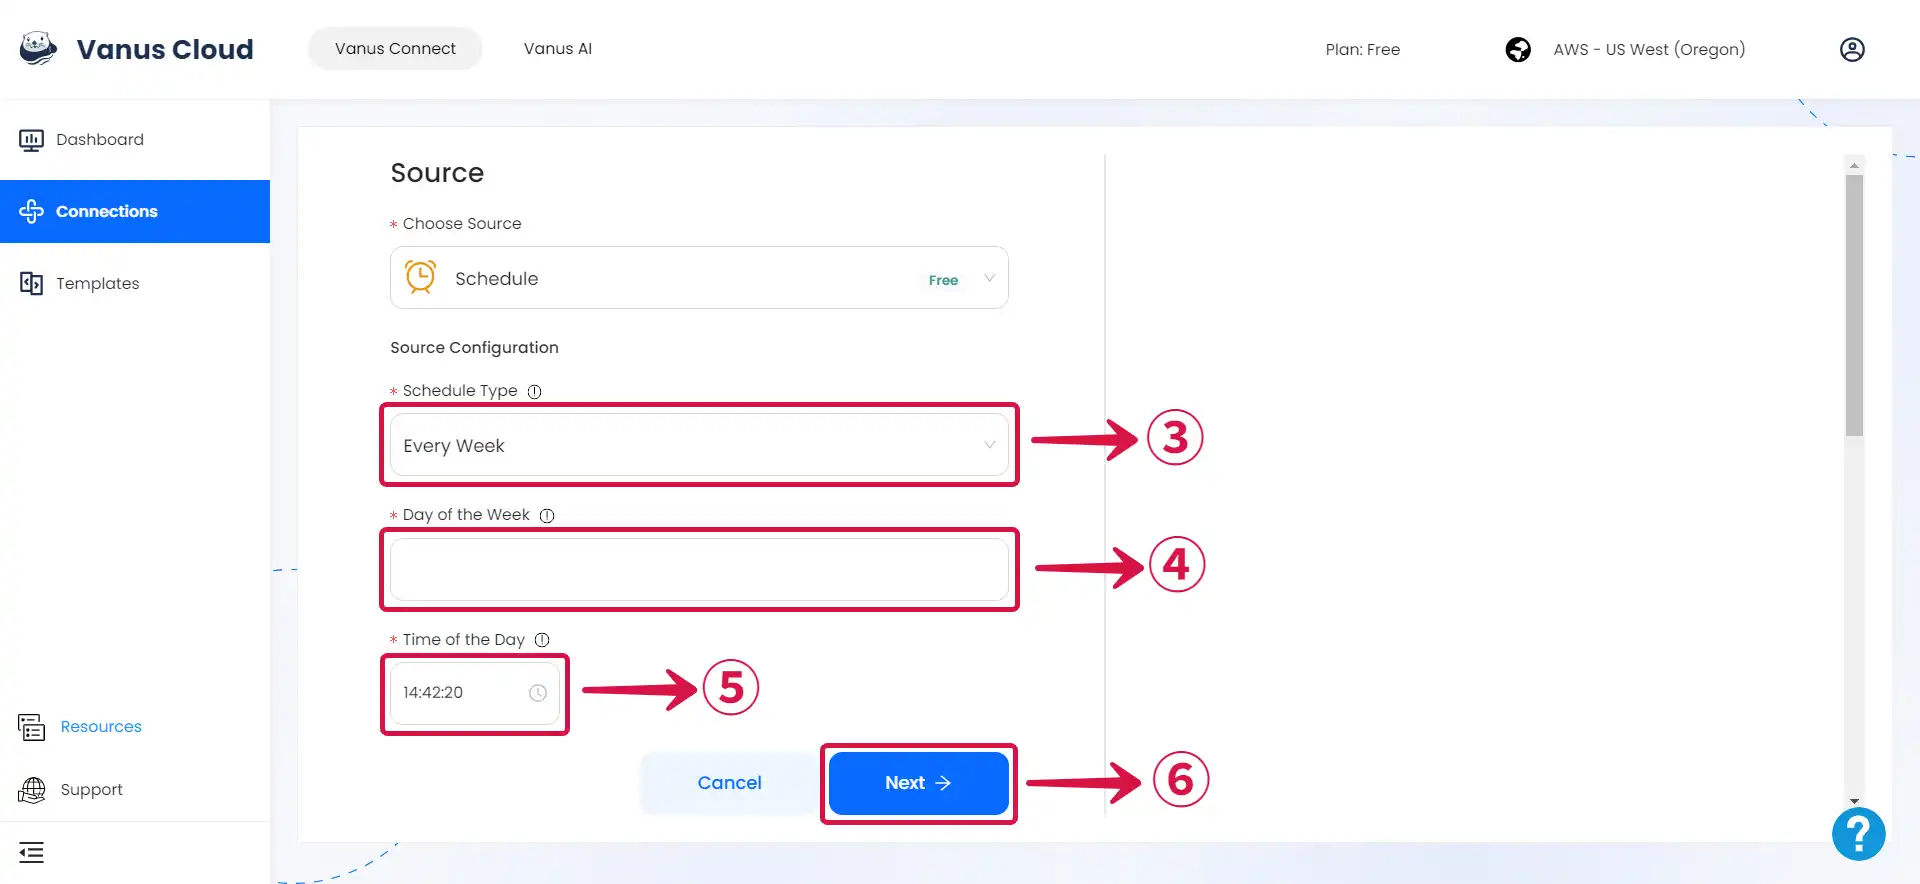
- Click Next⑥ and continue the configuration.
- If you opt for a Monthly③ schedule.
- The first step is to choose the Day of the Month④ (or days, based on your preferences) on which you desire the event to be sent. You can select a specific day of the month (such as the 15th) or multiple days of the month (like the 1st and the 15th).
- The second step is to specify the specify the precise Time of the Day⑤ when the event should be dispatched on the selected day(s) of the month.
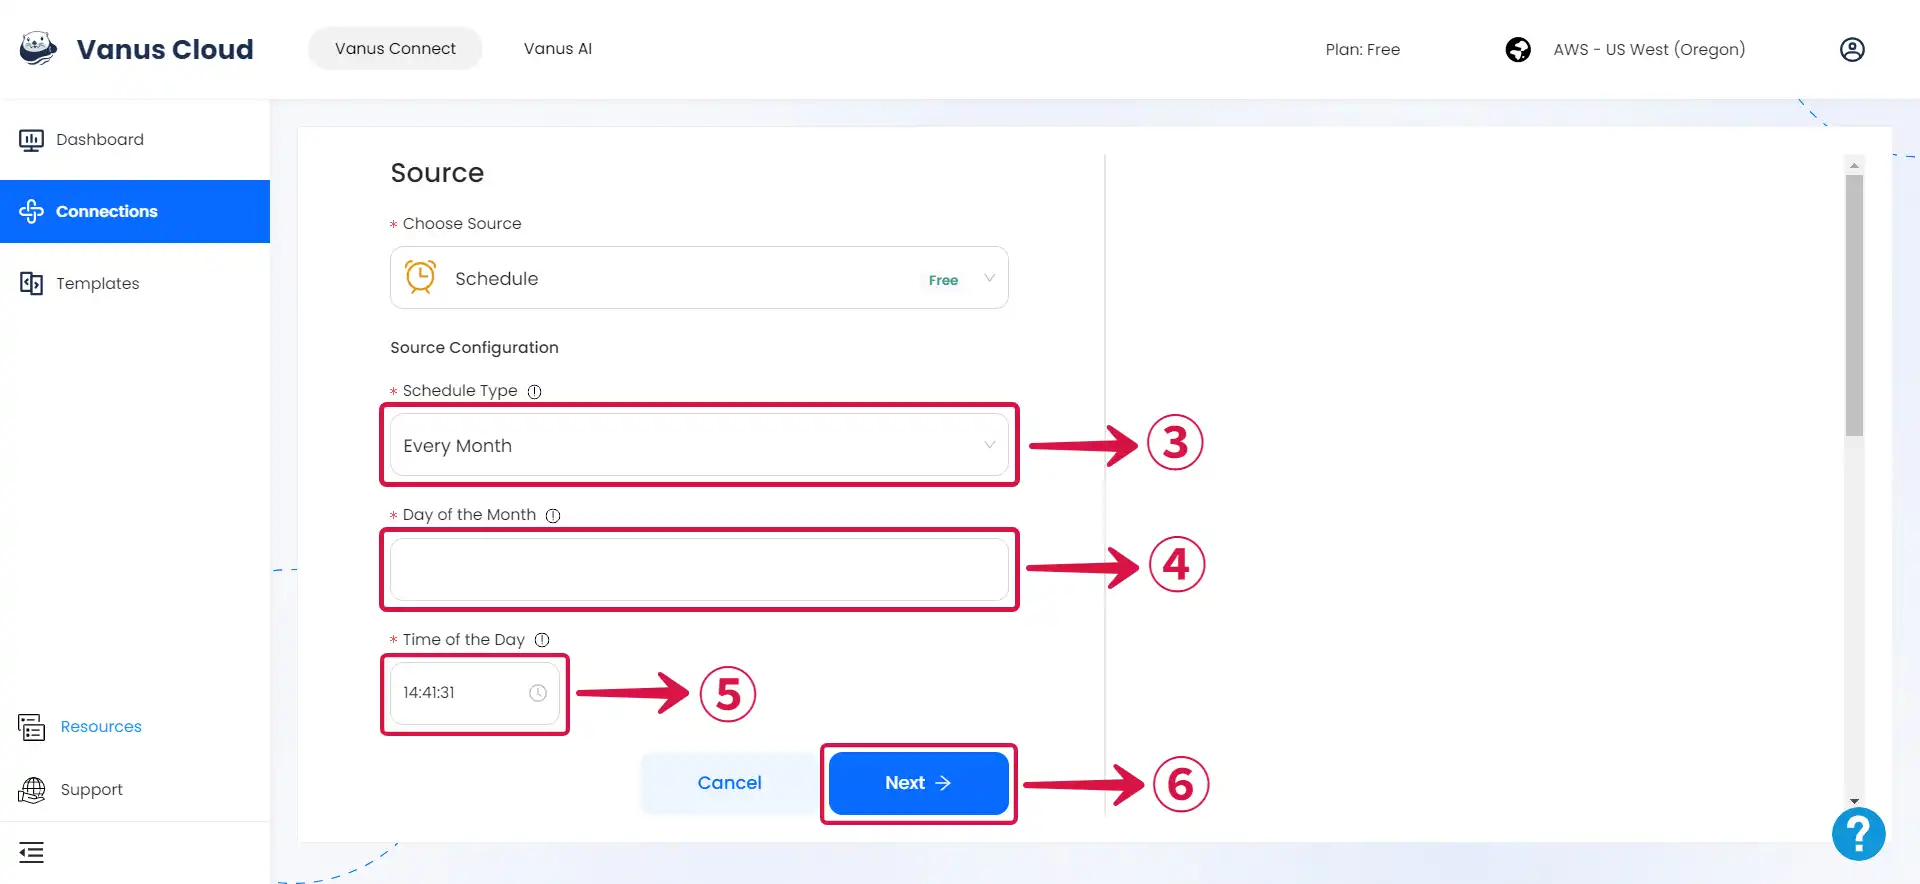
- Click Next⑥ and continue the configuration.
Learn more about Vanus and Vanus Connect in our documentation