Amazon SQS
This guide contains information to set up a SQS Source in Vanus Connect.
Introduction
Amazon Simple Queue Service (Amazon SQS) is a fully-managed message queuing service provided by Amazon Web Services (AWS).
It is designed to help developers build distributed systems and applications that need to communicate asynchronously by reliably sending, storing, and receiving messages between software components.
Vanus Connect provides the Amazon SNS Source connector, which retrieves SNS events and converts them into CloudEvents.
Prerequisites
Before obtaining SQS events, you must have:
Getting Started
Step 1: Create a new AWS user
Log in to the AWS Management Console using your root account credentials.
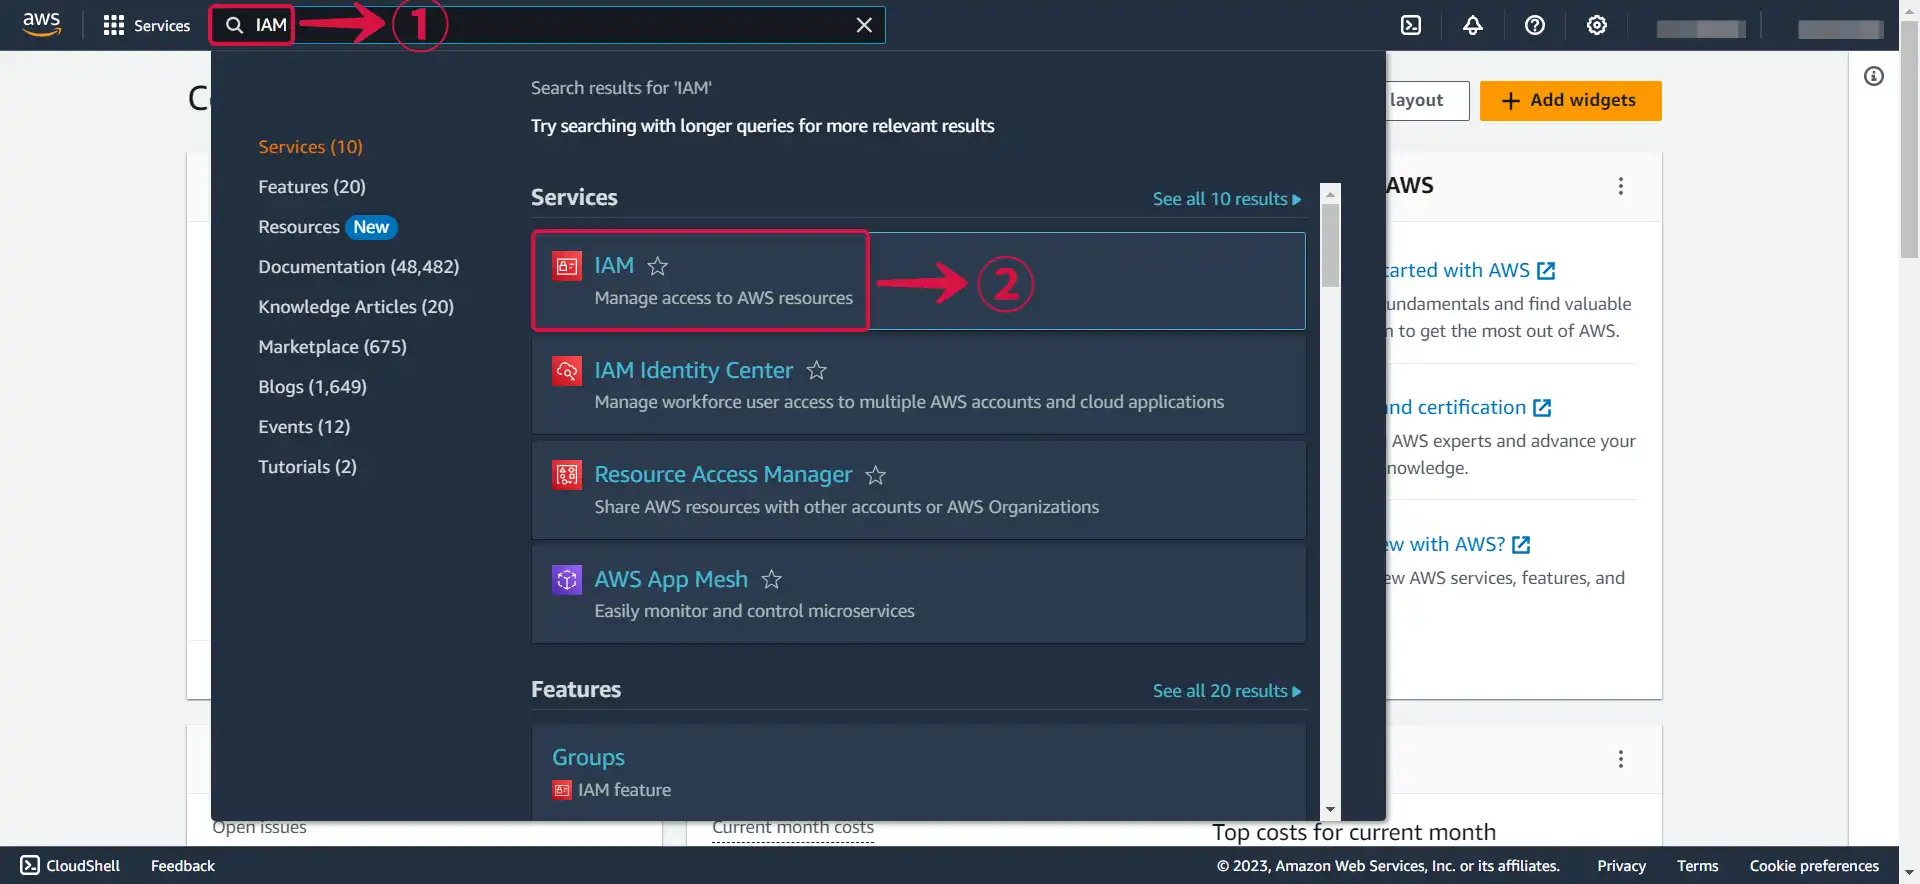
Navigate to the IAM service by searching for IAM① and click the IAM② service.
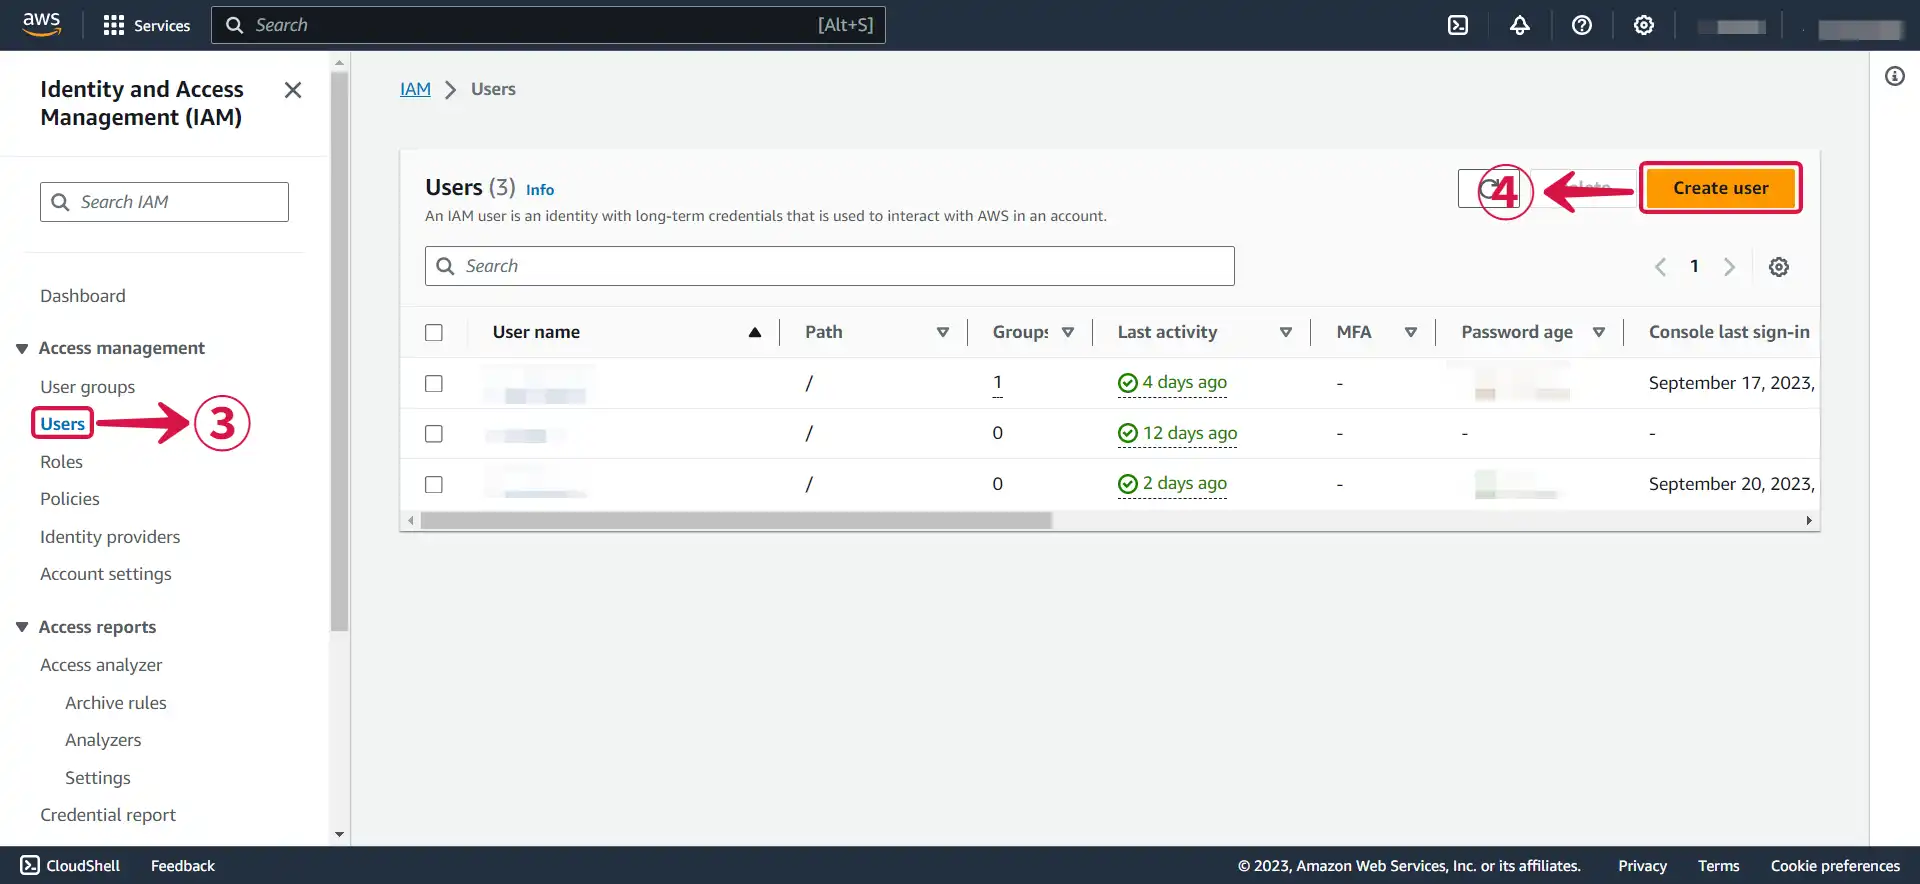
- Click the Users③ tab in the left navigation menu, then click the Create user④ button.
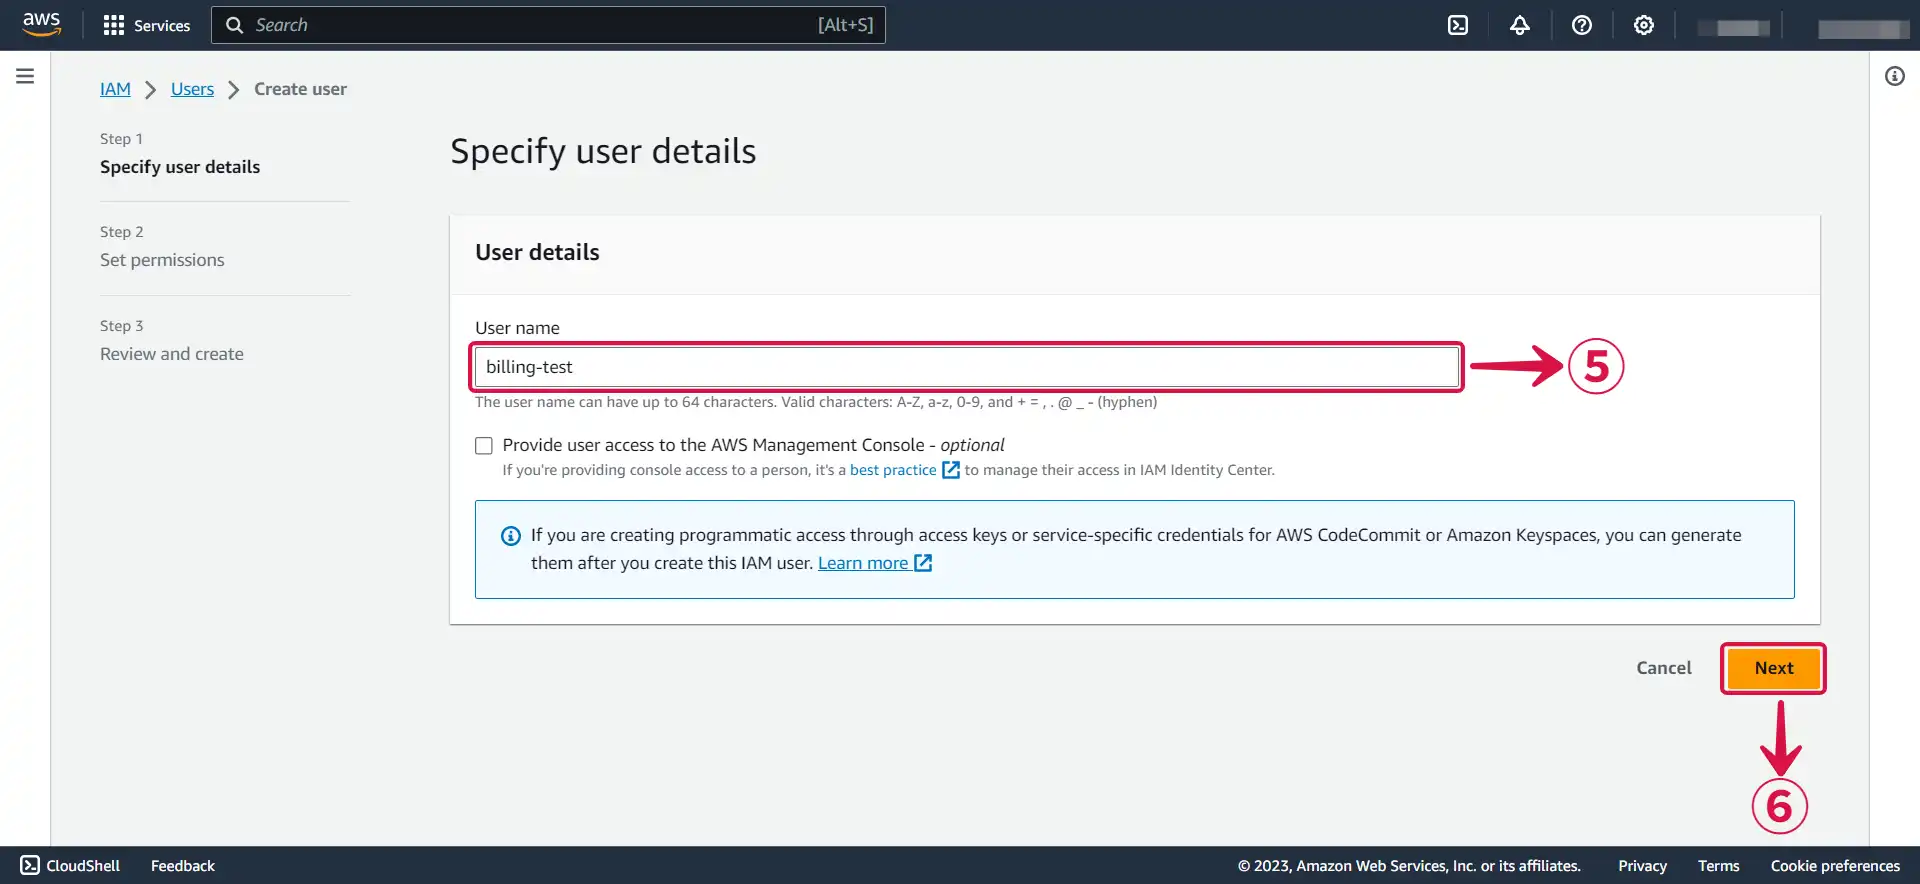
- Write your User name⑤ and click Next⑥.
- Select Attach policies directly⑦.
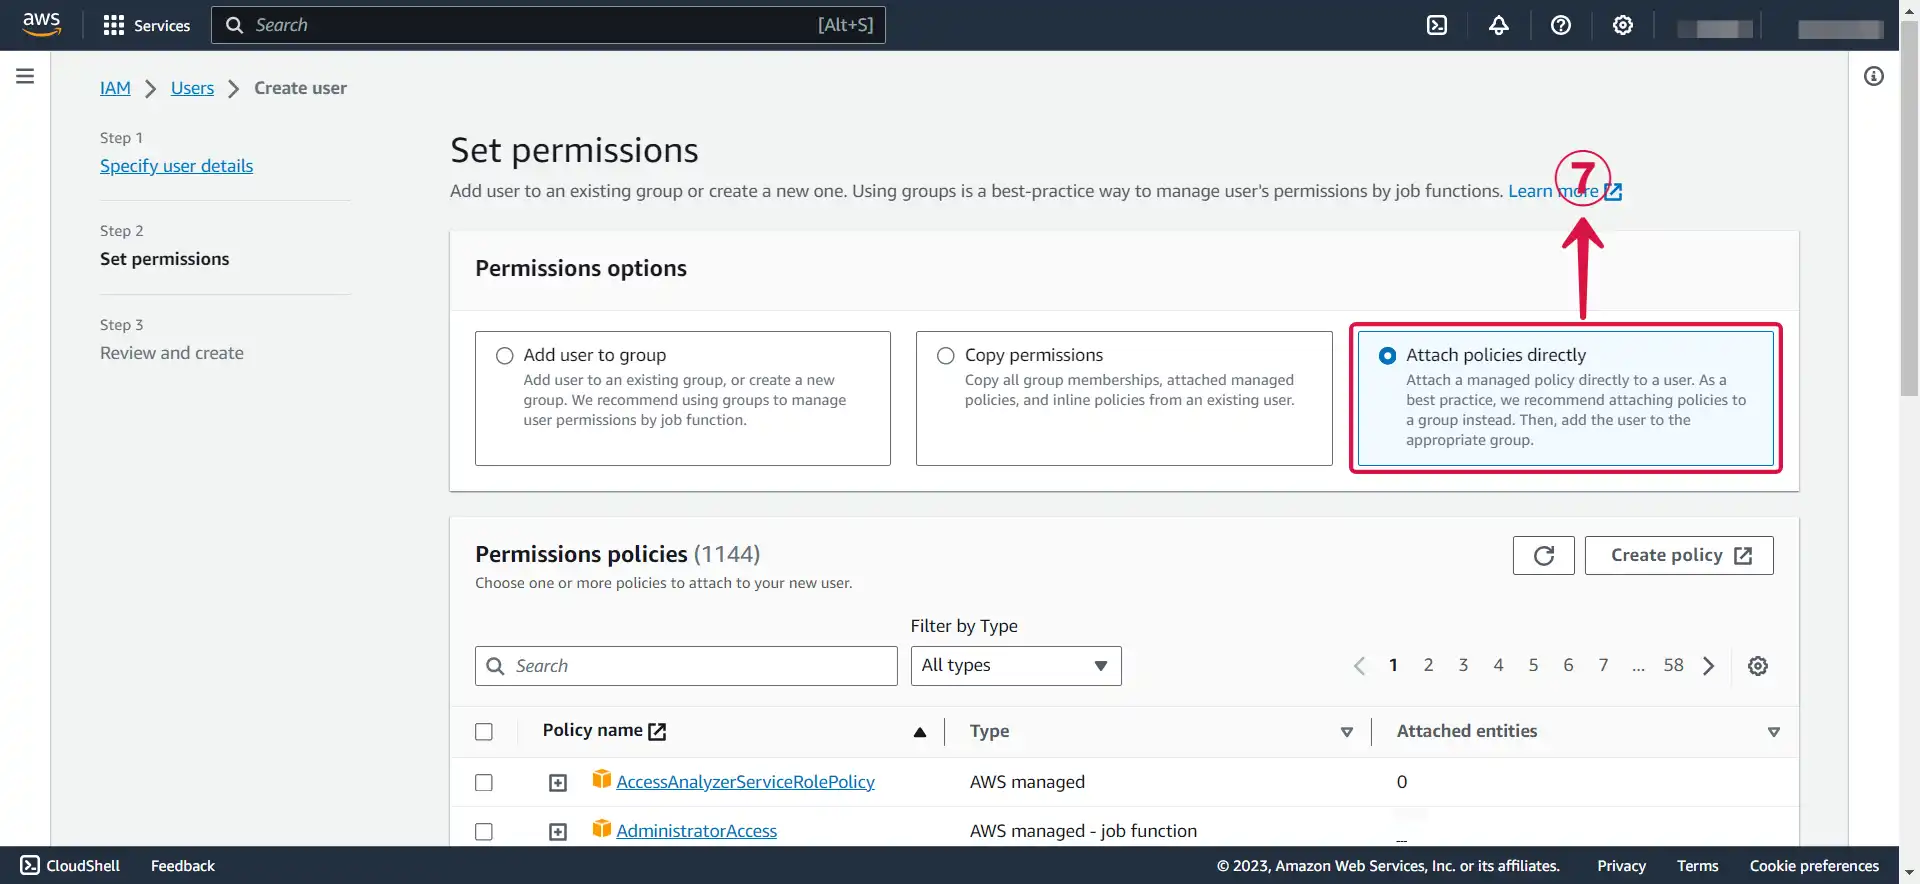
- Search for
AmazonSQSFullAccess⑧, select it⑨ and click Next⑩.
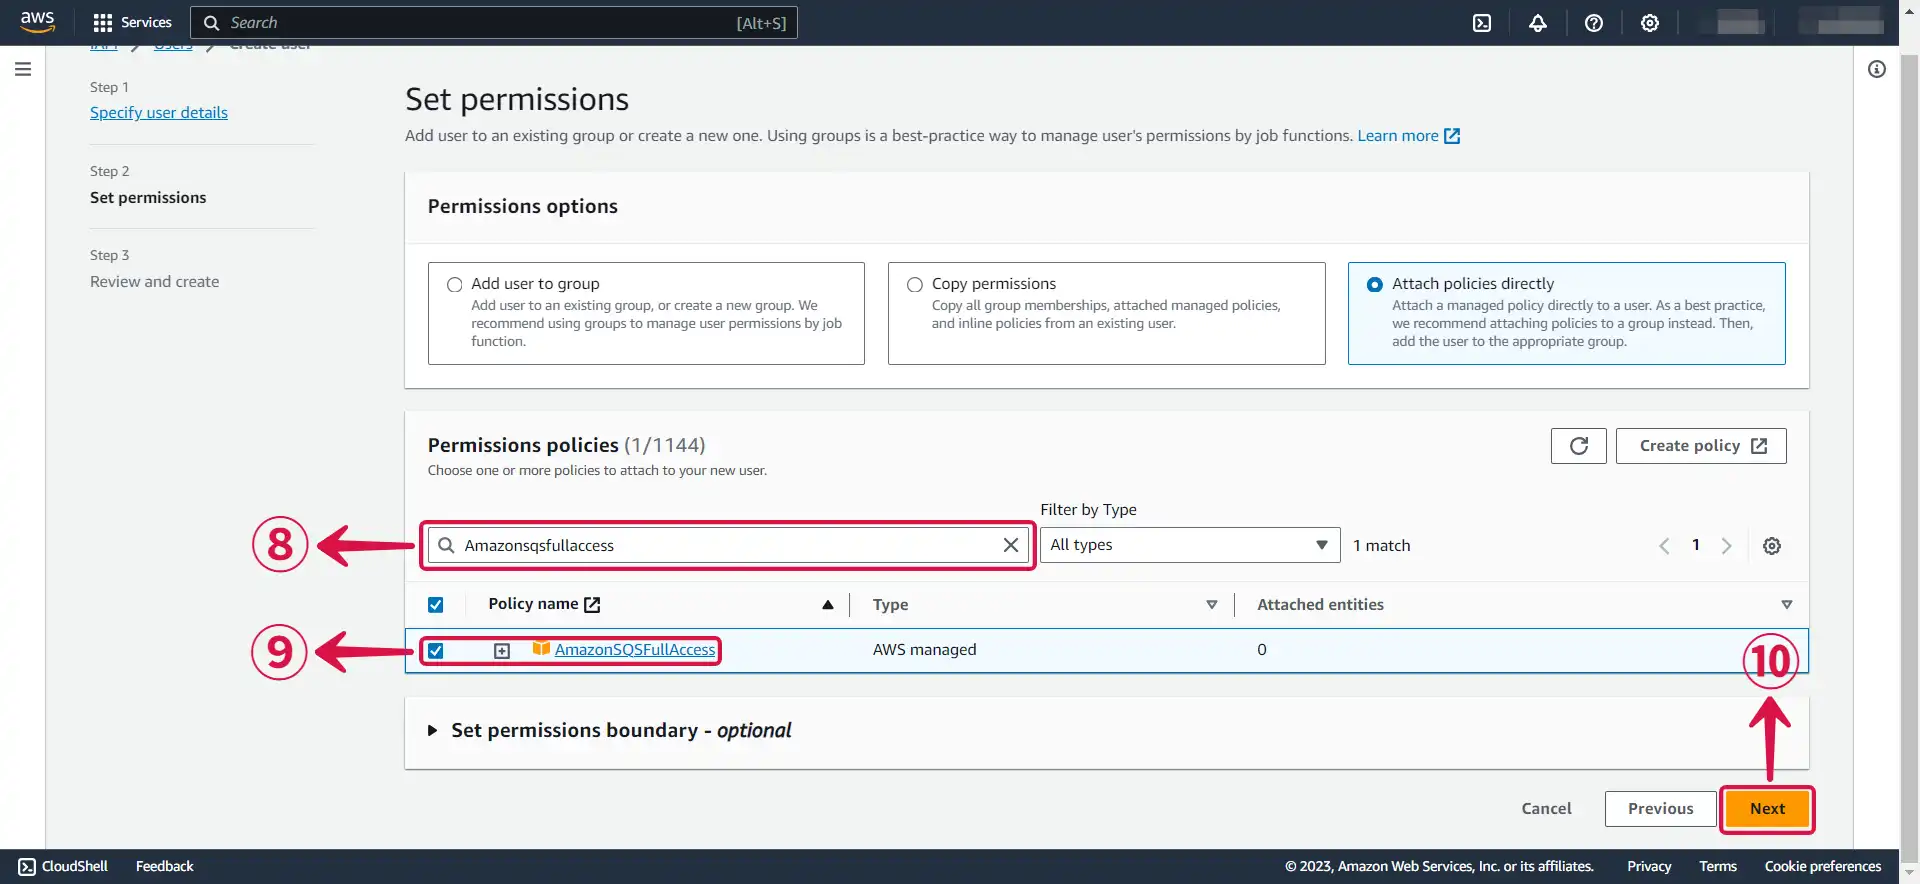
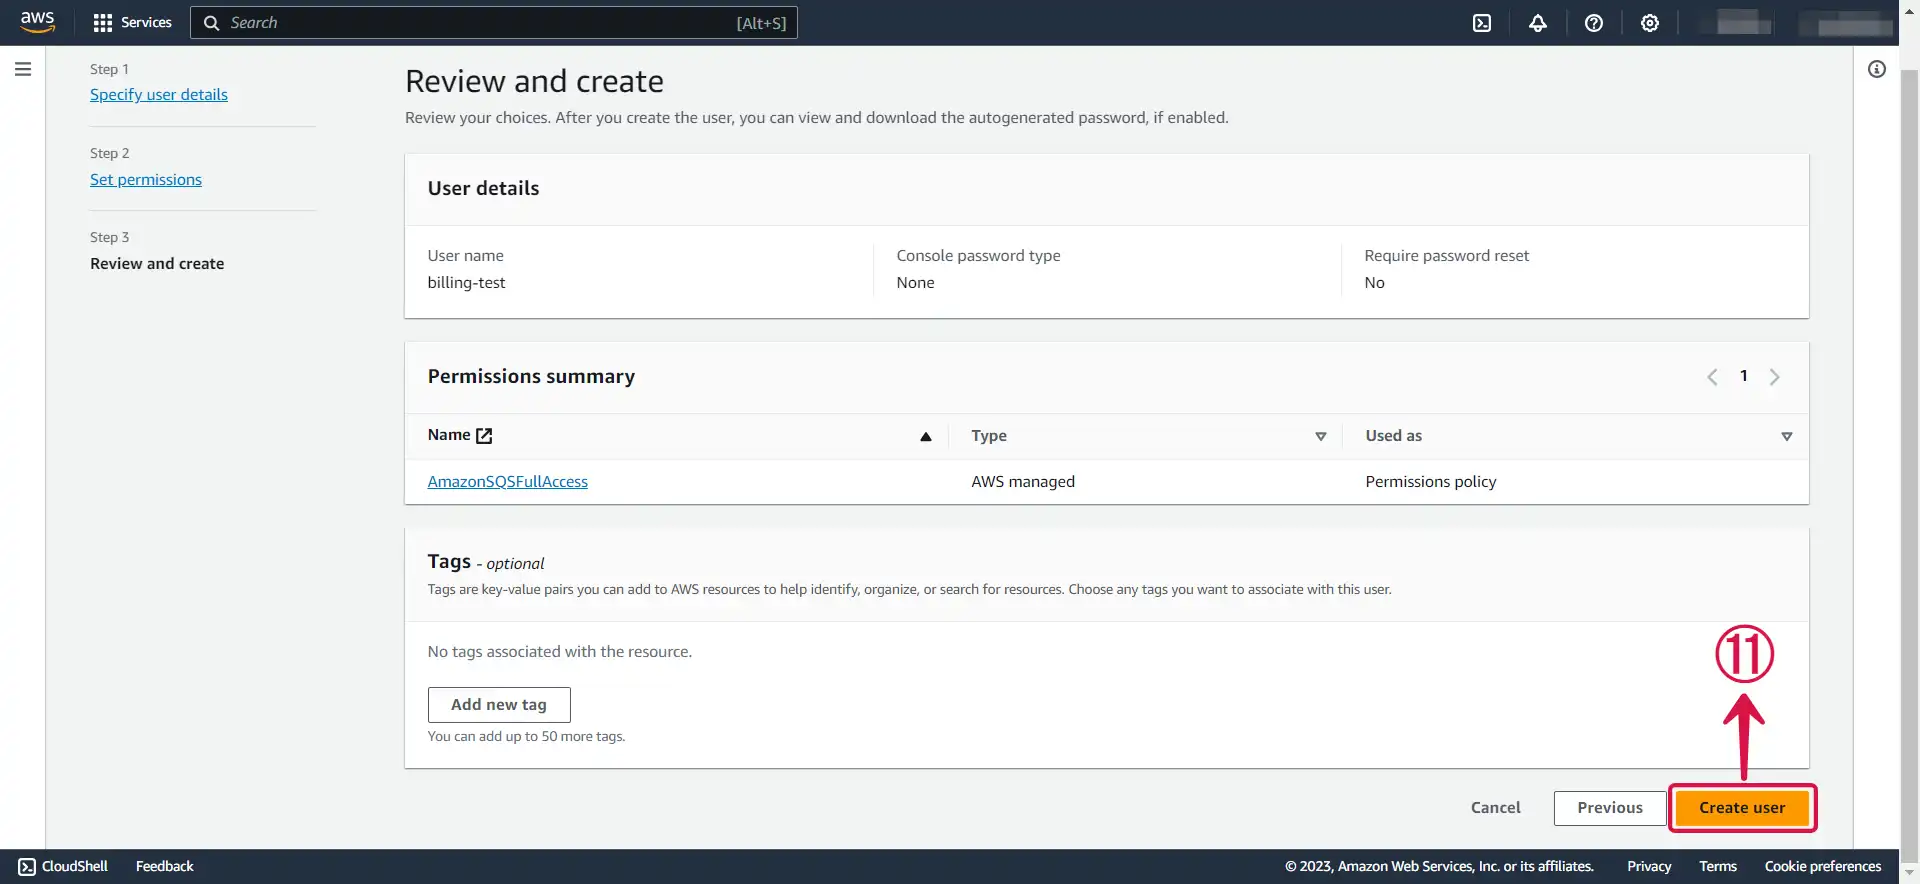
- Review and click on Create user⑪.
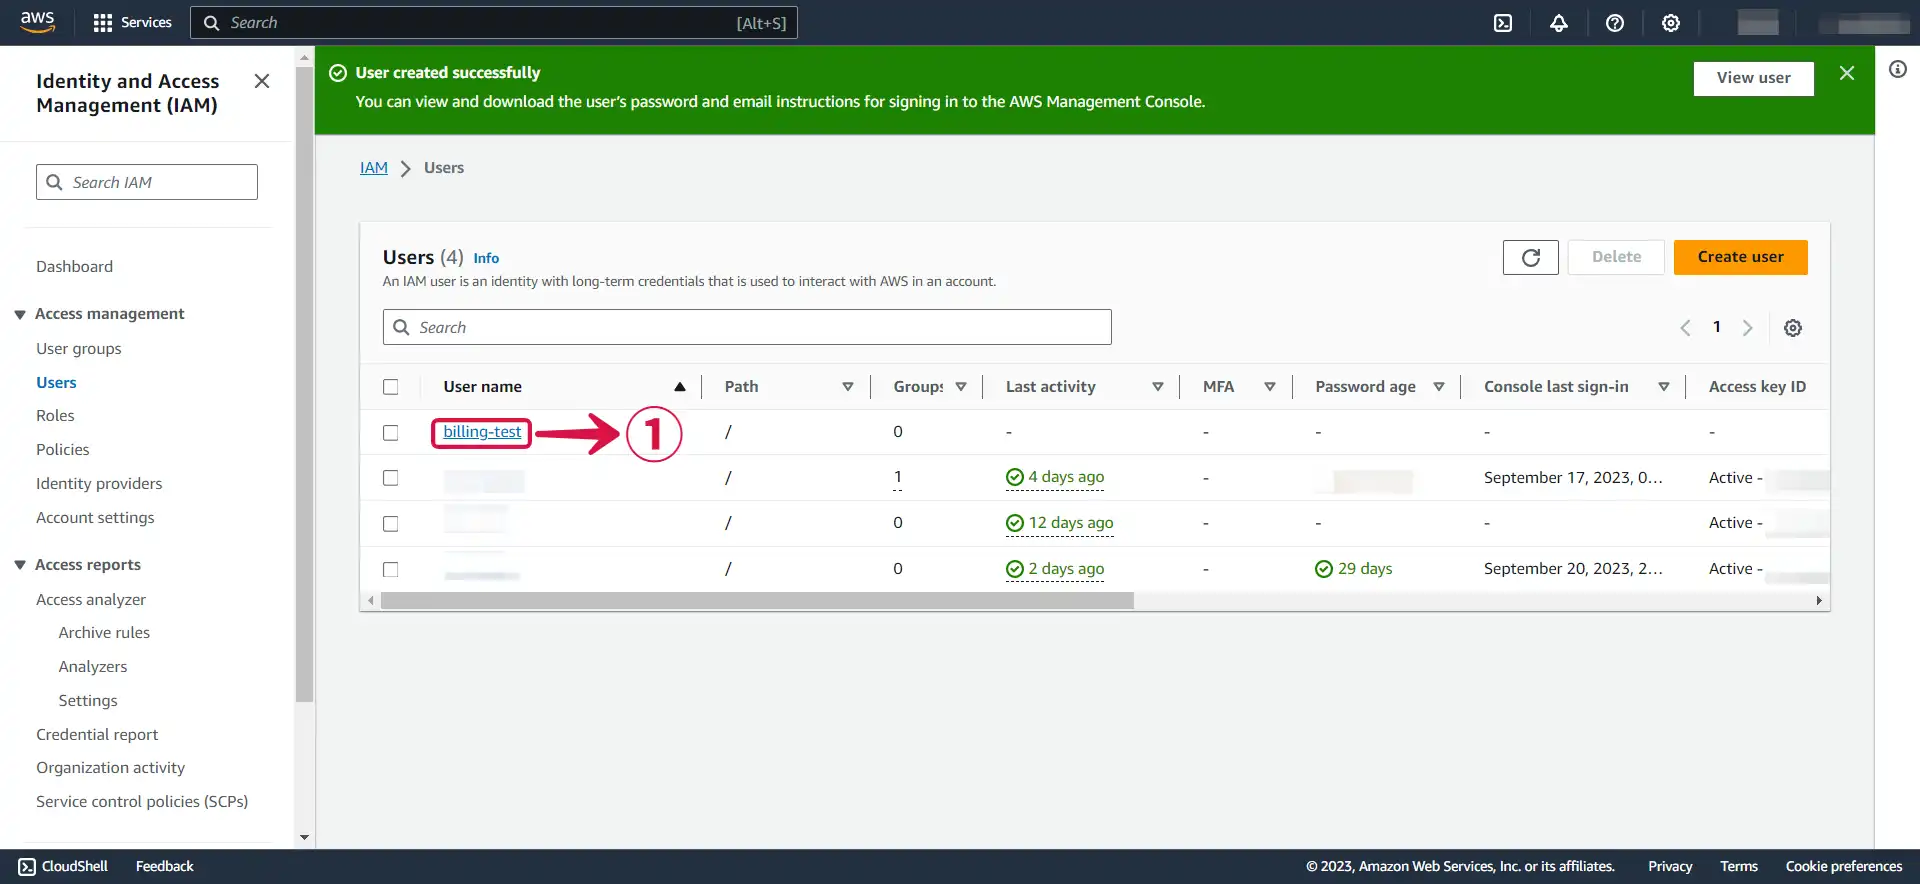
Step 2: Create an Access key and Secret access Key
- Now click on the user① you just created.
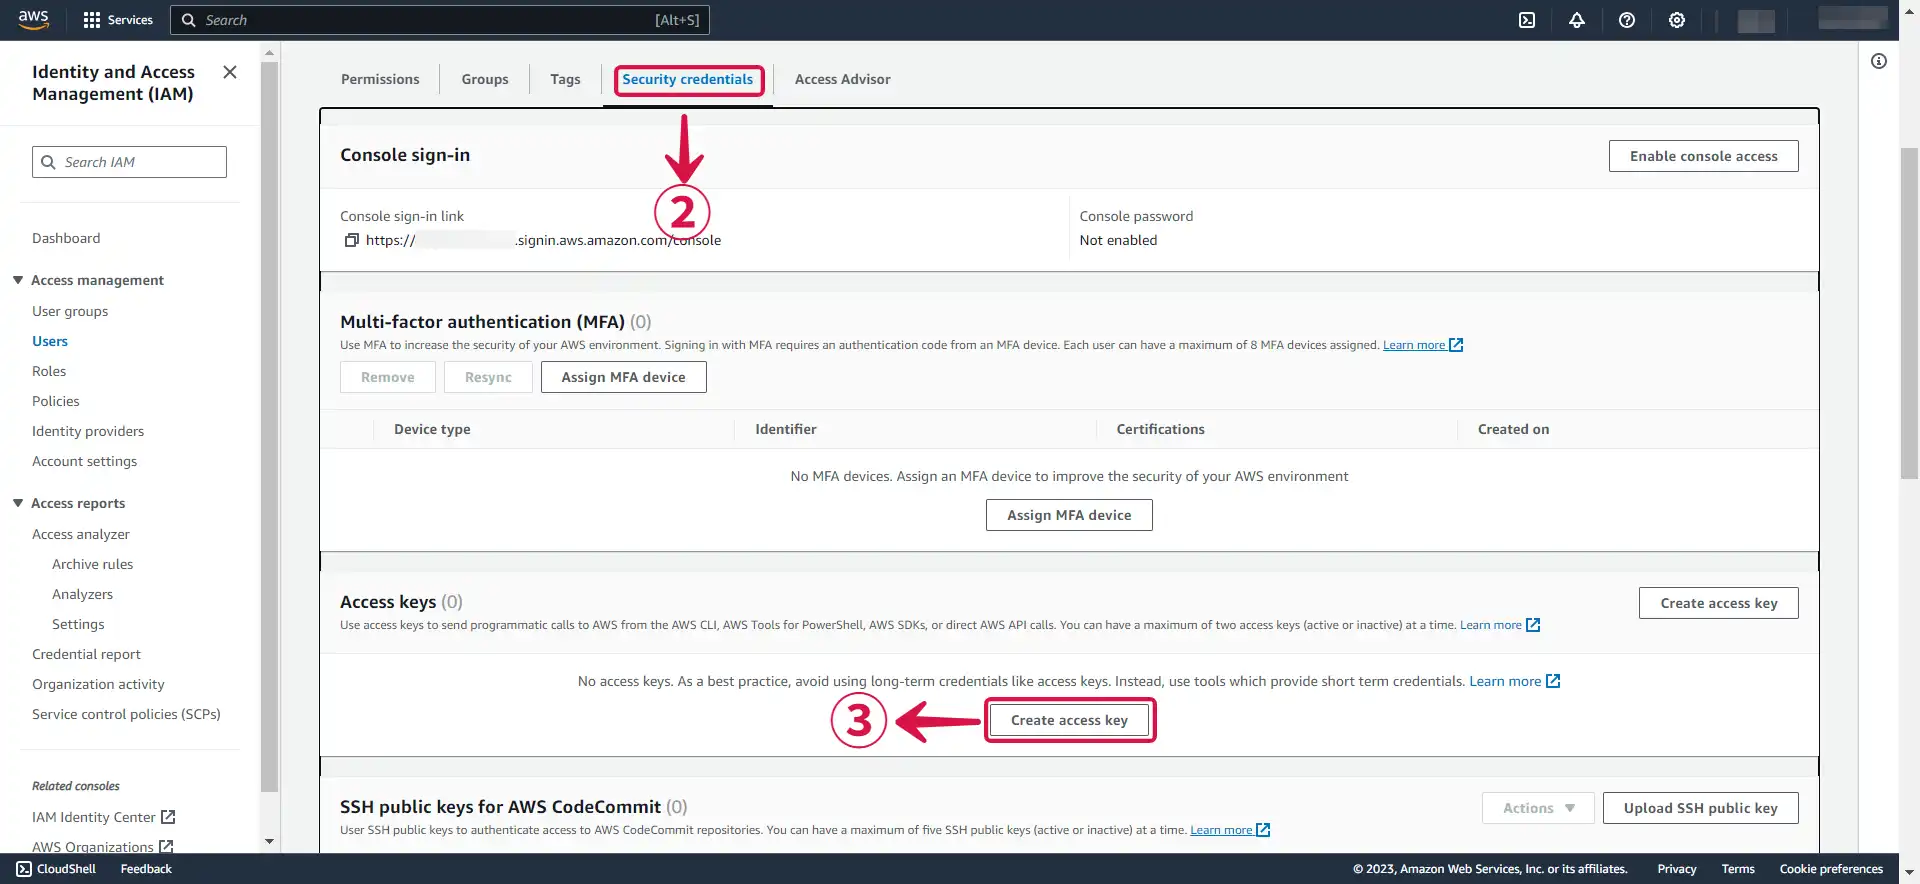
- Under Security credentials② scroll down the page to
Access Keys, and Click Create access key③.
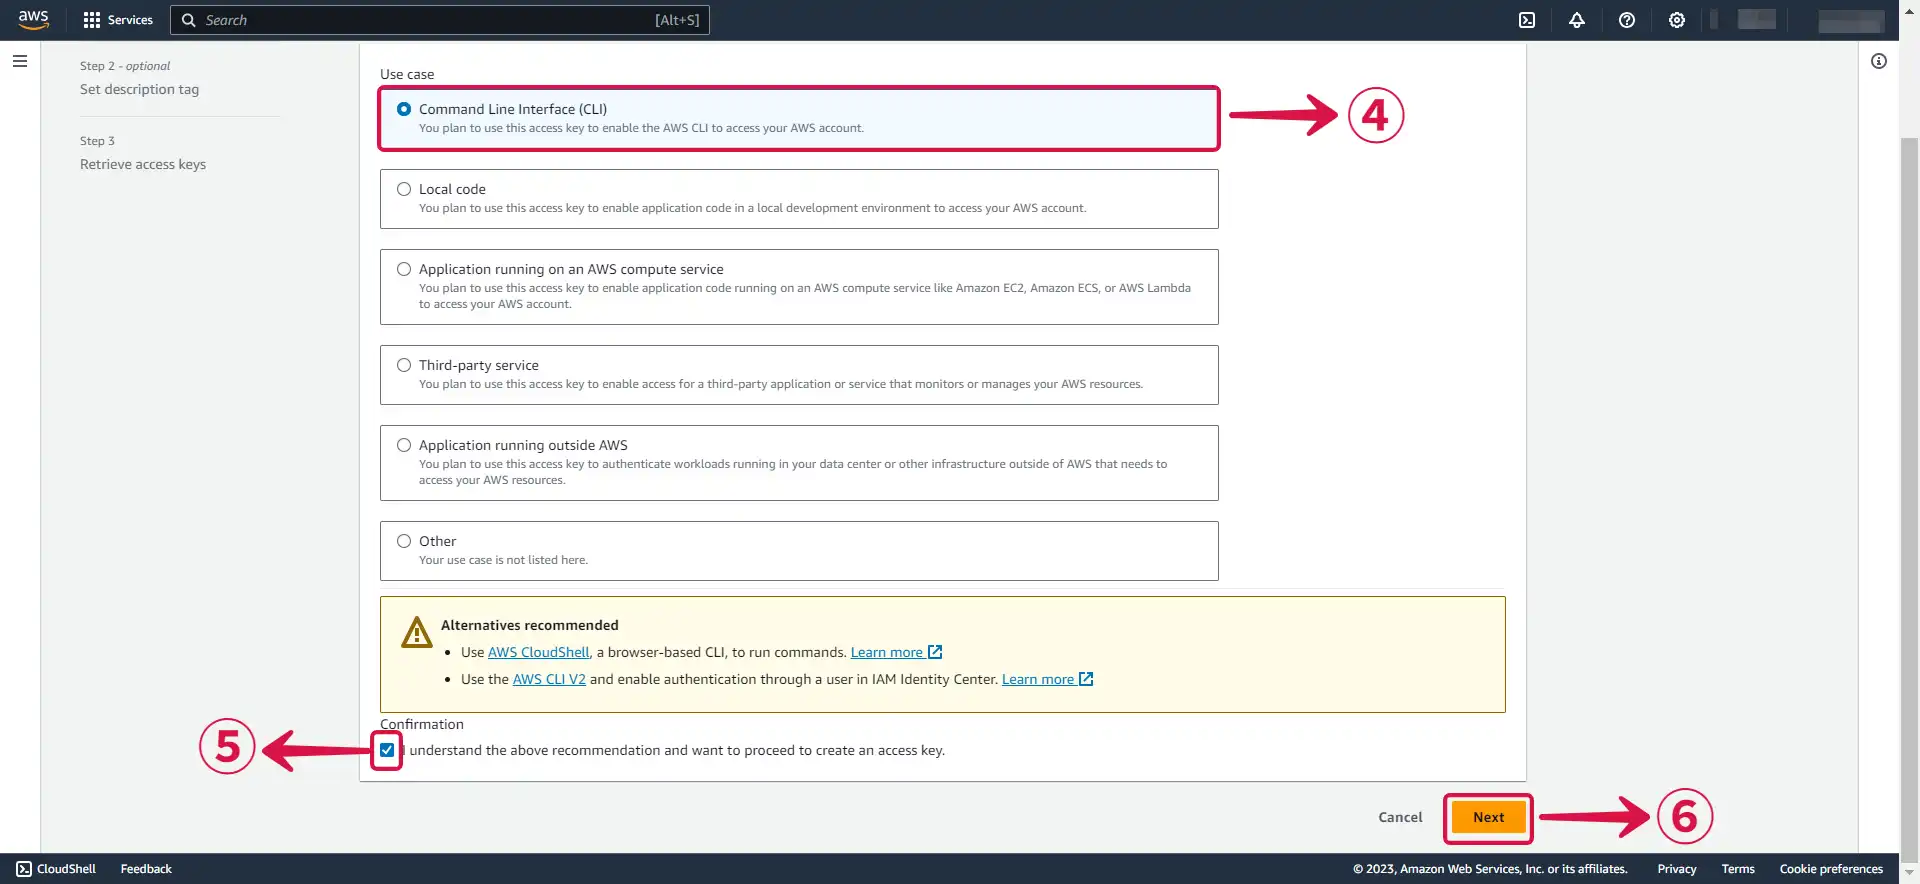
- Select Command line interface (CLI)④, tick the confirmation box⑤ and click Next⑥.
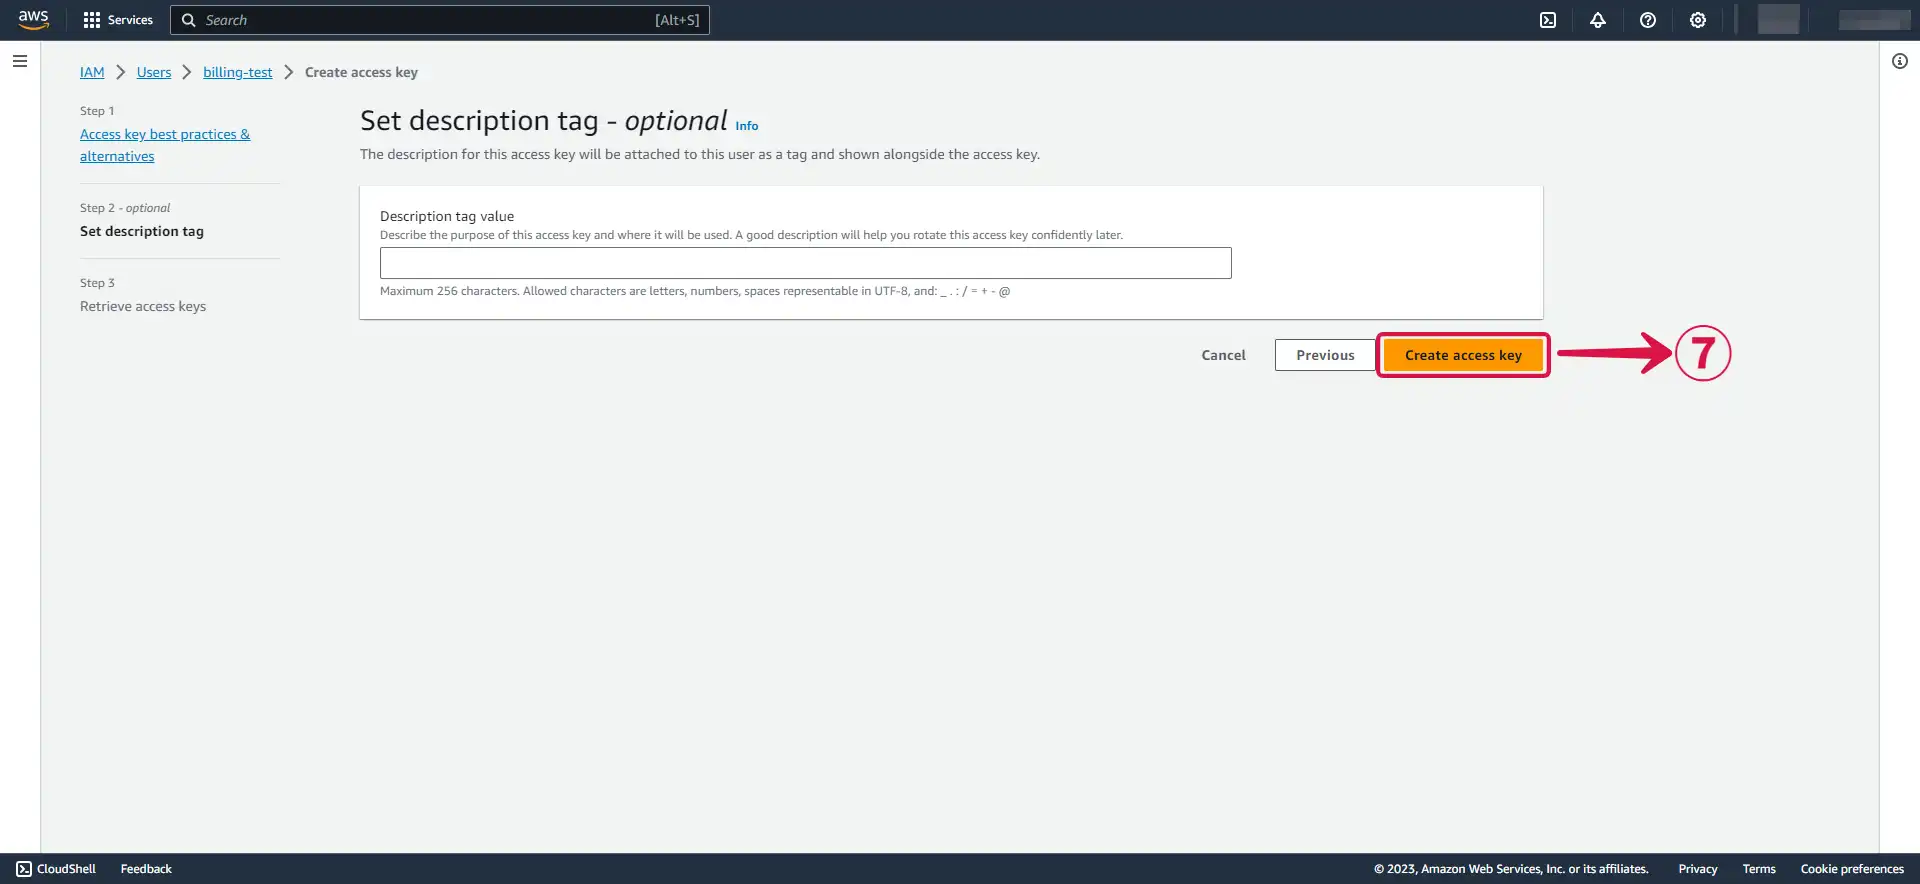
- Click Create access key⑦.
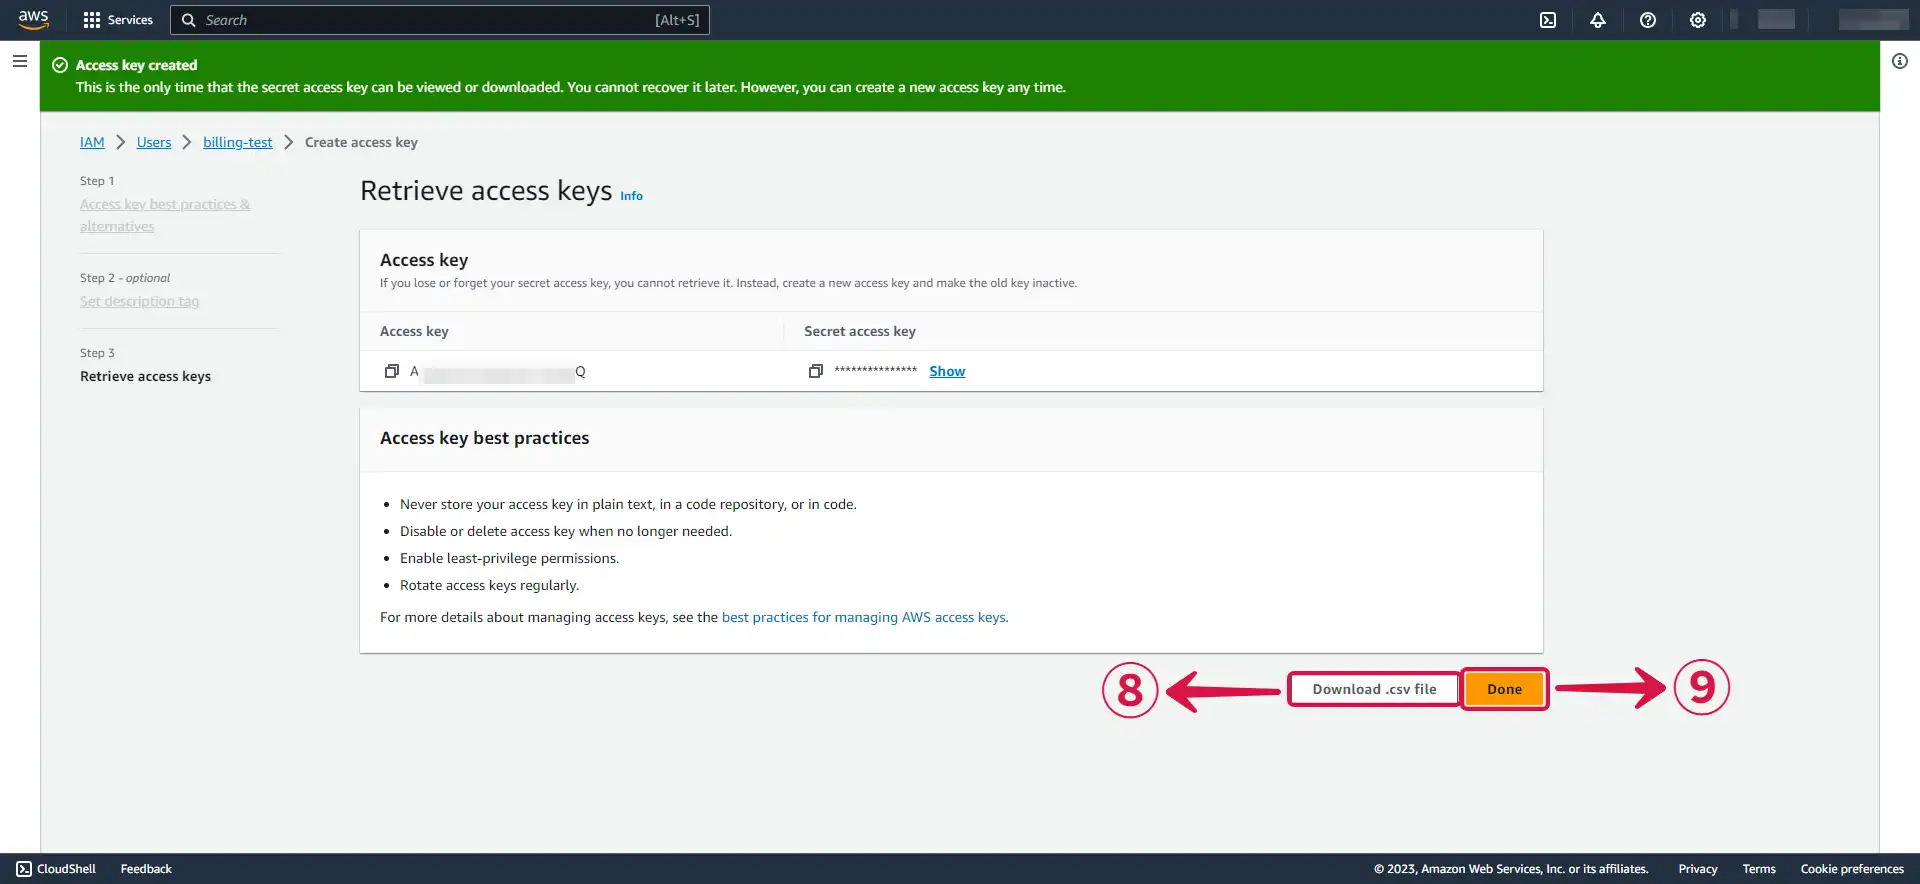
- Download your
Access keyandSecret access keyby clicking the Download .csv file⑧ button, and then click Done⑨.
Step 3: Create an SQS Queue on AWS
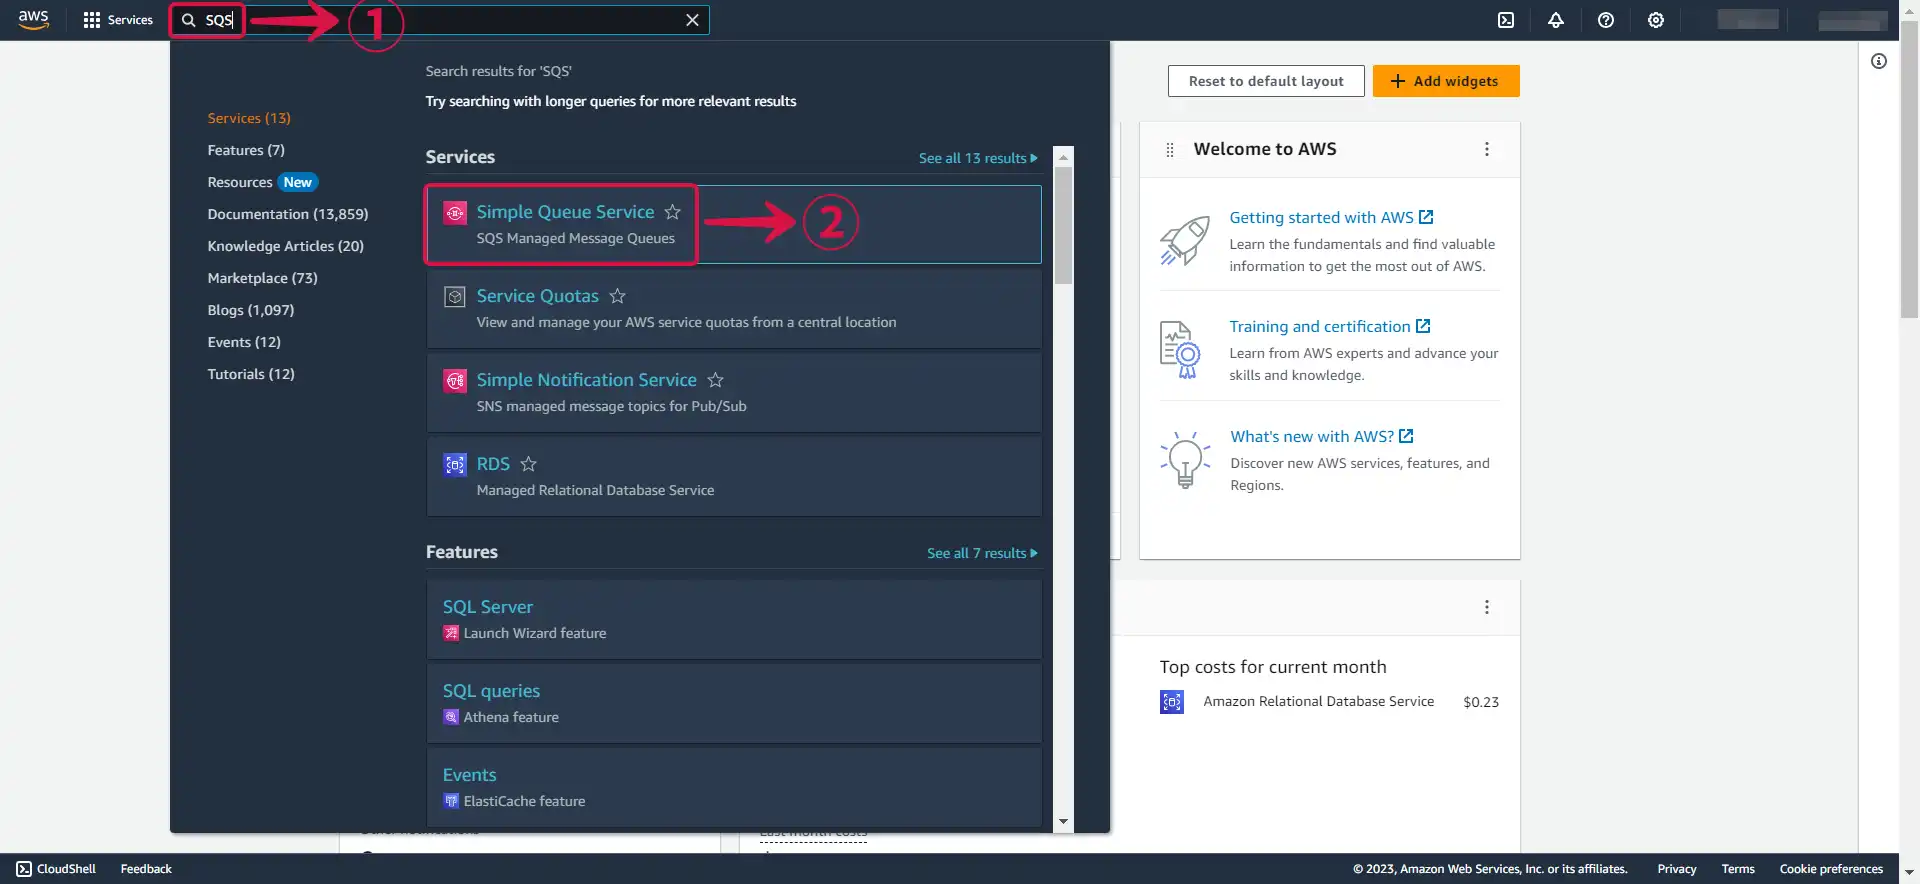
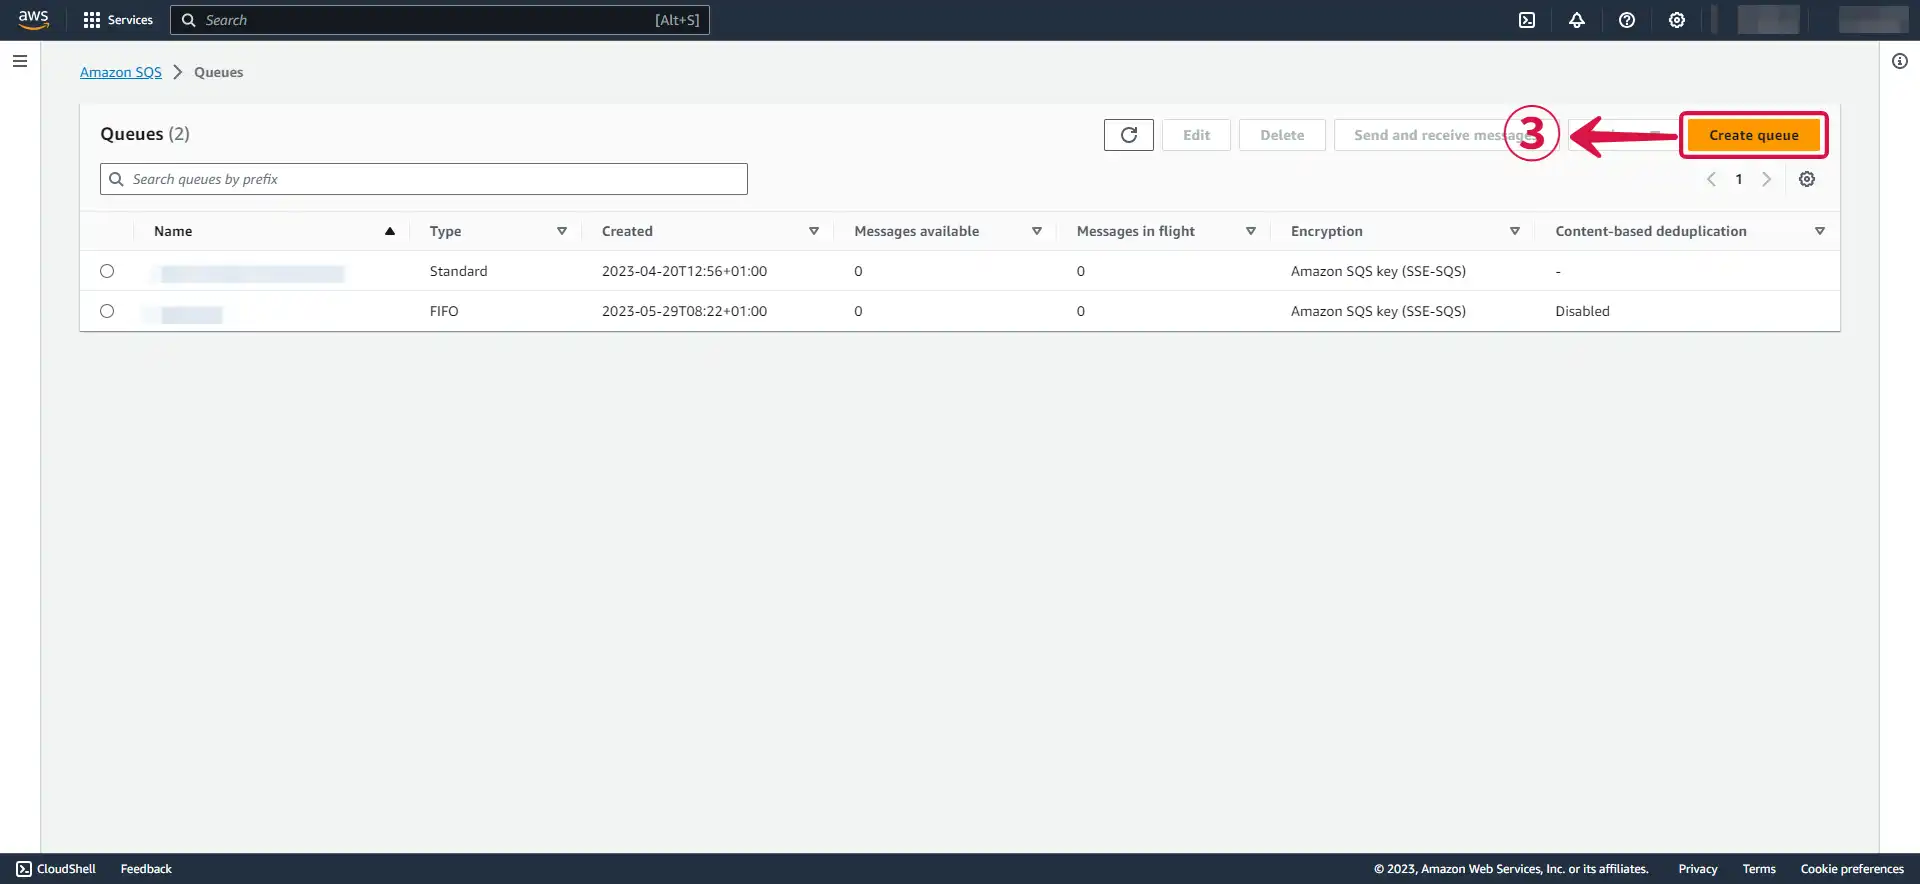
- Navigate to the Simple Queue Service page by typing SQS① in the search bar and selecting Simple Queue Service② from the drop-down menu.
- Click on Create queue③.
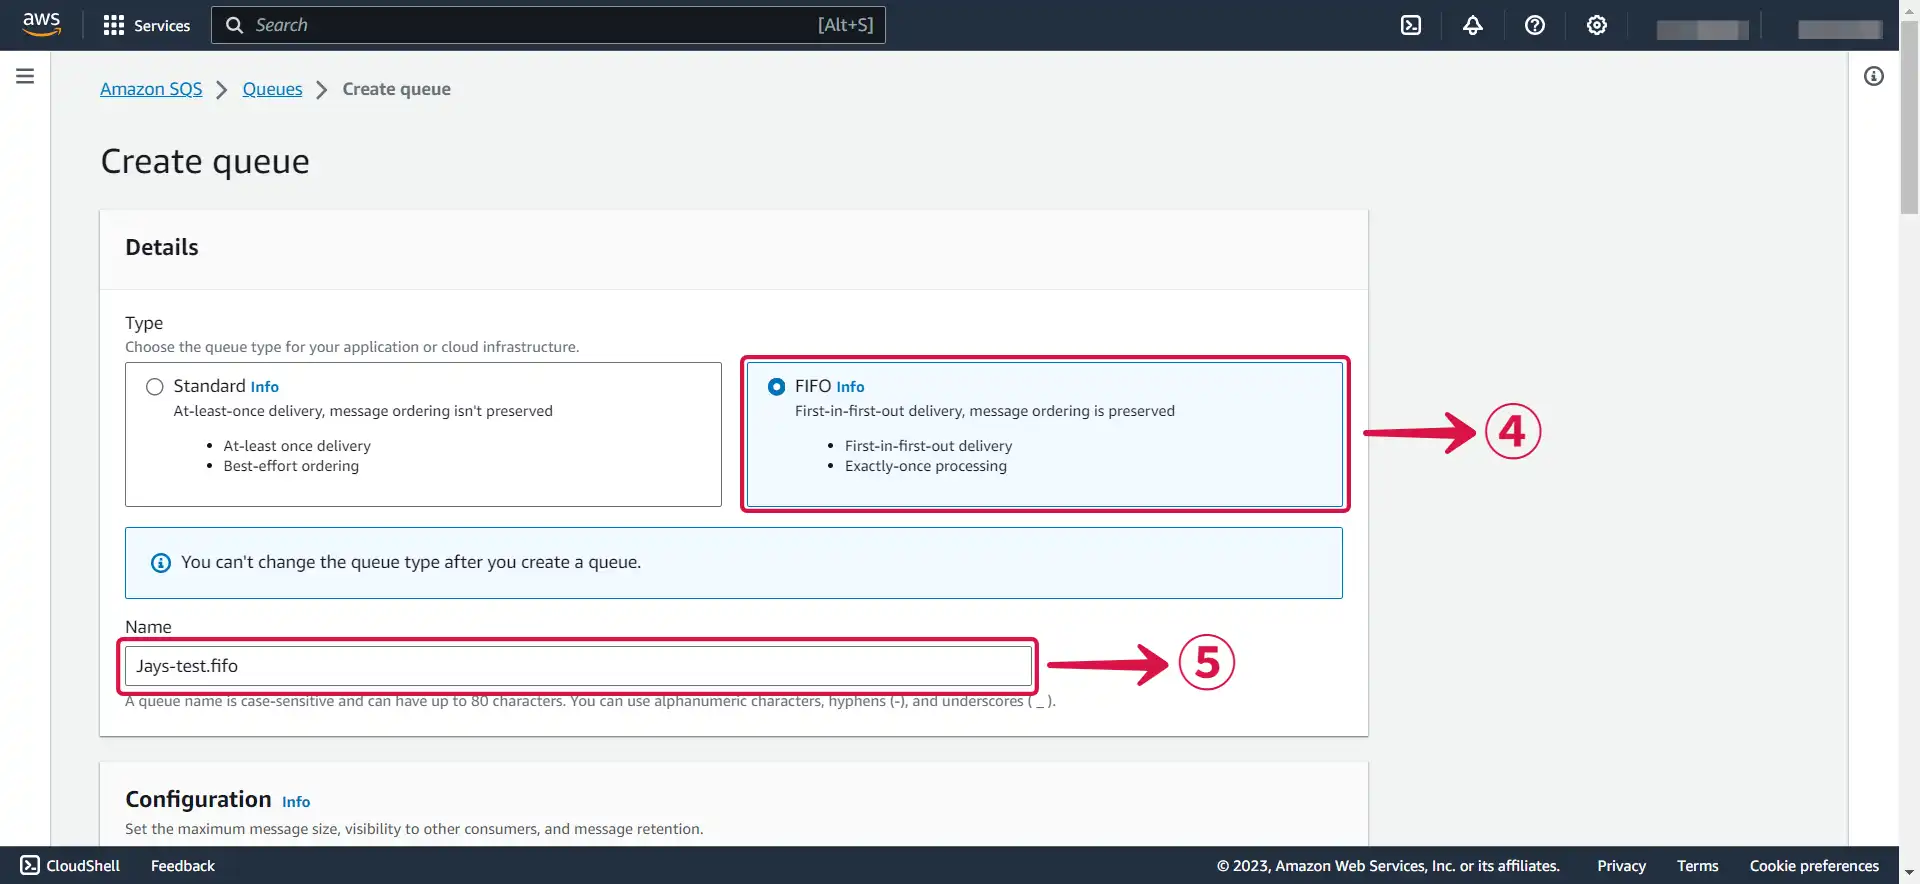
- Select FIFO④ and Name⑤ your queue.
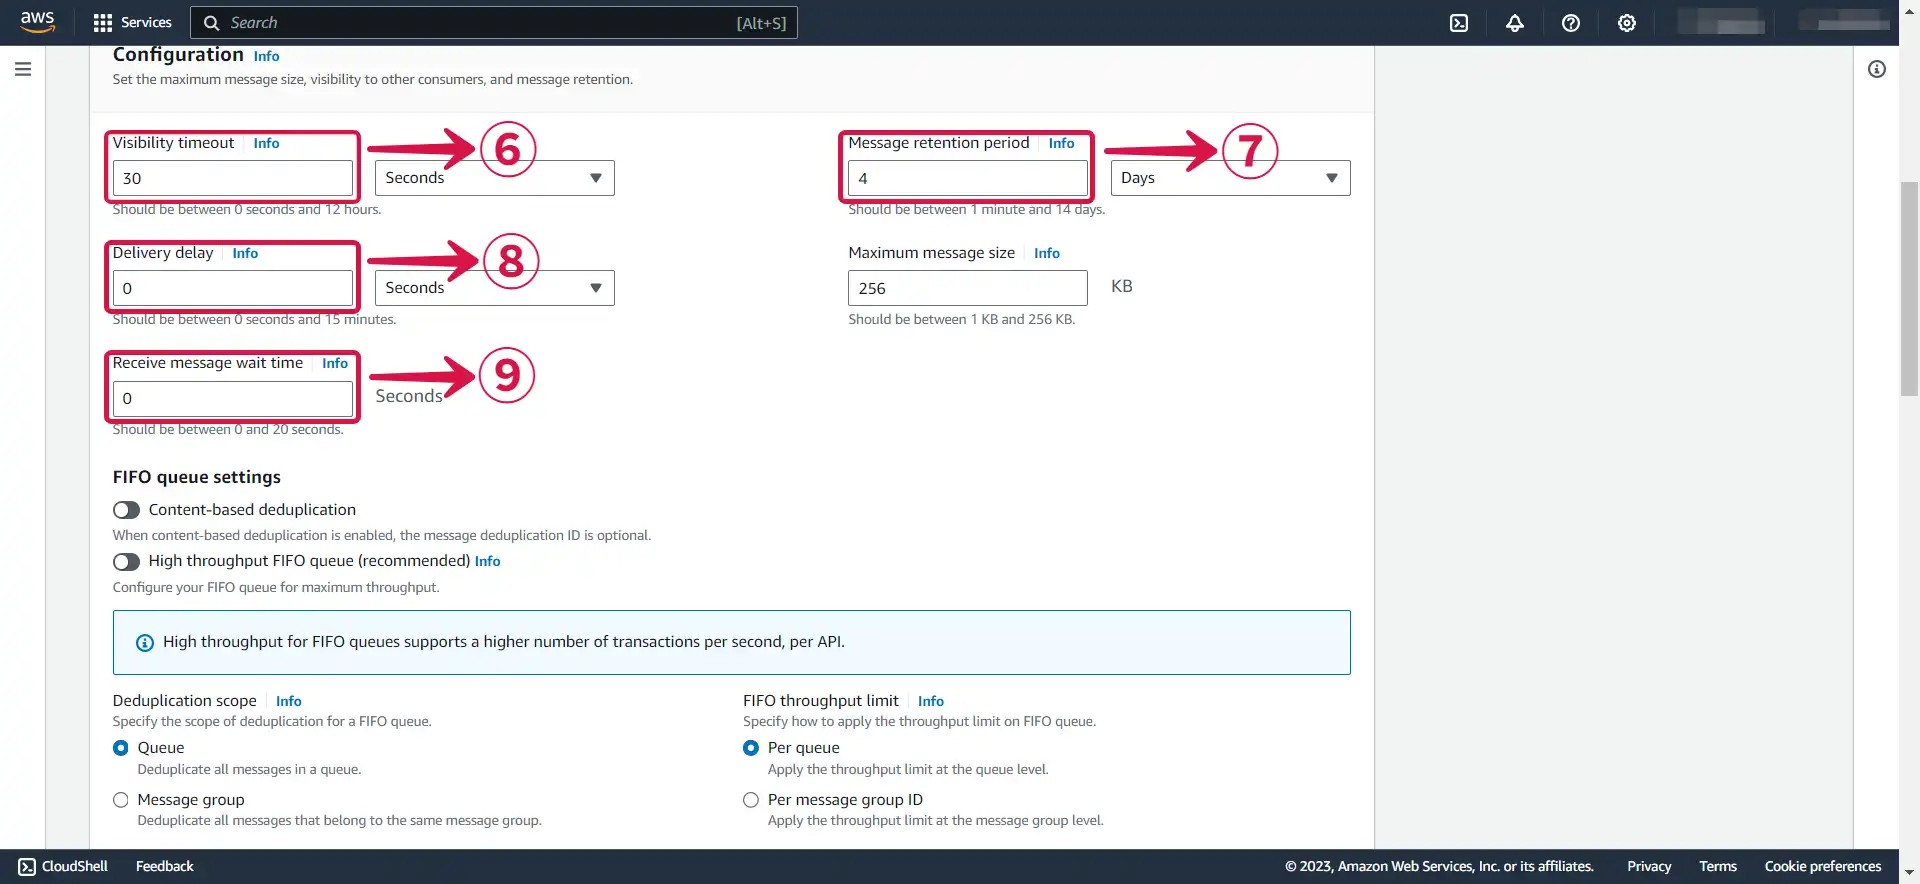
- Leave the configuration on the default setting, or change them to suit your needs.
Visibility timeout⑥: This is a setting that determines how long a message received from a queue will remain hidden from other consumers. When a message is received from an Amazon SQS queue by a consumer, the visibility timeout starts. If the consumer fails to process and delete the message before the visibility timeout expires, the message becomes visible to other consumers.
Message retention period⑦ : This refers to the length of time a message is kept in a queue if it is not deleted. Messages that exceed the maximum message retention period are automatically deleted by Amazon SQS.
Delivery delay⑧: This determines the amount of time before the first delivery of each message added to the queue. During the delay period, any messages sent to the queue are not visible to consumers.
Receive message wait time⑨: This refers to the maximum duration that polling will wait for messages to become available for receiving.
- Enable encryption⑩ and select your preferred Encryption key type⑪.

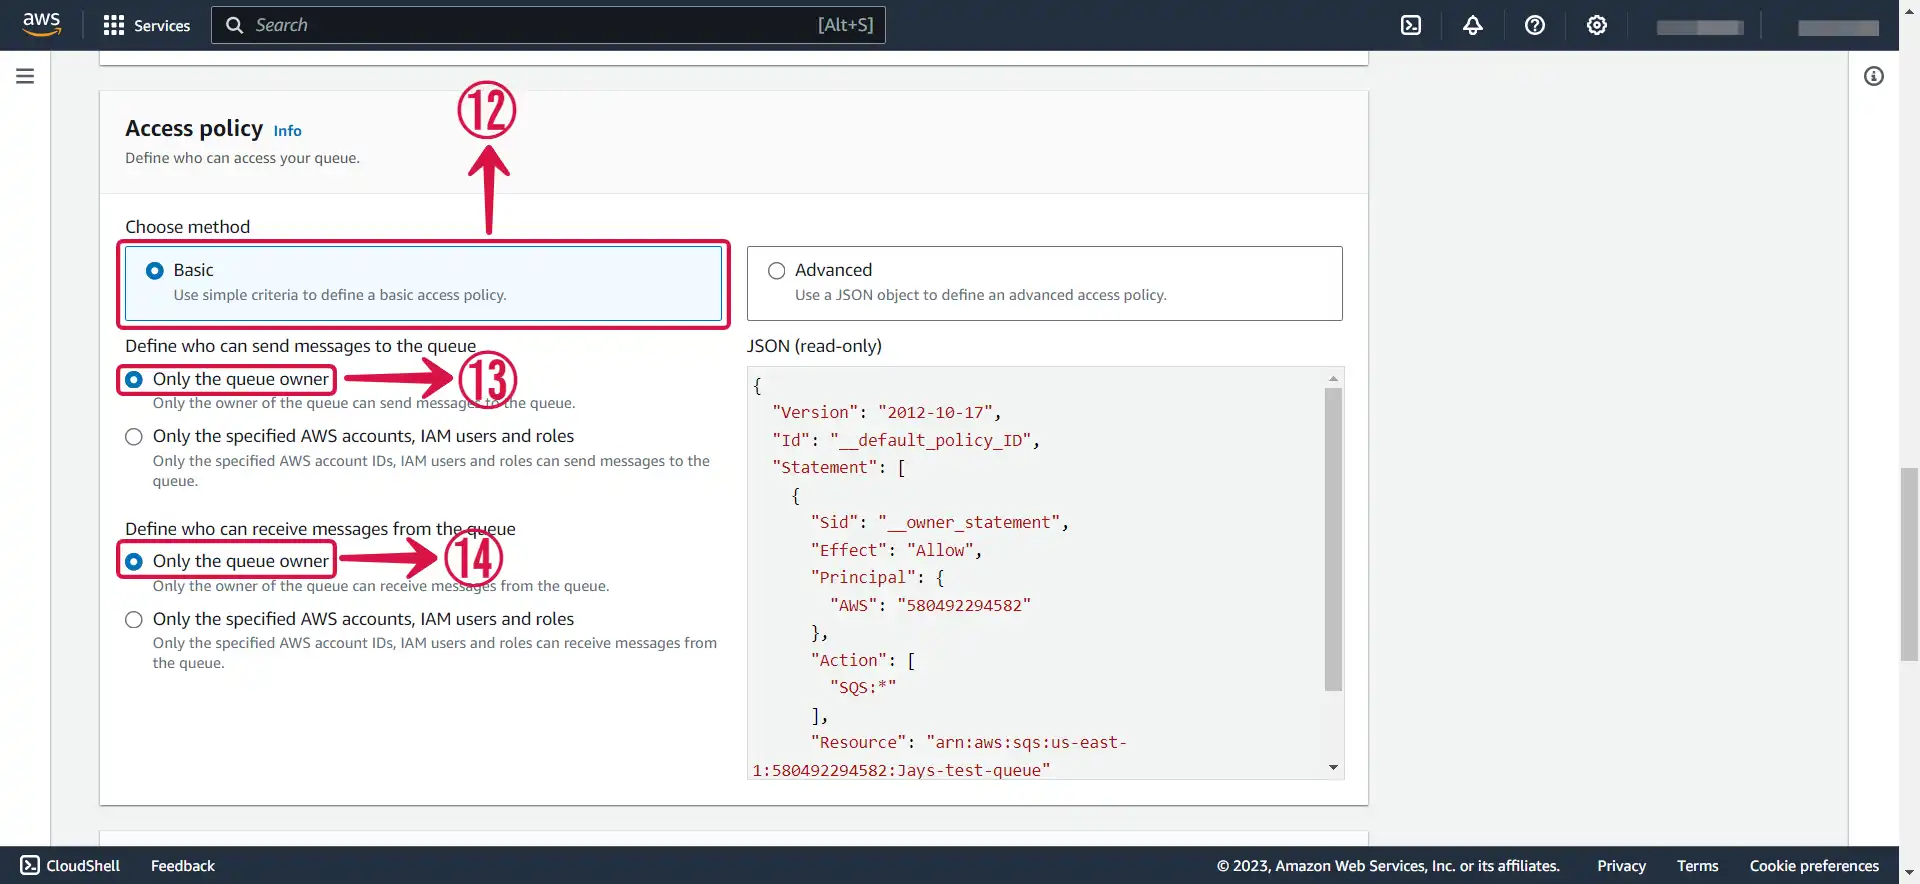
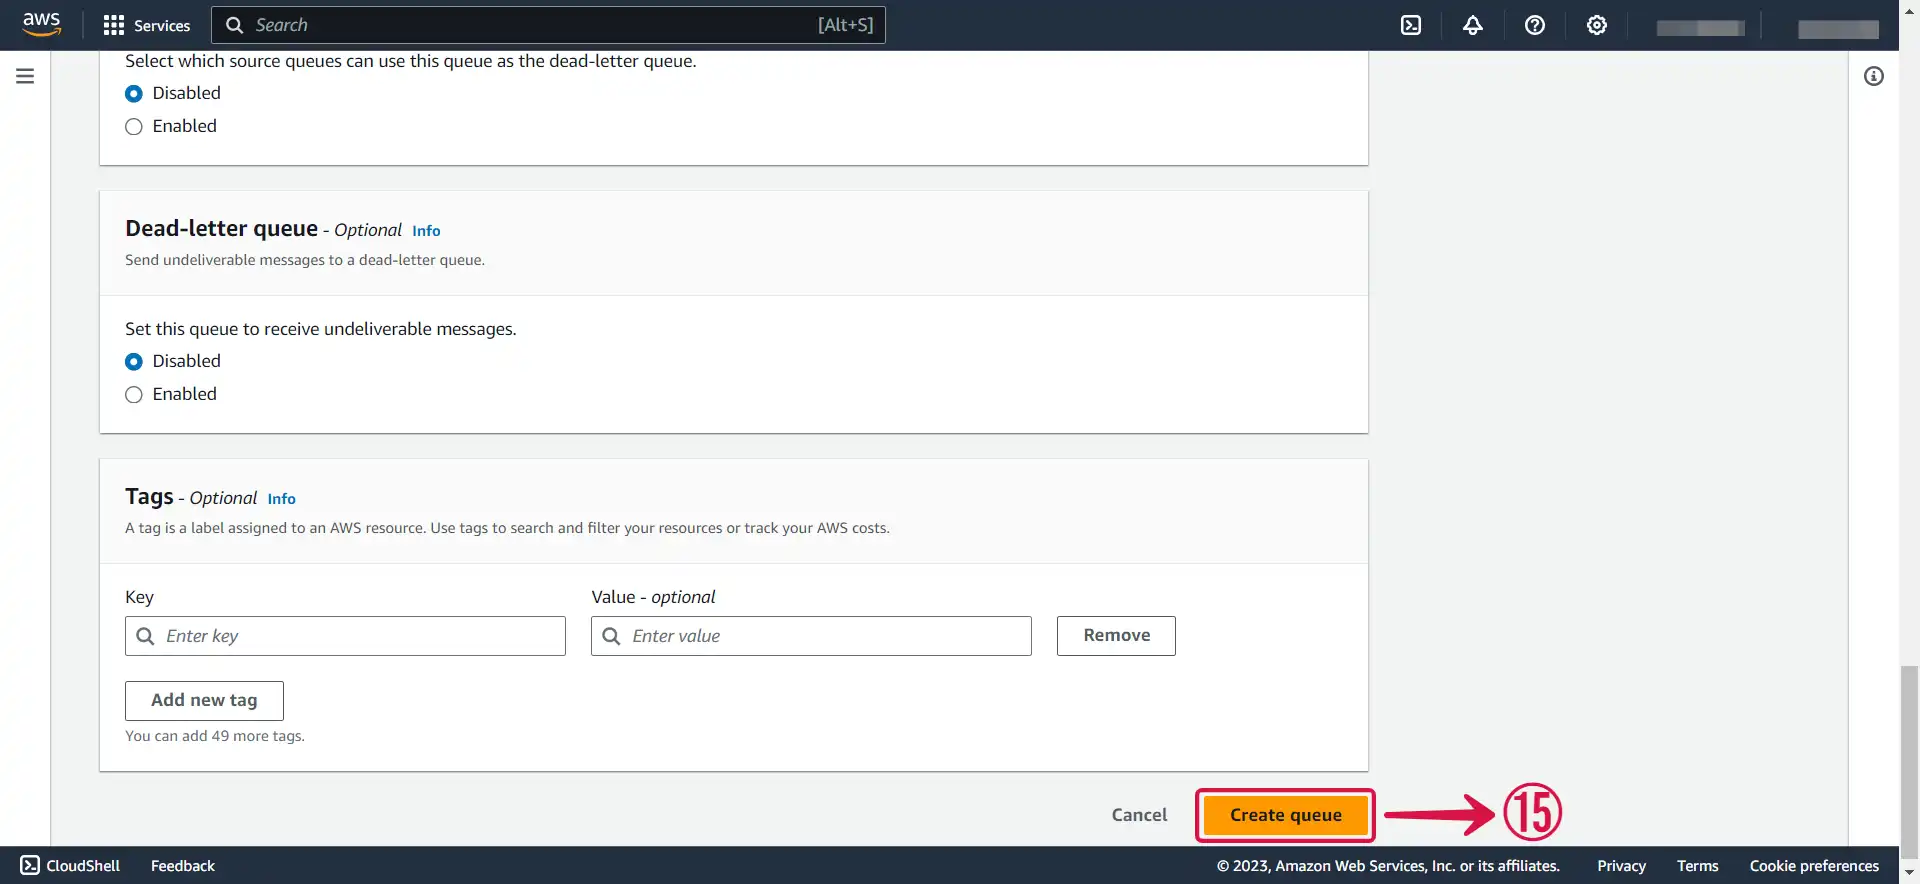
- Choose your preferred Access Policy method⑫, Define who can send messages to the queue⑬, and Define who can receive messages from the queue⑭.
- Click on Create queue⑮.
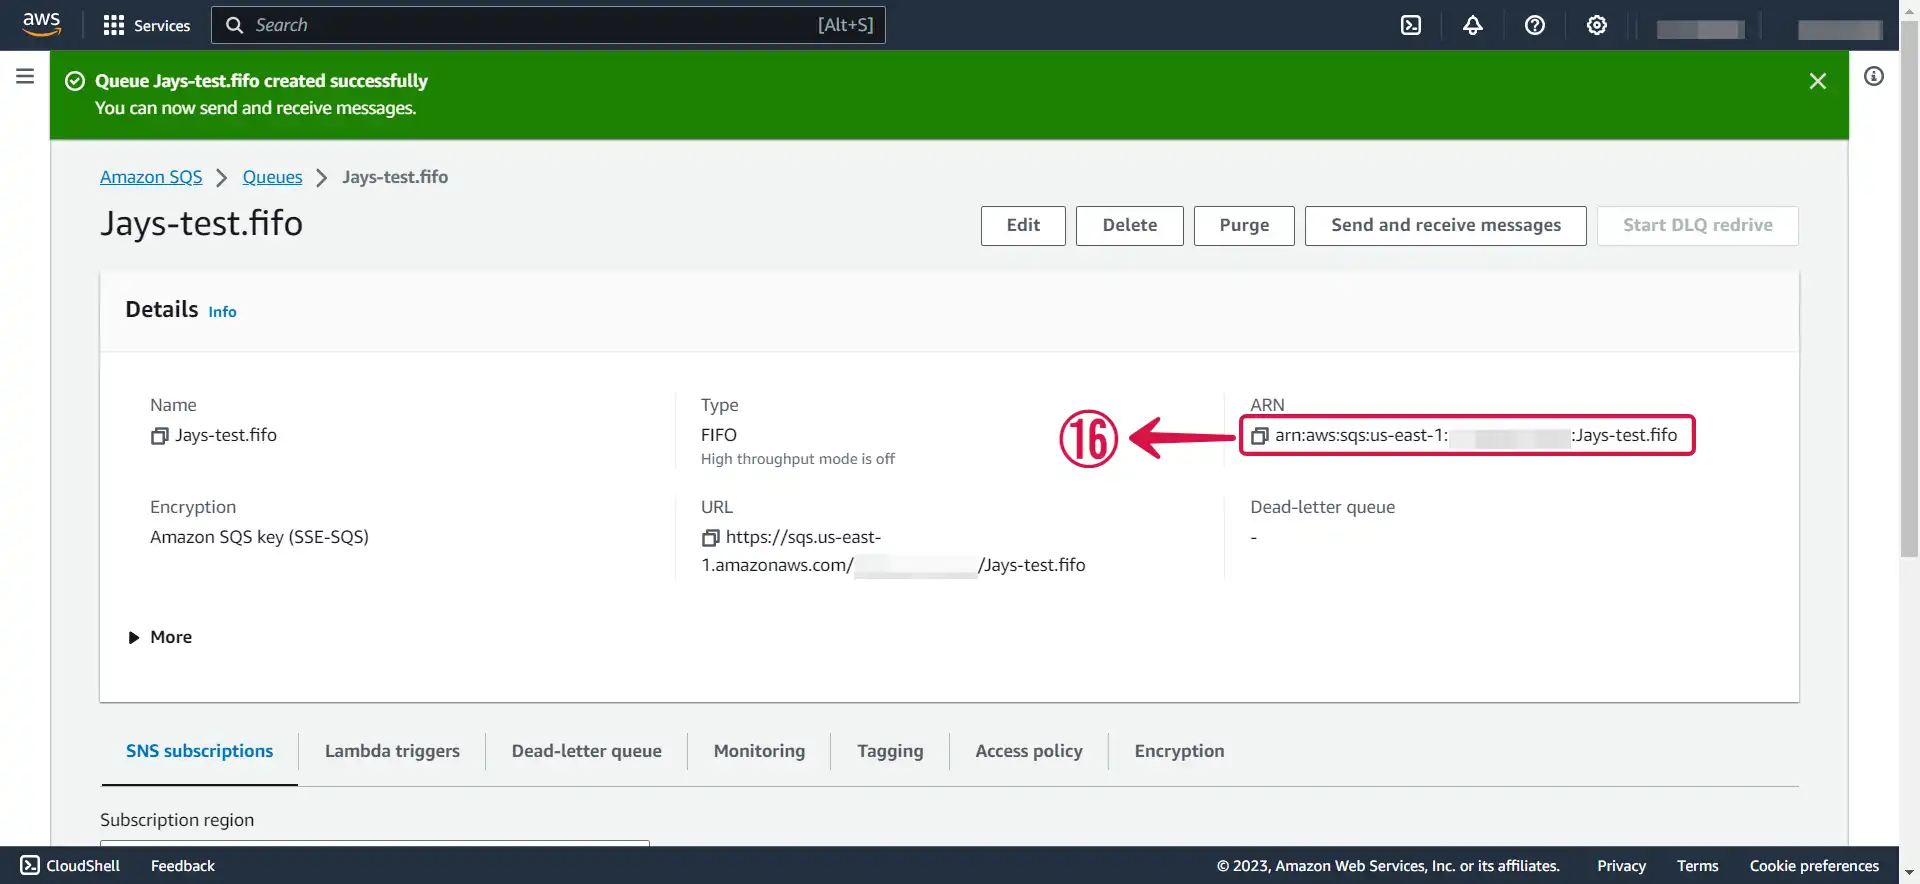
- Copy your SQS ARN⑯, it will be needed when creating your connection in Vanus.
Step 4: Amazon SQS Connection Settings
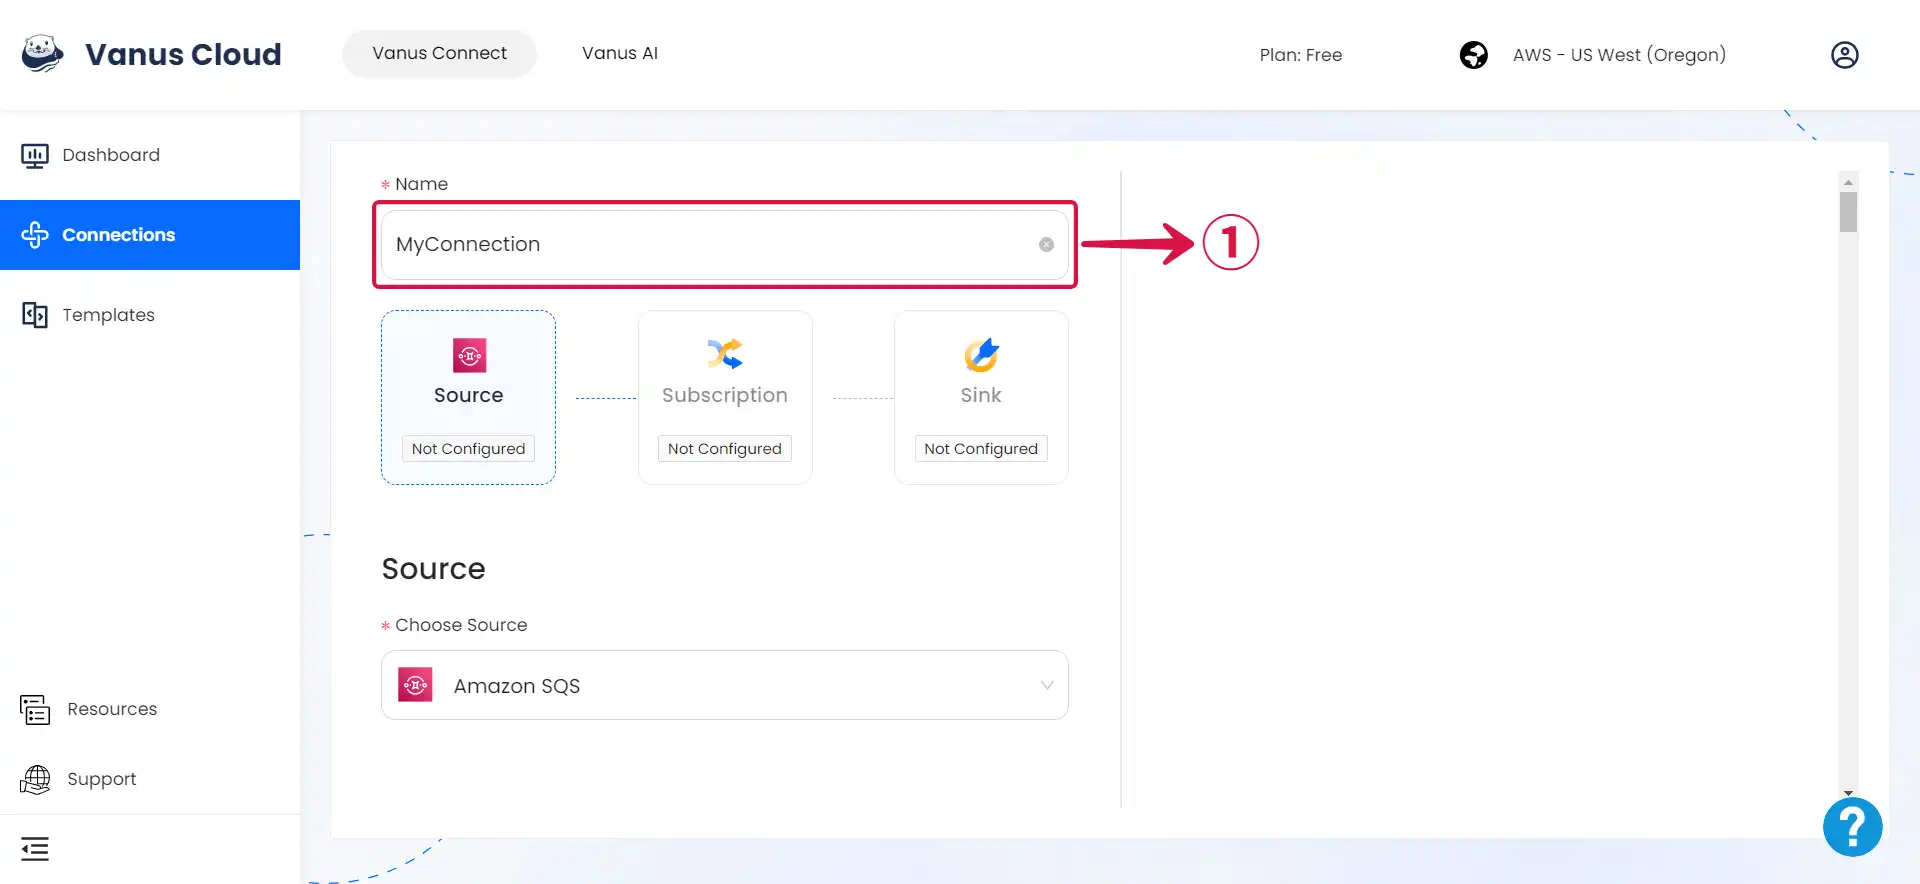
- Write a connection Name① without any spaces.
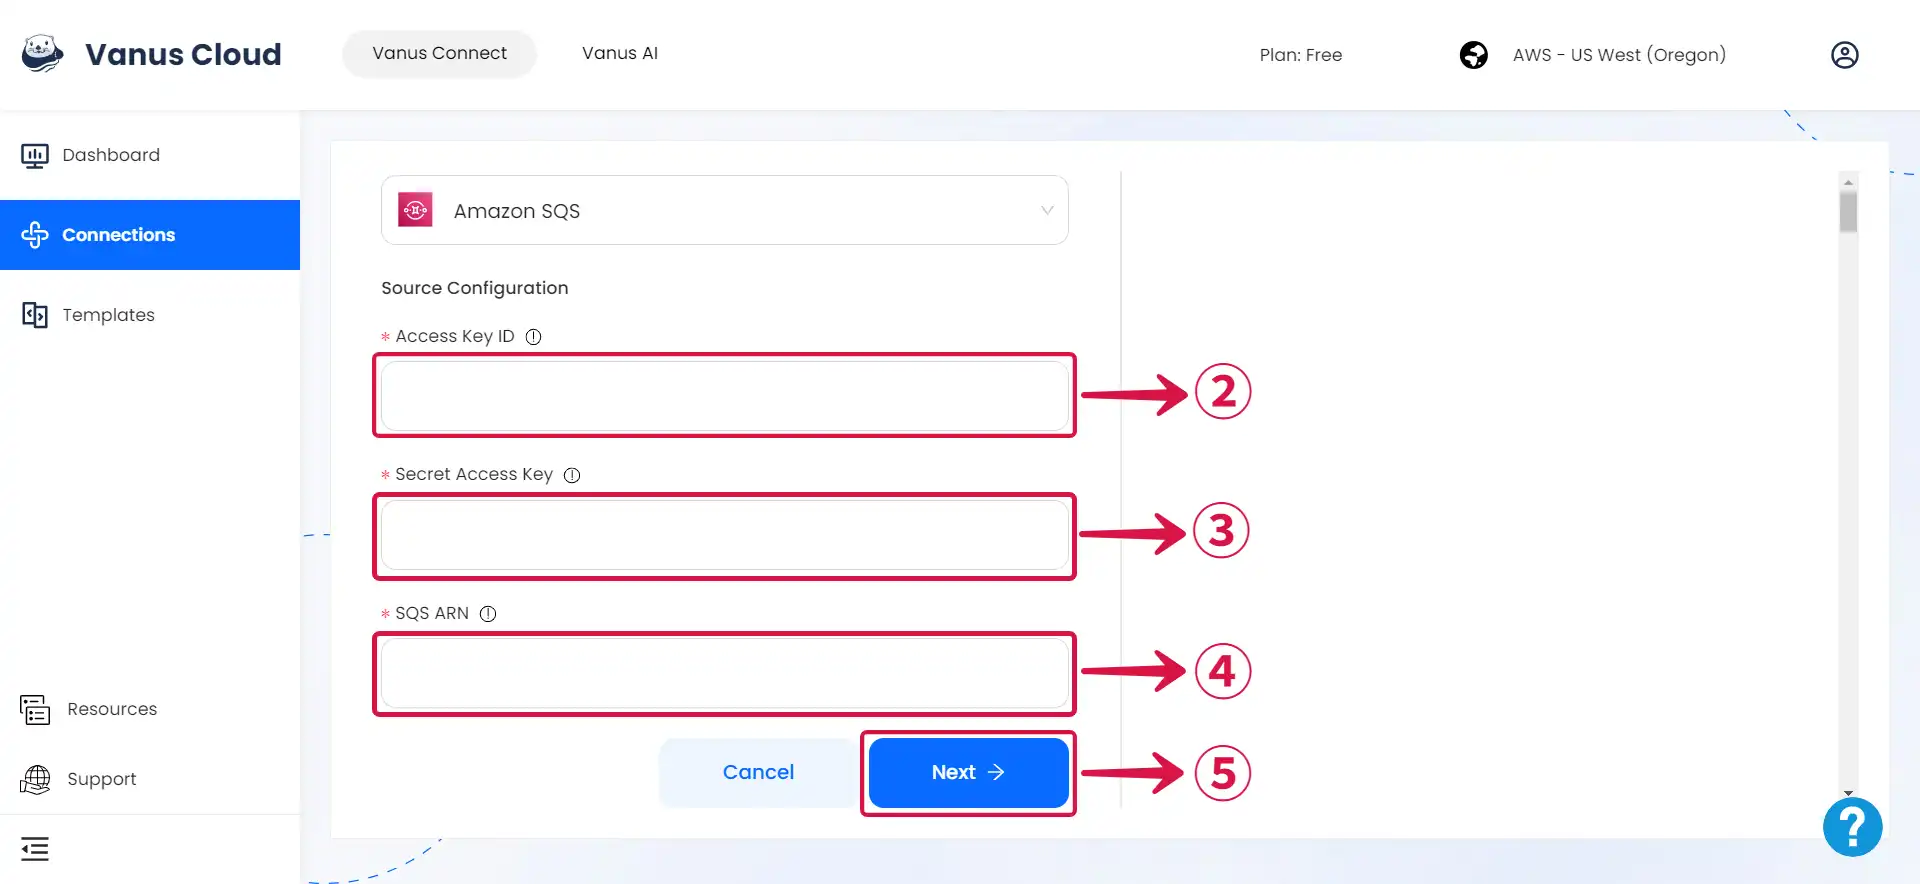
- Enter your Access Key ID②, Secret Access key③ and SQS ARN④, and click Next⑤ to continue the configuration.
Learn more about Vanus and Vanus Connect in our documentation.