SAP BTP
This guide contains information to set up a SAP BTP Source in Vanus Connect.
Introduction
SAP BTP, short for SAP Business Technology Platform, is a comprehensive platform-as-a-service (PaaS) that enables organizations to build, integrate, and extend their business applications and processes in a cloud-based environment. SAP BTP offers a range of services and tools that empower businesses to develop and deploy innovative applications, connect to various data sources, and leverage advanced technologies like artificial intelligence (AI), machine learning (ML), and Internet of Things (IoT).
The SAP BTP Source is a webhook server that enables you to establish an endpoint for receiving events from your SAP BTP application. To achieve this, it is necessary to establish a connection within SAP BTP.
Prerequisites
Before obtaining SAP BTP events, you must have:
- A SAP BTP account with administrative privileges
- A Vanus Cloud account
Getting Started
Create your connection in Vanus Connect
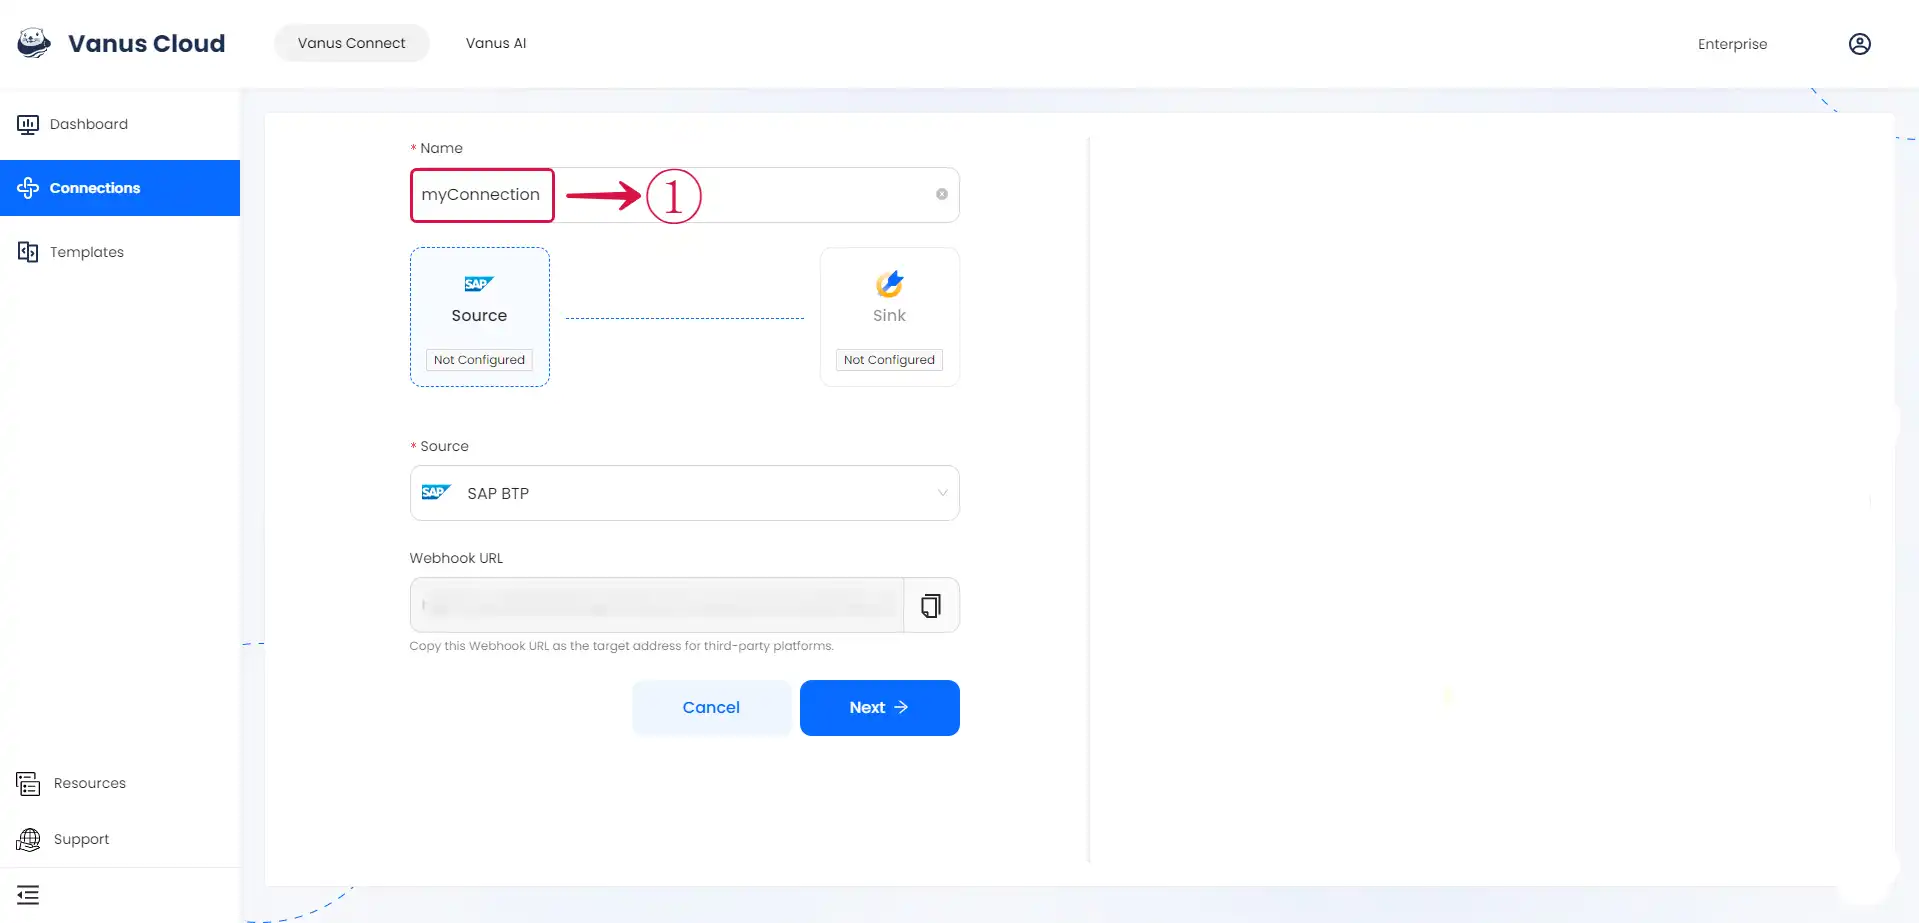
- Write a Name① for your connection in Vanus Connect.
Configure SAP BTP to Send Webhook Events
Step 1: Configure webhook
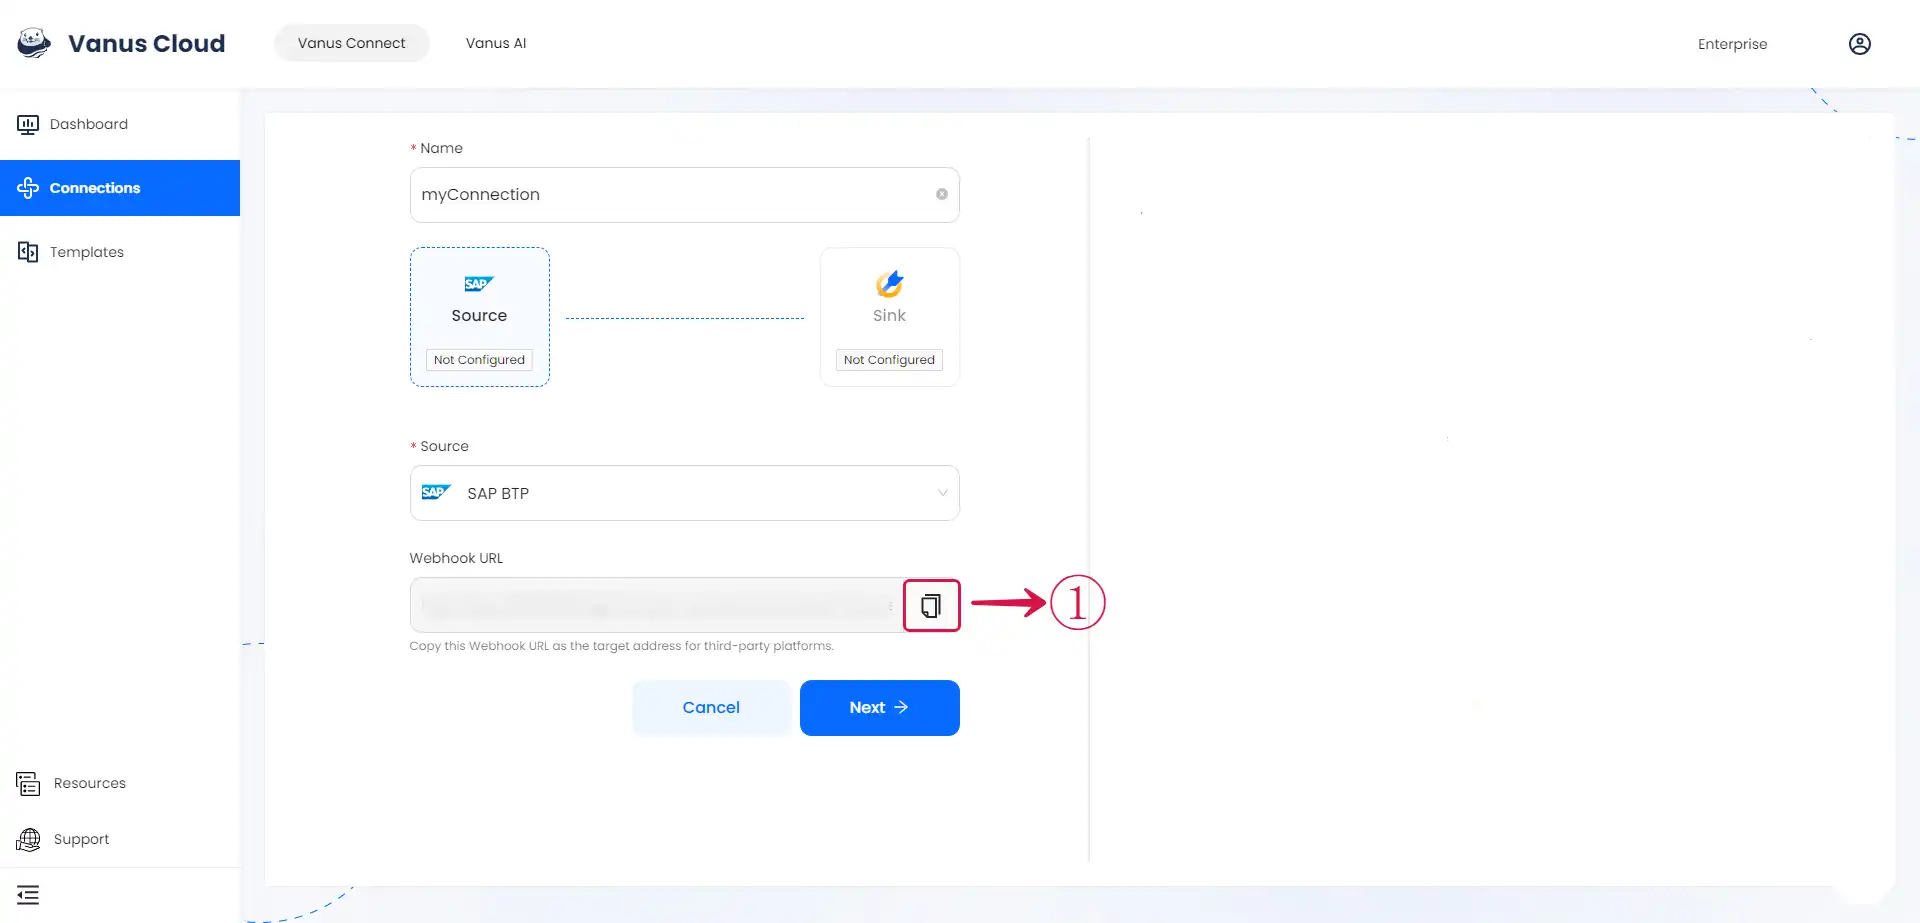
- Click the copy① icon to copy the webhook url.
Log in to your SAP BTP account.
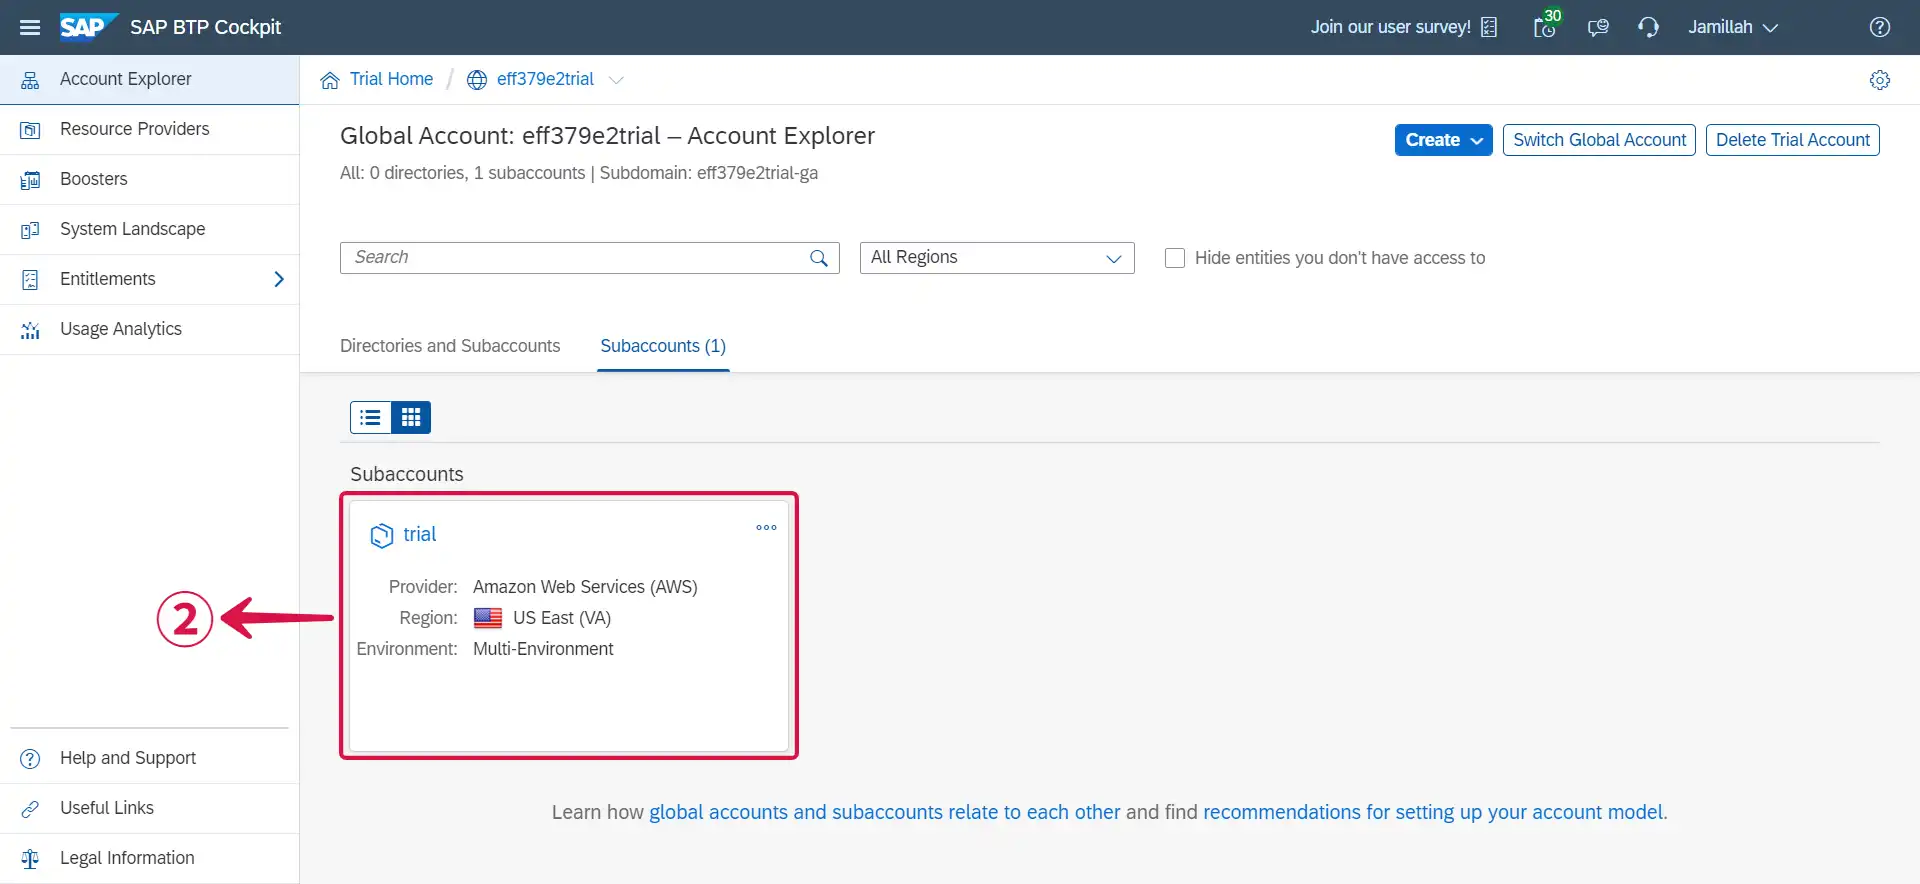
Navigate to the Subaccounts② page by clicking on it.
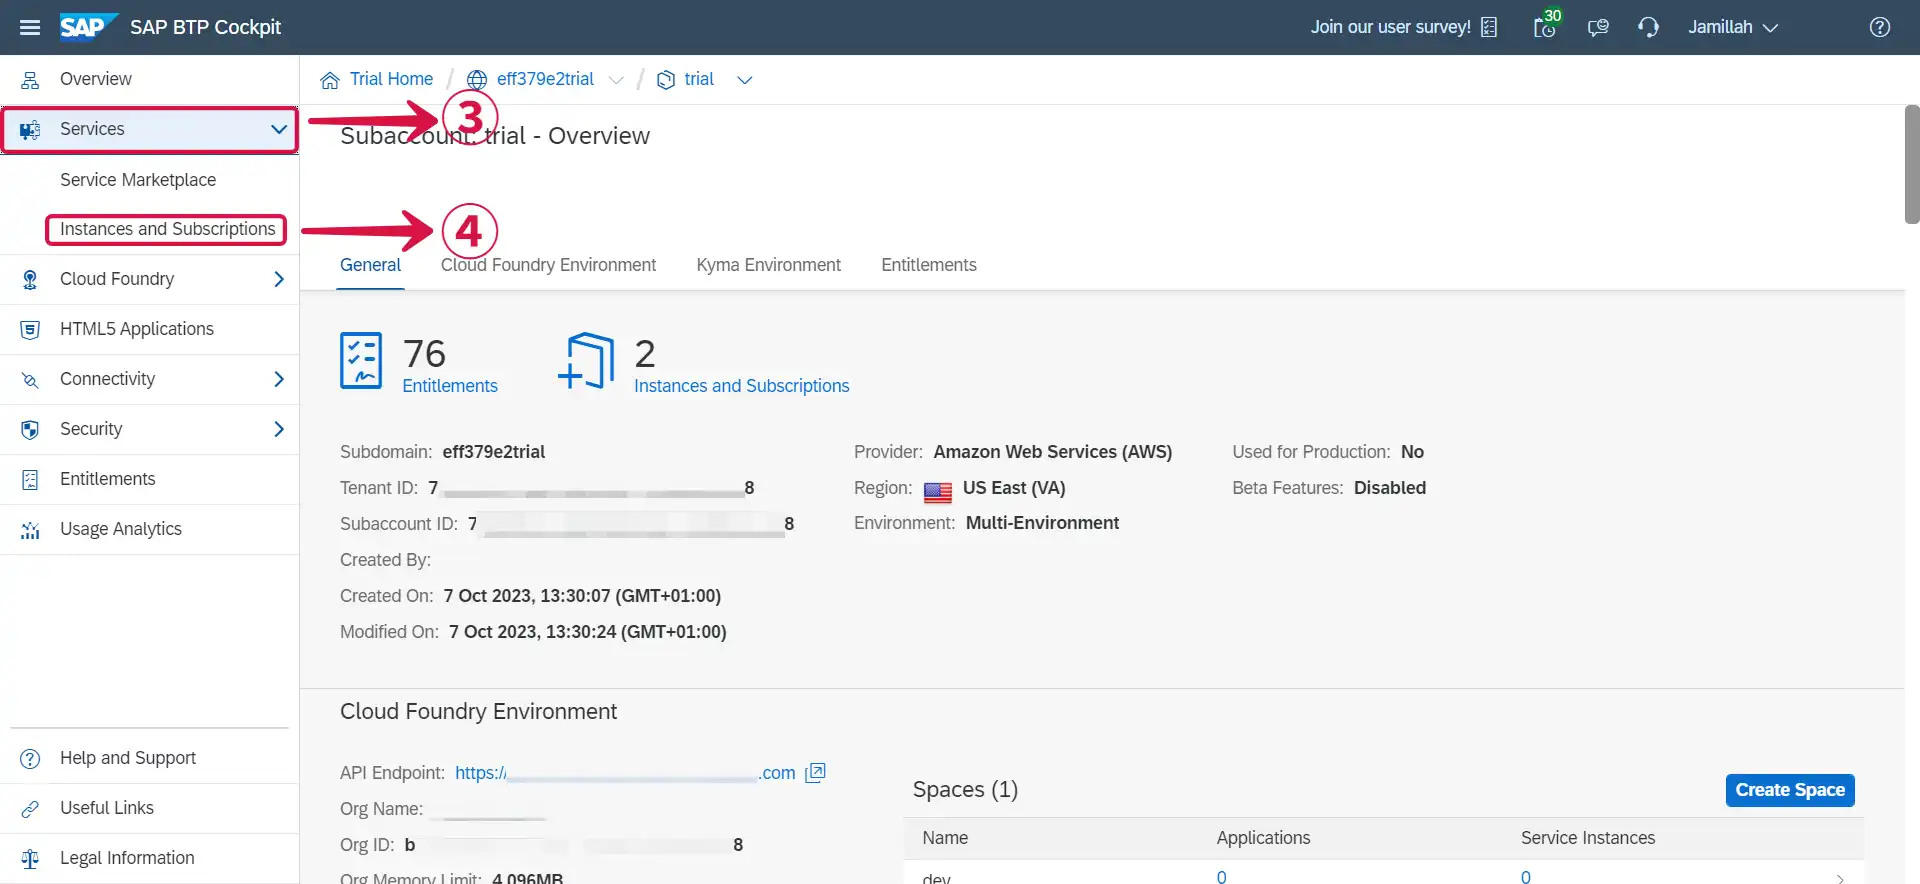
- Click on Services③ and select Instances and Subscriptions④.
- Click on the Create⑤ button at the top right.
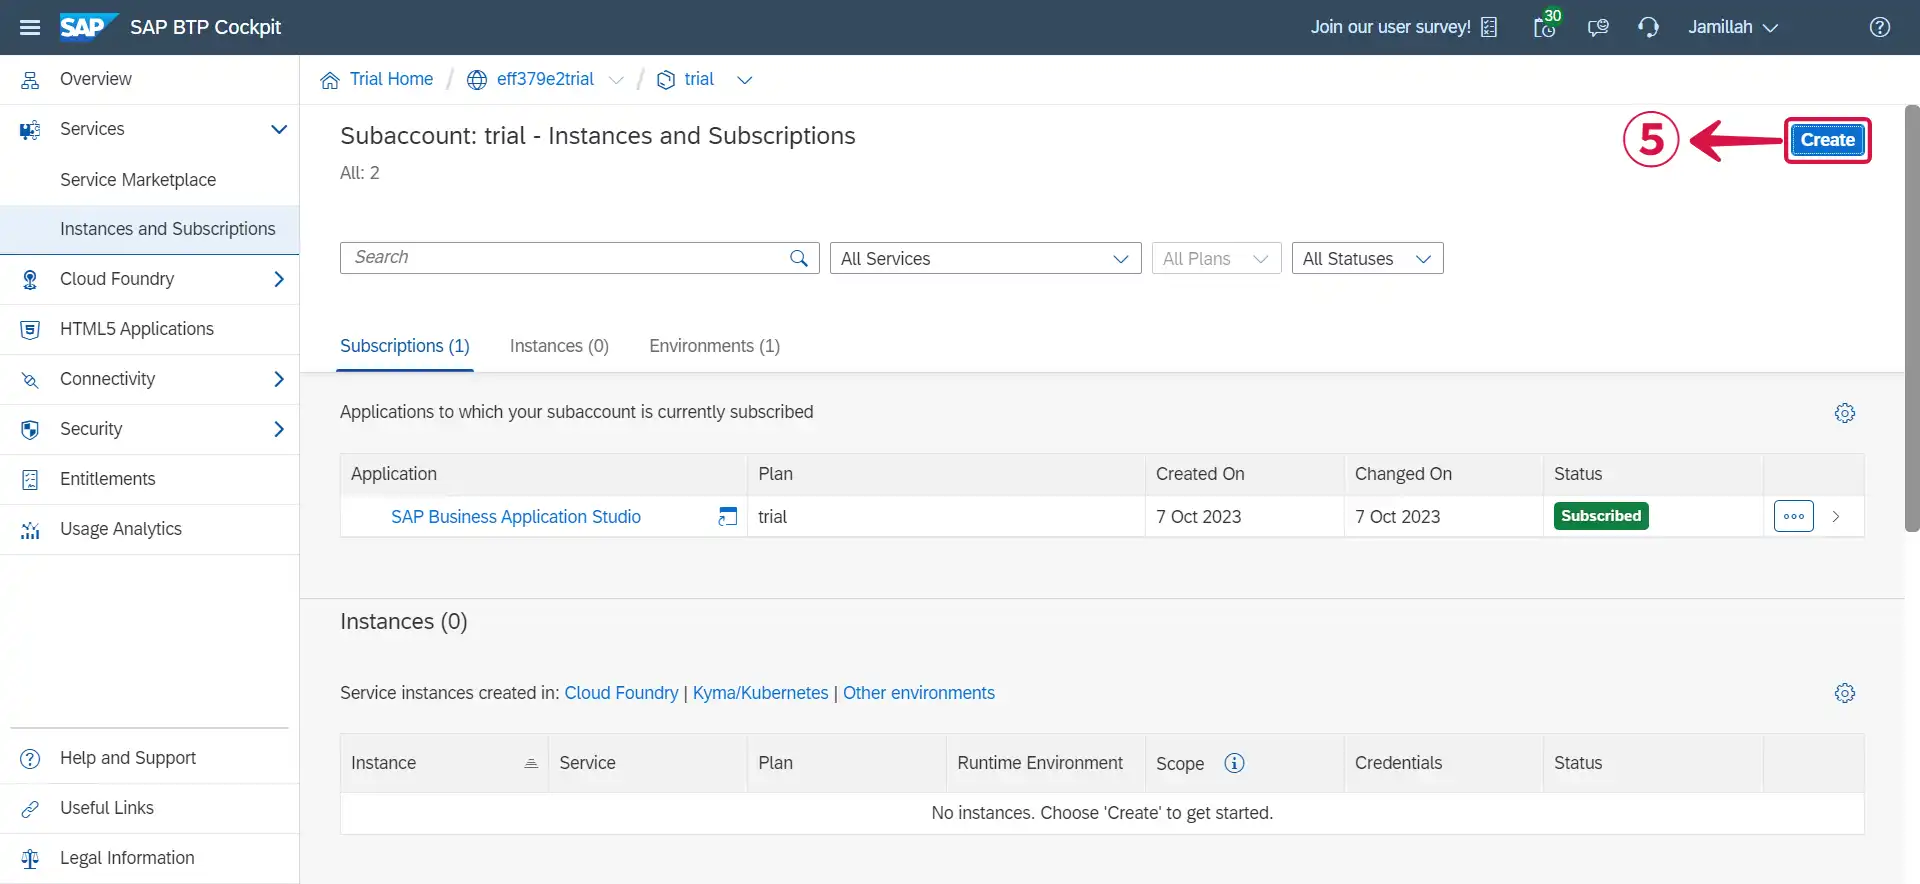
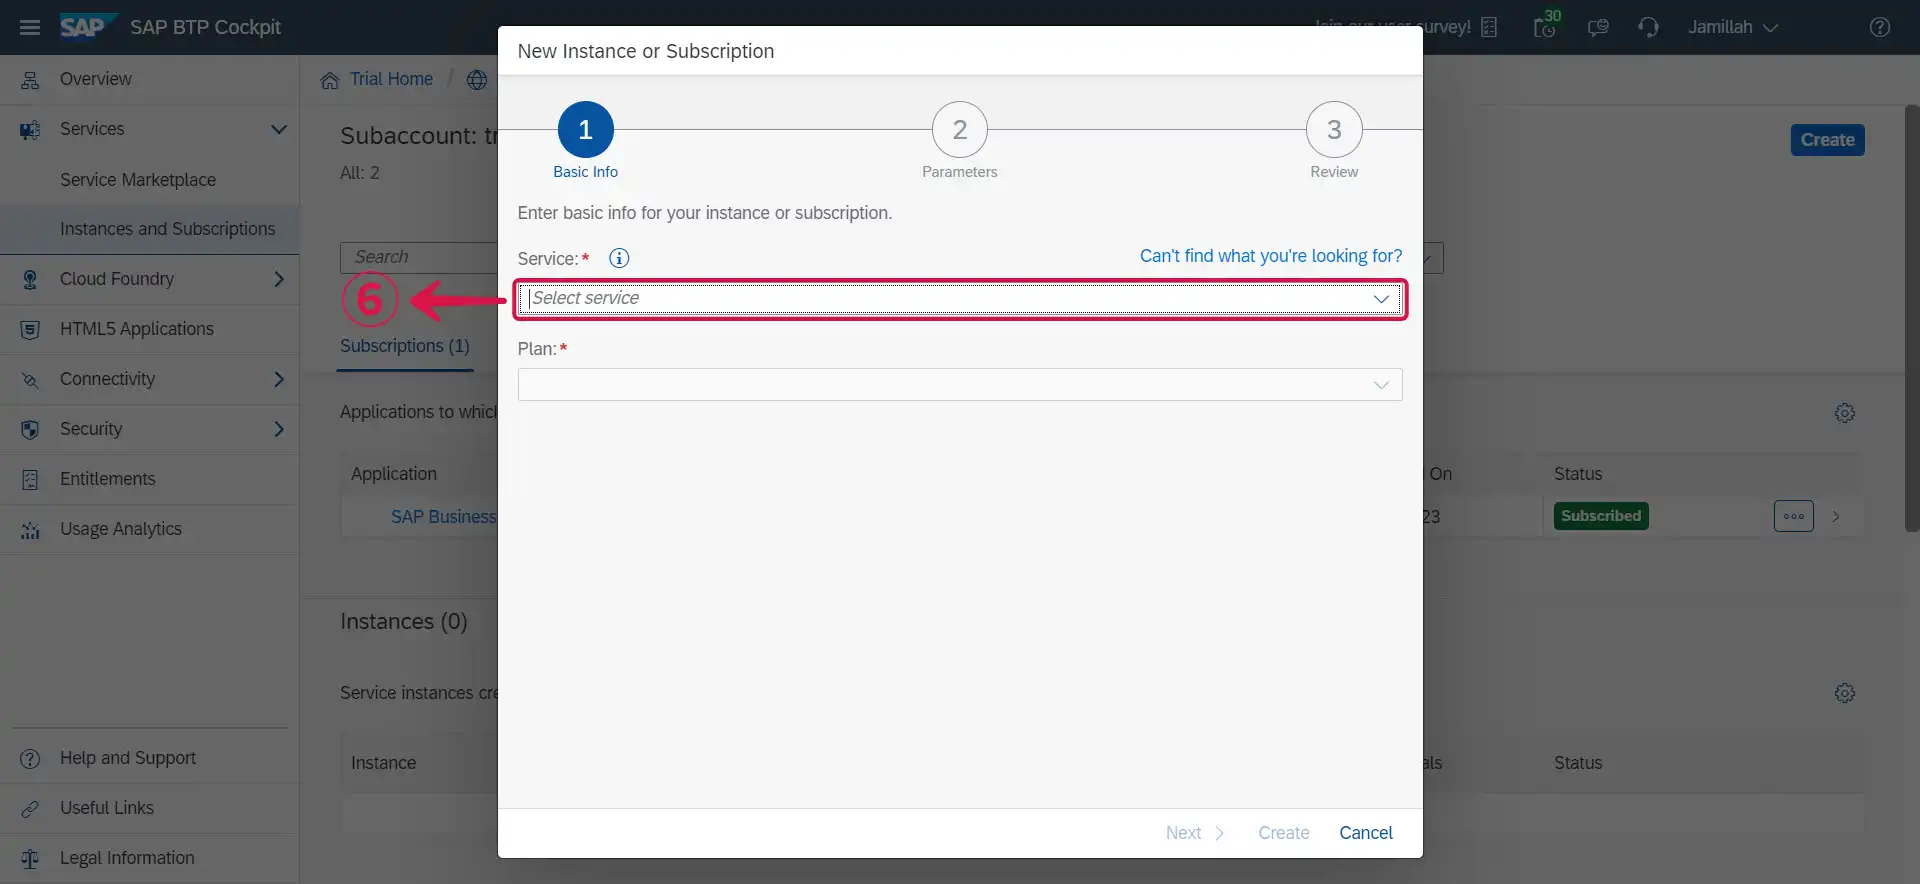
- Click on Select Service⑥ to reveal the dropdown menu.
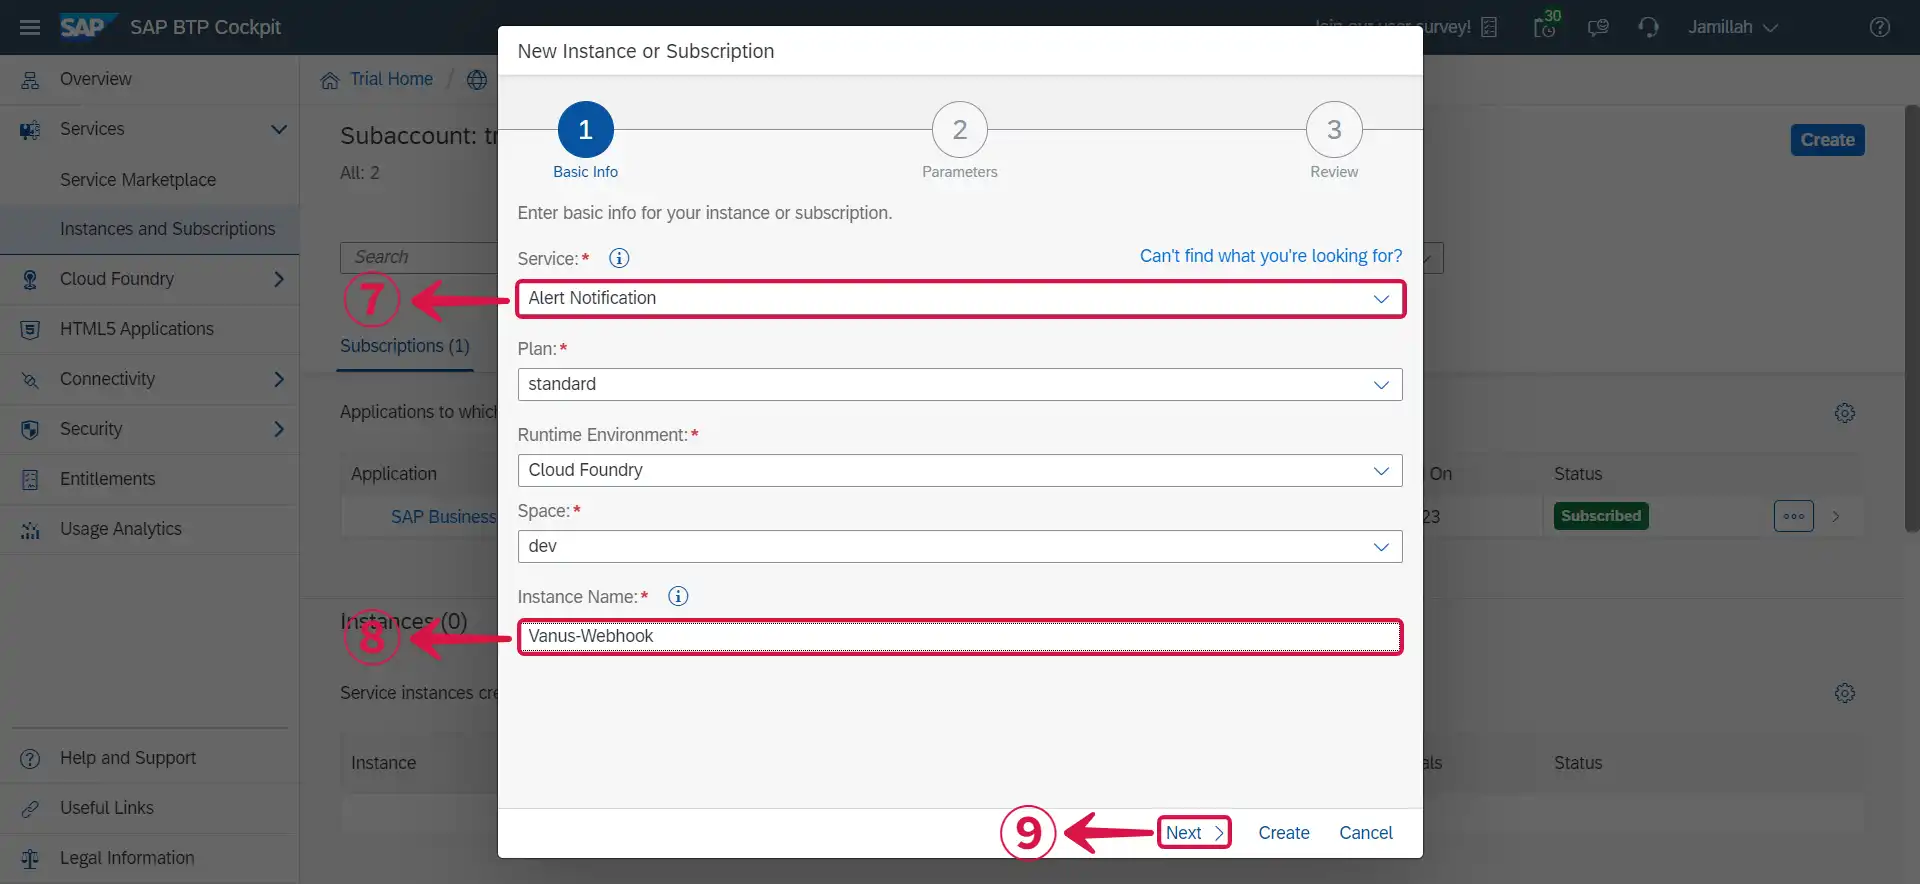
- Select Alert Notification⑦, choose an Instance Name⑧ of your choice and click on Next⑨.
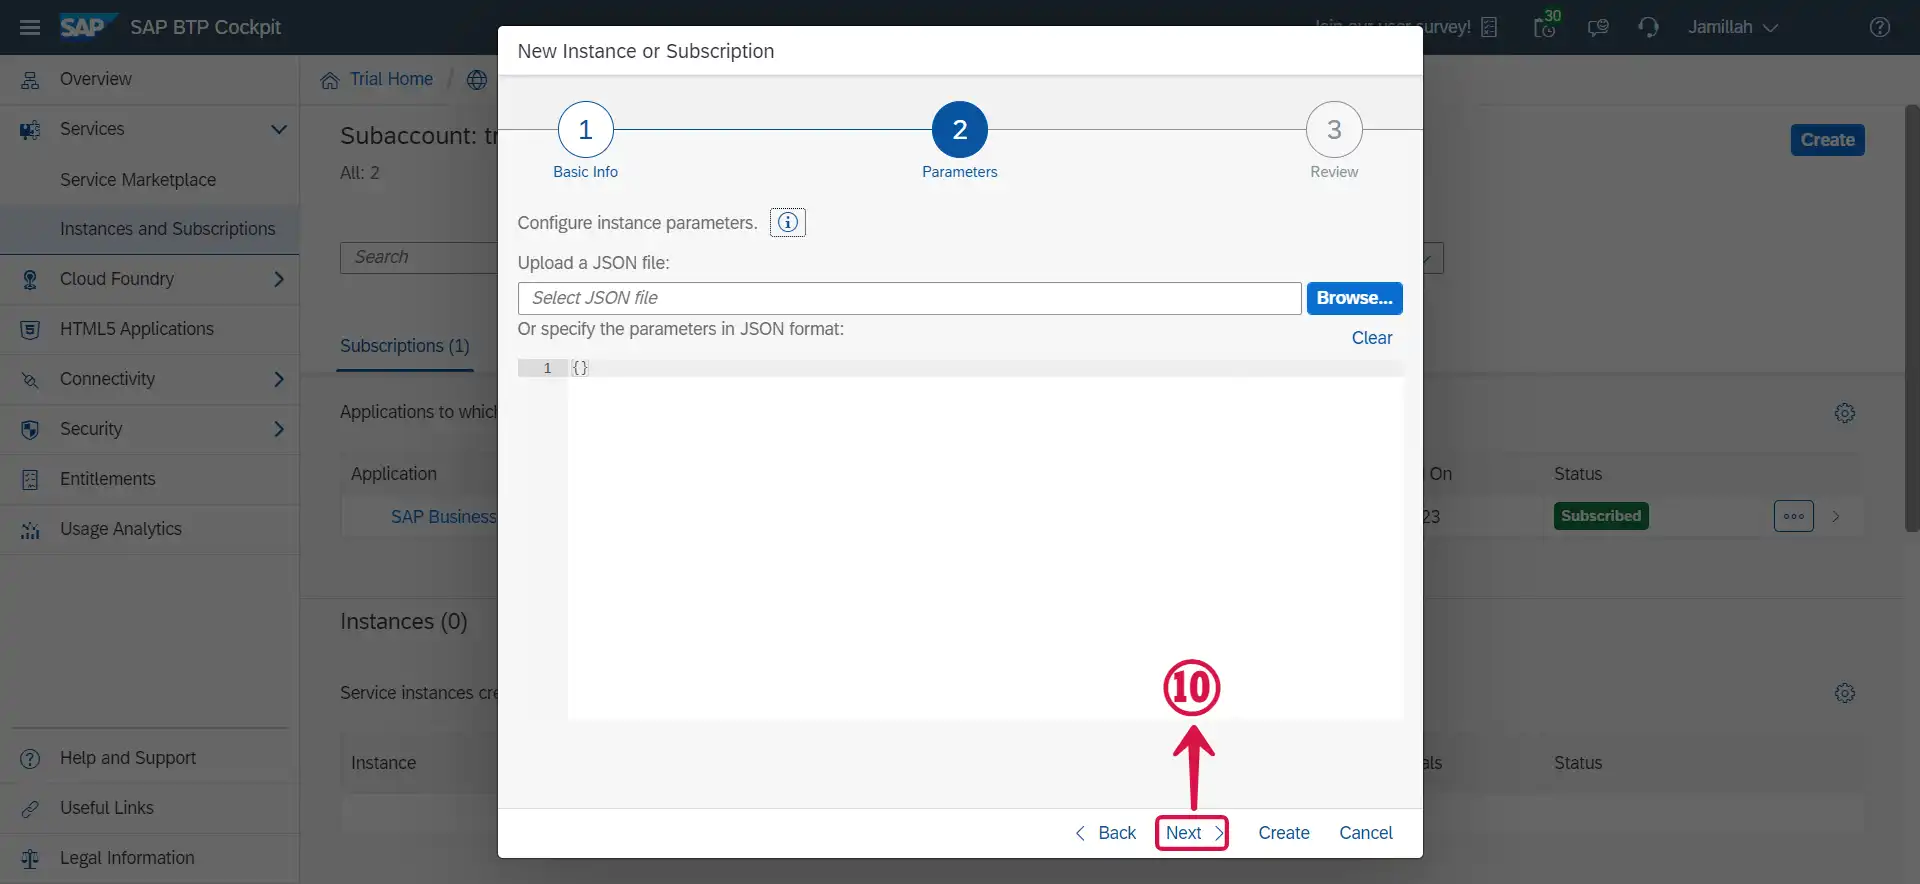
- Leave the Instance parameters as default and click Next⑩.
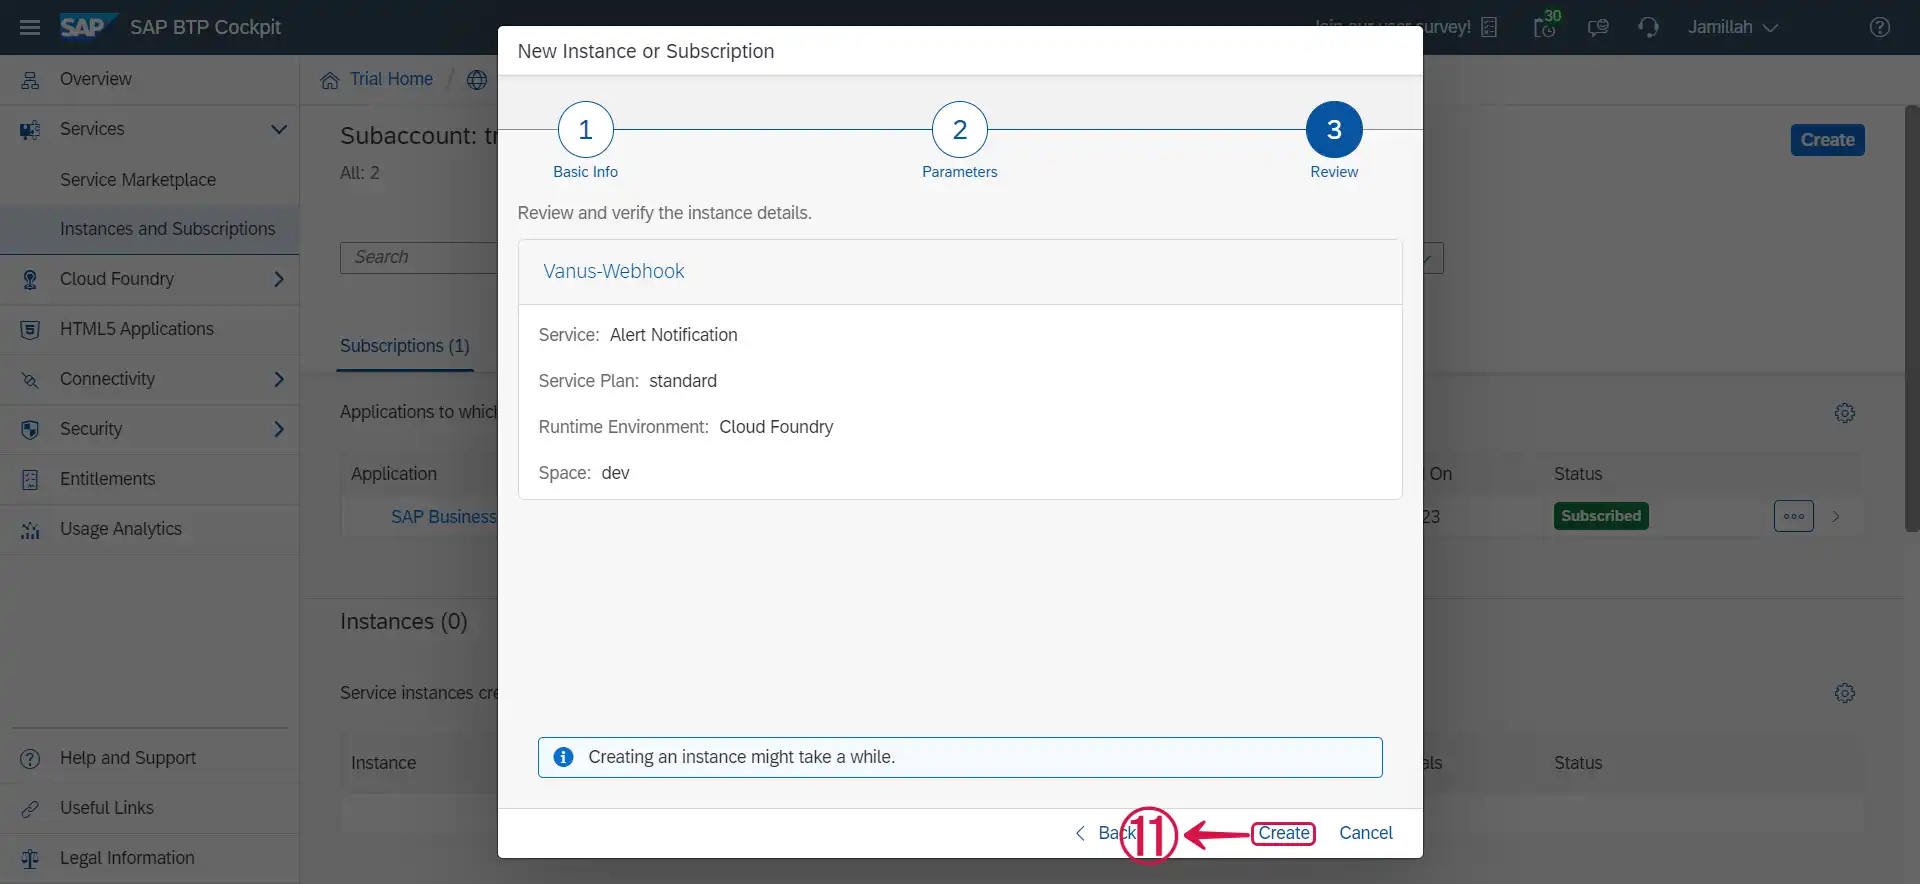
- Click Create⑪.
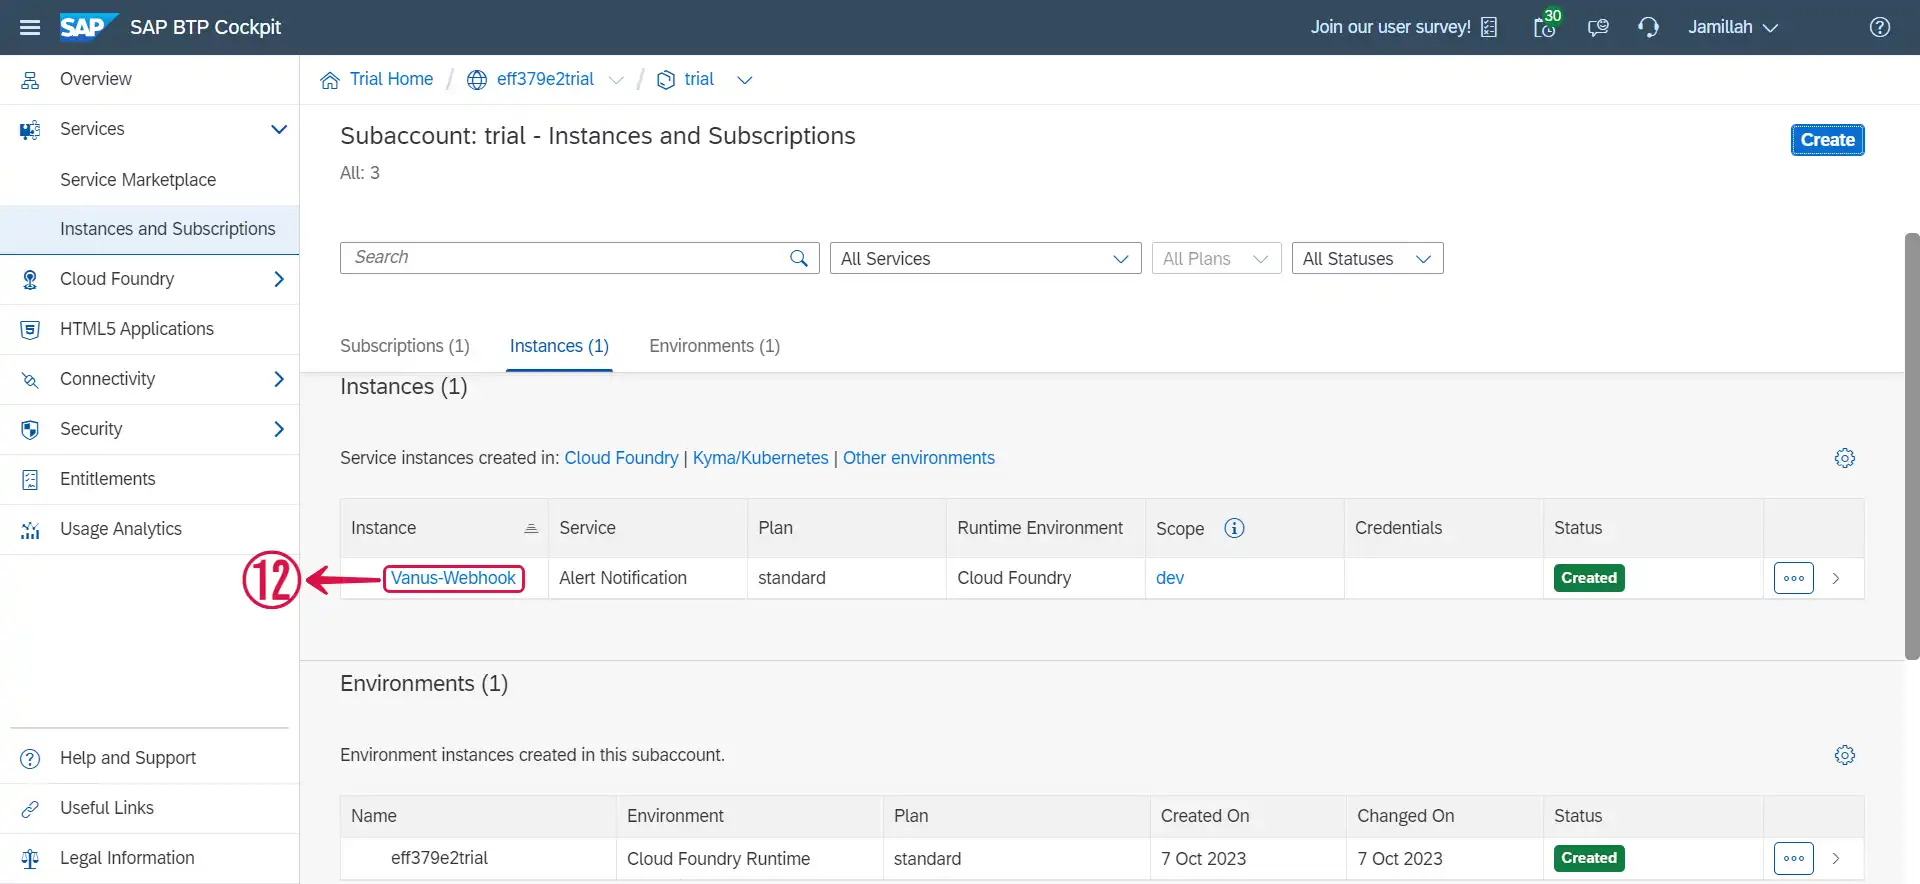
- Click on the name of the Instance⑫ that was just created.
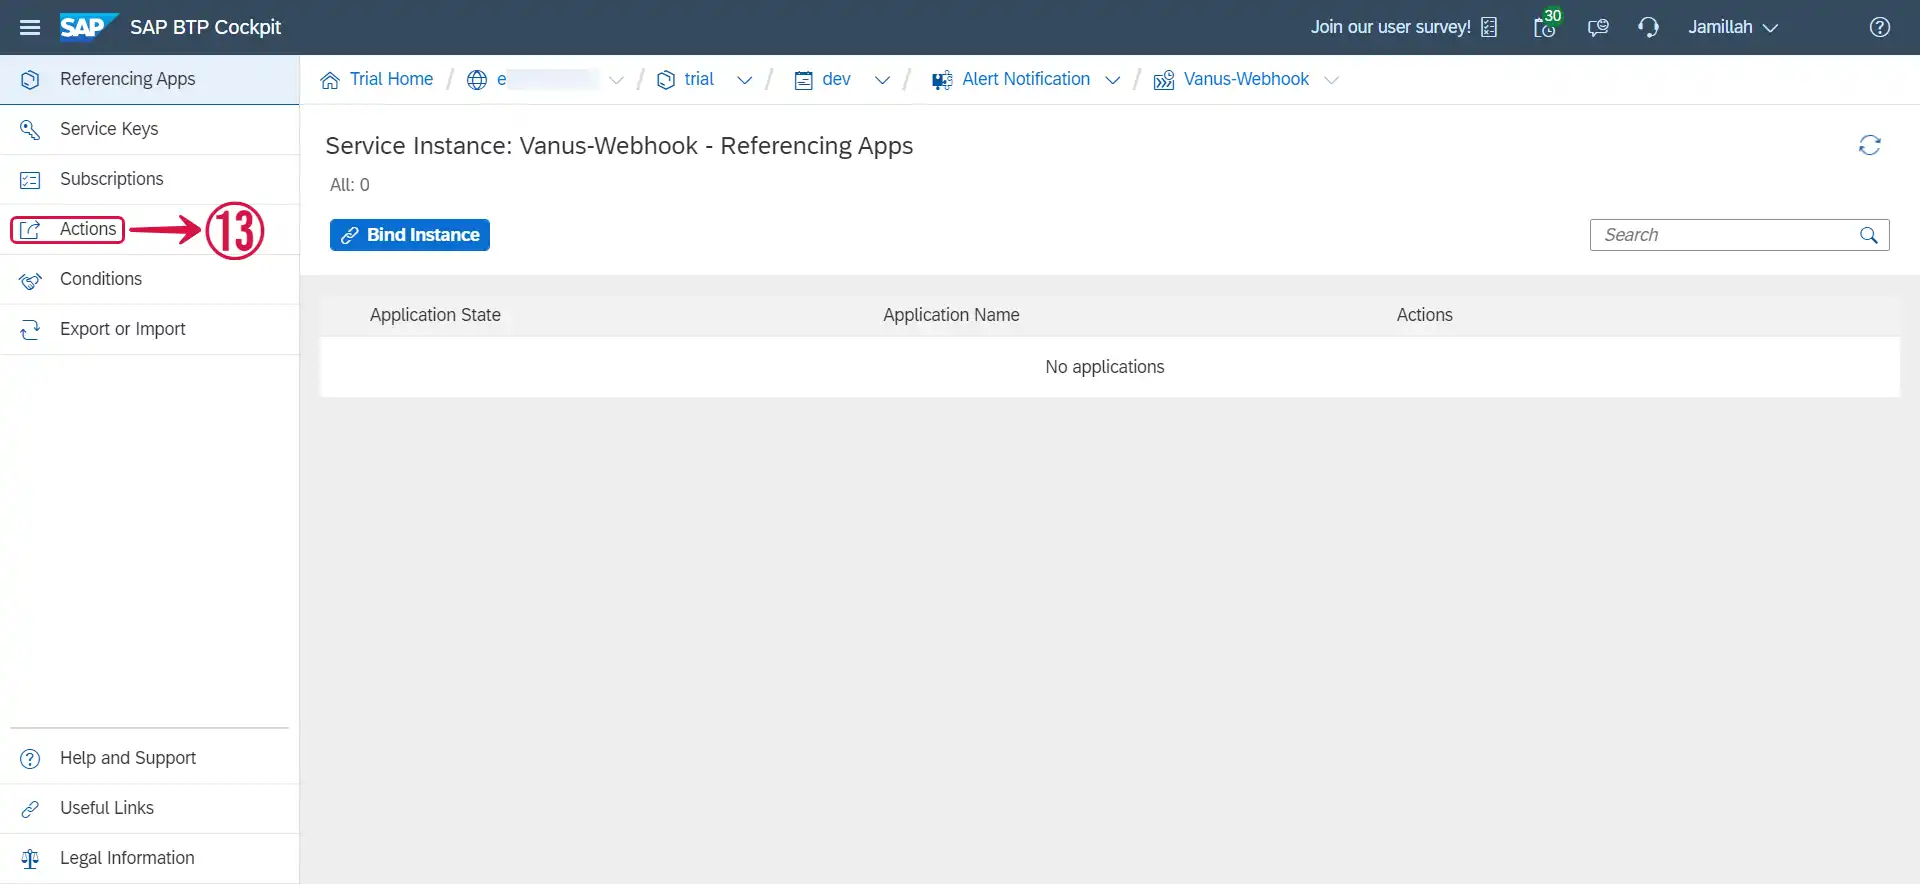
- Click on Actions⑬.
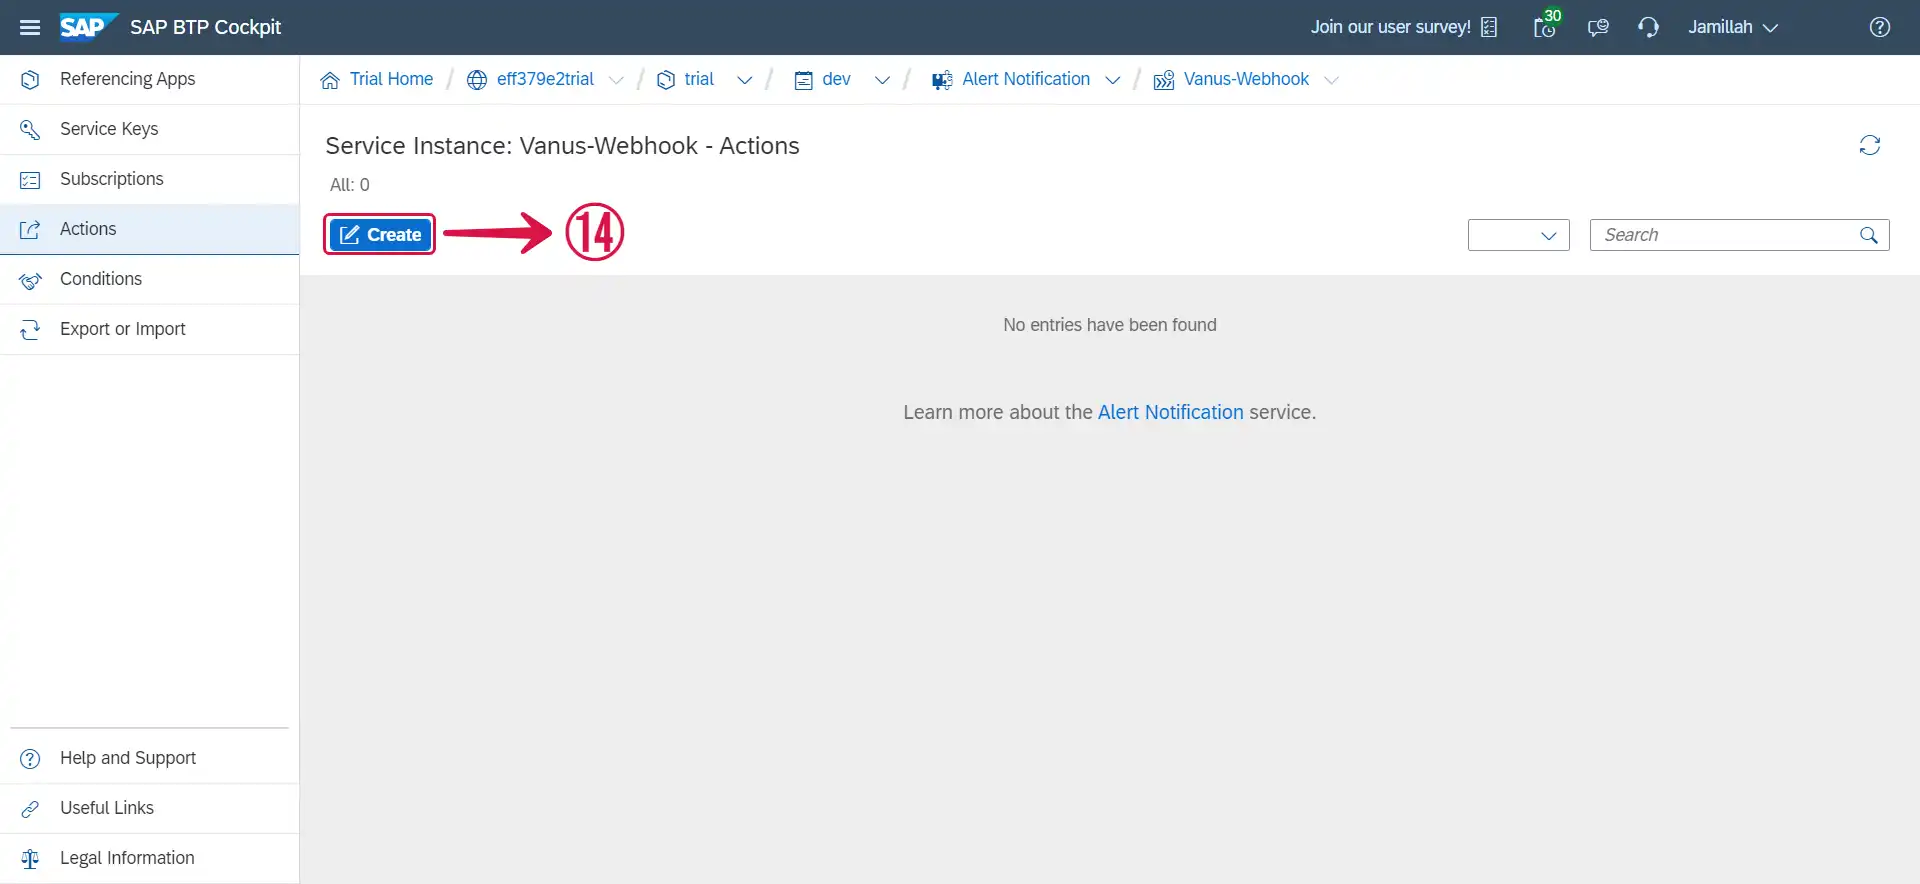
- Click on Create⑭.
- Scroll down and select Webhook⑮ as the action type and click on Next⑯.
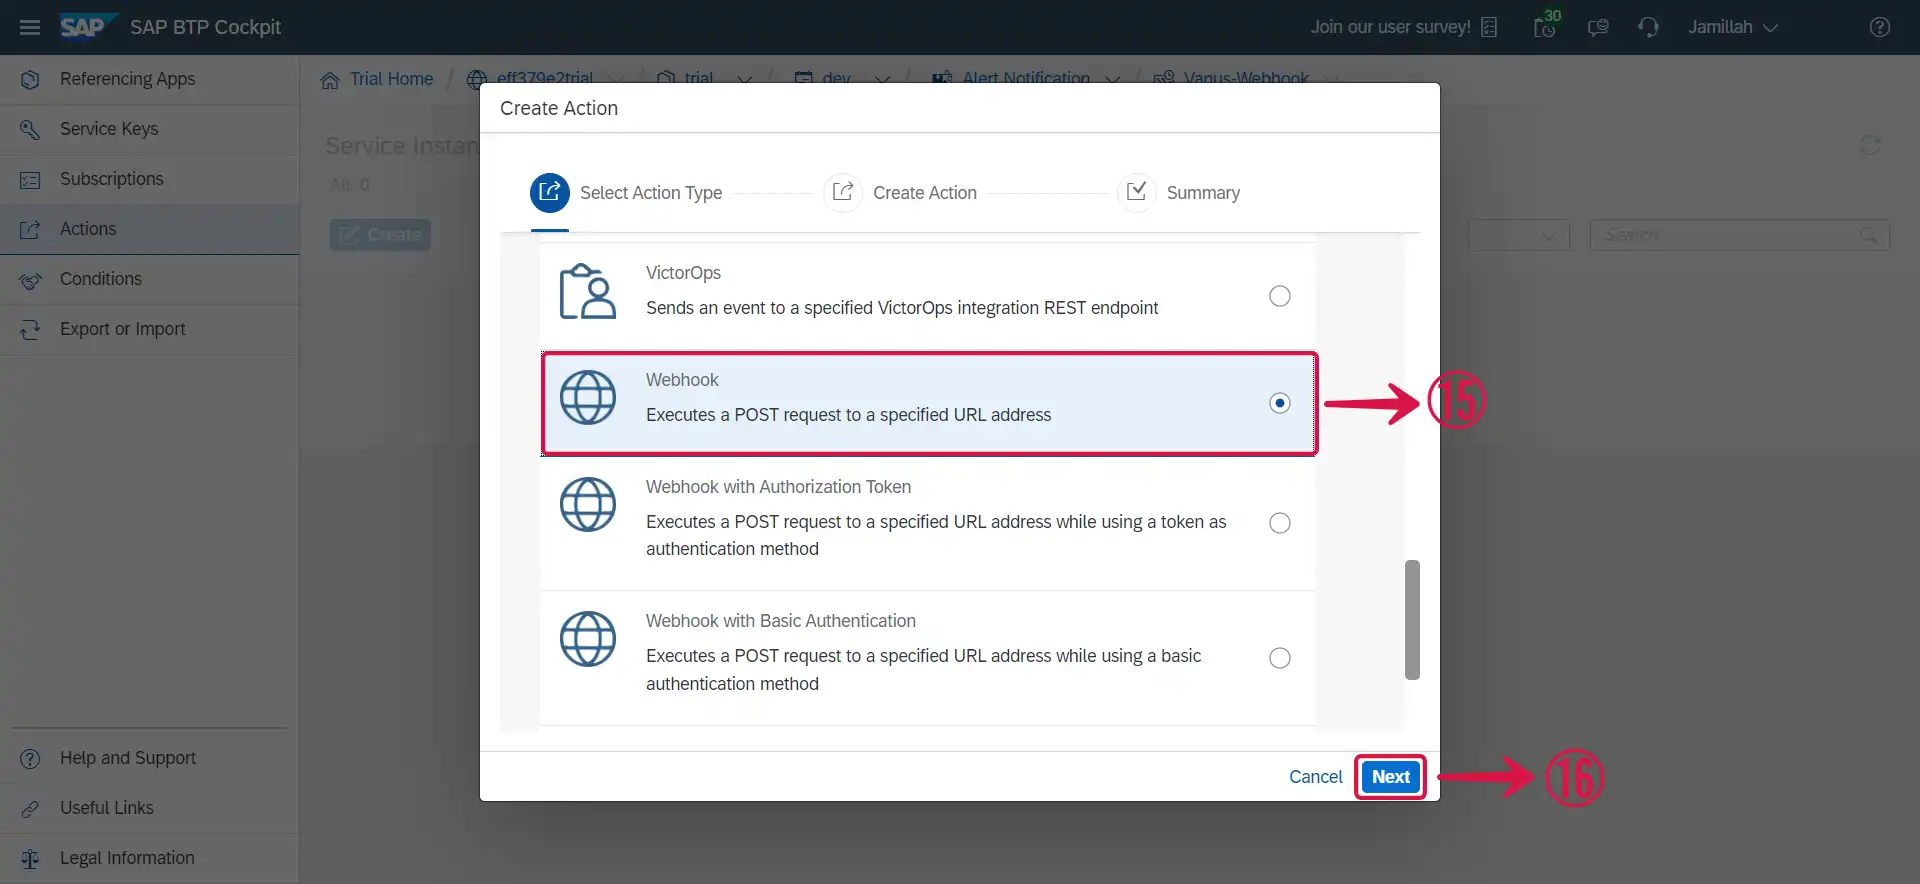
Do not select the Webhook with Authorization Token or Webhook with Basic Authentication as they would need extra level of authentication.
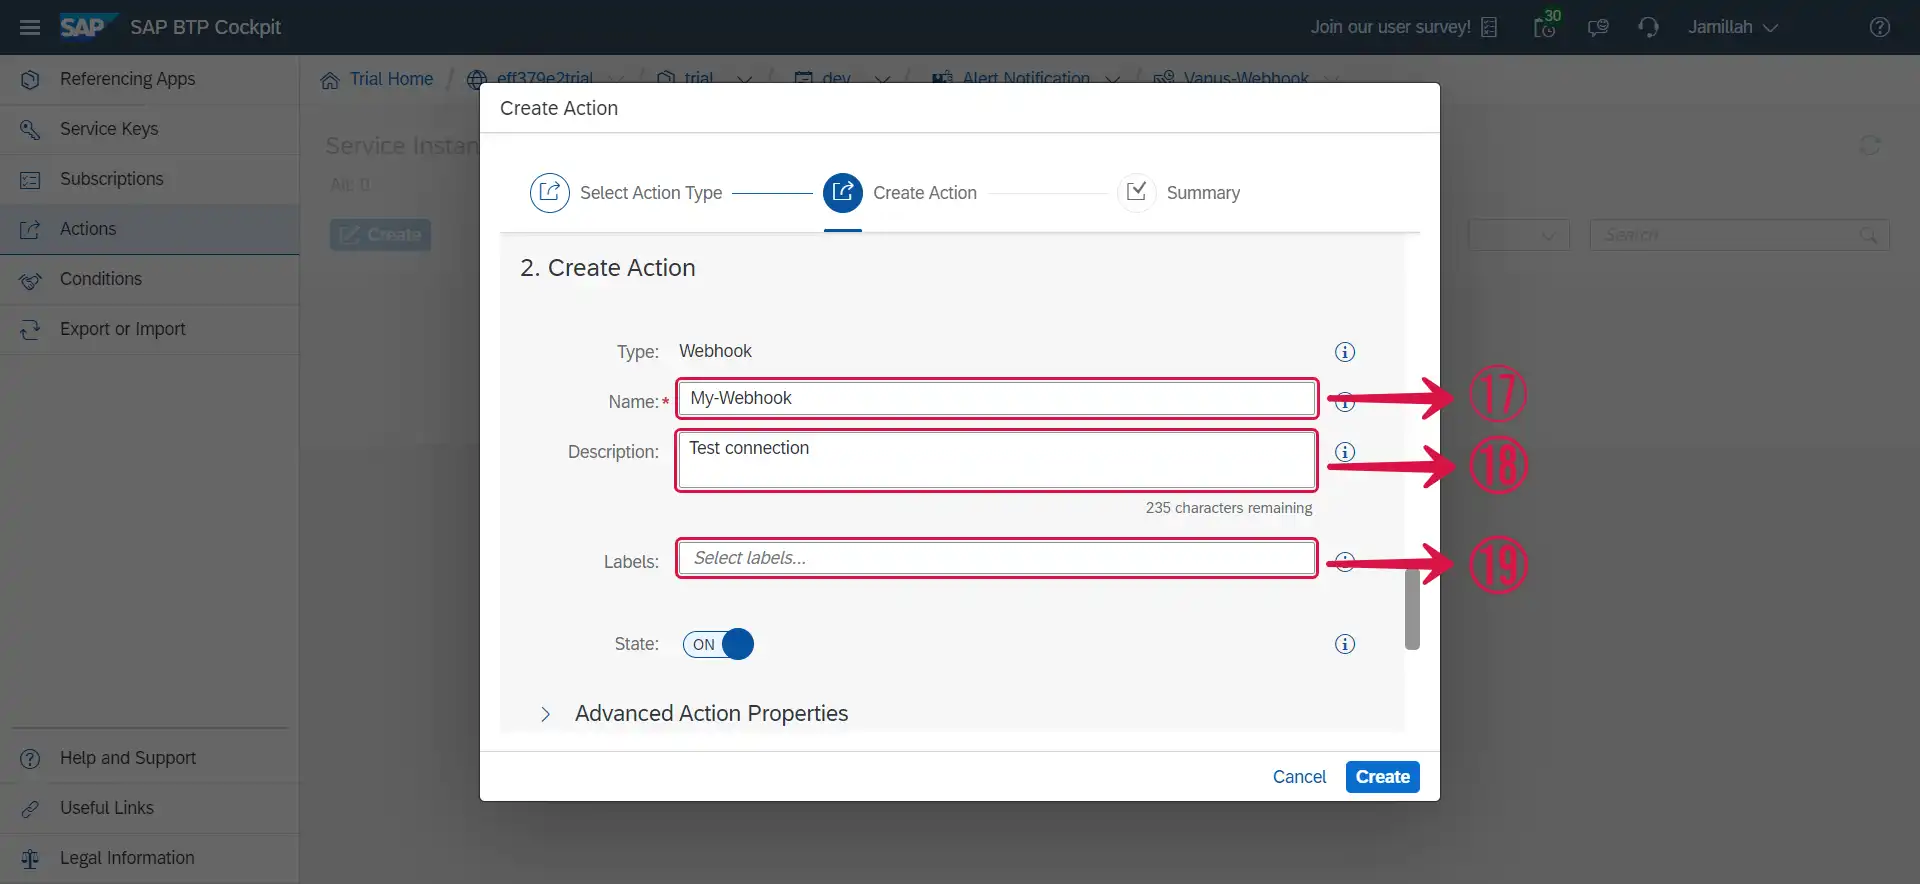
- Insert a desired Name⑰ for your webhook and Description⑱ or Labels⑲ if any.
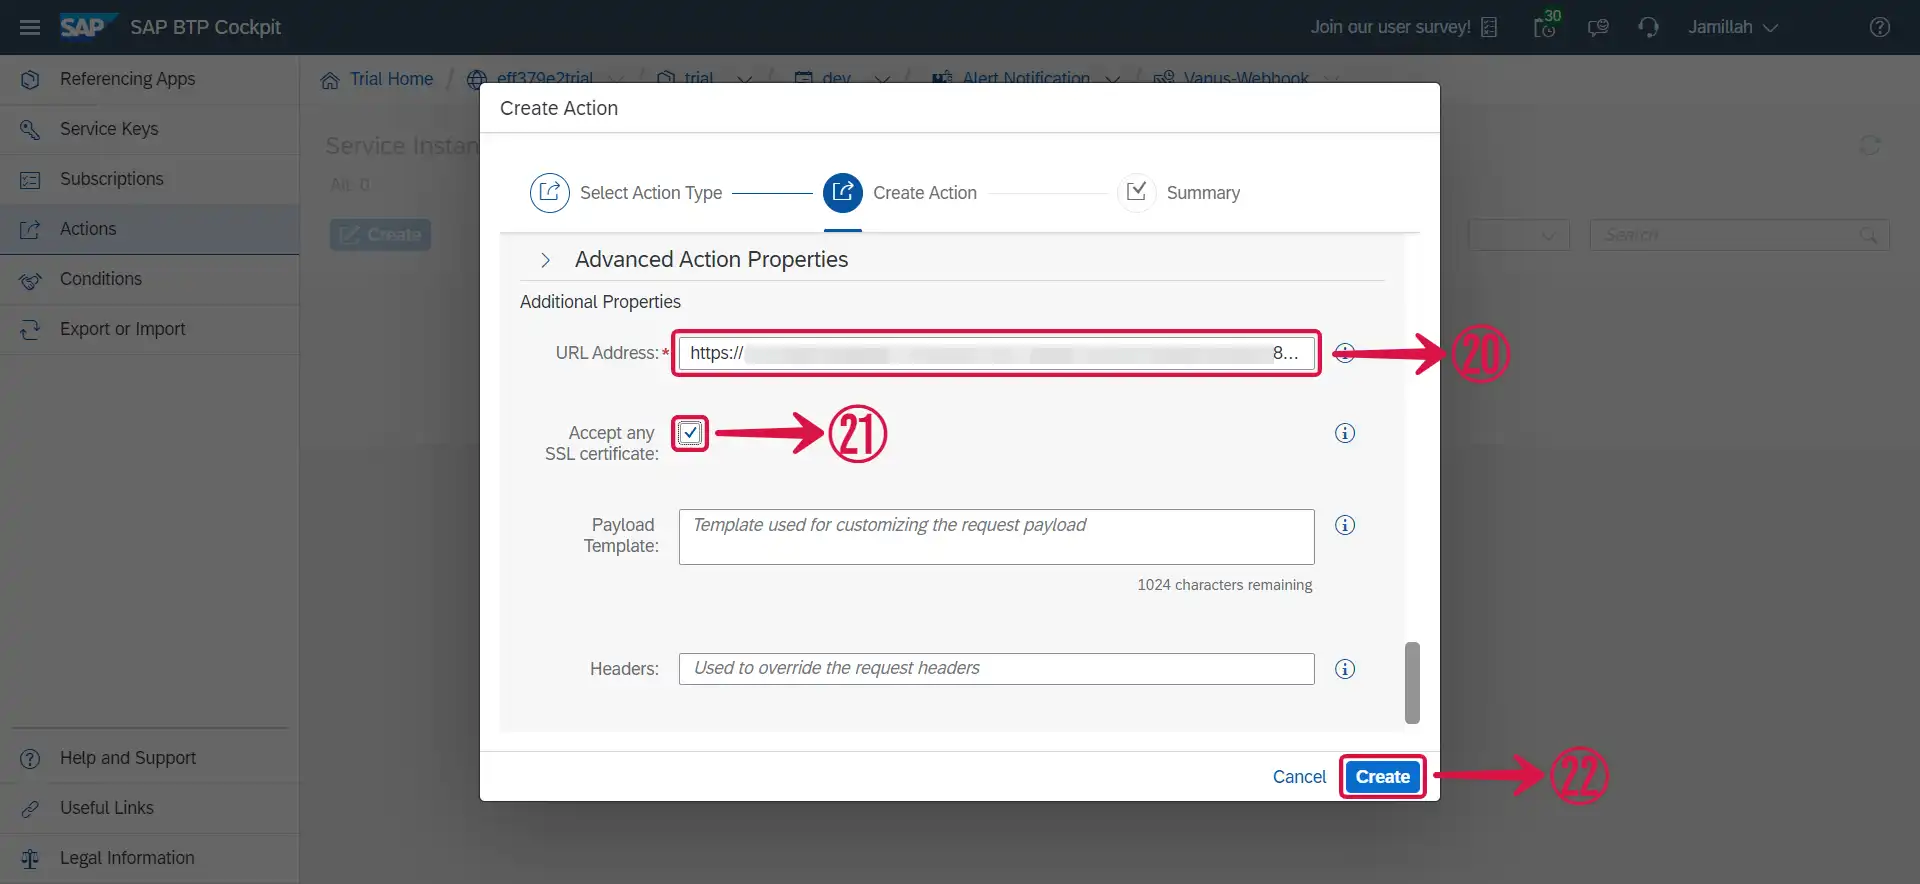
- Scroll down, paste the webhook URL you copied earlier in the URL Address⑳ section, tick the Accept any SSL certificate㉑ checkbox and click Create㉒.
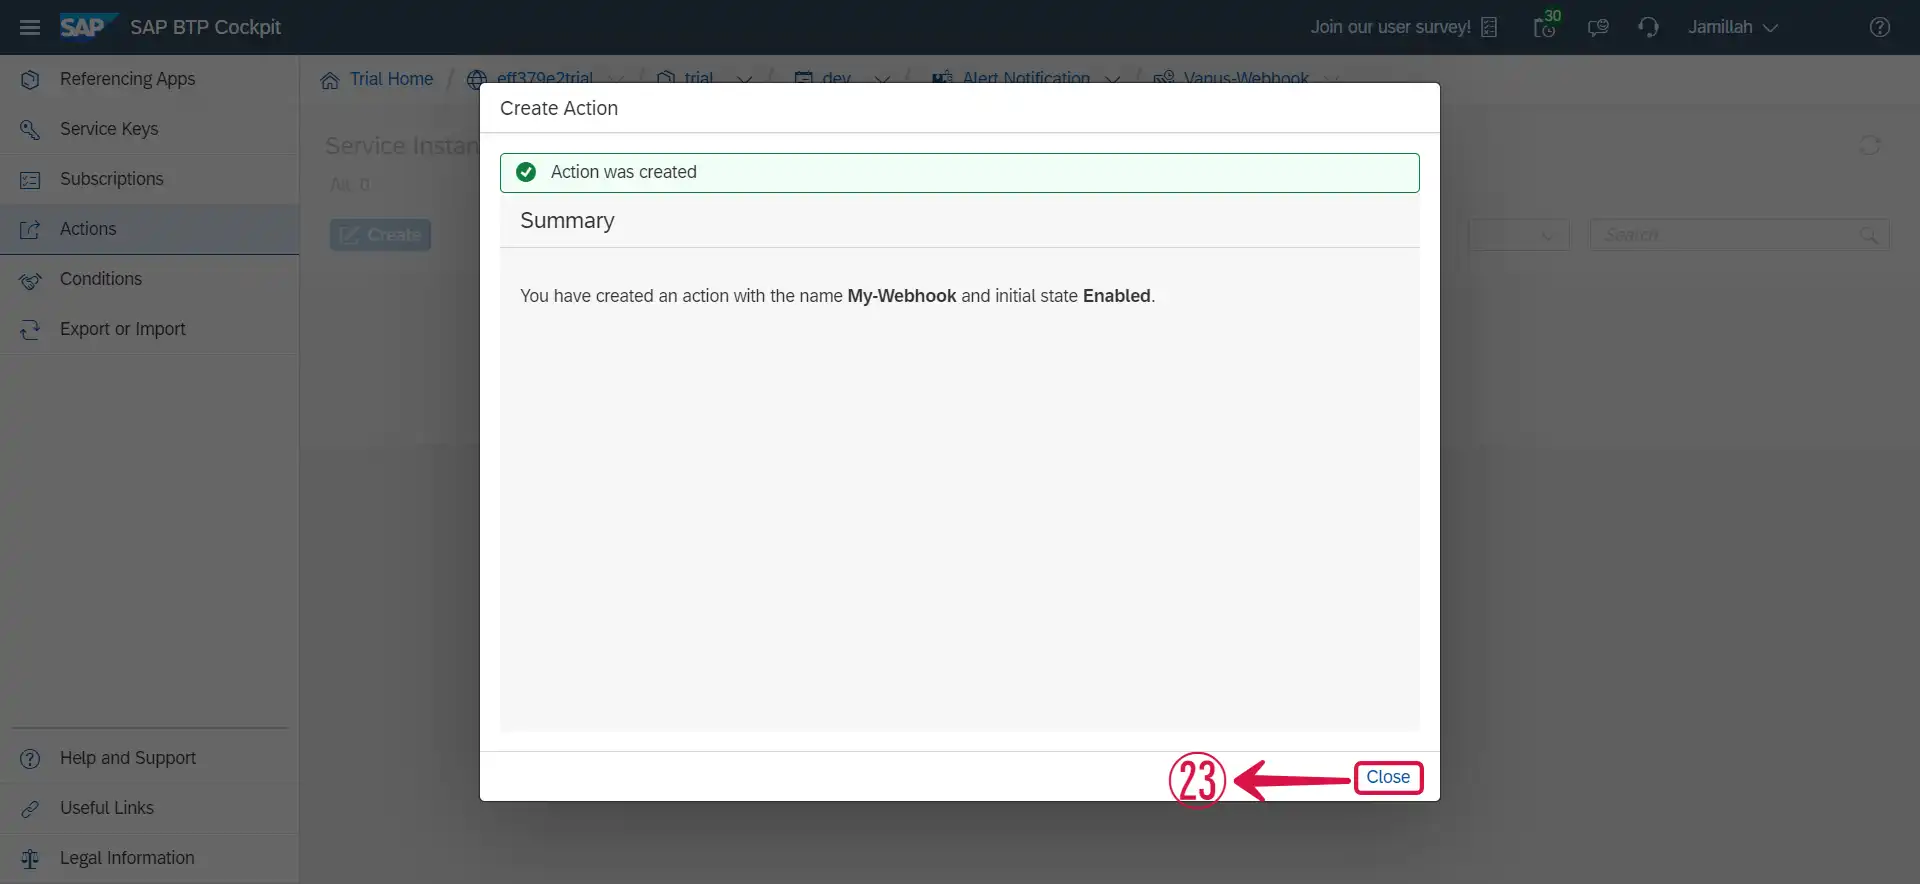
- Click on Close㉓.
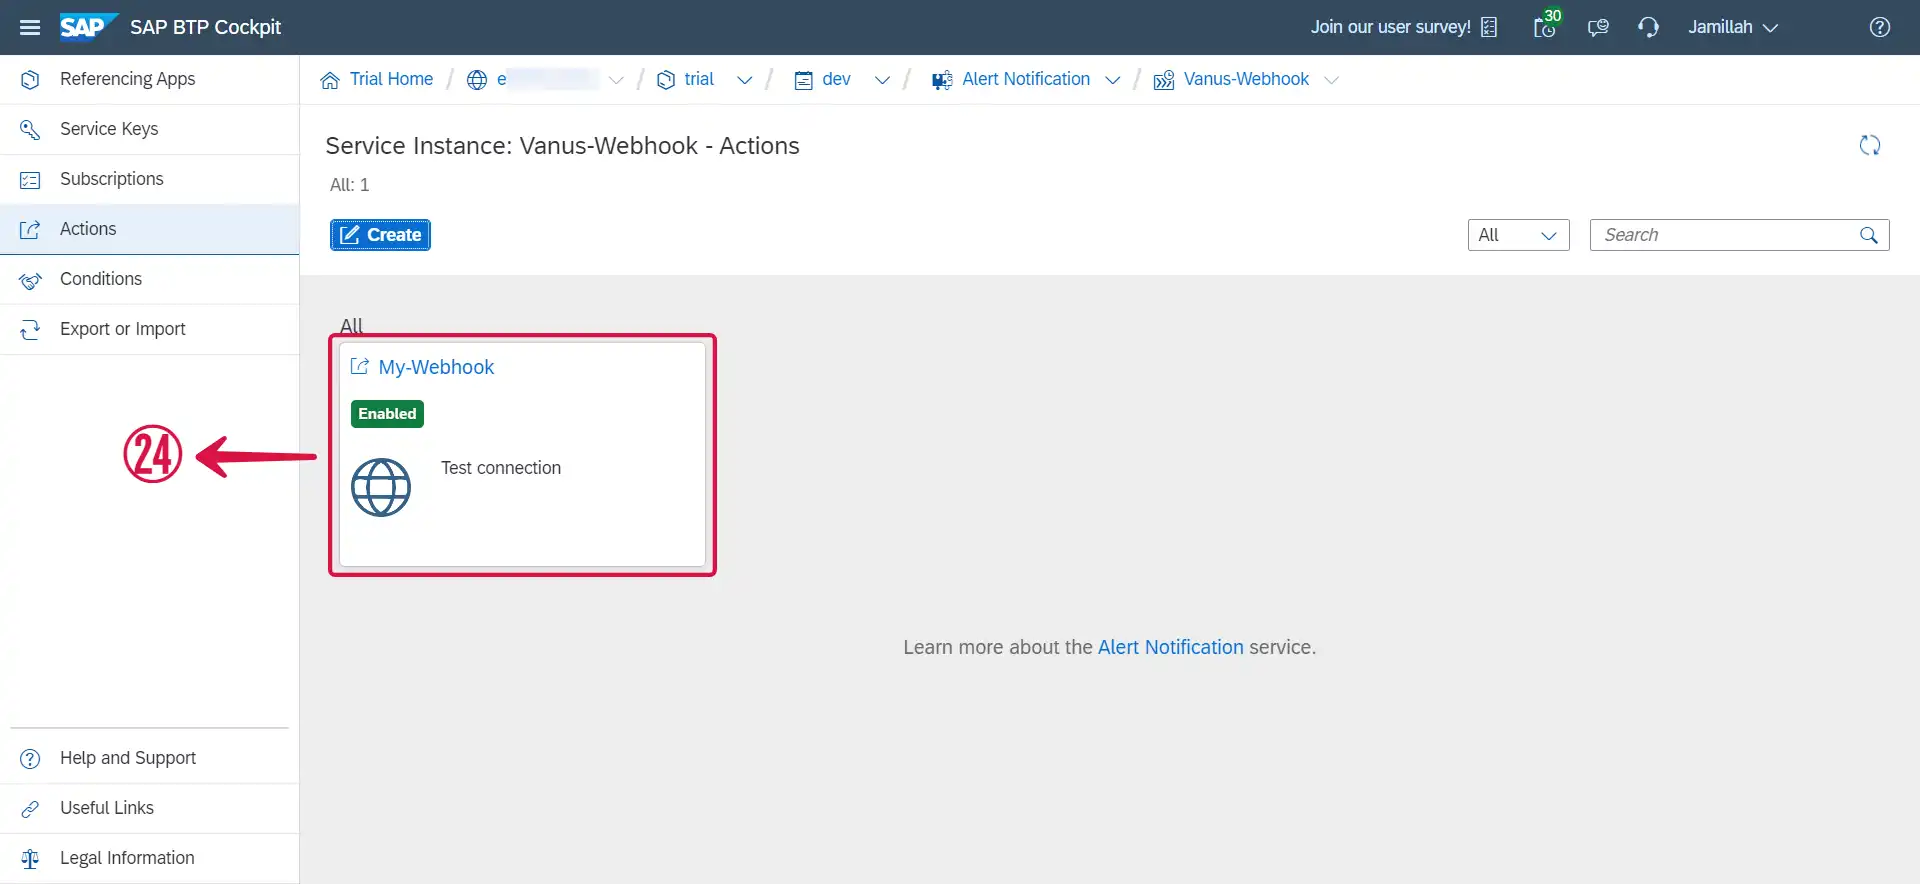
- A successful webhook integration would look like this㉔.
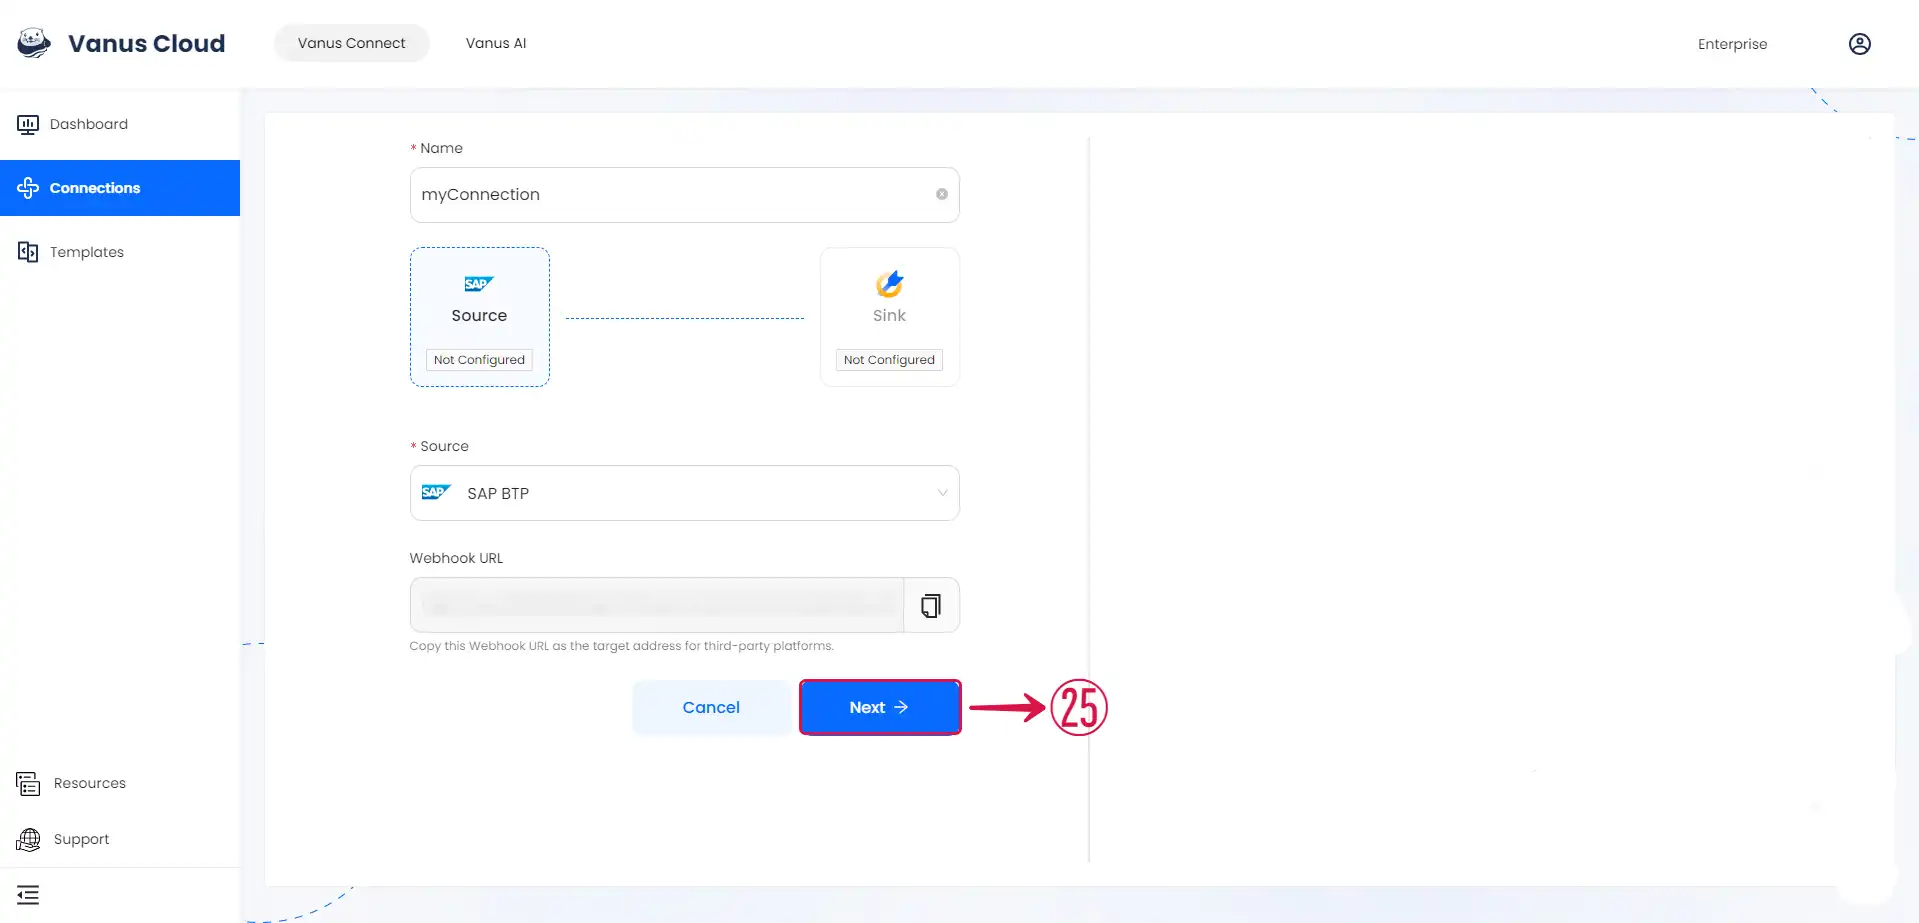
- Click Next㉕ and continue the configuration.
Learn more about Vanus and Vanus Connect in our documentation.